
2013 883 Hammer Performance 1250 Install
#1
 12-17-2014, 01:33 AM

Ok so here goes.
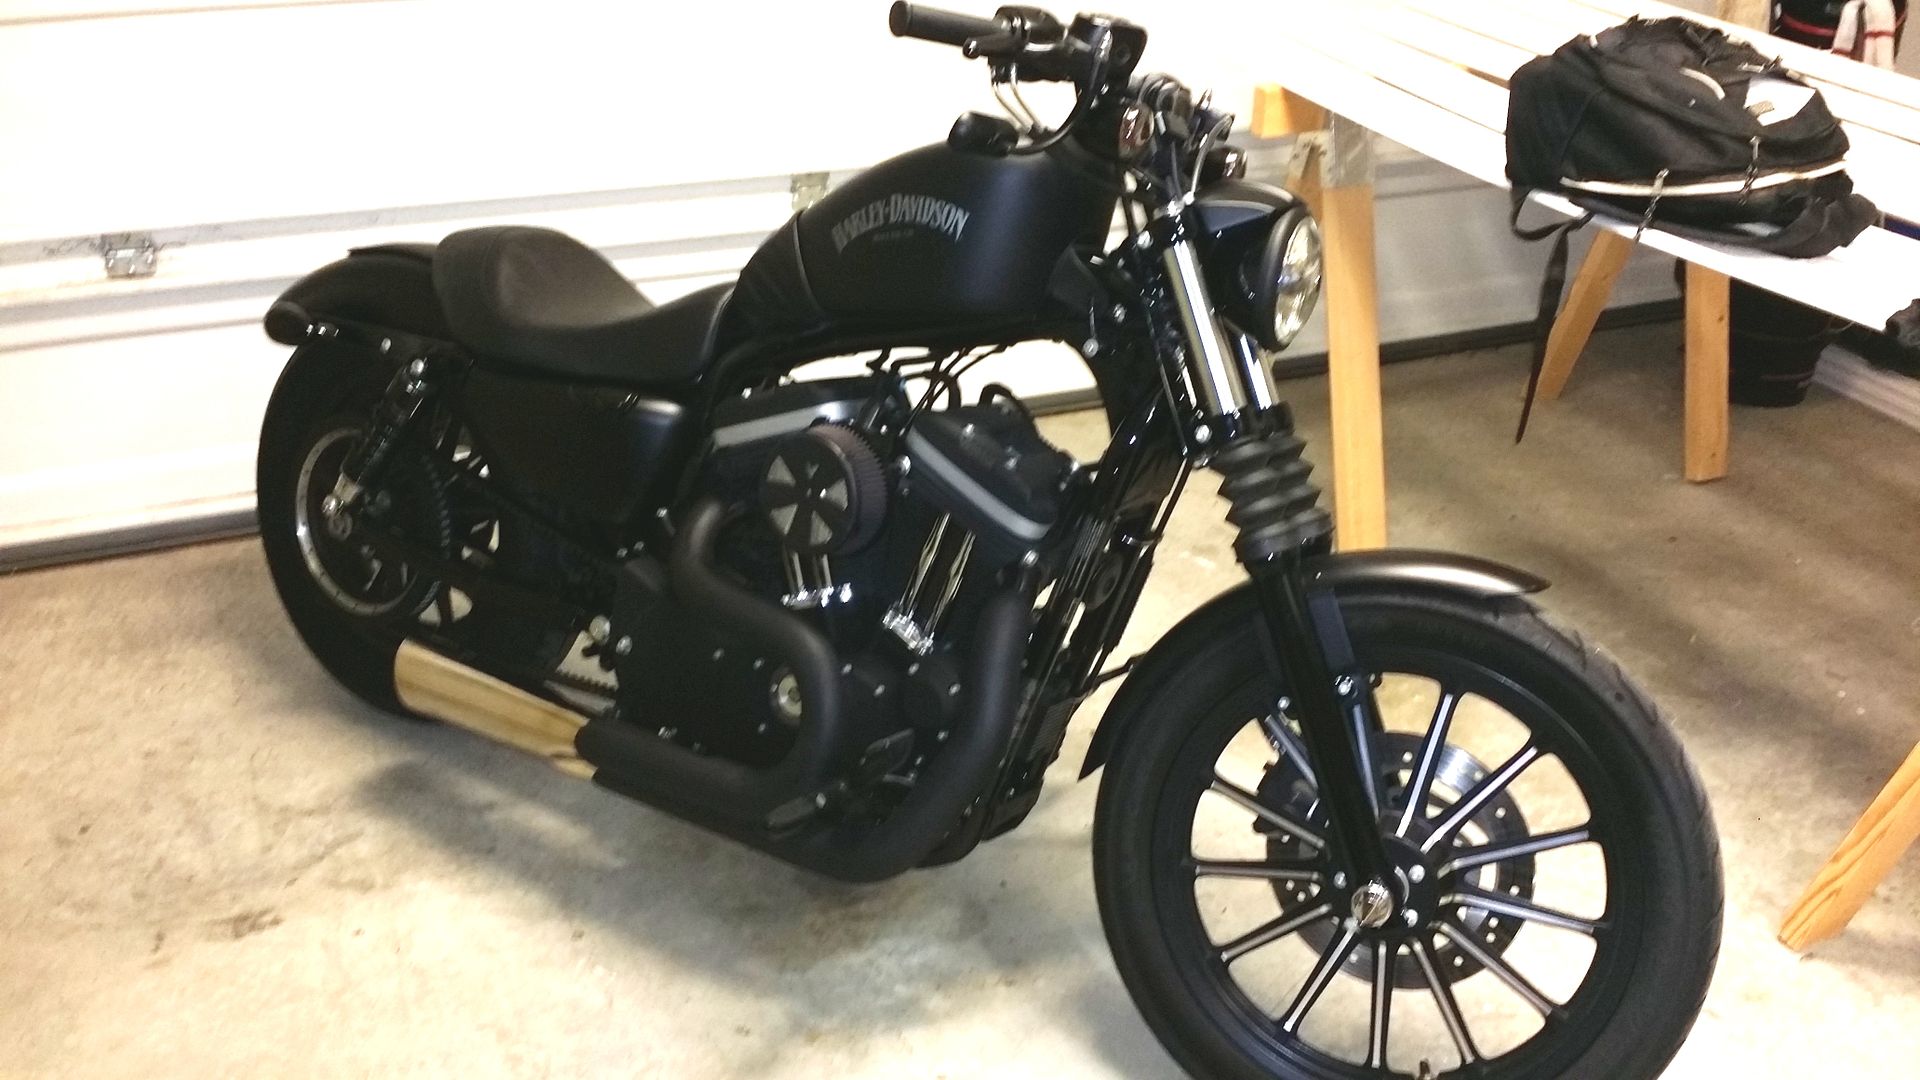
Here is my 2013 XL883N Cafe "Racer" Conversion.
I have decided to go against my better judgment and do an complete motor upgrade. After much deliberation and research I have decided to go this route:
Hammer Performance 1250 Kit
Hammer Performance Smash Port Job with Upgraded springs and Retainers
Hammer Performance Impact 560 Cams
Hammer Performance Push Rods
Energy One extra plate clutch pack
Power Vision Tuner
Power Vision Autotune Pro
I am hoping that this setup will get me to the 100hp mark. I have the RSD Slant 2-1 Exhaust and I saw that Dan with a similar set up hit 102 so that is my goal.
I also have a full build thread on the bike located here for those interested
https://www.hdforums.com/forum/sport...afe-build.html
A little background...In June I bought the bike with the intention of throwing on some clip ons, rear sets and the cafe seat and calling it quits. As you can see by the pics I completely abandoned that and have completely and unapologetically lost my damn mind.
This project has continued to evolve and hopefully once I get the motor done I will finally be able to just ride the damn thing...
Here is where we started:
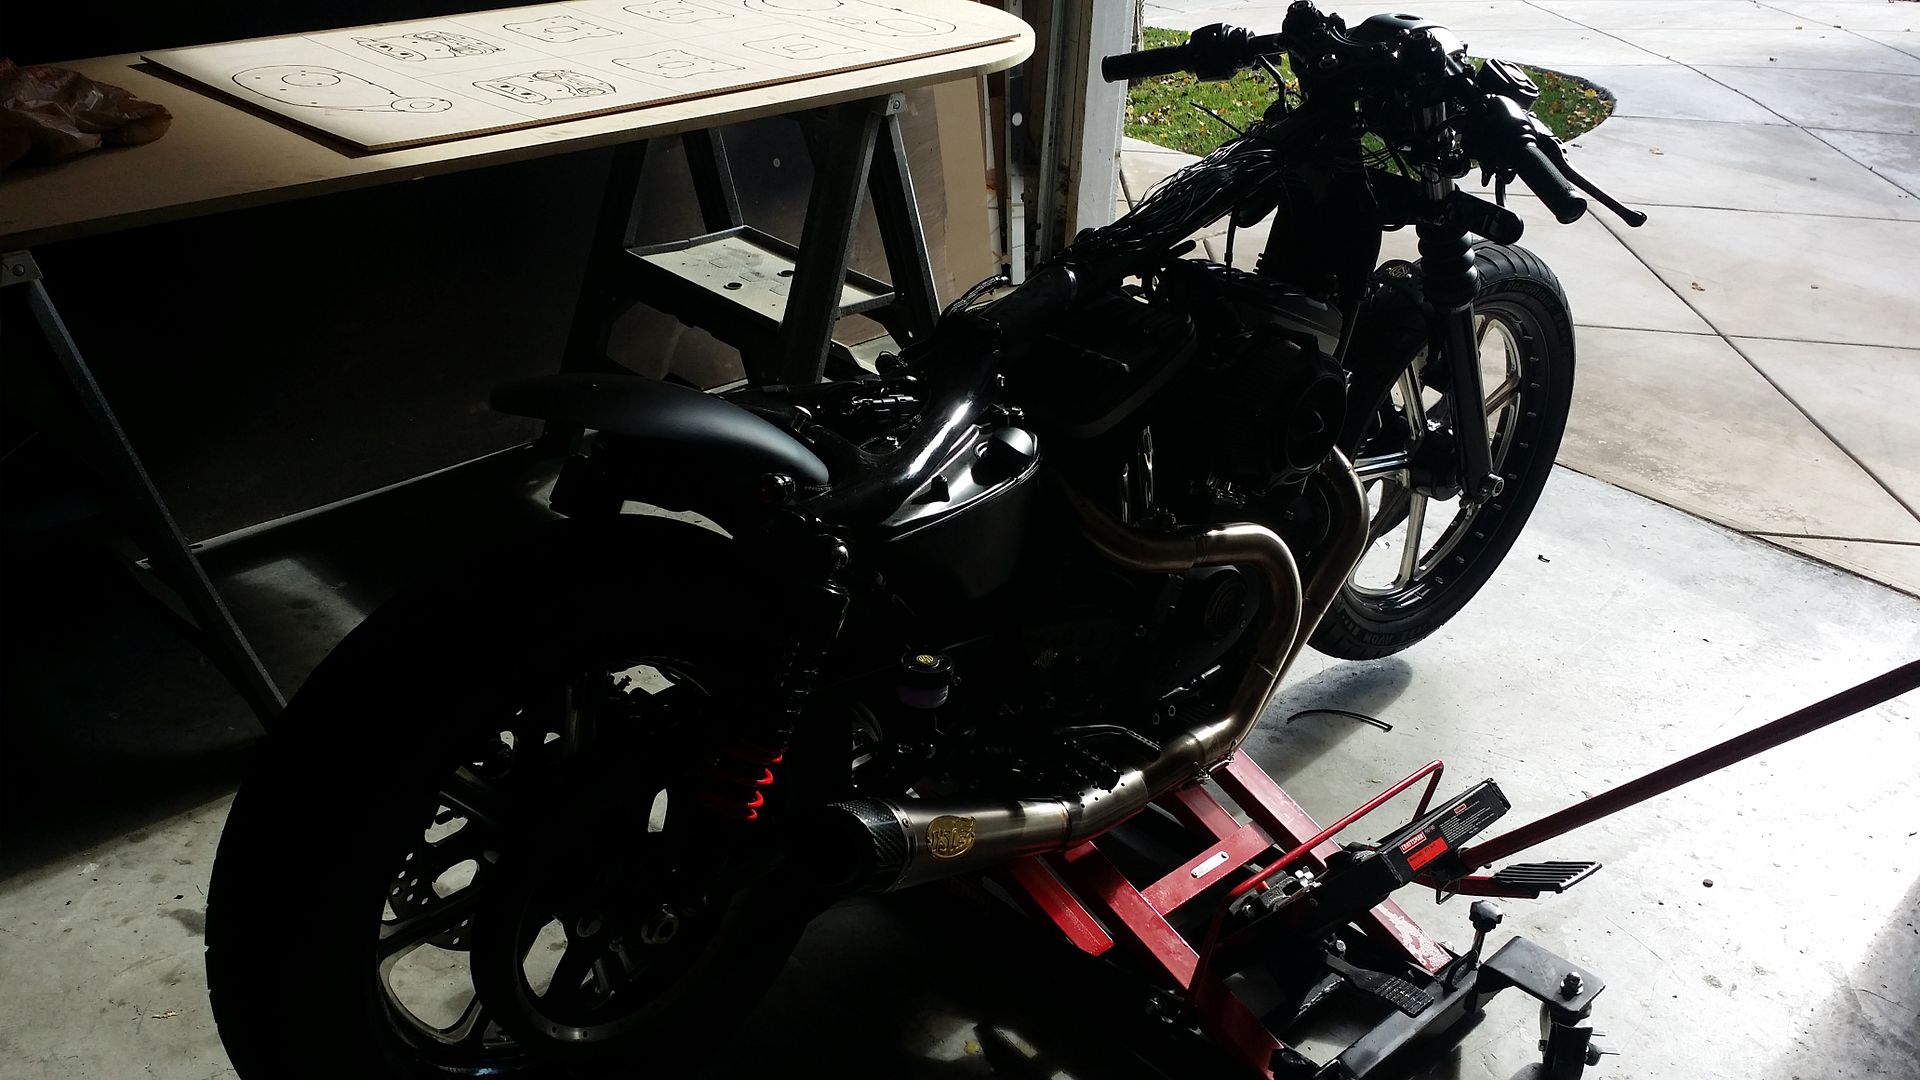
Here is where I was before I broke it down again:
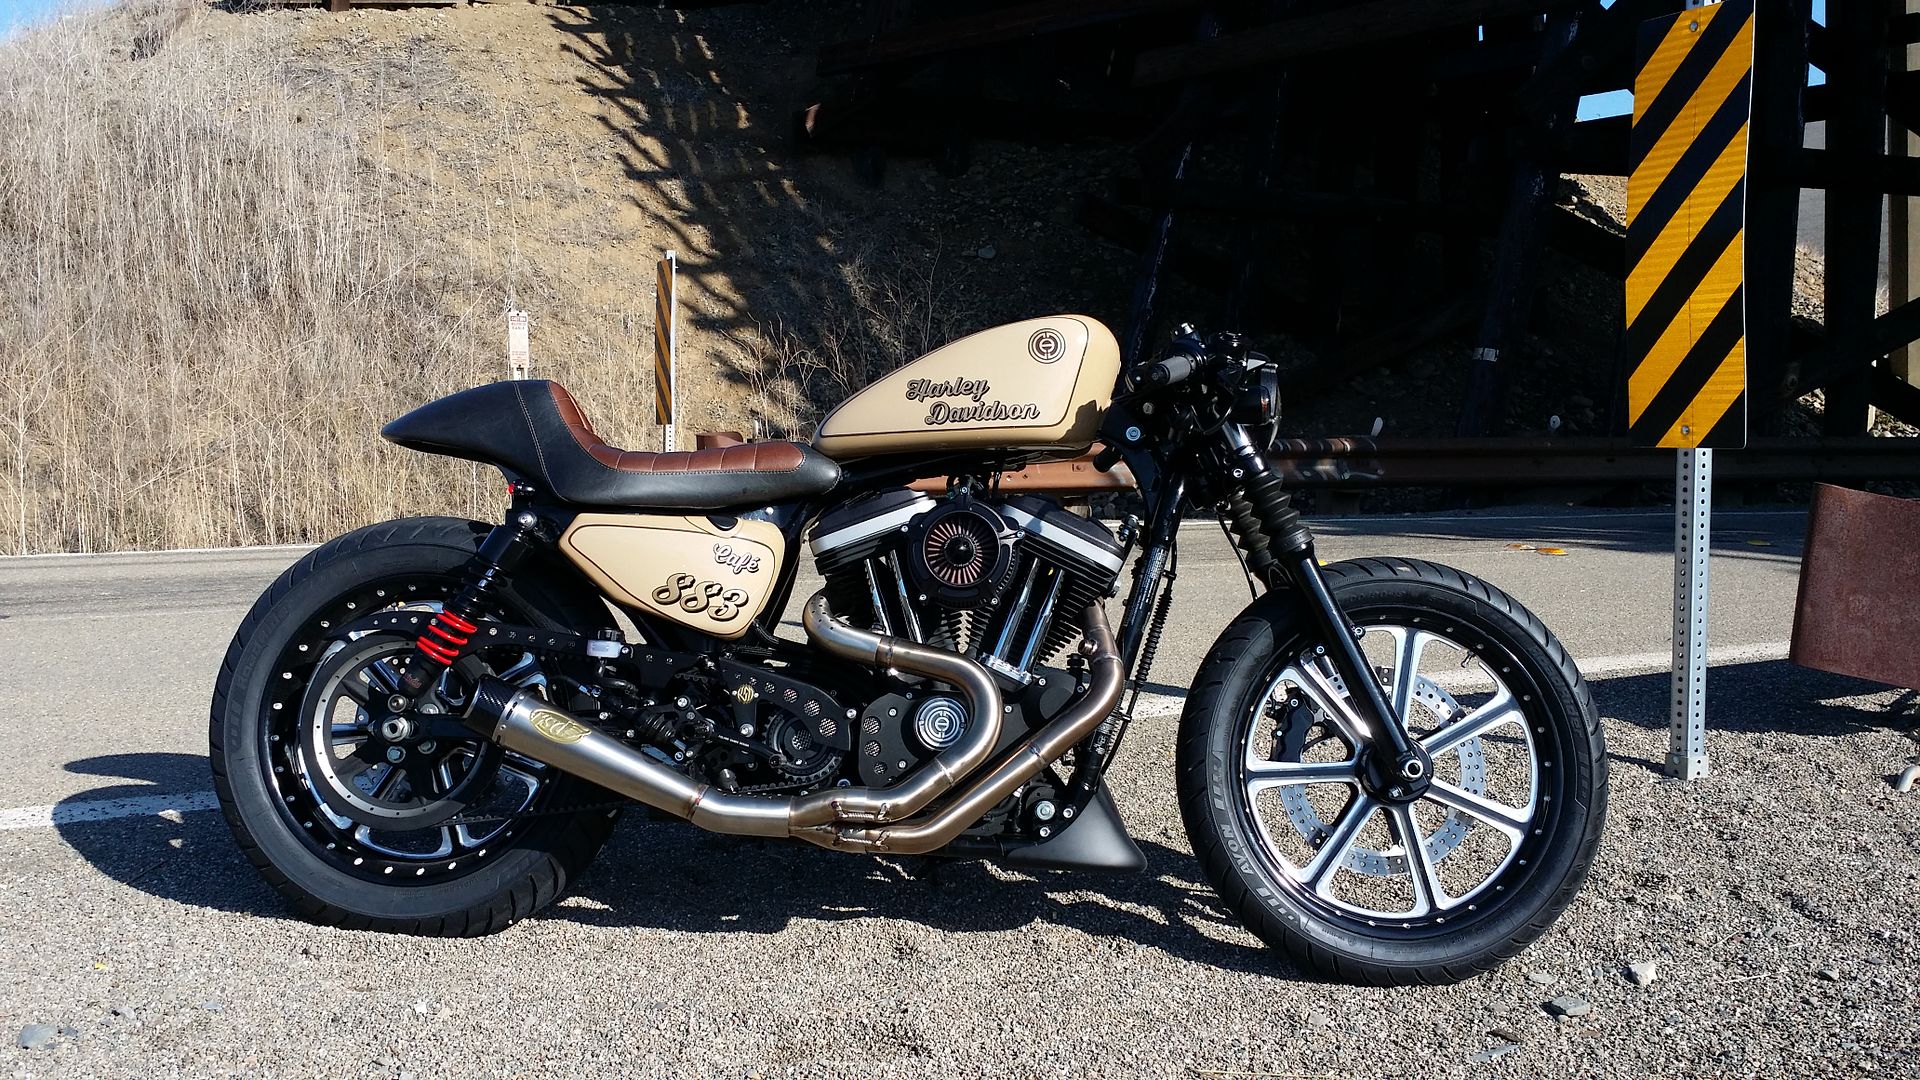
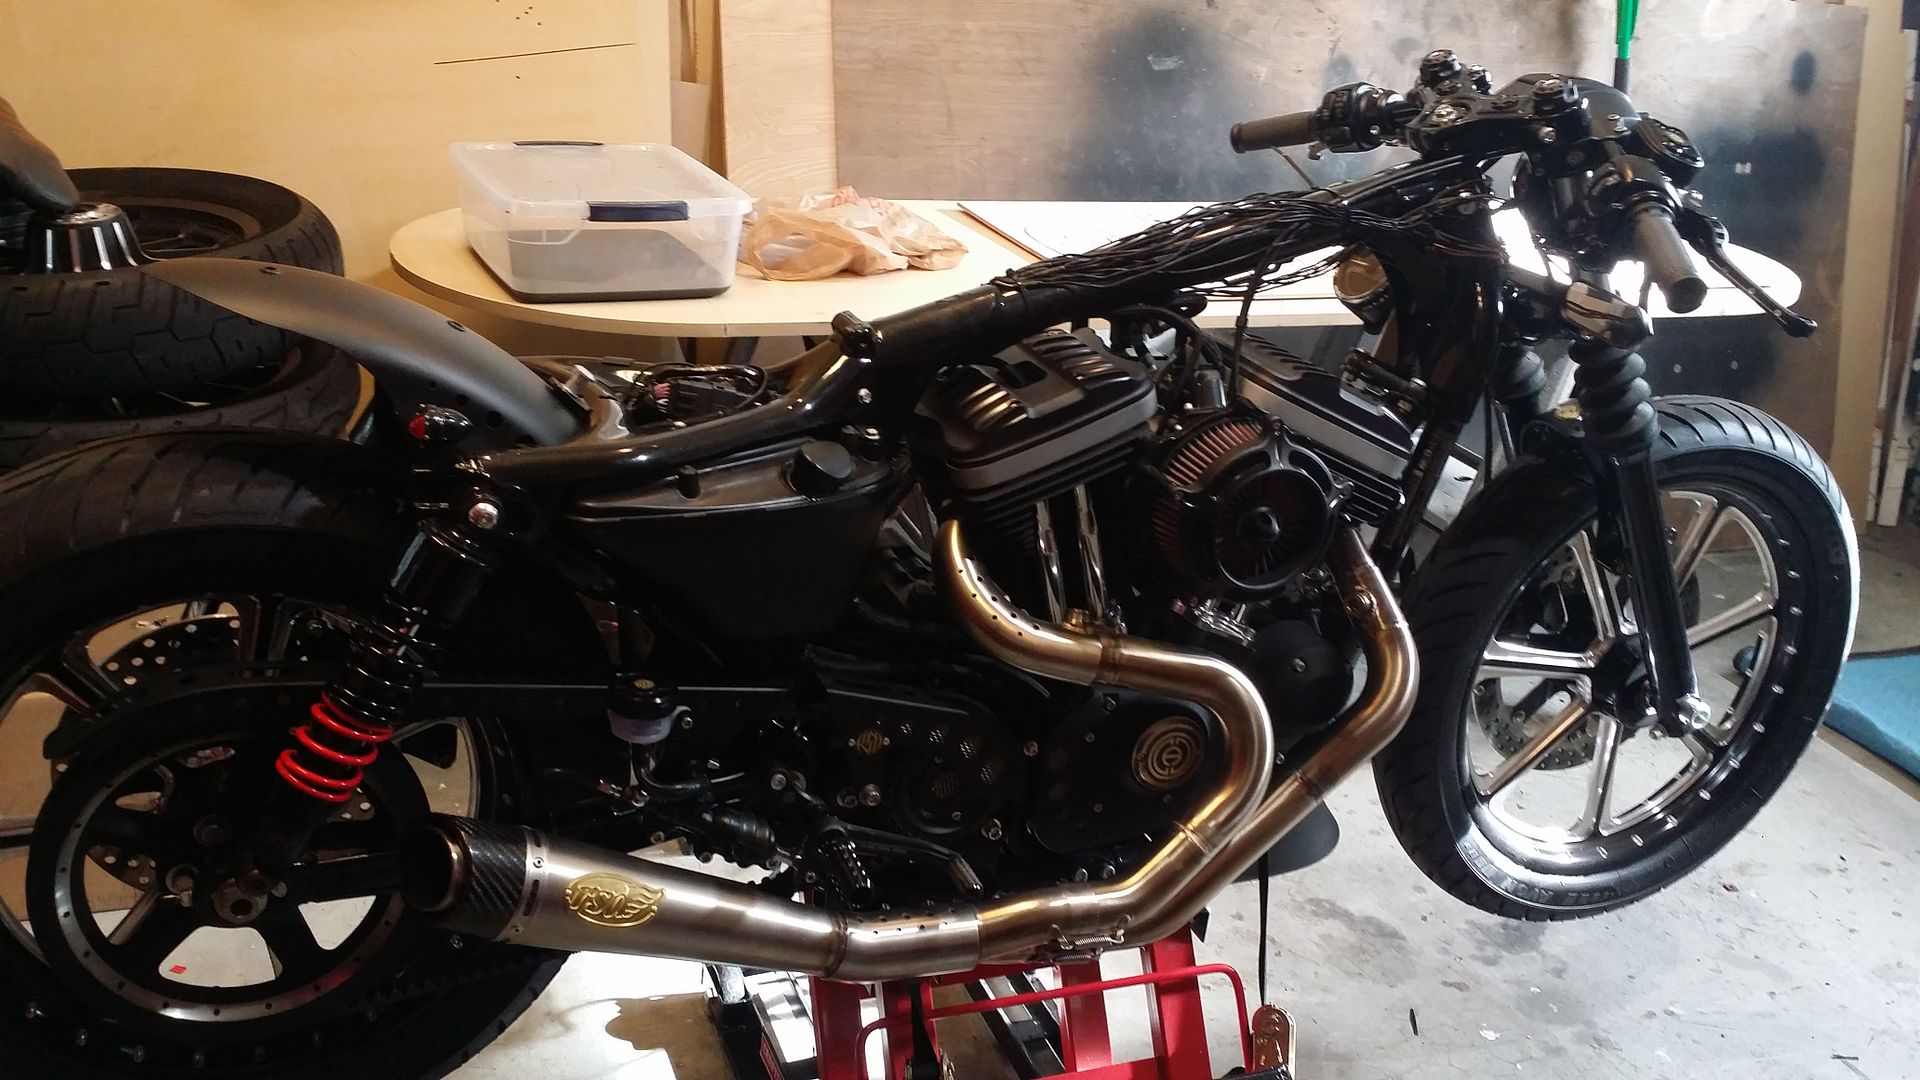
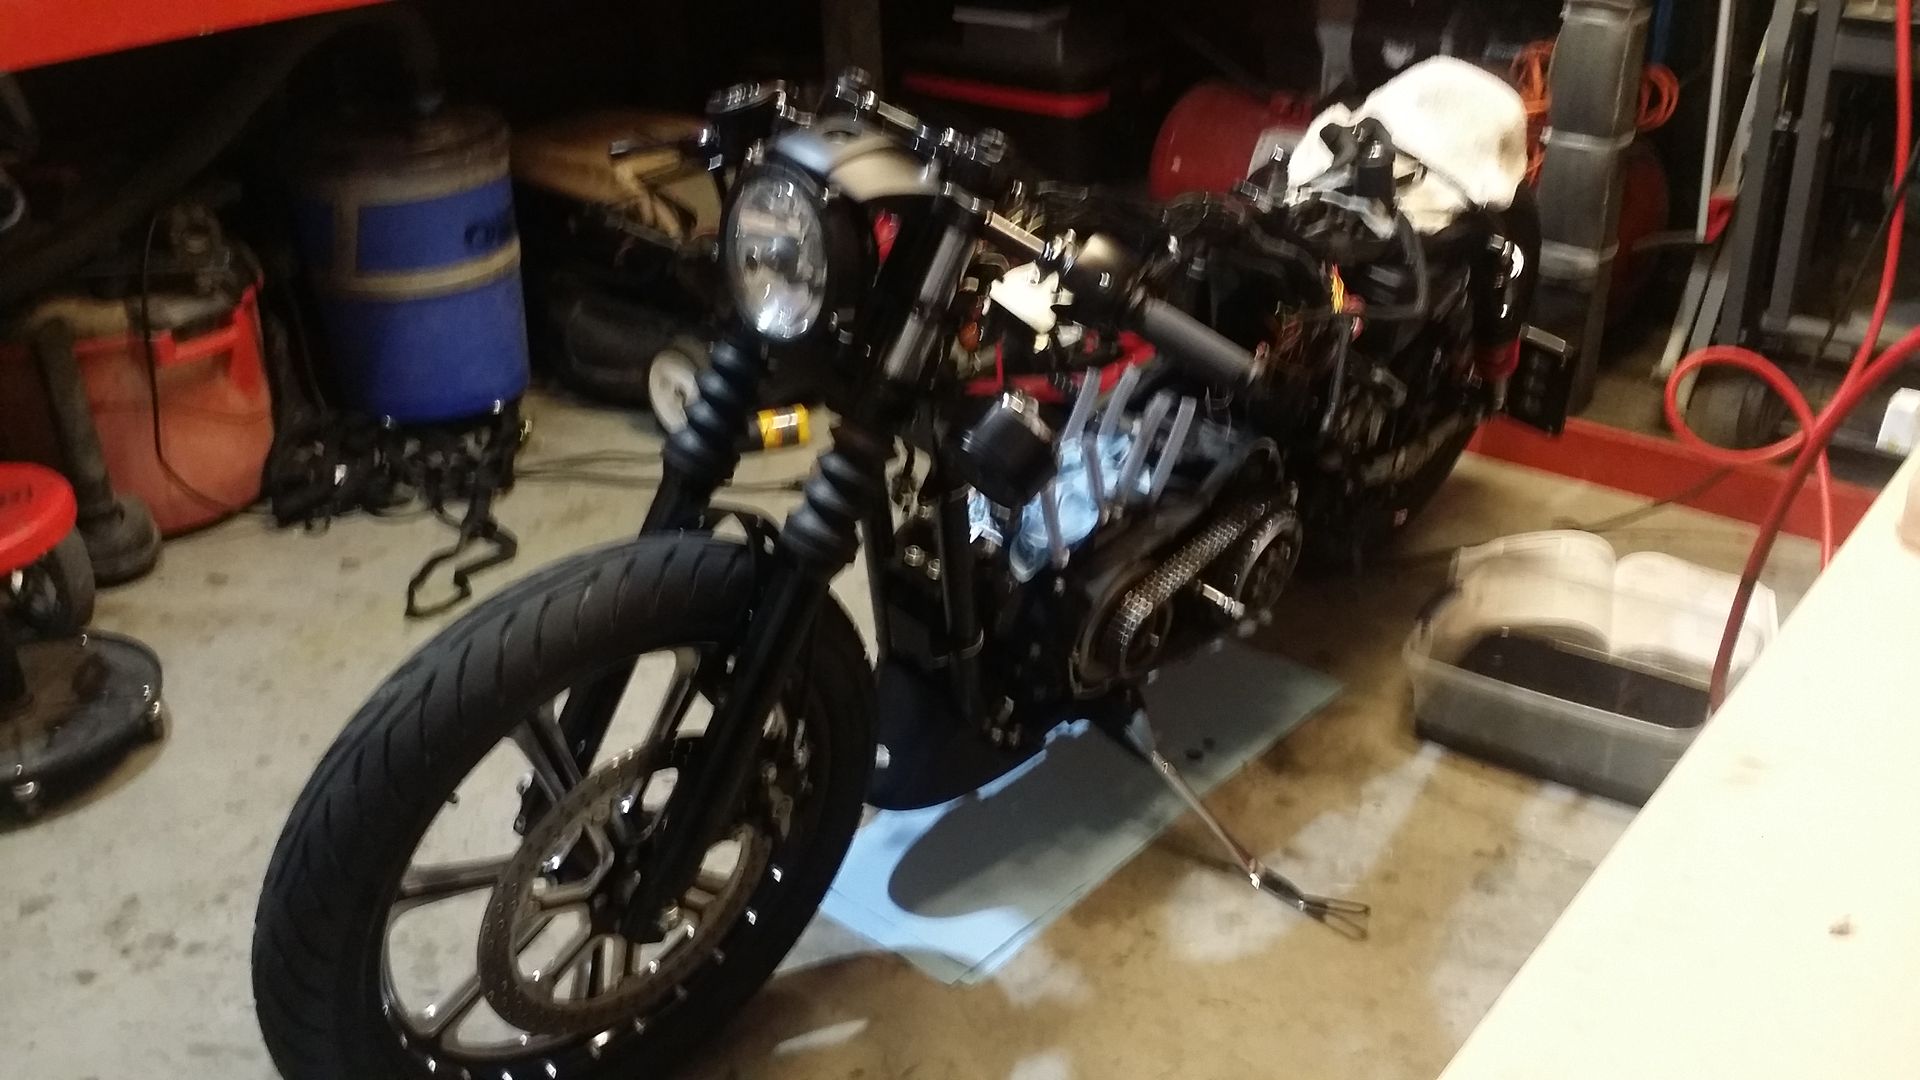
Here is where I am right now
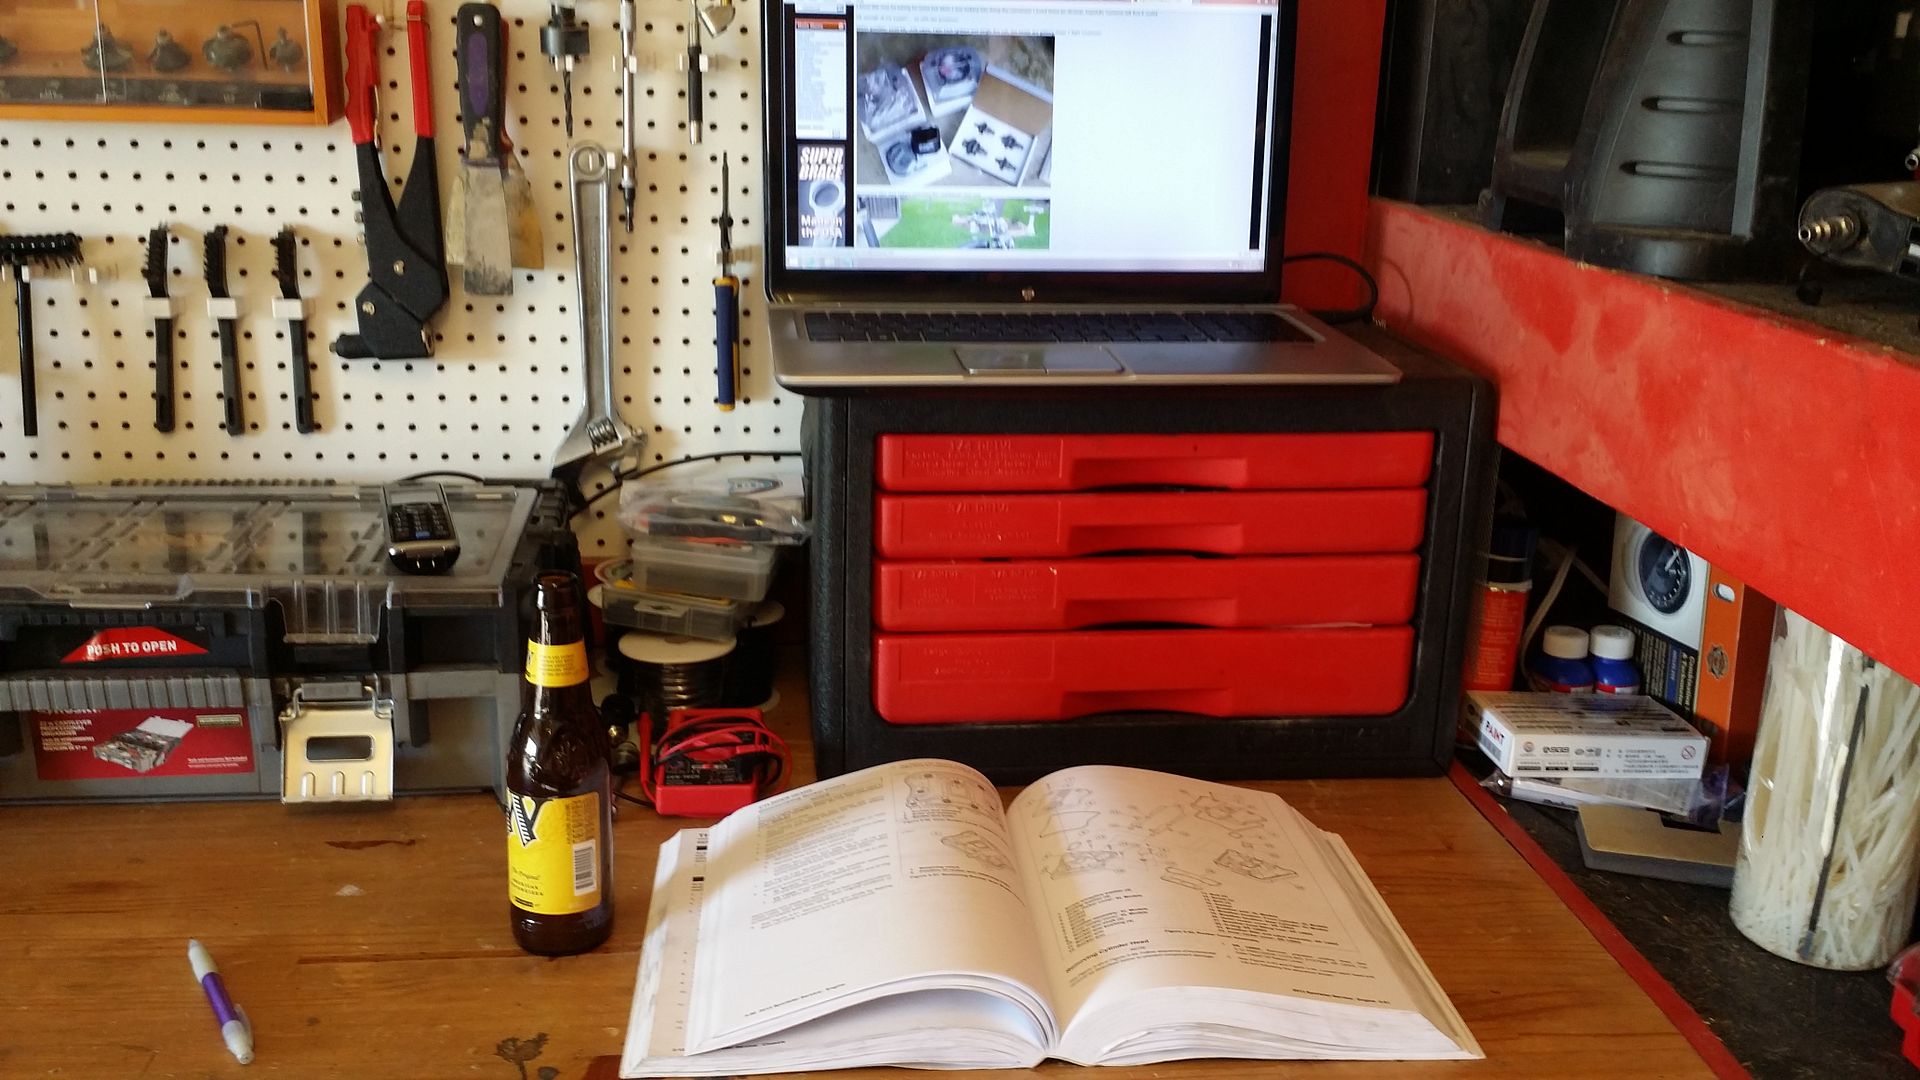
Ok so here we go....Beer..check... Forum on the laptop..check...HD Service manual...check...104.1 the Hawk Classic Rock on the Radio...CHECK...
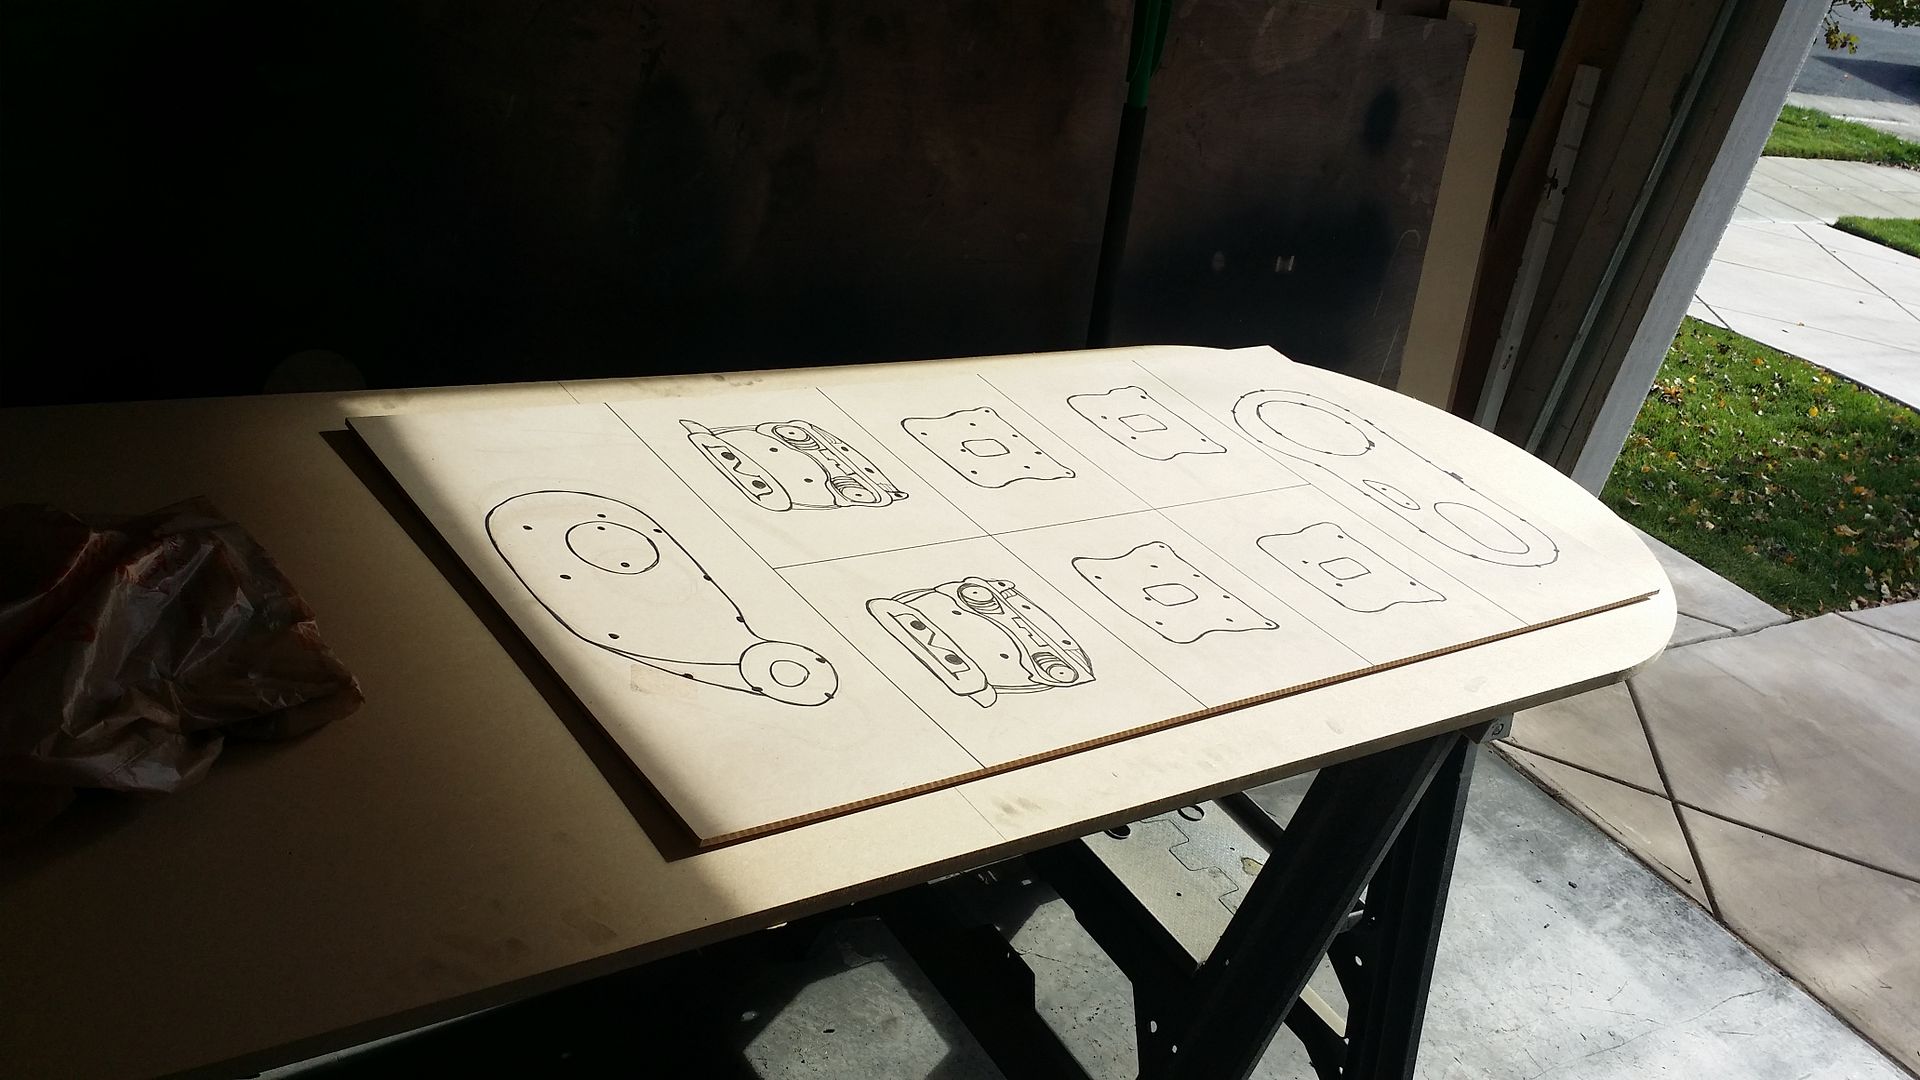
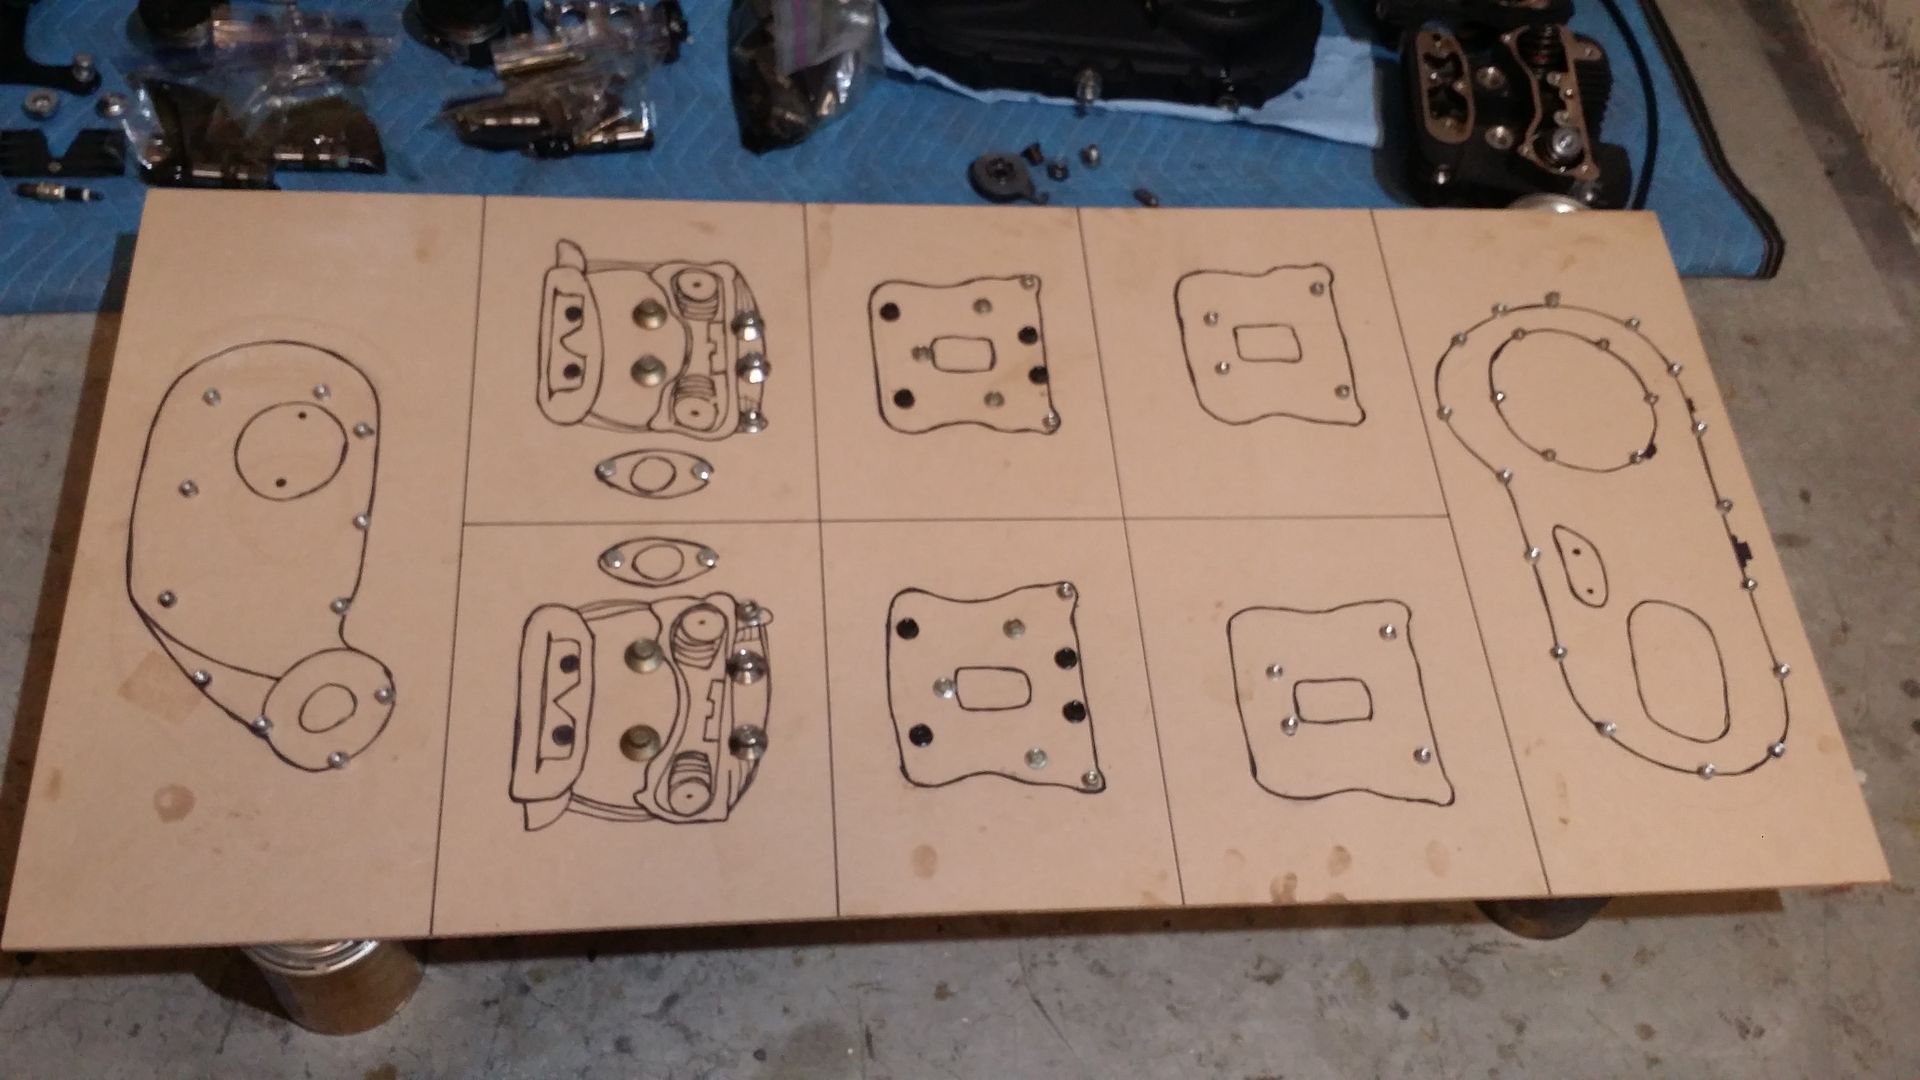
This is my version of the cardboard bolt holder.....Anything worth doing is worth...well being completely overdone :laugh
Somehow my XL Head drawings look more like angry Ninja Turtle Heads!!!
Now time to start the work...I will try to keep up with the pics.
All lifted and strapped down
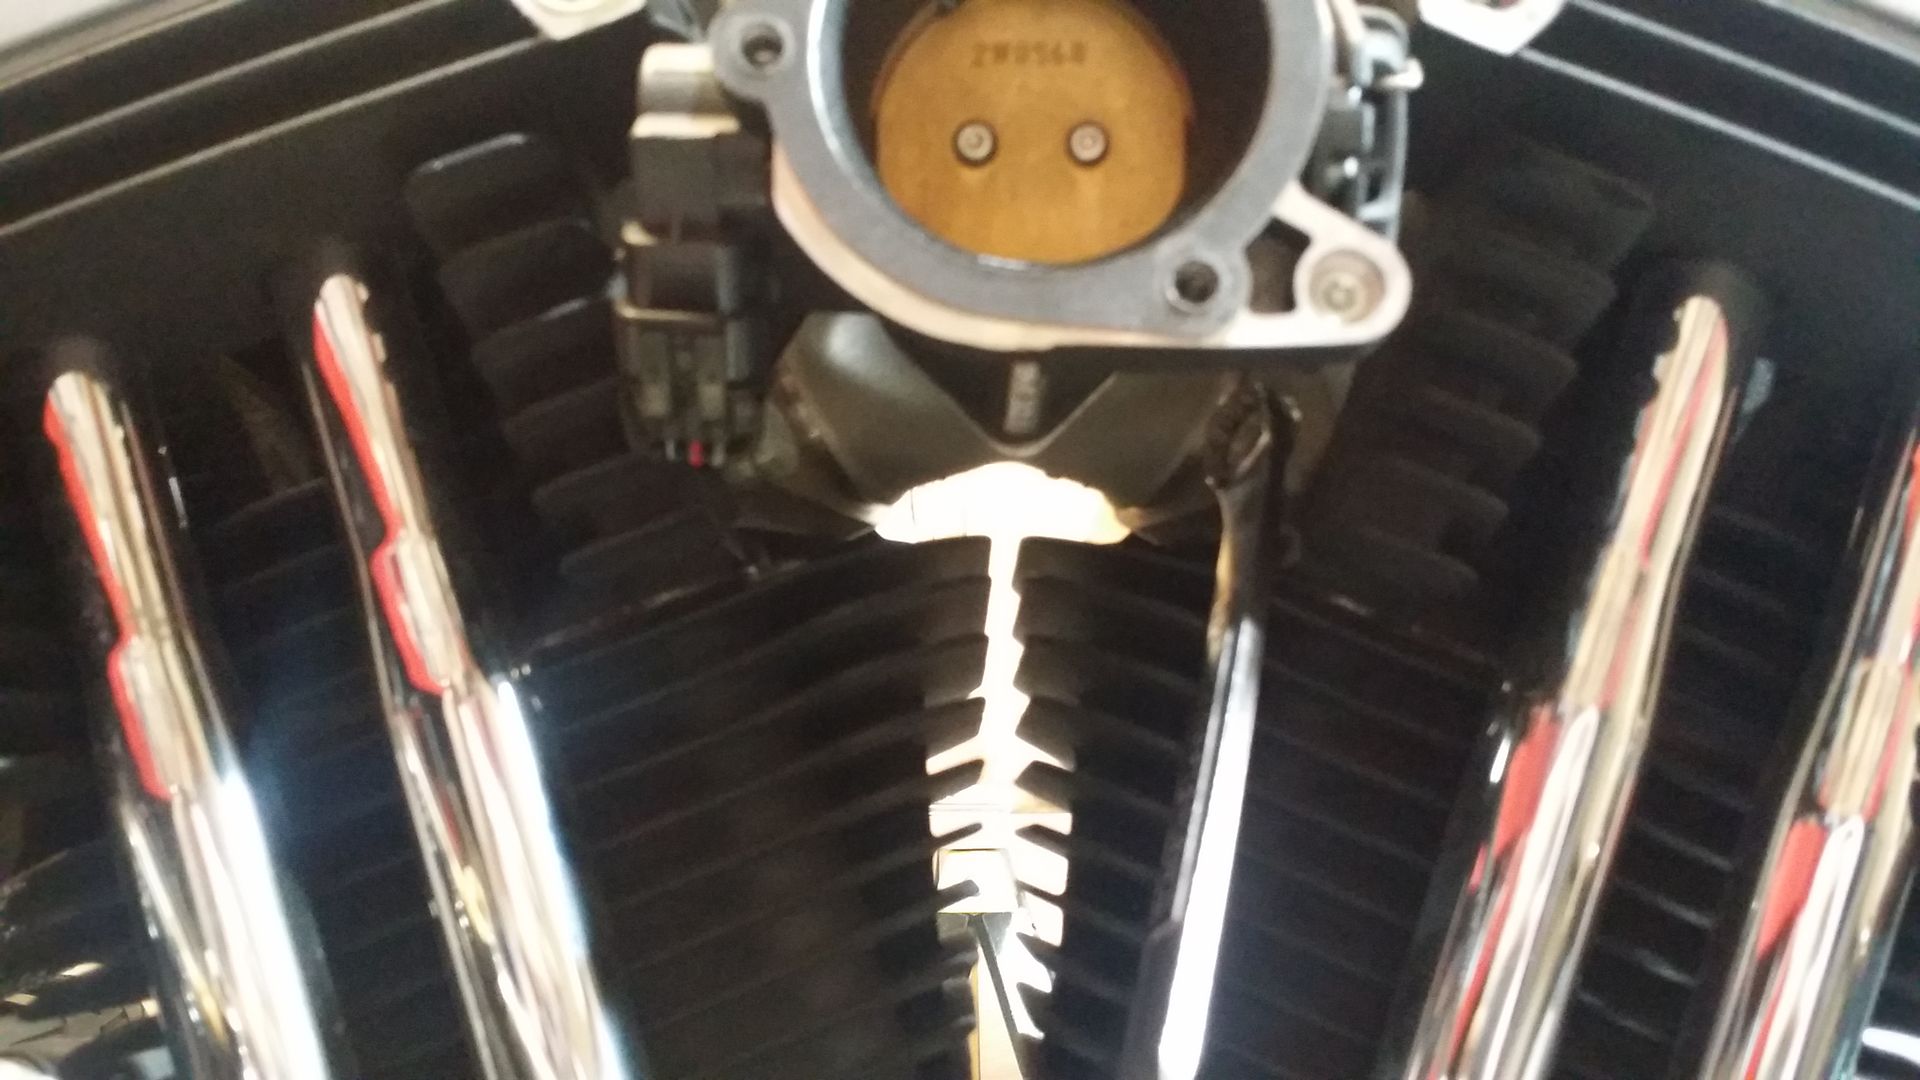
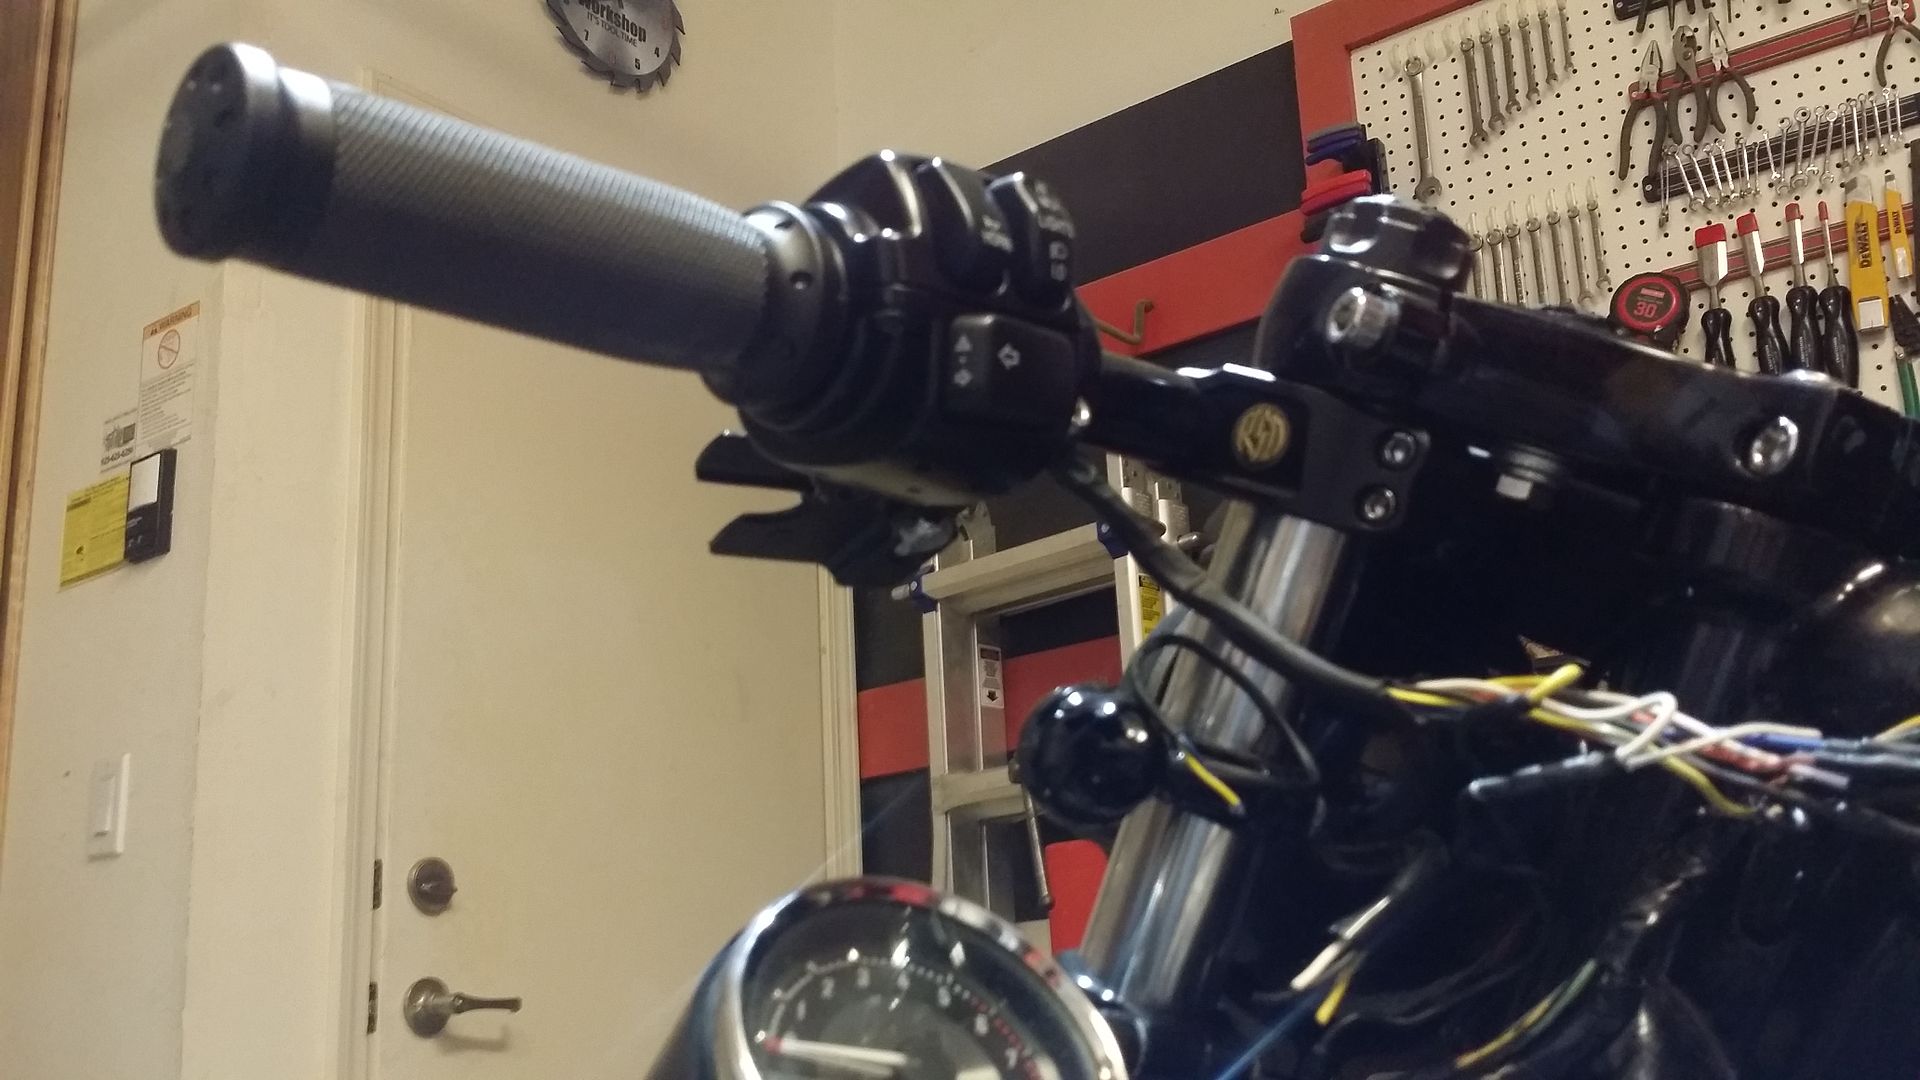
Removed the RSD air cleaner
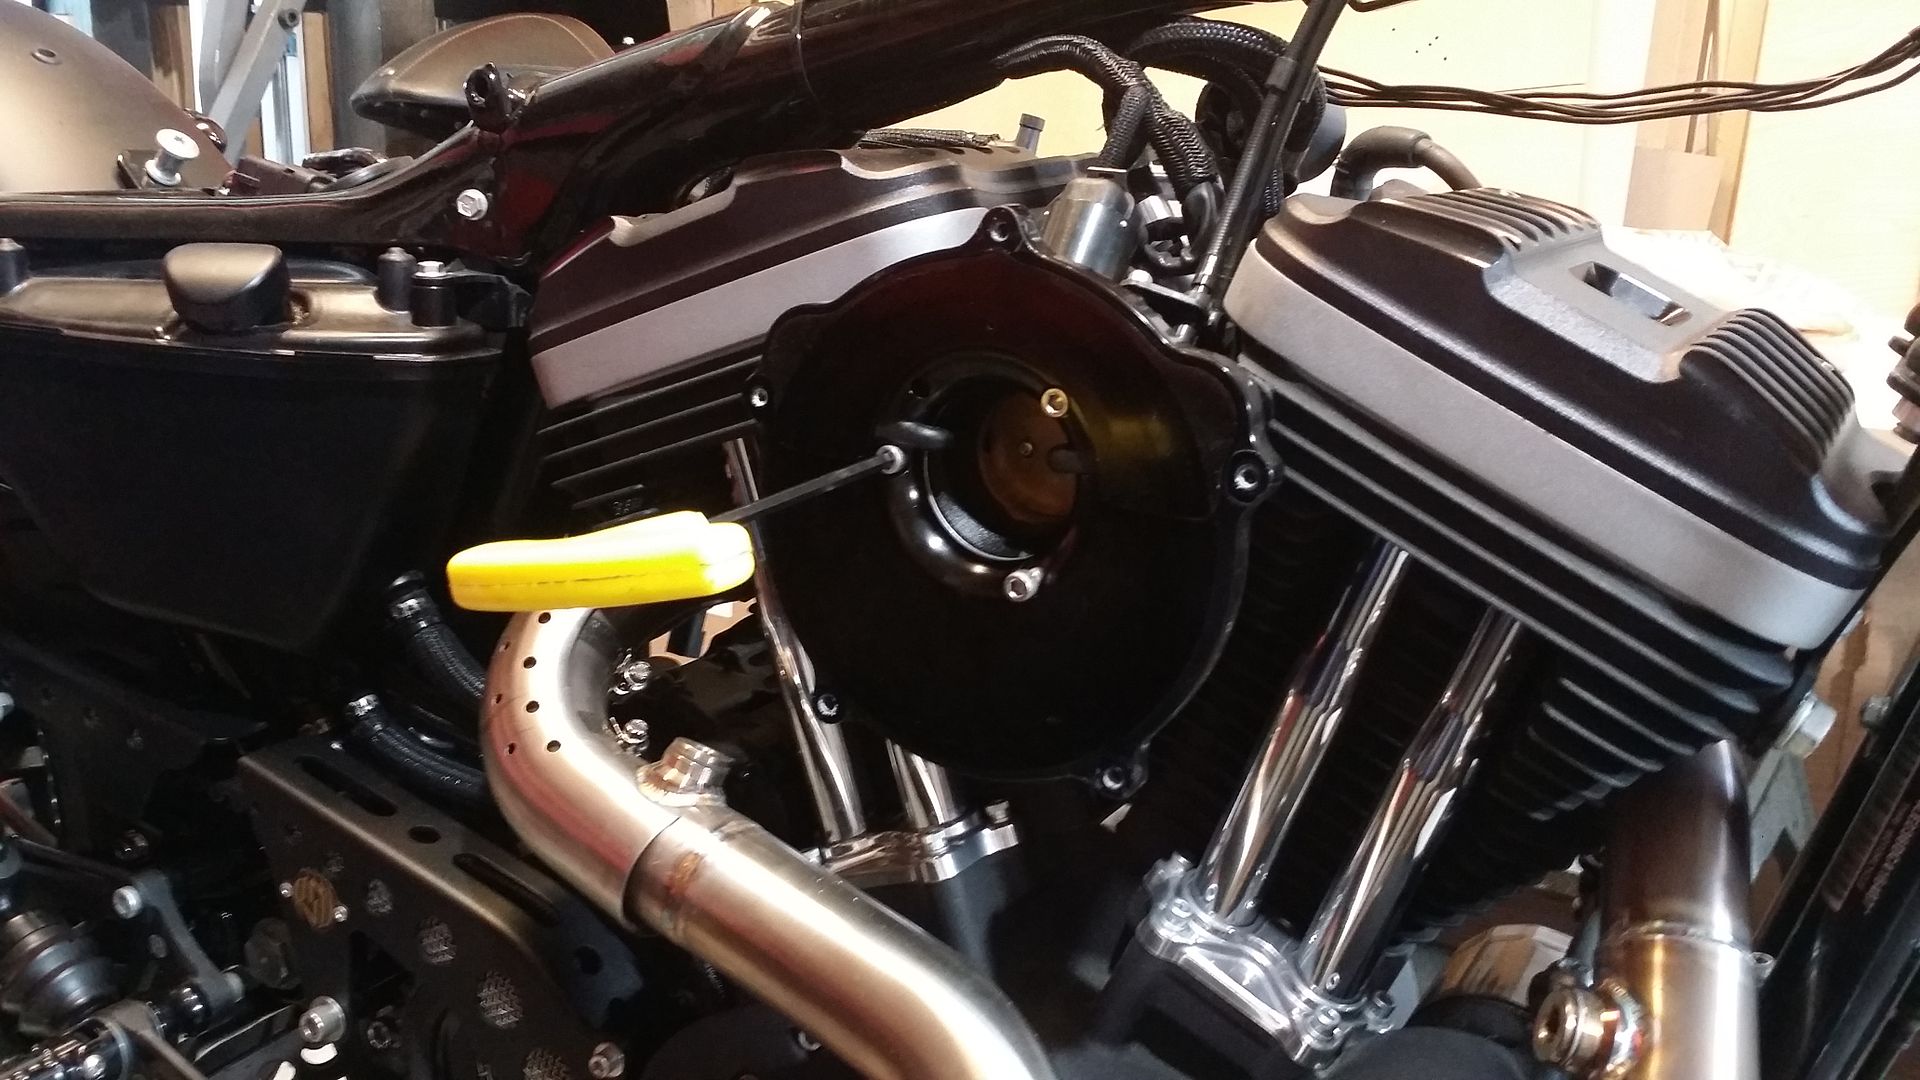
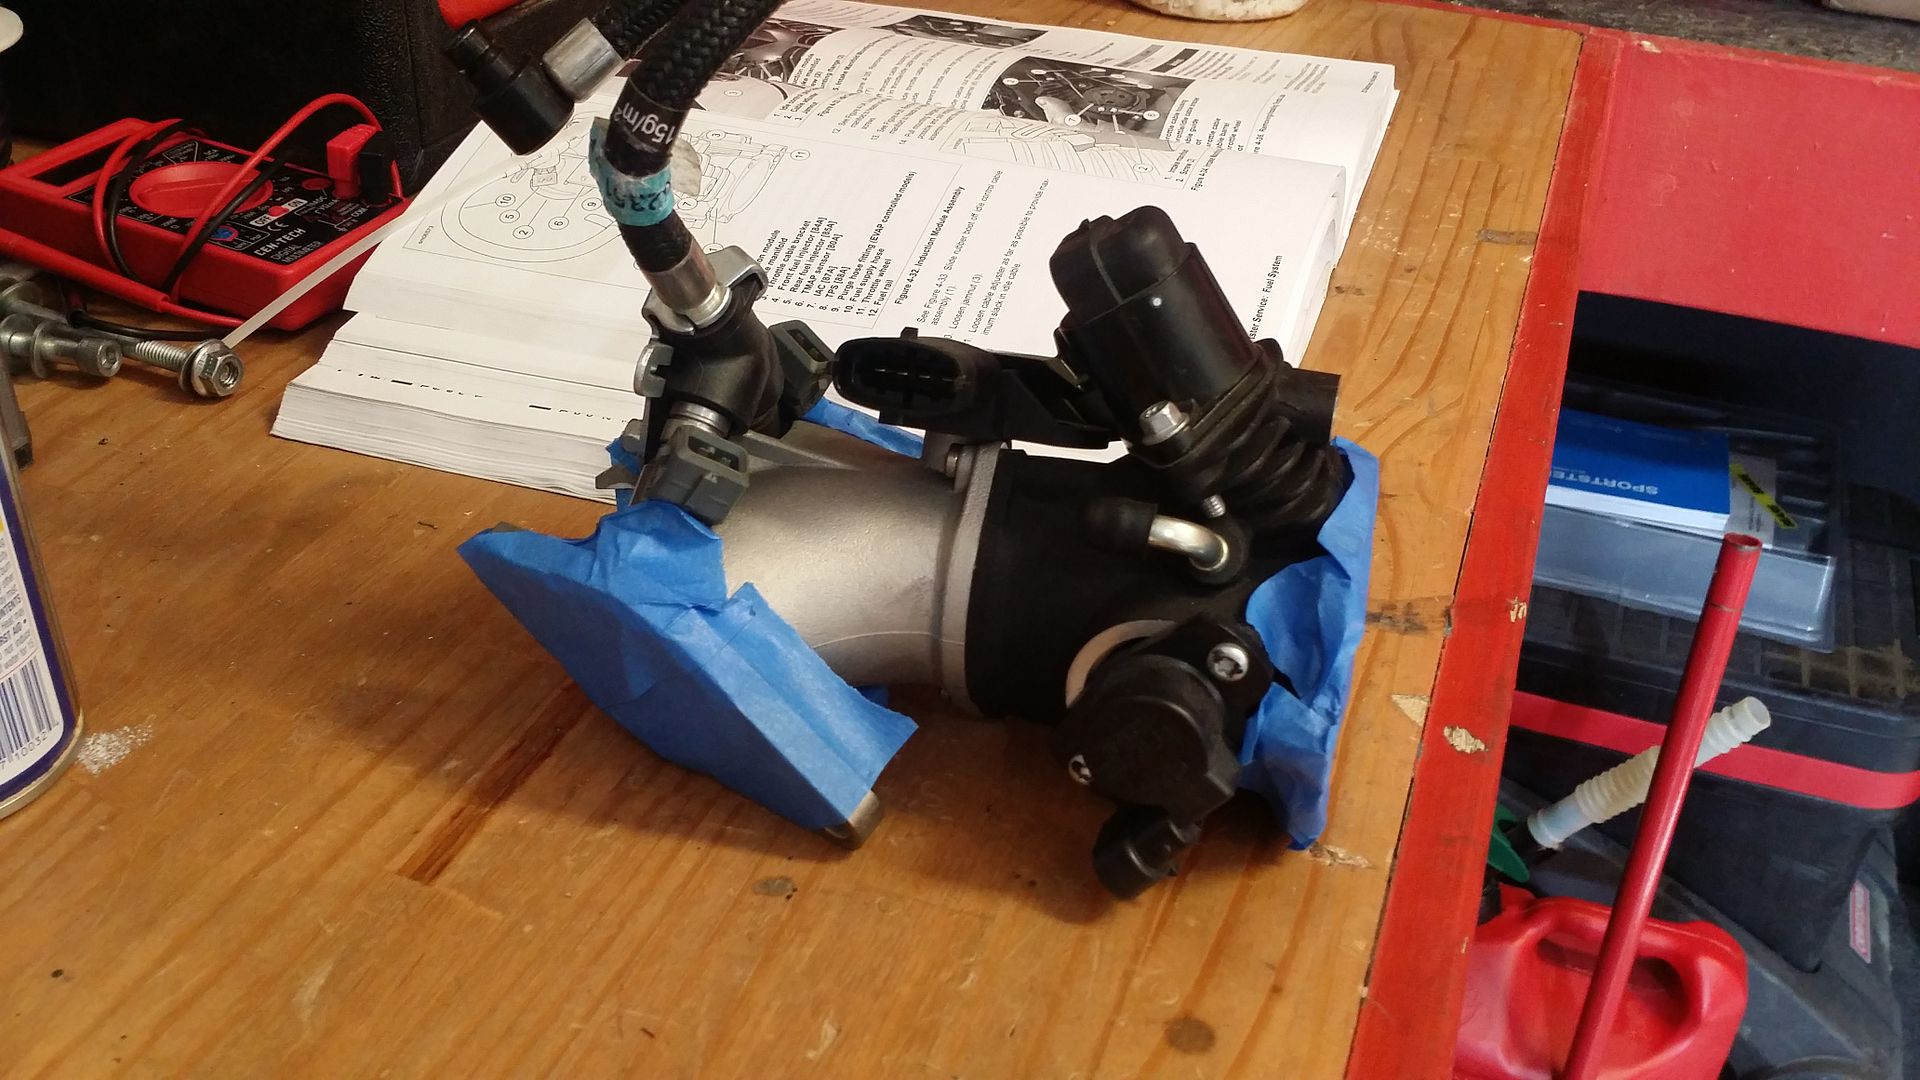
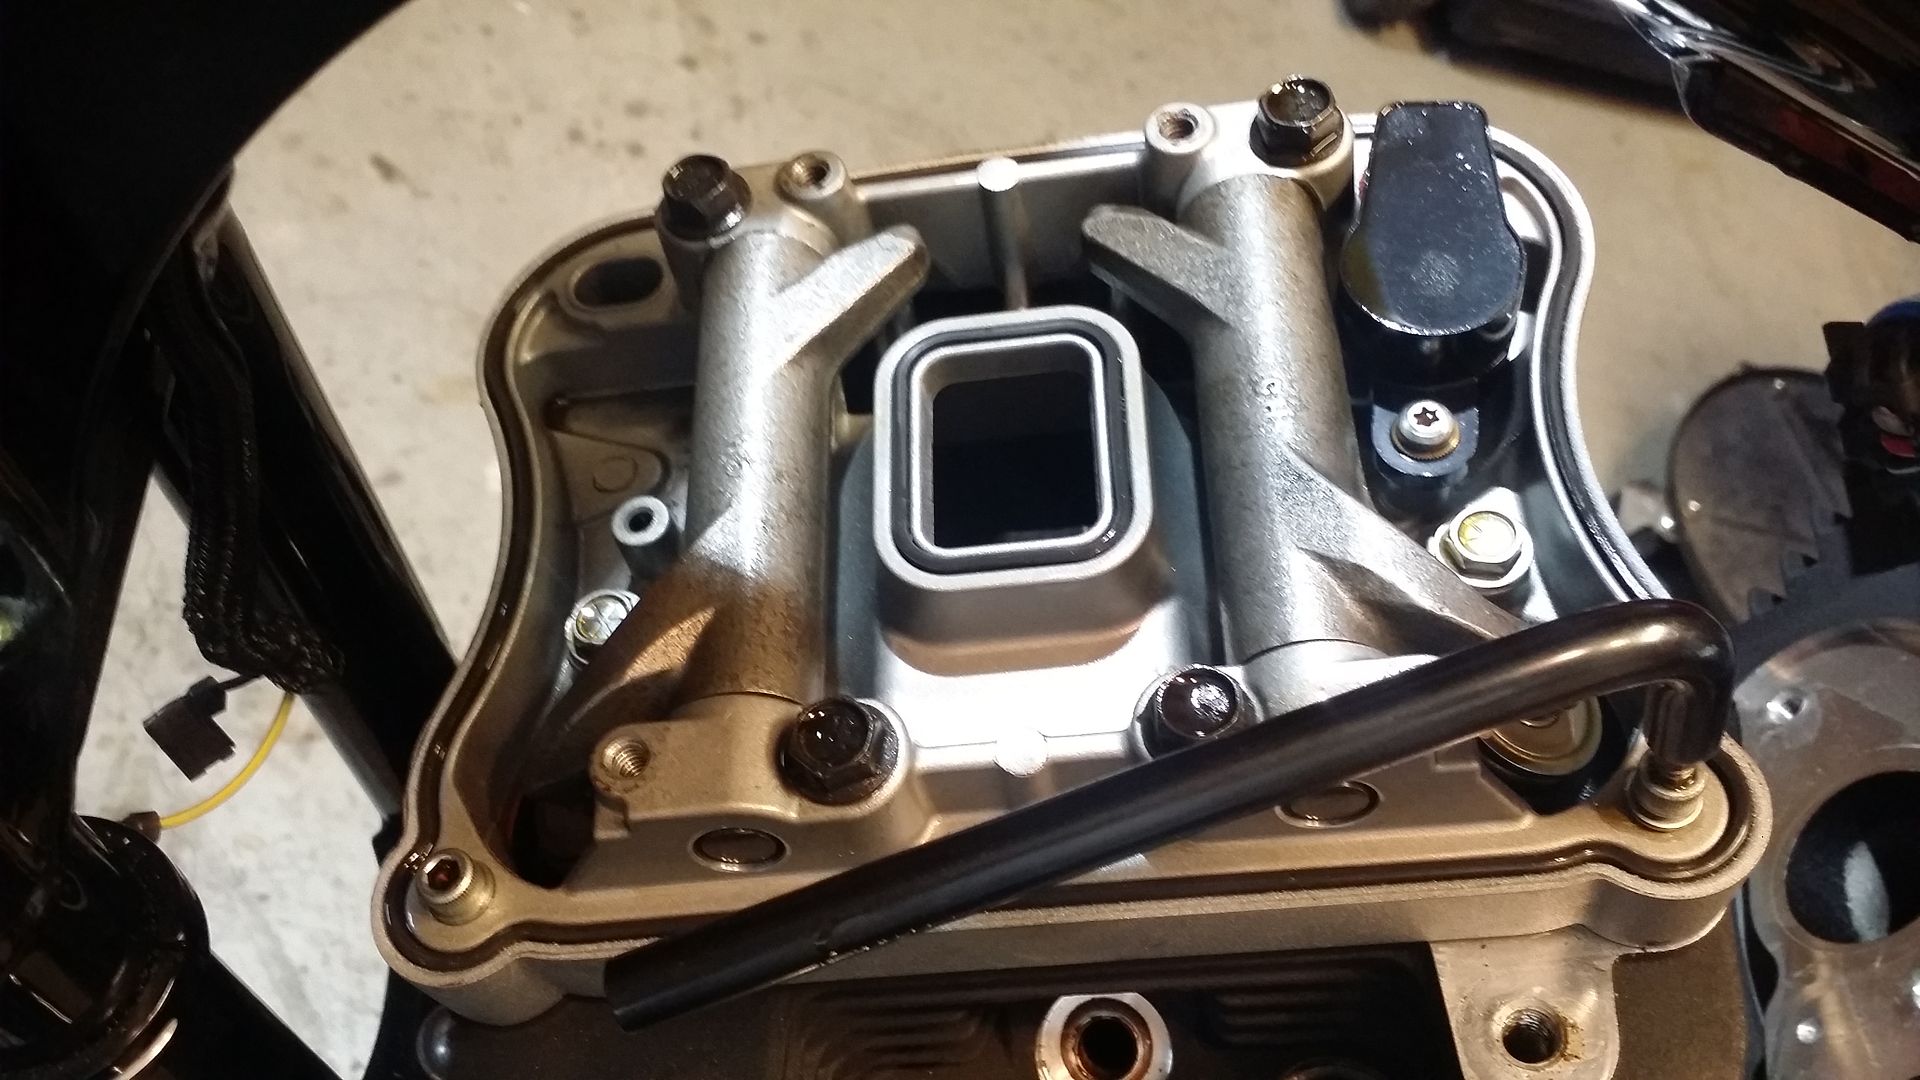
Now to start removing the Induction Module
First step was to loosen the Idle Control Cable Assembly by sliding the boot off and cracking the lock nut (much like the clutch cable)
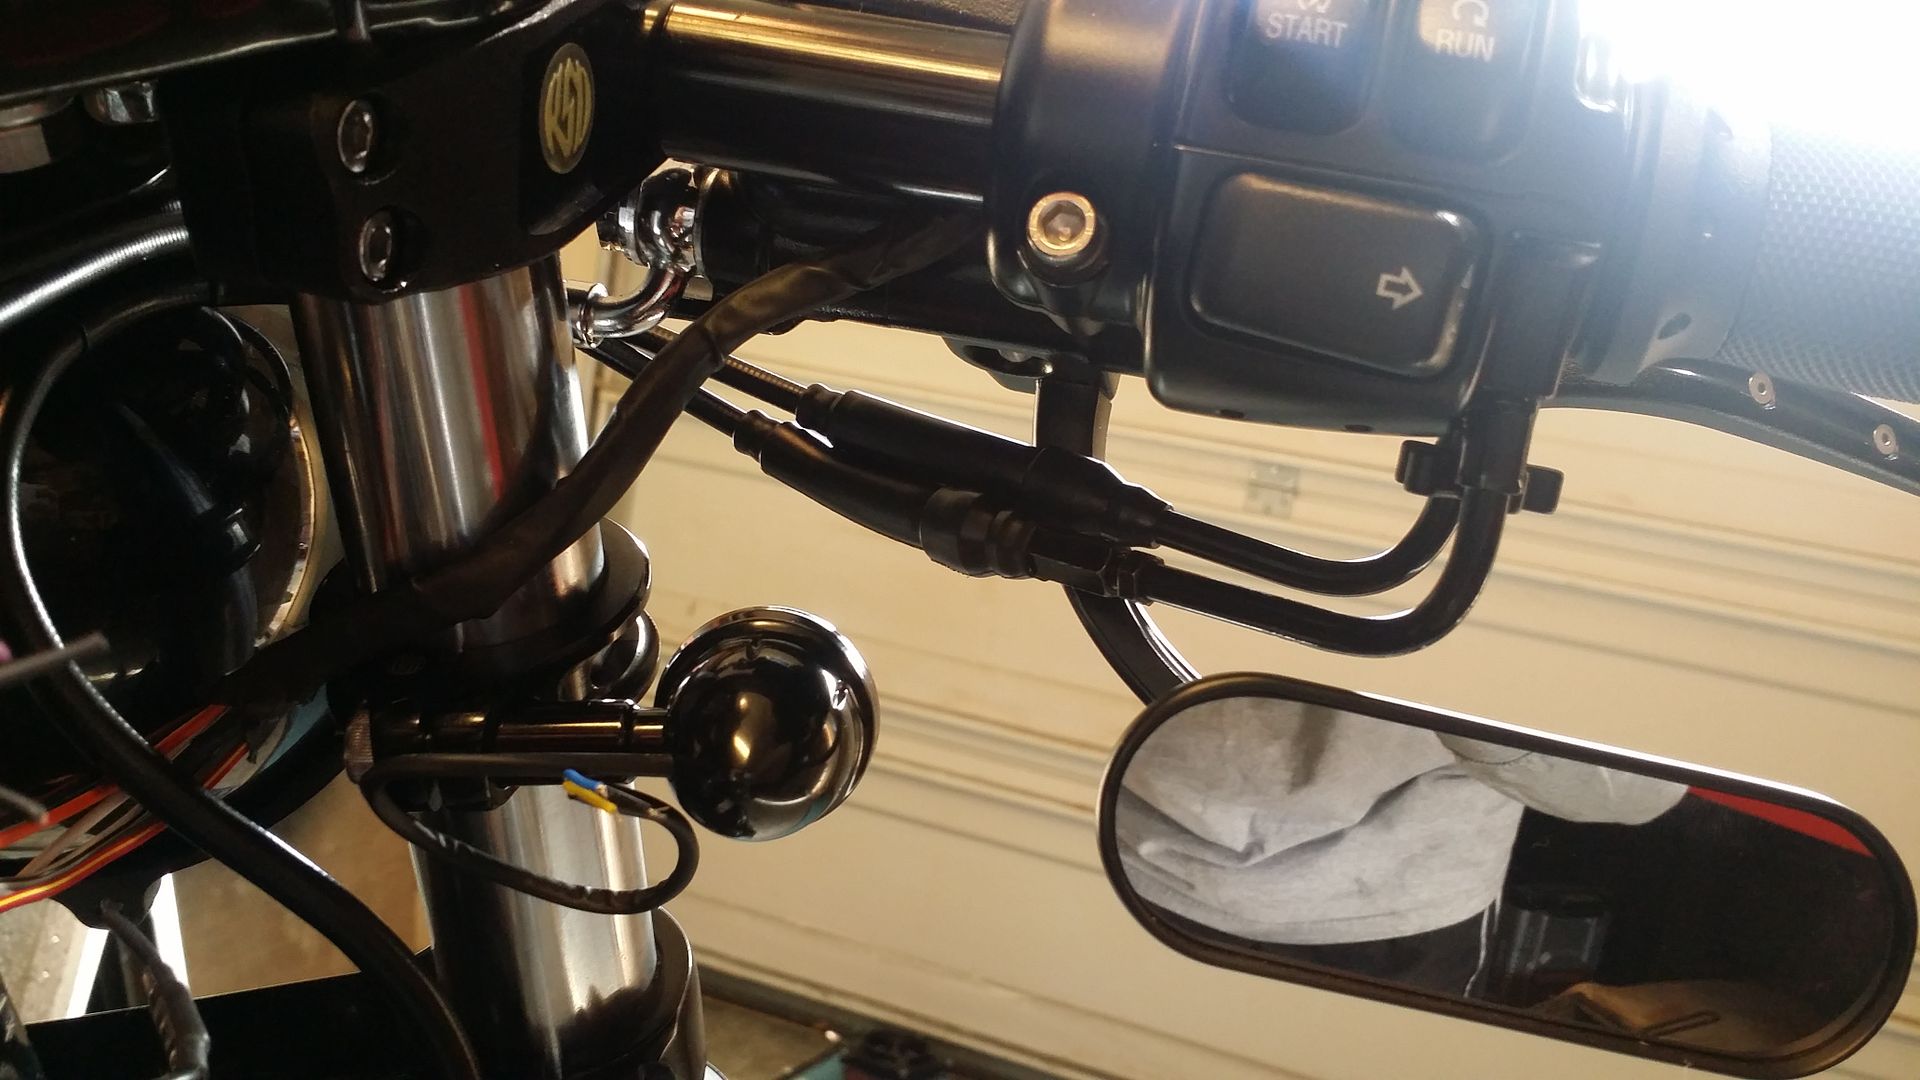
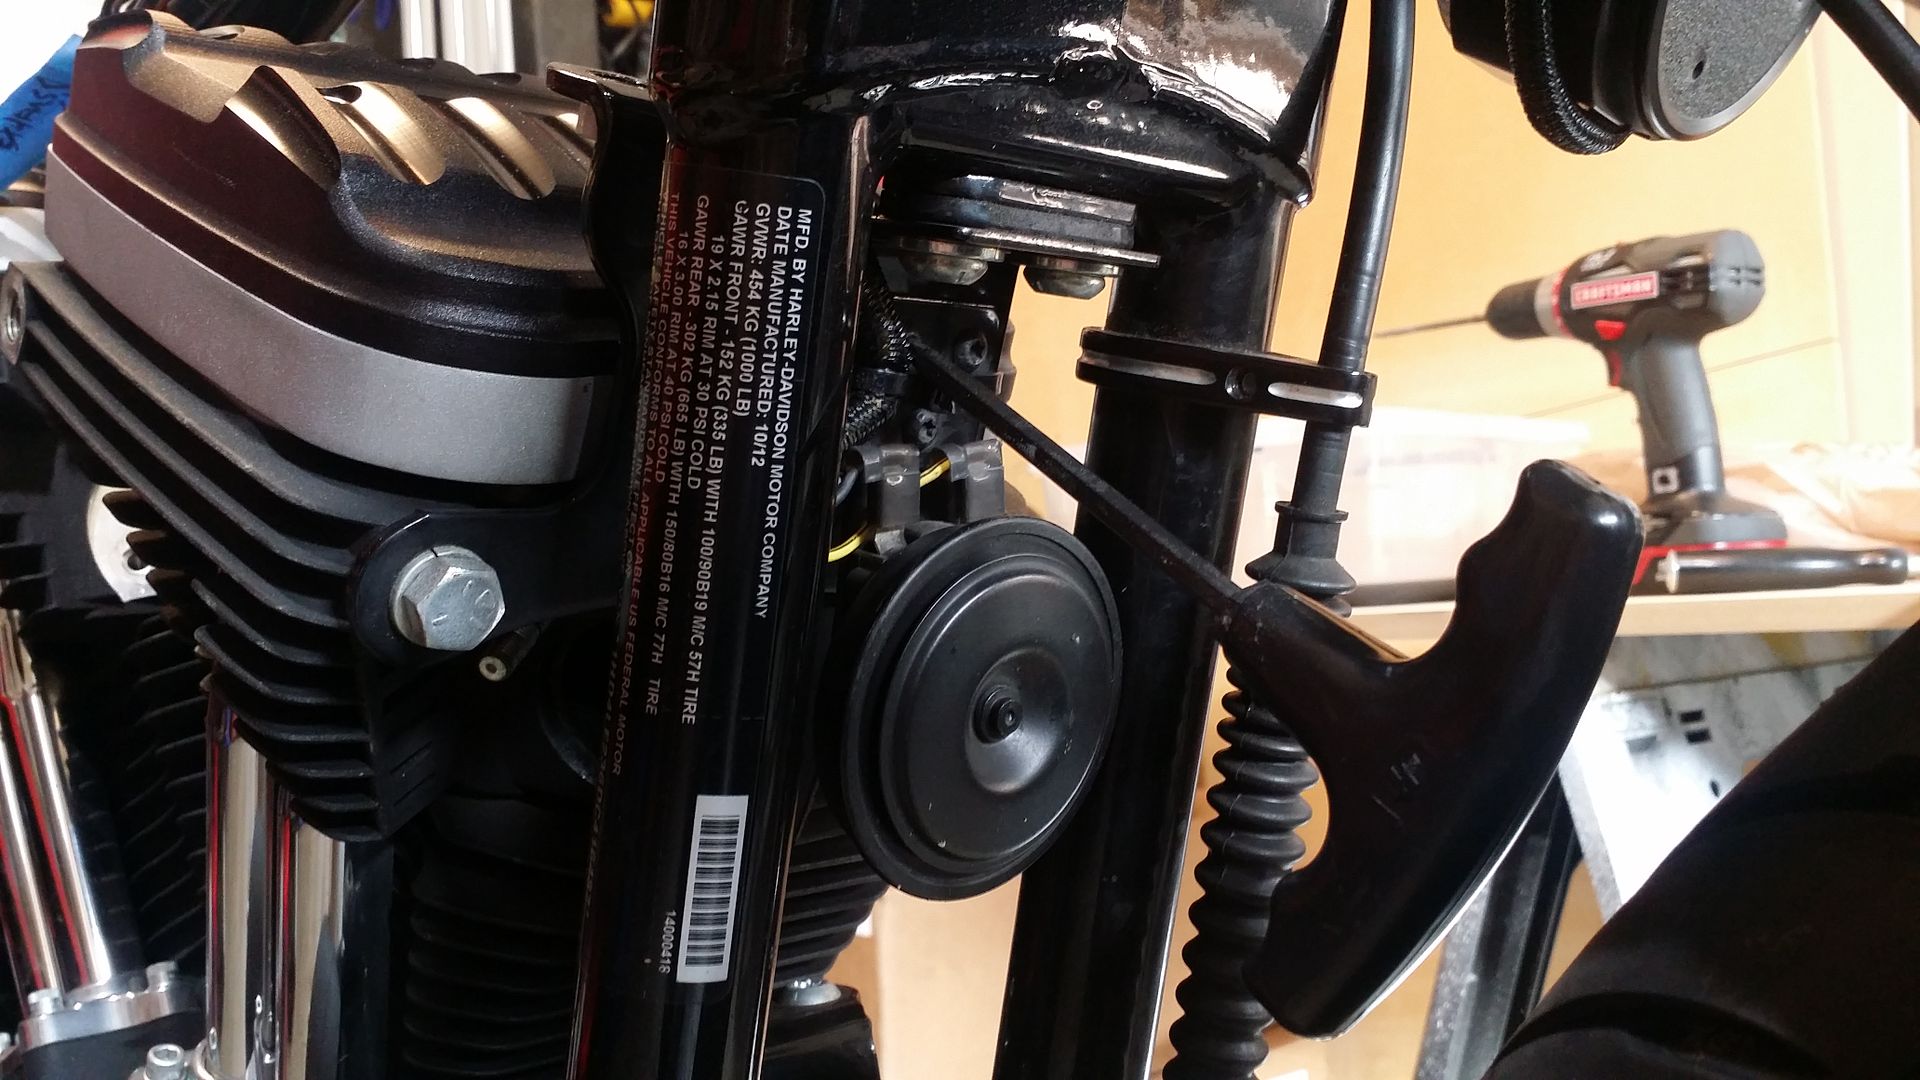
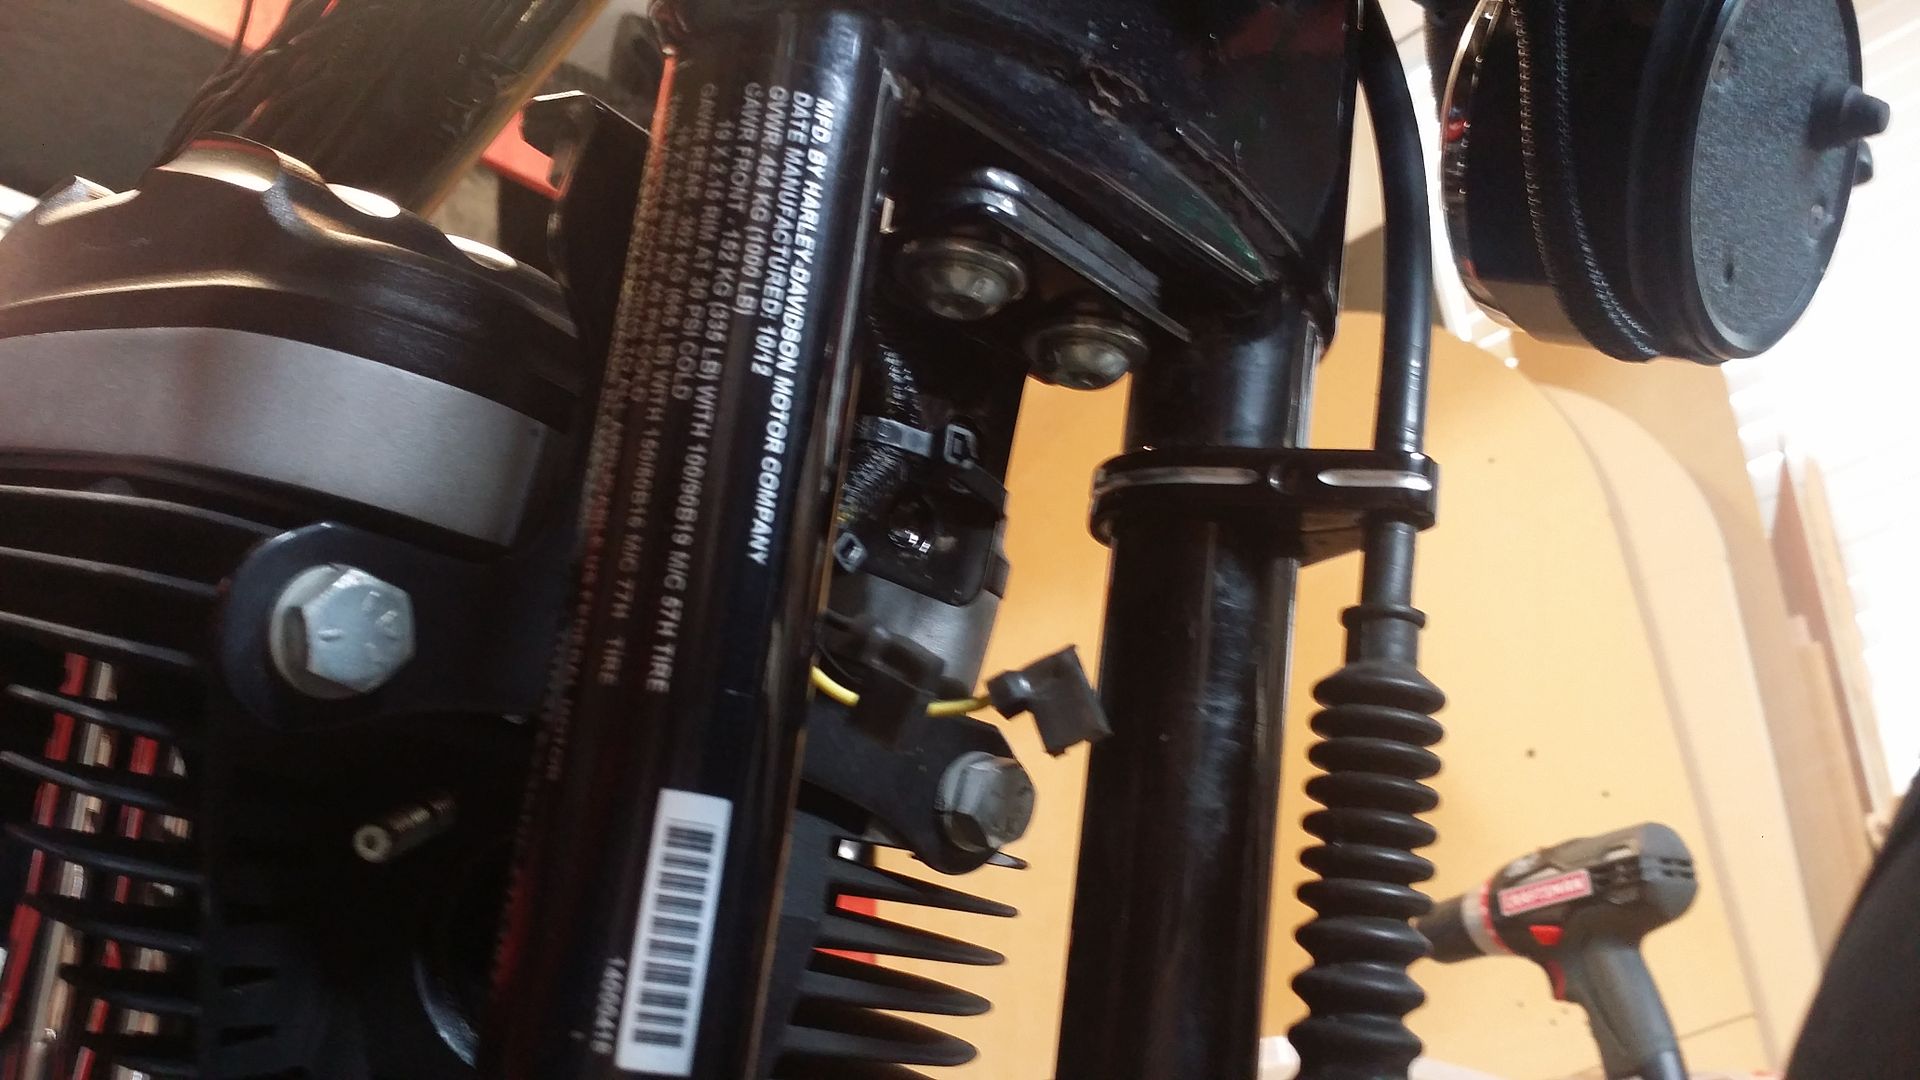
Had to remove the Coil relocation
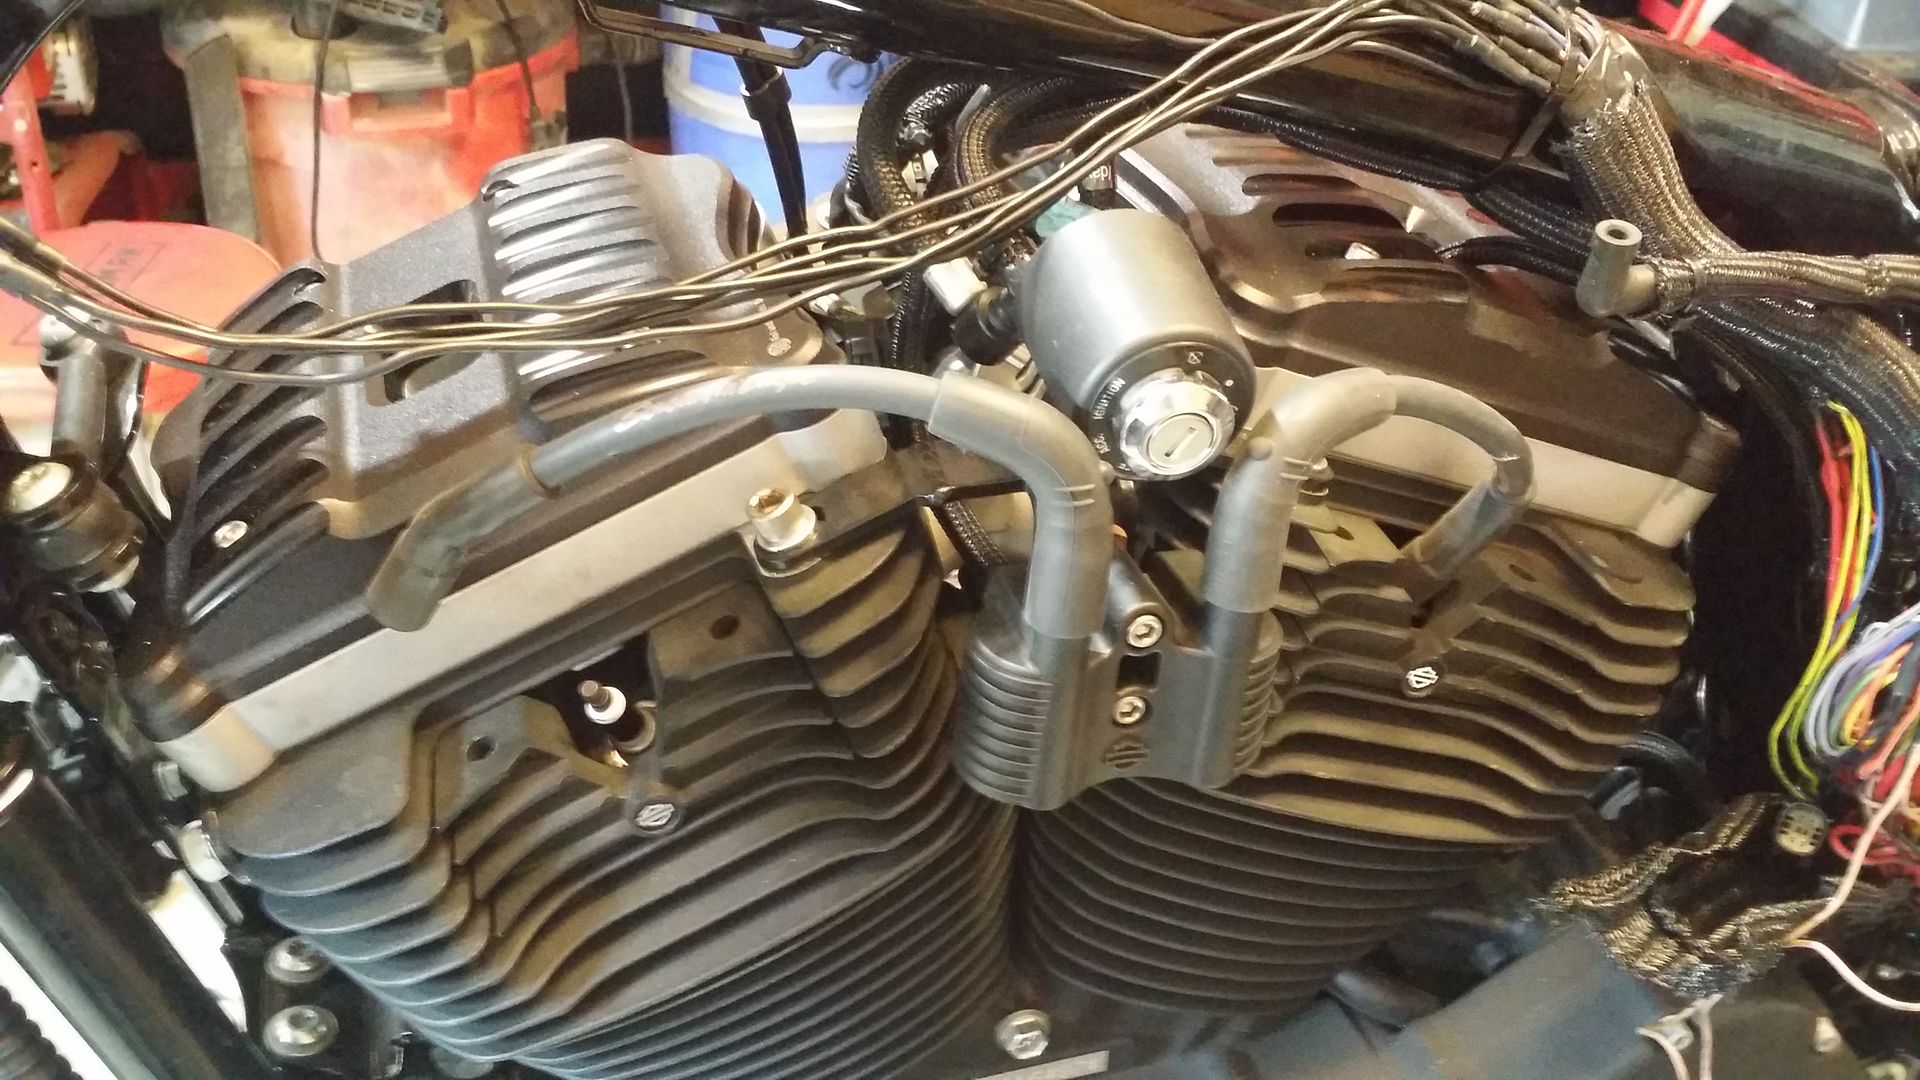
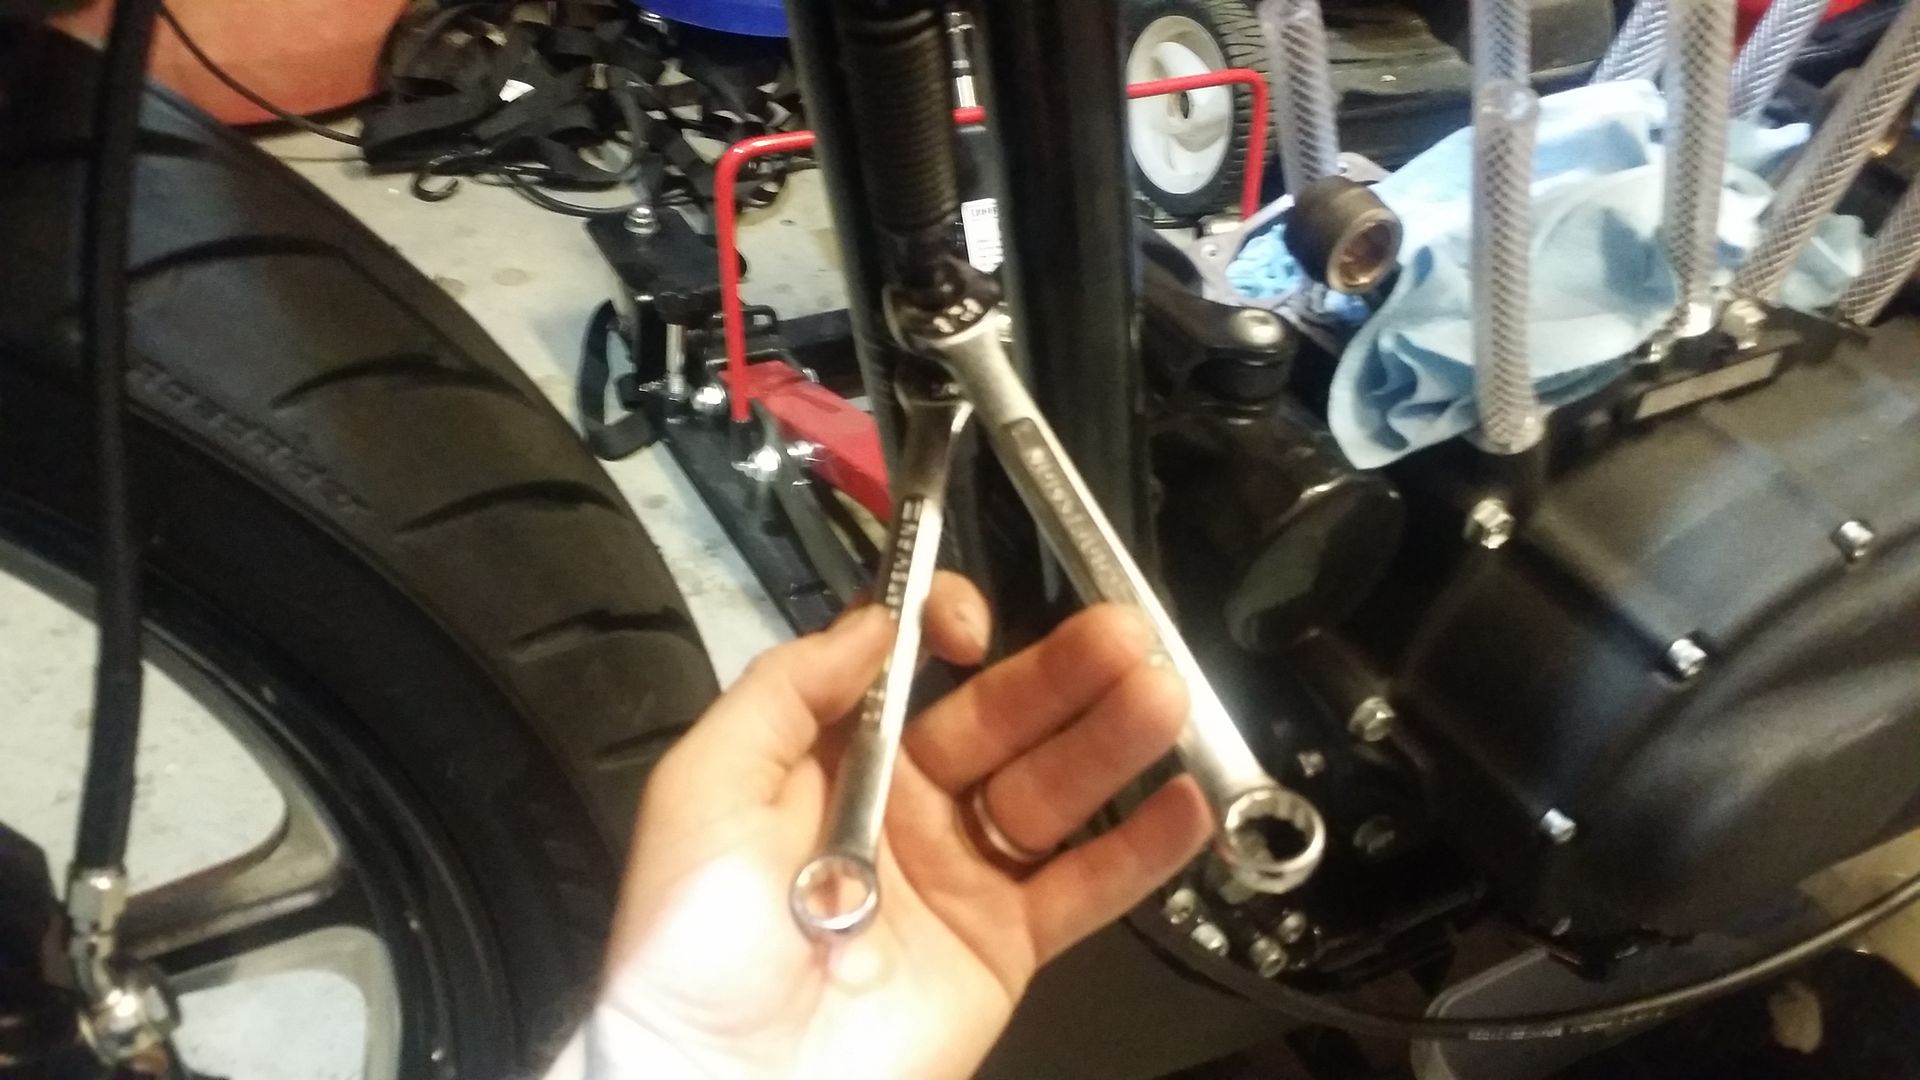
Manual says to loosen but not remove the Manifold Screws. I used a 1/2" wrench which felt loose but worked. Tried 14mm too big and 13mm too small
Using the same wrench I removed the (right side of the bike) bolts.
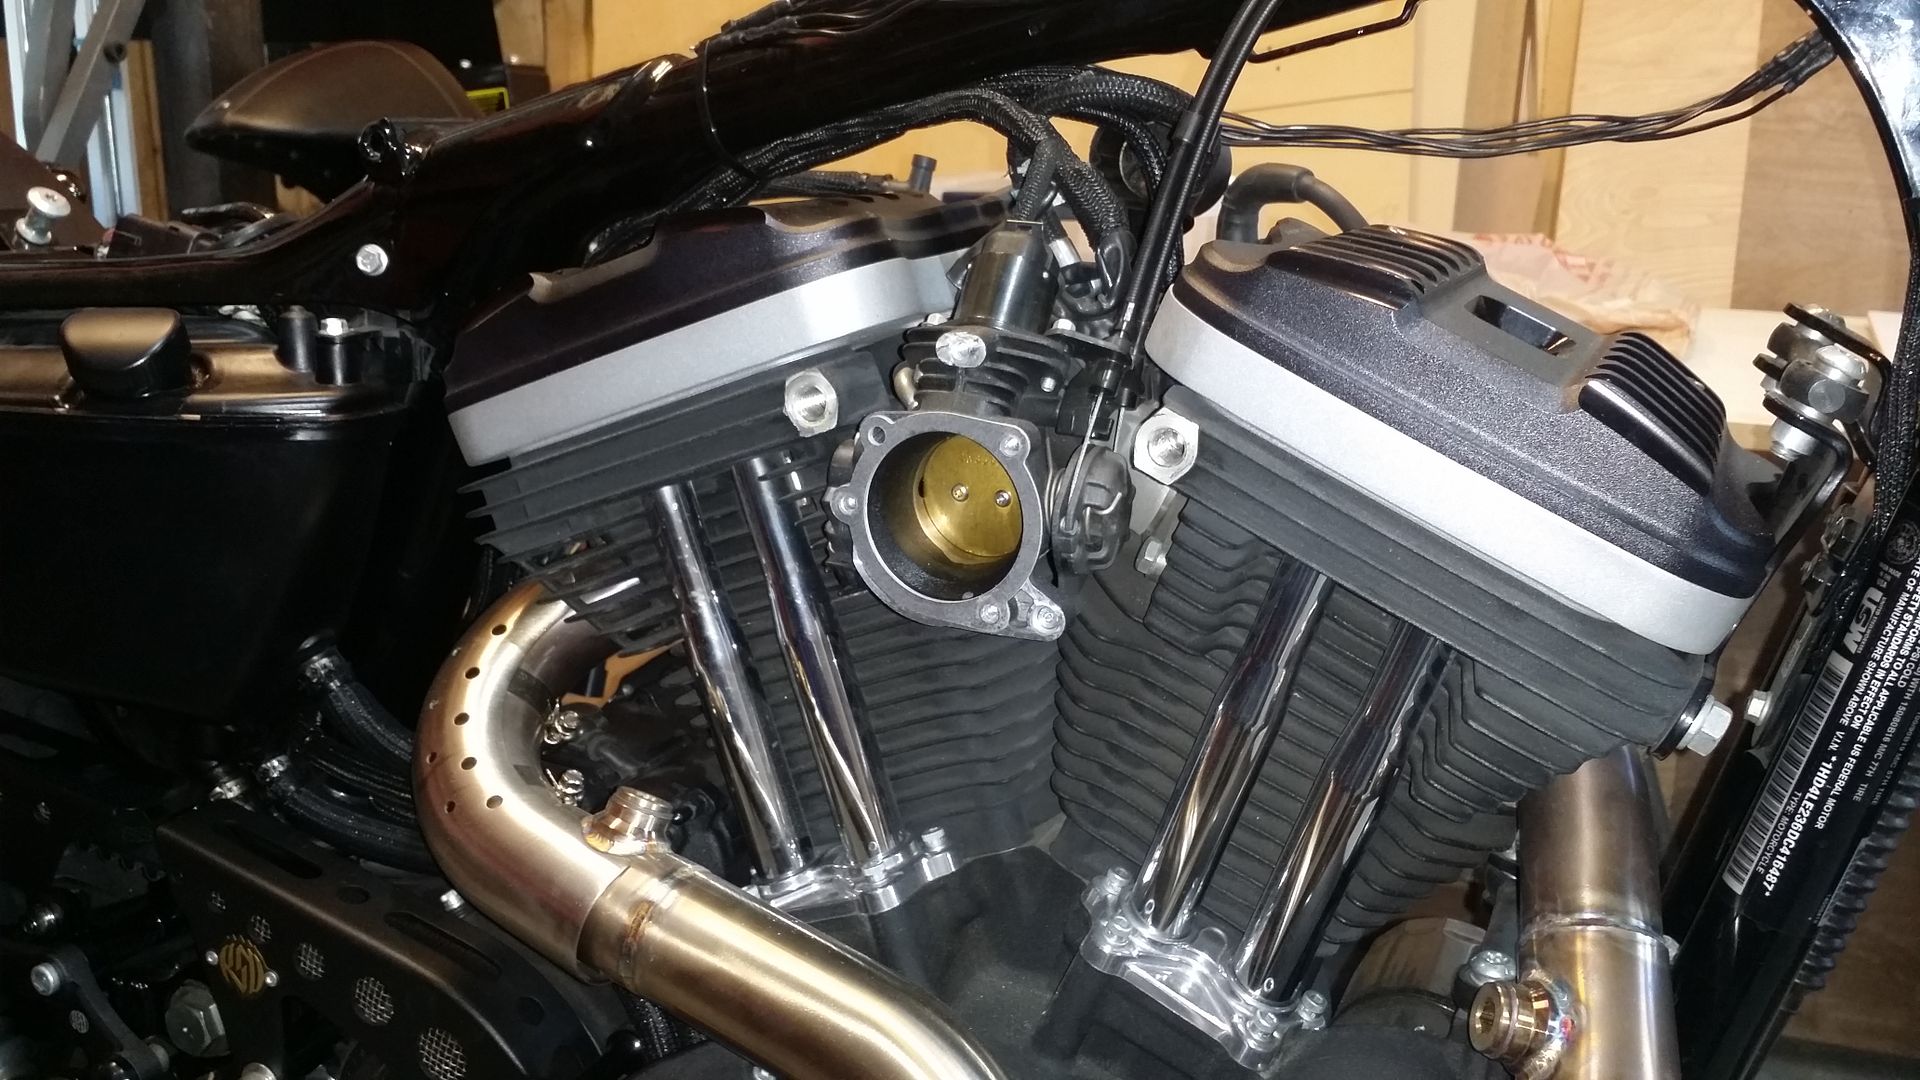
Then I used a plastic pry bar to get the flange away from the head. Then just pulled gently and it came out
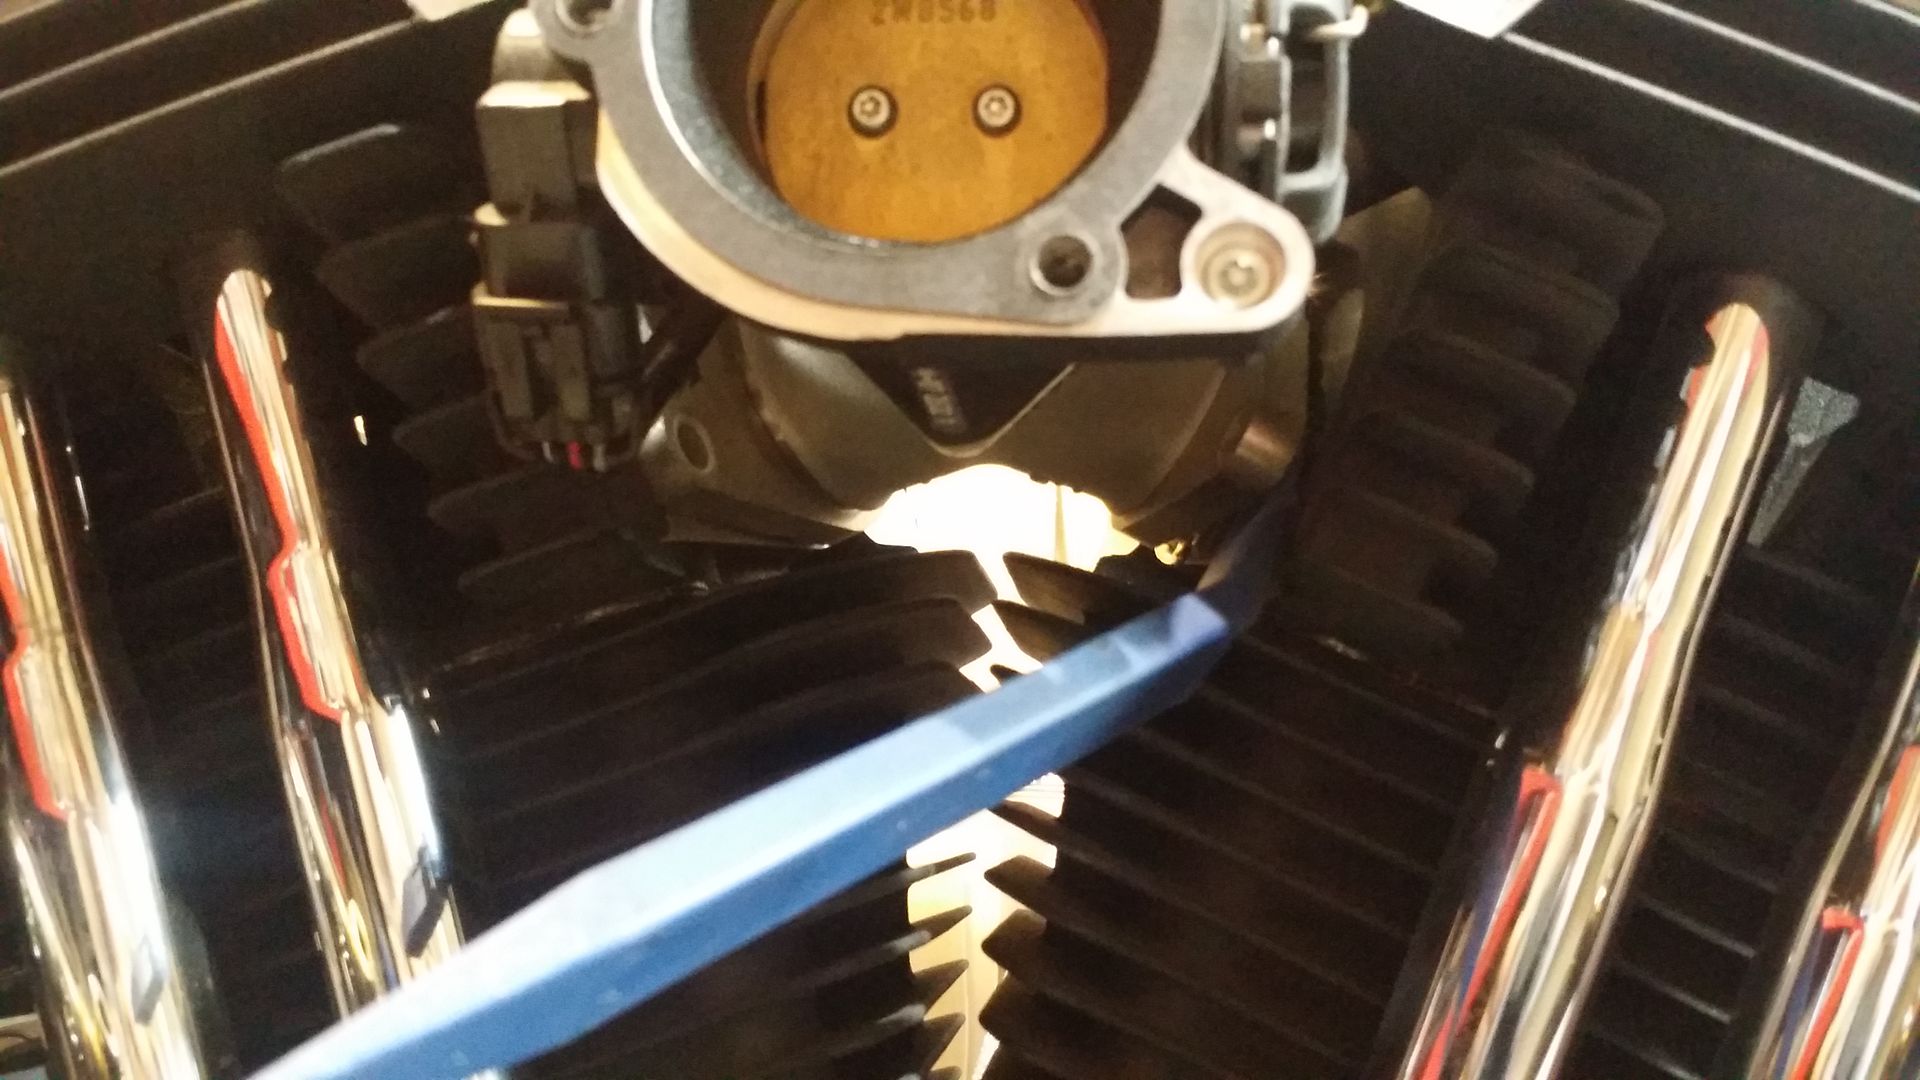
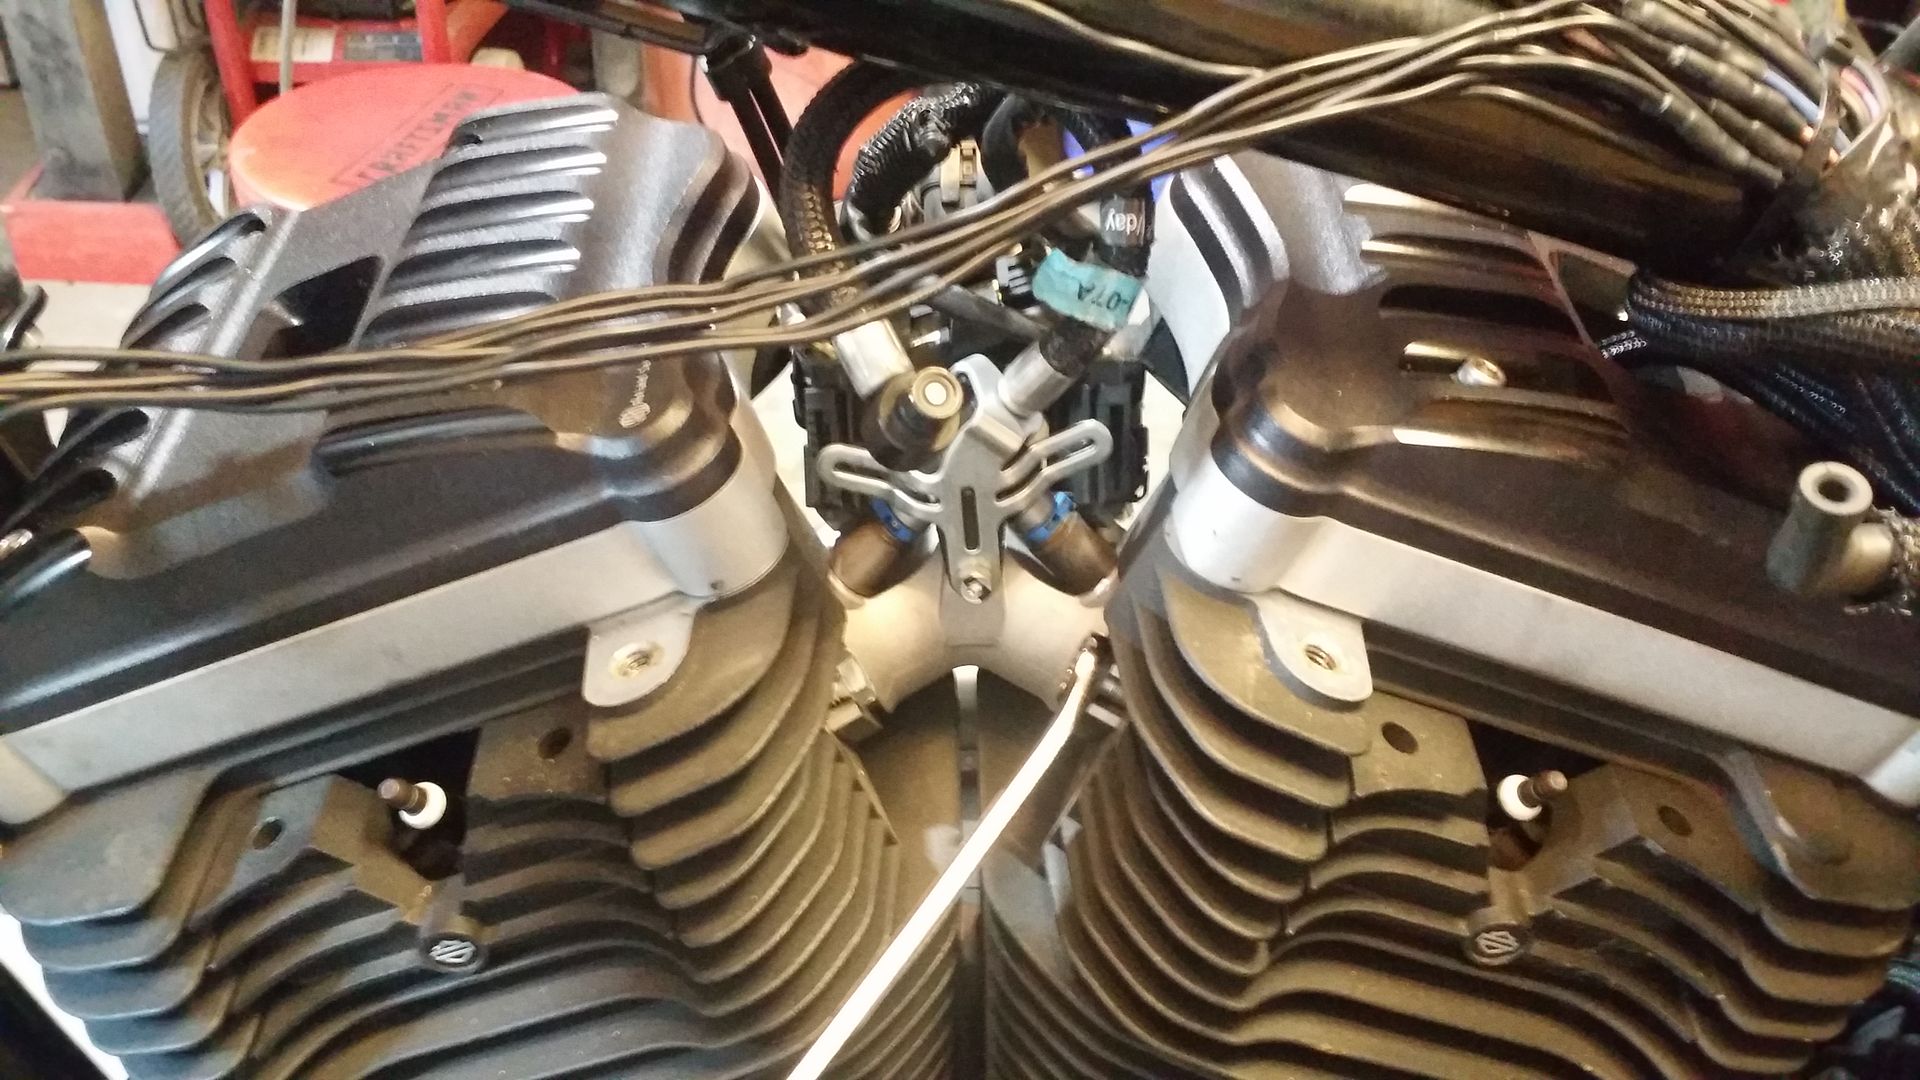
Next I unplugged all wires and removed the throttle cables. The plug with the little yellow lock was tricky you have to pull out the yellow tab enough to push on the plug release.

I taped up all the openings on the manifold to keep anything from getting to the injectors.
Here is my 2013 XL883N Cafe "Racer" Conversion.
I have decided to go against my better judgment and do an complete motor upgrade. After much deliberation and research I have decided to go this route:
Hammer Performance 1250 Kit
Hammer Performance Smash Port Job with Upgraded springs and Retainers
Hammer Performance Impact 560 Cams
Hammer Performance Push Rods
Energy One extra plate clutch pack
Power Vision Tuner
Power Vision Autotune Pro
I am hoping that this setup will get me to the 100hp mark. I have the RSD Slant 2-1 Exhaust and I saw that Dan with a similar set up hit 102 so that is my goal.
I also have a full build thread on the bike located here for those interested
https://www.hdforums.com/forum/sport...afe-build.html
A little background...In June I bought the bike with the intention of throwing on some clip ons, rear sets and the cafe seat and calling it quits. As you can see by the pics I completely abandoned that and have completely and unapologetically lost my damn mind.
This project has continued to evolve and hopefully once I get the motor done I will finally be able to just ride the damn thing...
Here is where we started:

Here is where I was before I broke it down again:

Here is where I am right now

Ok so here we go....Beer..check... Forum on the laptop..check...HD Service manual...check...104.1 the Hawk Classic Rock on the Radio...CHECK...

This is my version of the cardboard bolt holder.....Anything worth doing is worth...well being completely overdone :laugh
Somehow my XL Head drawings look more like angry Ninja Turtle Heads!!!

Now time to start the work...I will try to keep up with the pics.
All lifted and strapped down

Removed the RSD air cleaner


Now to start removing the Induction Module
First step was to loosen the Idle Control Cable Assembly by sliding the boot off and cracking the lock nut (much like the clutch cable)

Had to remove the Coil relocation

Manual says to loosen but not remove the Manifold Screws. I used a 1/2" wrench which felt loose but worked. Tried 14mm too big and 13mm too small

Using the same wrench I removed the (right side of the bike) bolts.

Then I used a plastic pry bar to get the flange away from the head. Then just pulled gently and it came out

Next I unplugged all wires and removed the throttle cables. The plug with the little yellow lock was tricky you have to pull out the yellow tab enough to push on the plug release.


I taped up all the openings on the manifold to keep anything from getting to the injectors.

#2
12-17-2014, 01:38 AM
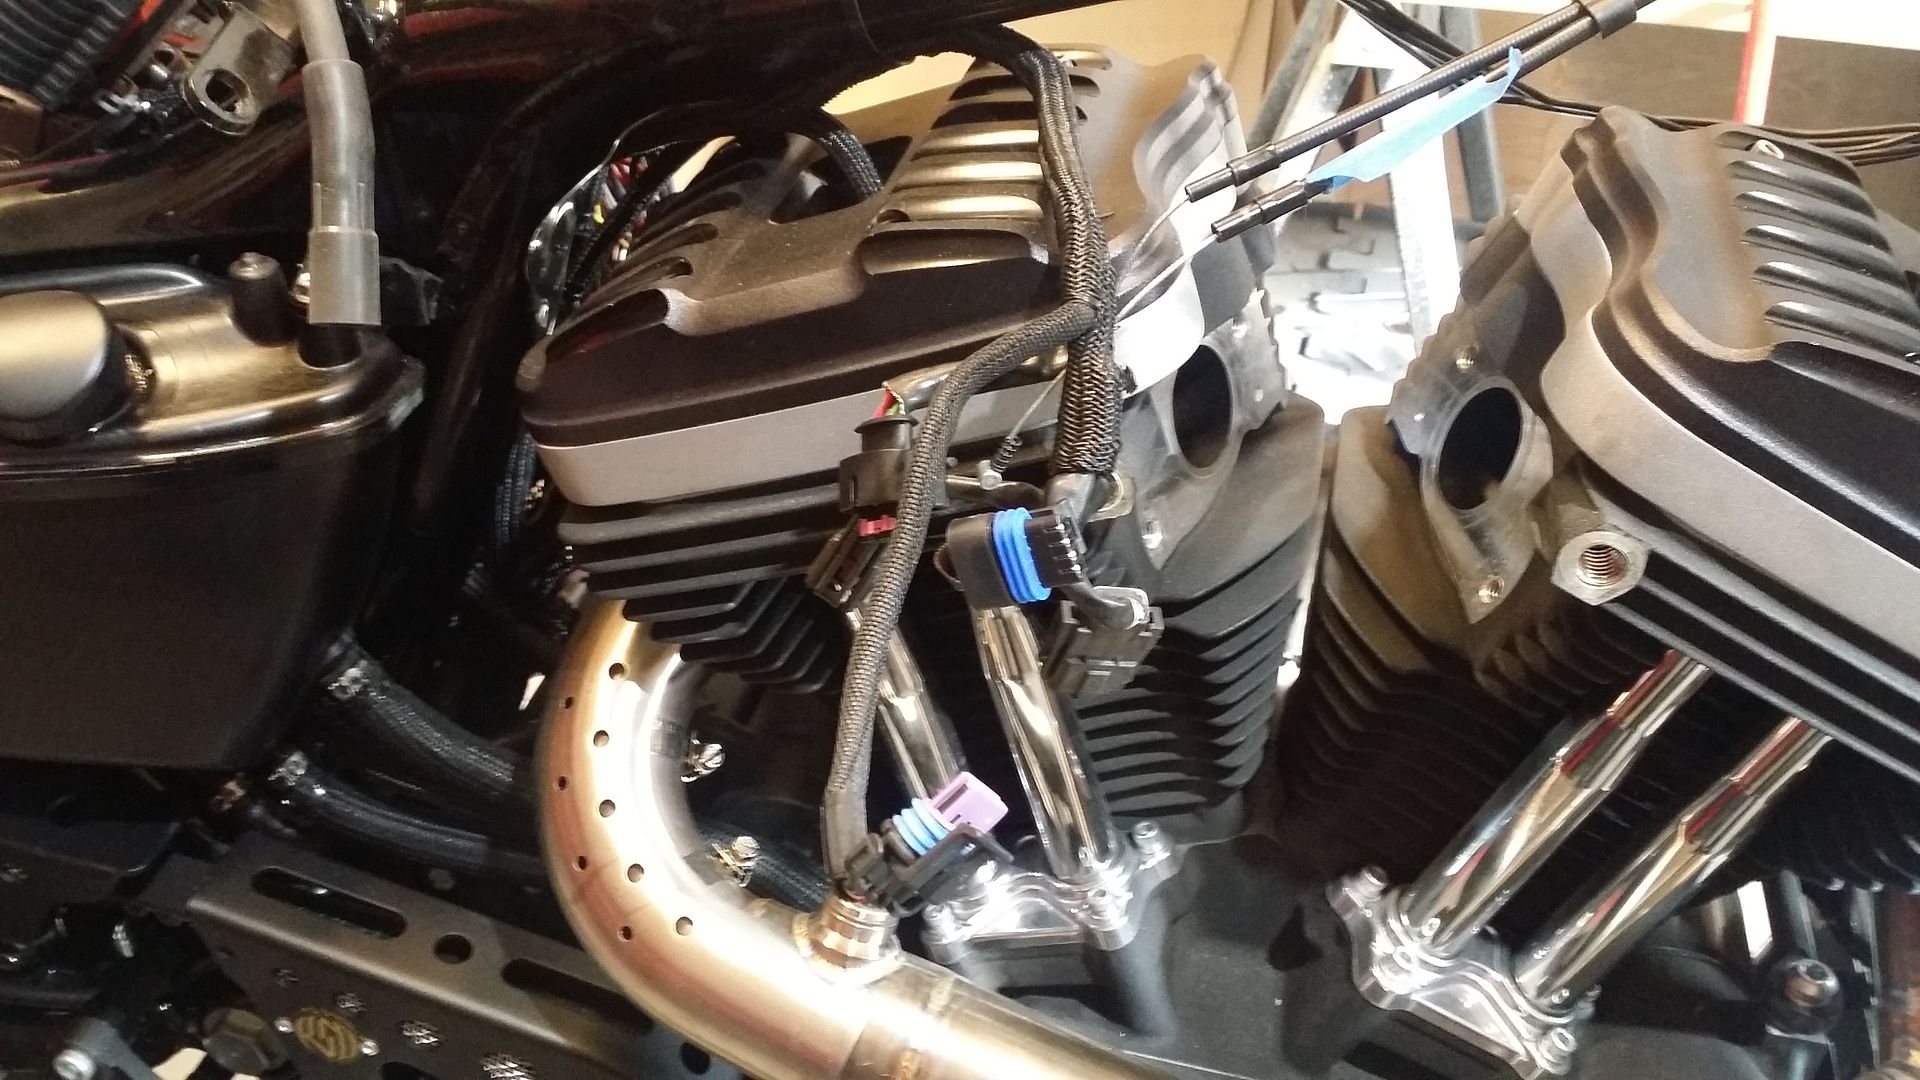
Next I remove the Exhaust....well because I overlooked it as the first step in the whole tear down....
I removed the front upper stabilizer link and horn mount. I used a Torx 45 socket for the larger bolts and a T25 t-handle for the horn mount
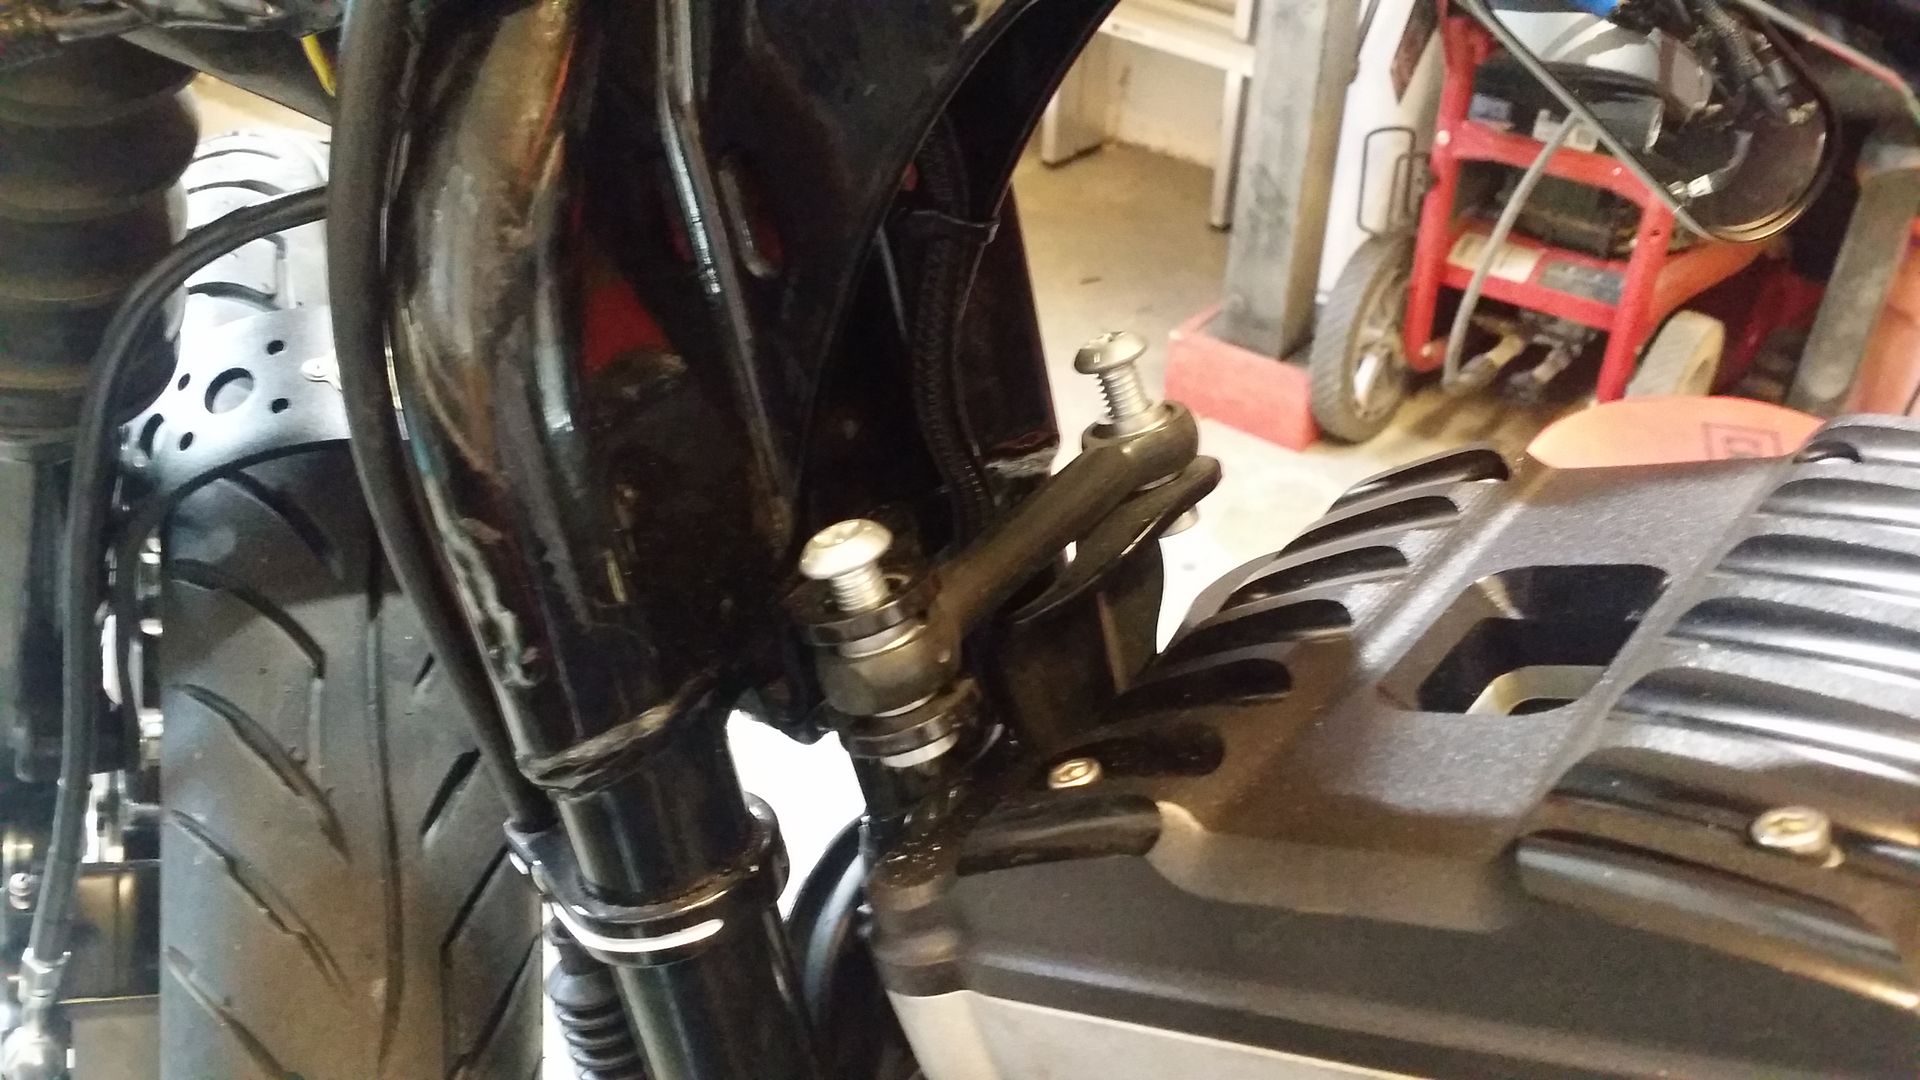
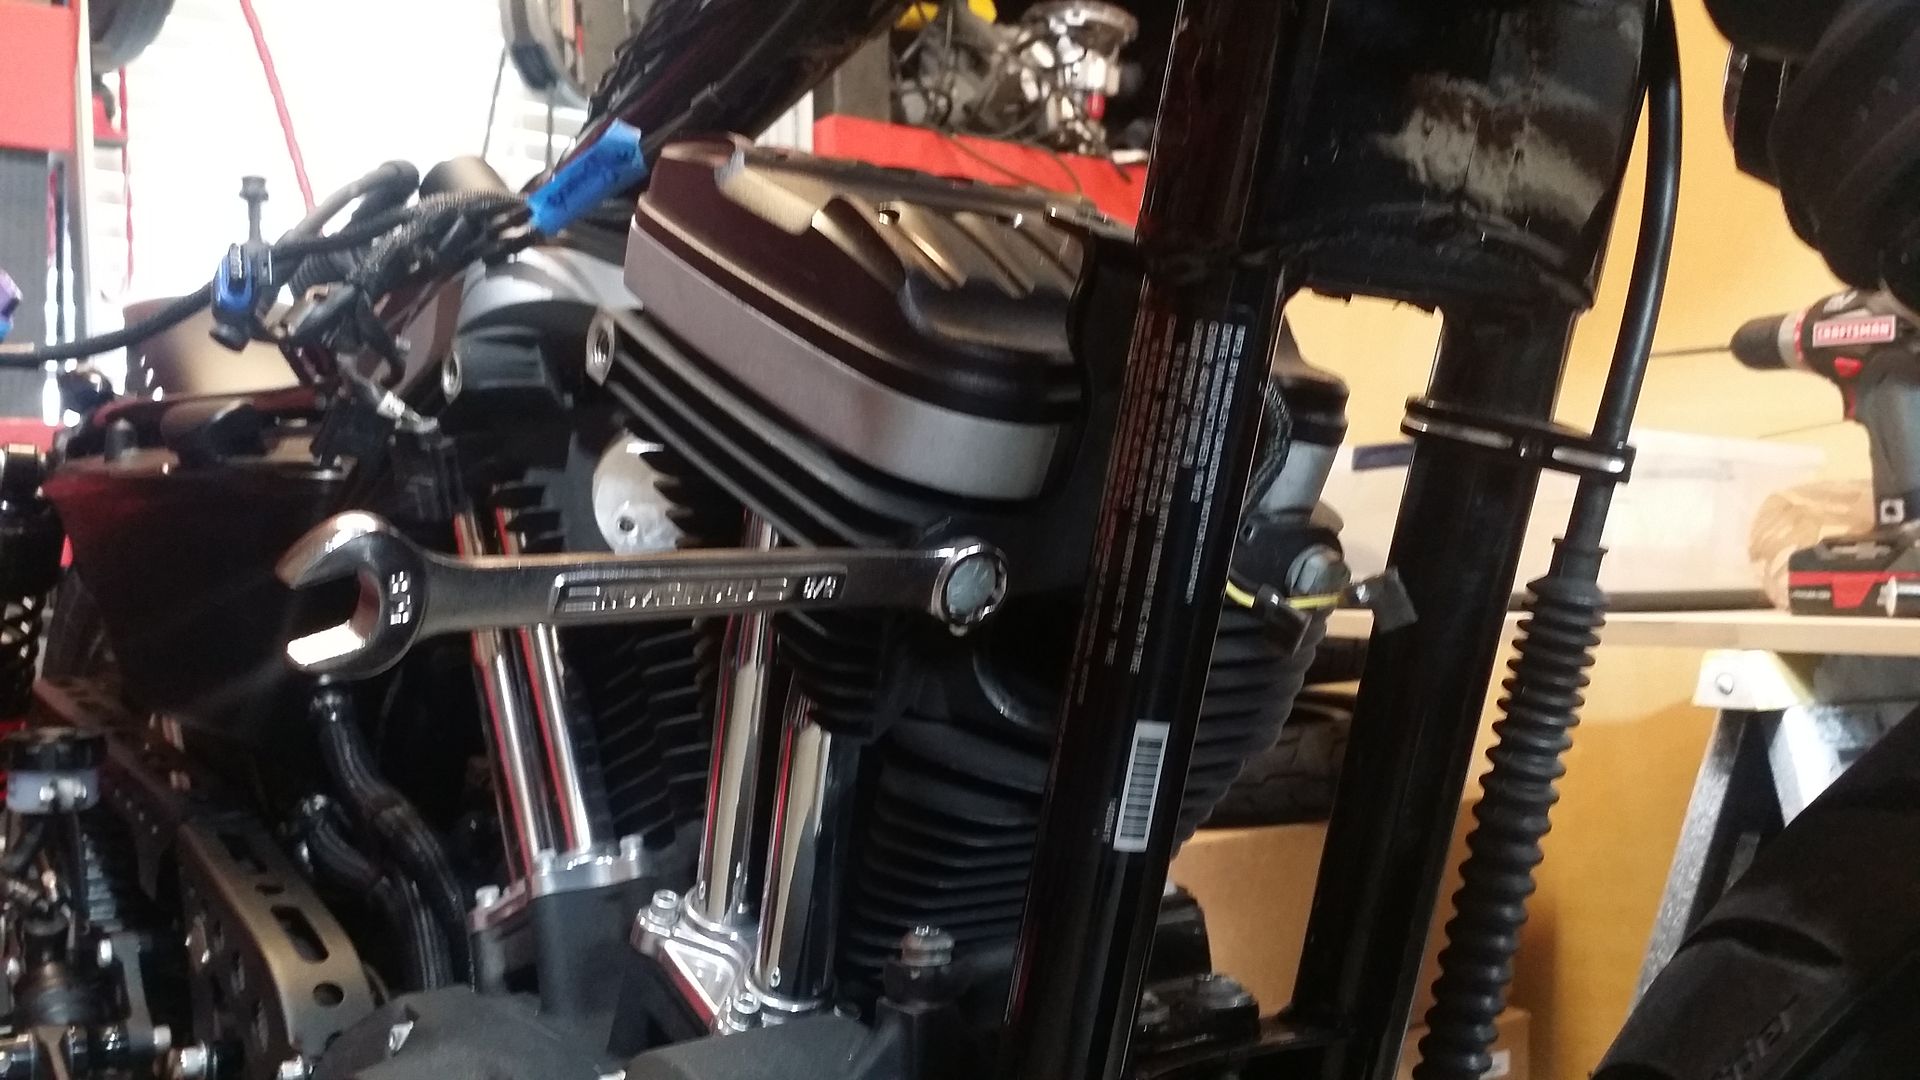
Took the mount off the front head using a 5/8 wrench
Next I removed the spark plugs using a 5/8 spark plug socket
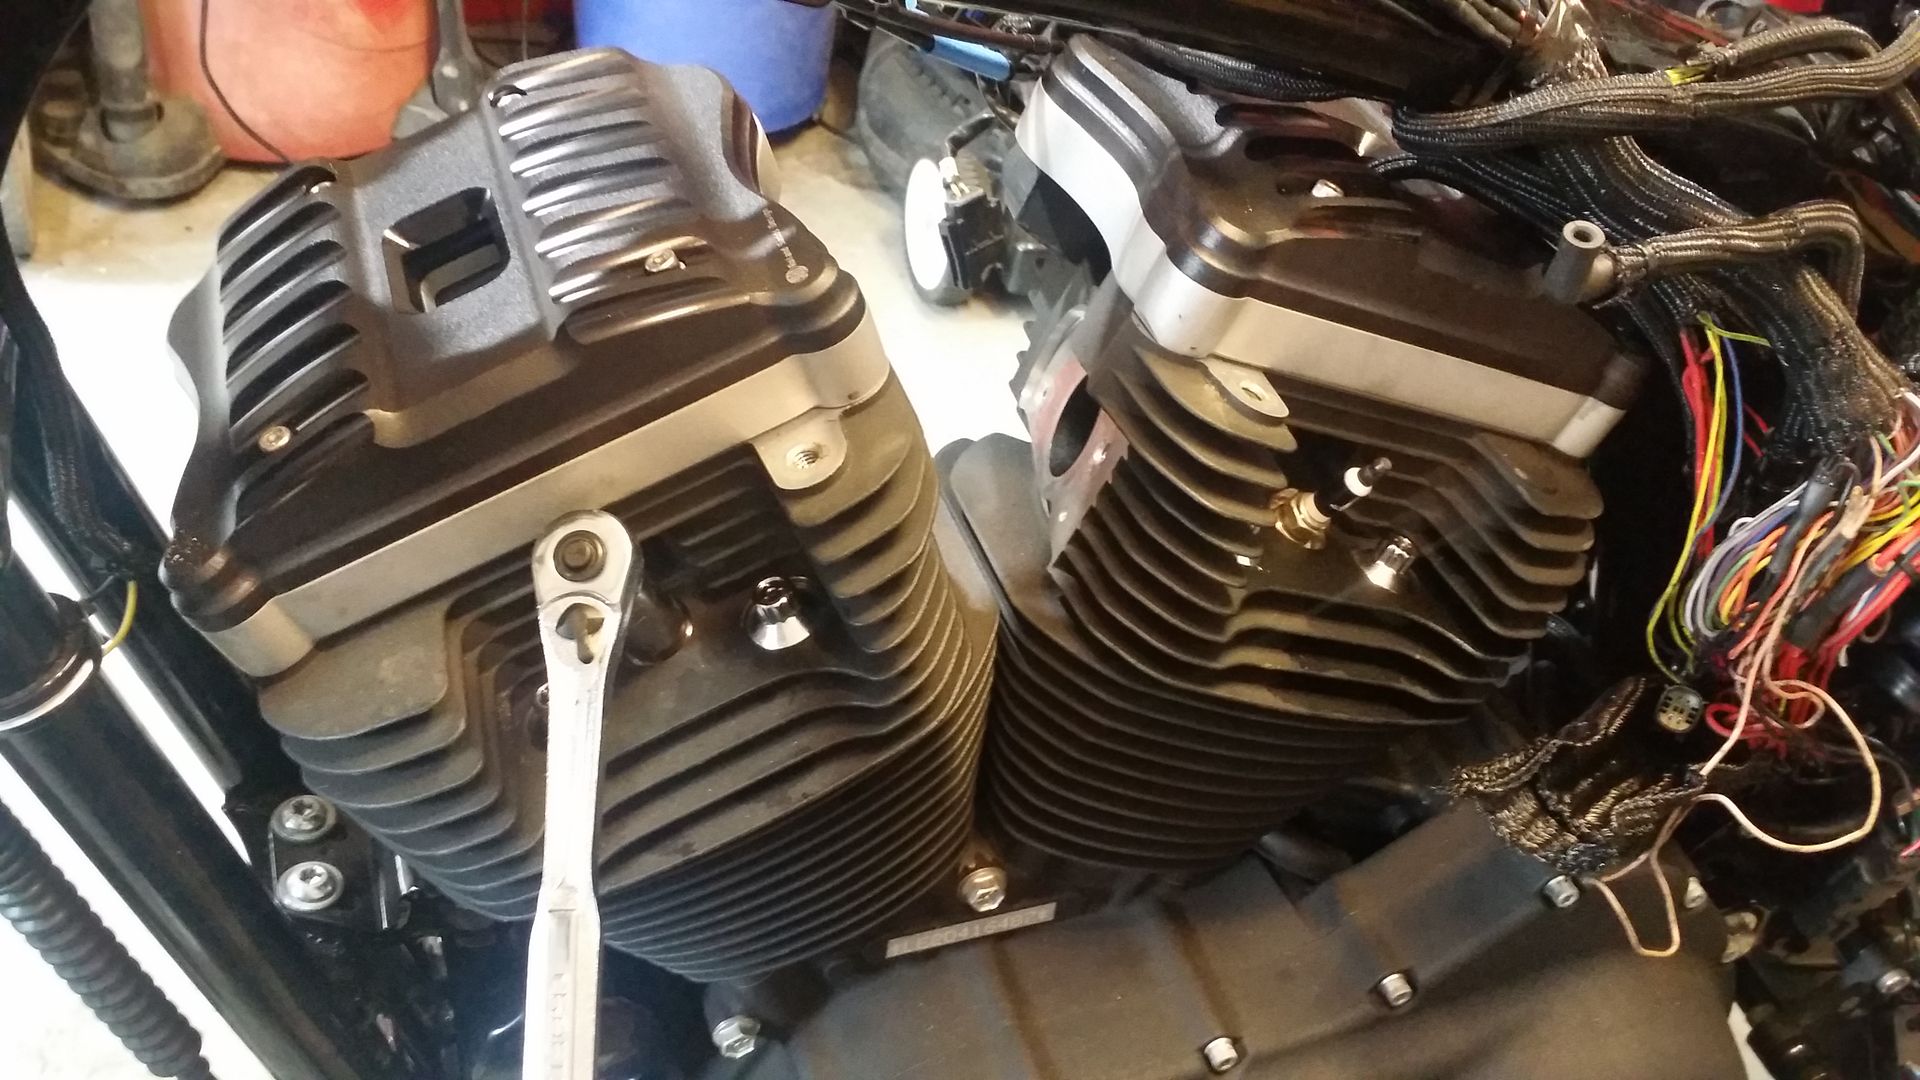
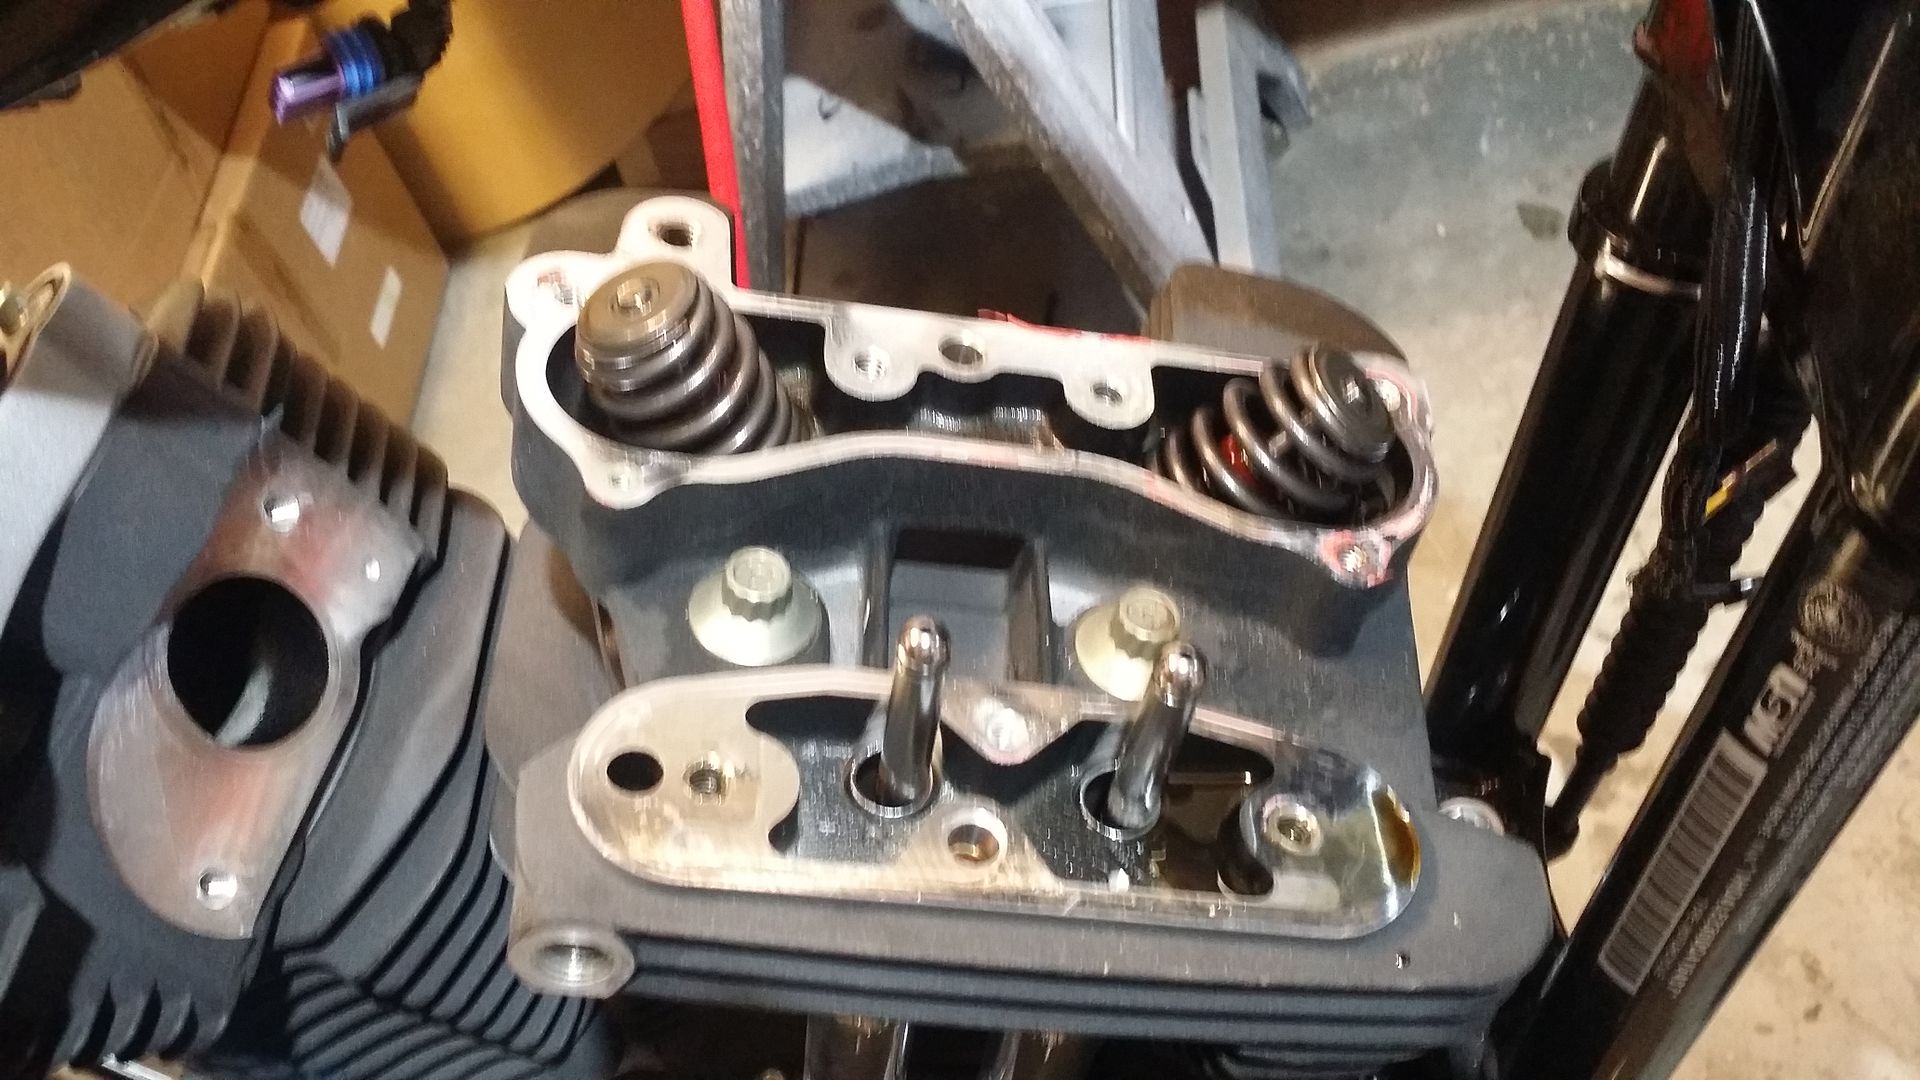
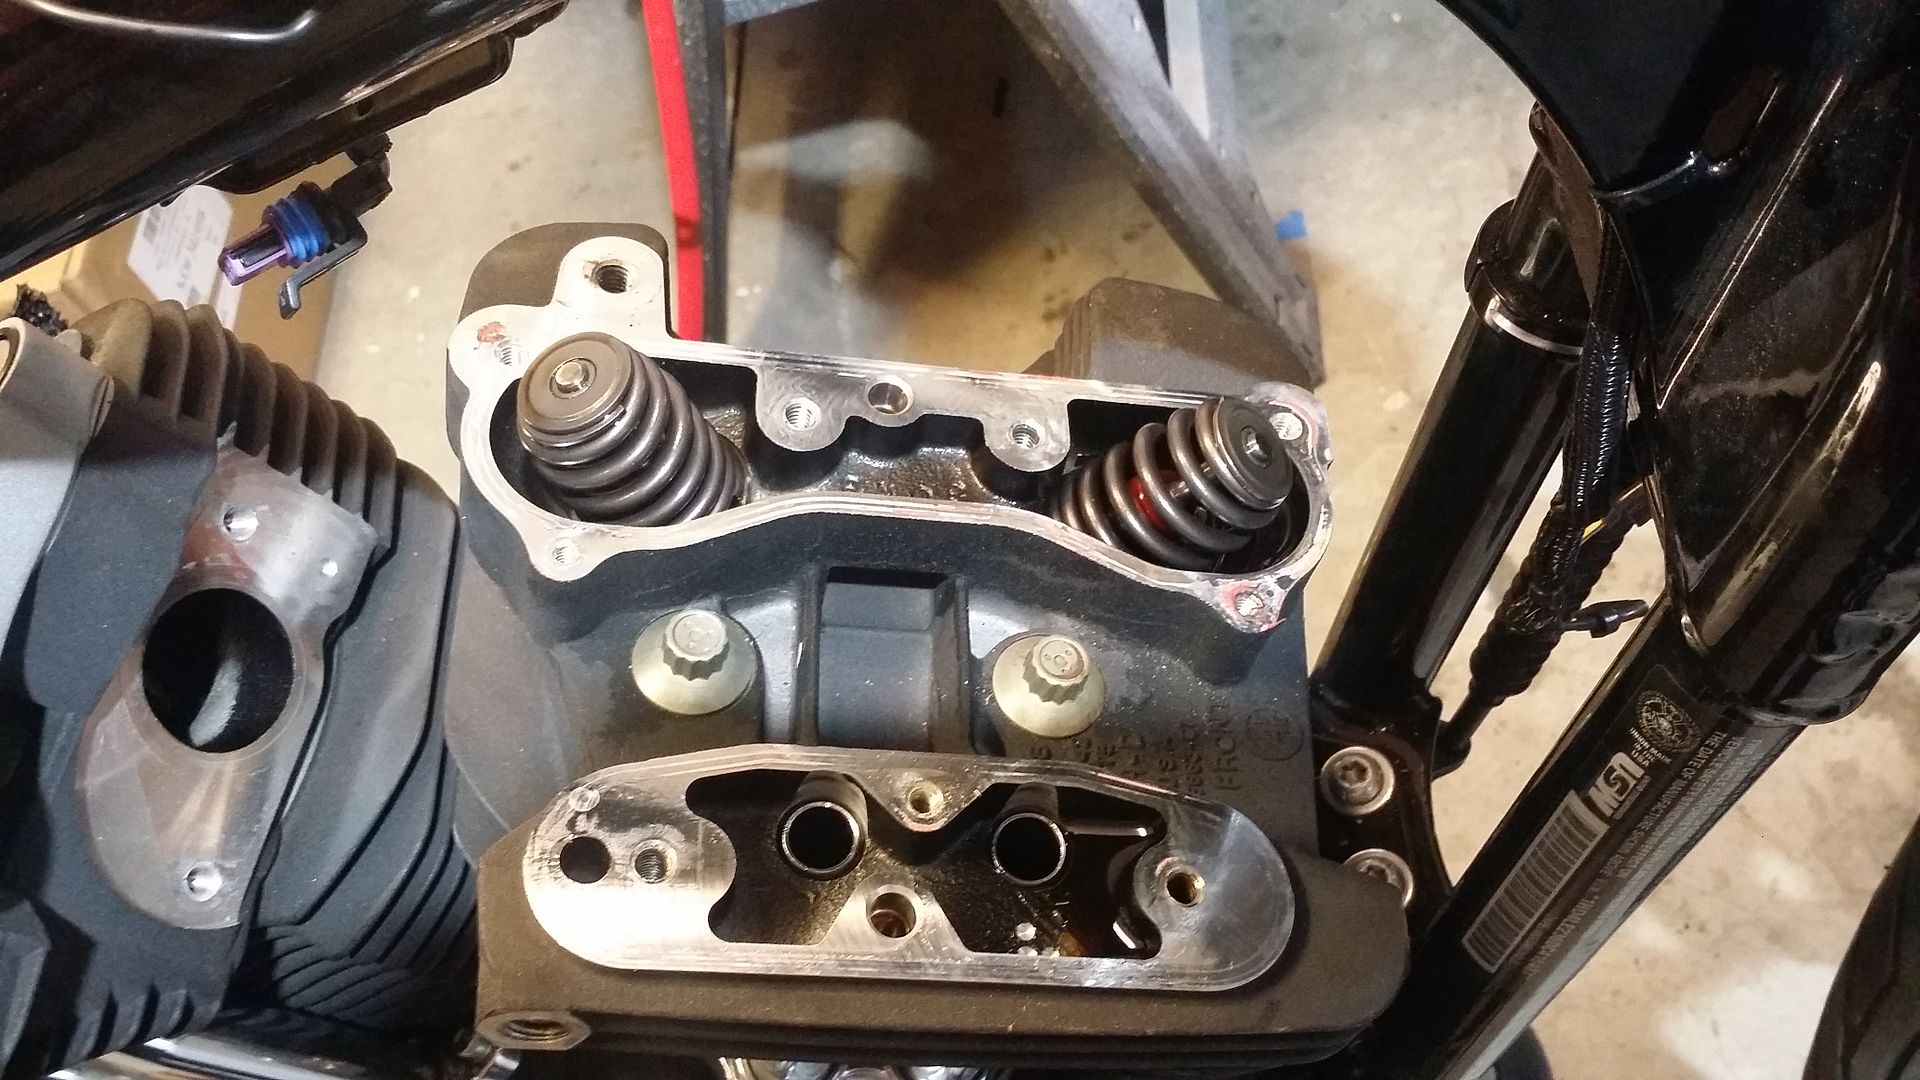
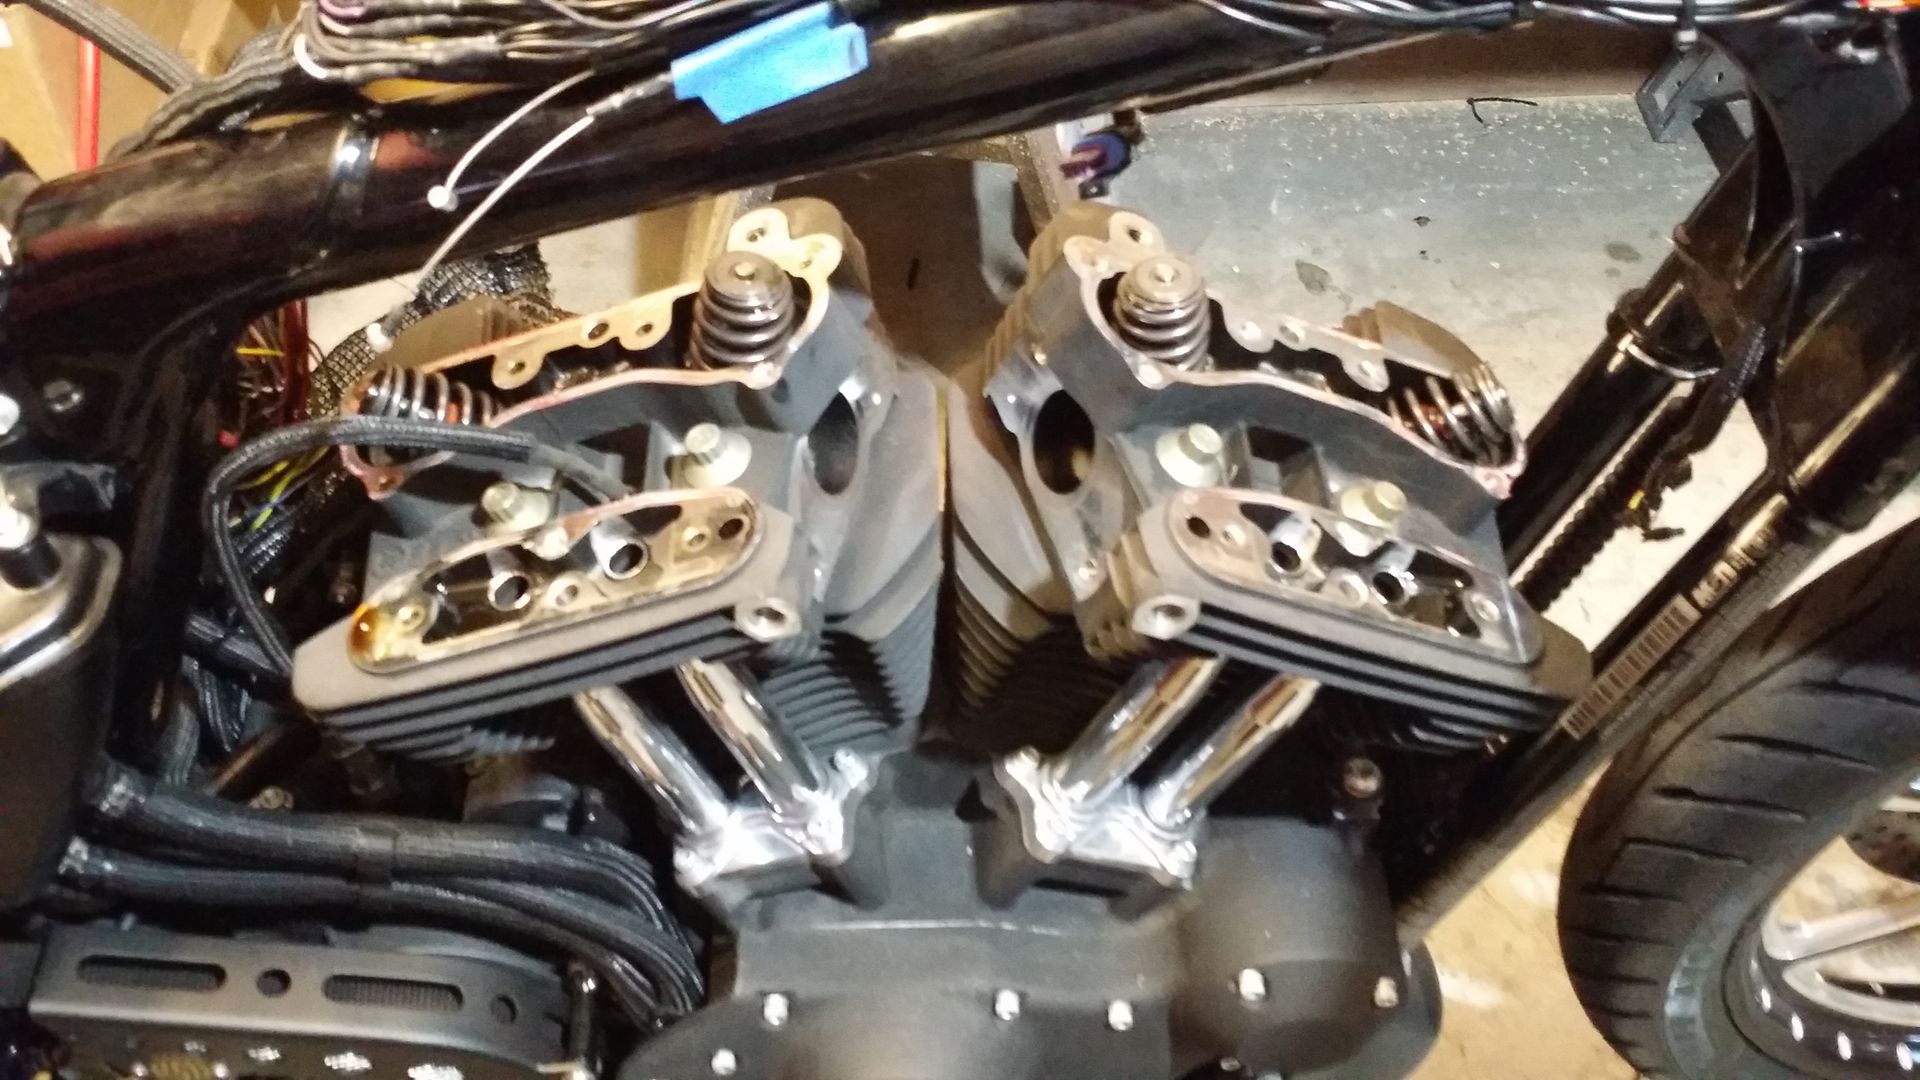
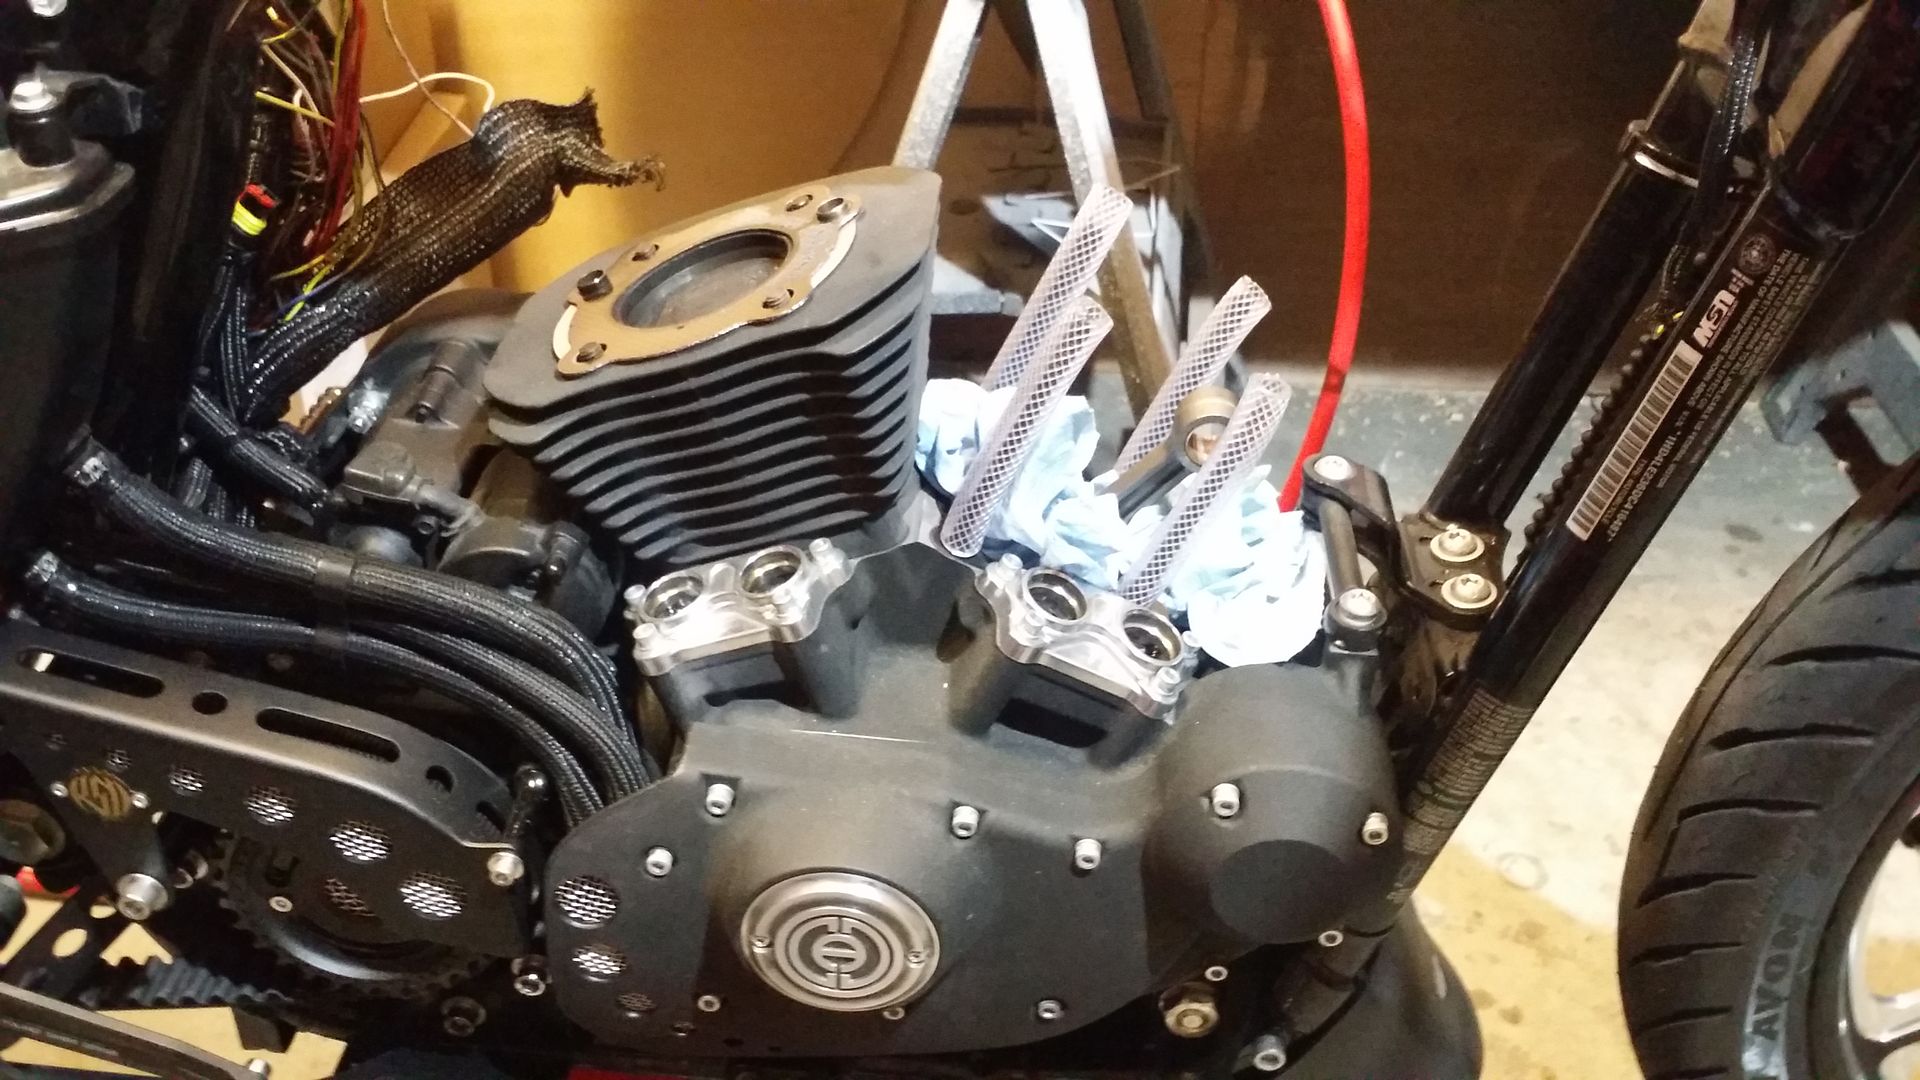
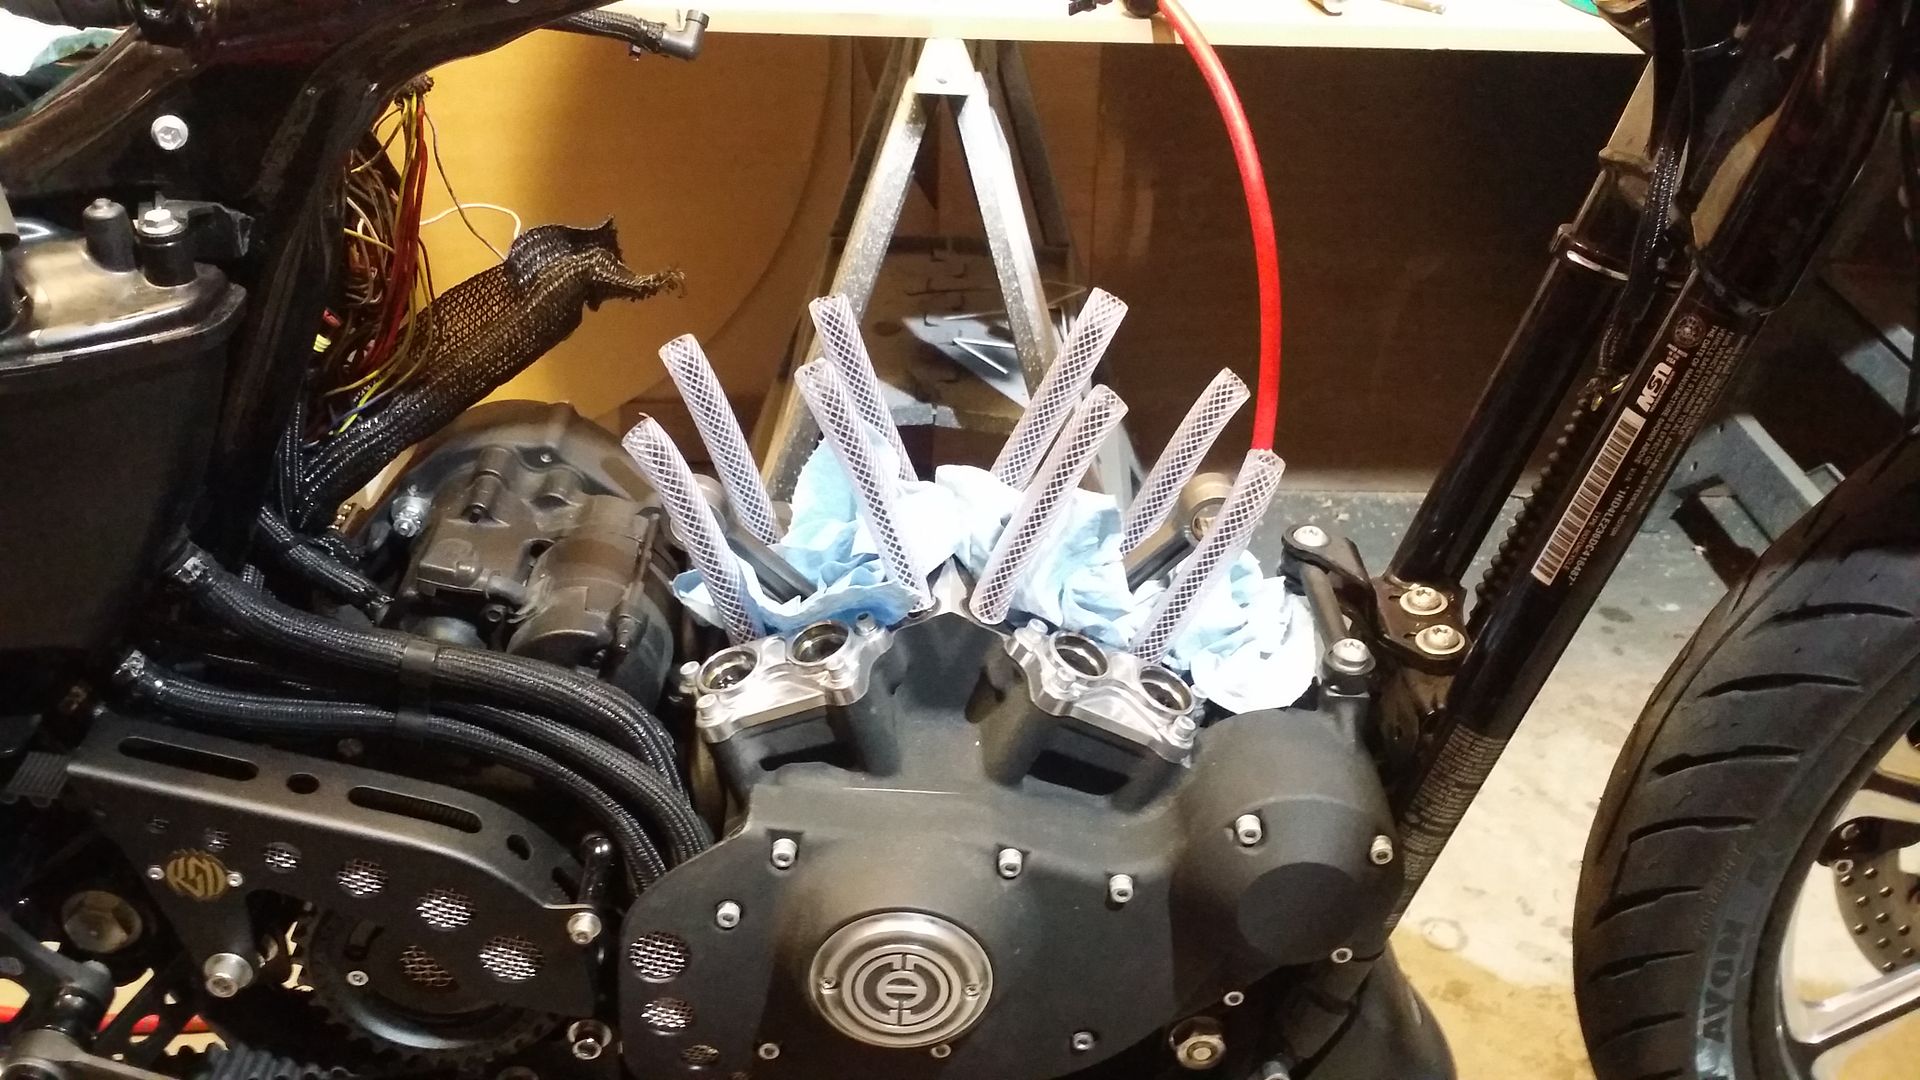
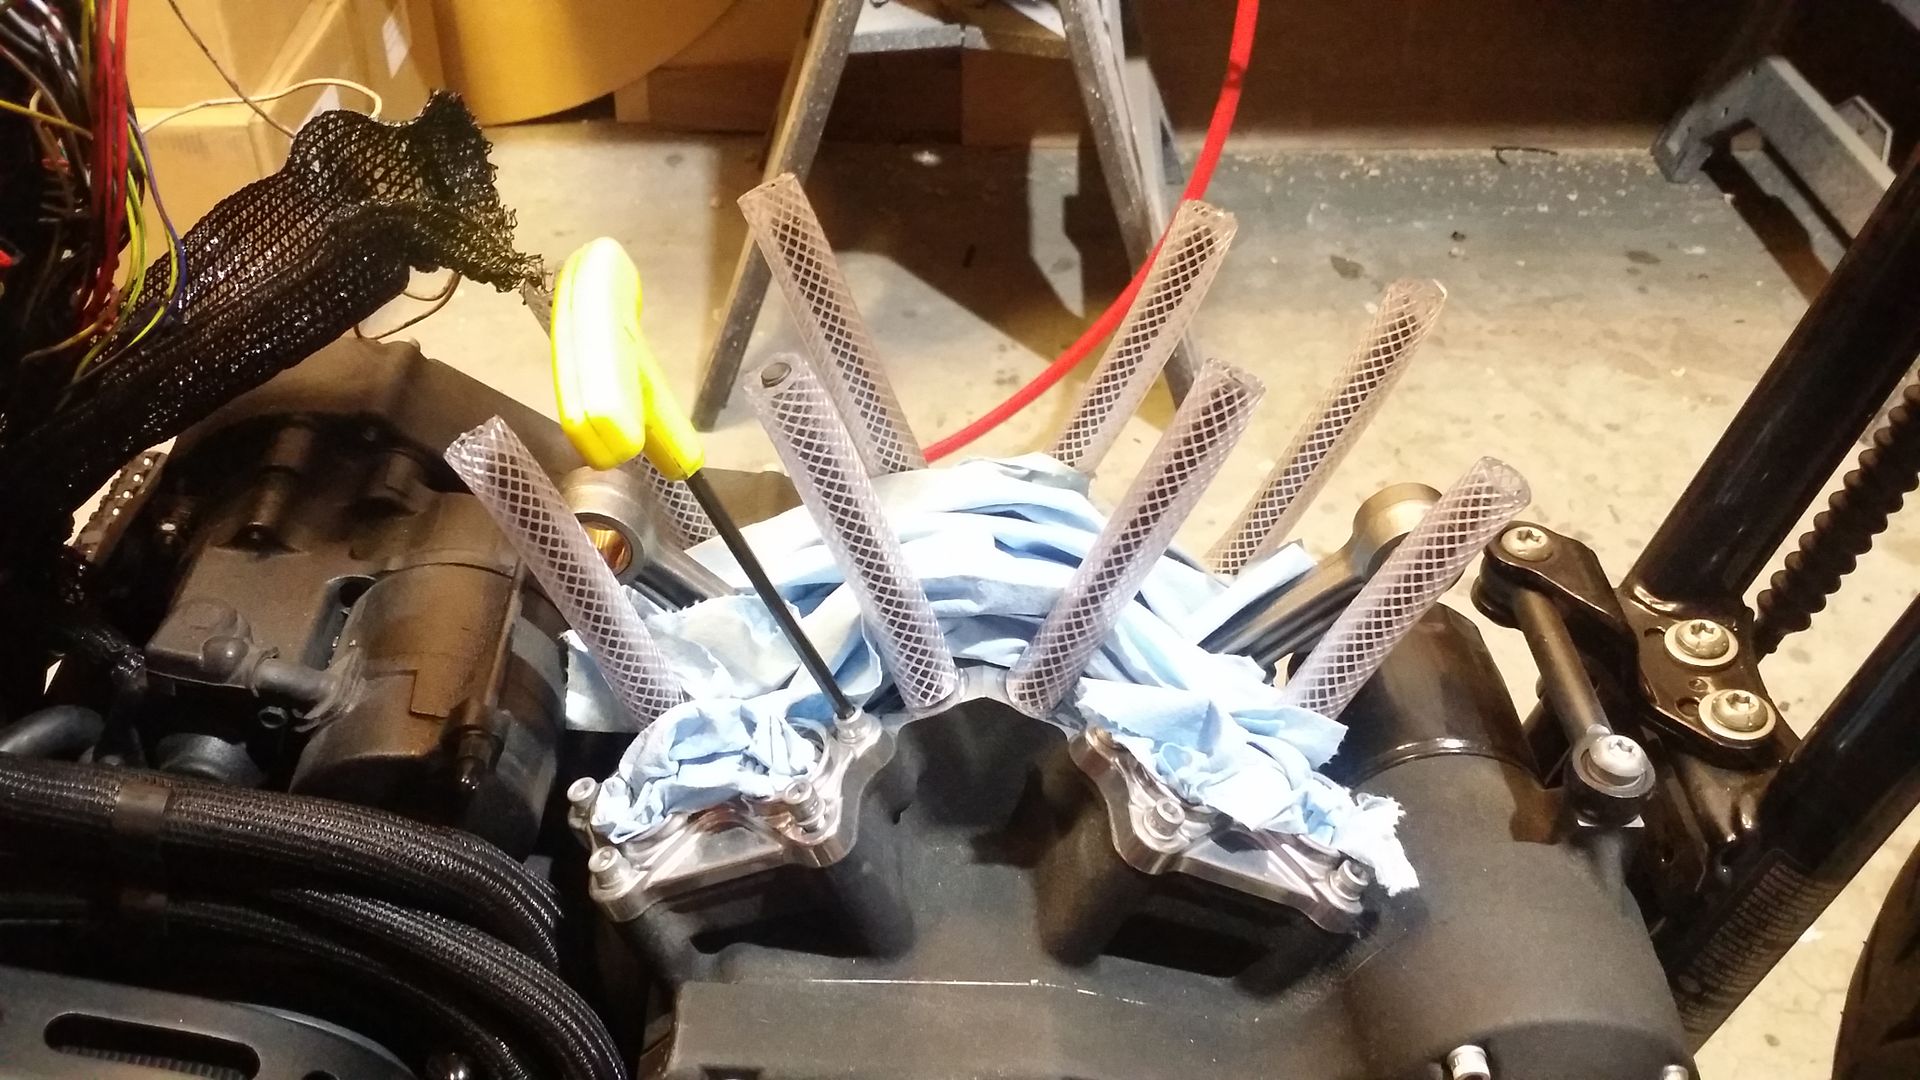
Then the RSD Rocker box cover come off I used a 3/16 allen for this

Removed the bolts from the Rocker boxes. I was careful to find TDC by having the bike in 5th and turning the rear wheel until I felt compression out of the spark plug hole and using a ziptie in side the hole to tell when the piston is at the top.
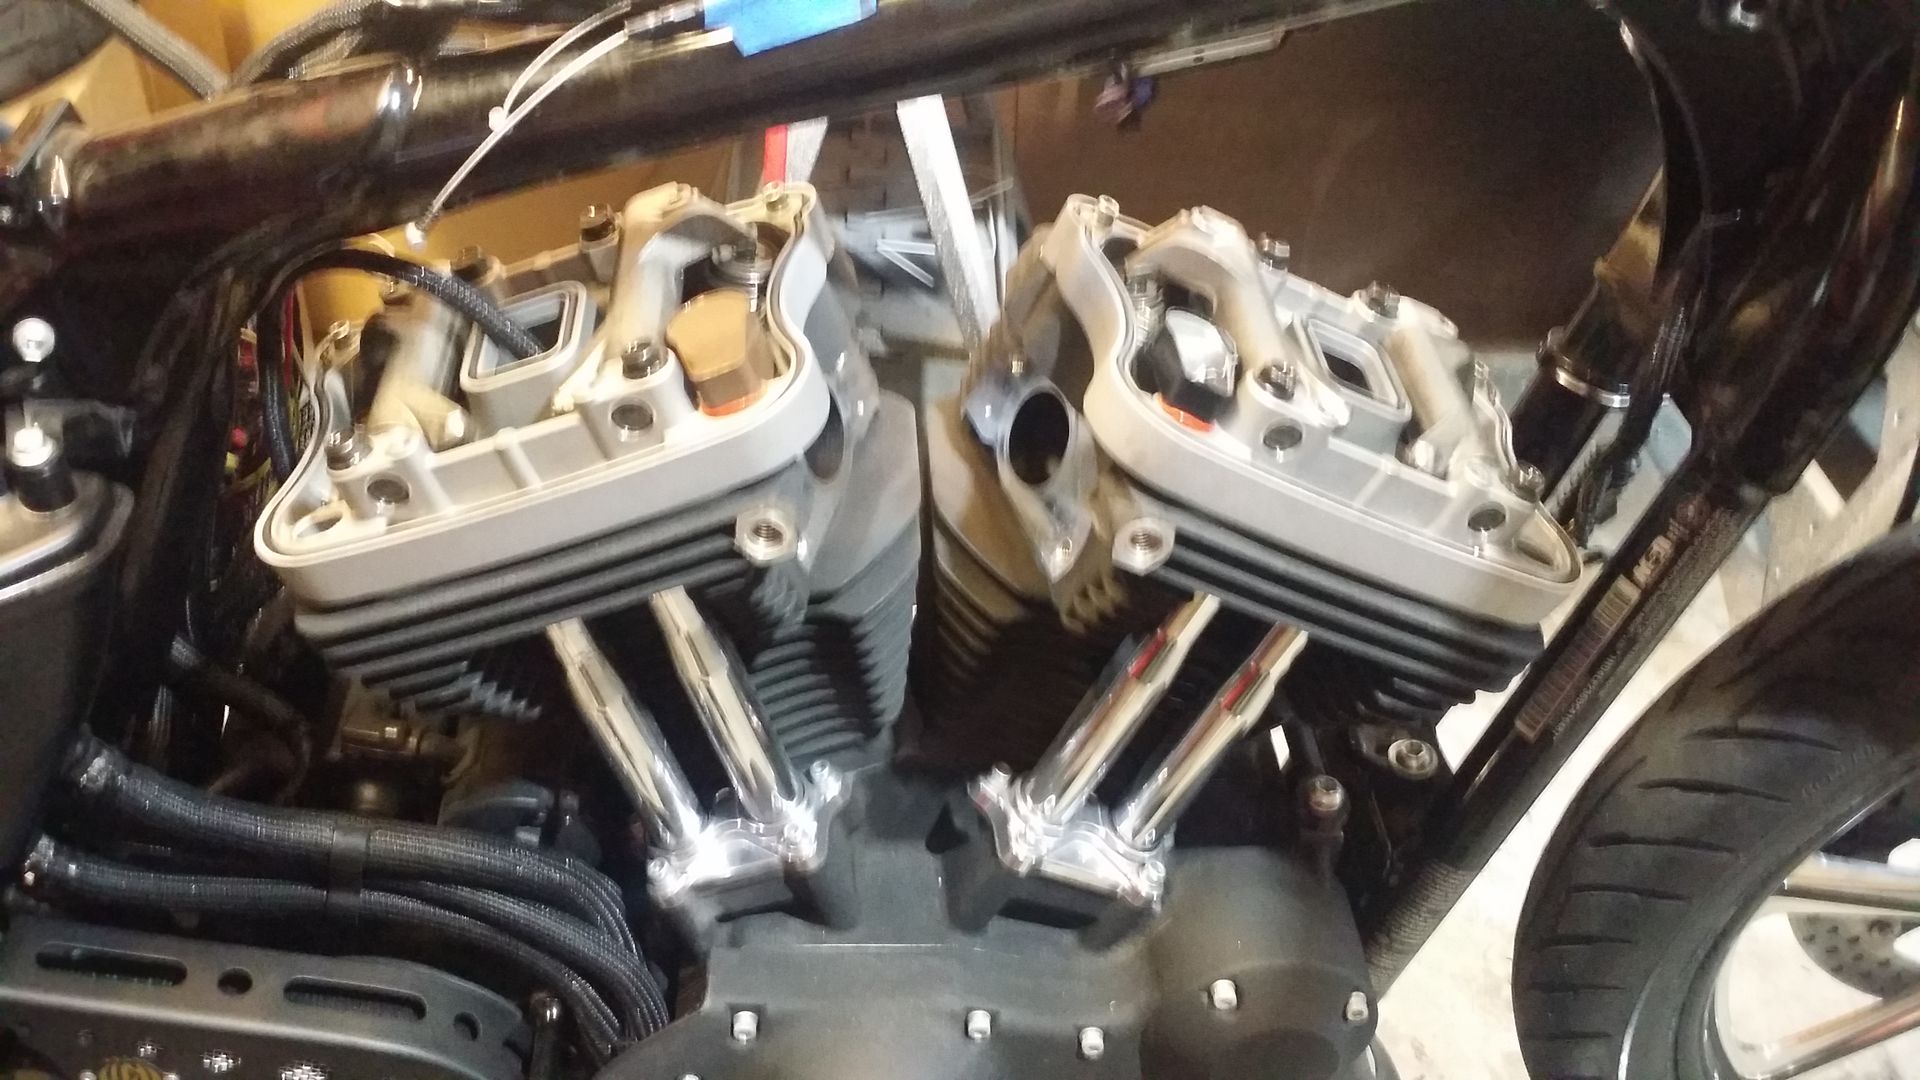
I used a 3/16 allen to remove the two bolts on the left side of the Rocker box. I used a 11mm socket to remove the 3 silver bolts in the middle. Then it was a 1/2 socket to remove the 4 outer black bolts. I loosened them in a zig zag pattern in 1/2 turn incriments until they were off the rocker box then took them out.
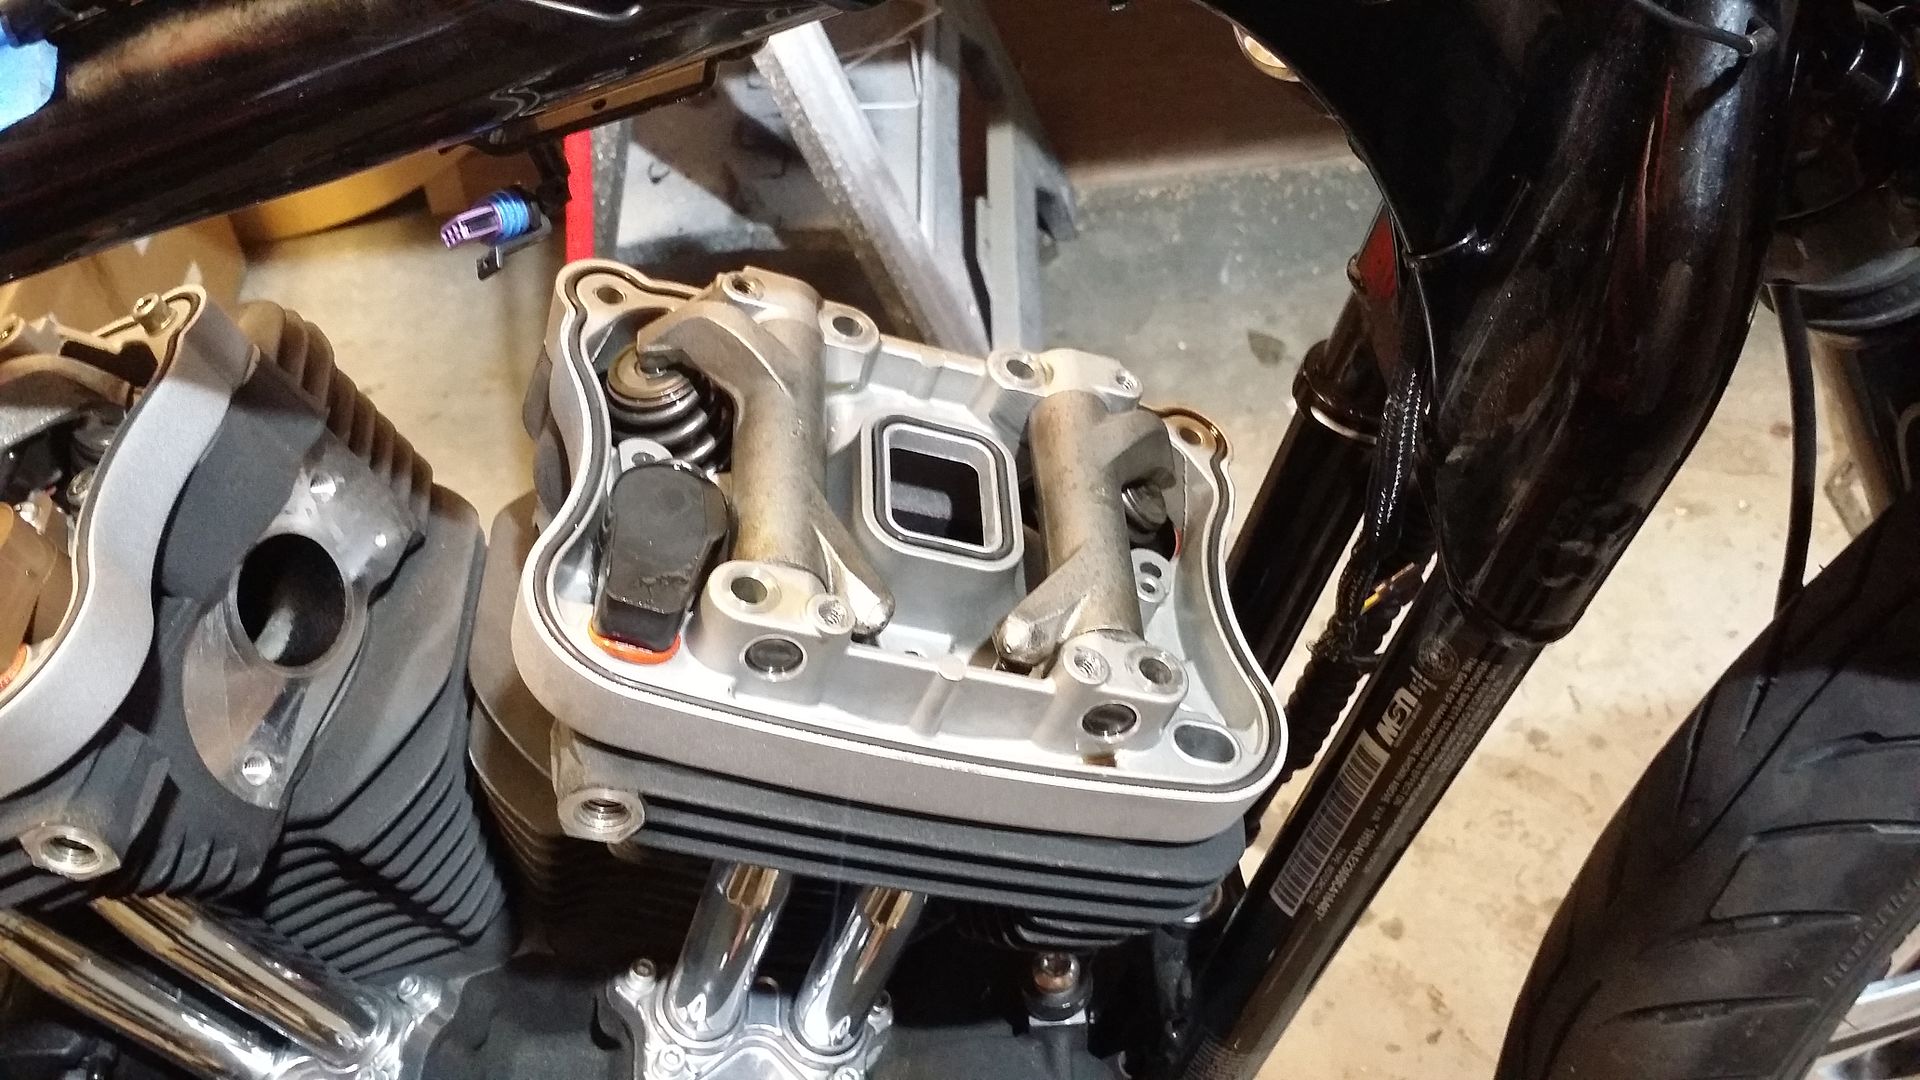
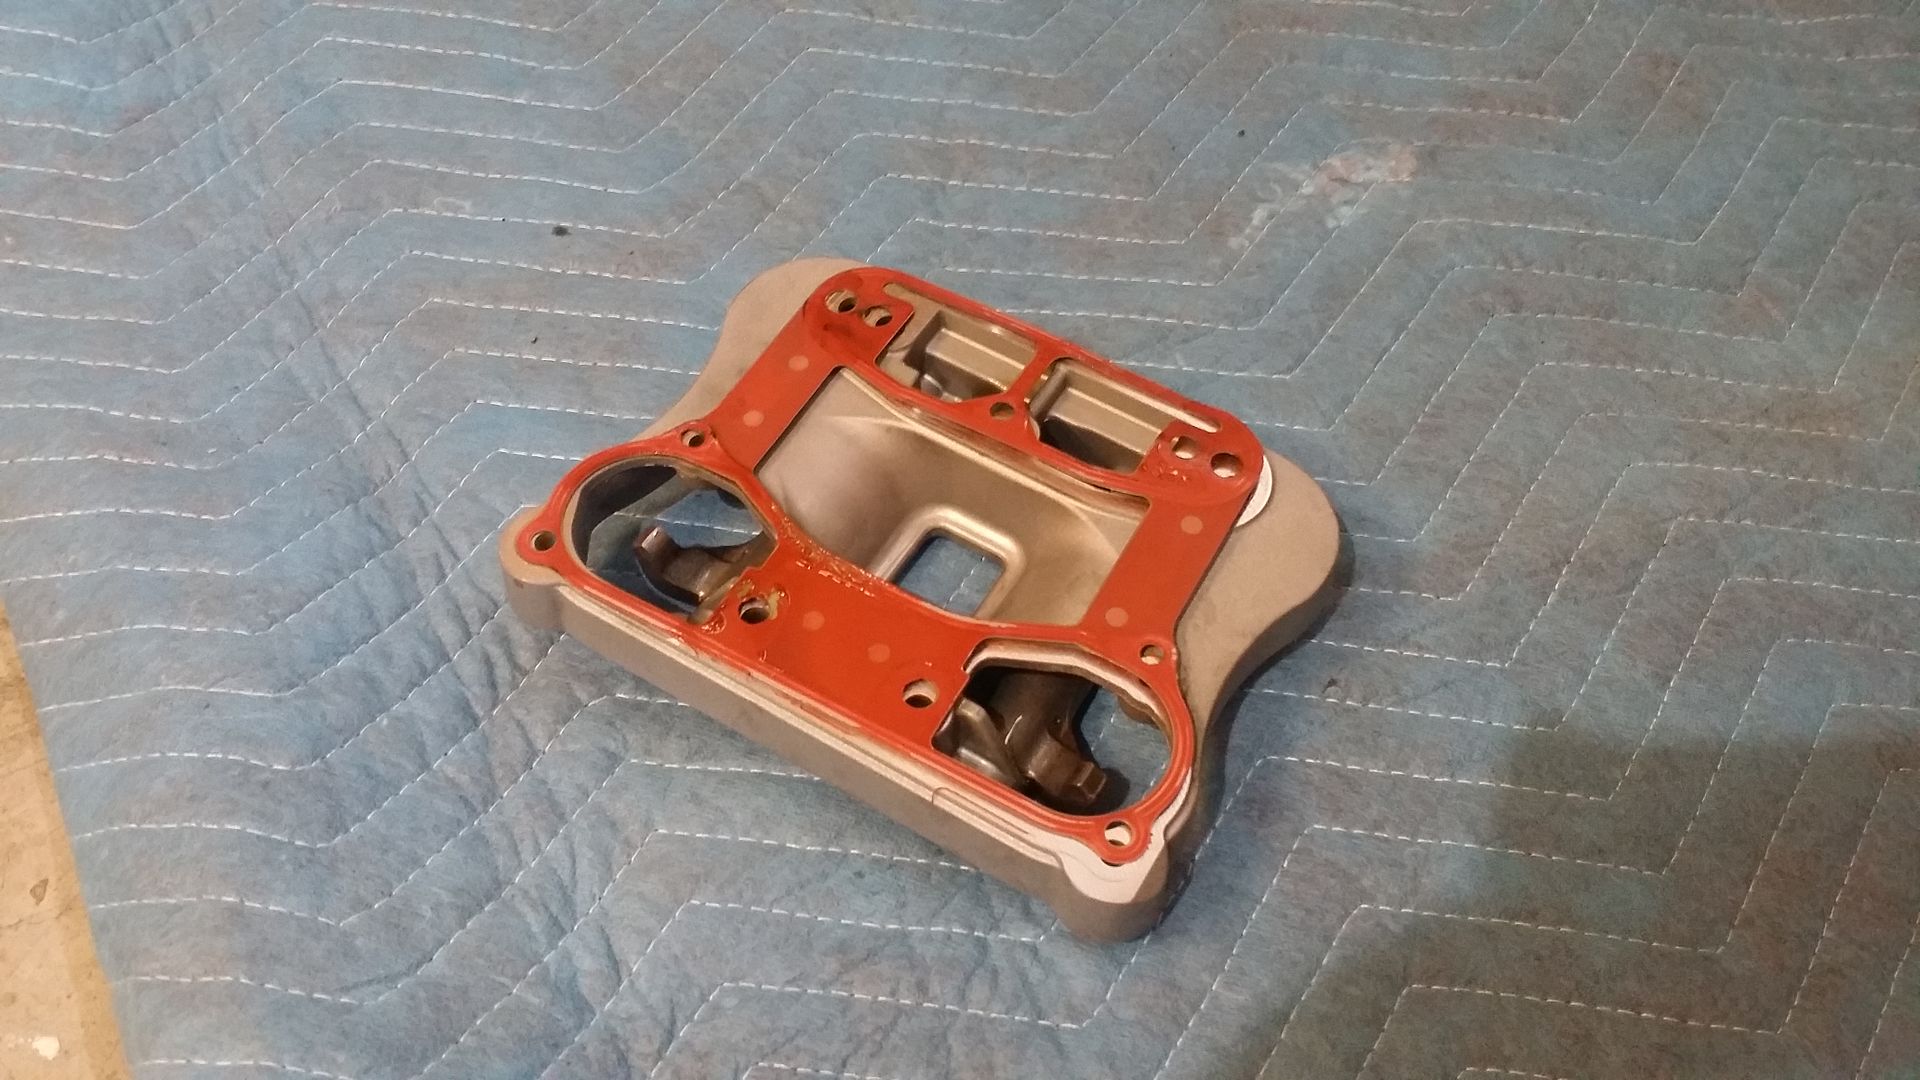
Next took off the rocker boxes. Threw away the gasket and pulled out the push rods.
I then repeated the process on the rear cylinder.
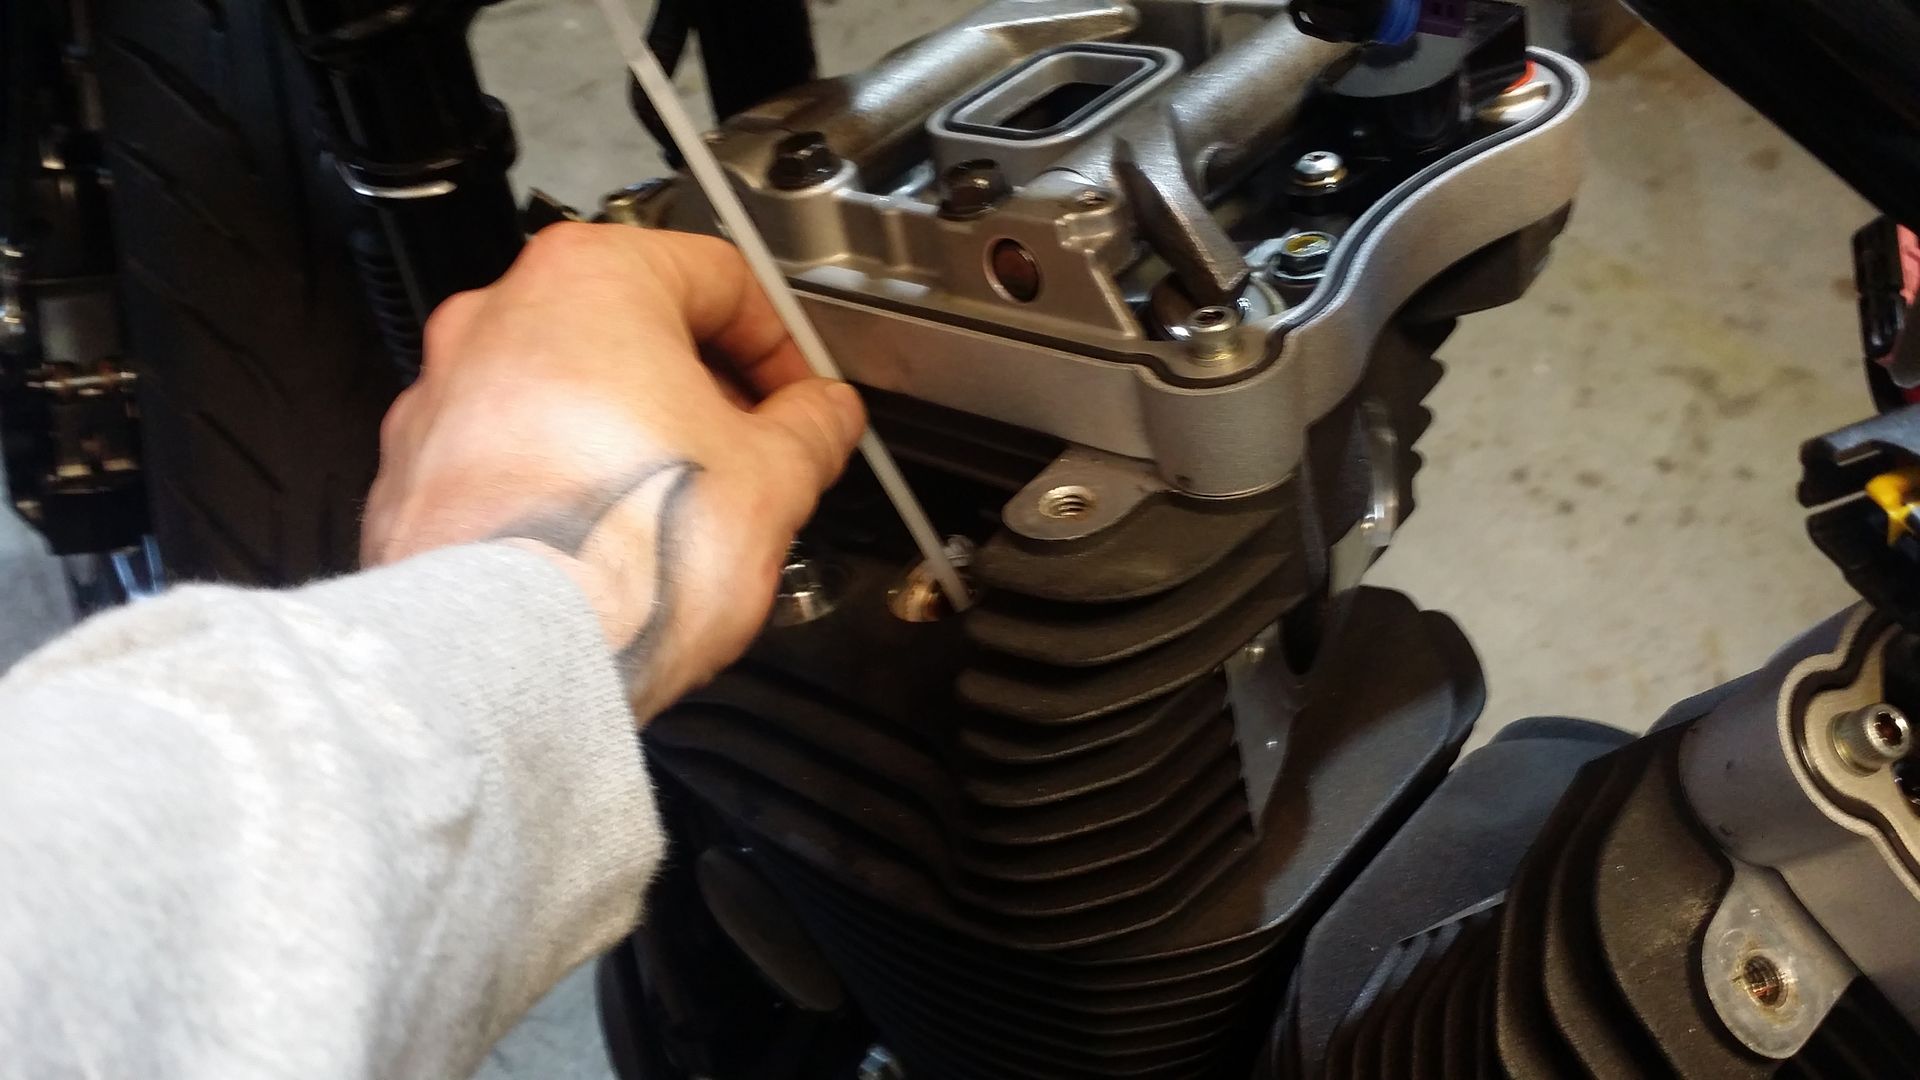
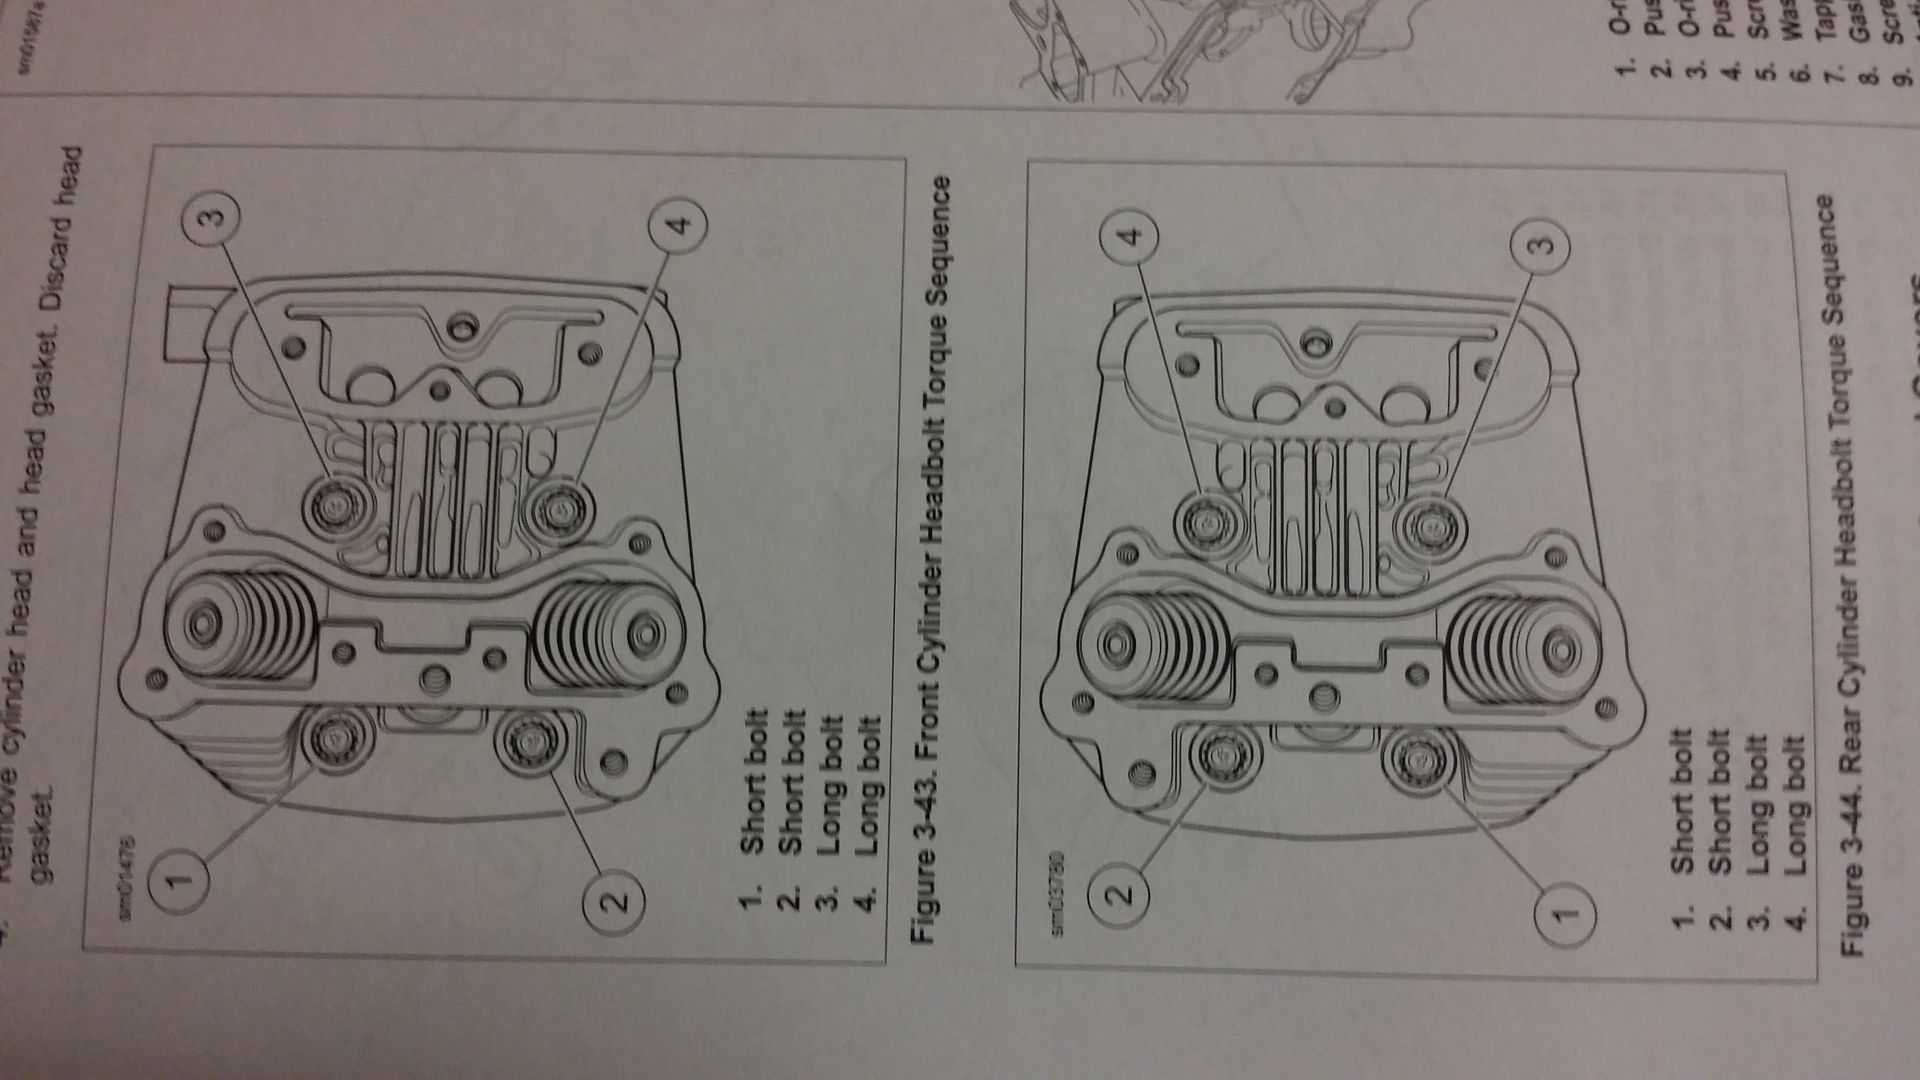
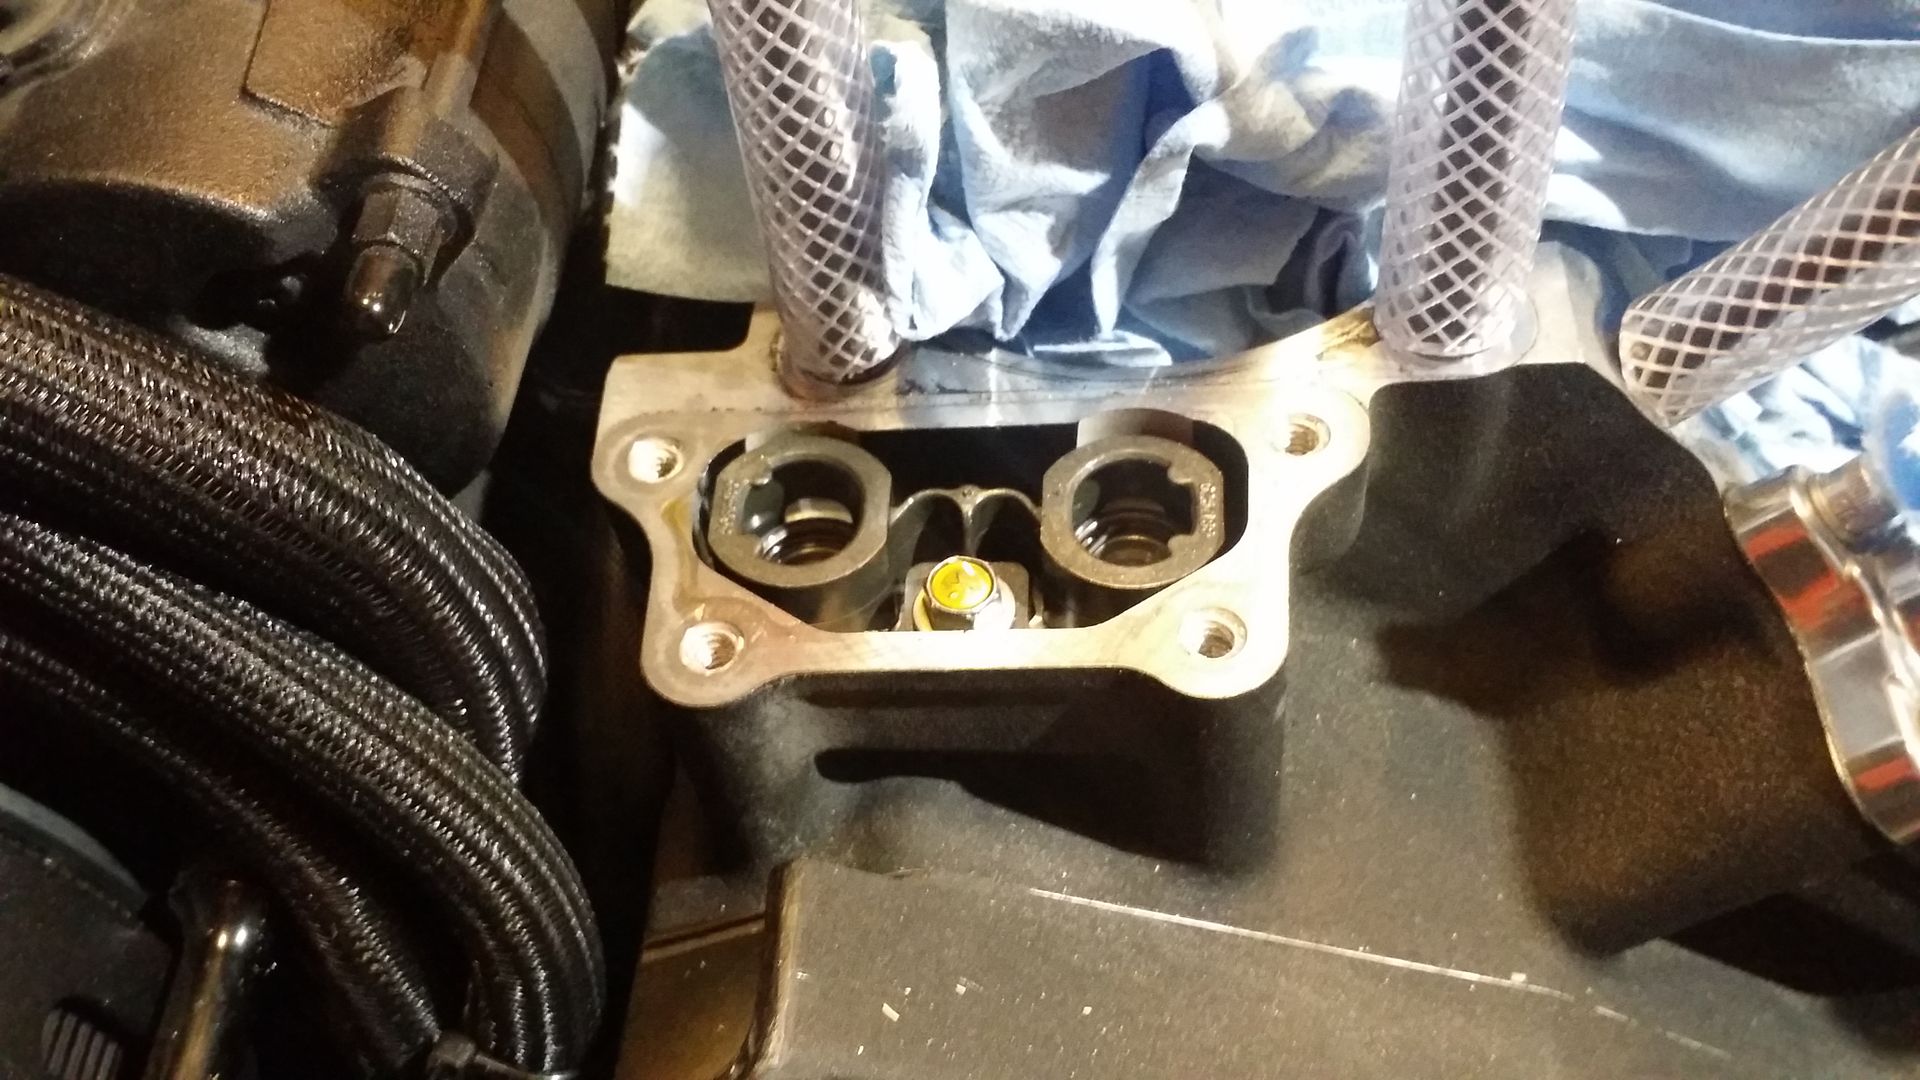
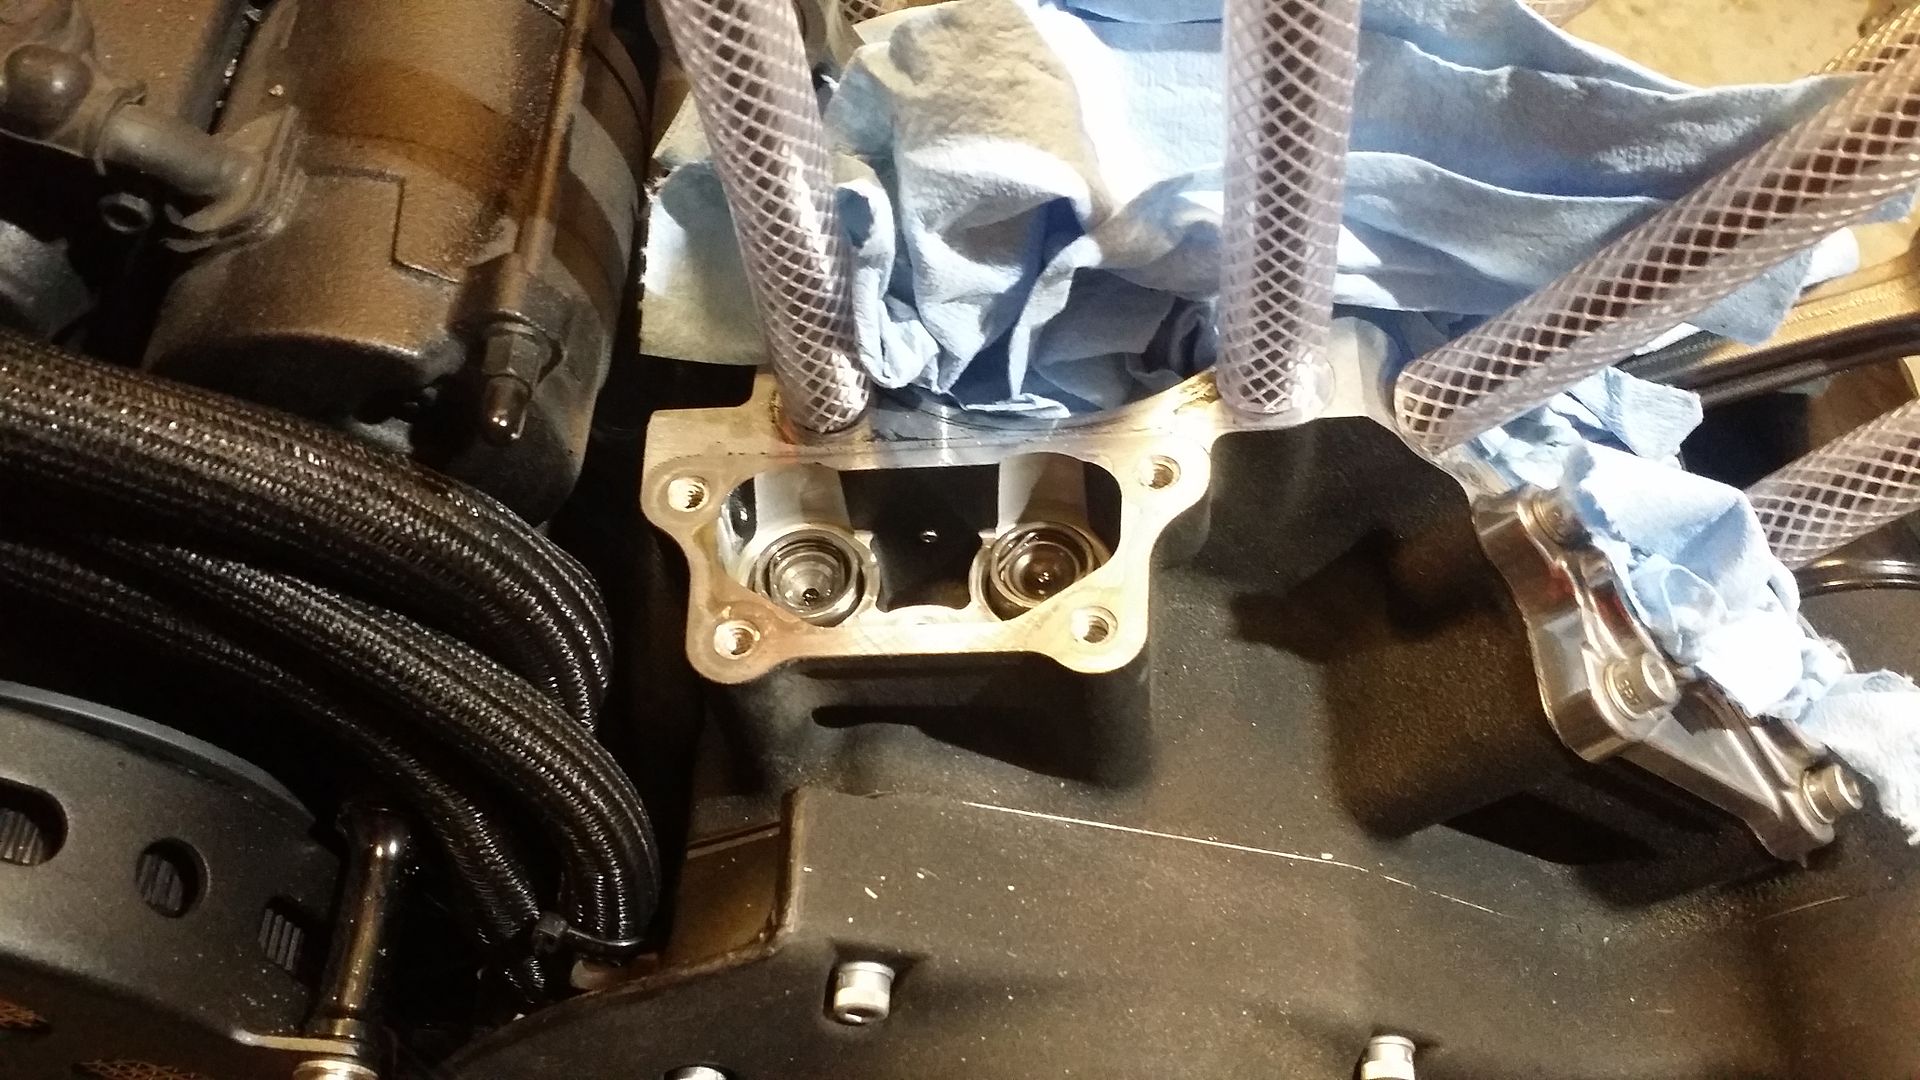
Head Removal....I used a 1/2 drive ratchet set with a 1/2 socket to take the head bolts out. You have to use only 1/8 turn incriments in the order shown in the pic (HD service manual). They were snug but the 1/2 drive took care of it.
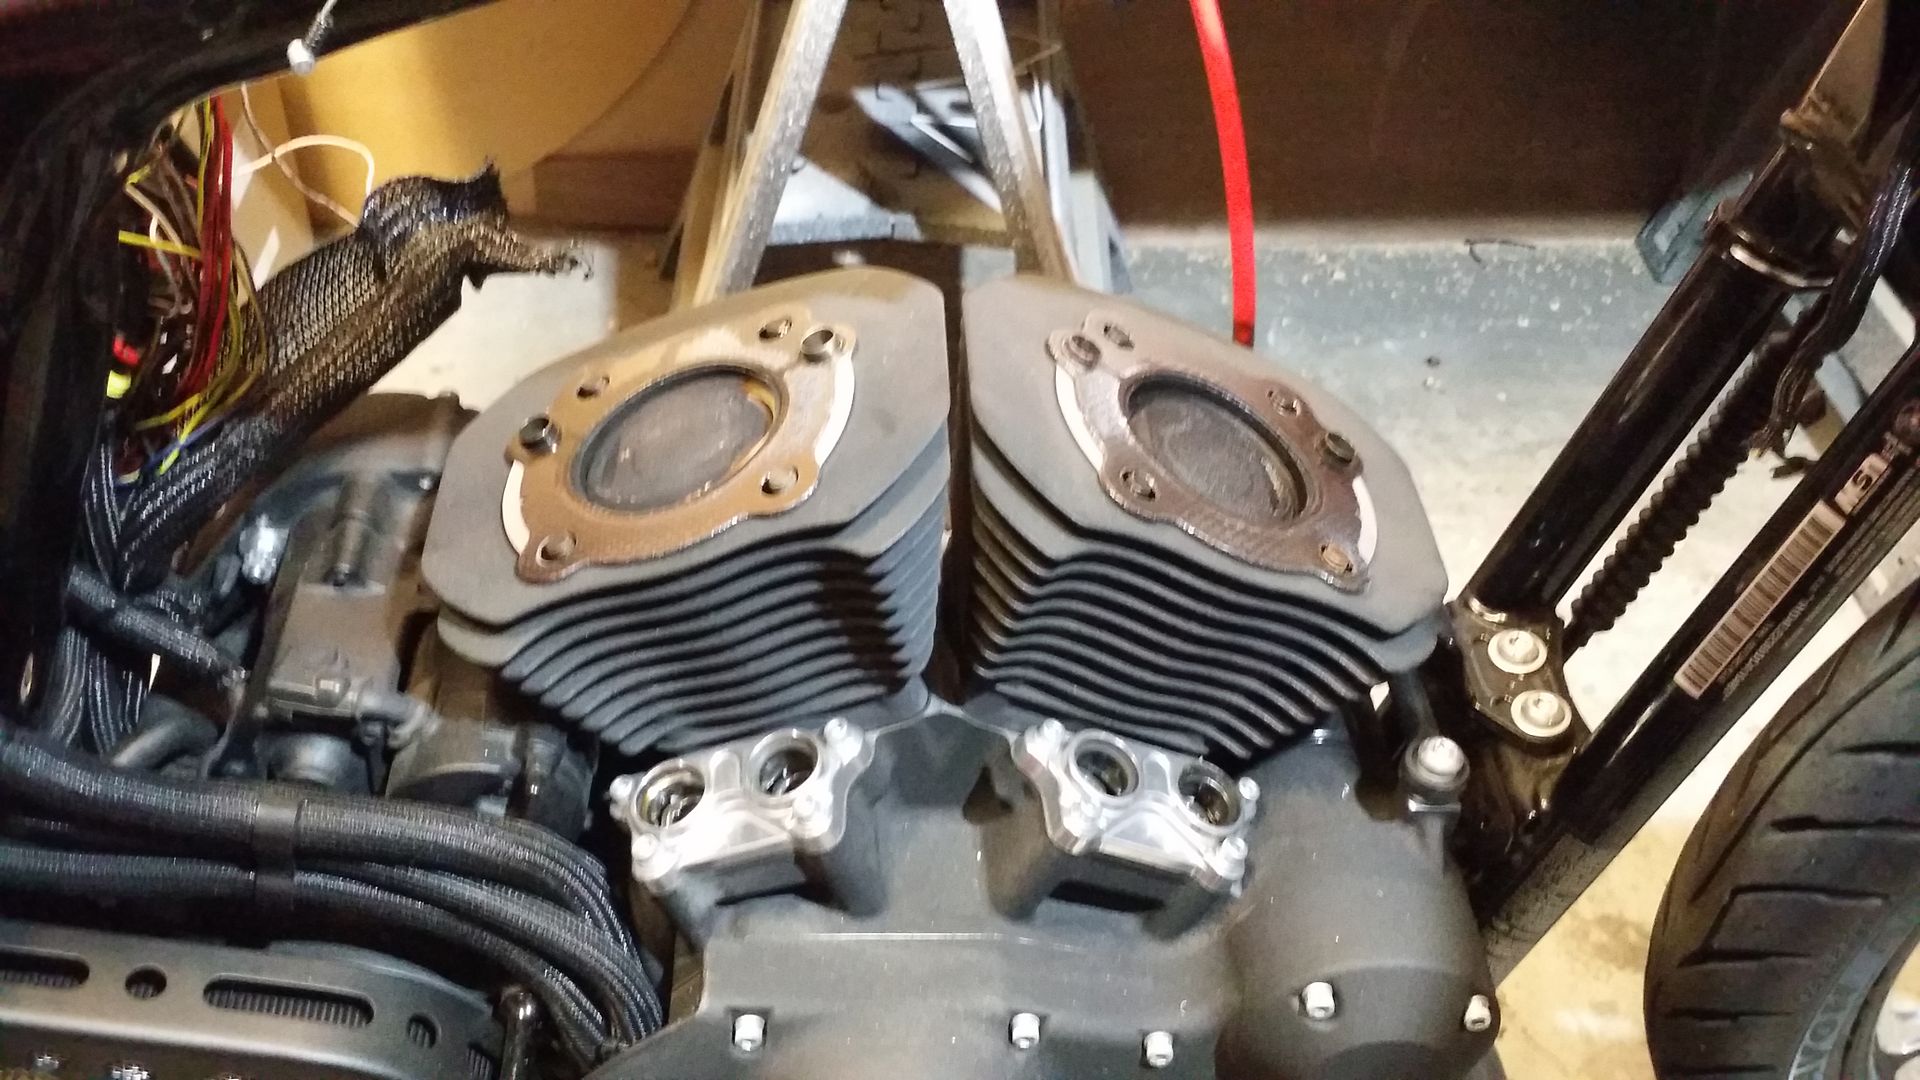
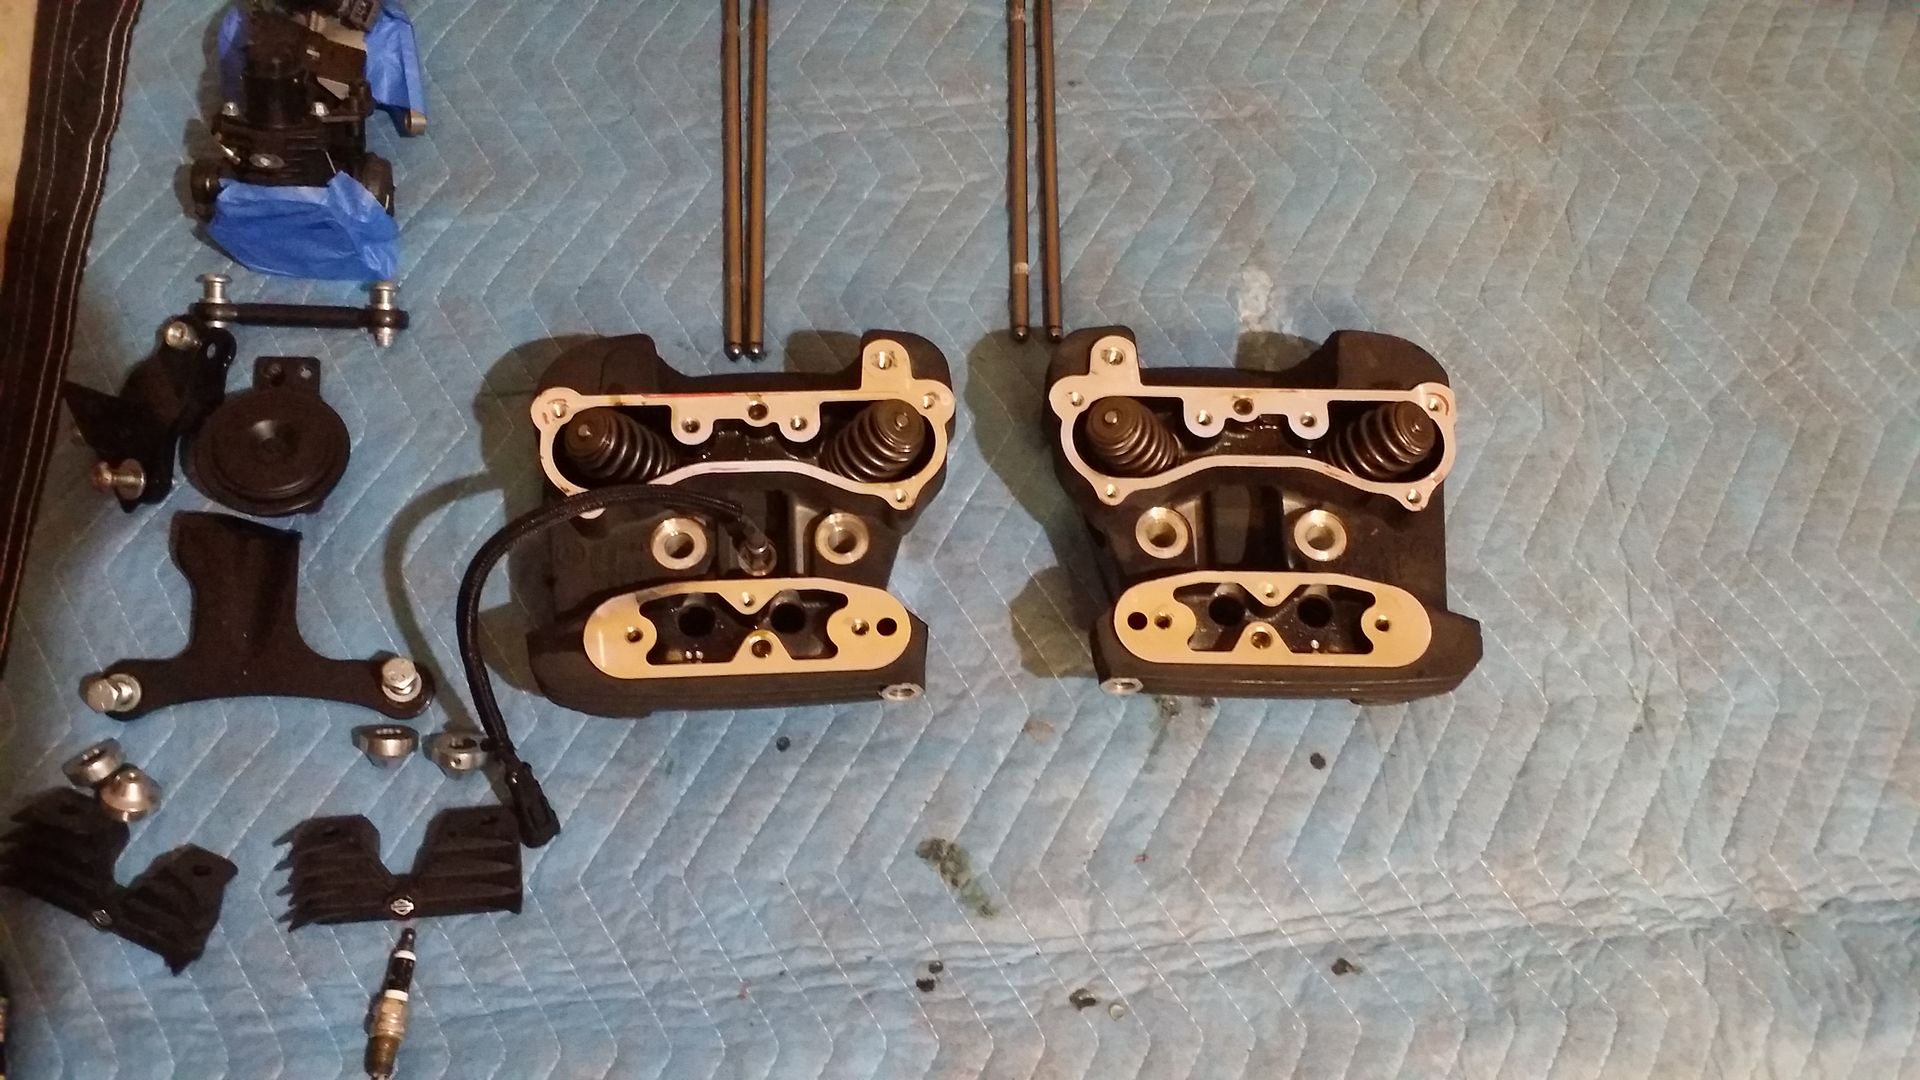
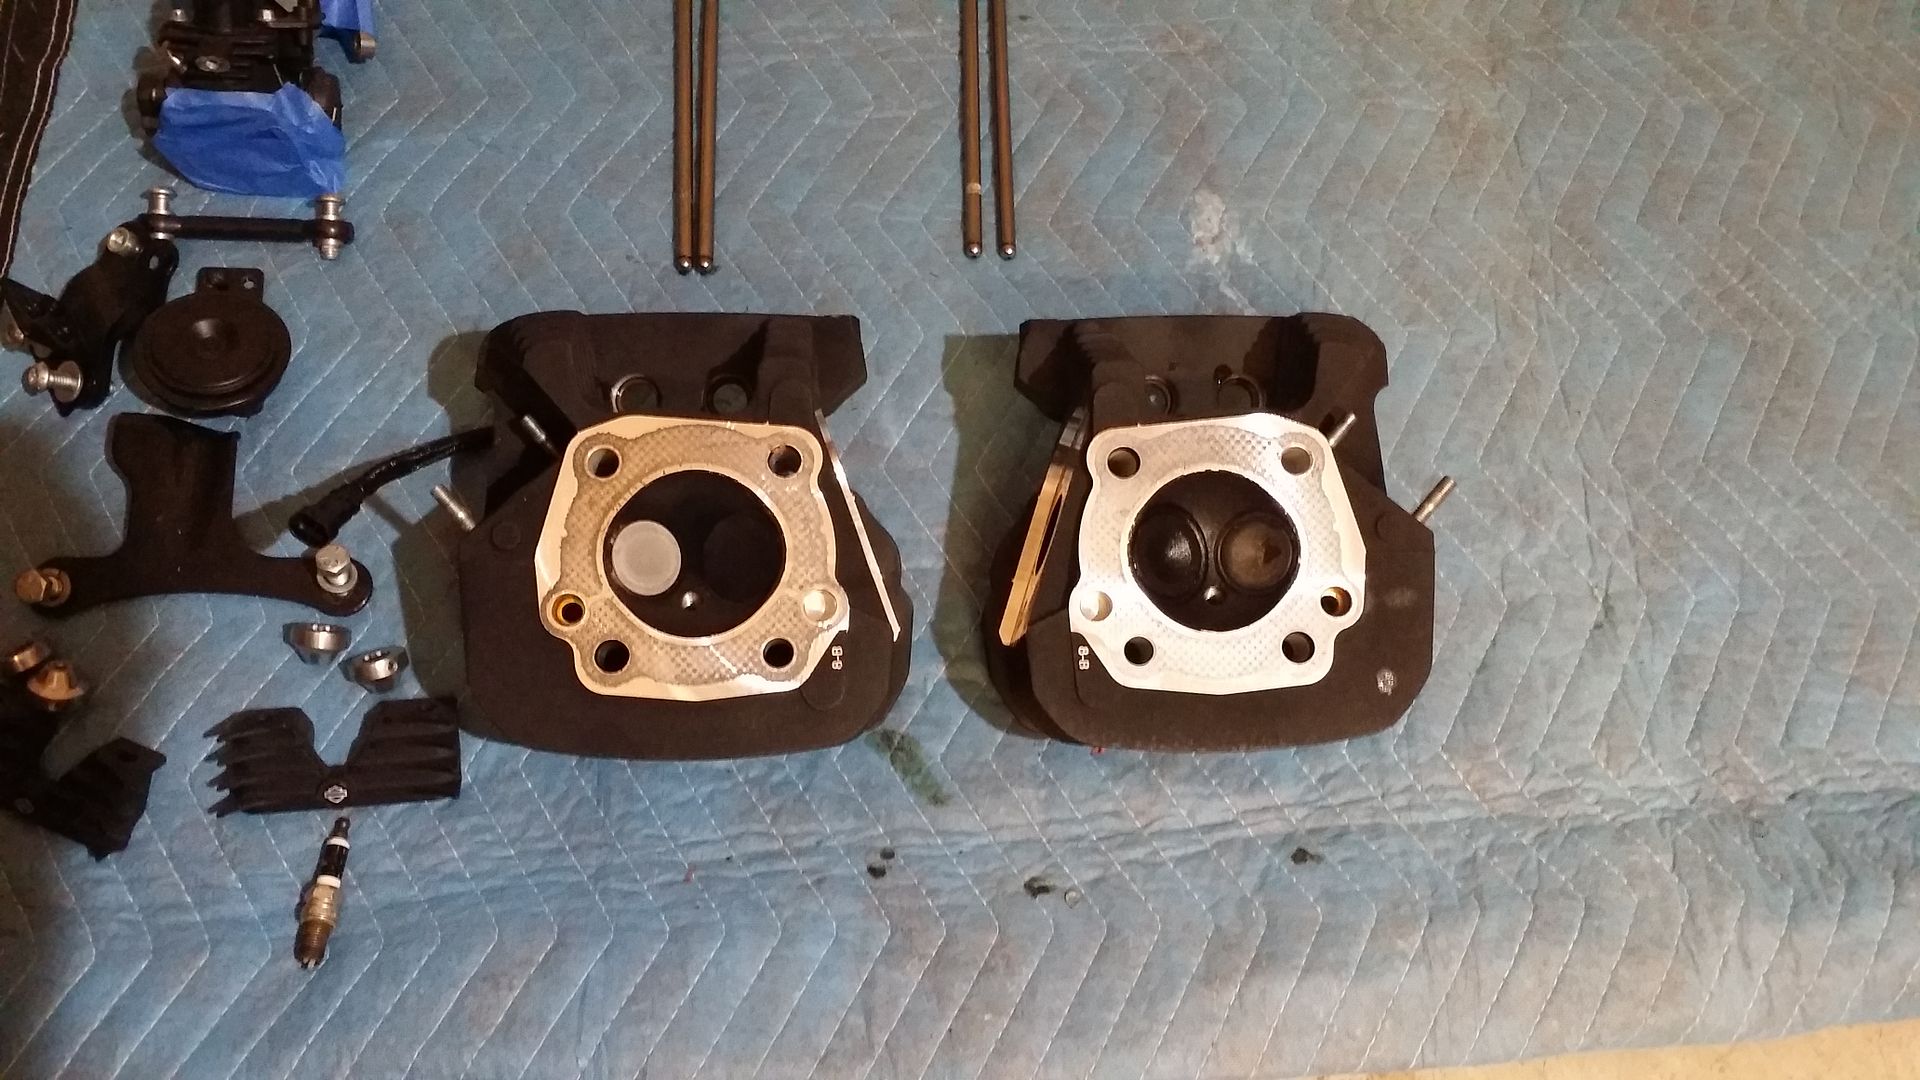
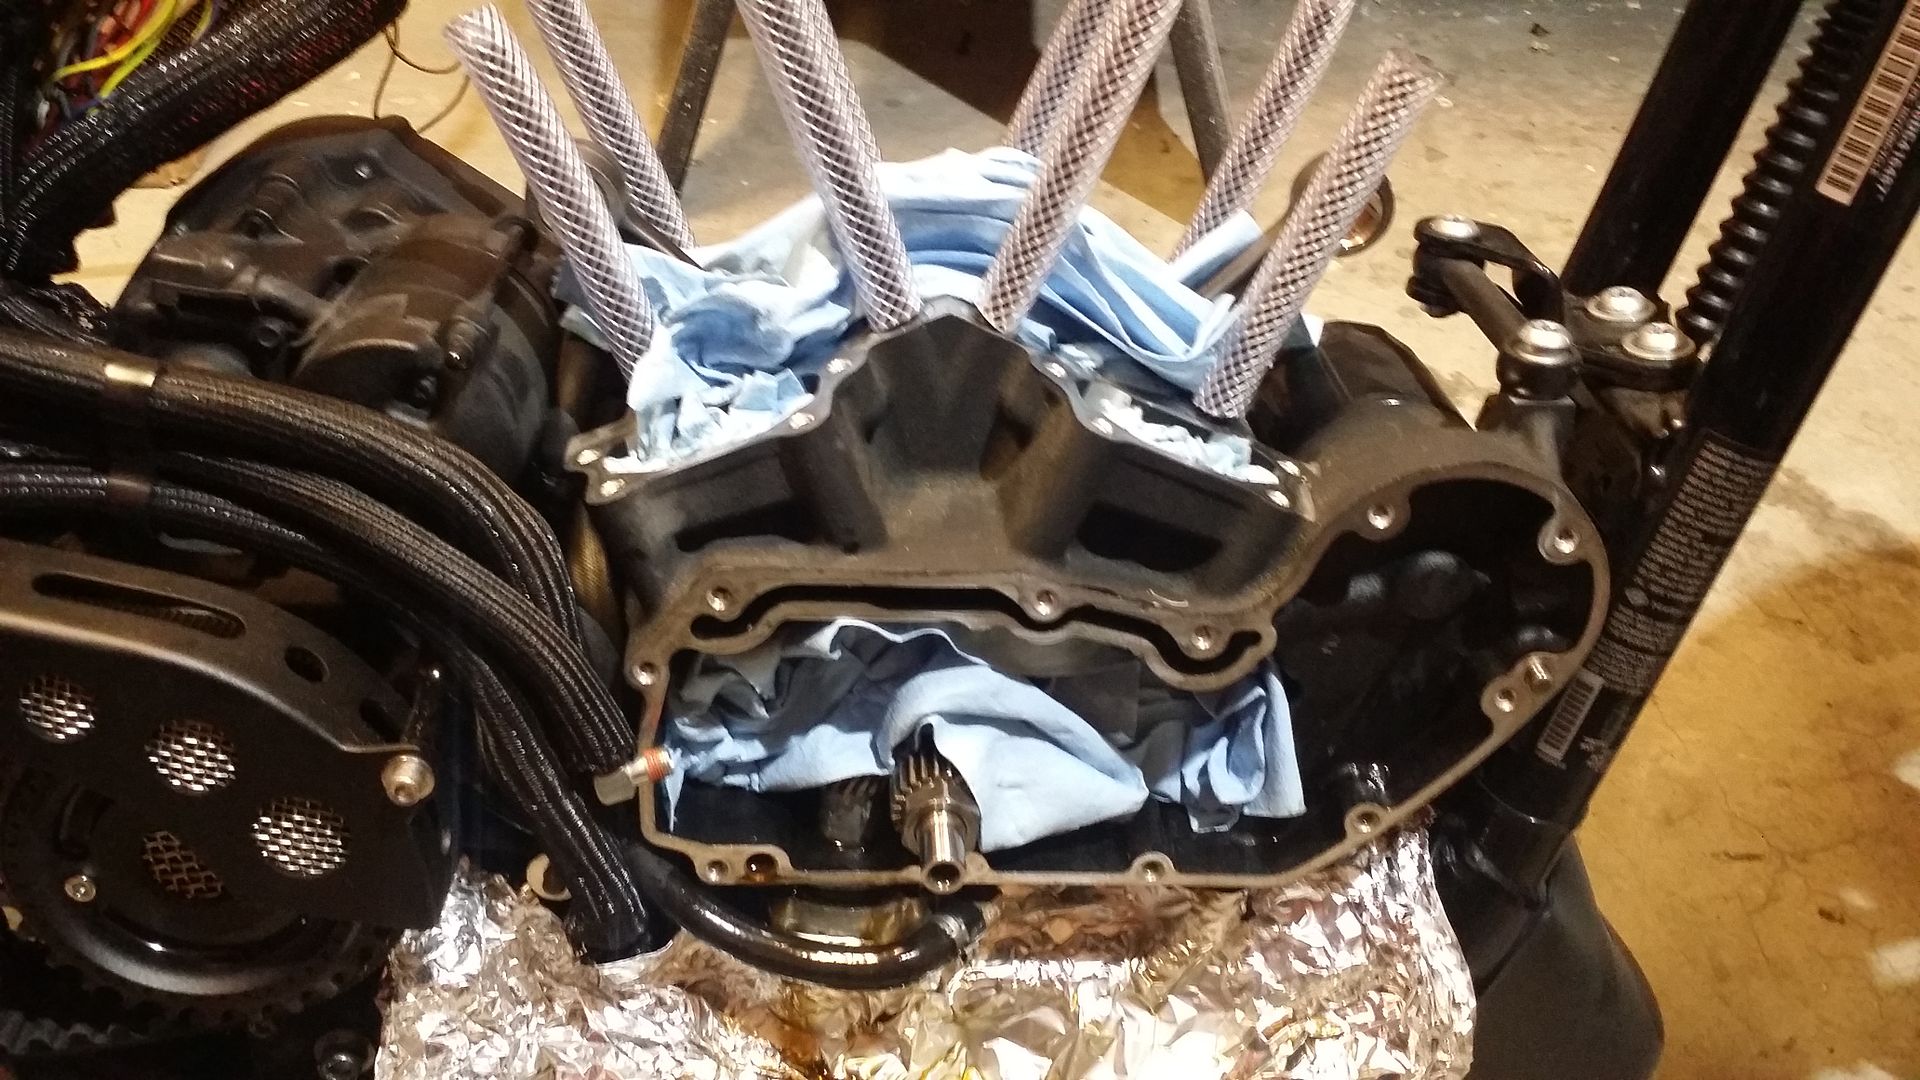
Removed the Heads and push rod tubes
Here they are. Wont see them again for a few weeks whild Hammer Dan works his magic.....

I removed the front upper stabilizer link and horn mount. I used a Torx 45 socket for the larger bolts and a T25 t-handle for the horn mount


Took the mount off the front head using a 5/8 wrench

Next I removed the spark plugs using a 5/8 spark plug socket

Then the RSD Rocker box cover come off I used a 3/16 allen for this


Removed the bolts from the Rocker boxes. I was careful to find TDC by having the bike in 5th and turning the rear wheel until I felt compression out of the spark plug hole and using a ziptie in side the hole to tell when the piston is at the top.
I used a 3/16 allen to remove the two bolts on the left side of the Rocker box. I used a 11mm socket to remove the 3 silver bolts in the middle. Then it was a 1/2 socket to remove the 4 outer black bolts. I loosened them in a zig zag pattern in 1/2 turn incriments until they were off the rocker box then took them out.


Next took off the rocker boxes. Threw away the gasket and pulled out the push rods.


I then repeated the process on the rear cylinder.
Head Removal....I used a 1/2 drive ratchet set with a 1/2 socket to take the head bolts out. You have to use only 1/8 turn incriments in the order shown in the pic (HD service manual). They were snug but the 1/2 drive took care of it.


Removed the Heads and push rod tubes

Here they are. Wont see them again for a few weeks whild Hammer Dan works his magic.....


#3
12-17-2014, 01:38 AM
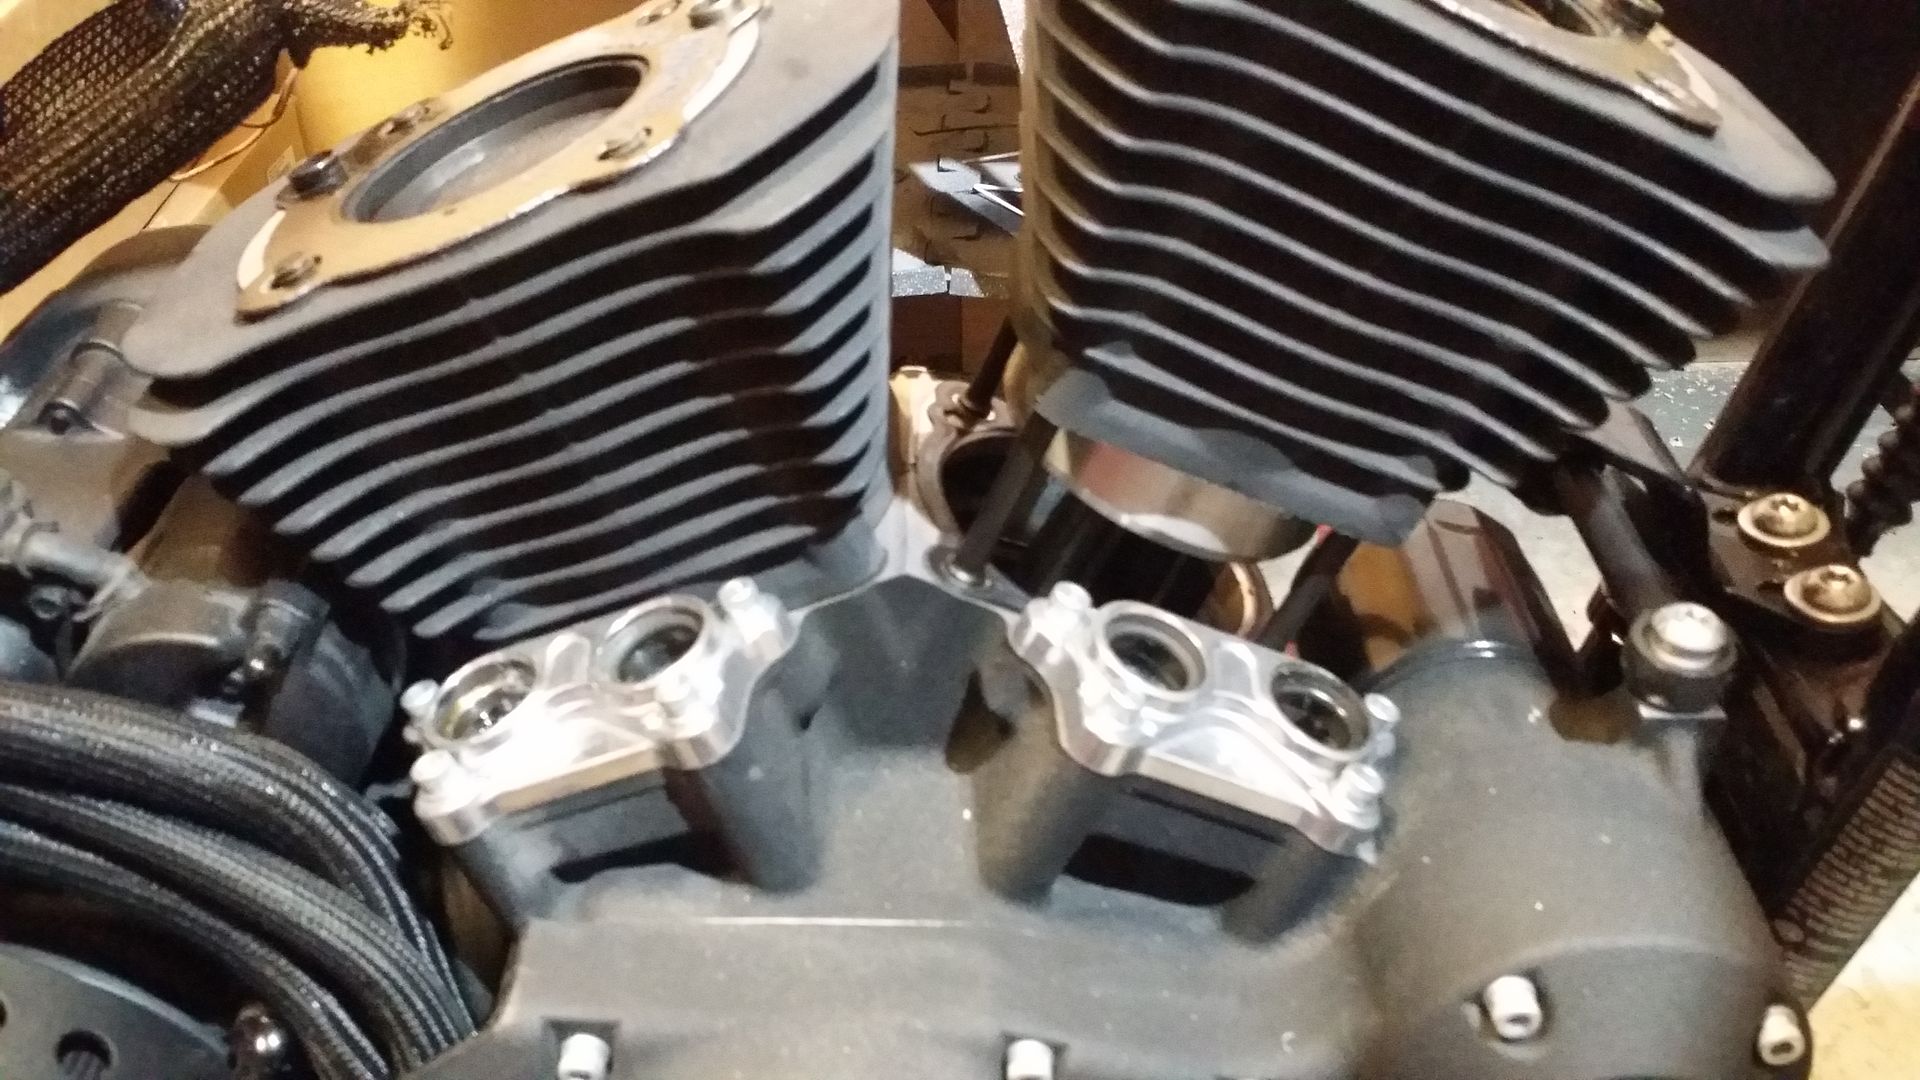
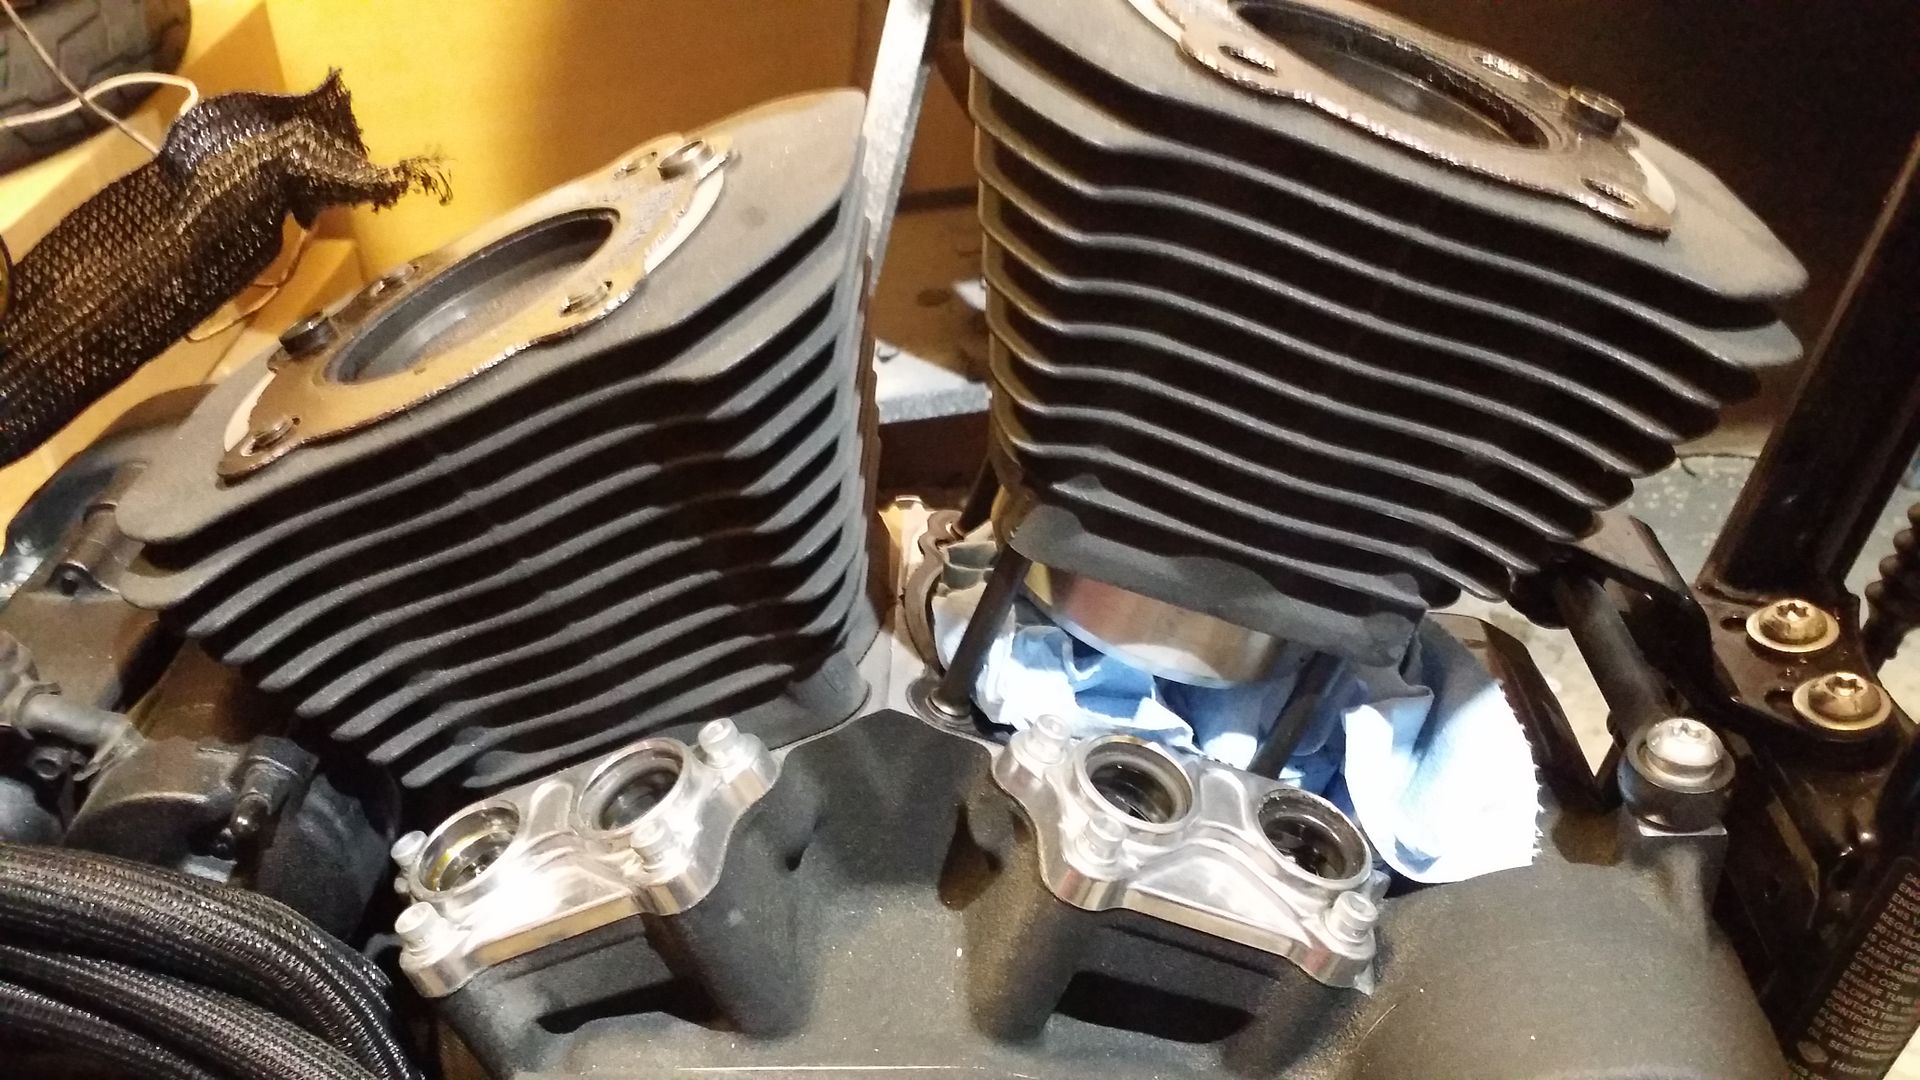
The cylinders just pop off. Made sure to put rags in the crank case holes and to use 6" lengths of rubber hose to place over the studs.

I removed the circlip using some long needle nose plyers and just pushed the wrist pin out from the other side. I guess I was lucky...I know a lot of people have trouble getting those out.
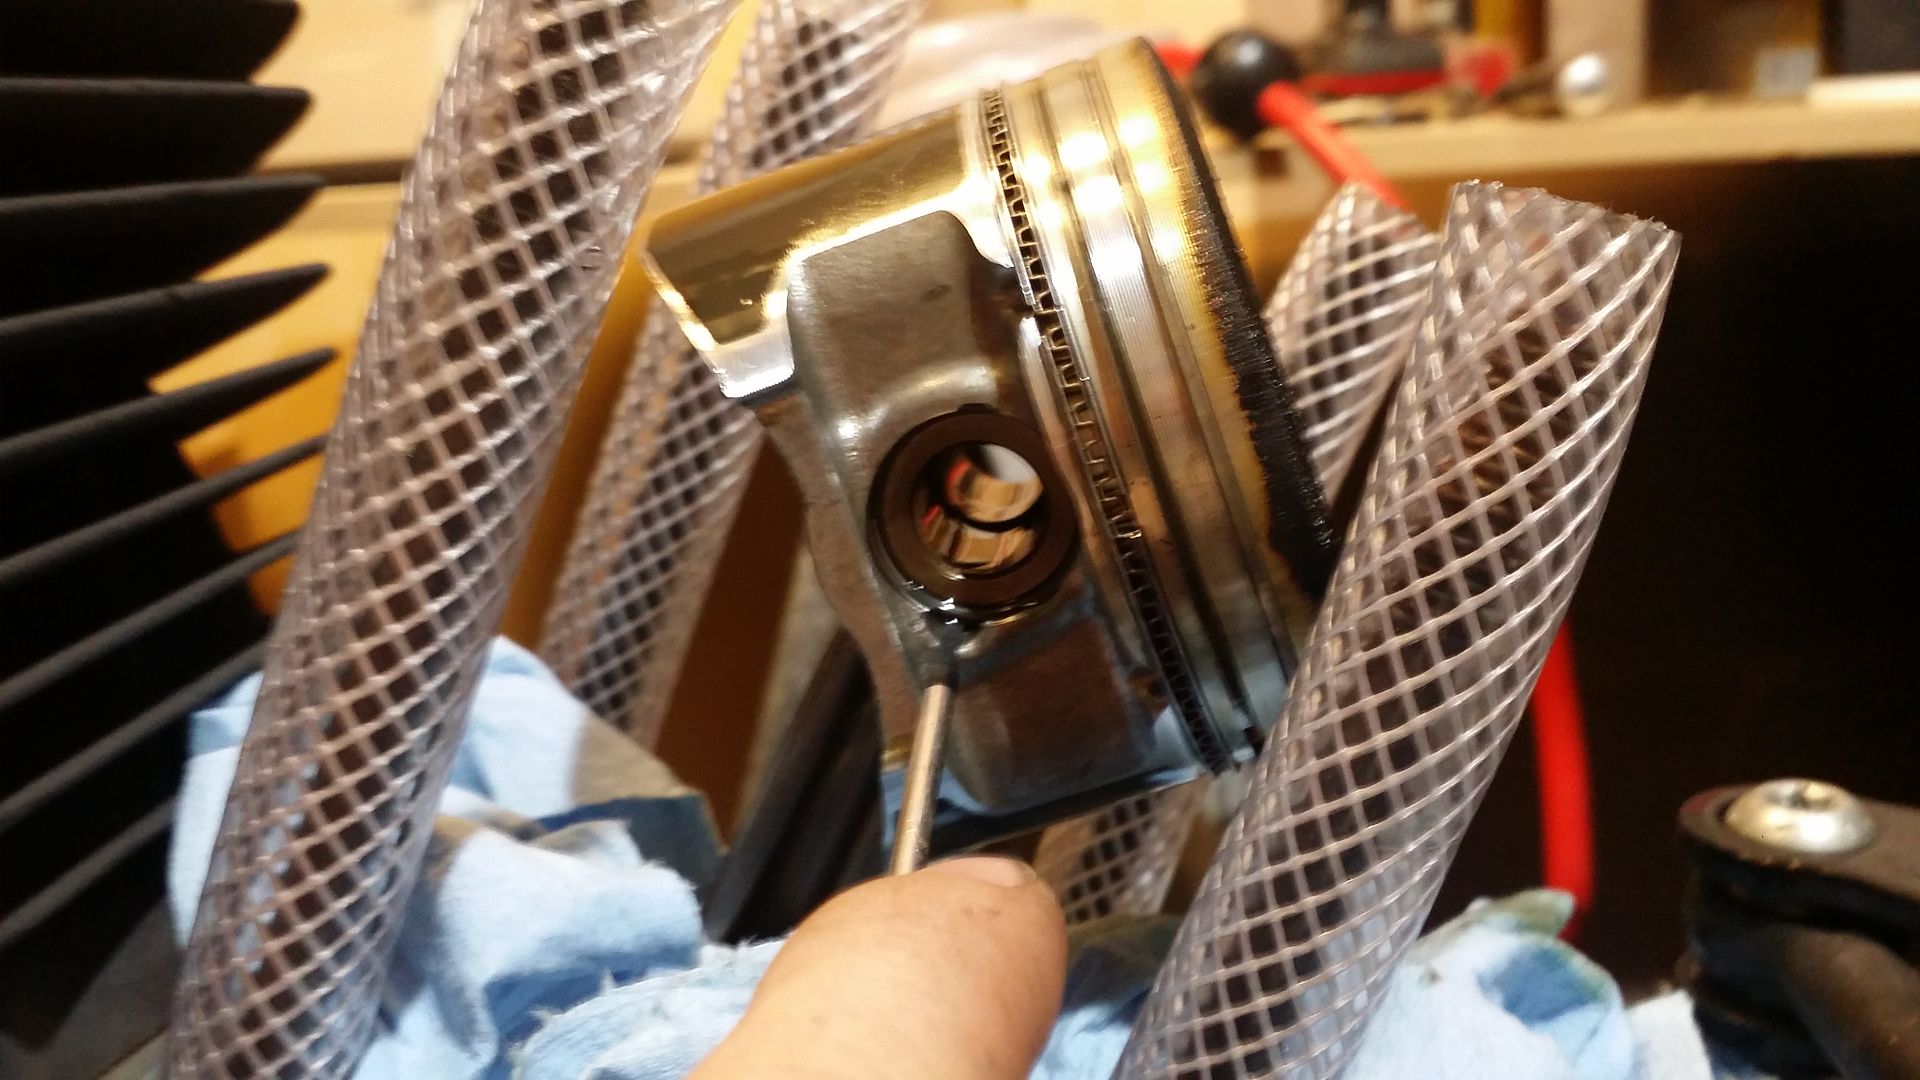
Repeated for the rear cylinder.
Gonna try and get more done, but.....I'm running out of beer :shhhh


I removed the circlip using some long needle nose plyers and just pushed the wrist pin out from the other side. I guess I was lucky...I know a lot of people have trouble getting those out.

Repeated for the rear cylinder.


Gonna try and get more done, but.....I'm running out of beer :shhhh
#4
12-17-2014, 01:40 AM
I removed the Push Rod Collar using a 5/16 T-Handle Allen...they were snug but came out easy enough.
Next I removed the Anti Rotation Device using a 3/8 socket. Those had some serious thread lock on them. Got them out though.
Repeated for the Front Cylinder
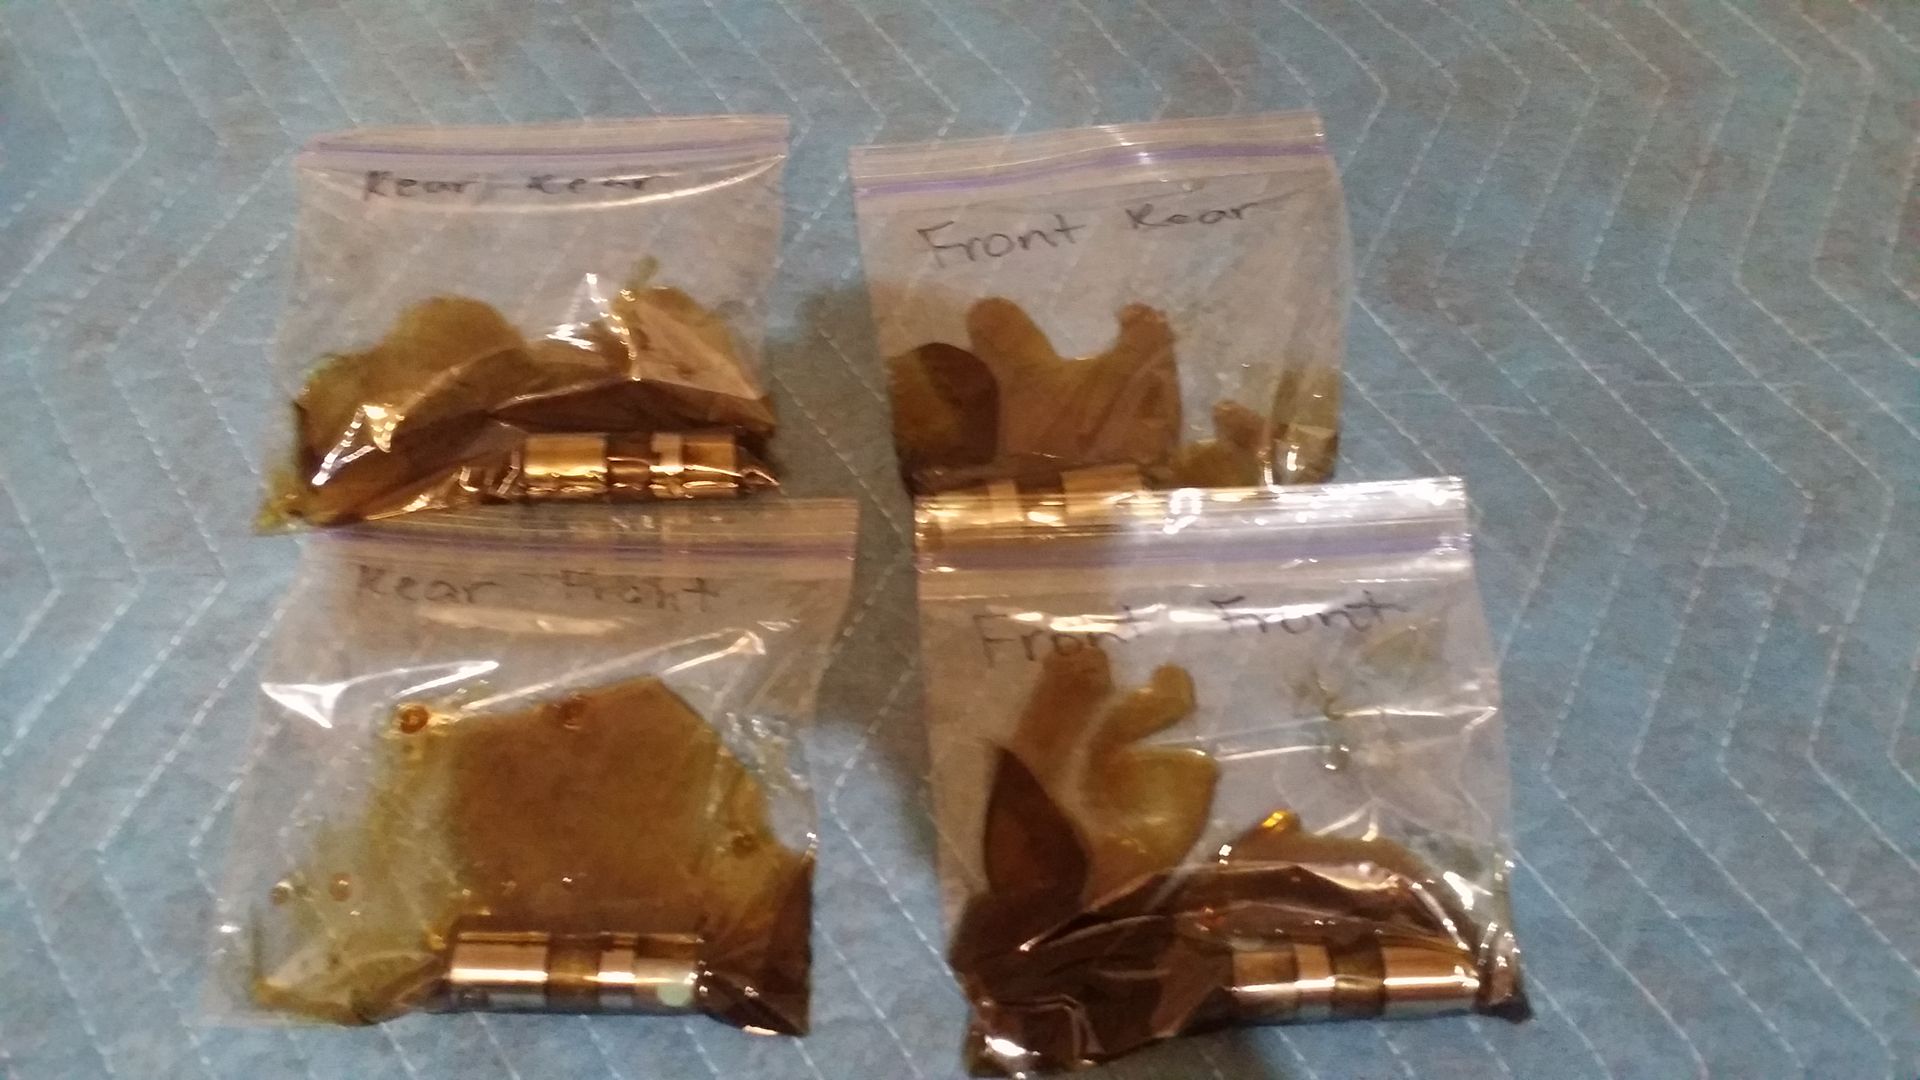
Pulled the tappets and labeled them individually in their own ziplock with oil. Overkill??? Probably.
Once everything was removed I stuffed all holes with shop towels.
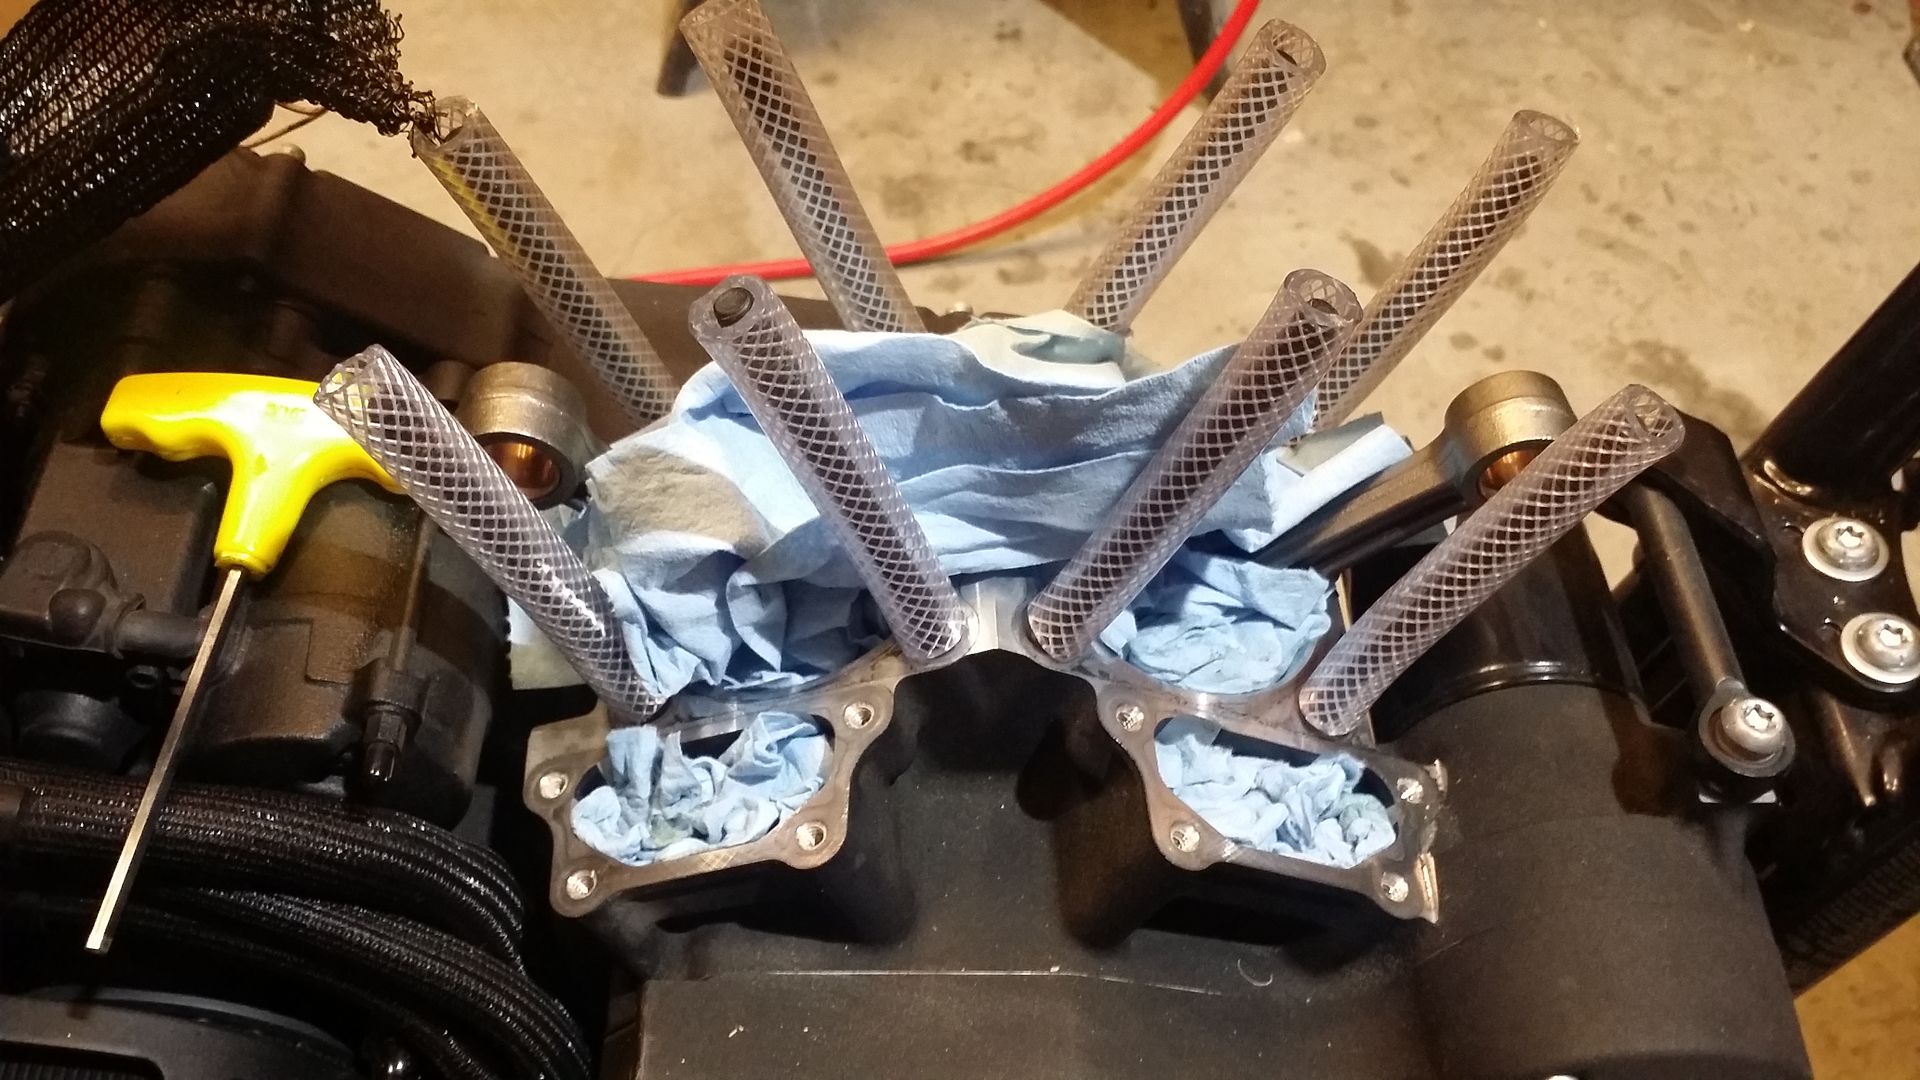
Next I took the bike down off the lift and put a catch pan under it. I used a 3/16 Allen socket to remove all the cam cover bolts. They are different sizes so be sure to keep track...Some use a piece of cardboard...I went over board and used a piece of mdf.
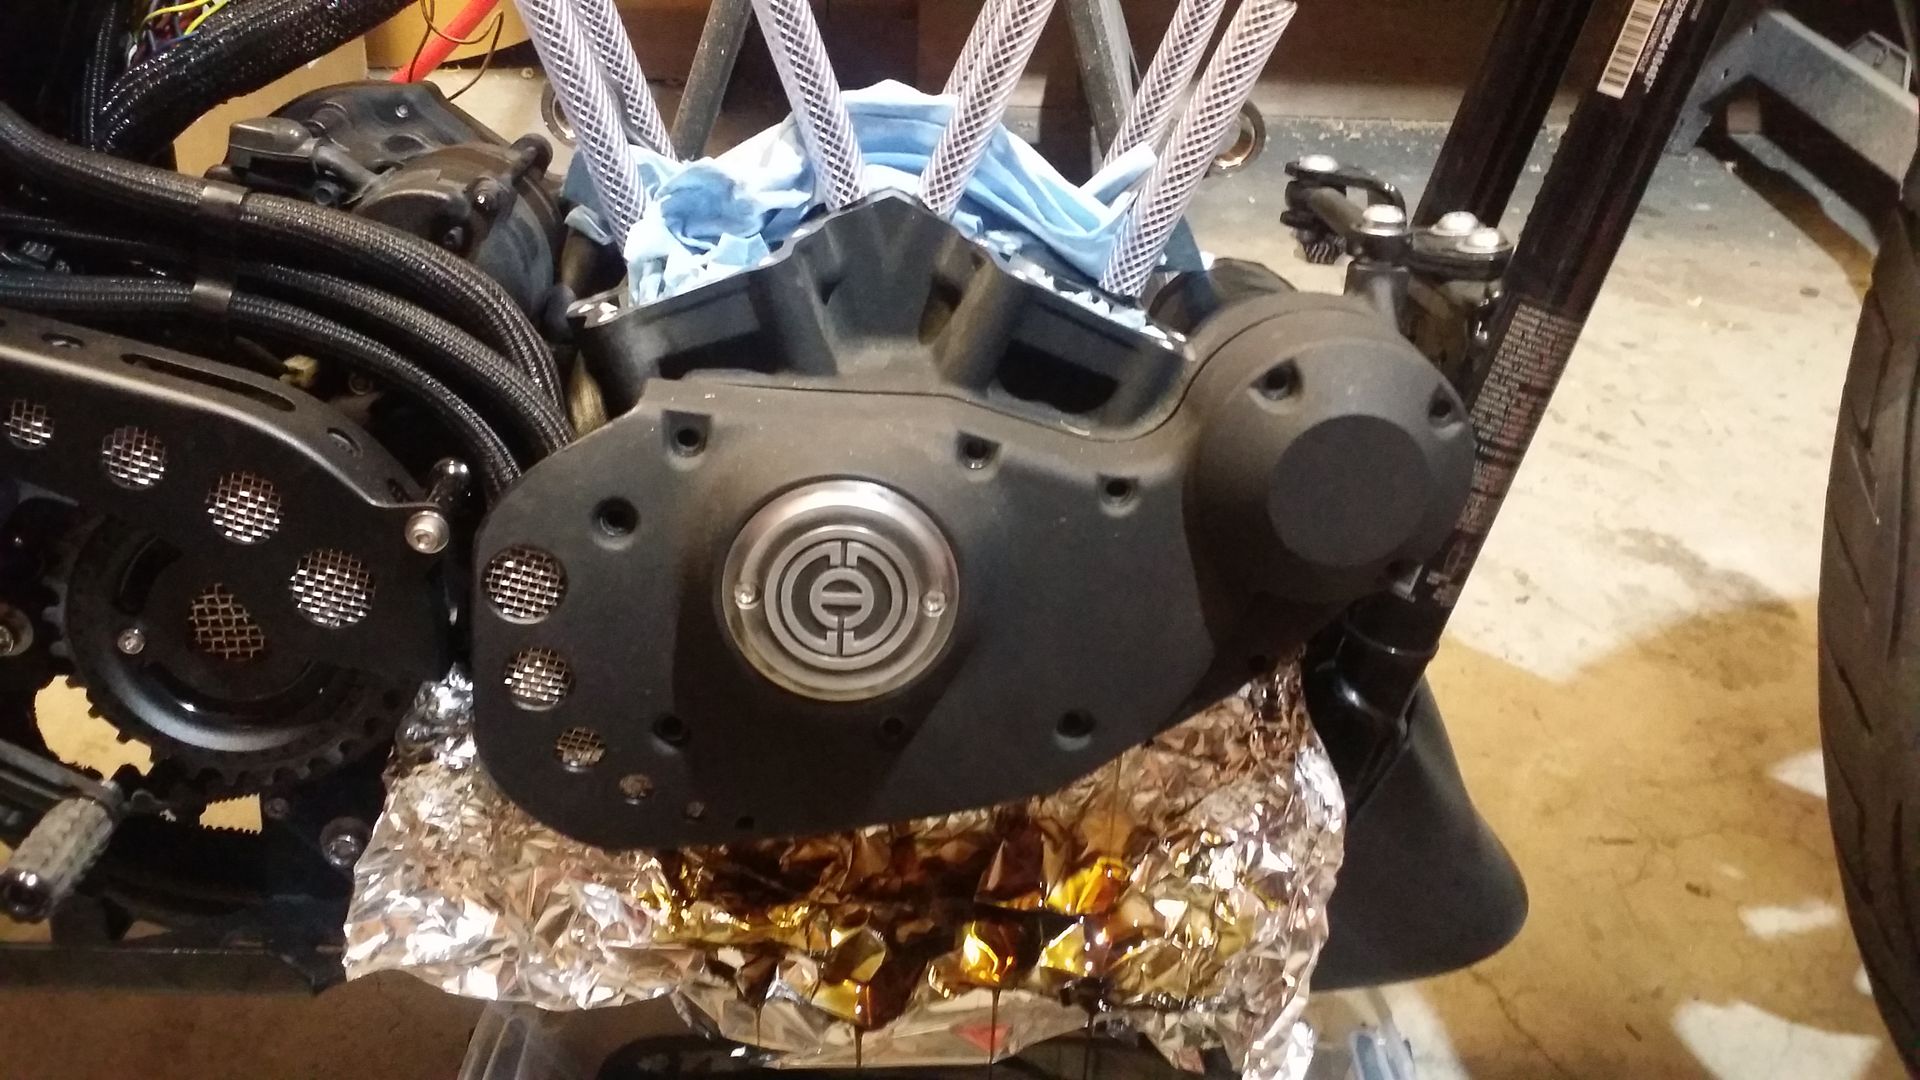
I pulled the cam cover off. Must be lucky again. Mine came right off with very little
force. I was sure to use aluminum foil to catch and funnel the oil to the catch pan.
There is my ugly mug lol...give me a break...been in the garage the whole day.
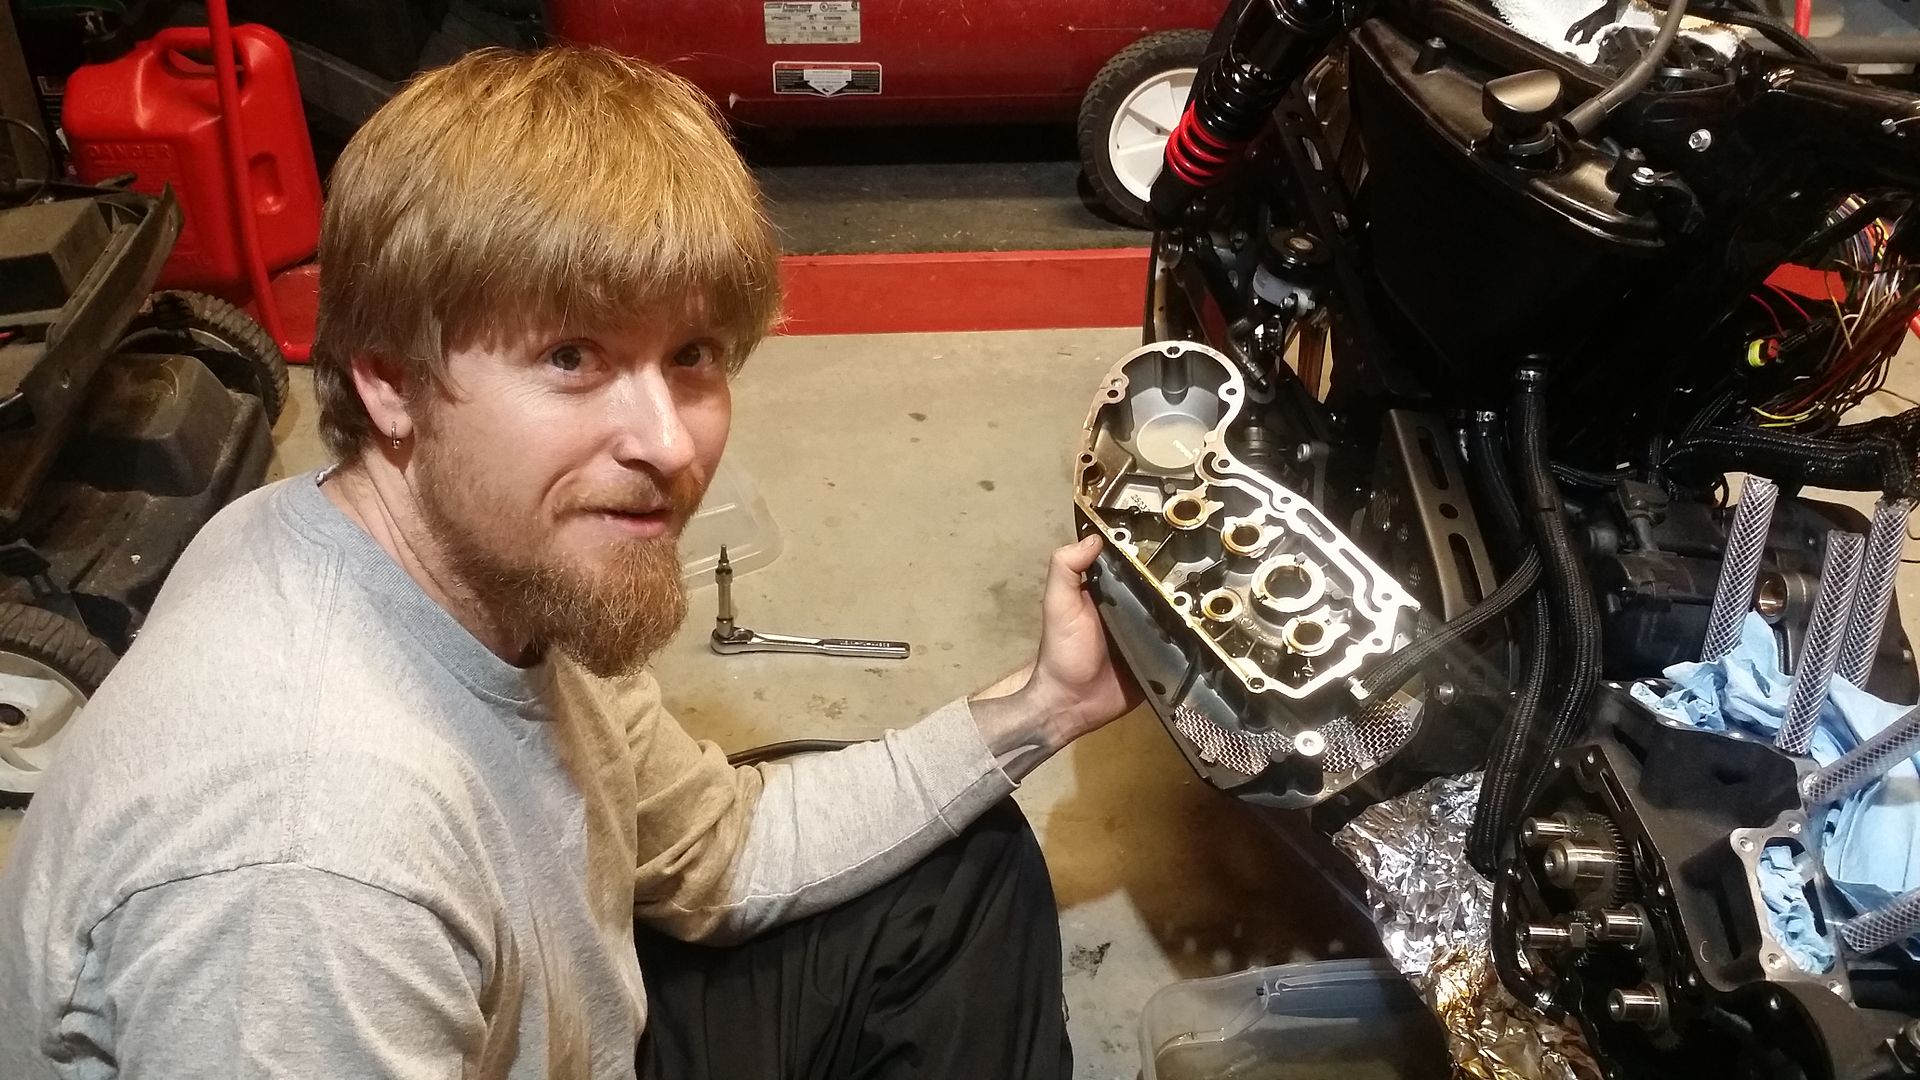
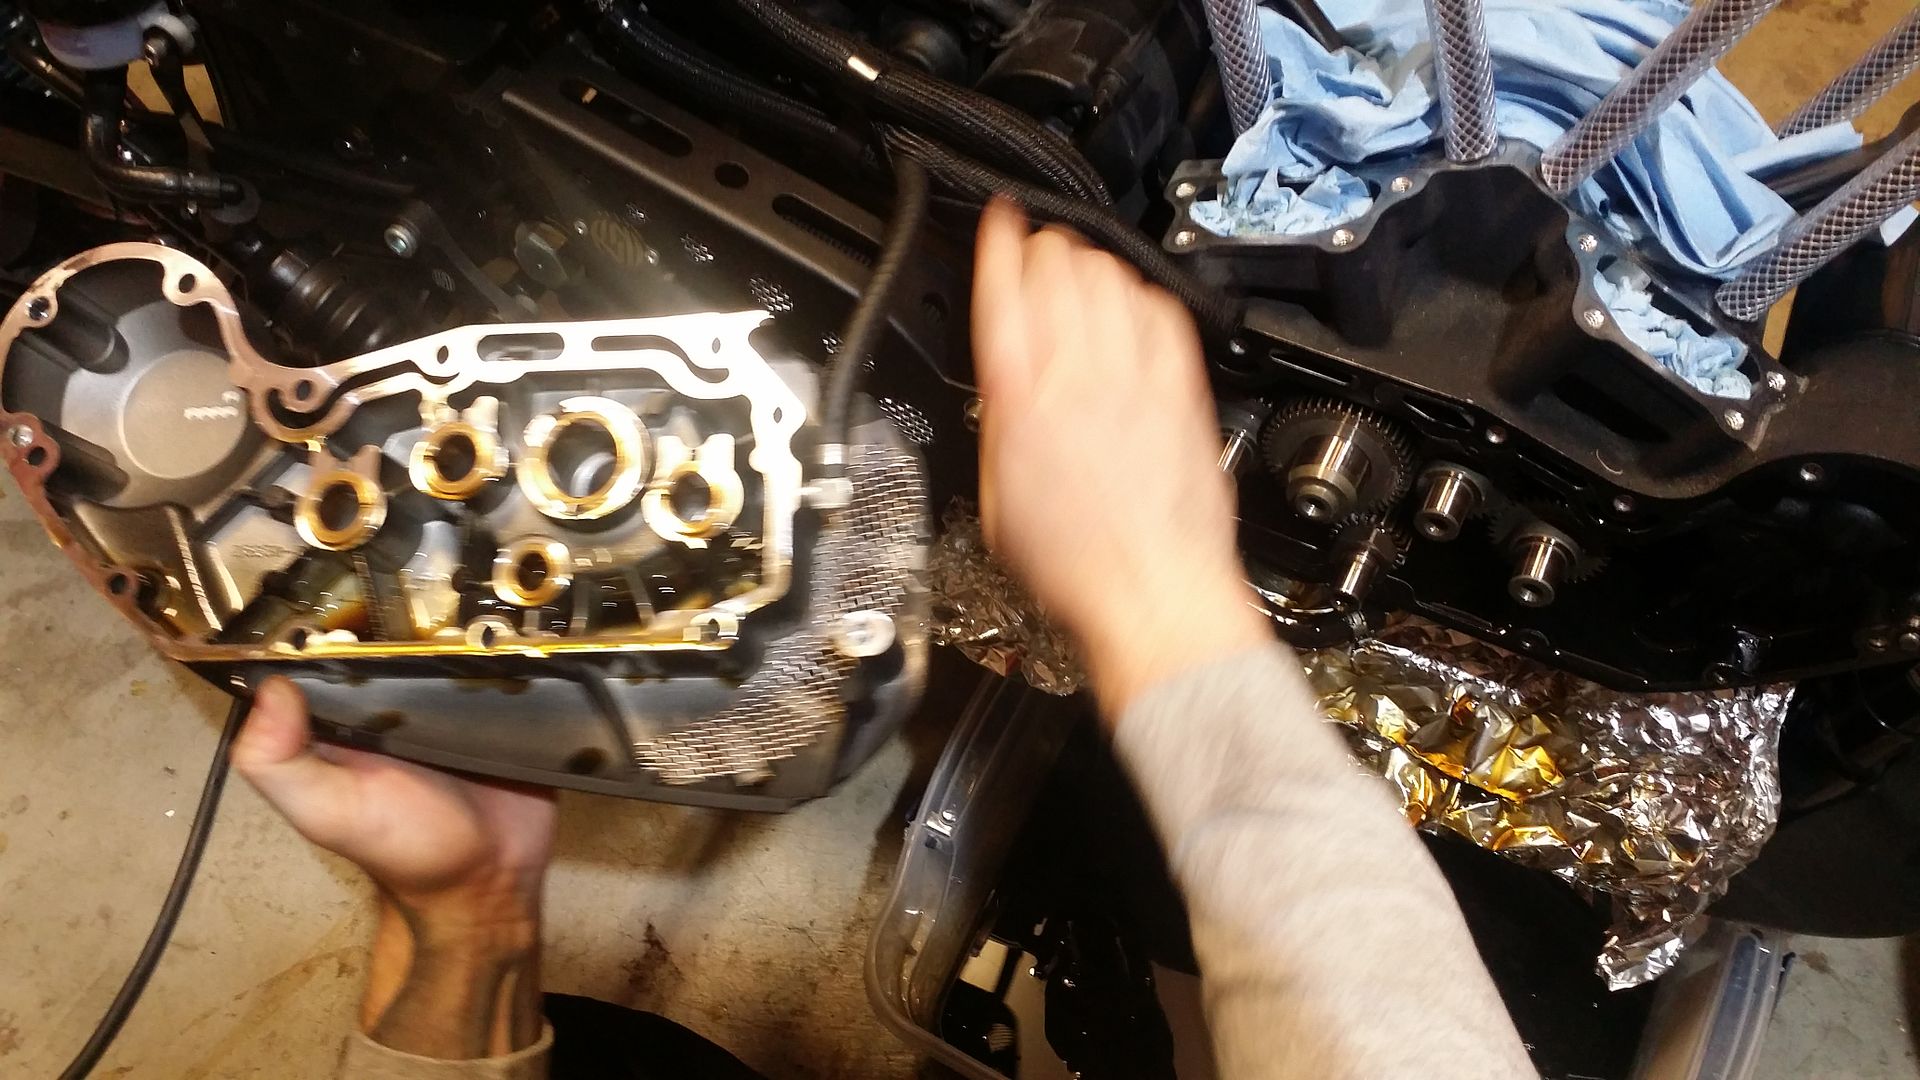
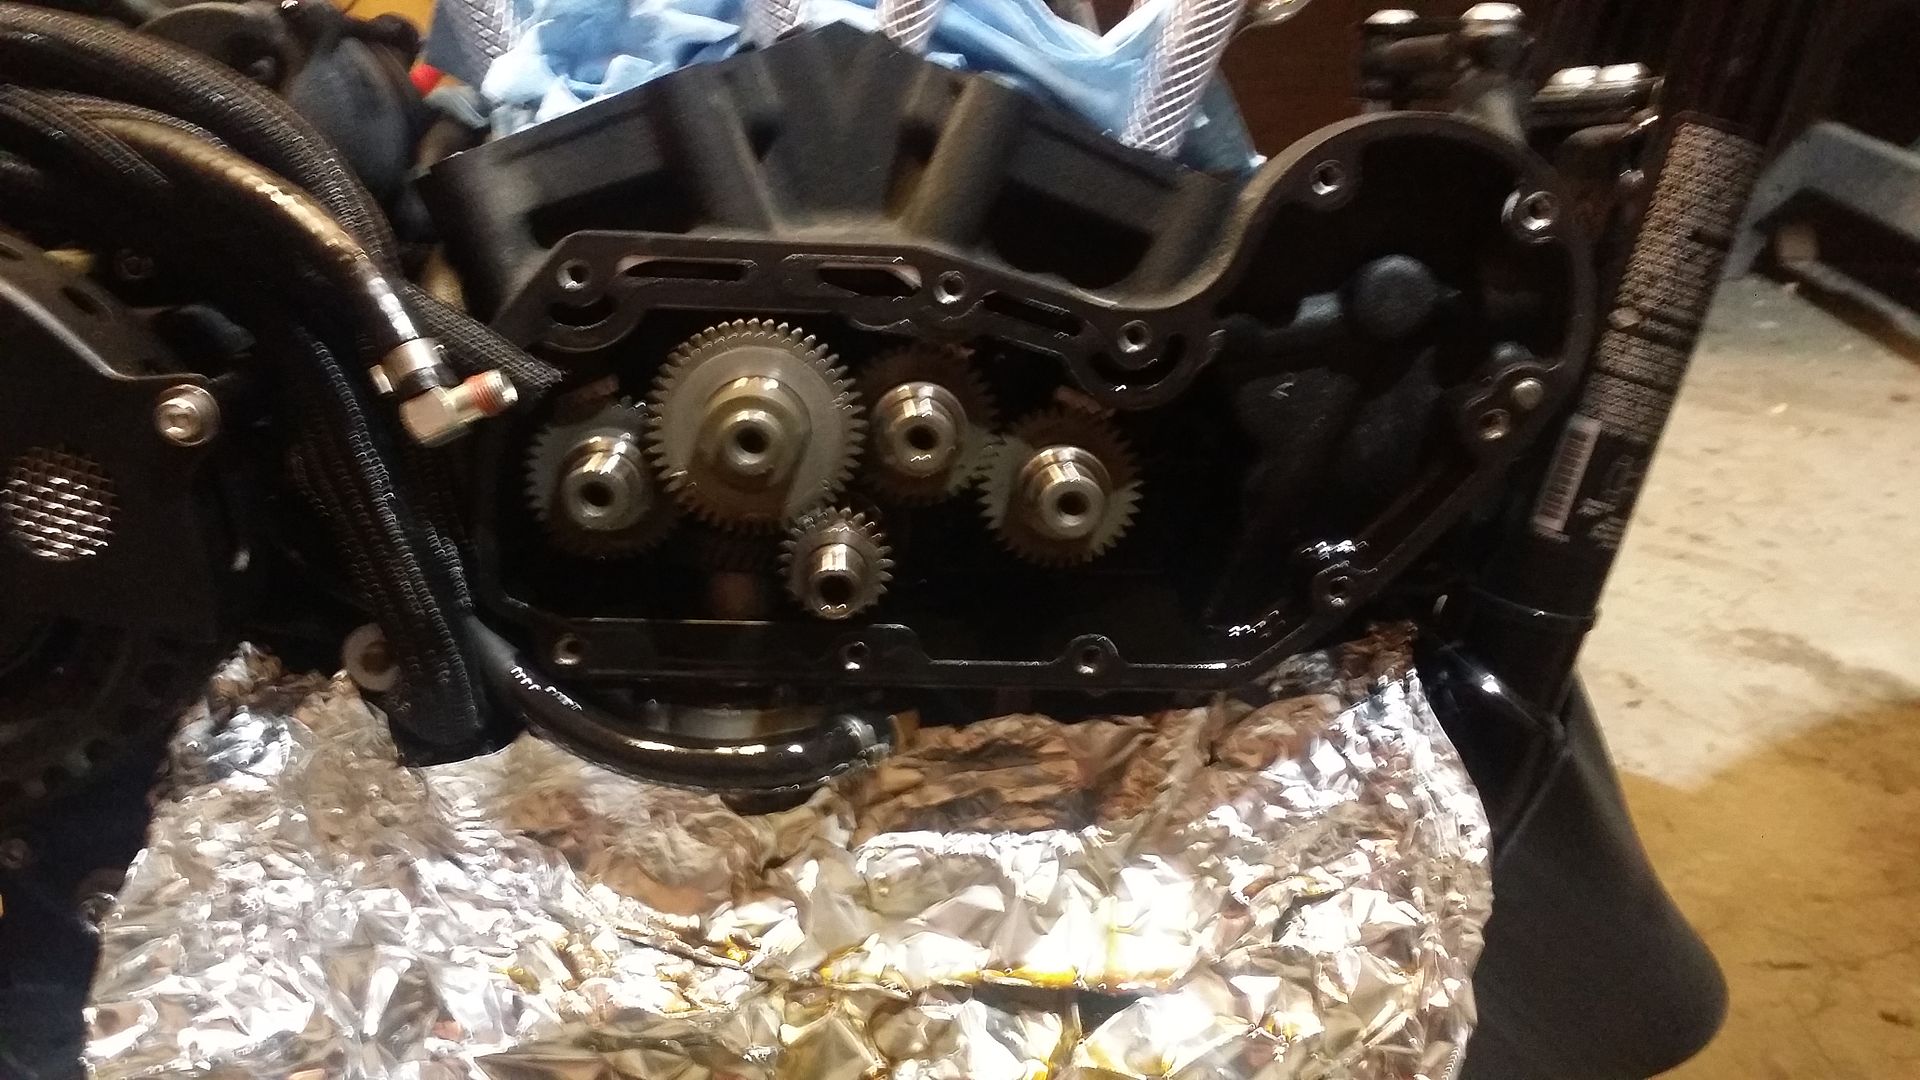
Here are the cams....Very cool. and there they go. I put them into a ziplock with some oil. Why???? I don't know.
Stuffed the holes with some shop towels now time to move on to the clutch side.....


Next I removed the Anti Rotation Device using a 3/8 socket. Those had some serious thread lock on them. Got them out though.

Repeated for the Front Cylinder
Pulled the tappets and labeled them individually in their own ziplock with oil. Overkill??? Probably.

Once everything was removed I stuffed all holes with shop towels.

Next I took the bike down off the lift and put a catch pan under it. I used a 3/16 Allen socket to remove all the cam cover bolts. They are different sizes so be sure to keep track...Some use a piece of cardboard...I went over board and used a piece of mdf.
I pulled the cam cover off. Must be lucky again. Mine came right off with very little
force. I was sure to use aluminum foil to catch and funnel the oil to the catch pan.

There is my ugly mug lol...give me a break...been in the garage the whole day.


Here are the cams....Very cool. and there they go. I put them into a ziplock with some oil. Why???? I don't know.


Stuffed the holes with some shop towels now time to move on to the clutch side.....

#5
12-17-2014, 01:42 AM
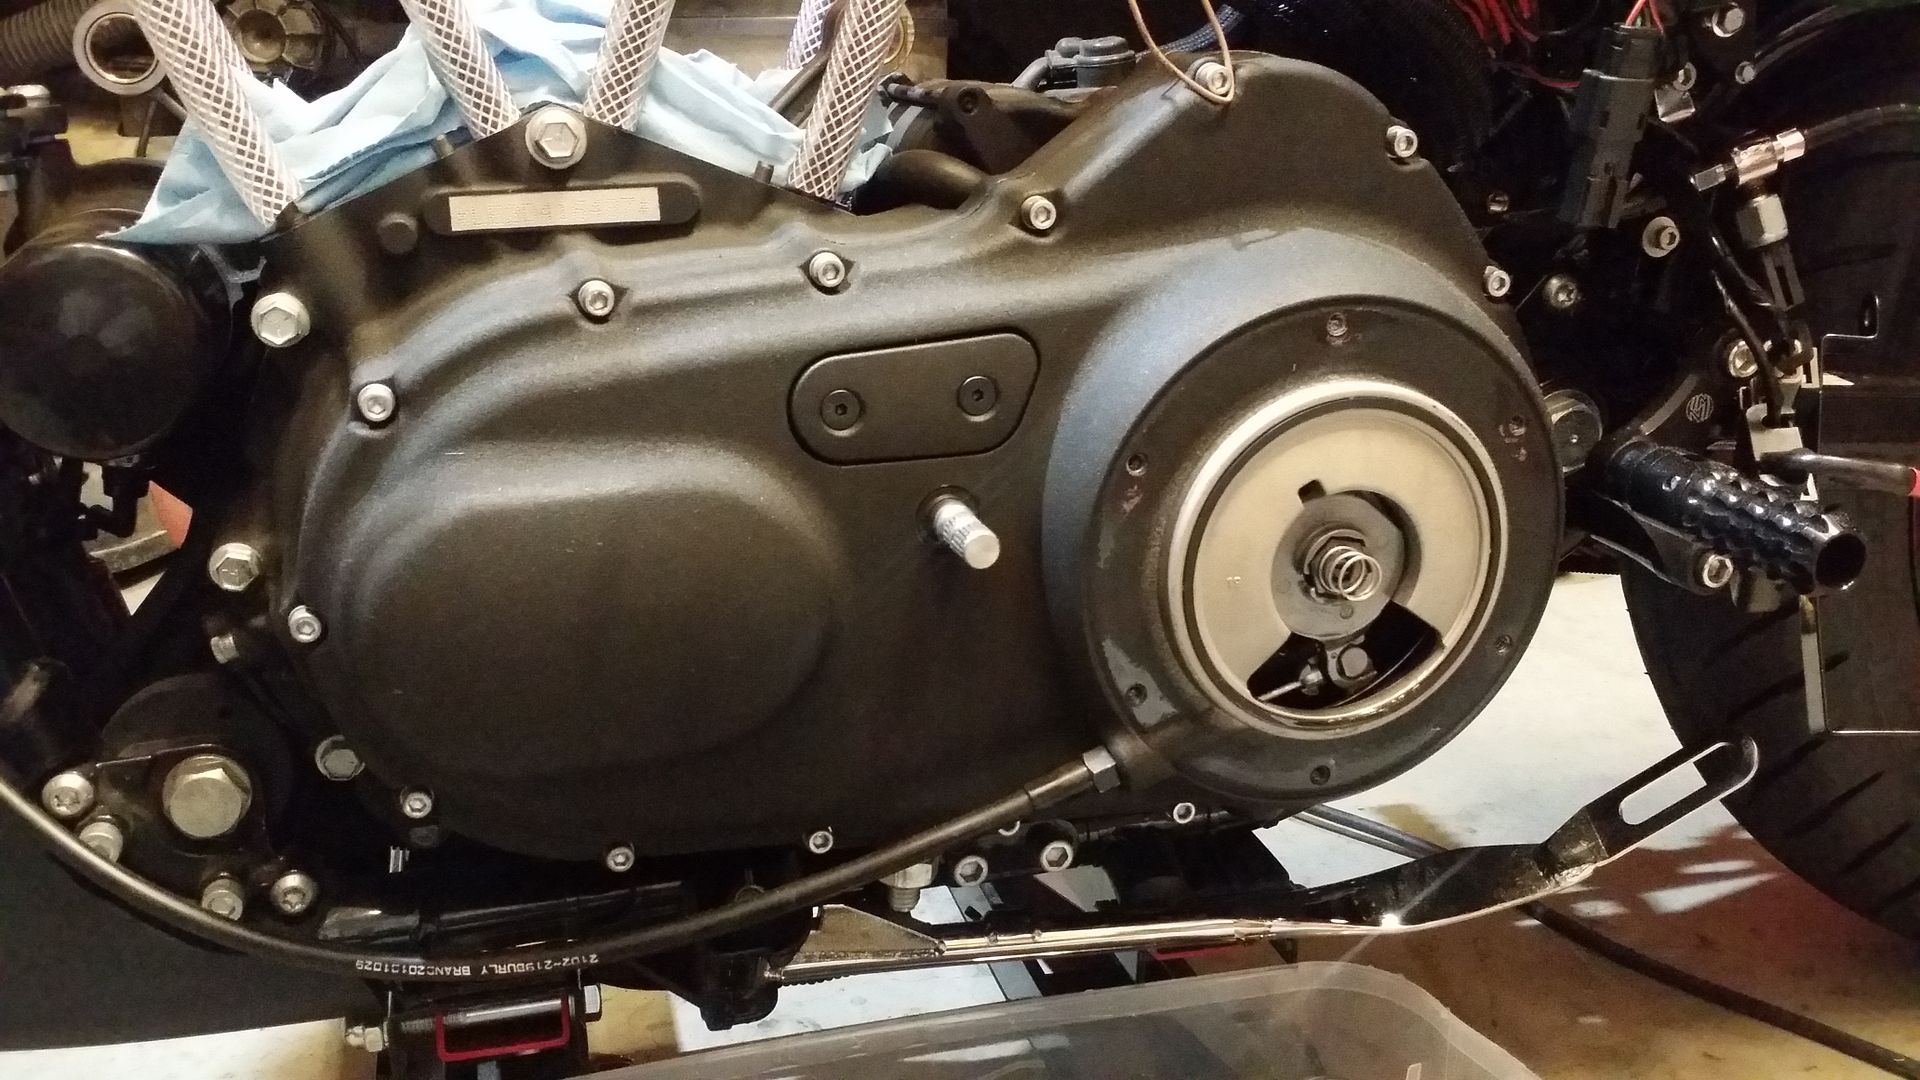
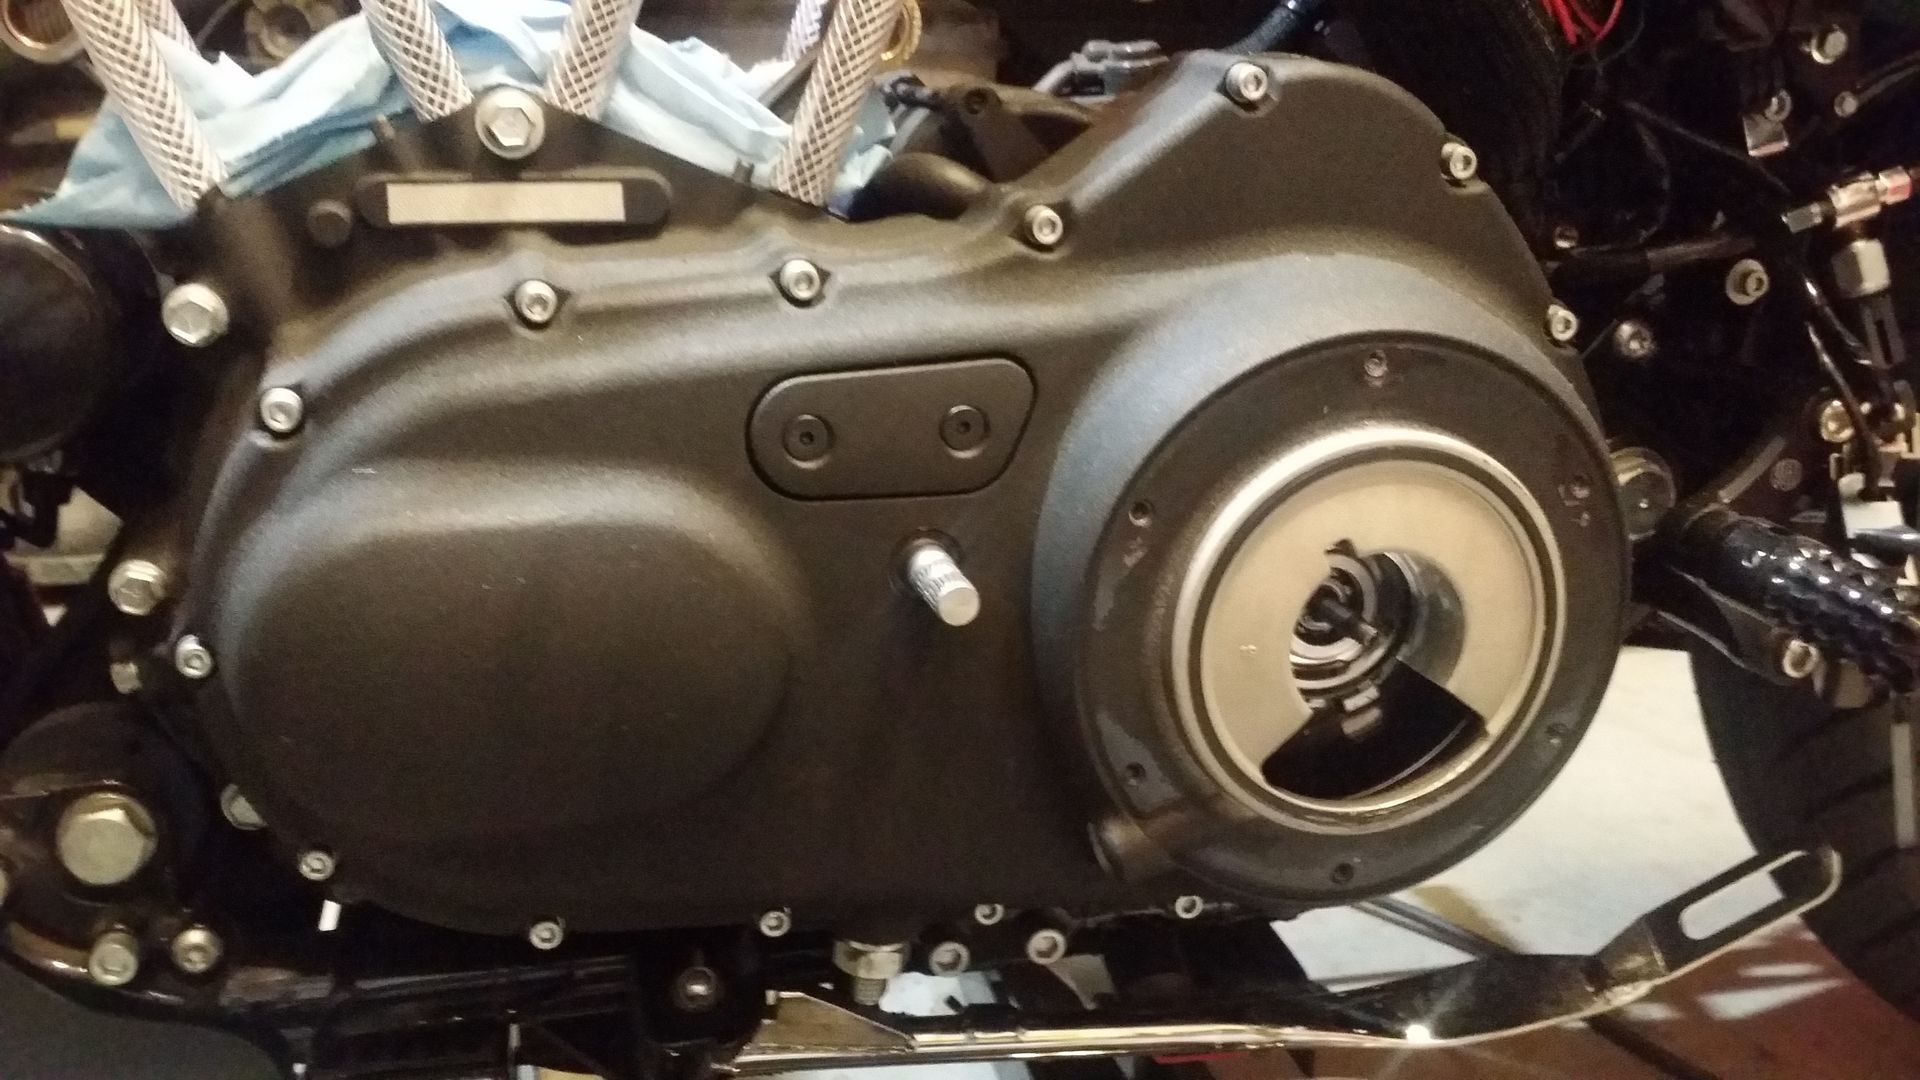
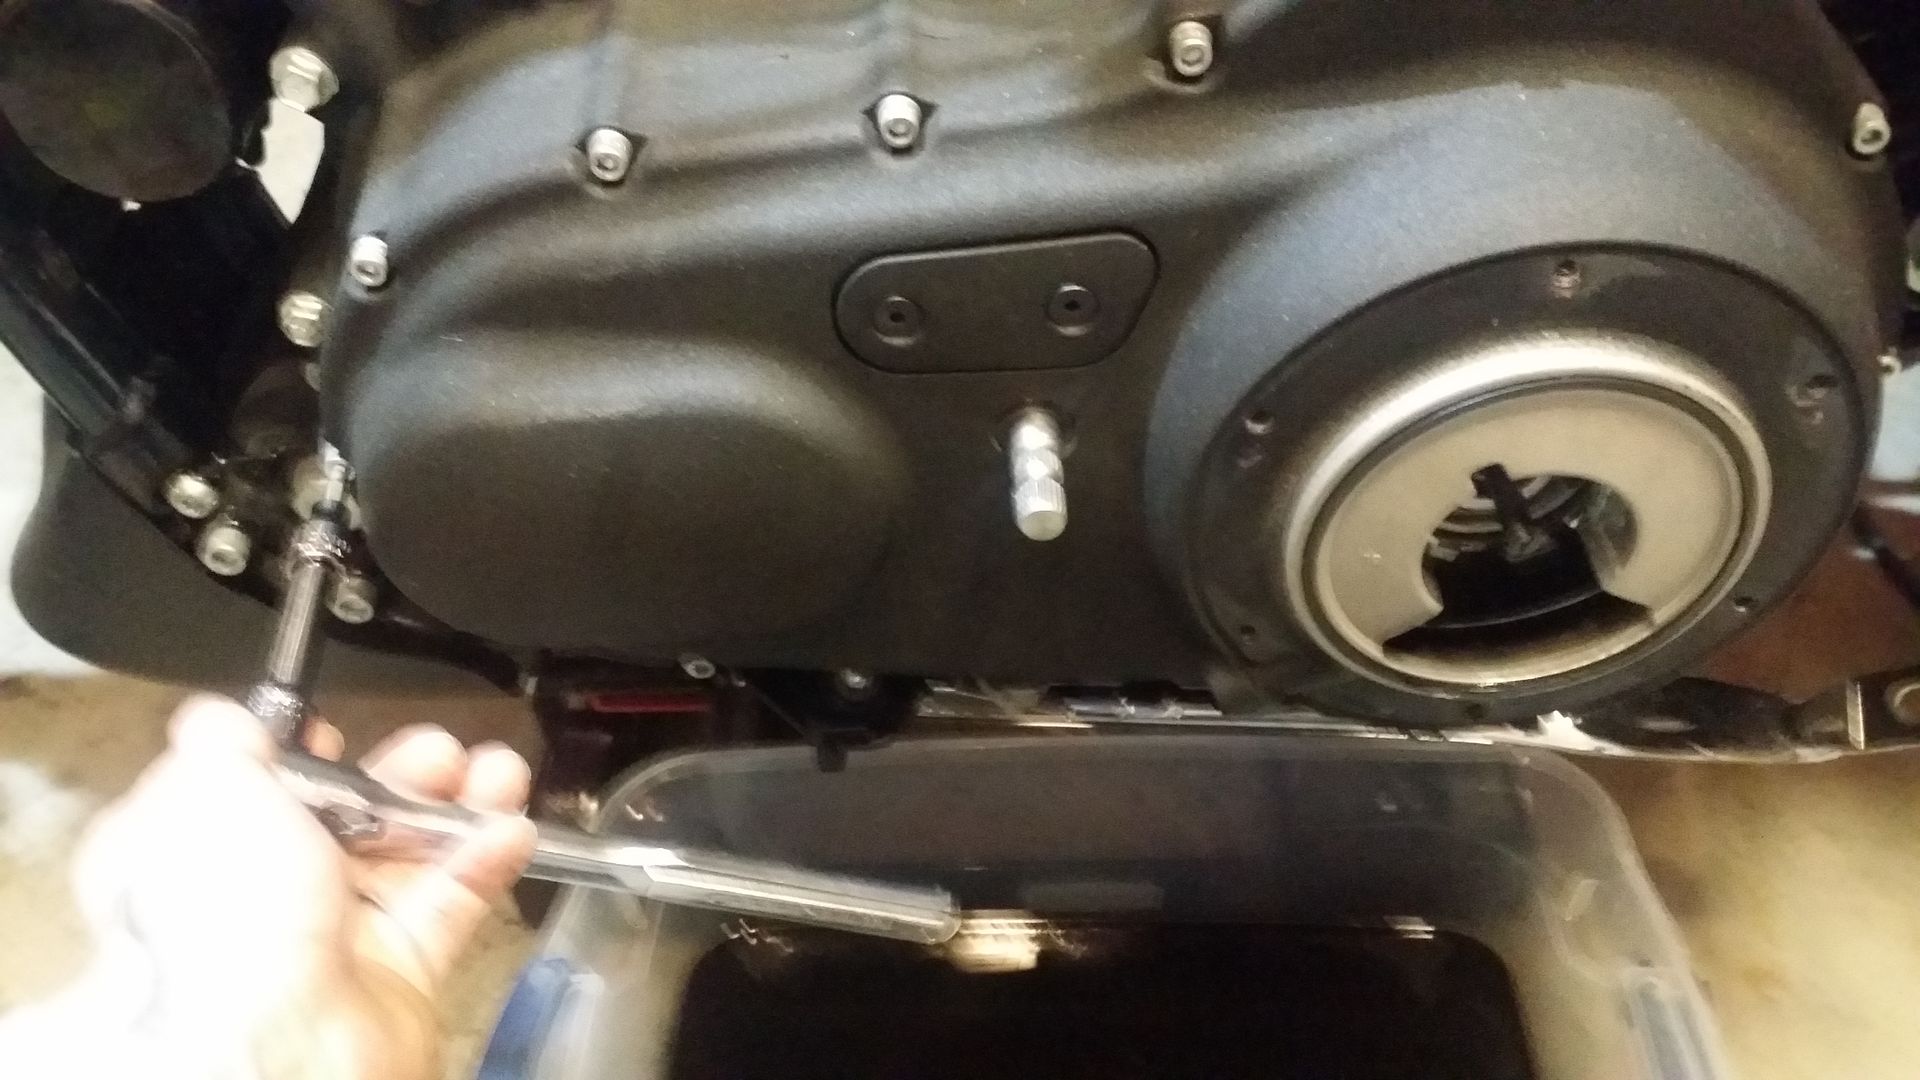
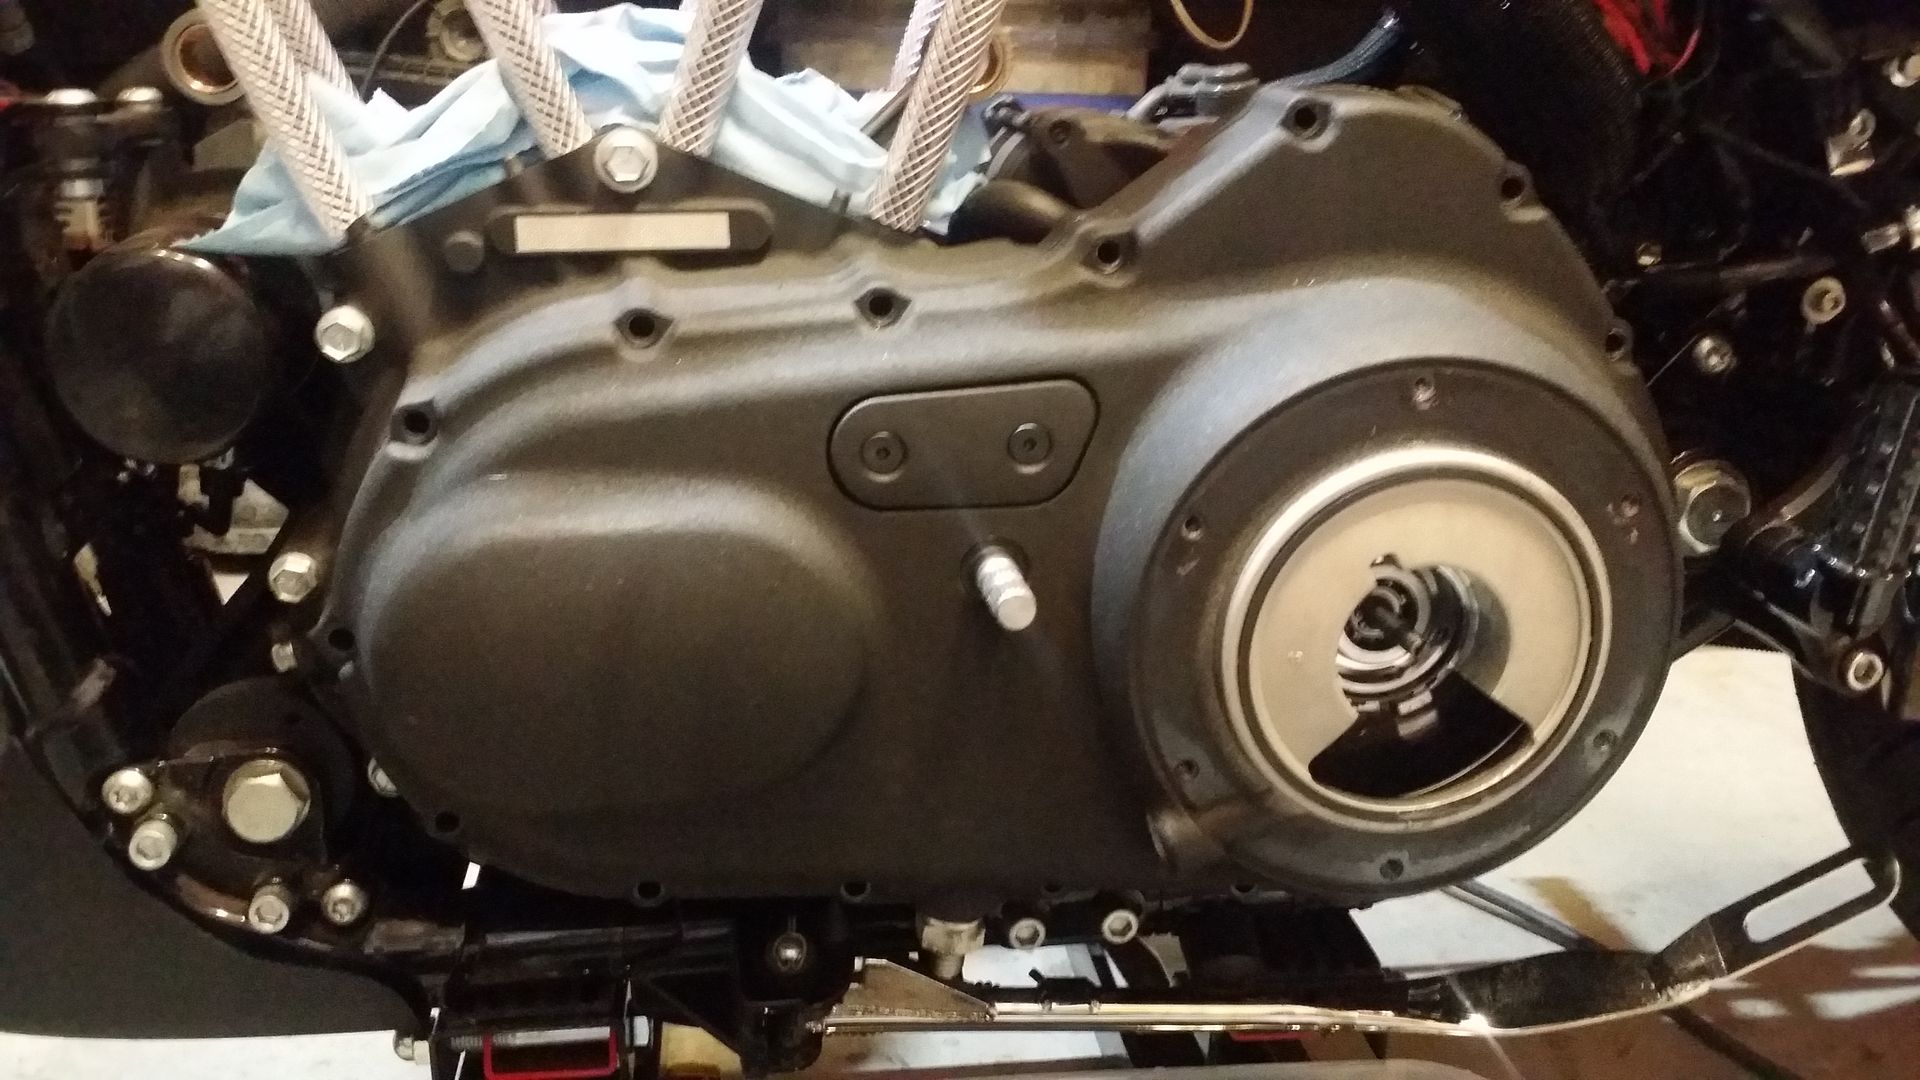
Ok so now to take off the primary / clutch cover. First I removed the RSD Rear Set shifter using a 3/16 allen T-Handle.

Next drained the primary fluid by removing the drain plug with a 5/8 wrench
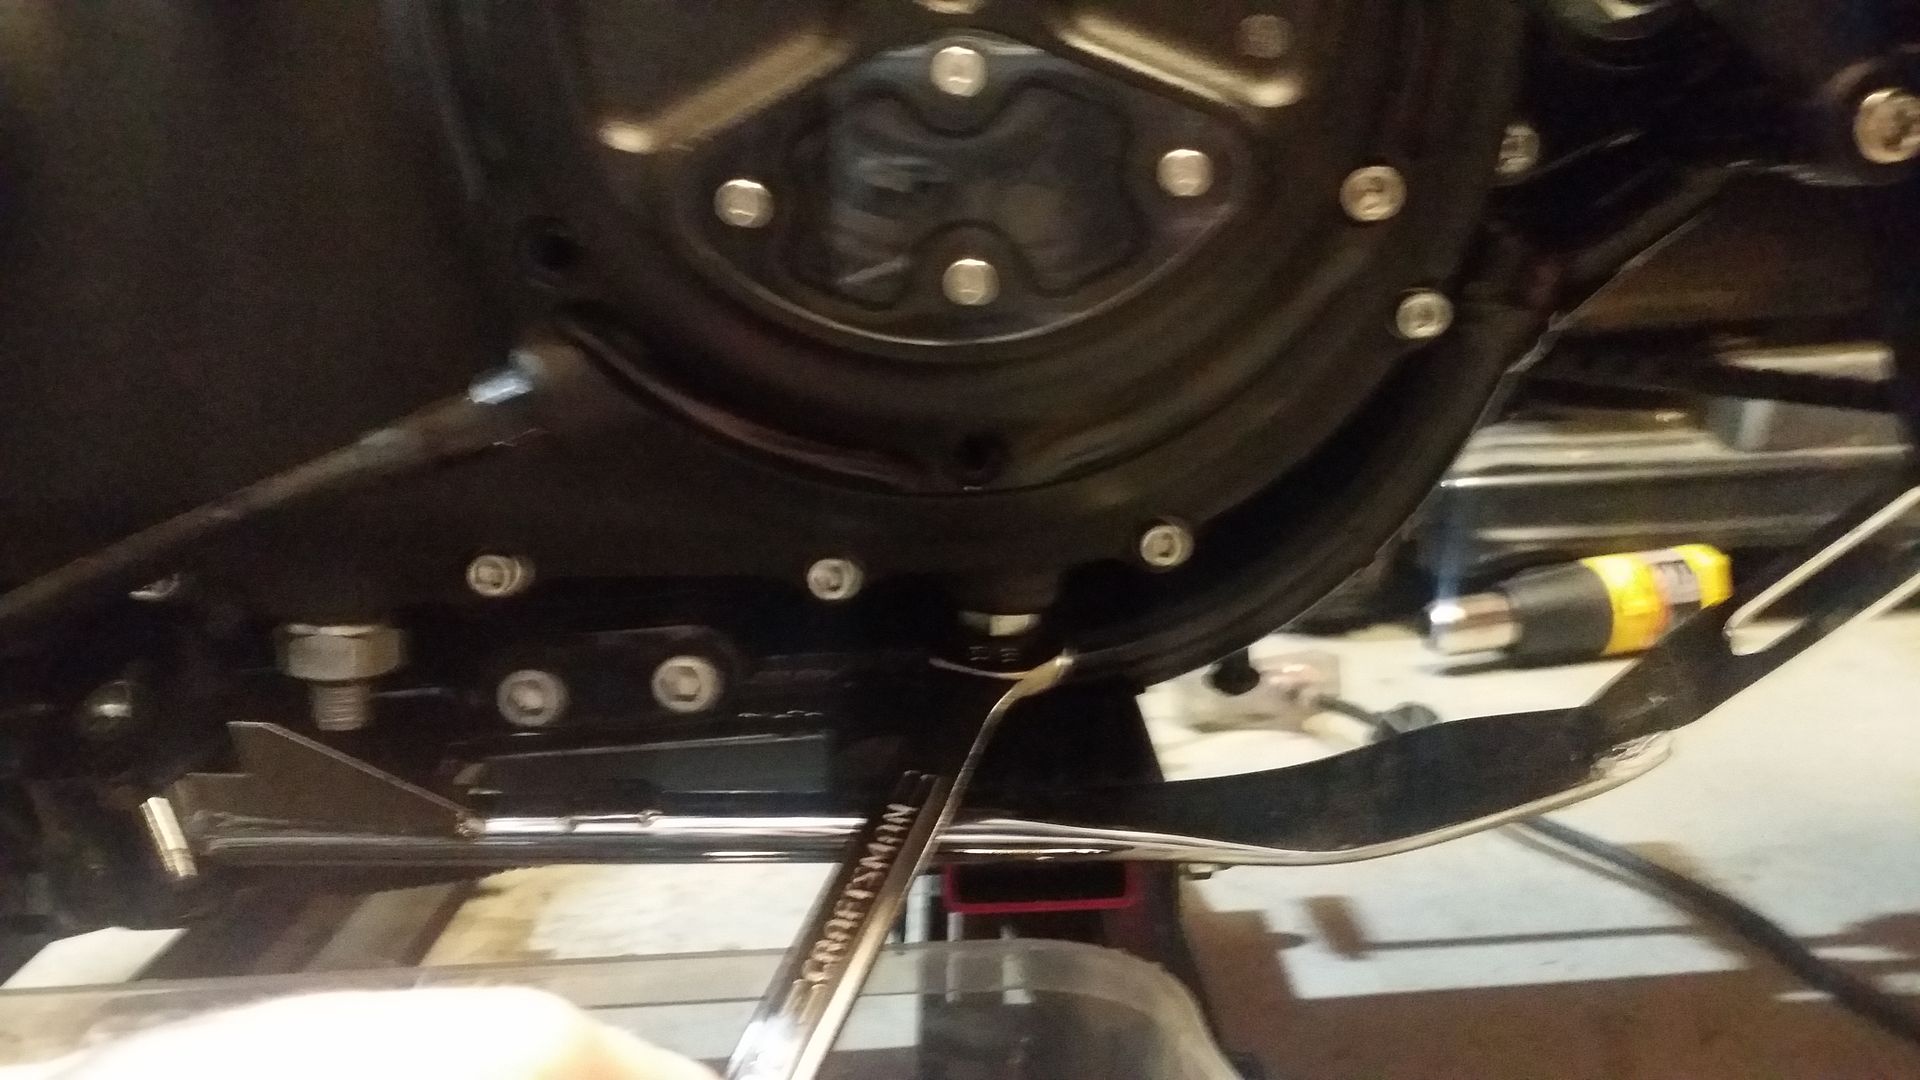
Next used a cresent wrench to loosen the primary chain tensioner. Just turned the little screw in the center.
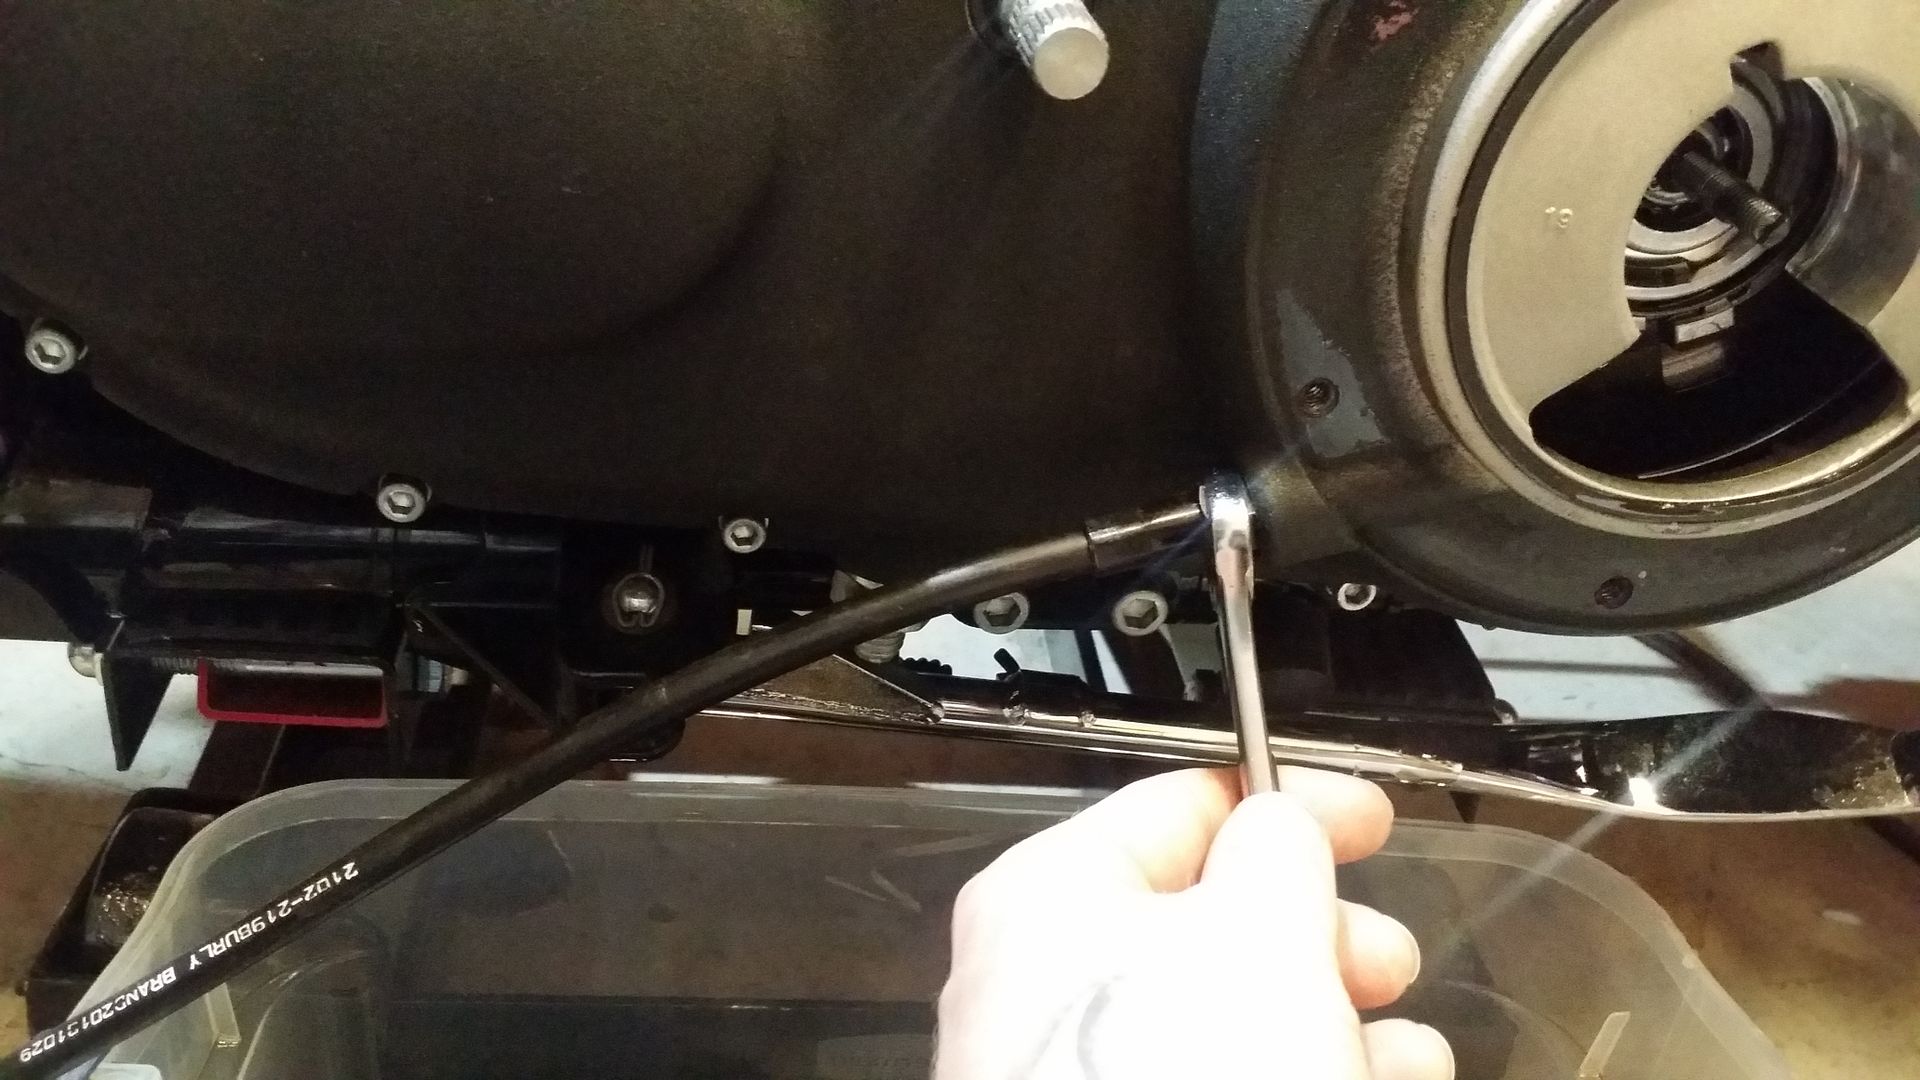
Loosened the clutch tension by cracking the clutch cable nuts with a 9/16 and 1/2 wrench and turning to loosen the and remove the cable and lever.
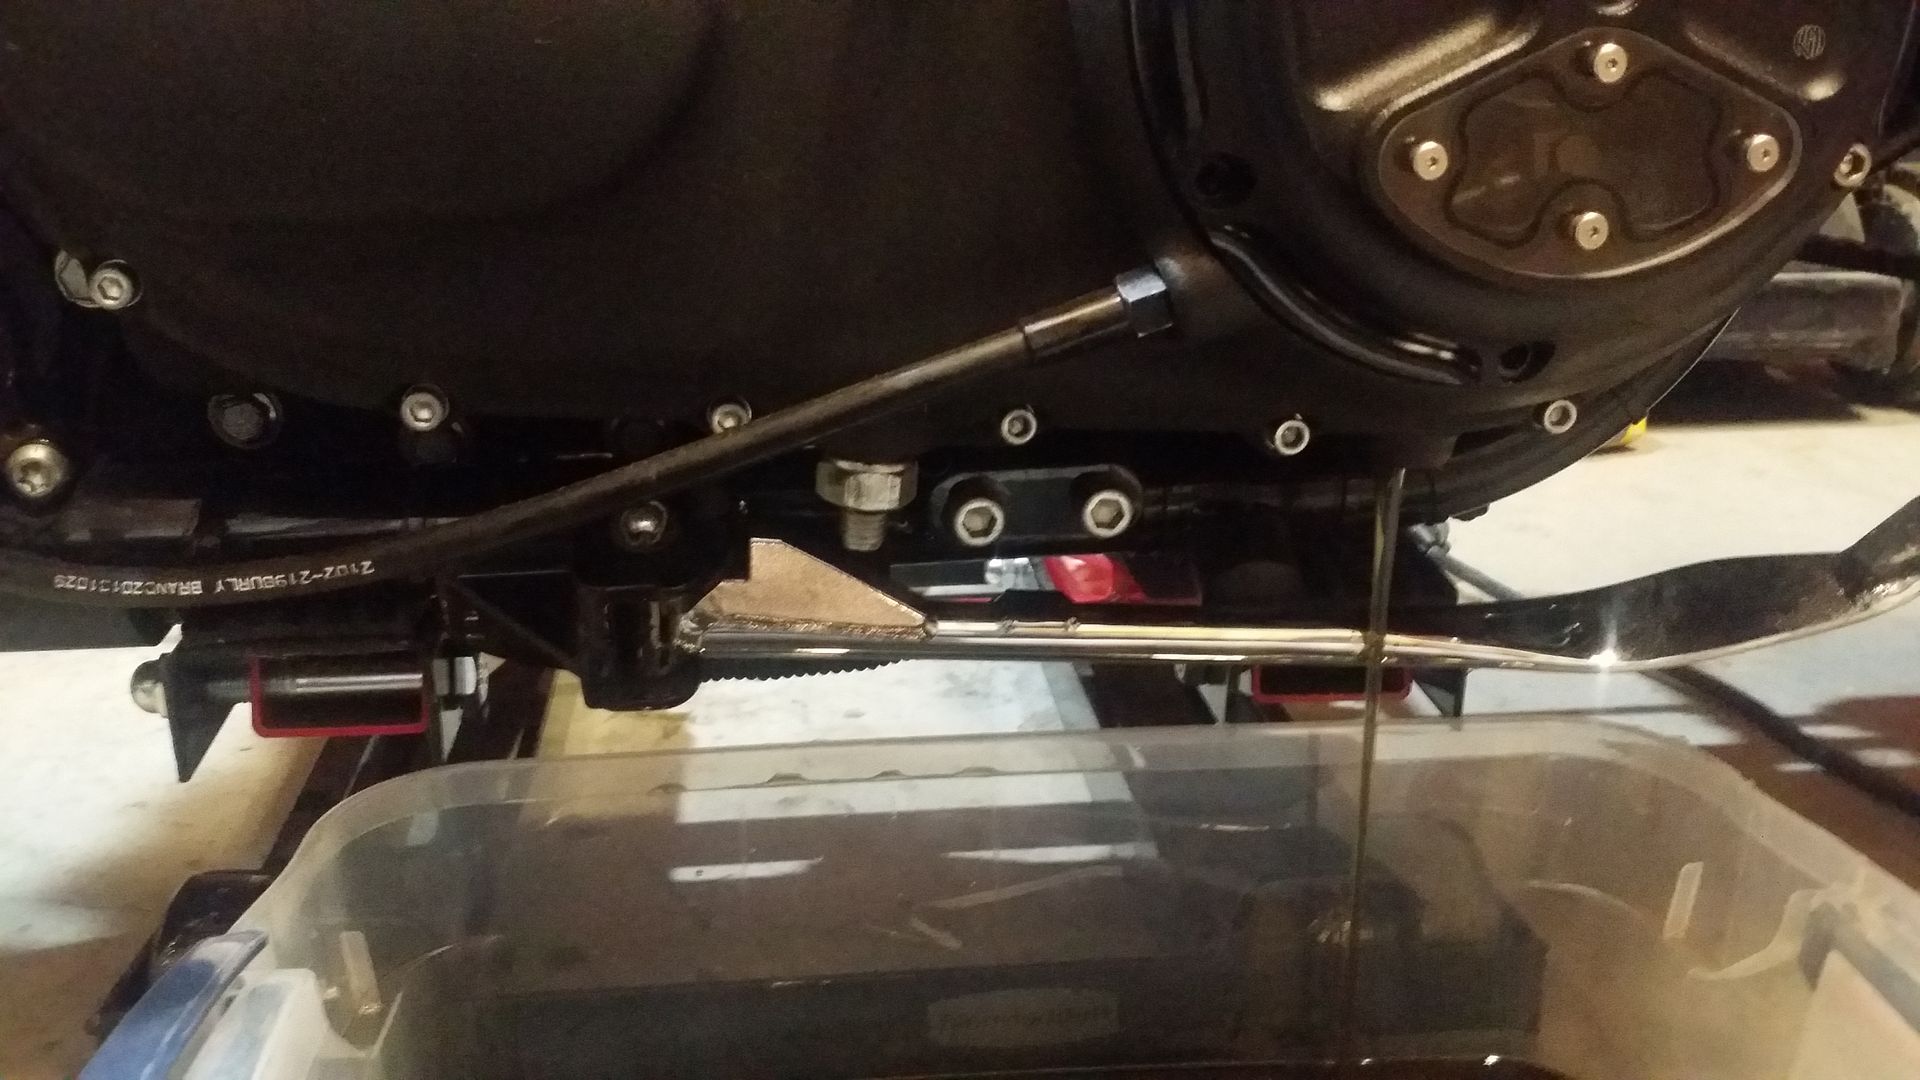
I used a 3/16 T-Handle to remove the bolts for the Derby Cover and Removed the locking nut with spring on the clutch...just pulls off.
Then turned the screw clockwise to remove the clutch cable arm. Took the cable end off of that and removed it.
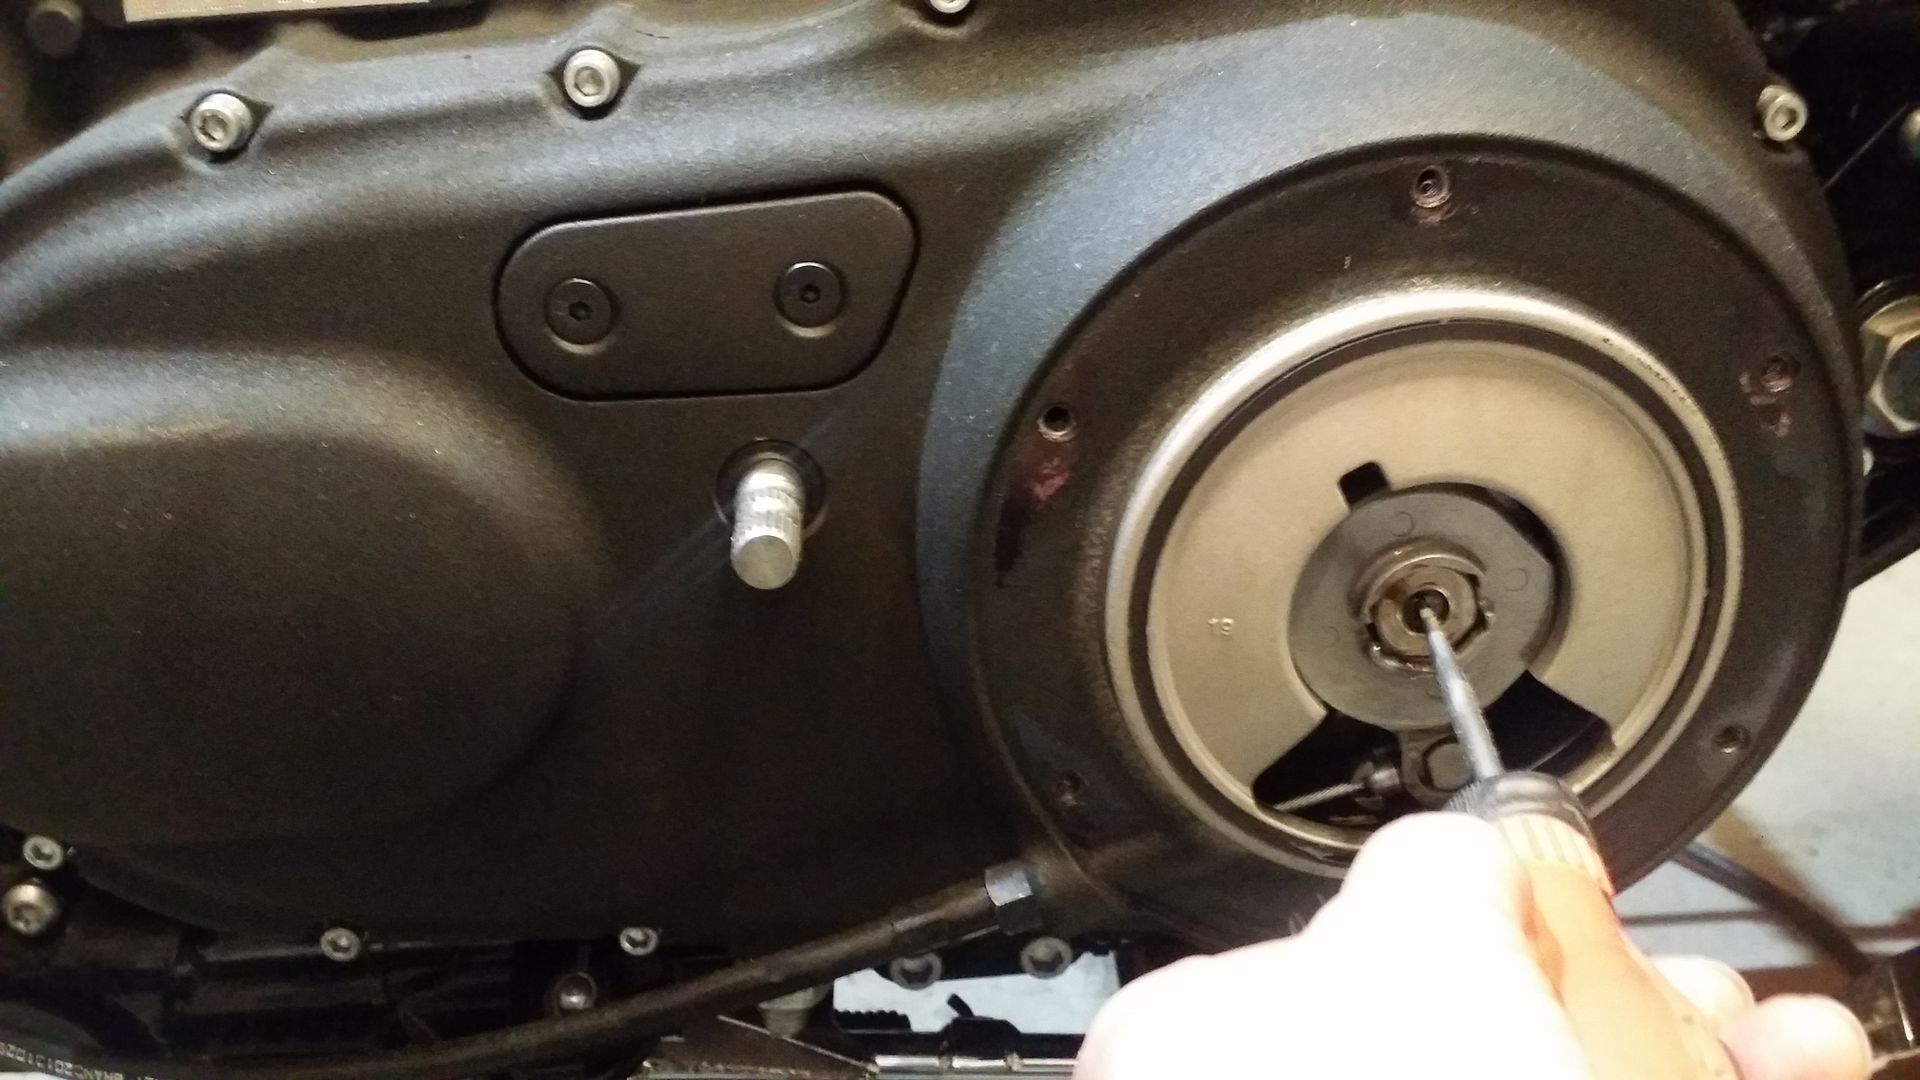
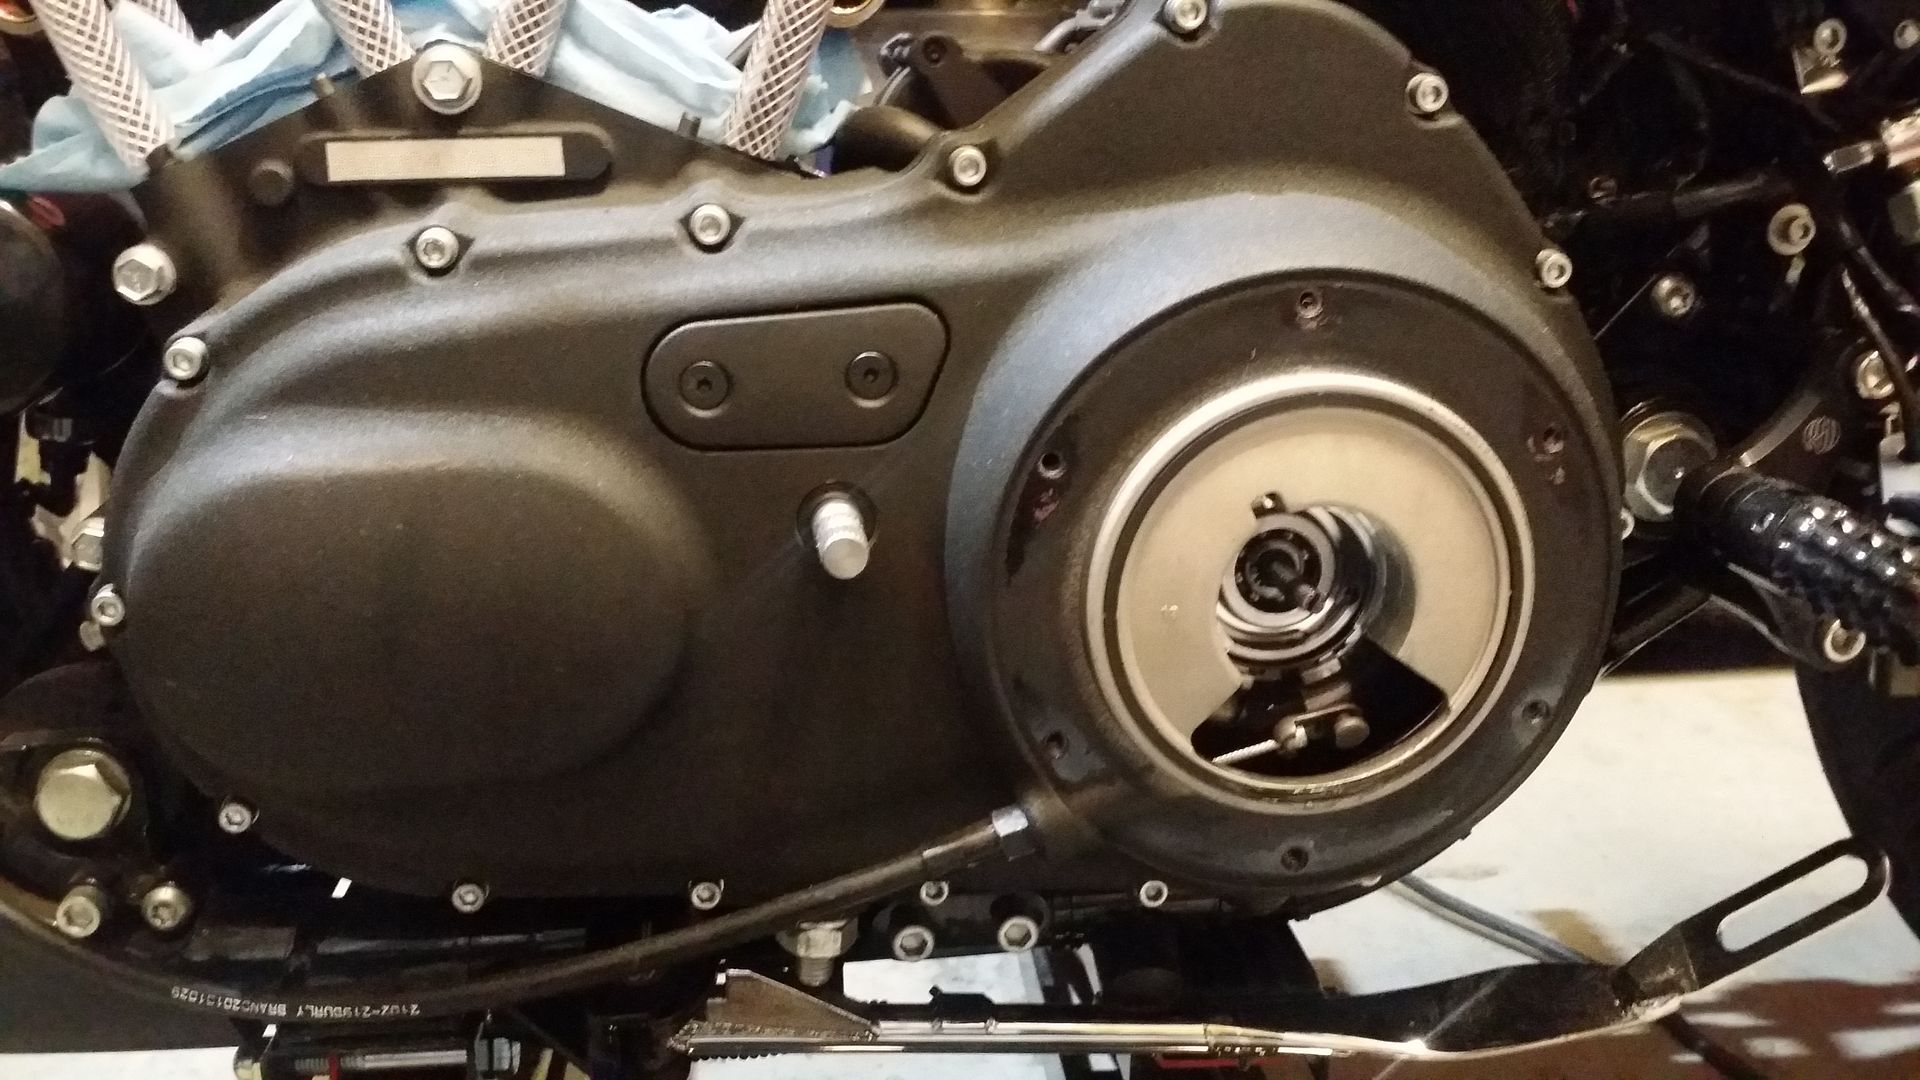

Used 9/16 wrench to remove the clutch cable from the primary cover.
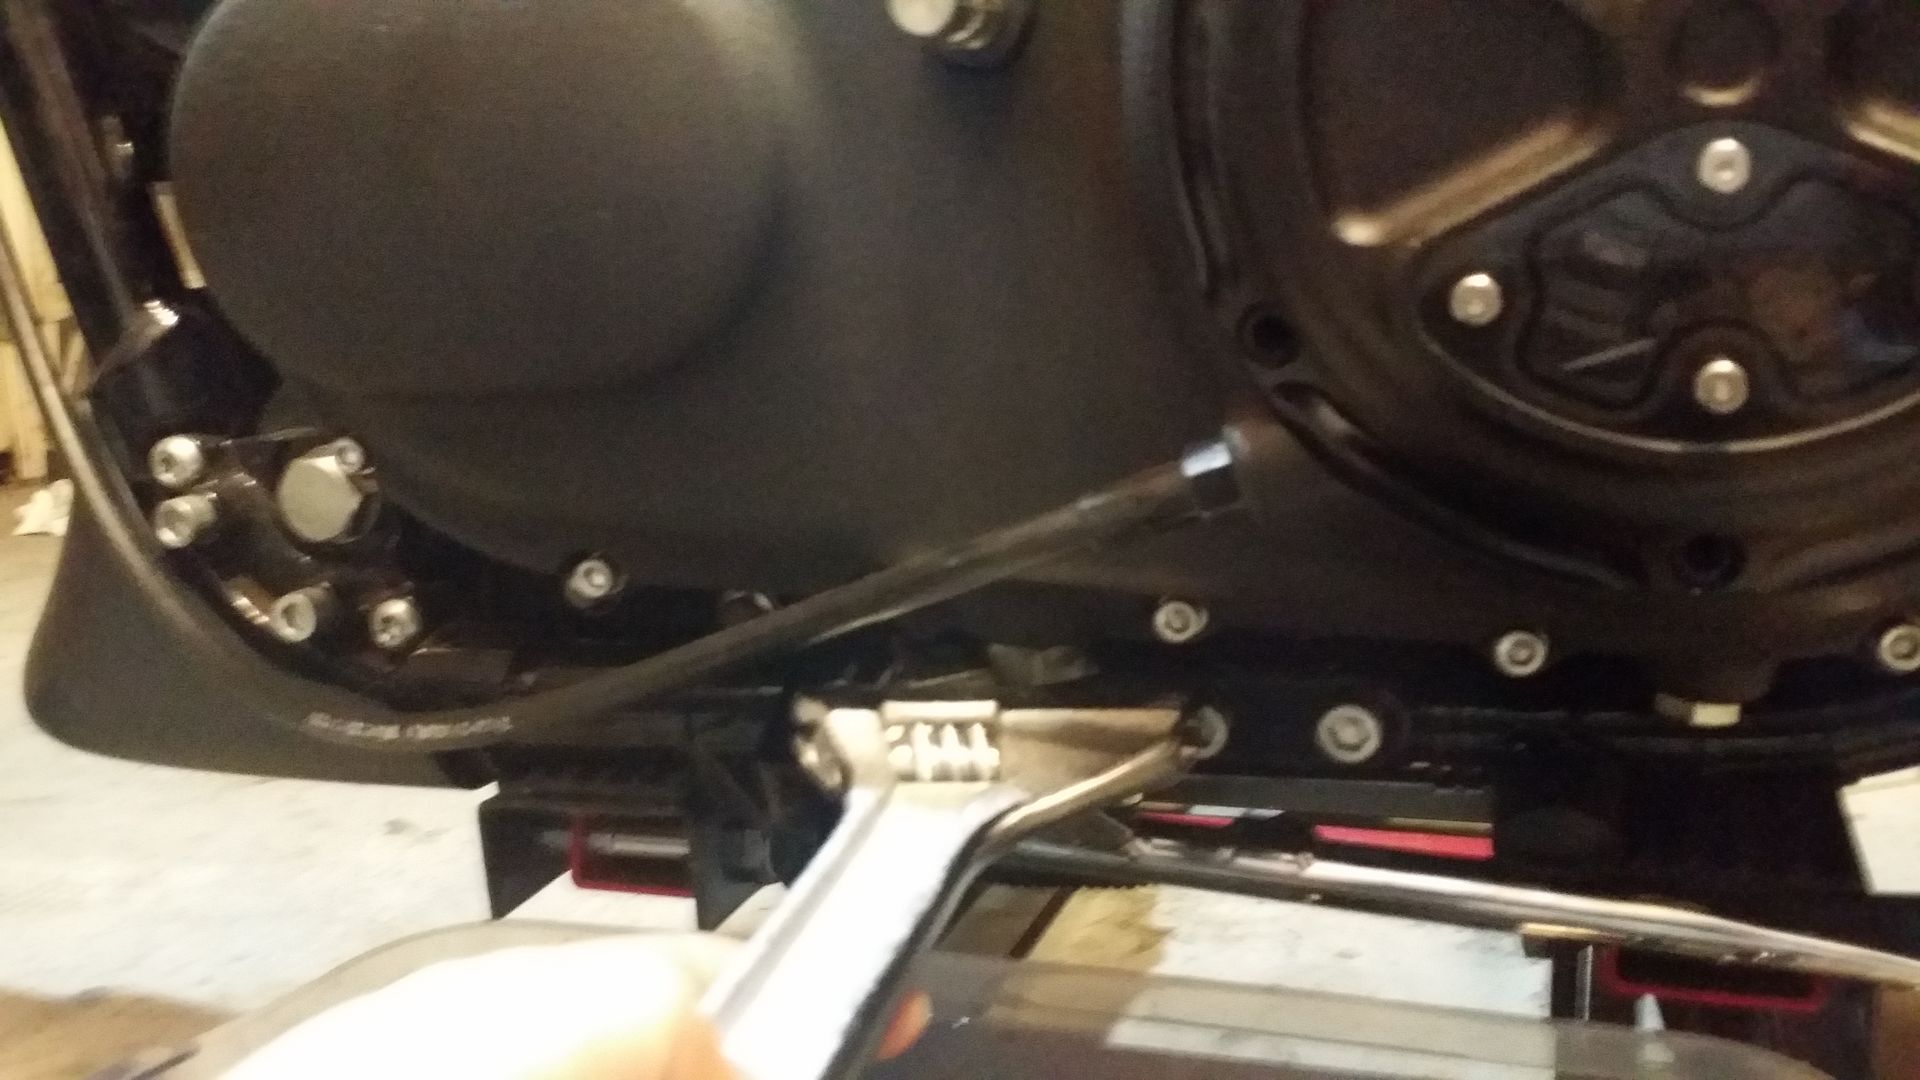
I used a 3/16th allen socket to remove all the bolts from the primary cover. Then popped off the cover...lucky again I guess. It just came right off.
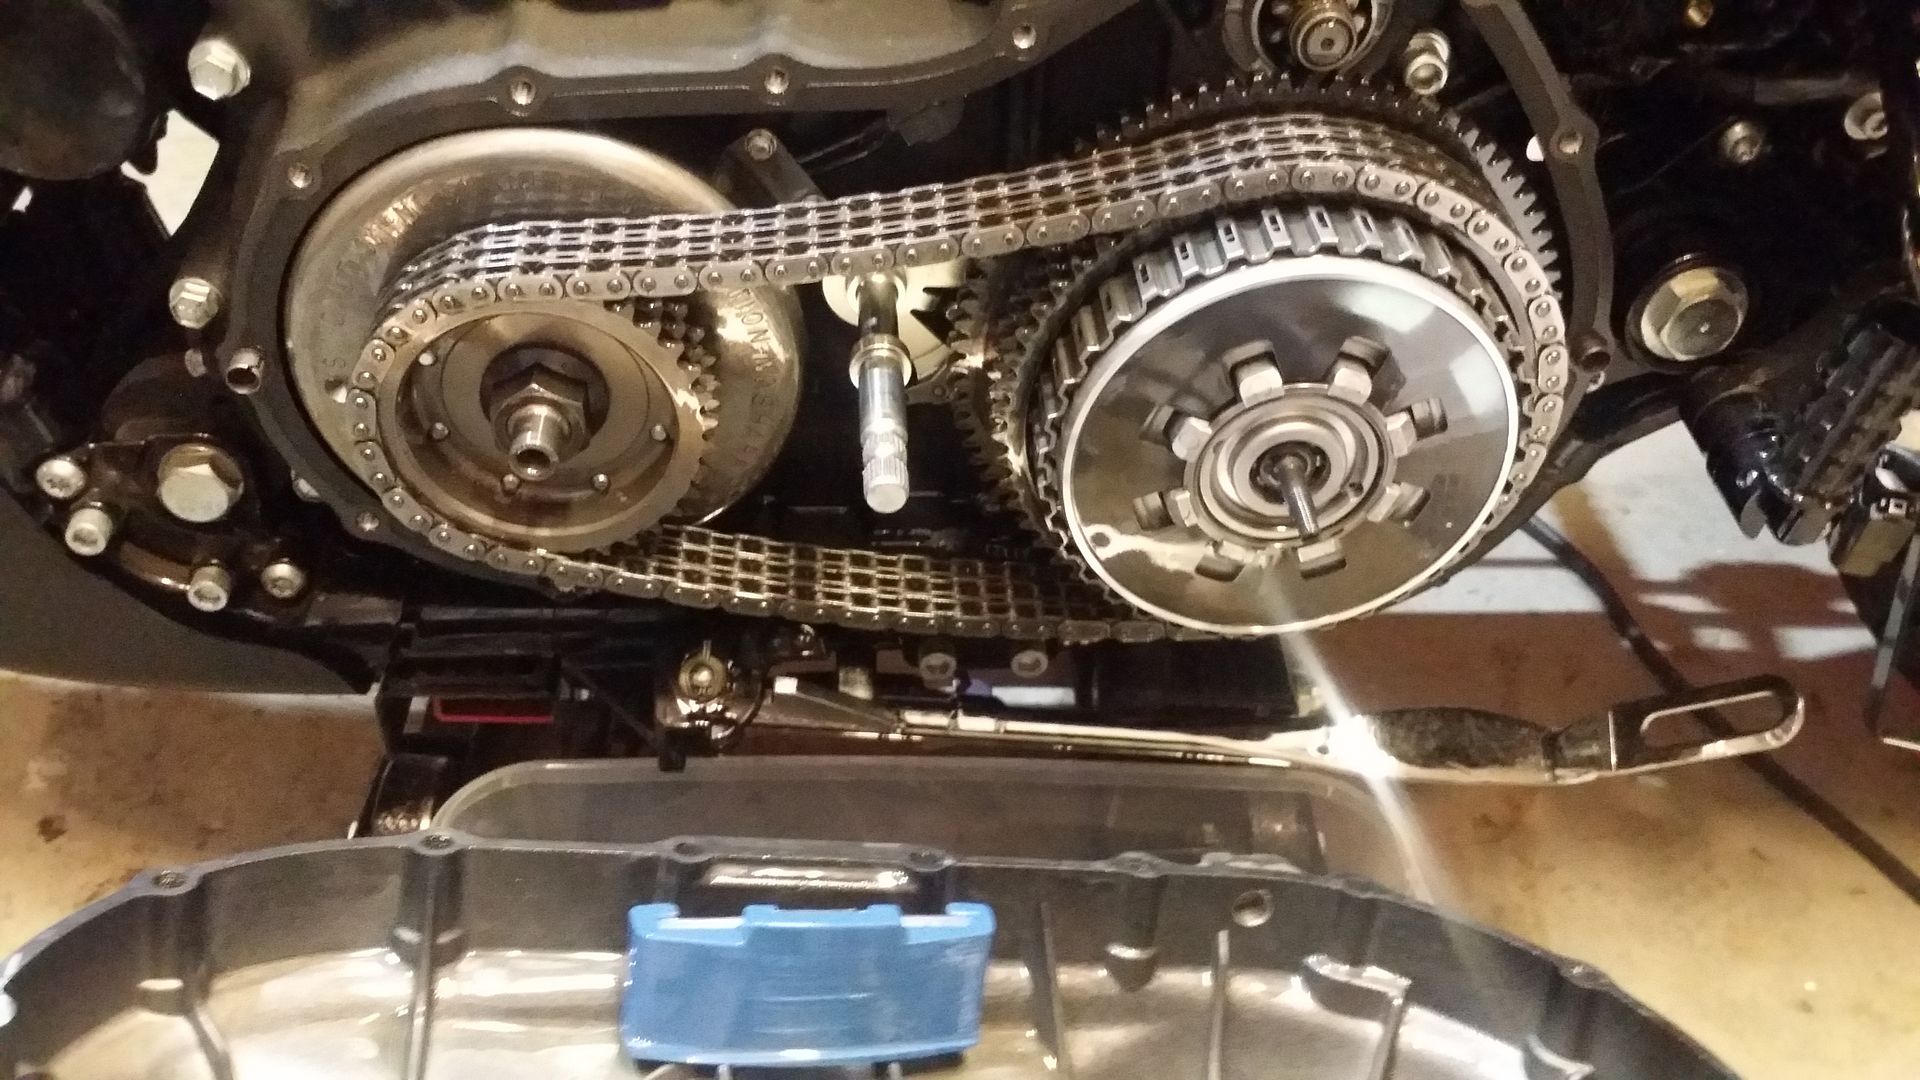
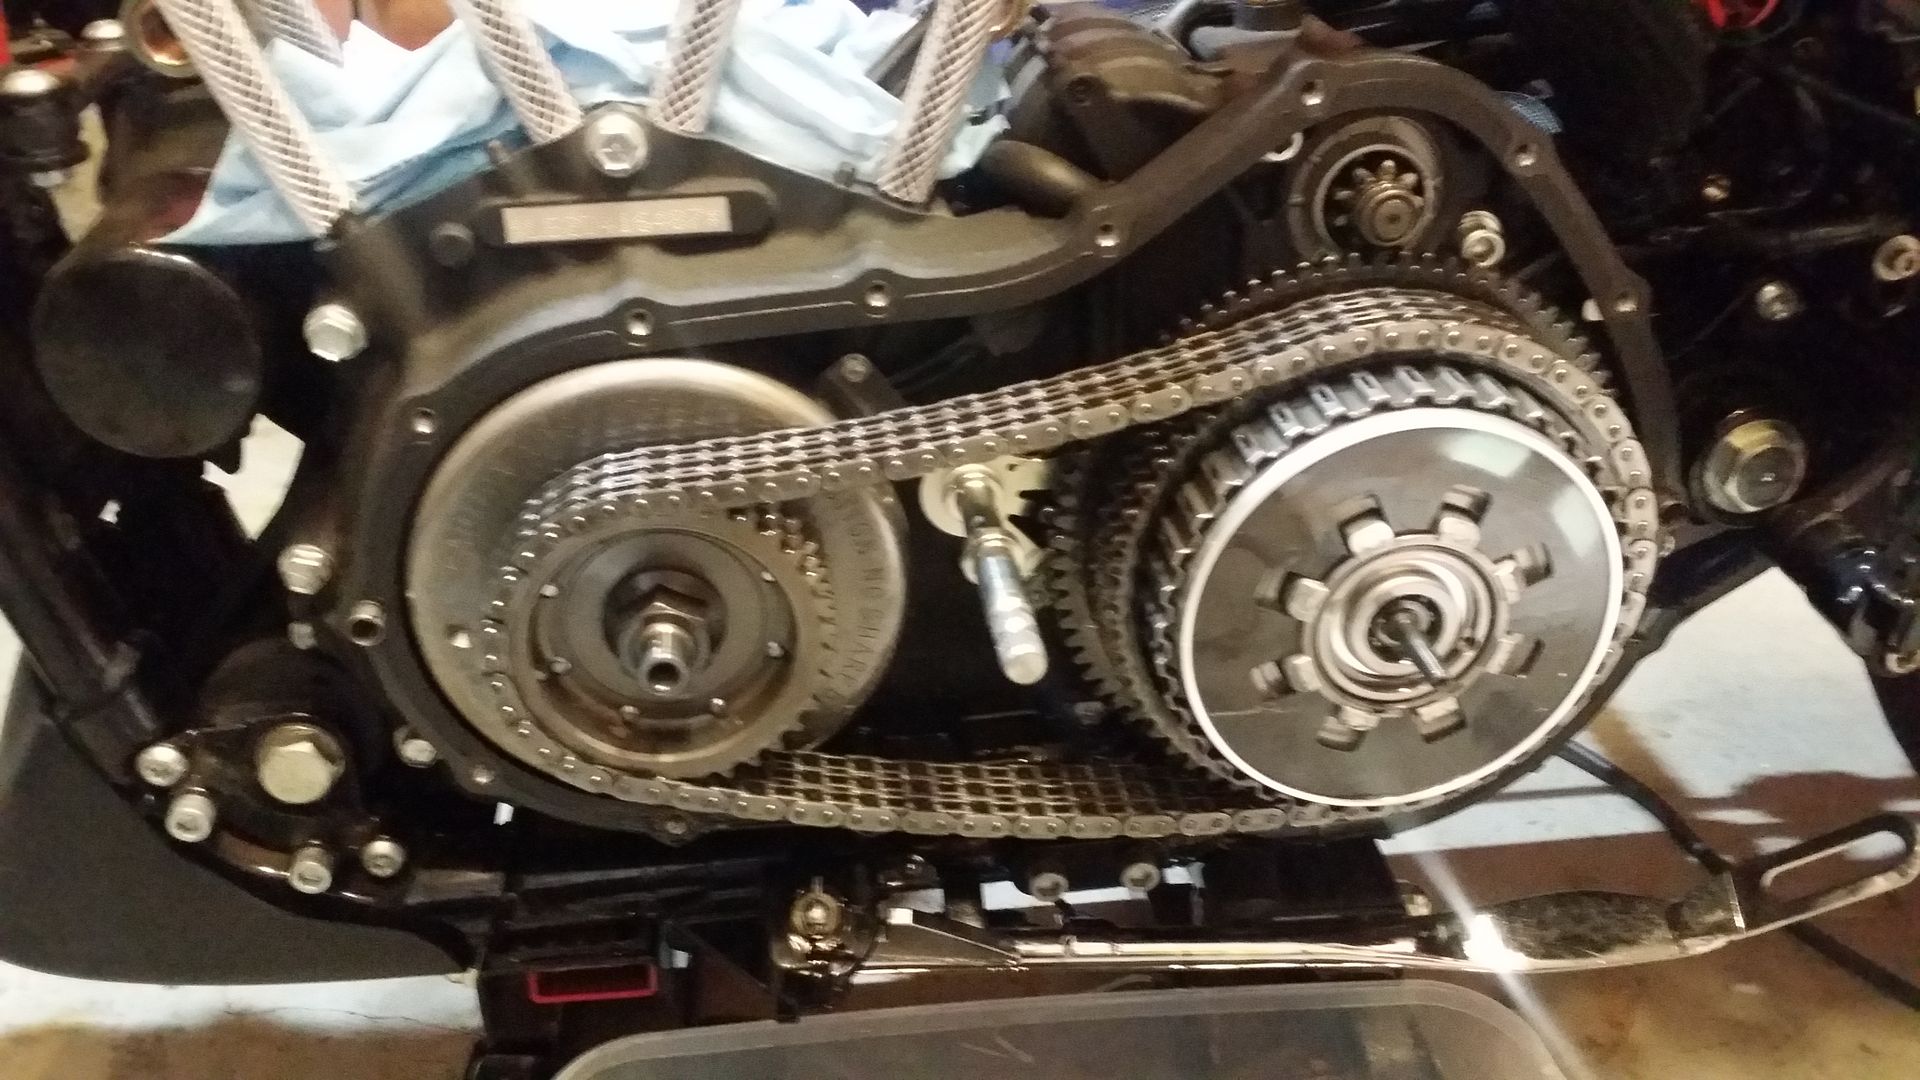

Next drained the primary fluid by removing the drain plug with a 5/8 wrench


Next used a cresent wrench to loosen the primary chain tensioner. Just turned the little screw in the center.

Loosened the clutch tension by cracking the clutch cable nuts with a 9/16 and 1/2 wrench and turning to loosen the and remove the cable and lever.


I used a 3/16 T-Handle to remove the bolts for the Derby Cover and Removed the locking nut with spring on the clutch...just pulls off.

Then turned the screw clockwise to remove the clutch cable arm. Took the cable end off of that and removed it.


Used 9/16 wrench to remove the clutch cable from the primary cover.


I used a 3/16th allen socket to remove all the bolts from the primary cover. Then popped off the cover...lucky again I guess. It just came right off.


#6
12-17-2014, 01:43 AM
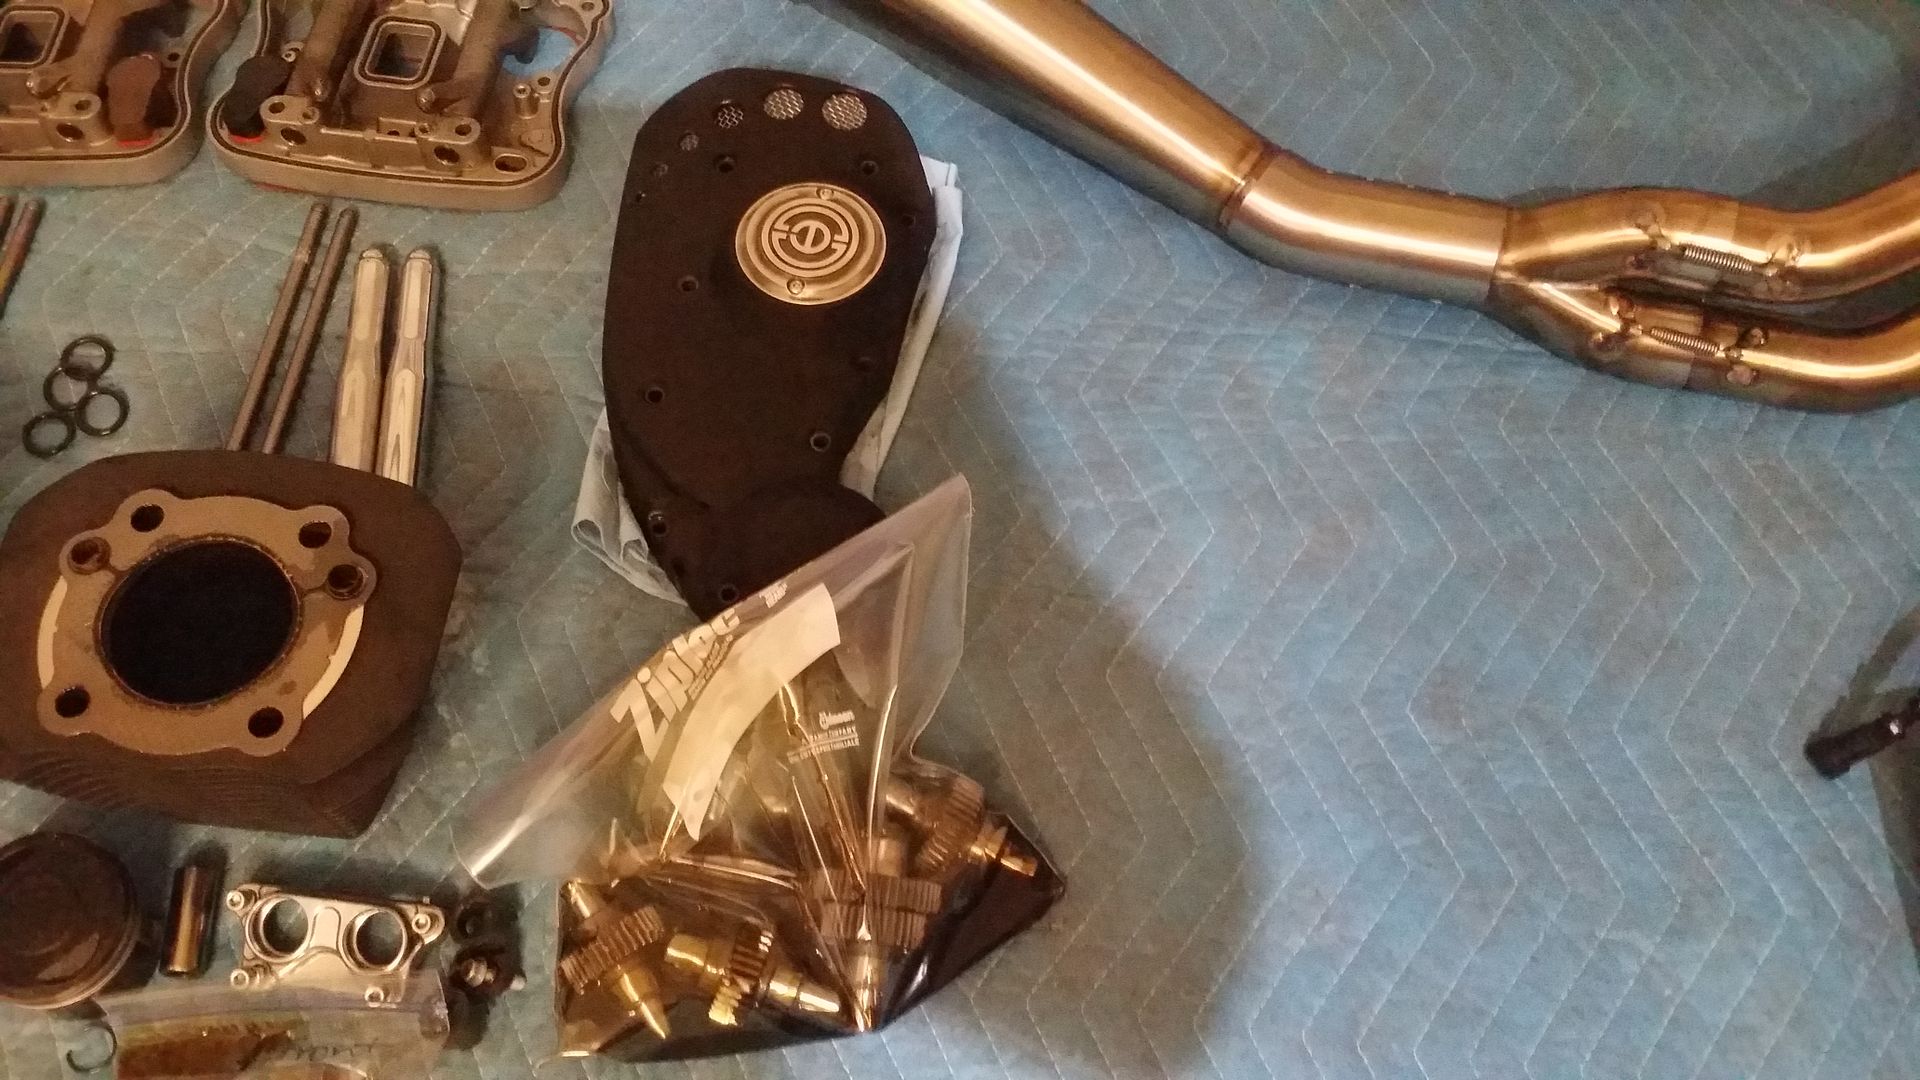
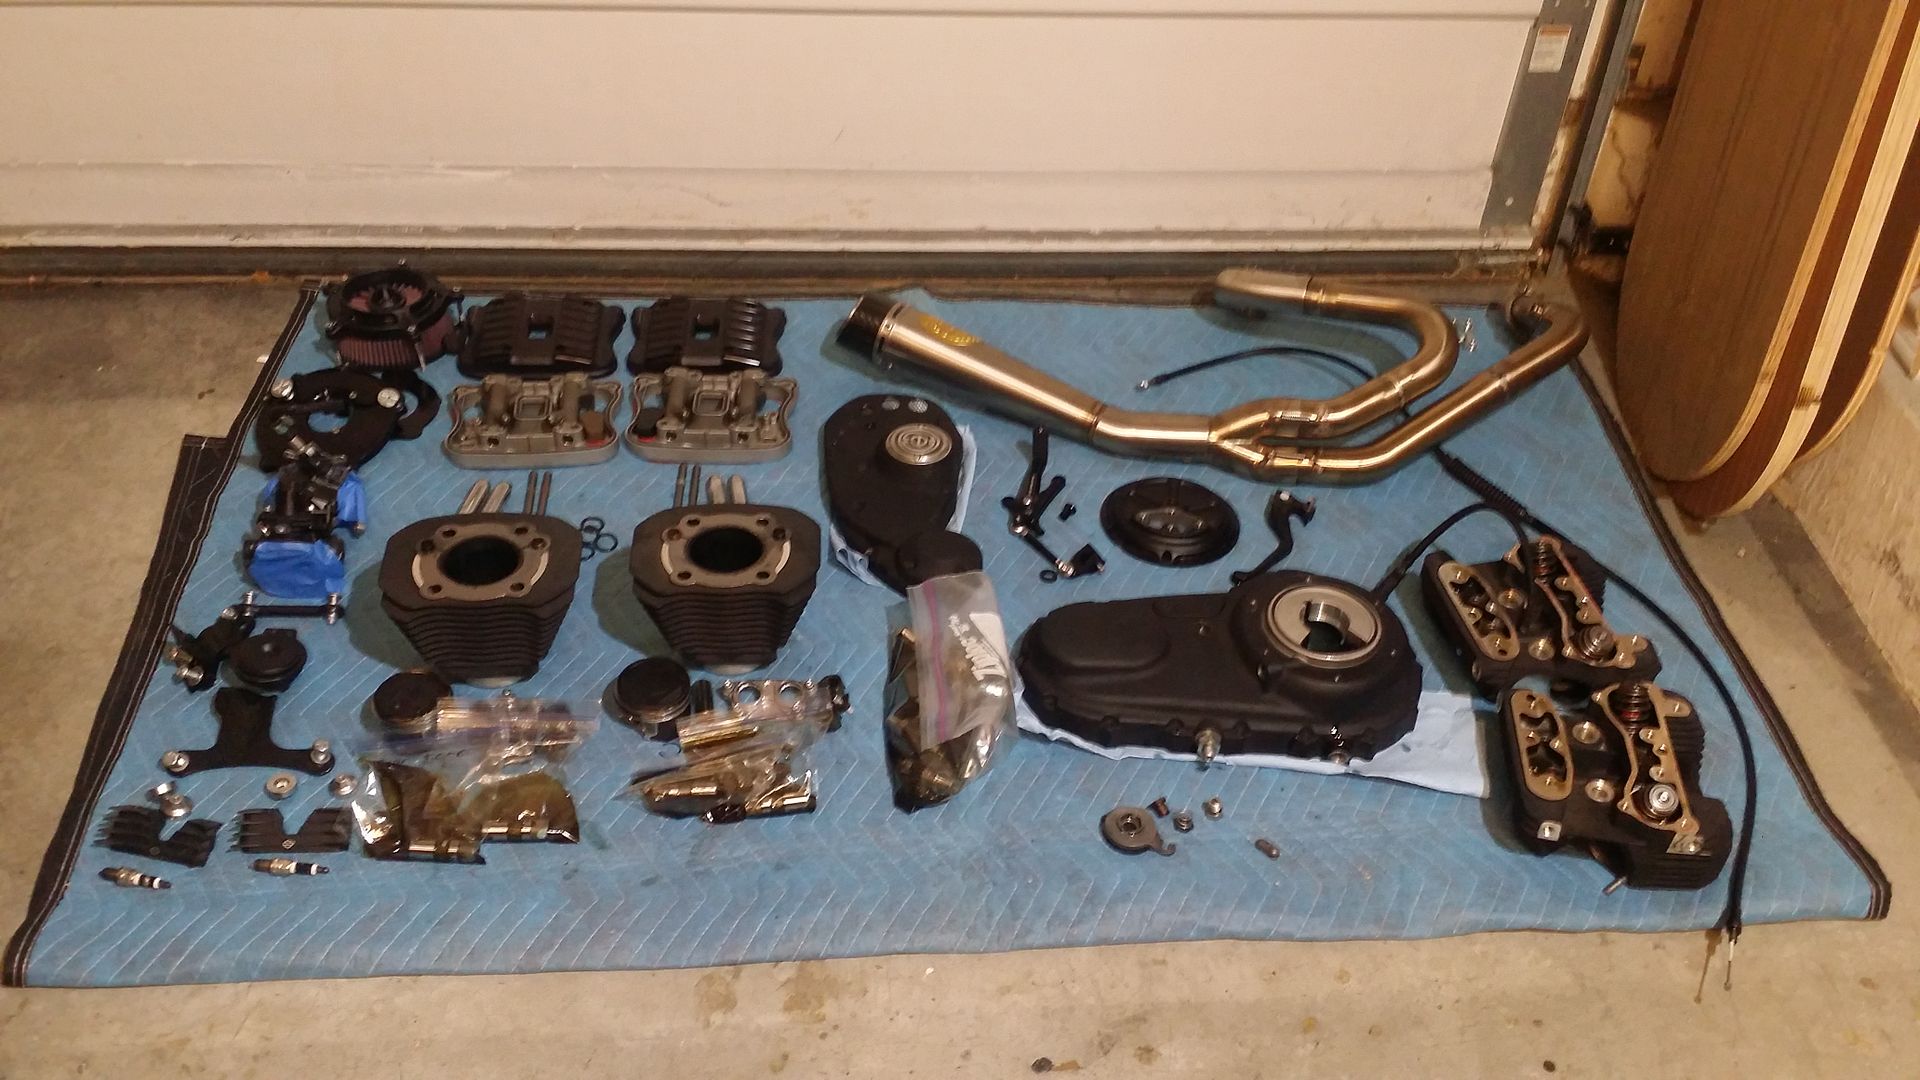
Well here is how she sits right now. Now all I have to do is wait for a few weeks to get the parts back in to put her back together.
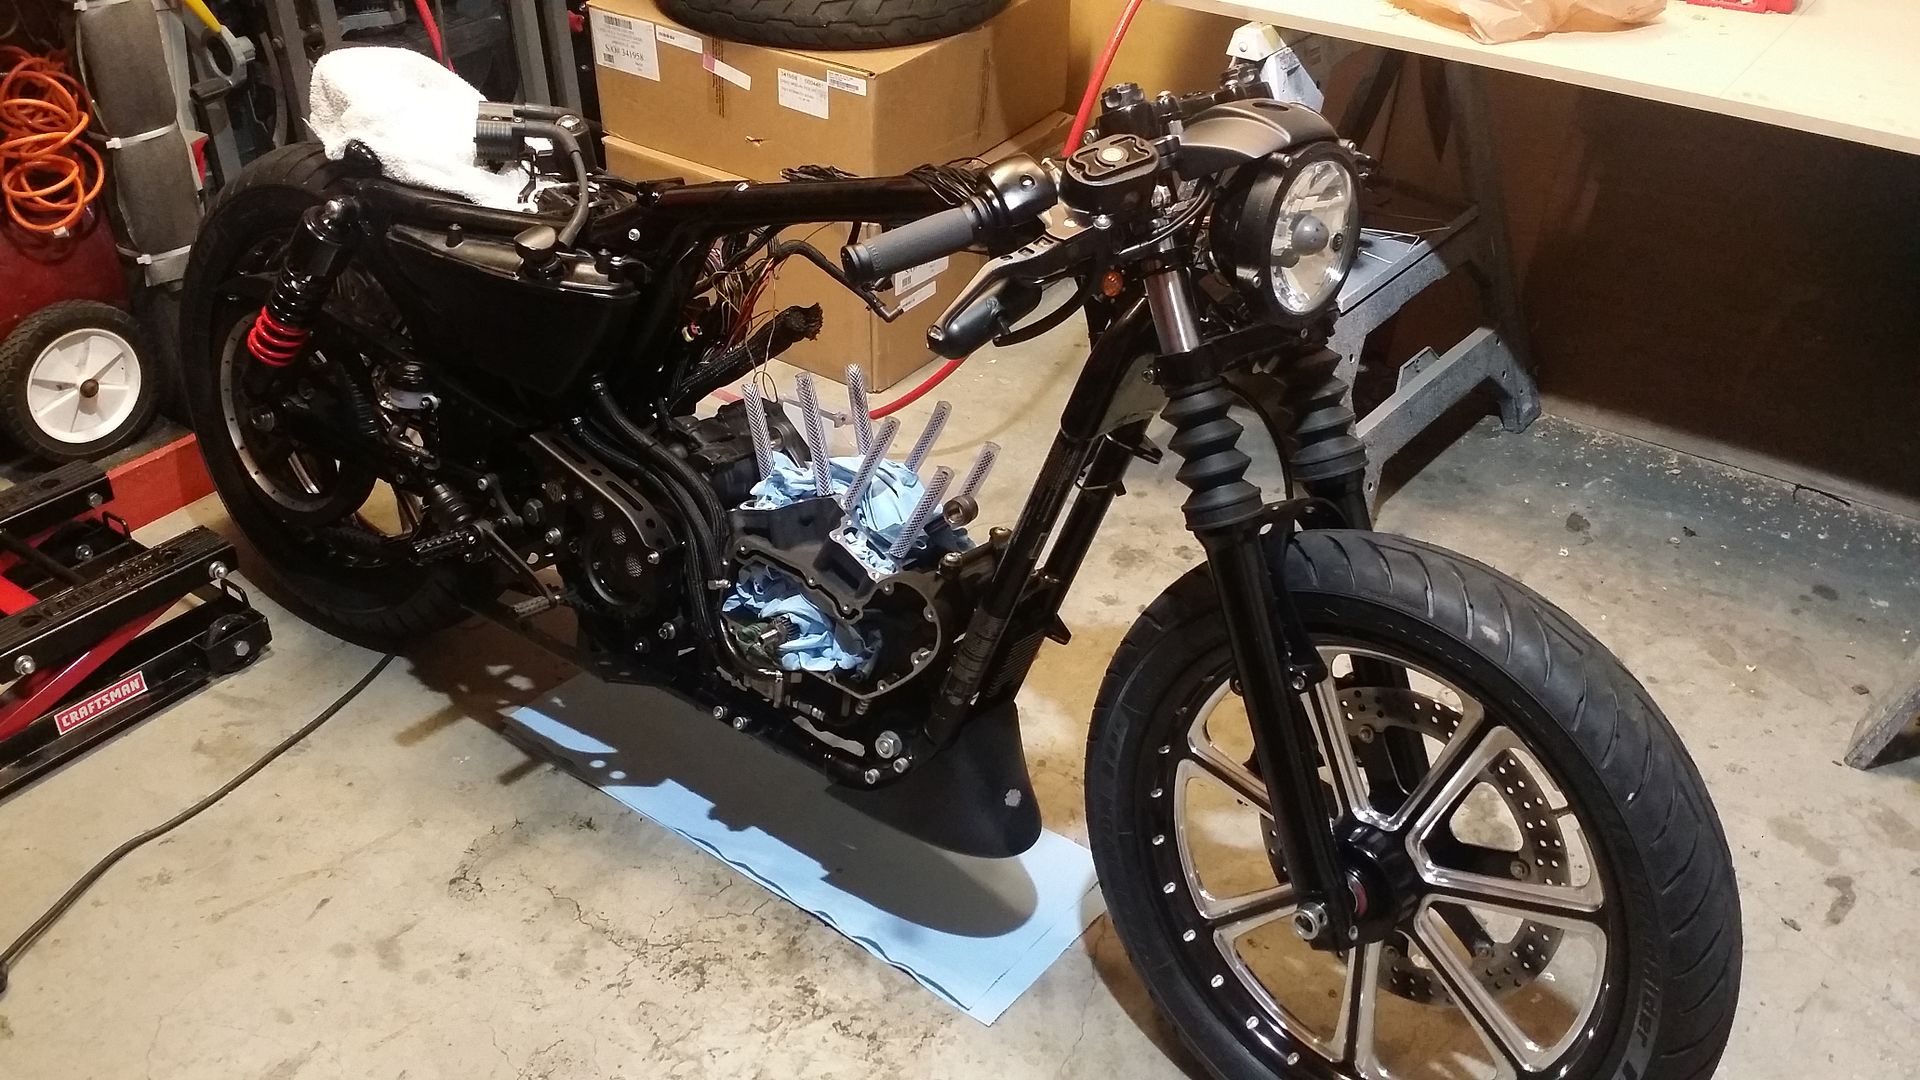
All her parts.....
My sweet *** bolt placer thingy ma jigger....
Not bad for a days work. I have been in the garage for about 10 hours today. I know that's slow but I wanted to document as I go.
Stay tuned for the rebuild....Can't wait!!!!!


All her parts.....

My sweet *** bolt placer thingy ma jigger....

Not bad for a days work. I have been in the garage for about 10 hours today. I know that's slow but I wanted to document as I go.
Stay tuned for the rebuild....Can't wait!!!!!
The following users liked this post:
Khibbs (01-15-2018)
#7
12-17-2014, 04:08 AM
Club Member

Trending Topics


#10
12-17-2014, 11:36 AM


