
Nightster Winter Makeover

#22
 11-16-2011, 04:48 AM

Welcome to the forum!
#23
11-16-2011, 10:41 AM
#24
11-16-2011, 07:21 PM
Thanks man. I did the sprocket cover a couple of weeks ago and I just finished the cam cover today. It came out pretty good. No time tonight, but I'll try to post an update tomorrow, complete with pics.
#25
11-16-2011, 08:37 PM
We want to see the sprocket and cam covers !!
Btw. Since the scoot is in pieces. Here is an idea to make the process of changing the front fork oil easier:
http://www.ebay.com/itm/Chrome-39mm-...#ht_1407wt_689
I received mine today. It looks like a good quality product ( and will not longer have to disassemble half of the front end just to change the oil, I am amazed that these caps does not come standard with the stock bike)
#26
11-17-2011, 07:19 AM
Btw. Since the scoot is in pieces. Here is an idea to make the process of changing the front fork oil easier:
http://www.ebay.com/itm/Chrome-39mm-...#ht_1407wt_689
I received mine today. It looks like a good quality product ( and will not longer have to disassemble half of the front end just to change the oil, I am amazed that these caps does not come standard with the stock bike)
http://www.ebay.com/itm/Chrome-39mm-...#ht_1407wt_689
I received mine today. It looks like a good quality product ( and will not longer have to disassemble half of the front end just to change the oil, I am amazed that these caps does not come standard with the stock bike)
http://www.ebay.com/itm/Chrome-Bille...item20bc2f8dff
#27
11-17-2011, 08:43 AM
Ok, so I took the afternoon off yesterday hoping that we would be able to work on the frame but my resident welder/fabricator (the trusty son-in-law) had real work to do. So I decided to get the cam cover chop out of the way. I did the sprocket cover a few weeks ago so I'll start with that.
I started off rough sketching the shape I wanted. There's really no limit here as to what it can look like aside from the three mounting holes. There are no gaskets or enclosed areas to worry about. It's just an open cover for the main sprocket. So I did this simple sketch directly on the cover.
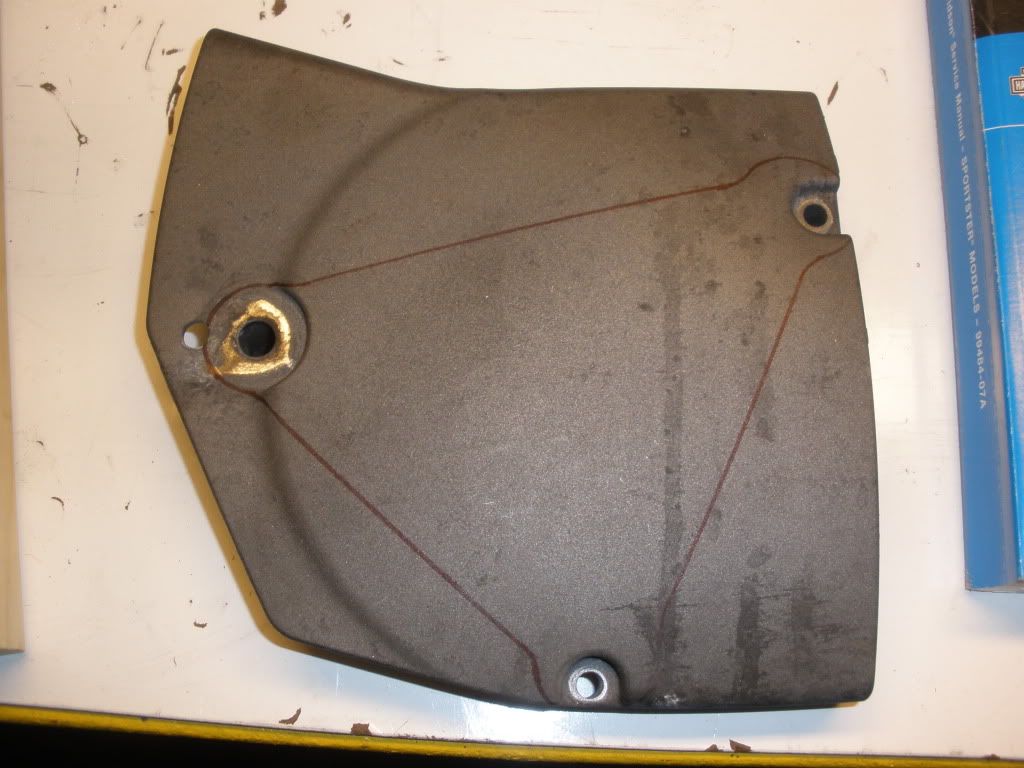
Then I made some rough cuts outside of those lines using a hand grinder with a cutoff wheel.
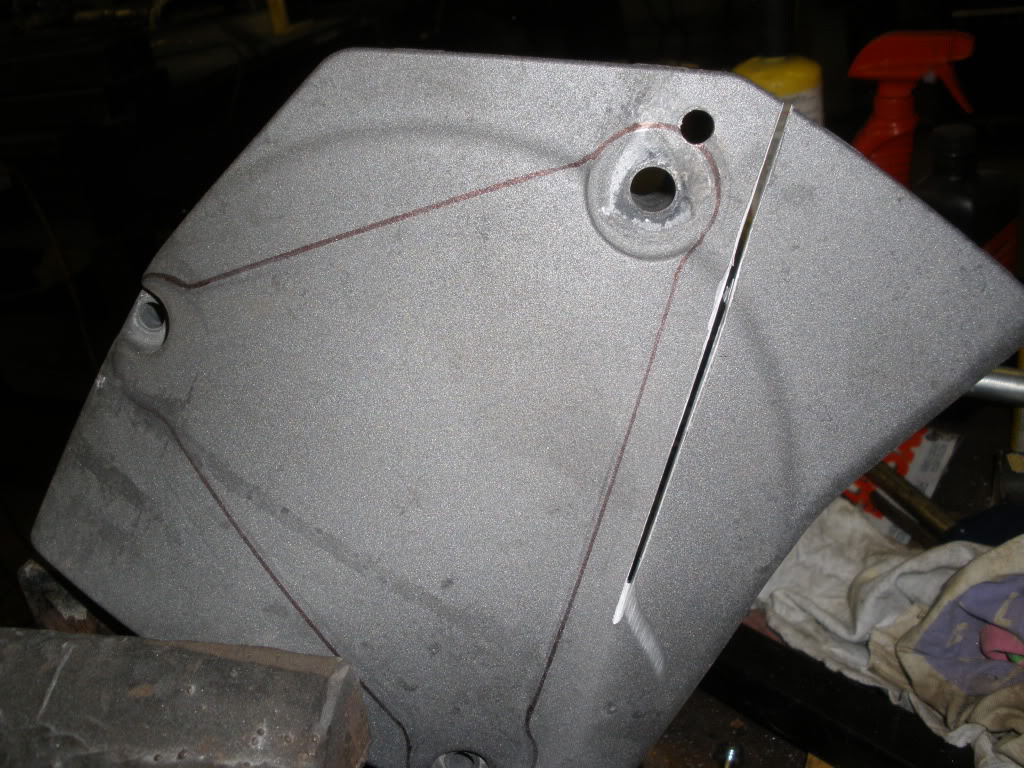
Then using the same wheel I took it down close to the marked lines.
I finished the cuts with a dremel and then a hand file to take it right to the marked lines.
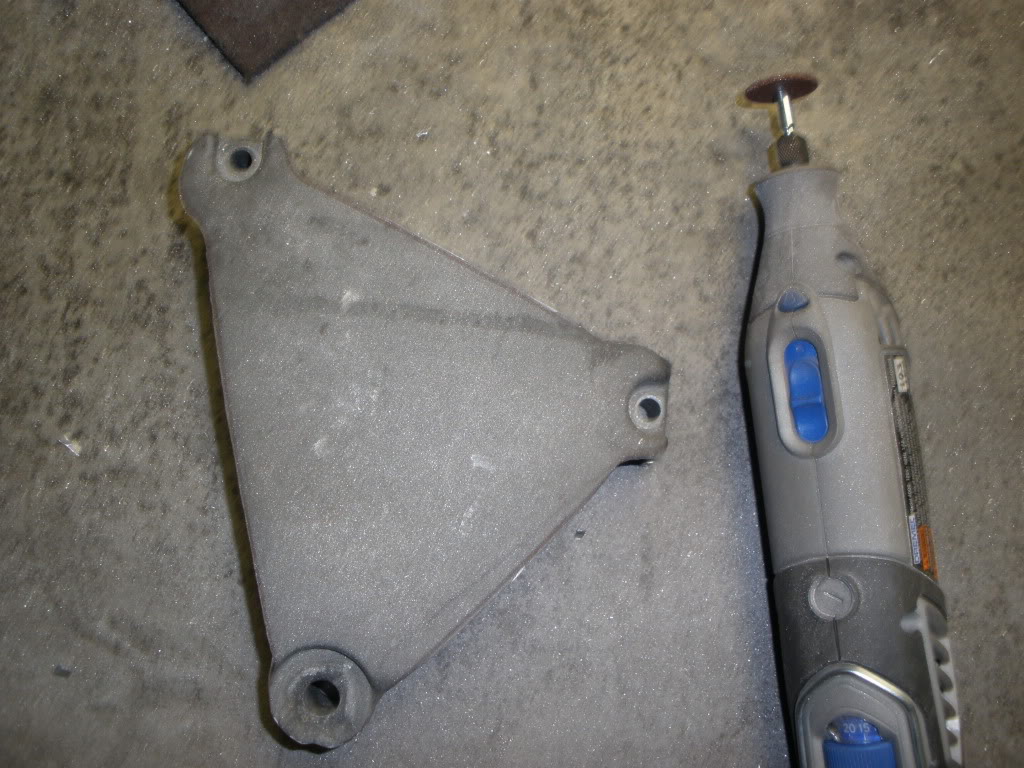
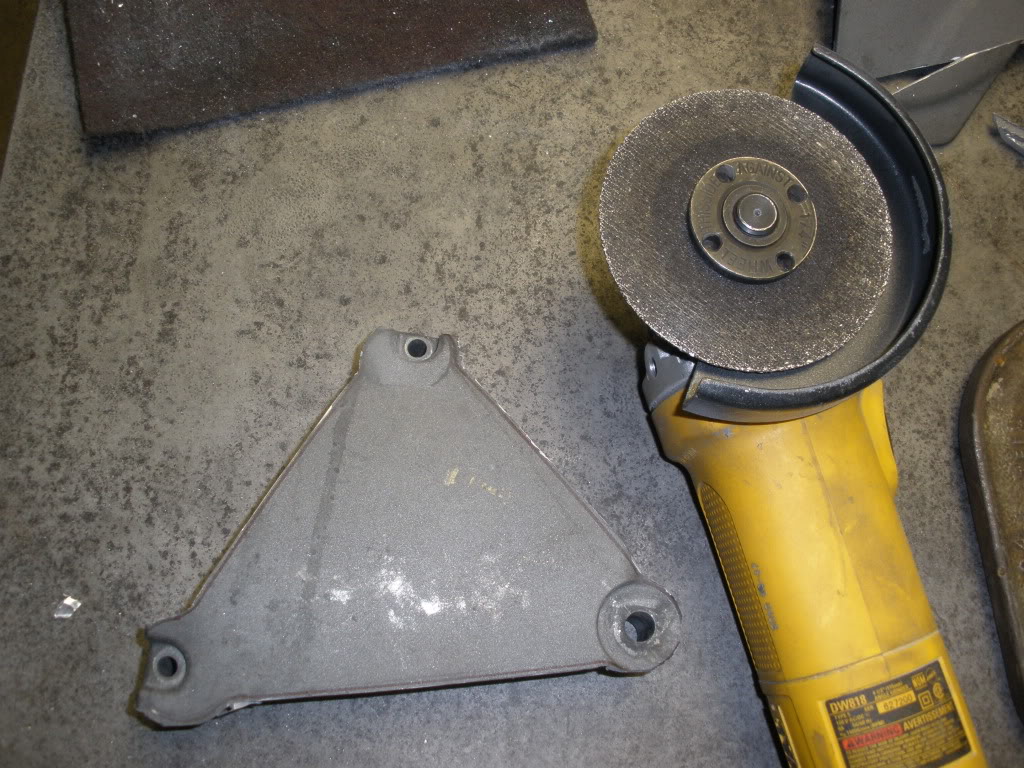
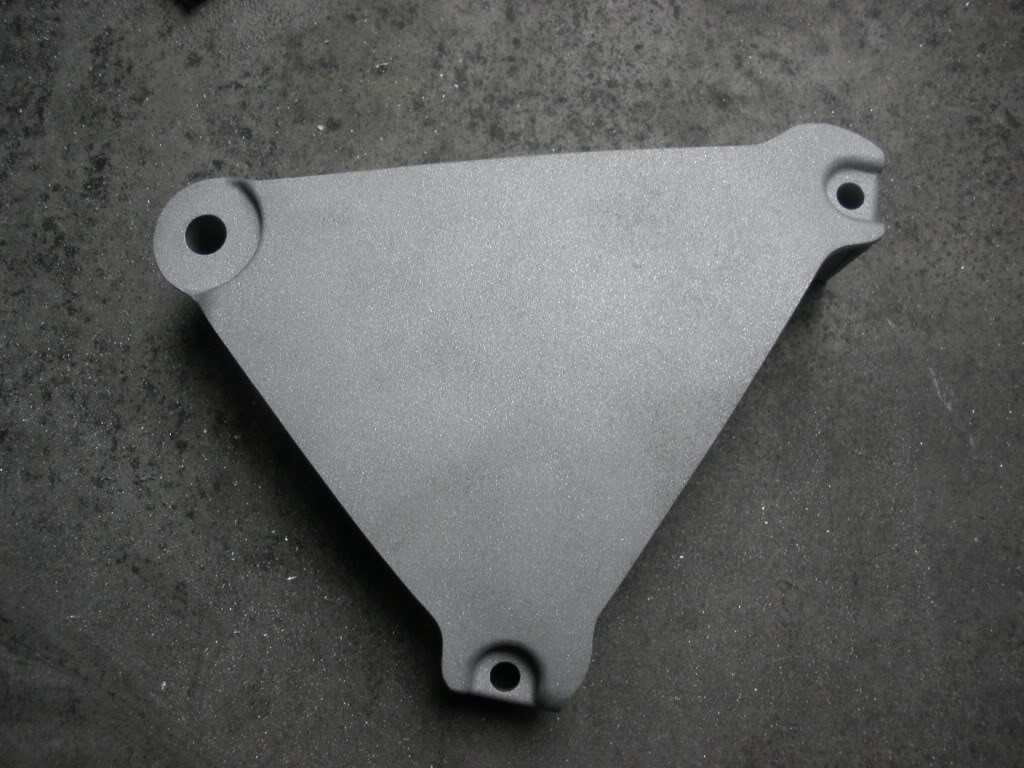
And finished it off in the sand blaster. Here's the finished cover. This was a really simple project and took about an hour to complete.
Now for the cam cover. I won't go into a lot of detail here because Joebotics covers this extremely well in his thread on the subject. But I'll try to give you some insight based on my experience with it.
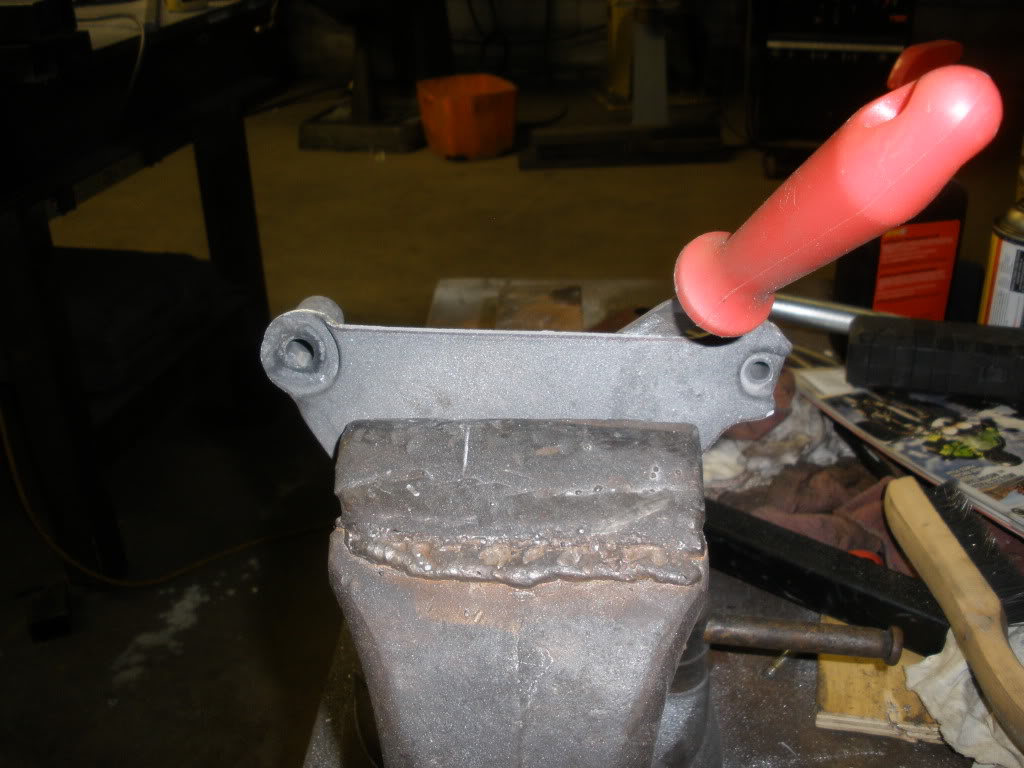
First, you have to pull the cover. I my case this was not an easy task. The sucker really fought NOT to come off. After pulling all the bolts, I used a two pound rubber mallet and tapped and tapped all around that thing for about 15 minutes, pulling on the cover as I was tapping. Nothing. Not a budge. So, heeding Joe's advise not to wedge something between the contact surfaces, but needing to do something to get it started, I used a screwdriver between the engine case and the rear of the cam cover beyond the point where it would be cut. Just a little gradual pressure while still tapping with the hammer and it eventually budged.
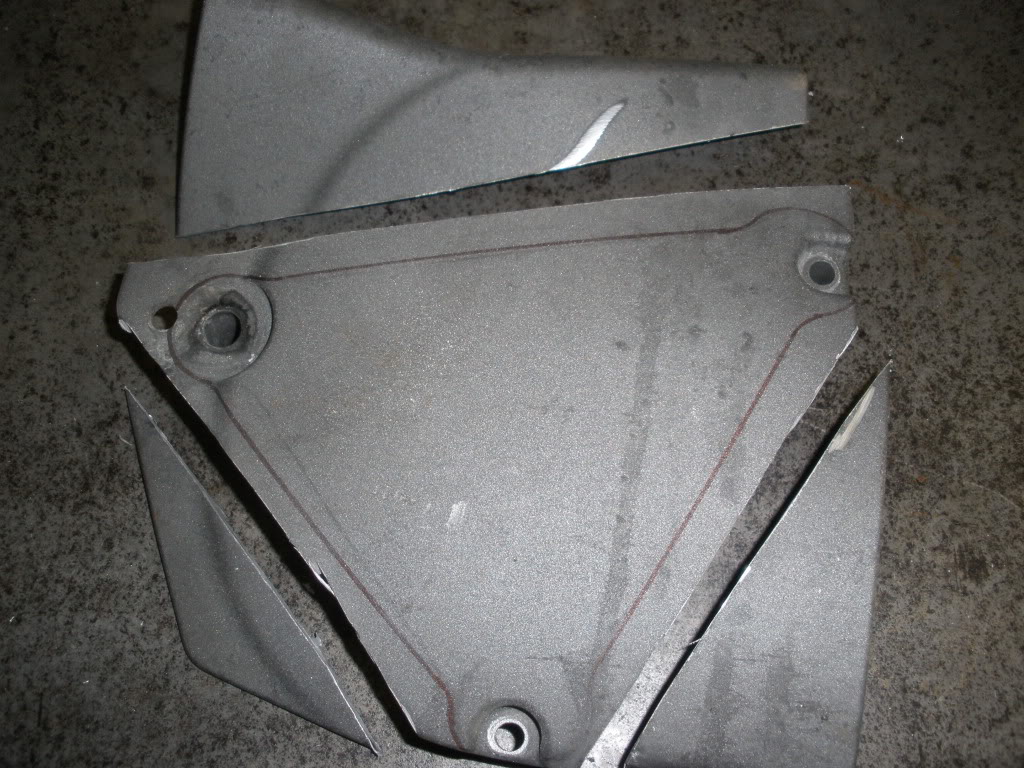
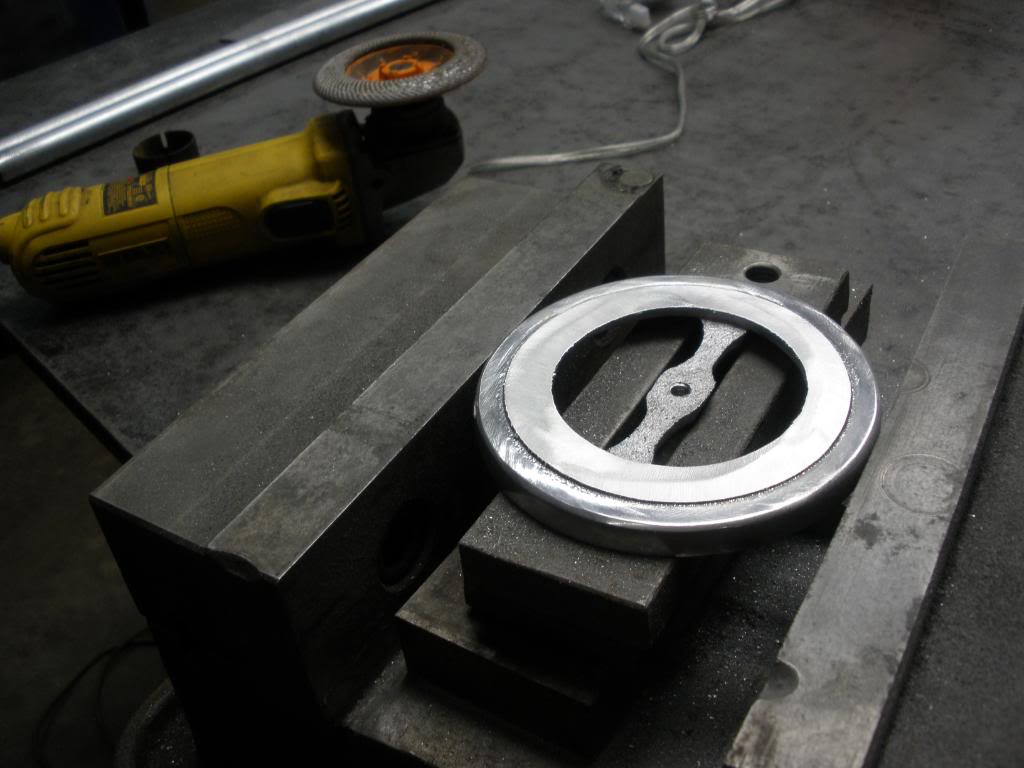
A lot of wiggling back and forth and pulling and it finally came free. Here's what it looks like.
Next, I took the cover and sprayed the whole inside with brake cleaner to get all the oil out of it. Per Joe's advise, you don't want anything to cause the aluminum dust particles to stick in there while you're cutting. You also want to tape the whole inside area off and the tape won't stick on oil. So I cleaned for about 30 minutes, spraying and wiping, spraying and wiping unitl there was no oil in any place I wanted to tape. Then using black gorilla tape I covered the entire inner half of the cover, leaving the area to be cut off exposed. Don't forget to tape off the oil line fitting at the far right side of the case. That goes directly into the inner case and will fill with aluminum dust if you don't tape it off.
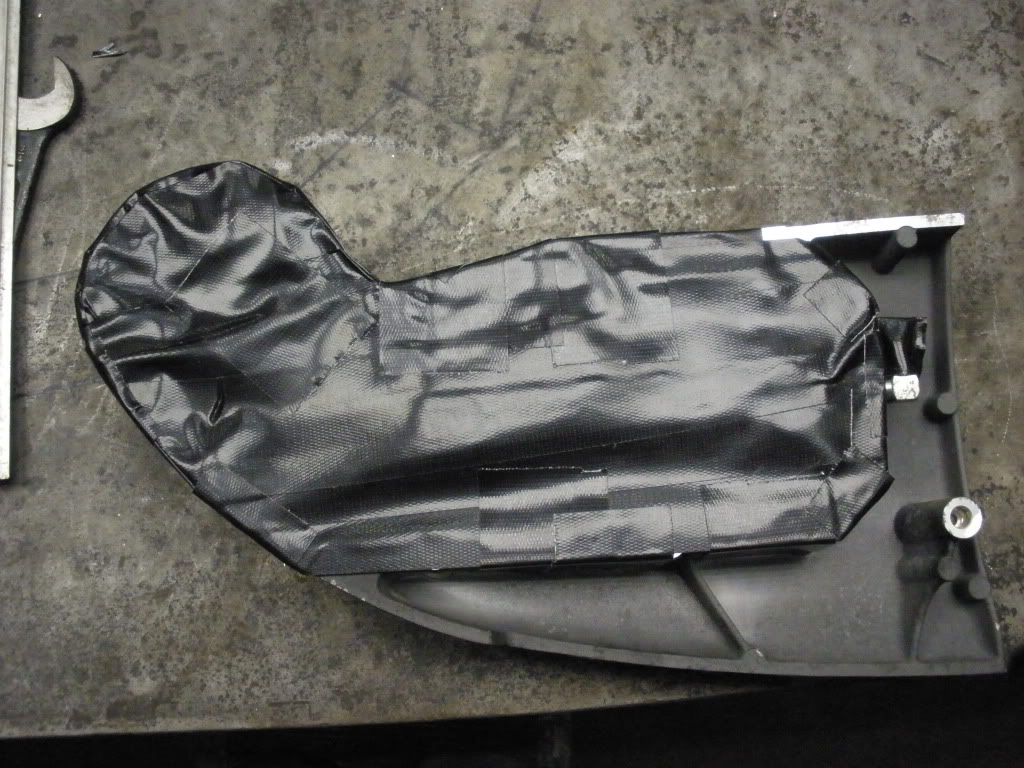
Also, I plugged the bolt holes on the outside of the case to ensure that aluminum wouldn't infiltrate into the case from the back side during the cutting process. Sponge ear plugs work best but I only had two, so some small bits of rag worked ok. I also wrapped the tape completely around where I could, just to be on the safe side. I used a lot of tape, laying on about three layers to ensure nothing got inside.
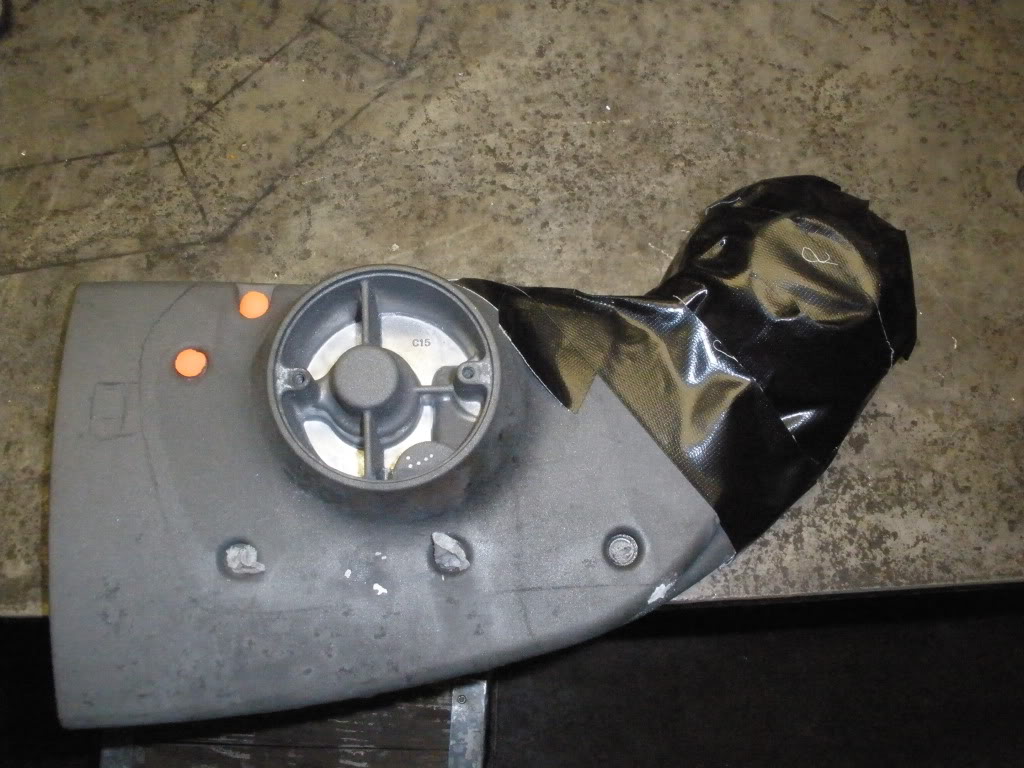
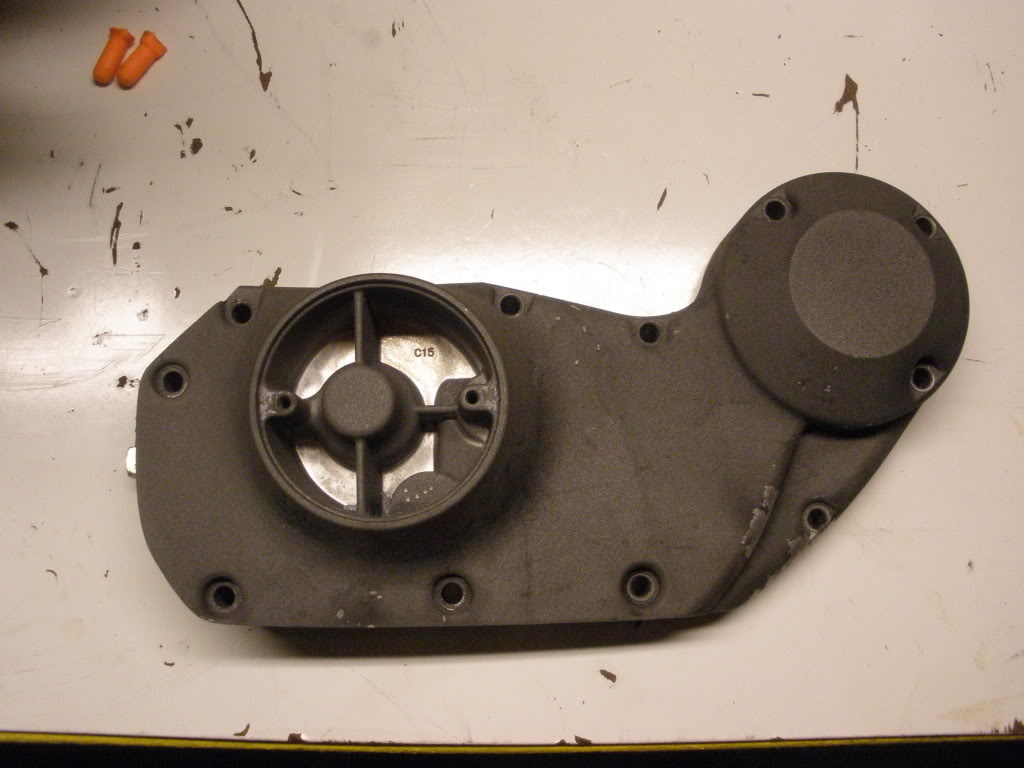
Then using the same hand grinder with the cutoff wheel, you make your cuts. You can see in the pic above I sketched some rough lines near where I wanted to cut, but since I wanted to be as close to the inner case as possible without leaving any over hang the cuts are pretty straightforward. You just follow the contours of the inner case and cut away all the excess. Like the sprocket cover, start out well away from the final line and work your way in, slowly, taking a little bit at a time. Stop, check your cuts, and take a bit more. When I got close to where I wanted it I switched over to the grinding wheel, then a hand file. Be careful not to cut or grind the oil fitting that potrudes from the back of the case. When I got it to where I wanted it I finished off the edges with a scotchbrite wheel on a rotary air grinder to polish it up. Used the air line to blow off the aluminum dust, pulled the tape, being careful to keep any dust still clinging to the tape out of the inner case, and here's what I ended up with.
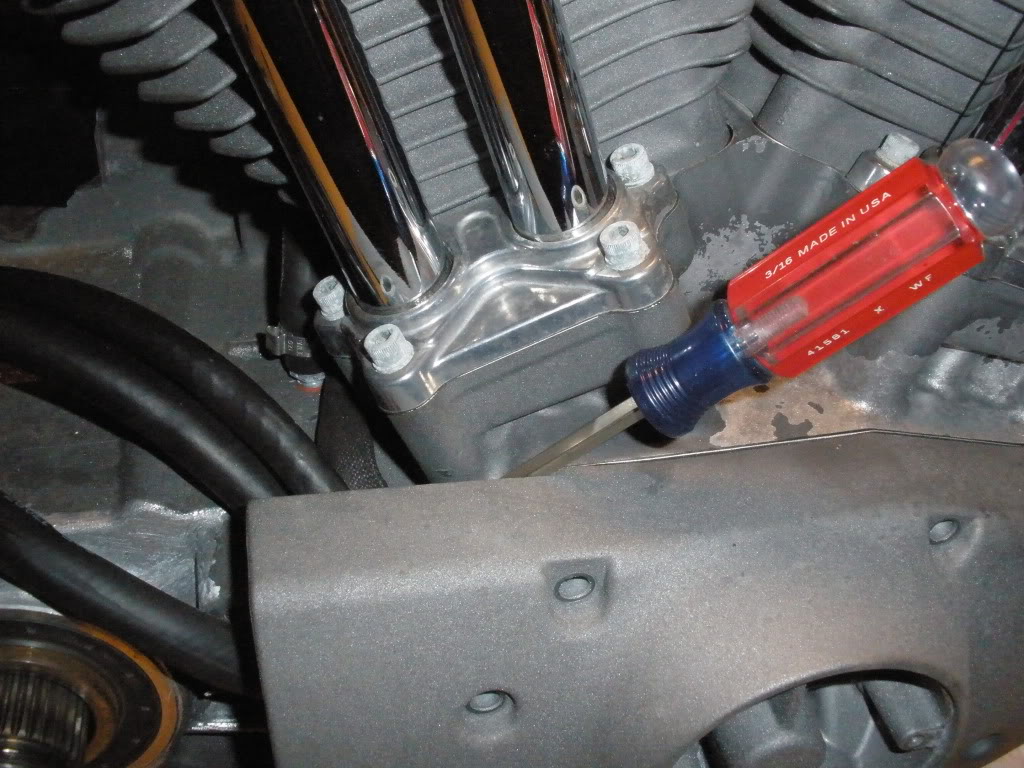
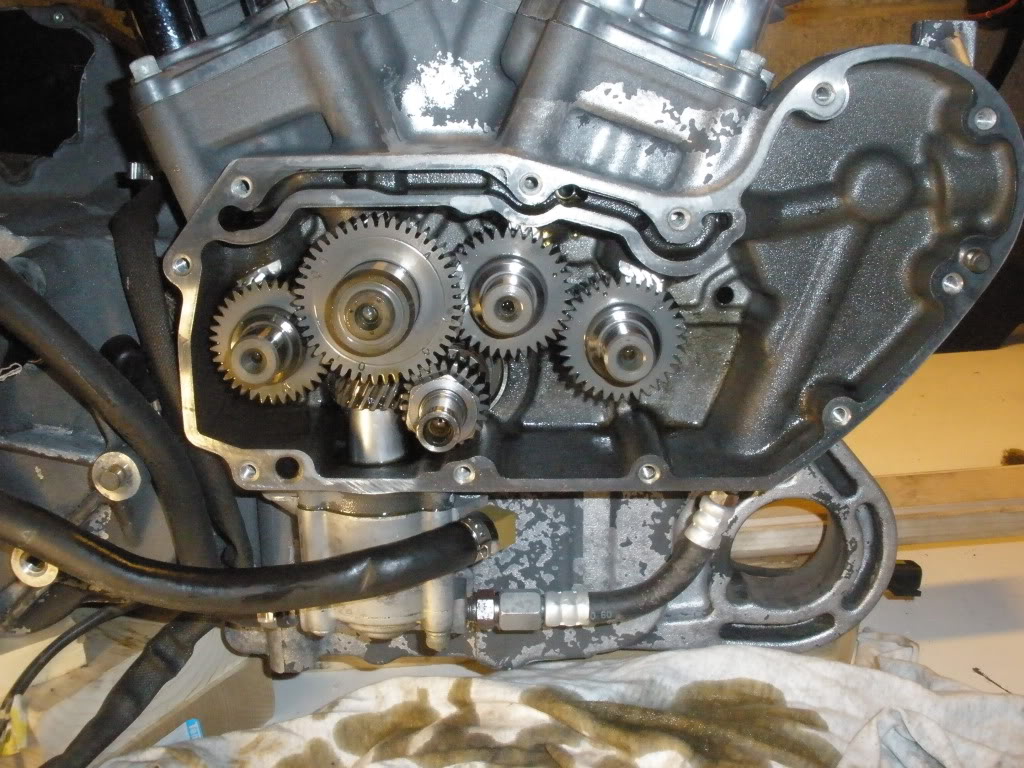
I didn't go through the hassle of sandblasting it because I'm having this, the sprocket cover and the clutch cover powder coated, so I'll let them worry about that. But I threw both covers back on the engine and here's what it looks like.
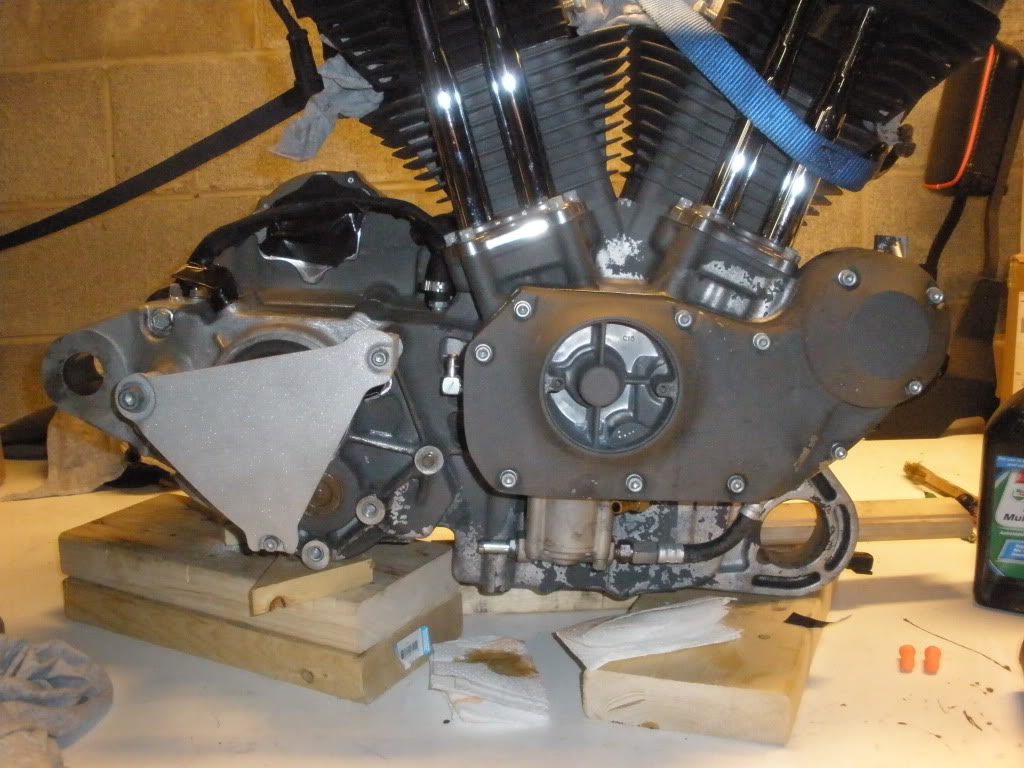
Now to get the rest of the lower engine cleaned up and painted. You can see in the above pic I've pulled the starter to have better access to the area behind the rear cylinder. You can also see the extent of the oxidation on the lower cases I'm having to deal with. With the cam and clutch covers back on, I plan on using some paint stripper to try and clean off all the old paint and the underlying oxidation. When I get that done I'll paint the main case, then pull the cam and clutch covers and send them off to the powdercoater.
Still a ton of work to do...
I started off rough sketching the shape I wanted. There's really no limit here as to what it can look like aside from the three mounting holes. There are no gaskets or enclosed areas to worry about. It's just an open cover for the main sprocket. So I did this simple sketch directly on the cover.
Then I made some rough cuts outside of those lines using a hand grinder with a cutoff wheel.
Then using the same wheel I took it down close to the marked lines.
I finished the cuts with a dremel and then a hand file to take it right to the marked lines.
And finished it off in the sand blaster. Here's the finished cover. This was a really simple project and took about an hour to complete.
Now for the cam cover. I won't go into a lot of detail here because Joebotics covers this extremely well in his thread on the subject. But I'll try to give you some insight based on my experience with it.
First, you have to pull the cover. I my case this was not an easy task. The sucker really fought NOT to come off. After pulling all the bolts, I used a two pound rubber mallet and tapped and tapped all around that thing for about 15 minutes, pulling on the cover as I was tapping. Nothing. Not a budge. So, heeding Joe's advise not to wedge something between the contact surfaces, but needing to do something to get it started, I used a screwdriver between the engine case and the rear of the cam cover beyond the point where it would be cut. Just a little gradual pressure while still tapping with the hammer and it eventually budged.
A lot of wiggling back and forth and pulling and it finally came free. Here's what it looks like.
Next, I took the cover and sprayed the whole inside with brake cleaner to get all the oil out of it. Per Joe's advise, you don't want anything to cause the aluminum dust particles to stick in there while you're cutting. You also want to tape the whole inside area off and the tape won't stick on oil. So I cleaned for about 30 minutes, spraying and wiping, spraying and wiping unitl there was no oil in any place I wanted to tape. Then using black gorilla tape I covered the entire inner half of the cover, leaving the area to be cut off exposed. Don't forget to tape off the oil line fitting at the far right side of the case. That goes directly into the inner case and will fill with aluminum dust if you don't tape it off.
Also, I plugged the bolt holes on the outside of the case to ensure that aluminum wouldn't infiltrate into the case from the back side during the cutting process. Sponge ear plugs work best but I only had two, so some small bits of rag worked ok. I also wrapped the tape completely around where I could, just to be on the safe side. I used a lot of tape, laying on about three layers to ensure nothing got inside.
Then using the same hand grinder with the cutoff wheel, you make your cuts. You can see in the pic above I sketched some rough lines near where I wanted to cut, but since I wanted to be as close to the inner case as possible without leaving any over hang the cuts are pretty straightforward. You just follow the contours of the inner case and cut away all the excess. Like the sprocket cover, start out well away from the final line and work your way in, slowly, taking a little bit at a time. Stop, check your cuts, and take a bit more. When I got close to where I wanted it I switched over to the grinding wheel, then a hand file. Be careful not to cut or grind the oil fitting that potrudes from the back of the case. When I got it to where I wanted it I finished off the edges with a scotchbrite wheel on a rotary air grinder to polish it up. Used the air line to blow off the aluminum dust, pulled the tape, being careful to keep any dust still clinging to the tape out of the inner case, and here's what I ended up with.
I didn't go through the hassle of sandblasting it because I'm having this, the sprocket cover and the clutch cover powder coated, so I'll let them worry about that. But I threw both covers back on the engine and here's what it looks like.
Now to get the rest of the lower engine cleaned up and painted. You can see in the above pic I've pulled the starter to have better access to the area behind the rear cylinder. You can also see the extent of the oxidation on the lower cases I'm having to deal with. With the cam and clutch covers back on, I plan on using some paint stripper to try and clean off all the old paint and the underlying oxidation. When I get that done I'll paint the main case, then pull the cam and clutch covers and send them off to the powdercoater.
Still a ton of work to do...
#28
11-17-2011, 08:47 AM
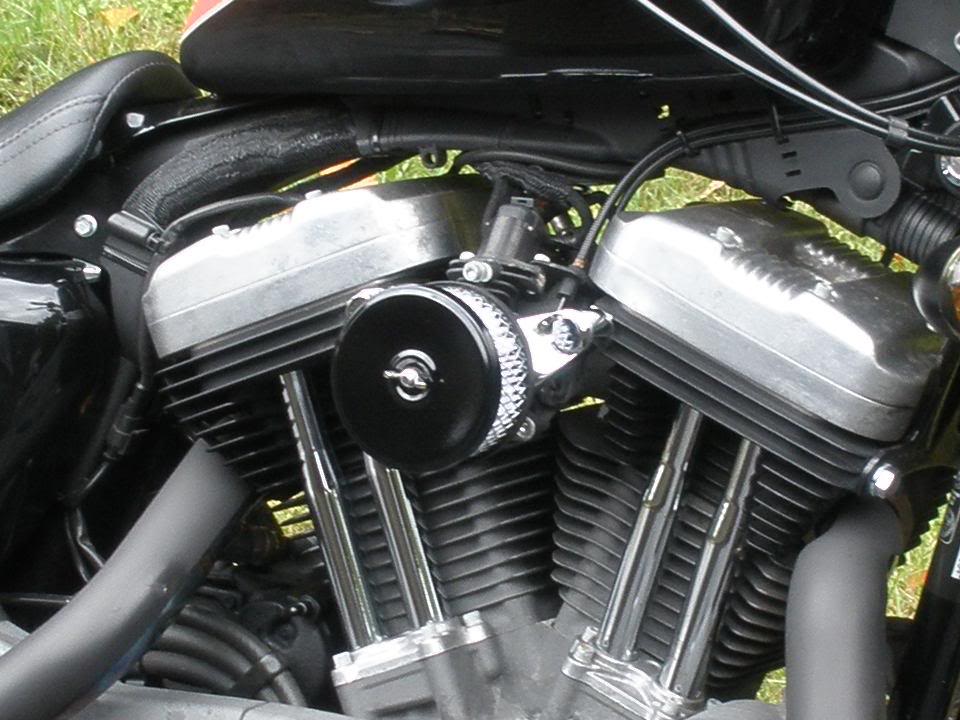
I bought this breather bracket from BK a few months ago and really like it. So I'm on the mailing list and I spotted those filler caps a few weeks ago...
http://www.ebay.com/itm/Chrome-Bille...item20bc2f8dff
http://www.ebay.com/itm/Chrome-Bille...item20bc2f8dff
.
.
.
#30
11-17-2011, 09:21 AM
Hey!... question.. have you tried the breather kit on your bike?... the specs shows it as it fits 91 and newer Sportsters... I thought the EFI XLs had a different bolt arrangement compared to carburetor based Xls.. I hope somebody can shed more light on this question.... very nice breather assembly !!!...
.
.
When I was taking the bike apart for this winter makeover the cheapo AC broke. So I ordered one I found here. Actually, I remember someone in another thread...might have been the original mreed thread on the cheap and easy AC mentioned this one.
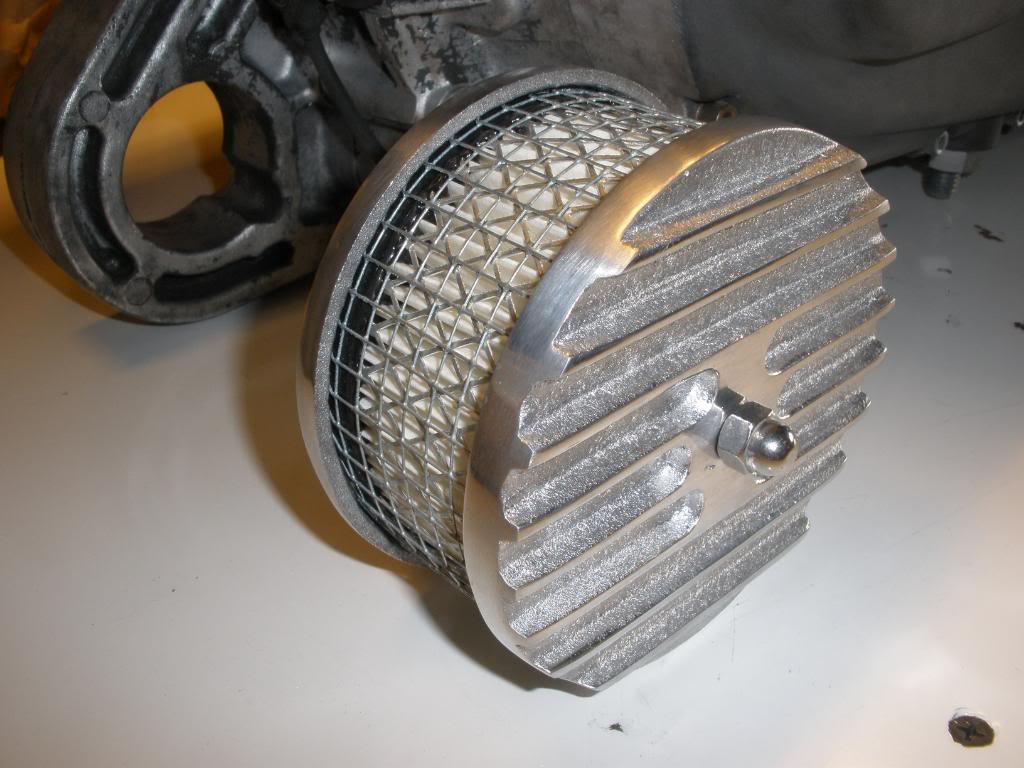
Did the standard mreed mods to it and it should mount right up when I get to point of reassembly.
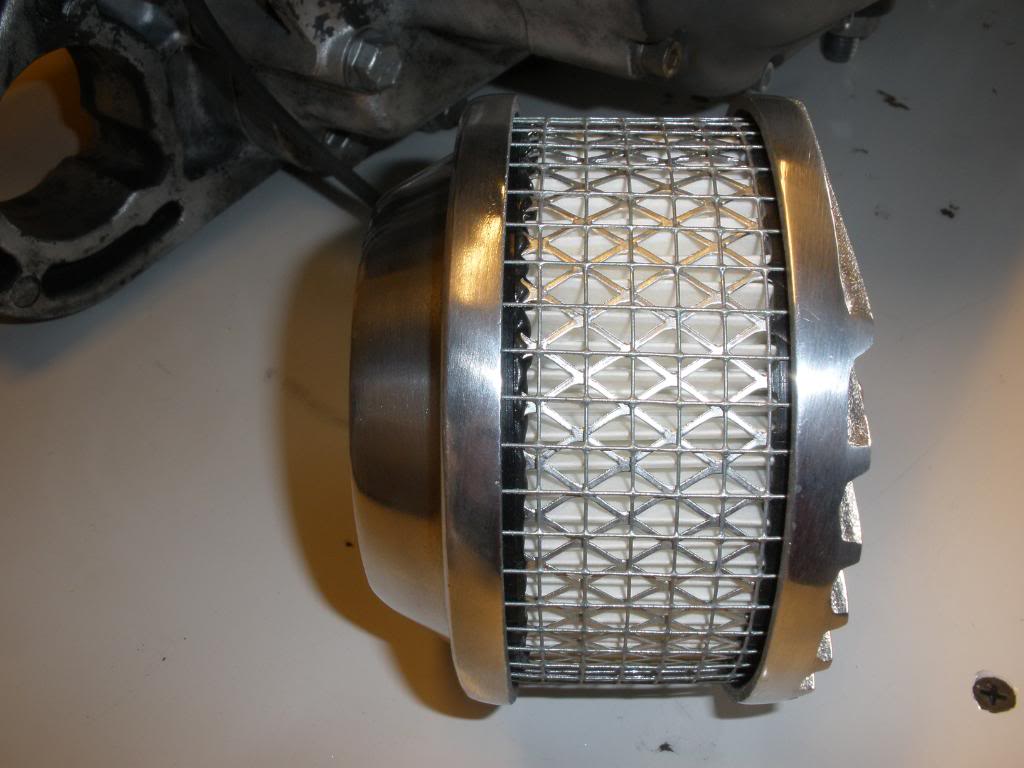
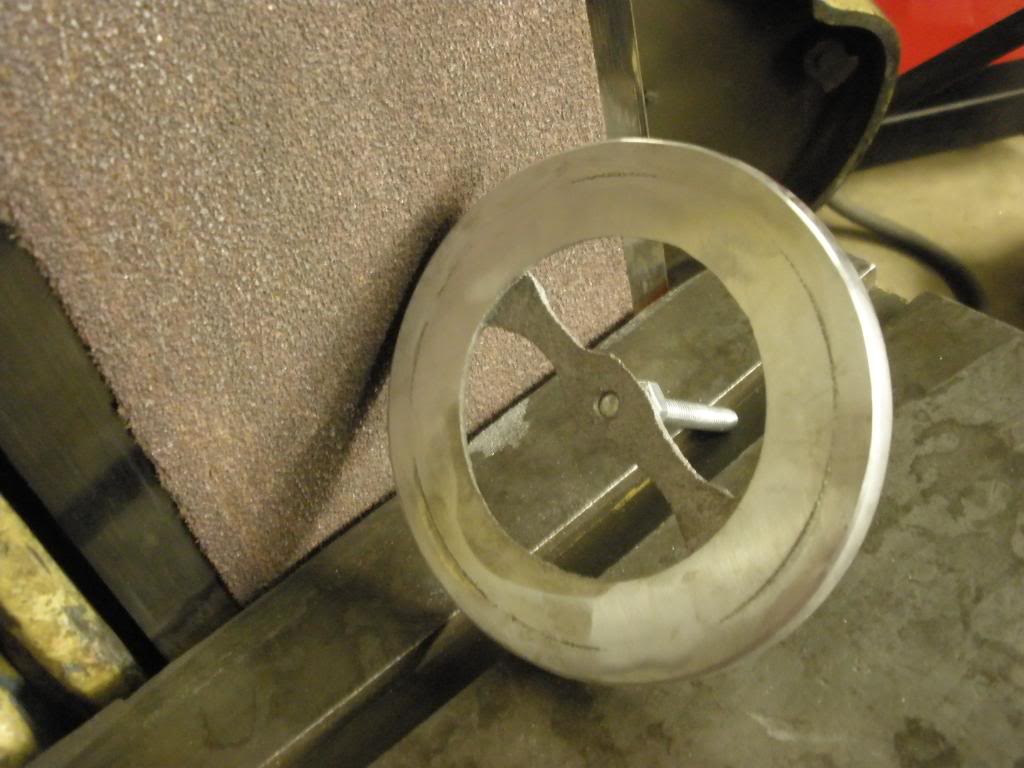
I haven't finished it up yet but this AC seems well made and sturdy, much stronger than the Autozone AC. I'm gonna paint this one black and perhaps polish the fins...
And yes, I am having fun.

Last edited by Ergonight; 11-17-2011 at 10:40 AM.