
Install: Vance and Hines Short Shots
#1
 02-25-2012, 11:35 PM


PART I
I finally got around to installing my Vance and Hines Short Shots on my 48. The install went quicker than expected (about 2 hrs), and the pipes sound better than expected. Here is the install and all the pics I took along the way...
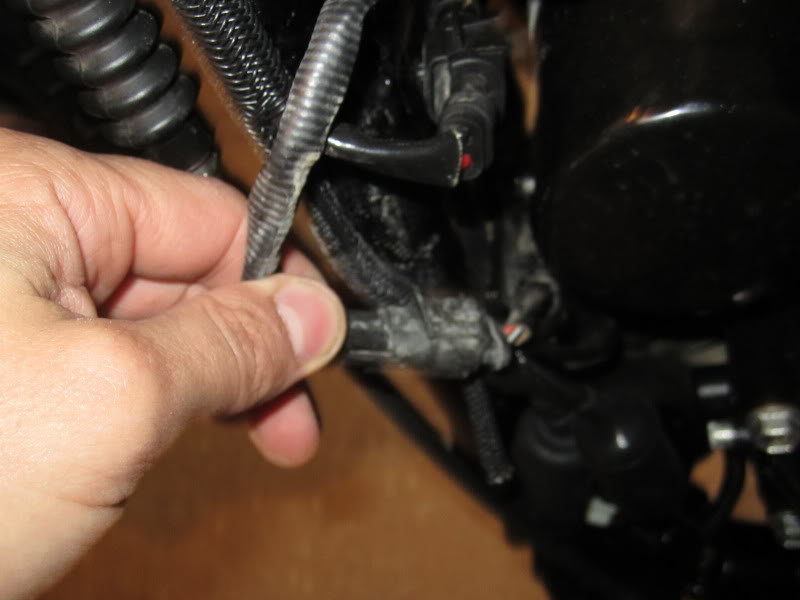
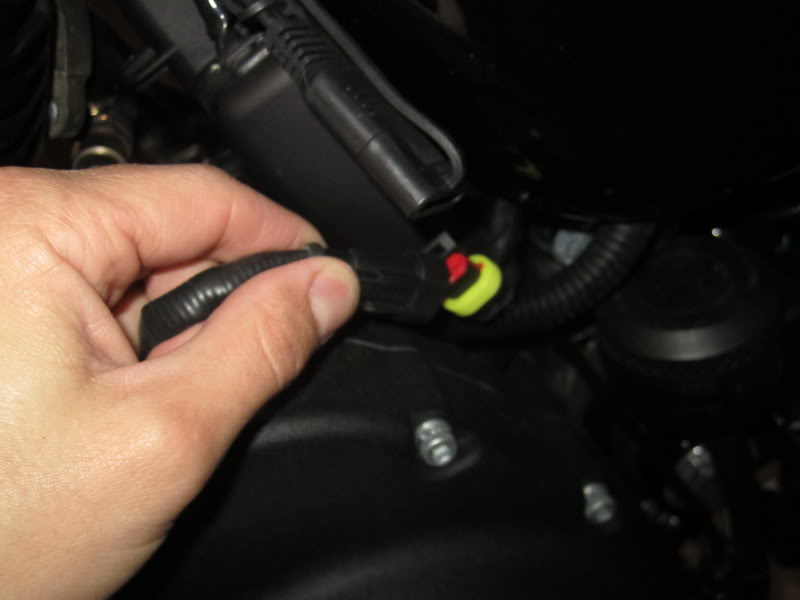
First you need to unplug the O2 Sensors. Locate the sensors on the stock exhaust and trace the wires back to the quick connect. On the front pipe, you will need to use a flathead screw driver to pry off the clip that secures the bundle of wires to the frame.
Next loosen the clamps that secure the heatshields to the stock exhaust. You will need a flathead screwdriver or a 5/16 socket.
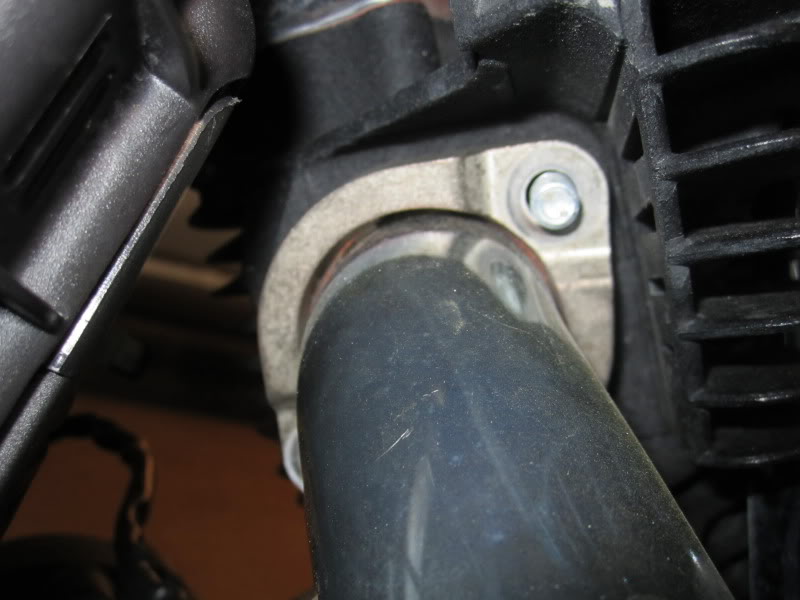
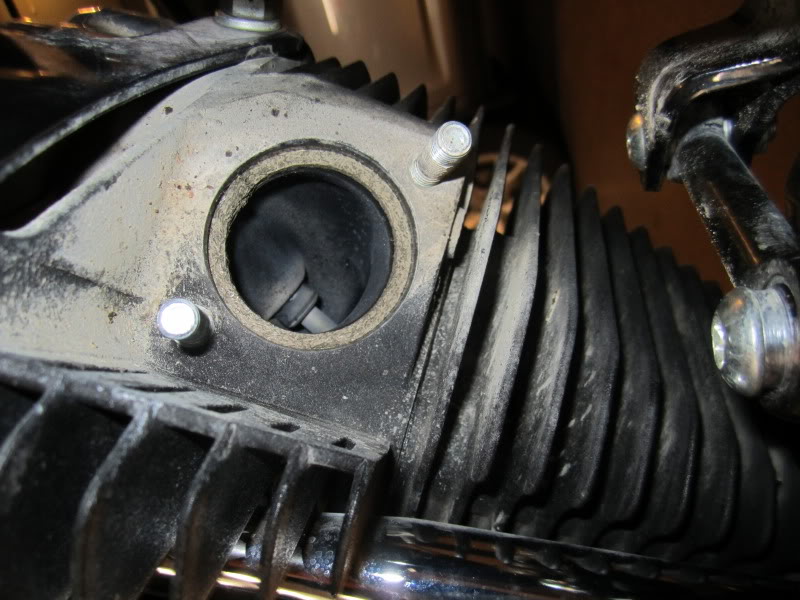
Using a 1/2" socket remove the two nuts that secure the flange to the engine. A 6 or 8" socket extension helps.
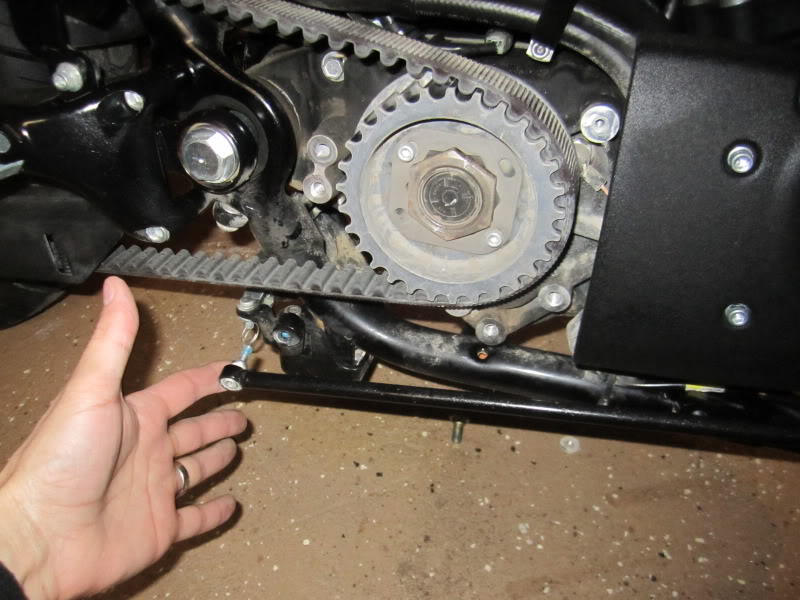
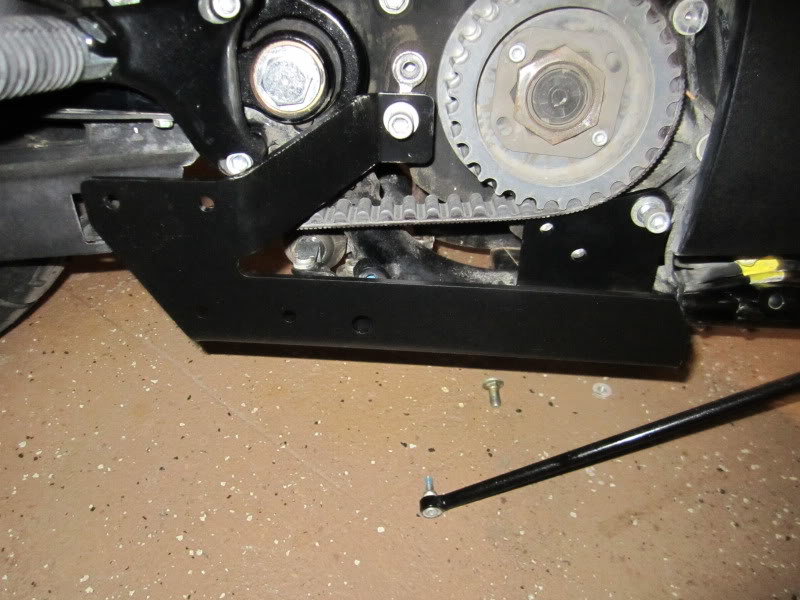
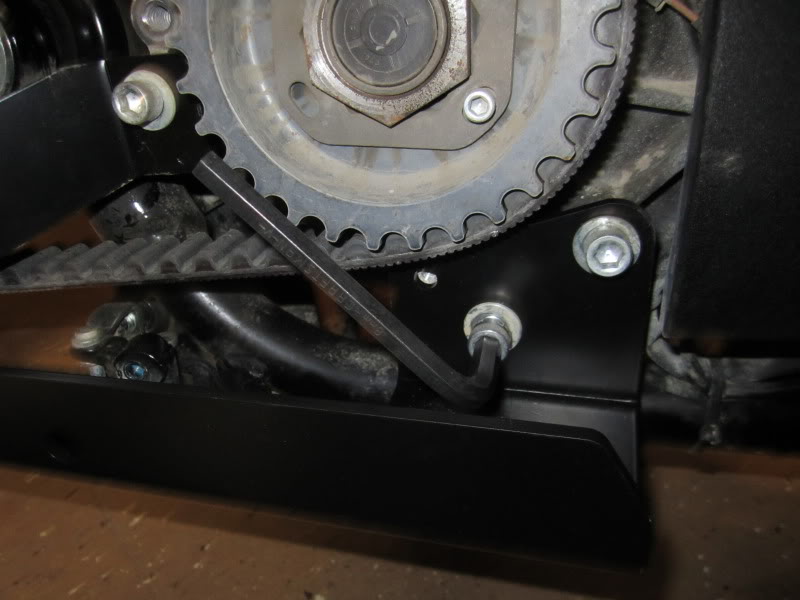
On the belt cover you will see a bracket that is attached to the exhaust. Remove the bolt that secures the exhaust to that bracket.
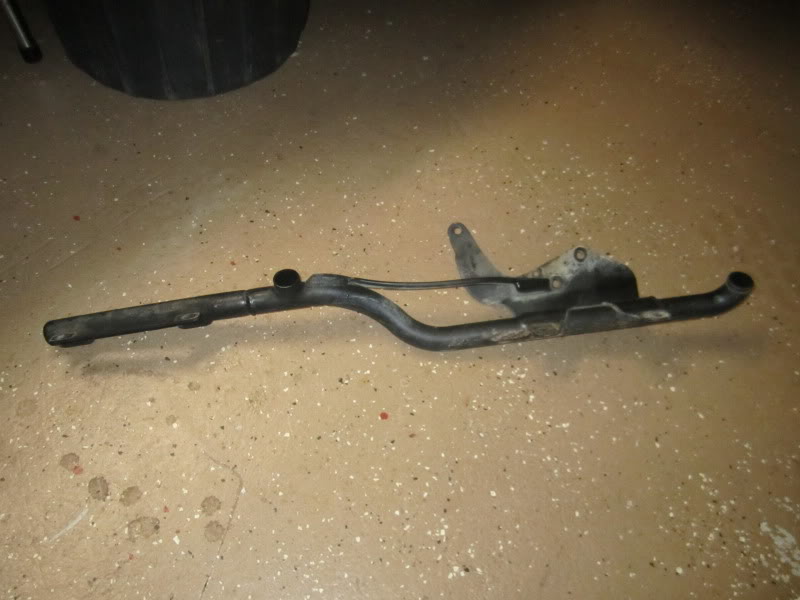
Locate the round bar that is attached to the stock exhaust. Remove the bolts securing the exhaust. This is the last step before the pipes will be free from the bike so hang on to them as you remove the bolts...
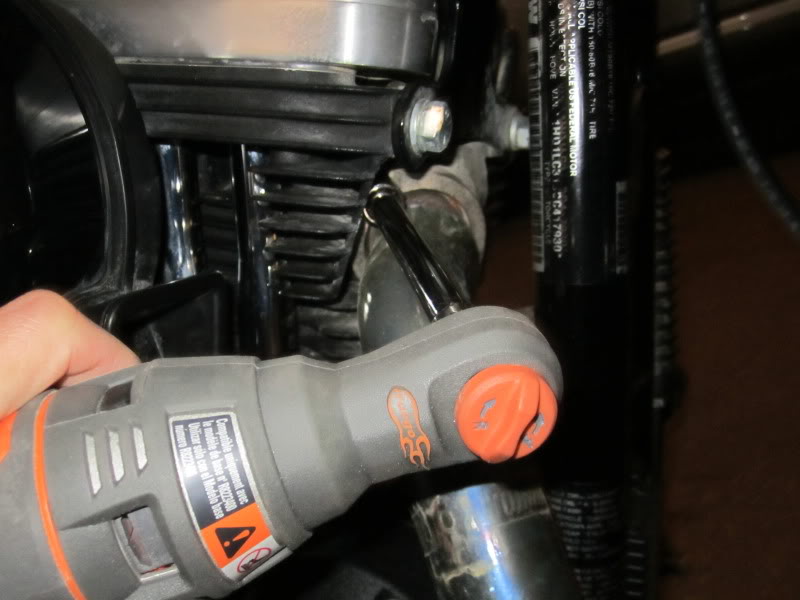
Using a 22mm wrench, remove the O2 sensors from the stock pipes
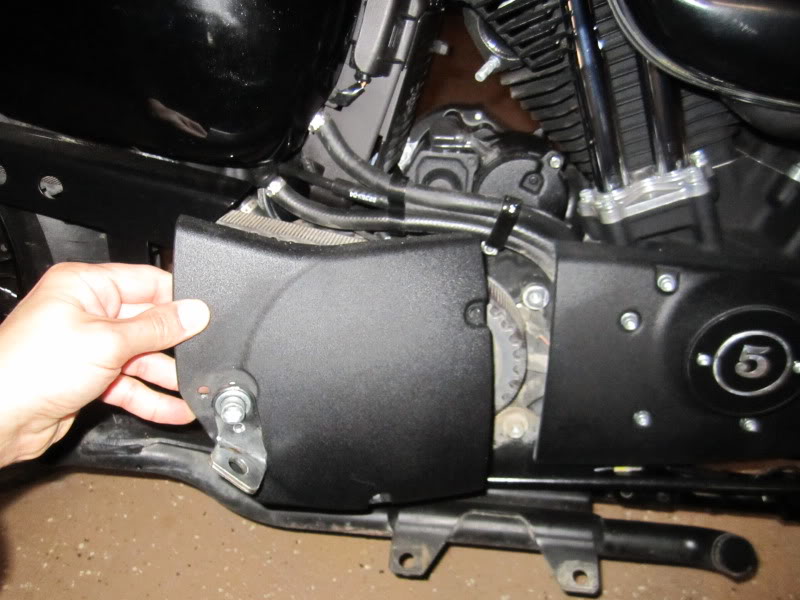
Remove the drive belt cover by removing the bolts that secure it with a 3/16" allen wrench. The bolt that secures the bracket also needs to be removed with a 5/16" allen wrench.
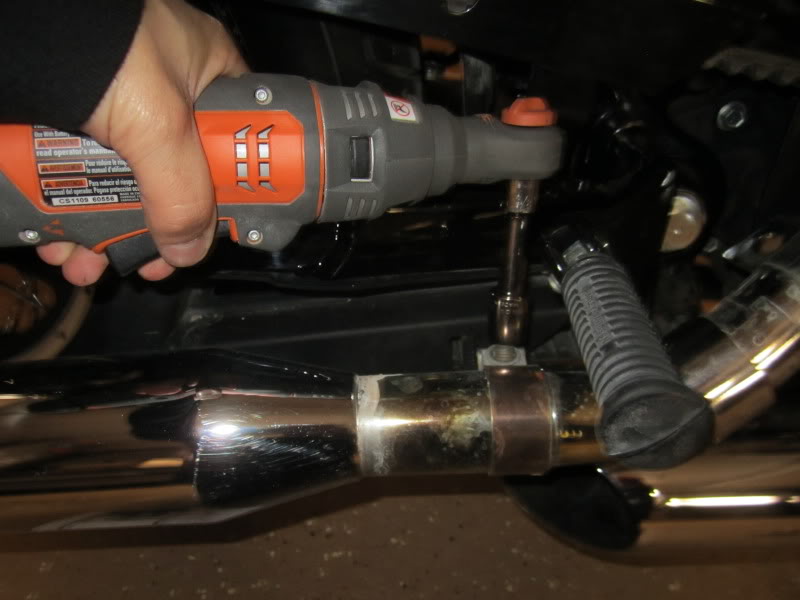
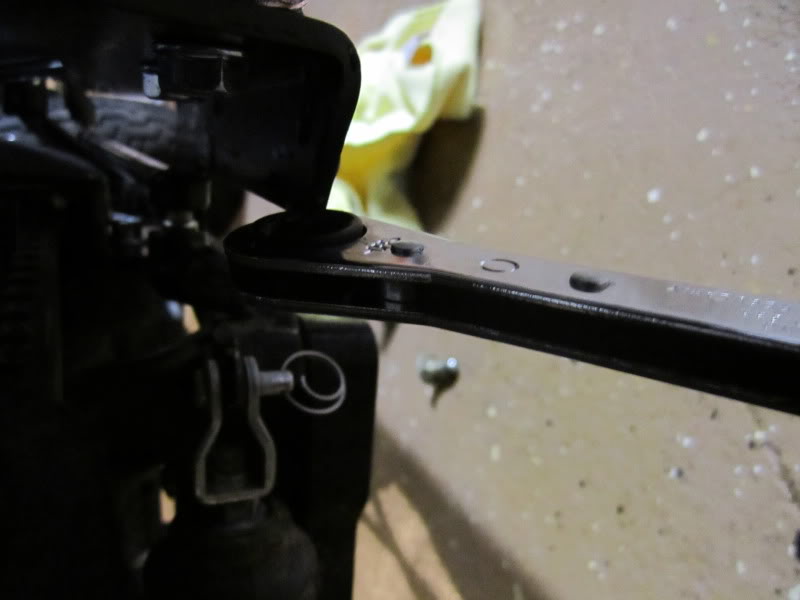
Follow the rod from the brake pedal to its furthest point back. Use a T-30 torx driver to remove the bolt securing the rod at that point.
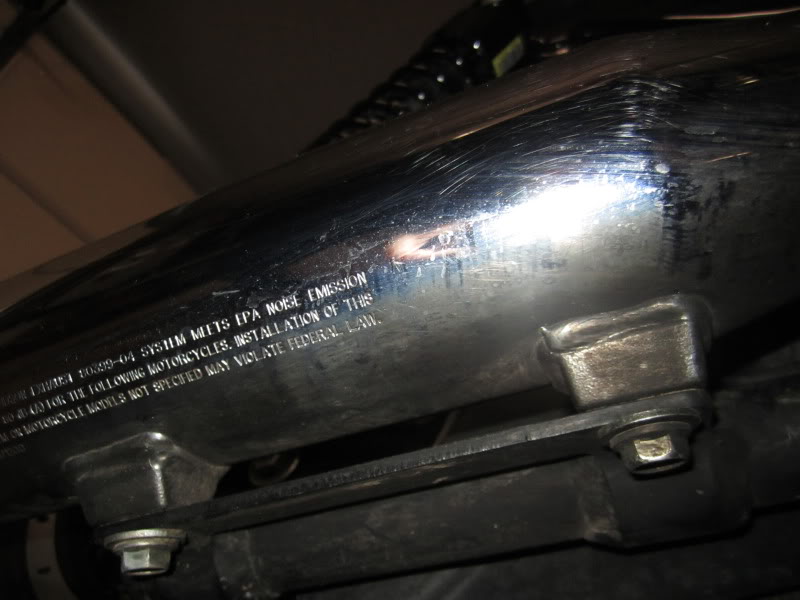
Remove the three bolts securing the stock exhaust mounting bar to the bike. Save the bolts for re-use
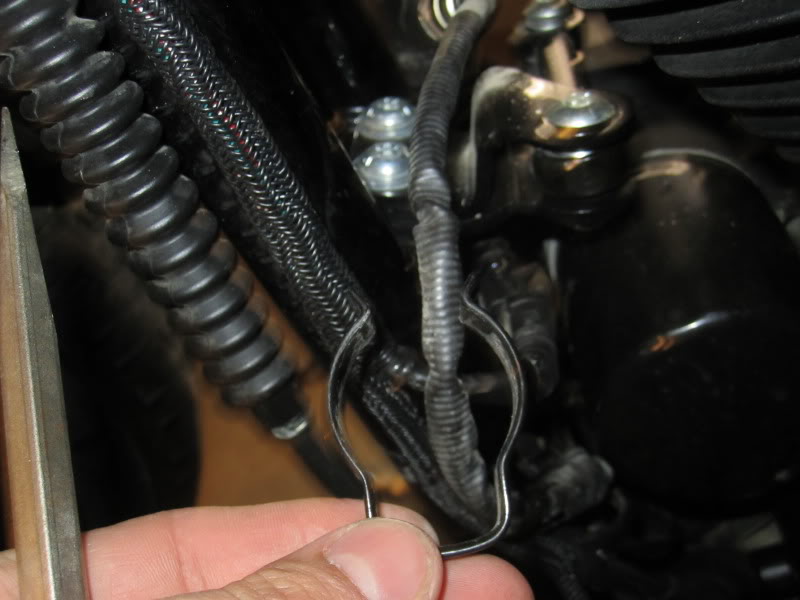
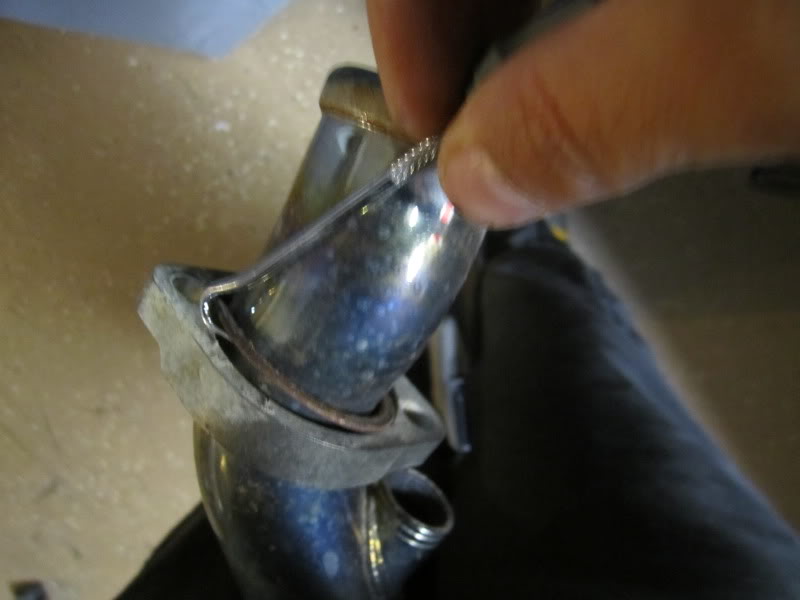
I used two sets of pliers to remove the clips that hold the flanges to the exhaust pipe. Pull apart just enough to get the clip off at an angle. Be careful not to deform the clips or you will need new ones.
One of the clips was stuck in the groove on the flange so I used a small hook tool to free it.
PART 2 TO FOLLOW...
I finally got around to installing my Vance and Hines Short Shots on my 48. The install went quicker than expected (about 2 hrs), and the pipes sound better than expected. Here is the install and all the pics I took along the way...
First you need to unplug the O2 Sensors. Locate the sensors on the stock exhaust and trace the wires back to the quick connect. On the front pipe, you will need to use a flathead screw driver to pry off the clip that secures the bundle of wires to the frame.
Next loosen the clamps that secure the heatshields to the stock exhaust. You will need a flathead screwdriver or a 5/16 socket.
Using a 1/2" socket remove the two nuts that secure the flange to the engine. A 6 or 8" socket extension helps.
On the belt cover you will see a bracket that is attached to the exhaust. Remove the bolt that secures the exhaust to that bracket.
Locate the round bar that is attached to the stock exhaust. Remove the bolts securing the exhaust. This is the last step before the pipes will be free from the bike so hang on to them as you remove the bolts...
Using a 22mm wrench, remove the O2 sensors from the stock pipes
Remove the drive belt cover by removing the bolts that secure it with a 3/16" allen wrench. The bolt that secures the bracket also needs to be removed with a 5/16" allen wrench.
Follow the rod from the brake pedal to its furthest point back. Use a T-30 torx driver to remove the bolt securing the rod at that point.
Remove the three bolts securing the stock exhaust mounting bar to the bike. Save the bolts for re-use
I used two sets of pliers to remove the clips that hold the flanges to the exhaust pipe. Pull apart just enough to get the clip off at an angle. Be careful not to deform the clips or you will need new ones.
One of the clips was stuck in the groove on the flange so I used a small hook tool to free it.
PART 2 TO FOLLOW...
#2
02-25-2012, 11:51 PM
PART II
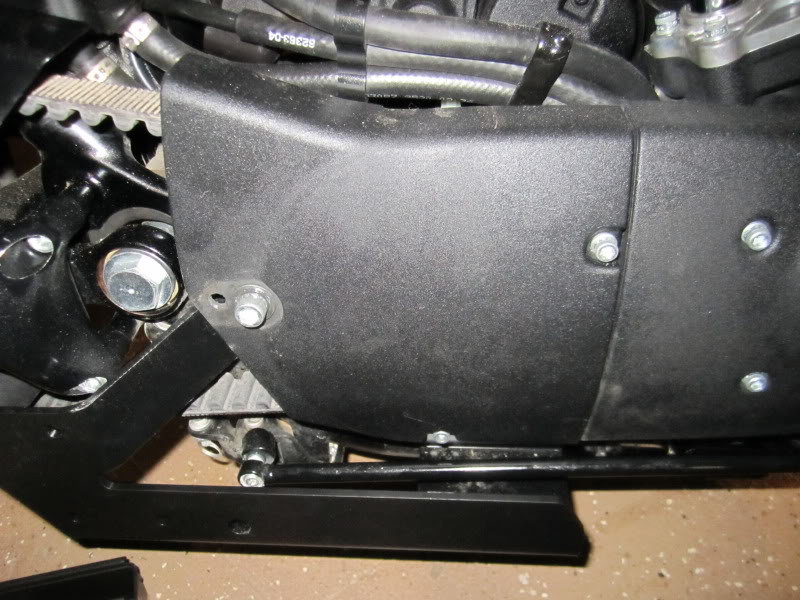
Use the stock washers and bolts to install the new bracket included with the short shots. Torque those bolts to 32 ft lbs
Re install the belt drive cover and torque to small bolts to 100 in lbs and the large bolt that was attached to the bracket to 32 ft lbs
Re install the brake rod with blue locktite. I was not able to torque this because there is not enough room to get a torque wrench in there...just tighten it down good and with the locktite, it shouldnt go anywhere

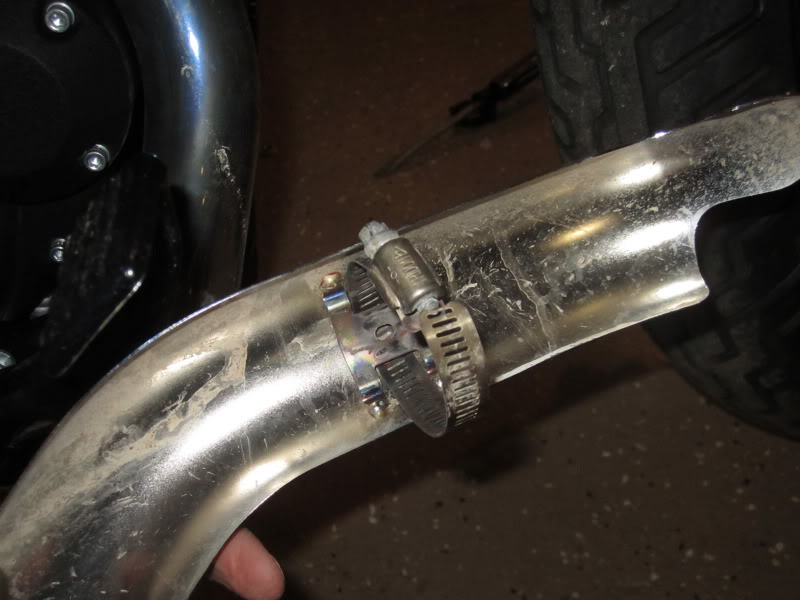
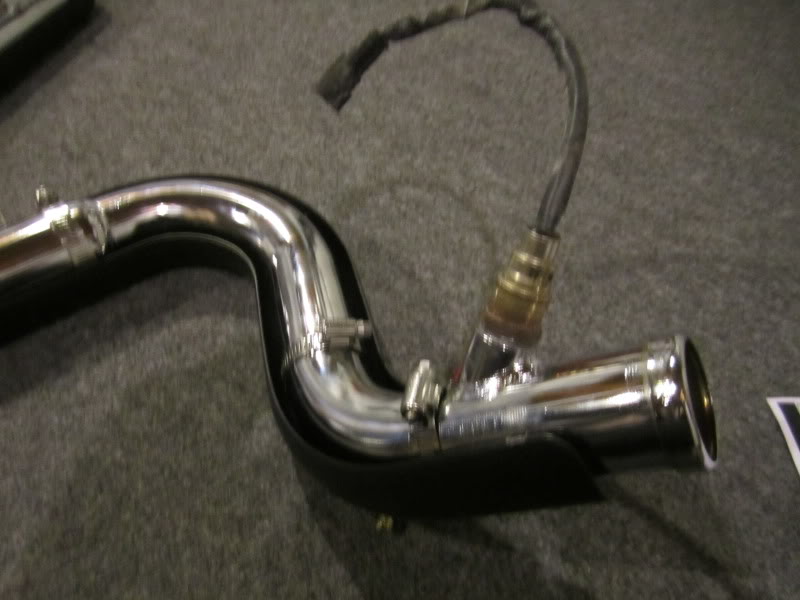
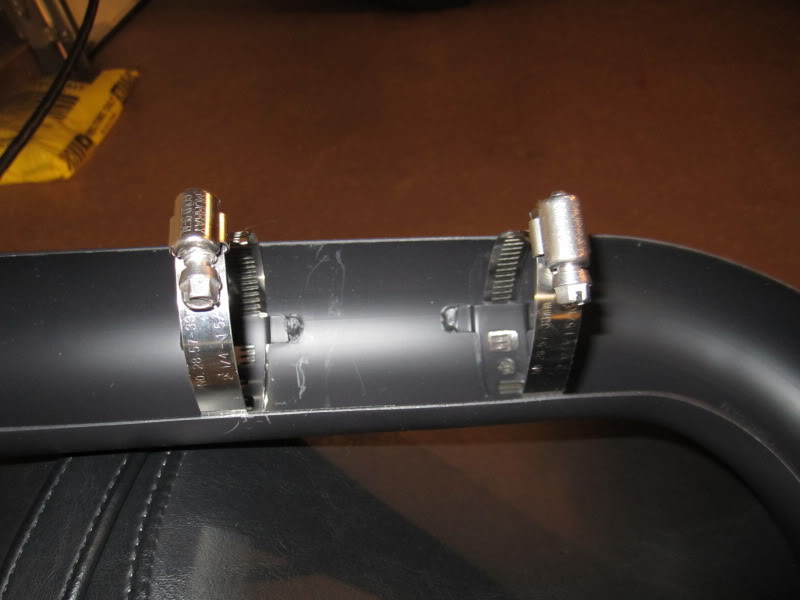
Lay the V&H heat shields on a towel and install the hose clamps. Leave them open. Be sure to leave the two rear clamps with the screw head facing up (as it is installed on the bike) and the rest of the clamps on the front and rear heatshields with the screwhead facing down. This will enable you to tighten them up once installed.
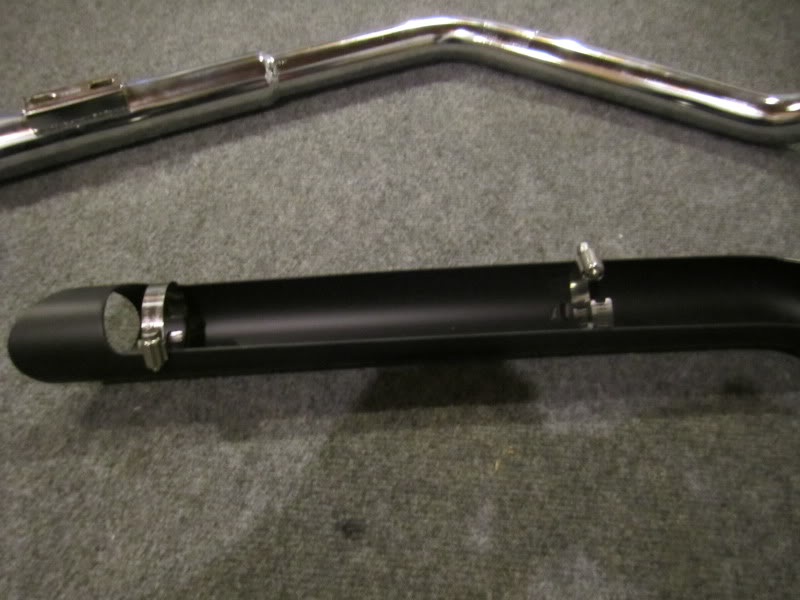
Lay the pipes into the heatshields and tighten the hose clamps enough to connect and start to close them...dont tighten all the way...
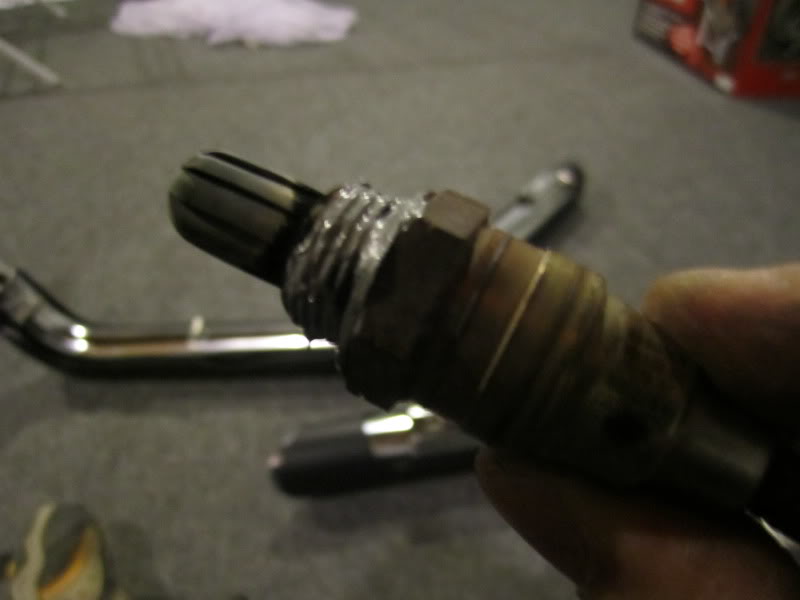
Use a O2 sensor thread chaser (avaialable at sears with the auto tools) to clean out the threads on the new pipes. Be sure to use antiseize on the thread chaser. Lightly coat the O2 sensors from the stock pipes with anti sieze (dont get any on the sensor part) and thread them into the new pipes, and tighten them up, do not over tighten.
Slip the exhaust flanges on to the new pipes, and using your 2 pairs of pliers, have someone hold the V&H pipes while you spread the stock clips apart and get them on. I found that starting the clips on the pipe at an angle, closed side on first helped...
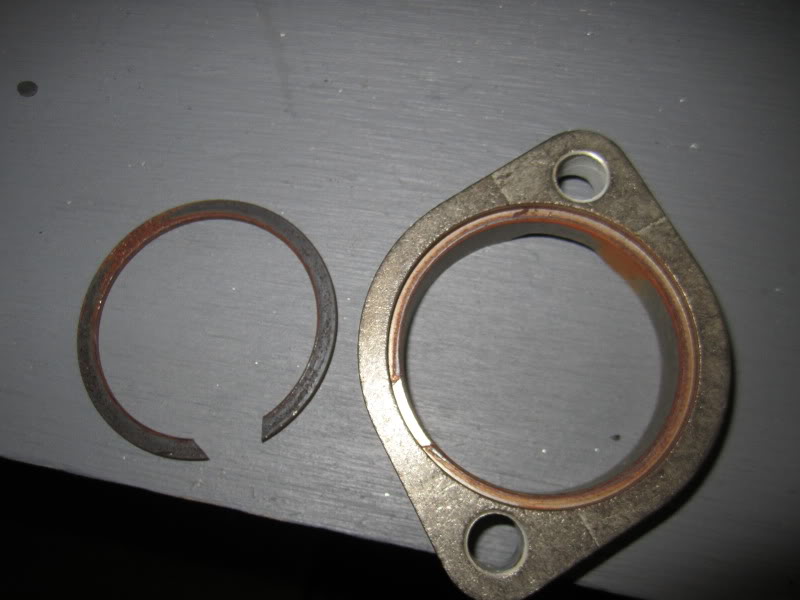
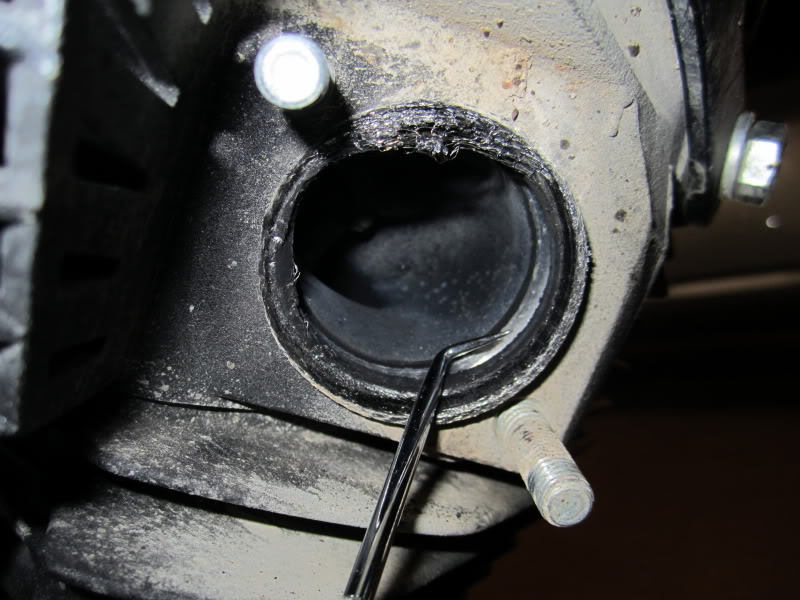
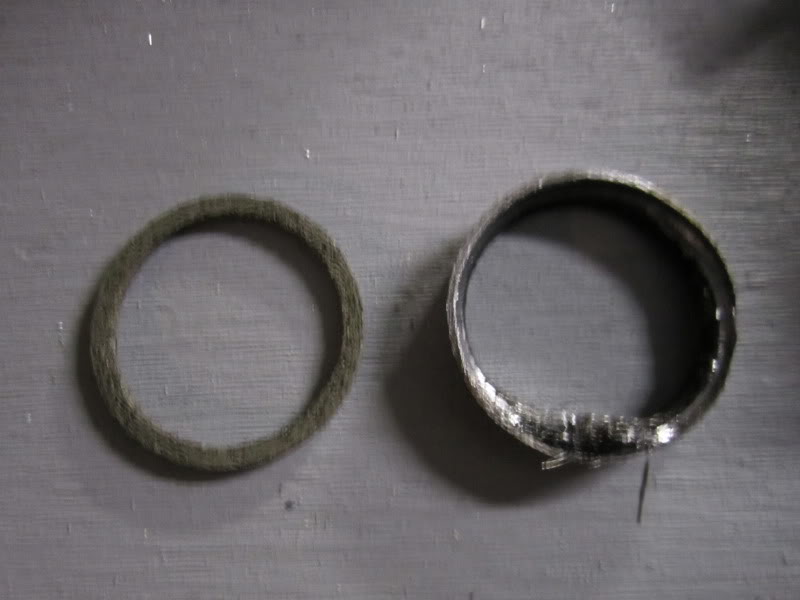
Using a hook tool, pry off the old gasket. It will look like a wire mesh foil...I didnt even notice it at first. Once the old gasket is out, firmly push in your new screamin eagle gasket.
Install the pipes starting with the exhaust flange. Start the stock flange nuts, but do not tighten
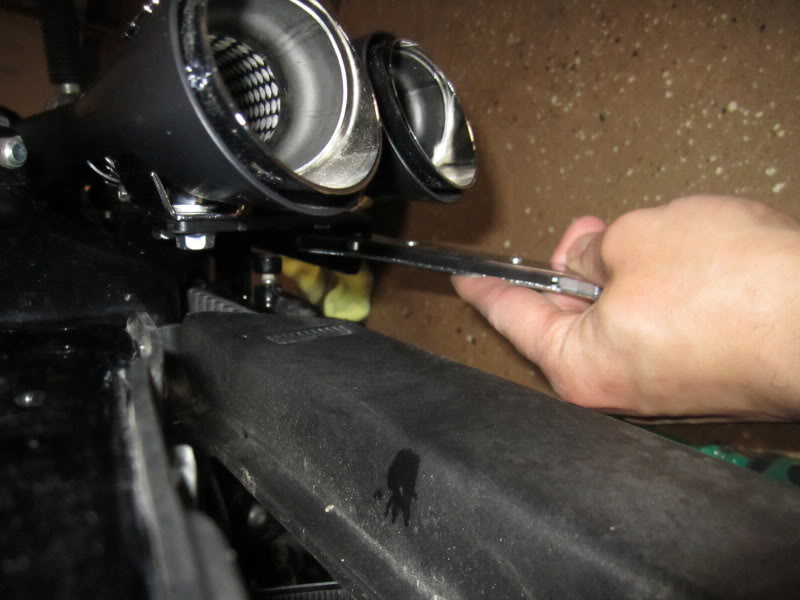
Line up the pipes on the new bracket. Install the included nut plate between the exhaust and the attached mounting bracket and line it up with the holes on the bracket attached to the belt cover. Use the supplied bolts to secure the bracket to the pipes. A wratcheting wrench came in very handy here...
Tighten the flange nuts
Tighten all of the hose clamps
Route the O2 sensor wires the same way they were when you started. Re attach the clamp to the frame on the front.
Clean your pipes with some warm soapy water. Make sure all wires are secured, out of the way. Double check the flange nuts and the bolts securing the exhaust to the bracket as well as the belt cover and brake rod, once it is all tightened up, start her up!!
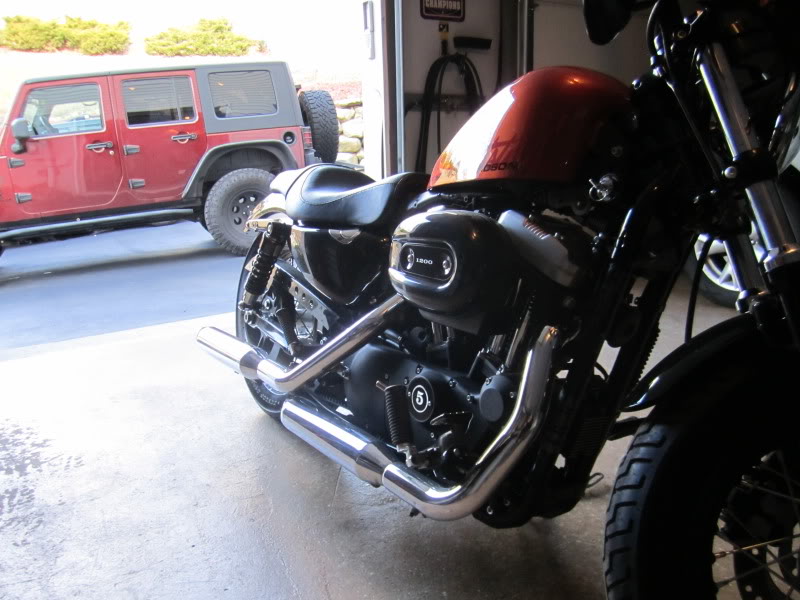
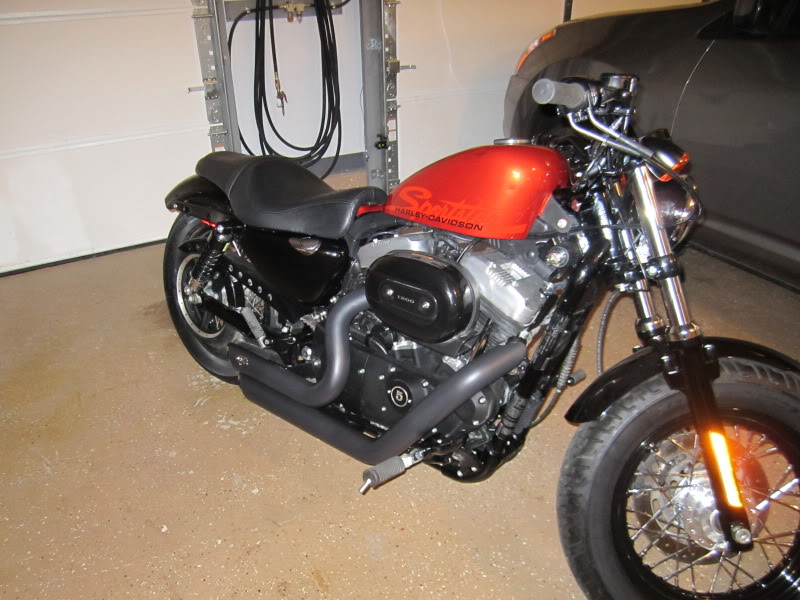
BEFORE:

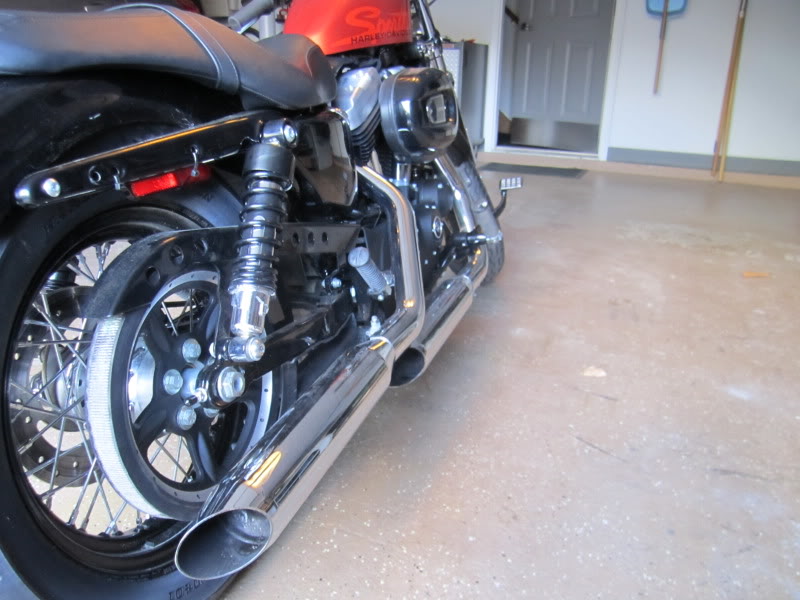
AFTER:
Use the stock washers and bolts to install the new bracket included with the short shots. Torque those bolts to 32 ft lbs
Re install the belt drive cover and torque to small bolts to 100 in lbs and the large bolt that was attached to the bracket to 32 ft lbs
Re install the brake rod with blue locktite. I was not able to torque this because there is not enough room to get a torque wrench in there...just tighten it down good and with the locktite, it shouldnt go anywhere
Lay the V&H heat shields on a towel and install the hose clamps. Leave them open. Be sure to leave the two rear clamps with the screw head facing up (as it is installed on the bike) and the rest of the clamps on the front and rear heatshields with the screwhead facing down. This will enable you to tighten them up once installed.
Lay the pipes into the heatshields and tighten the hose clamps enough to connect and start to close them...dont tighten all the way...
Use a O2 sensor thread chaser (avaialable at sears with the auto tools) to clean out the threads on the new pipes. Be sure to use antiseize on the thread chaser. Lightly coat the O2 sensors from the stock pipes with anti sieze (dont get any on the sensor part) and thread them into the new pipes, and tighten them up, do not over tighten.
Slip the exhaust flanges on to the new pipes, and using your 2 pairs of pliers, have someone hold the V&H pipes while you spread the stock clips apart and get them on. I found that starting the clips on the pipe at an angle, closed side on first helped...
Using a hook tool, pry off the old gasket. It will look like a wire mesh foil...I didnt even notice it at first. Once the old gasket is out, firmly push in your new screamin eagle gasket.
Install the pipes starting with the exhaust flange. Start the stock flange nuts, but do not tighten
Line up the pipes on the new bracket. Install the included nut plate between the exhaust and the attached mounting bracket and line it up with the holes on the bracket attached to the belt cover. Use the supplied bolts to secure the bracket to the pipes. A wratcheting wrench came in very handy here...
Tighten the flange nuts
Tighten all of the hose clamps
Route the O2 sensor wires the same way they were when you started. Re attach the clamp to the frame on the front.
Clean your pipes with some warm soapy water. Make sure all wires are secured, out of the way. Double check the flange nuts and the bolts securing the exhaust to the bracket as well as the belt cover and brake rod, once it is all tightened up, start her up!!
BEFORE:
AFTER:
Last edited by jmat1980; 02-26-2012 at 12:00 AM.
The following users liked this post:
1HD1C (01-24-2023)
#3
02-26-2012, 12:10 AM

#4
02-26-2012, 07:49 PM
Thanks...Those nuts were a pain, but not too bad...Ive got magnetic sockets so I just use that to put it back on...
#5
02-26-2012, 08:07 PM
Road Master

#7
07-04-2012, 12:35 PM

hey i just installed my short shots and was wondering if yours looked like mine. The exhaust gasket doesn't sit flush with the motor and i can still see threads on the bolt. So i was wondering if this is right. Here are some pictures of what it looks like. Thanks
http://i46.tinypic.com/352m710.jpg
http://tinypic.com/r/so643o/6
http://i46.tinypic.com/352m710.jpg
http://tinypic.com/r/so643o/6
Trending Topics
 , that would be my first choice.
#9
07-04-2012, 03:15 PM
Cruiser
Join Date: Mar 2012
Location: SoCal
Posts: 112
Likes: 0
Received 0 Likes
on
0 Posts
hey i just installed my short shots and was wondering if yours looked like mine. The exhaust gasket doesn't sit flush with the motor and i can still see threads on the bolt. So i was wondering if this is right. Here are some pictures of what it looks like. Thanks
http://i46.tinypic.com/352m710.jpg
http://tinypic.com/r/so643o/6
http://i46.tinypic.com/352m710.jpg
http://tinypic.com/r/so643o/6
