Got a pic of that? I might do the same sometime soon. Thanx.
Unfortunately my hands were too oily to touch the phone, so no. However when or if you pull the dampers the seals HAVE to come out to get to them, so it only makes sense to put in new ones. Just look closely at the old ones before you take them off the fork tube, and it is obvious how the new ones go on.
In the pic where I show my fancy oil measuring system , you see the PVC coupling I rigged up to tap them back in. Use a hard plastic hammer to do this cause those tubes are surprisingly soft. Don't ask how I know that part.
Just remember seals are to keep oil IN a space and expand to do so. Looking at the seal you will see one side is fairly solid, but the other is designed to expand under pressure.
After a 2.5 hour round trip to pick up a pair of used stock mufflers for $35, I tried going to the tags place to FINALLY register the bike (they closed a day early for the holiday, bastards), swung by the local dealer to return the air filter that didn't fit and price out tire replacement, then set to swapping the baffle-less mufflers on my Sporty for the used OEM ones. Getting off the rear one was easy. Getting off the front one was a BITCH. Not only did I not have the proper wrench to remove the locking nut (a 3/4" standard angled wrench did the trick, but required a quick trip to Lowes after aborting an attempt to remove the rear brake assembly), but I had to loosen the header pipe slightly, do my best to totally disassemble the mangled clamp, spray a little WD-40 on the muffler connection (I wiped it off afterward), and fight with the f***** for almost an hour before it finally came loose. The muffler connection had been crimped somehow, so it wouldn't actually rotate or shift much at all relative to the header pipe. By the time I was done with all of this, especially after the early and active morning I'd already had, I'm too damn tired to ride. I'll try getting out tomorrow. Pity, though: today's weather is perfect, and the rest of the holiday is going to be hot as hell. :/
I did do a brief DB Meter measurement near the back pipe with full choke before and after the swap: about 116db before, about 111db after. Definitely louder and more bassy without the baffles. Hopefully after warm-up it will be less-loud ('cause it still ain't quiet) enough that my neighbor won't continue to bitch.
Dude, have you considered Supertrapp? You can actuall tune the sound.
A week ago my bike started spitting and sputtering, I thought it my be the fuel filter so this afternoon I pulled the tank and replaced the filter and pump. After getting everything back together I fired her up she was running on one cylinder I checked the coil, that was good so I started to panic with visions of stuck valves or clogged injectors, turns out it was the Pulstar sparkplugs I had installed a month ago. I made a trip to the local auto parts store and picked up a set of champion copper core plugs and the world is right again.
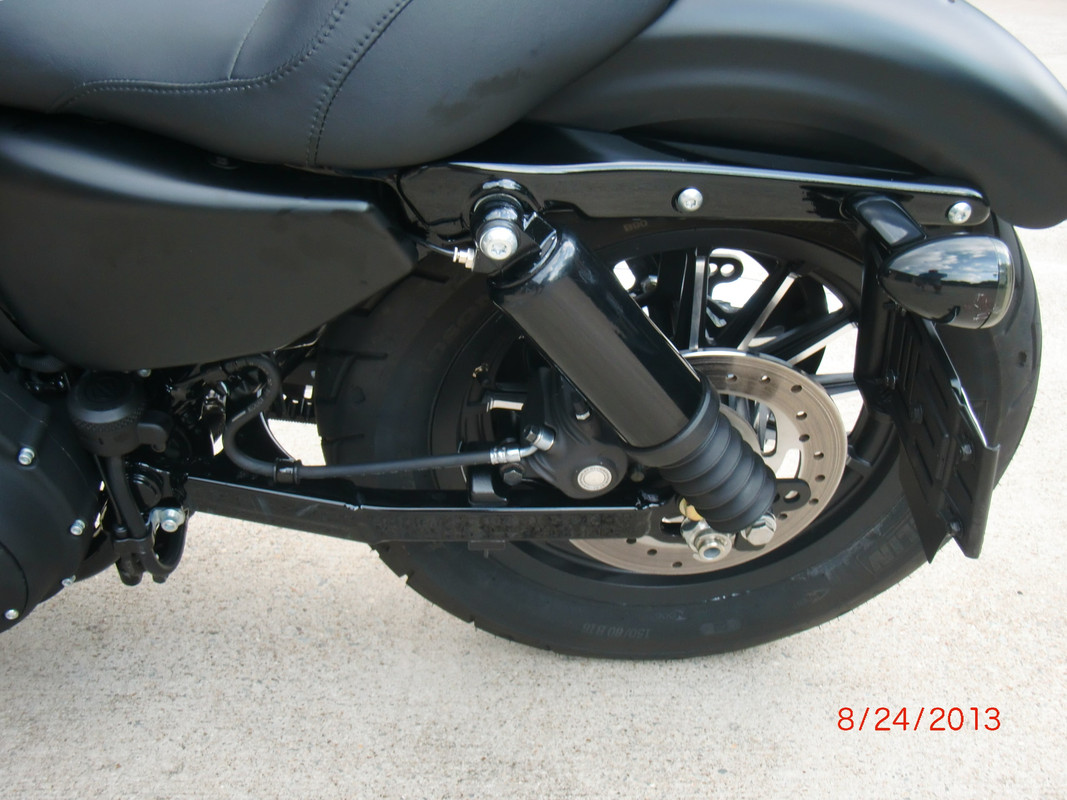
Rode into town today to find some shorter air valves for my RK air shocks. The ones I first bought were from Ace hardware. They call them tank valves and come with 1/8" mpt on one end and about a 1" stem on the other, for the air pump. Problem is, when the were installed, I realized now I cannot screw on my HD air pump.
The long one in the pic is the Ace one. Tried Ace again to see if anything new came in, nope. So I went to what used to be NAPA auto parts, now CarQuest. Sure enough, found a pair of them for what Ace wanted for one. Hmmm
It is the shorter one. Even as short as it is, it is still a very tight fit to get the valve on, but it works. Easy to access with the bags on too. I did see a 45* street EL at Ace, and might still go that route. That will make the angle very easy to work with.
Here the short ones are installed.
Last edited by handirifle; 05-25-2019 at 08:24 PM.
Rode into town today to find some shorter air valves for my RK air shocks. The ones I first bought were from Ace hardware. They call them tank valves and come with 1/8" mpt on one end and about a 1" stem on the other, for the air pump. Problem is, when the were installed, I realized now I cannot screw on my HD air pump....
Looks like you installed them facing forward, have you considered turning the shock around so they face backward? I put mine on with the valve to the rear, gives me a little more room, no problem getting the pump on the short valve.
Yes I tried that first but there is a wedge shaped tab, you can see in the pic above, that hit the frame preventing me from mounting it that way.
This solution works fine. I also discovered I could use only 2 washers. I tried 2 when first installing them but the rubber dust cover ring hit the belt guard. Really not sure why it did then but when I tried this time it was fine.
So I set them both on with just 2 washers. More strength that way, plus not as obvious. I tried 5 psi in them for solo riding, and it seemed harsher than empty, so I bled them back to zero. Much better ride solo. For 2 up I will start with 5 and go from there. That HD pump is fantastic. I paid a lot for it at the dealer, but that only hurts once. Now I have a pump for the shocks, and in an emergency, for the tires.
I was concerned when I did all this (shocks, dampers) that I might make it too high, since my inseam, used to be 29". Not sure anymore, but the 29" pants will drag the ground LOL. Anyway, am happy I can still flat foot, and this puppy will lean now. Have not yet dragged any parts and have leaned it way more than ever before. Not sure I will ever get it to drag parts, as I am not one to really push my boundries that far.
Yes I tried that first but there is a wedge shaped tab, you can see in the pic above, that hit the frame preventing me from mounting it that way.
This solution works fine. I also discovered I could use only 2 washers. I tried 2 when first installing them but the rubber dust cover ring hit the belt guard. Really not sure why it did then but when I tried this time it was fine.
So I set them both on with just 2 washers. More strength that way, plus not as obvious. I tried 5 psi in them for solo riding, and it seemed harsher than empty, so I bled them back to zero. Much better ride solo. For 2 up I will start with 5 and go from there. That HD pump is fantastic. I paid a lot for it at the dealer, but that only hurts once. Now I have a pump for the shocks, and in an emergency, for the tires.
...snip...
What I found to be "easiest" (for me) was to just run the HD push-lok tubing to the HD common "manifold" with a single shrader.
That way I know there is the same pressure to both shocks and I mounted the schrader in a fairly easy to get
to place under the battery cover. Here's a couple of older pics.

 05-25-2019, 03:35 PM


 , you see the PVC coupling I rigged up to tap them back in. Use a hard plastic hammer to do this cause those tubes are surprisingly soft. Don't ask how I know that part.