
2011 Road King Classic Makeover Project
#1
 04-28-2016, 11:31 PM


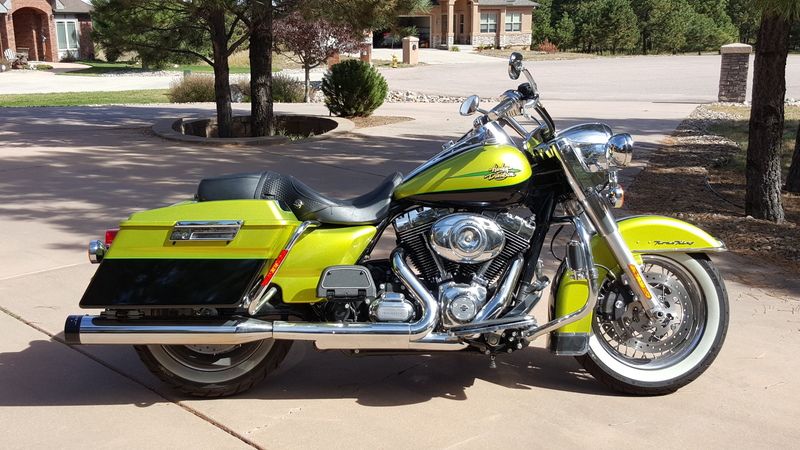
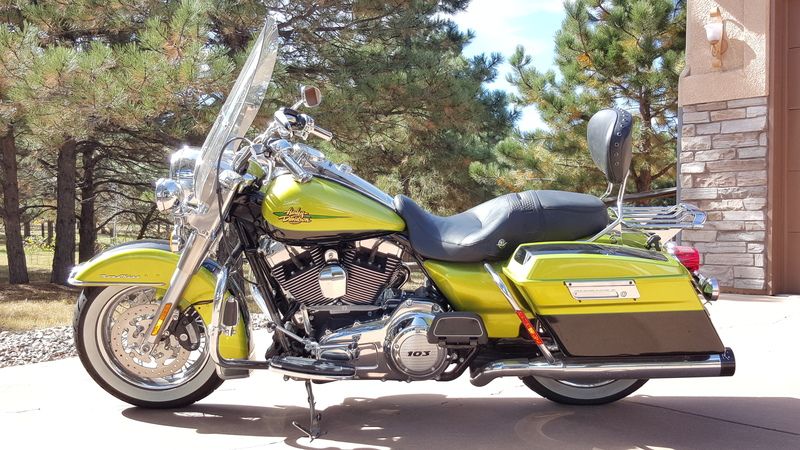
Last October, I came across a 2011 Road King Classic in Green Apple/Vivid Black. I've always had a thing for the Green Apple color, and the hook was set pretty quick. After a few rounds of haggling, the seller and I agreed to a mutually fair price, and I rode it 16 miles home from his house. Since then, it's been on the jack, undergoing a serious makeover.
I'm not really getting into the engine on this one - at least not yet. I'll be stopping at a stage 1. Hell, the bike only has 3,122 miles on it.
The previous owner had added some chrome doo-dads and Rinehart 4" slip ons. The stock head pipes are still on, but they're soon to be replaced. Probably the most significant investment the PO made was the addition of hard bags from an Ultra Classic, already painted to match. It was a good thought, but the Vivid Black on the bag lowers is waaaay too high. It looked really unbalanced.
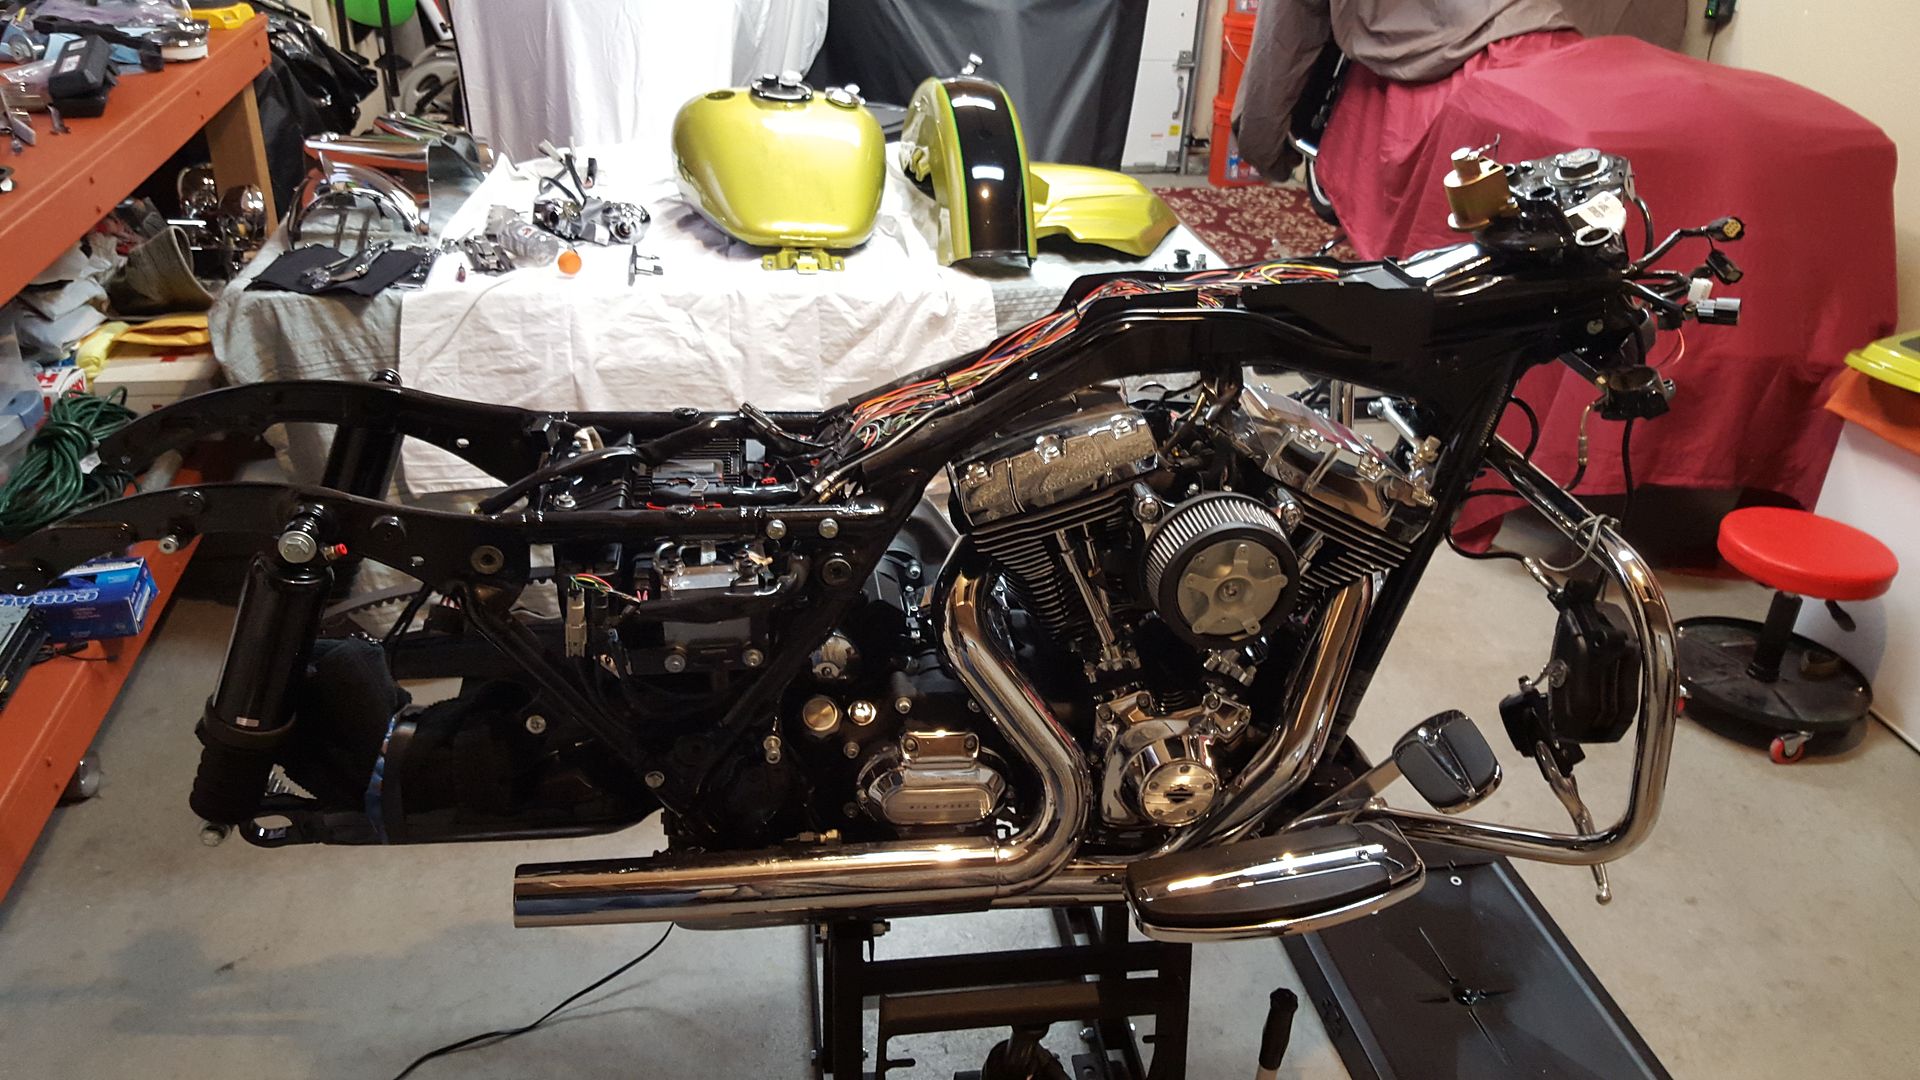
Here she is on day one:
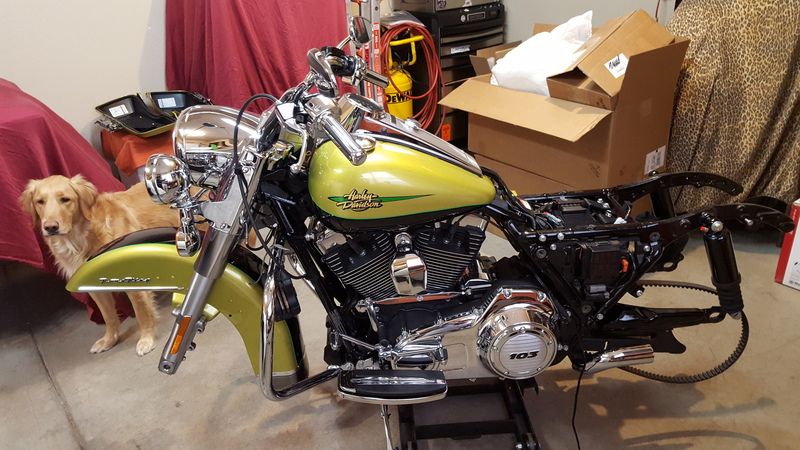
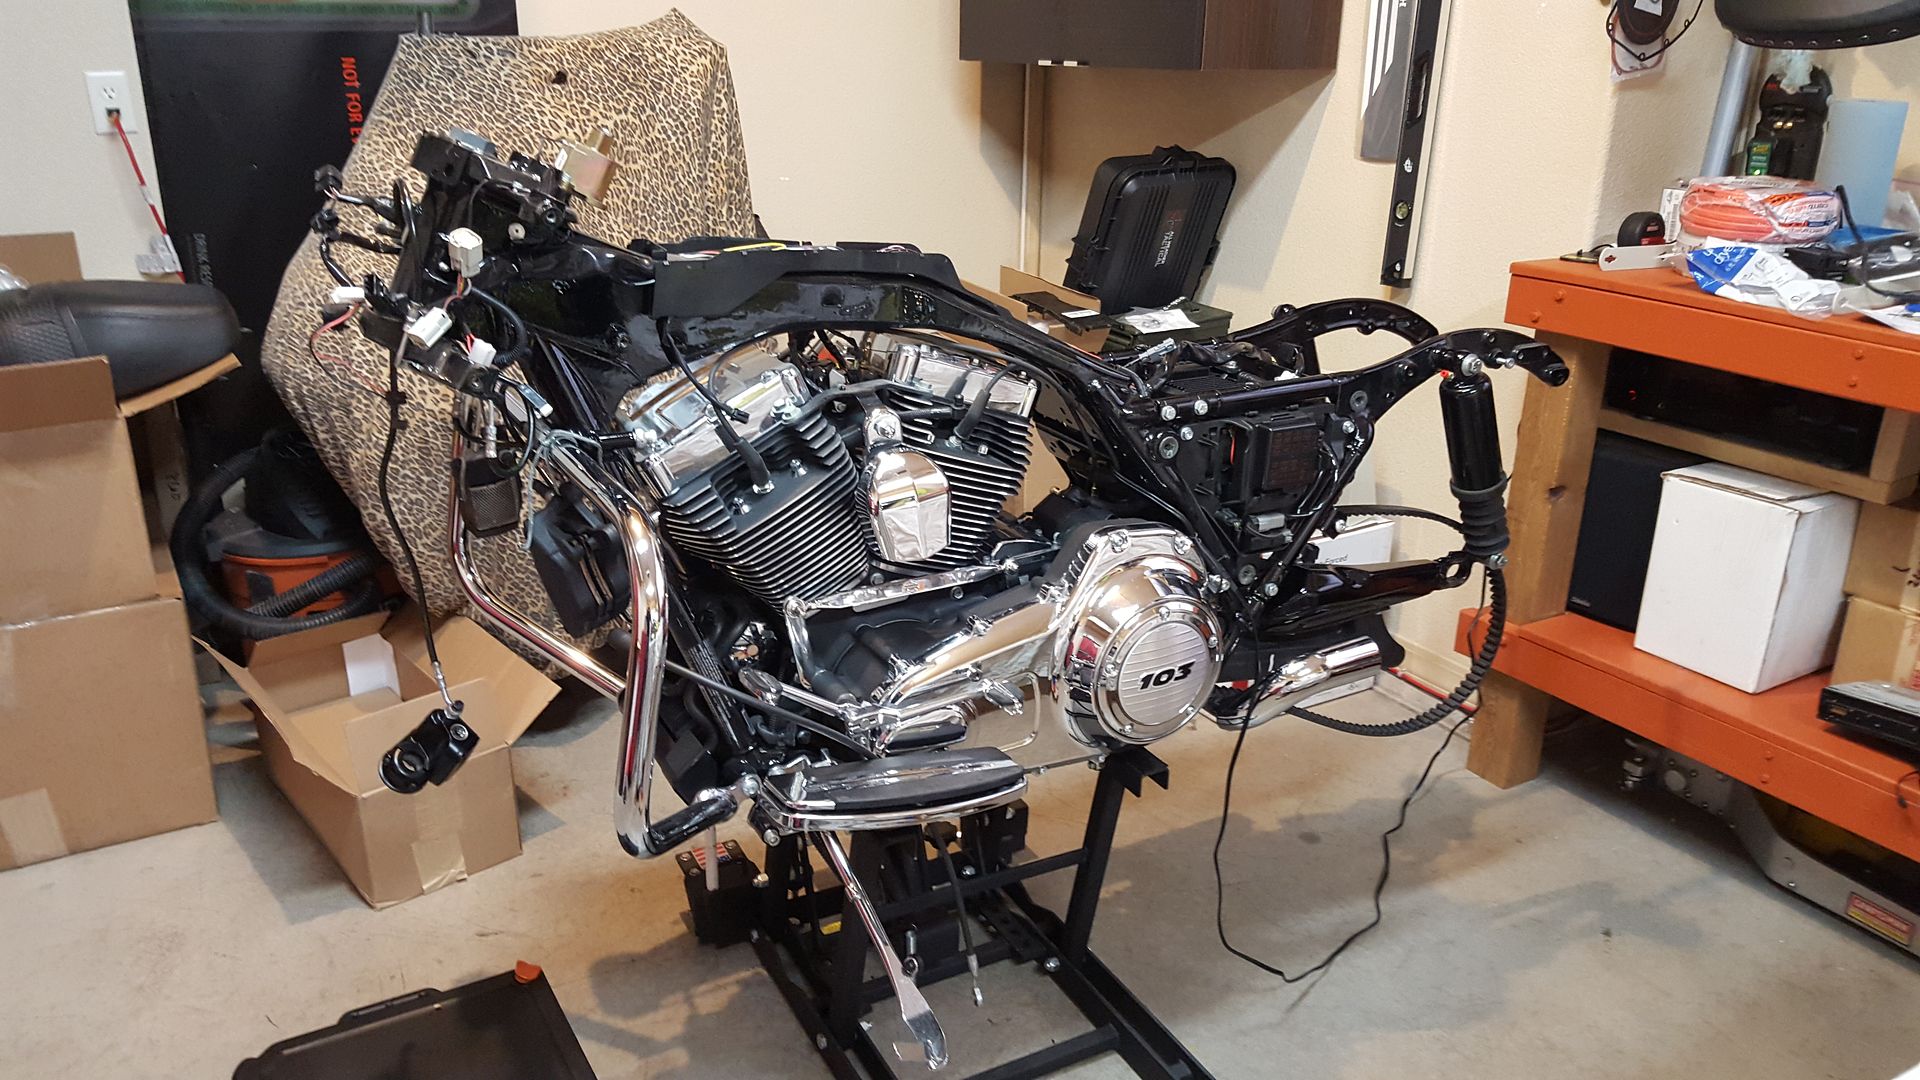
Like I said, it's been on the jack ever since it came home.
I had a vision for this one and quickly set about stripping it down. My little helper, Mango, loves being in the garage with me! He's such a good dog!!
I'm an ape hanger guy through and through. I decided on a set of Carlini 18" 1.50" diameter Flyin' Apes. This required a fat 1.5" riser as well.
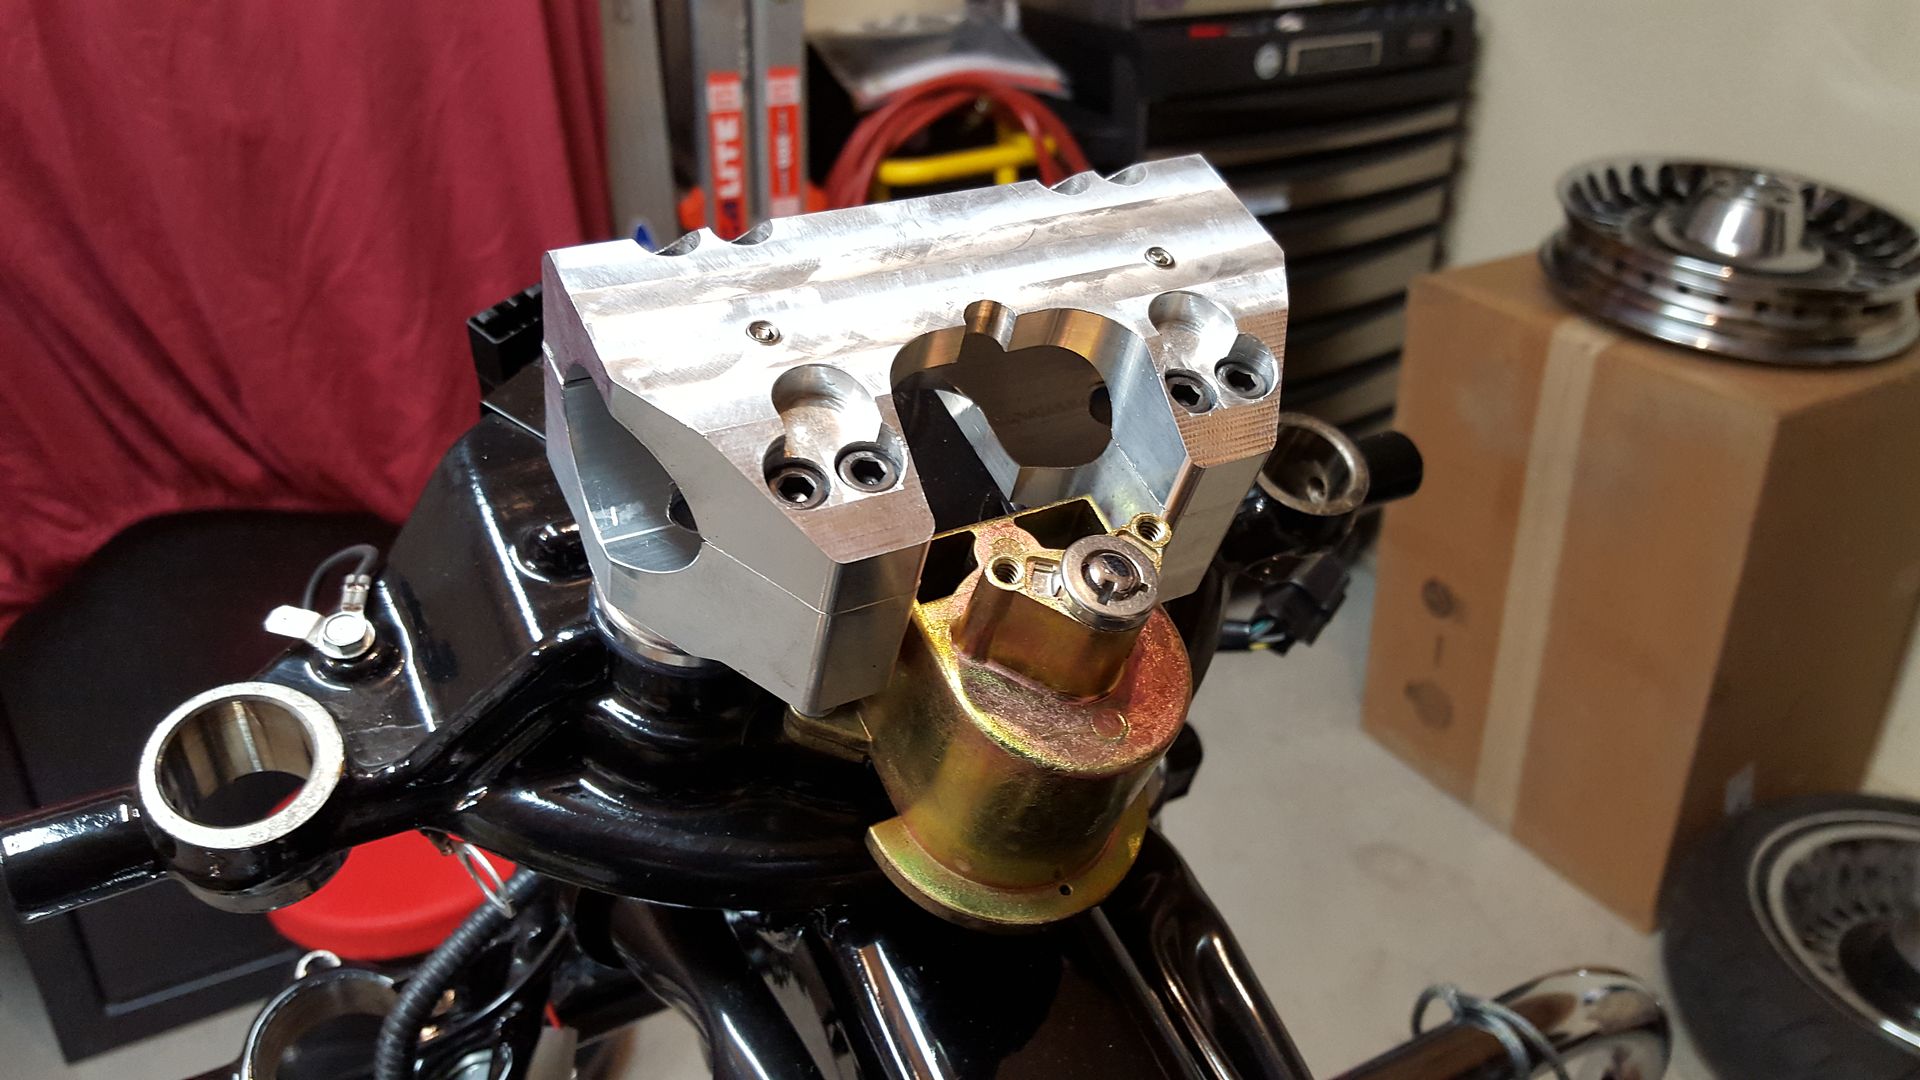
I have the Flyin' Apes all wired and ready to go, but decided after I mounted them that I'd be going with different bars. The Flyin' Apes will be posted for sale soon.
Since I was having a lot of paint work done, I decided this was the perfect time to replace the stock fork components with a chrome kit. As an added bonus, I took this opportunity to upgrade the front suspension to Progressive Monotubes.
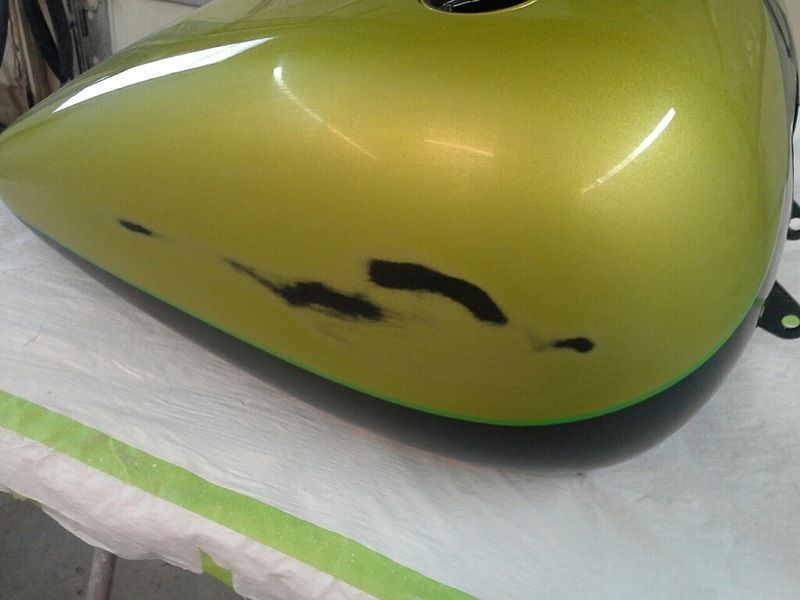
One of the things I really didn't like with this bike was the layout of the paint scheme. The side covers had no vivid black on them. The tank had awful decals (IMHO) that had a surfboard kind of feel to them. I mean, on a RKC, they just looked a million miles out of place. Since I was doing extended bags, I decided to have the decals removed in favor of emblems.
I also decided I liked the look of the Street Glide fascia in favor of filler strips. Plus, I wanted extended CVO bags. The fascia was necessary to complete the look of the rear end. I also ordered a new rear fender from a 2009 Street Glide (so I can retain the stock RKC taillight and signal bar). The previous owner drilled an extra 3 holes below the taillight on the original fender to move the plate. So, to get a clean and smooth look, there were 9 holes that needed to be closed. It was cheaper to just get the new fender!
In order to keep things balanced, I will also be adding the front fender tip light, to match the fascia lighting that the rear end will have.
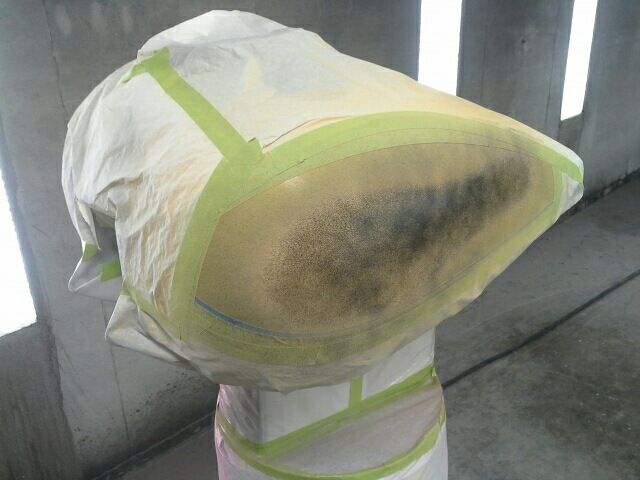
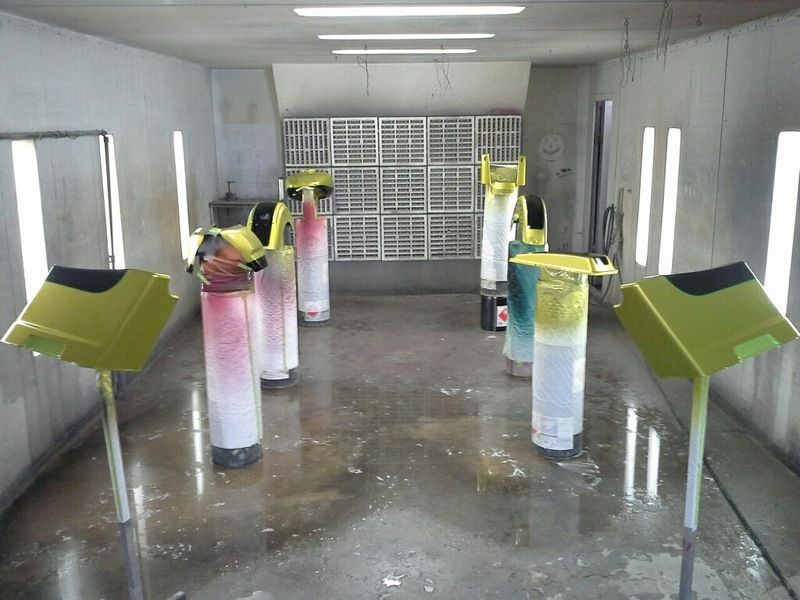
While I was having the new bag lowers painted, I brought in every other part. There were a few small chips here and there that needed to be addressed, so my awesome painter set about making things look new again.
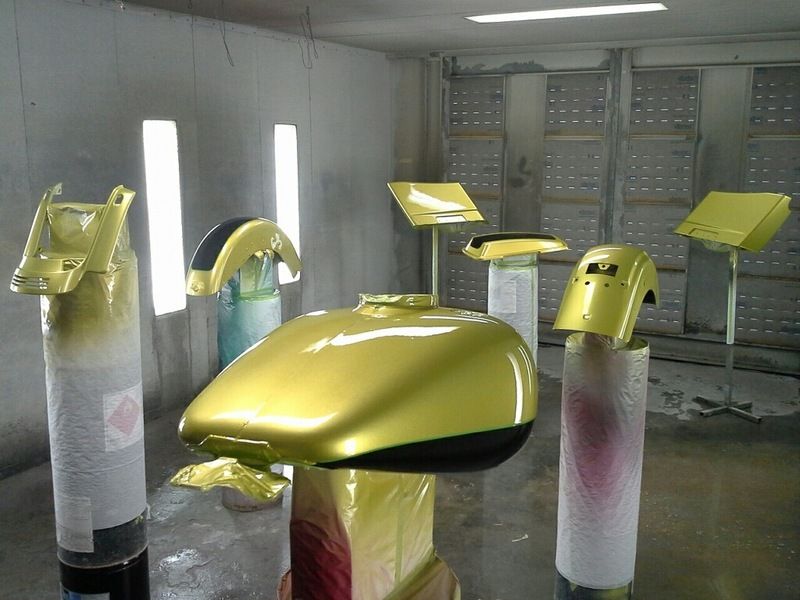
Early this week, I met with the painter to discuss the two-tone layout on the bags, side covers, and rear fender. All the Vivid Black has been shot and the pinstriping between the colors should be completed soon. I might have the body work back from the painter this weekend, but we'll see.
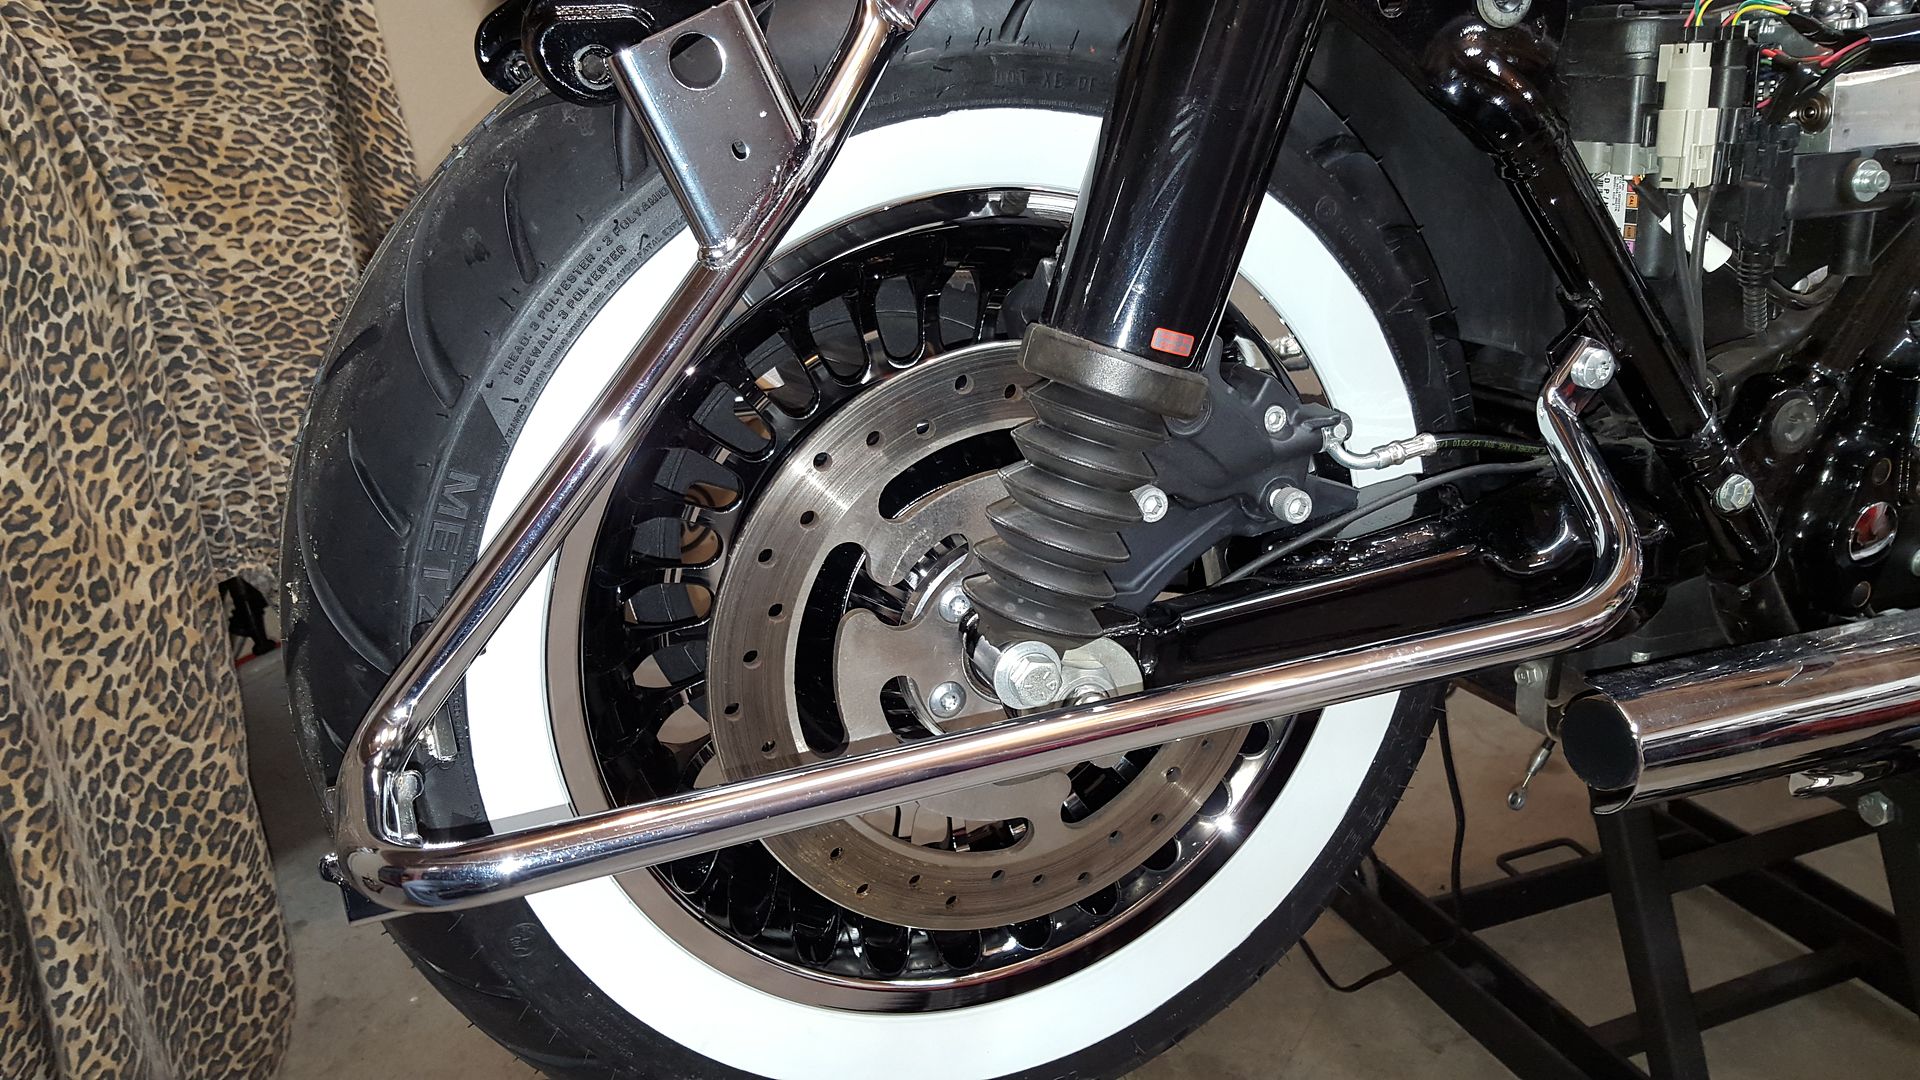
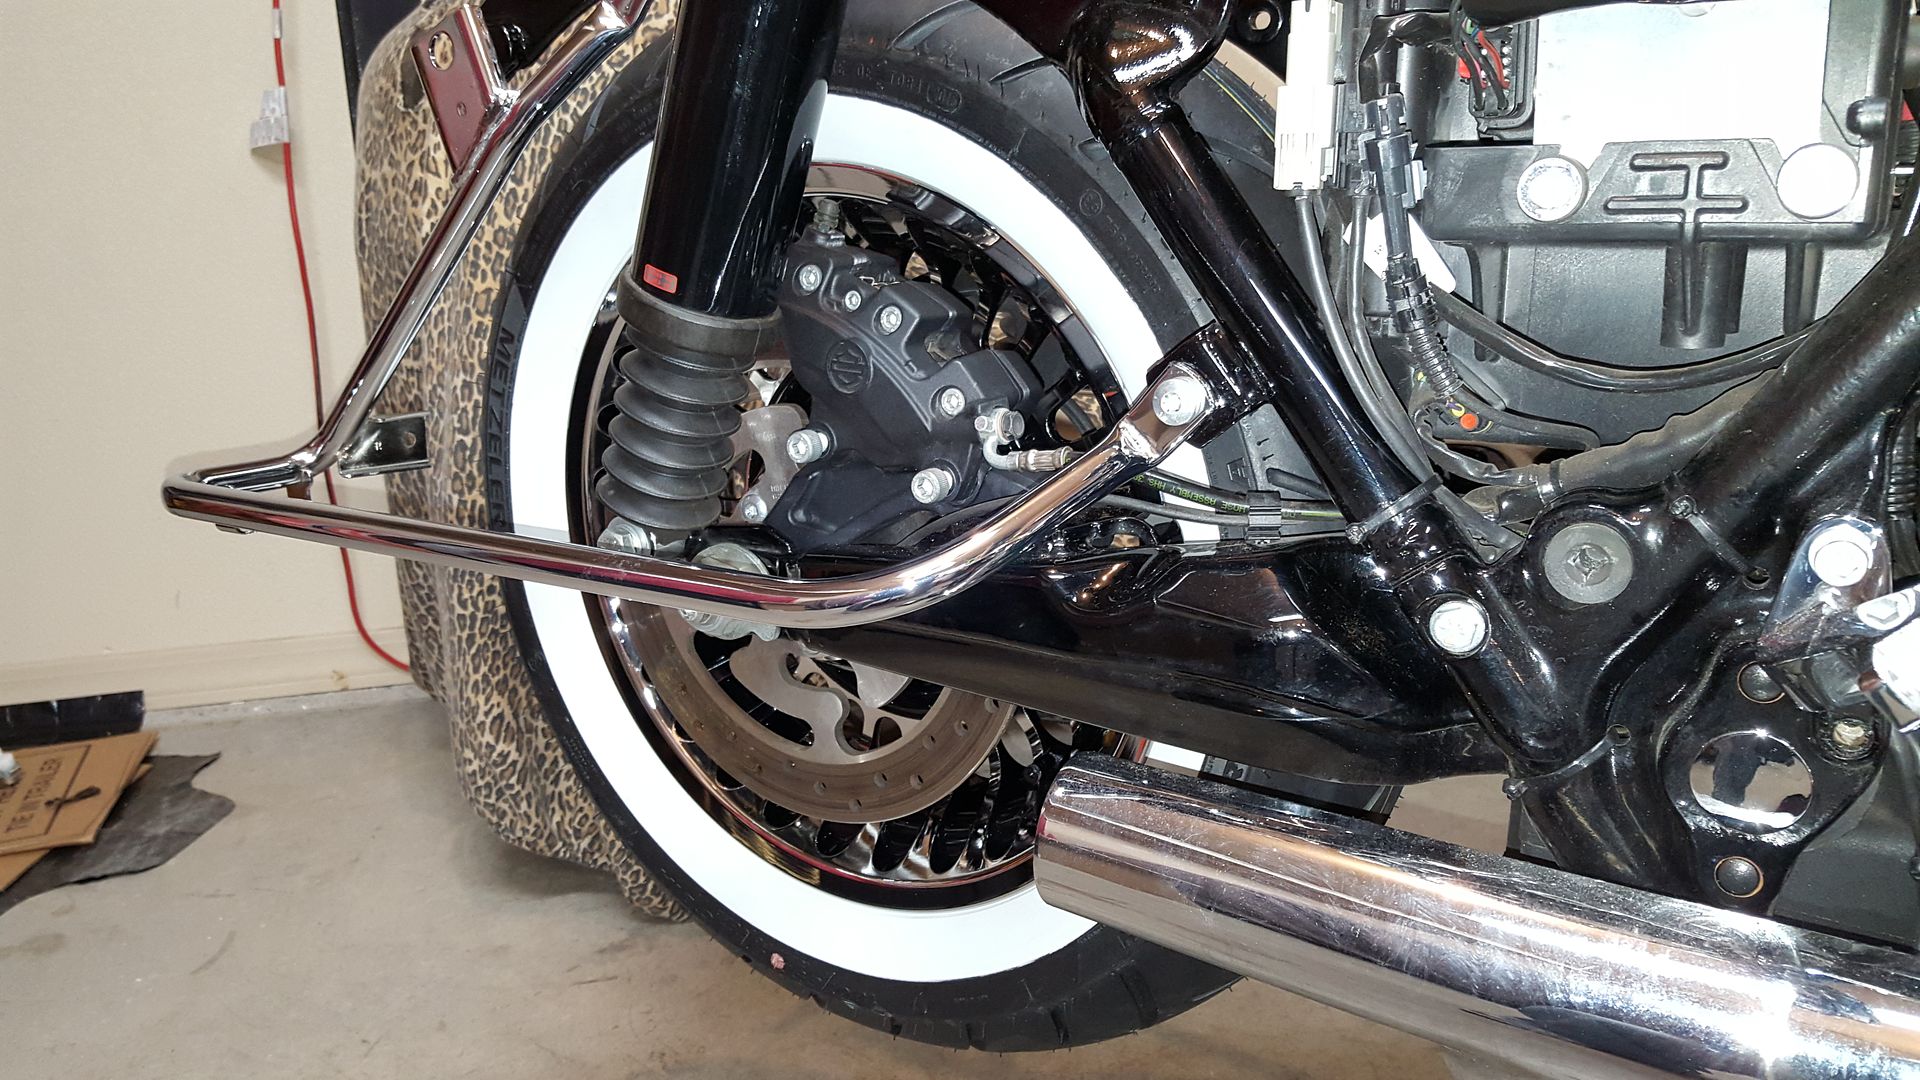
I also decided to replace the wheels. The original wheels were the profile laced chrome spoke wheels. They looked good, but I wanted a set of the 28 Knuckles. I found a set that needed a little TLC and cleaning. They look good as new now. These wheels typically come on an Ultra Limited and usually are wrapped with a skinny white wall.
Well, this is a RKC!! It NEEDS to have wide white walls. So, I mounted up a pair of Metzler ME880 Ultra Marathons. Bonus points awarded for swapping the valve stems over to 90* stems and balancing with Dyna Beads - such a clean look.
The front wheel is waiting for some tear drop rotors from a later 2000s CVO Electra Glide Classic - these rotors are just like the regular tear drops, except the center carriers are powder coated black. This is going to match so well with the contrast cut wheels.
And that brings us to today - the rear wheel is mounted and looking good. I love the way the fat WWW's look against the chrome and black wheels.
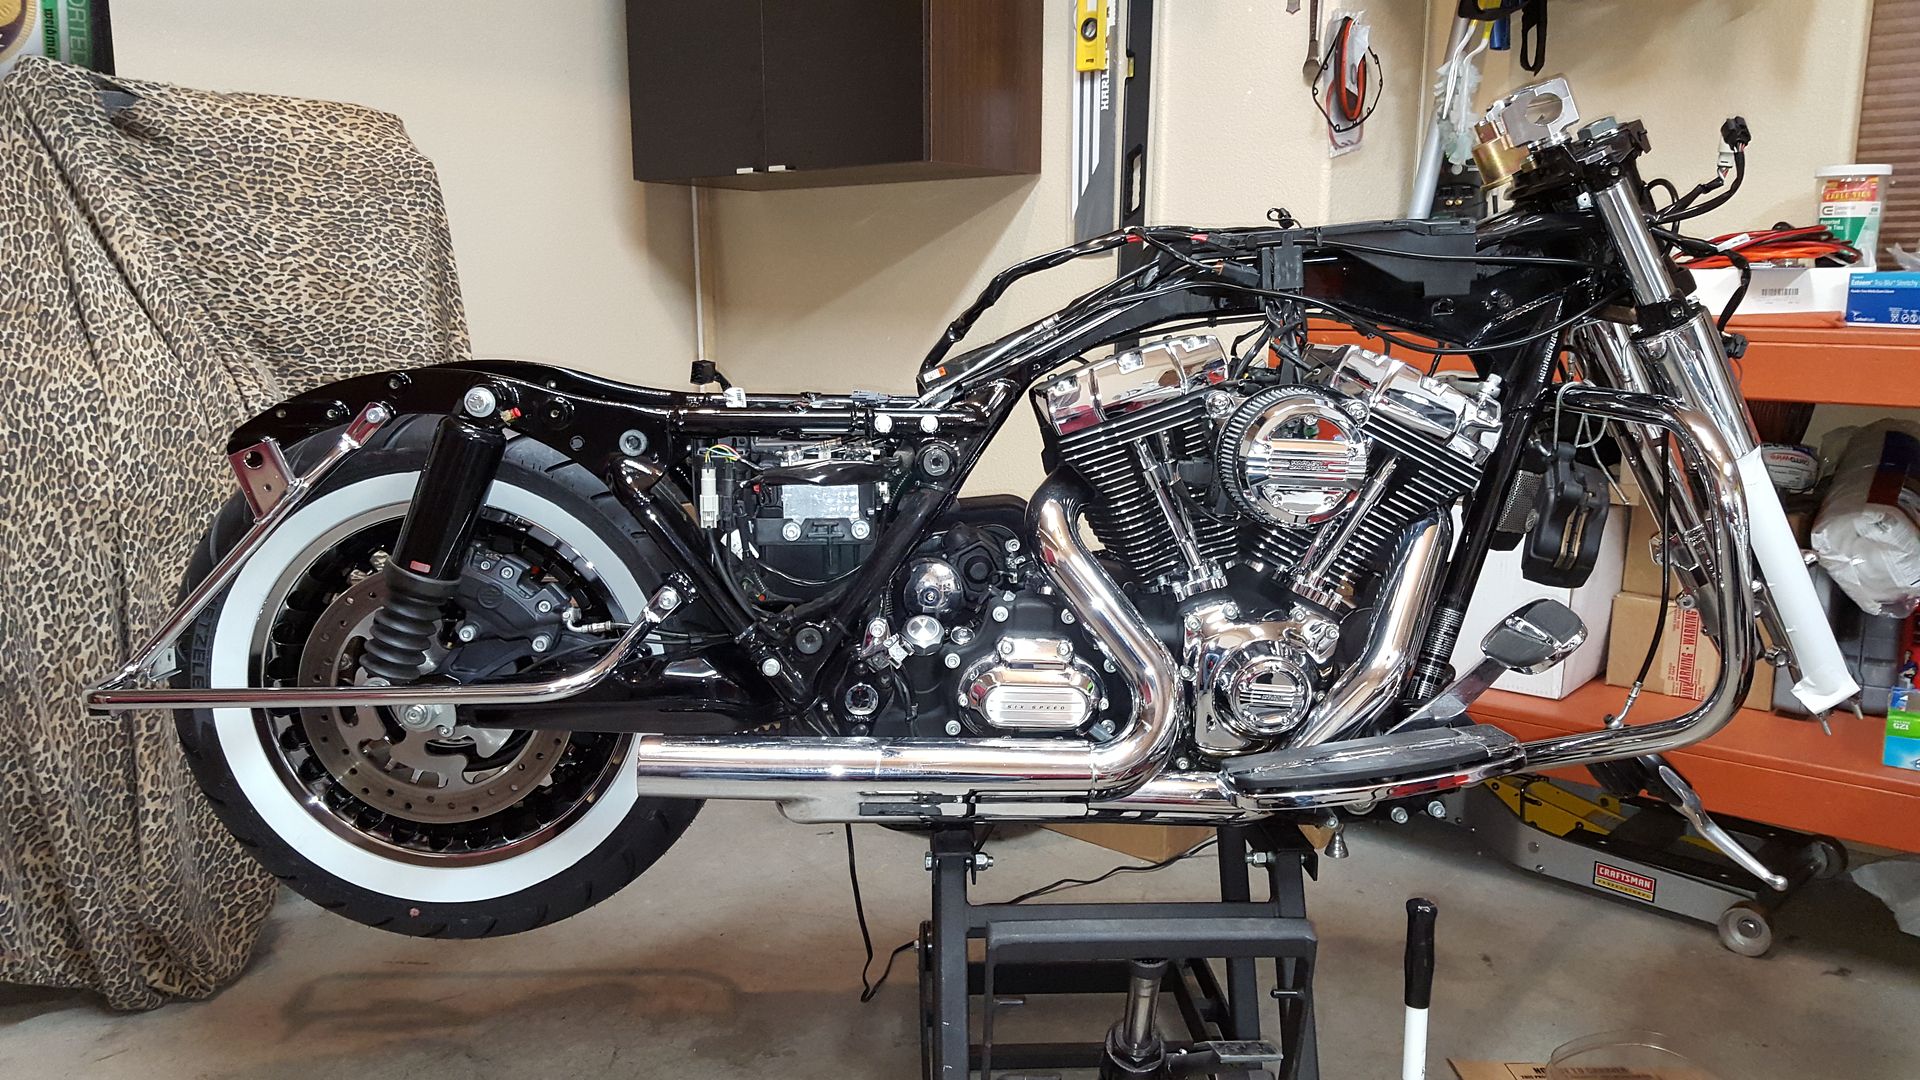
I'll be adding more to this thread as the makeover project progresses.
Thanks for looking and I appreciate your thoughts and comments!
-RB719
I'm not really getting into the engine on this one - at least not yet. I'll be stopping at a stage 1. Hell, the bike only has 3,122 miles on it.
The previous owner had added some chrome doo-dads and Rinehart 4" slip ons. The stock head pipes are still on, but they're soon to be replaced. Probably the most significant investment the PO made was the addition of hard bags from an Ultra Classic, already painted to match. It was a good thought, but the Vivid Black on the bag lowers is waaaay too high. It looked really unbalanced.
Here she is on day one:


Like I said, it's been on the jack ever since it came home.
I had a vision for this one and quickly set about stripping it down. My little helper, Mango, loves being in the garage with me! He's such a good dog!!


I'm an ape hanger guy through and through. I decided on a set of Carlini 18" 1.50" diameter Flyin' Apes. This required a fat 1.5" riser as well.

I have the Flyin' Apes all wired and ready to go, but decided after I mounted them that I'd be going with different bars. The Flyin' Apes will be posted for sale soon.
Since I was having a lot of paint work done, I decided this was the perfect time to replace the stock fork components with a chrome kit. As an added bonus, I took this opportunity to upgrade the front suspension to Progressive Monotubes.
One of the things I really didn't like with this bike was the layout of the paint scheme. The side covers had no vivid black on them. The tank had awful decals (IMHO) that had a surfboard kind of feel to them. I mean, on a RKC, they just looked a million miles out of place. Since I was doing extended bags, I decided to have the decals removed in favor of emblems.


I also decided I liked the look of the Street Glide fascia in favor of filler strips. Plus, I wanted extended CVO bags. The fascia was necessary to complete the look of the rear end. I also ordered a new rear fender from a 2009 Street Glide (so I can retain the stock RKC taillight and signal bar). The previous owner drilled an extra 3 holes below the taillight on the original fender to move the plate. So, to get a clean and smooth look, there were 9 holes that needed to be closed. It was cheaper to just get the new fender!
In order to keep things balanced, I will also be adding the front fender tip light, to match the fascia lighting that the rear end will have.
While I was having the new bag lowers painted, I brought in every other part. There were a few small chips here and there that needed to be addressed, so my awesome painter set about making things look new again.

Early this week, I met with the painter to discuss the two-tone layout on the bags, side covers, and rear fender. All the Vivid Black has been shot and the pinstriping between the colors should be completed soon. I might have the body work back from the painter this weekend, but we'll see.

I also decided to replace the wheels. The original wheels were the profile laced chrome spoke wheels. They looked good, but I wanted a set of the 28 Knuckles. I found a set that needed a little TLC and cleaning. They look good as new now. These wheels typically come on an Ultra Limited and usually are wrapped with a skinny white wall.
Well, this is a RKC!! It NEEDS to have wide white walls. So, I mounted up a pair of Metzler ME880 Ultra Marathons. Bonus points awarded for swapping the valve stems over to 90* stems and balancing with Dyna Beads - such a clean look.
The front wheel is waiting for some tear drop rotors from a later 2000s CVO Electra Glide Classic - these rotors are just like the regular tear drops, except the center carriers are powder coated black. This is going to match so well with the contrast cut wheels.
And that brings us to today - the rear wheel is mounted and looking good. I love the way the fat WWW's look against the chrome and black wheels.


I'll be adding more to this thread as the makeover project progresses.
Thanks for looking and I appreciate your thoughts and comments!
-RB719

#6
04-29-2016, 06:18 PM
Thanks guys, I'll make sure I take more pictures and keep updating the threads as I get more done.
The wheels are contrast cut from HD, so the black is a factory finish. HD also makes a full chrome version, and a regular aluminum version as well.
The wheels are contrast cut from HD, so the black is a factory finish. HD also makes a full chrome version, and a regular aluminum version as well.
#7
04-29-2016, 08:38 PM
Trending Topics
#9
04-29-2016, 11:45 PM
Road Warrior
#10
04-30-2016, 01:00 AM
Initially I thought I'd just have to learn to like the decals. My painter told it wouldn't be difficult to remove them, and I'm glad I did.
As for the price - I paid 13k. I realize I could have gotten a Rushmore RK for a bit more, but this color got me. Plus, I still prefer the older style touring bikes. And with only 3k miles on the odometer, it was almost brand new!
As for the price - I paid 13k. I realize I could have gotten a Rushmore RK for a bit more, but this color got me. Plus, I still prefer the older style touring bikes. And with only 3k miles on the odometer, it was almost brand new!