Harley Davidson Dyna Glide: Stereo Sound System Diagnostic
I don't know about you, but since installing a sound system on my bike, the ride just isn't the same without my music. In this article we'll lead you through some basic audio system troubleshooting procedures for when you have unexpected silence.
This article applies to the Harley Davidson Dyna Glide.
You're heading out on the highway and one minute you're goovin' to Steppenwolf's "Born to be Wild" and the next is total silence, annoying static or distortion in your audio system. Instead of looking for adventure, you find yourself looking for the problem! We're going to run through a few basic procedures to check out your system. In some cases there may be a simple wiring problem, while in others there may be a component issue. We'll try to isolate the problem in this article.

Materials Needed
- Multimeter or test light
- Necessary tools to remove side panels, seats, fuel tank, etc. to access audio system wiring
- Soldering iron and solder, or crimp connectors
- Electrical tape or shrink tubing
- Fine sandpaper
Step 1 – Confirm the audio system is receiving power
Has your system lost power? If yes, read on; if no, skip to Step 3.
Switch the system on and observe. Does the display or LED power on indicator light up, or is it completely dead? If the system seems completely dead, the first thing you'll want to do is locate and inspect the system fuse. If your system is OEM installed, the fuse should be in the bike's fuse box; if you have installed an aftermarket one, the fuse may be located somewhere along the main power lead. Replacing a blown fuse might seem like the simplest possible fix, but ask yourself why the fuse has blown. Is the fuse rating correct? Check your system's requirements and make sure that the appropriate amp rating fuse has been installed. If the blown fuse was rated too low, you may have found the issue. If the fuse rating is correct, simply replacing it may or may not correct it. Try replacing the fuse because sometimes you just get a bad one or the vibration can cause it to break over time, but if it blows again, further investigation will be required.

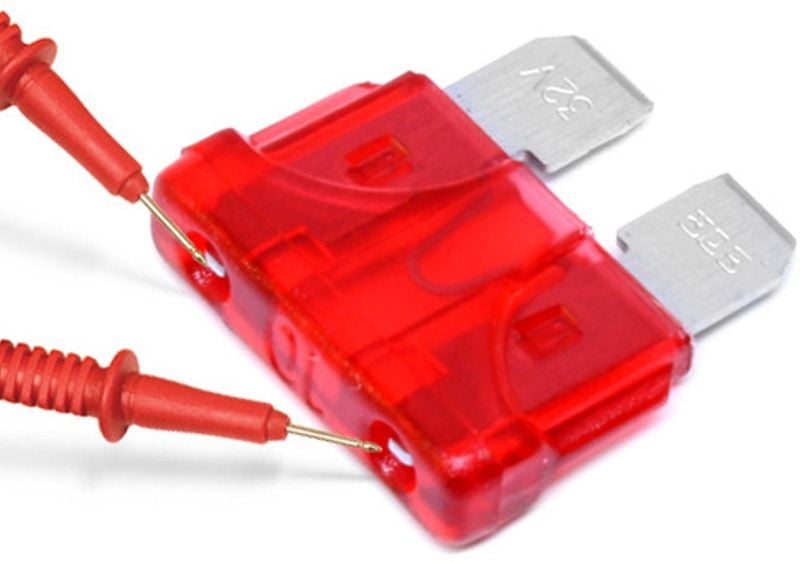
Most of the time you can tell if a fuse is bad by observing it. Sometimes the fuse may appear good but isn't, so testing conductivity with your volt ohm meter is really the acid test. Set you meter to ohms and touch the leads to each conductor, and if the fuse is good, the meter should show zero to very little resistance. If the meter does not respond, the fuse is bad. If you are lucky, this will have solved your problem and you are ready to head back out on the highway.
Pro Tip
Always check your multimeter by touching the leads together when set to ohms to confirm it shows conductivity.
Warning
Never install a higher rated fuse than recommended, doing so could permanently damage your bike's wiring or the audio components.
Step 2 – Inspect power wiring harness
If your audio system turns on but there's no sound, skip to Step 3 below. If the replacement fuse blows again or the original fuse is found to be good, read on.
There are several possibilities if you have no power and the fuse is good, or the new fuse blows again immediately, both of which require inspection of the main power harness and ground wires to the audio system.
If you found the fuse was good, inspect the wiring for an open circuit such as a broken wire or a disconnected, loose, burned, or otherwise bad connector. If all appears well on the power side, next inspect the ground wire side for the same issues. A loose, dirty or corroded ground point connection to the frame is a common failure point for motorcycles since they tend to expose more of their wiring to the elements. All of these things could cause a loss of power to your system without blowing a fuse.
In the case of the replacement fuse blowing, this is clear indication of a short circuit in the system. In this case, the problem will be on a power carrying wire. Inspect the main power lead to the system for any worn wire insulation, melted wires, or exposed conductors that could short against metal frame or engine parts. These big twins can vibrate enough to cause chaffing and eventual shorting of wires, especially for poorly done aftermarket installations. If the power wire checks out okay, expand your inspection to include the hot wires leading to the speakers, radio and amplifier. A short circuit anywhere in the system may cause a blown fuse.
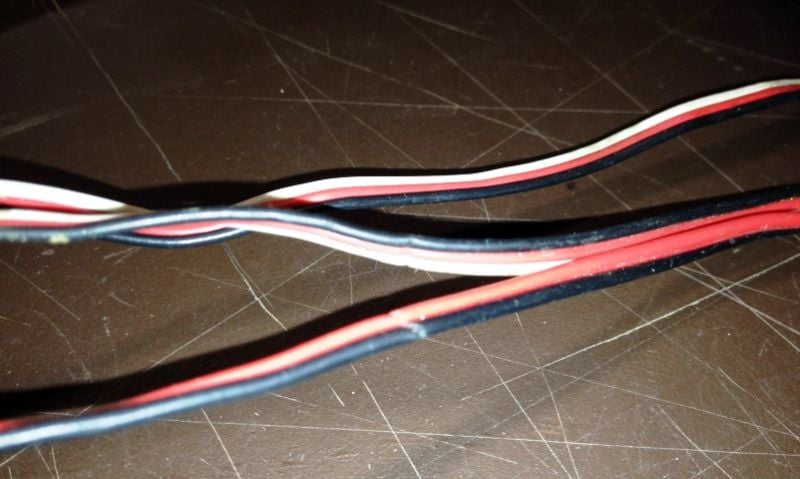
Figure 3. Pinched wires can cause shorts or loss or power. 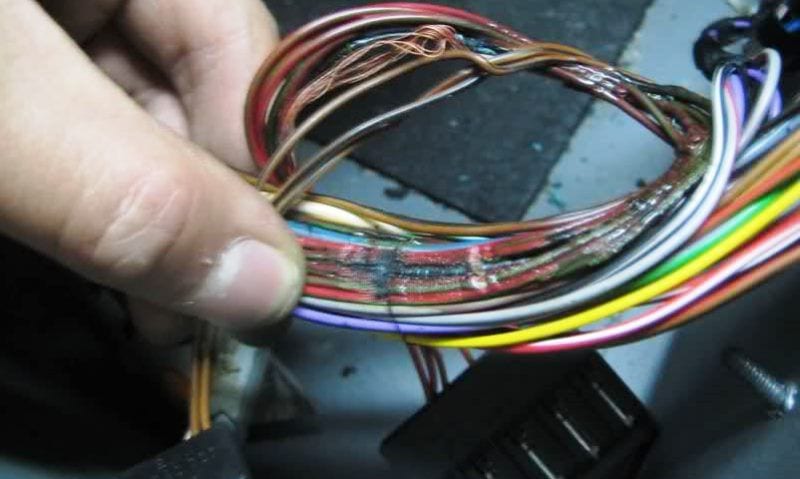
Figure 4. Example of a shorted wire. Note the burned off insulation and exposed wires.
Step 3 – Check connections between audio components
If radio turns on and the display lights up but there's still no sound from the speakers, read on.
If you have power and you still have no sound, check for bad connections between the audio source, iPod input, radio head unit, amplifier, and speakers for any damage similar to that described in Step 2. A close inspection of all the wires and their connections, not just the power providing ones, is warranted. In this case, we are mostly looking for open wires such as breaks, pinches, disconnections, or dirty connectors. A short between the speakers and the amp might not blow the fuse, but it might cause problems in the amp itself. With the bike and audio system switched off, open any covers and inspect all the wiring connections at each component. If you're lucky, maybe a slip-on connector has come apart somewhere, in which case you have found your problem. Handlebar speakers may have to be disassembled to properly inspect the connections. Hopefully you will find your problem here.
Step 4 – Make the repairs
If after completing the above steps you've found the problem, here's how you fix it and if no faults were found, skip to Step 5.
Broken or Shorted Wires
The best thing to do for a broken or shorted wire is to strip back enough of the harness wrapping tape to isolate the offending wire(s) and cut the damage sections away. There won't usually be enough extra length to join the good ends, so you will need to splice in a length of good wire. Strip back enough insulation from each wire to twist the two ends tightly together and then solder them. Remember to protect the repaired wires with electrical tape or shrink tubing to prevent shorting. Alternatively, crimp on connectors can be used. They do take extra space however.
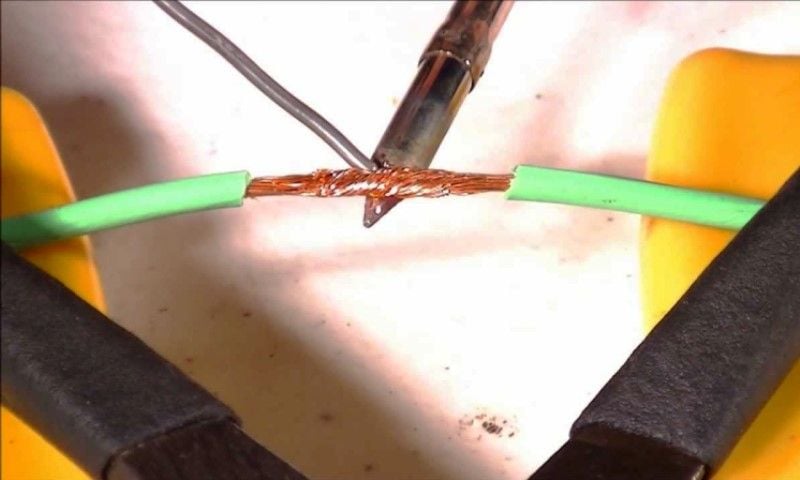
Figure 6. Soldering to repair wire. 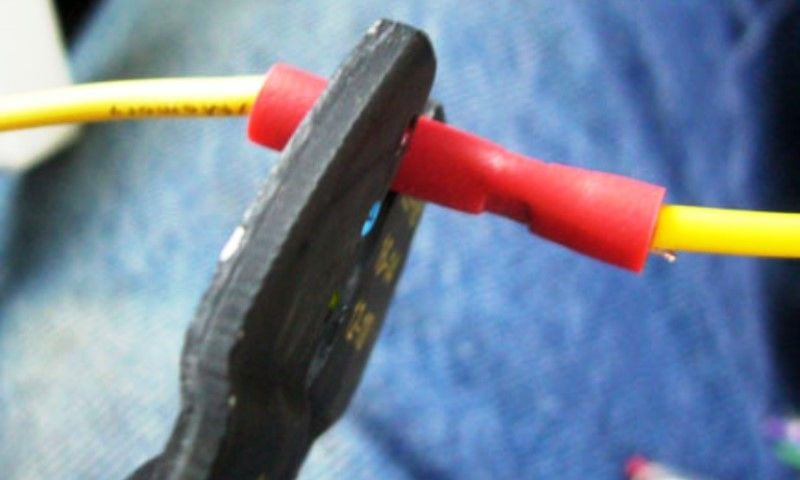
Figure 7. Crimped wire repair.
Bad Connector
If you have discovered a burned or corroded connector, these can be replaced with similar techniques to those described above, except you may need to fix multiple wires depending on the connector. Optionally, on occasion you could choose eliminate the connector and directly solder or crimp the respective wires together, or crimp or wire on individual connectors.
Bad Ground
A bad ground connection to the frame is pretty easy to fix. Remove the securing fastener or bolt and using some fine sandpaper, thoroughly clean the ground wire terminal and the surface on the frame that it's bolted to until you can see shiny metal. Avoid steel wool because the tiny conductive fibers can fall into the electrics and cause new problems. In some cases it might be advisable to replace the ground wire terminal itself. These are usually in the form of loop that gets screwed to the frame and crimps to the wiring.
Pro Tip
Wiring problems and repairs as described above may not always cause complete loss of sound. Intermittent or noise problems can also be caused be faulty wiring.
Step 5 – Call in the pros!
If you have not discovered any obvious faults or are uncomfortable with the repair steps described above, this is your only option.
If all the wiring and connections check out with no suspicious observations at all, you may well have a failed audio component. If both speakers are out, then it's more likely that there has been an internal failure in either the radio or the amplifier that has failed simultaneously. It's probably time to have those units check out by your dealer, or the manufacturer of the system if it's aftermarket.
If you have one speaker working, It might still be failure in the left or right channel or just a bad speaker. Swapping speakers will reveal which. A pinched or shorted speaker wire could be the cause of an amp going bad, so be sure to check before hooking up a new component.
Related Discussions
- Radio Turns on Fully-No Sound/Volume? - HDForums.com
- Radio, Speakers Cutting Out Problem - HDForums.com
- Problem With Stereo Cutting Off When Riding - HDForums.com
- Boom Audio Amp/Speaker Issues - HDForums.com