Harley Davidson Sportster: How to Replace Battery
You've prepared for a nice ride only to find your bike will not crank over. Besides the disappointment of not being able to ride, now you have the expense of replacing the battery. We'll show you how to do it yourself and save some money on both labor and parts cost.
This article applies to the Harley Davidson Sportster.
The purpose of your bike's battery is to store energy to power the starter motor and start the engine. This can require several hundred cold cranking amps or CCA to provide enough power to crank a big twin like the Sportster. Even a small degradation of battery conditions can result in a no-start situation. Batteries have limited lifetimes, so if you keep your bike more than a couple of years, you will likely face replacing the battery at some point. Besides engine starting duties, the battery also serves to power the lights when the engine stops or is inadvertently stalled. In many states, it is a law for the lights to remain on when the engine has stopped but the ignition key is on. You certainly want to remain visible to other road users at night should you clumsily stall the engine or worse, have a fall.
There are options online and many auto parts, or discount, stores for OEM batteries that can save you some real money.

Materials Needed
- 10mm box or open ended wrench
- Screwdriver or socket set
- Wire brush
- Volt Ohm meter (optional)
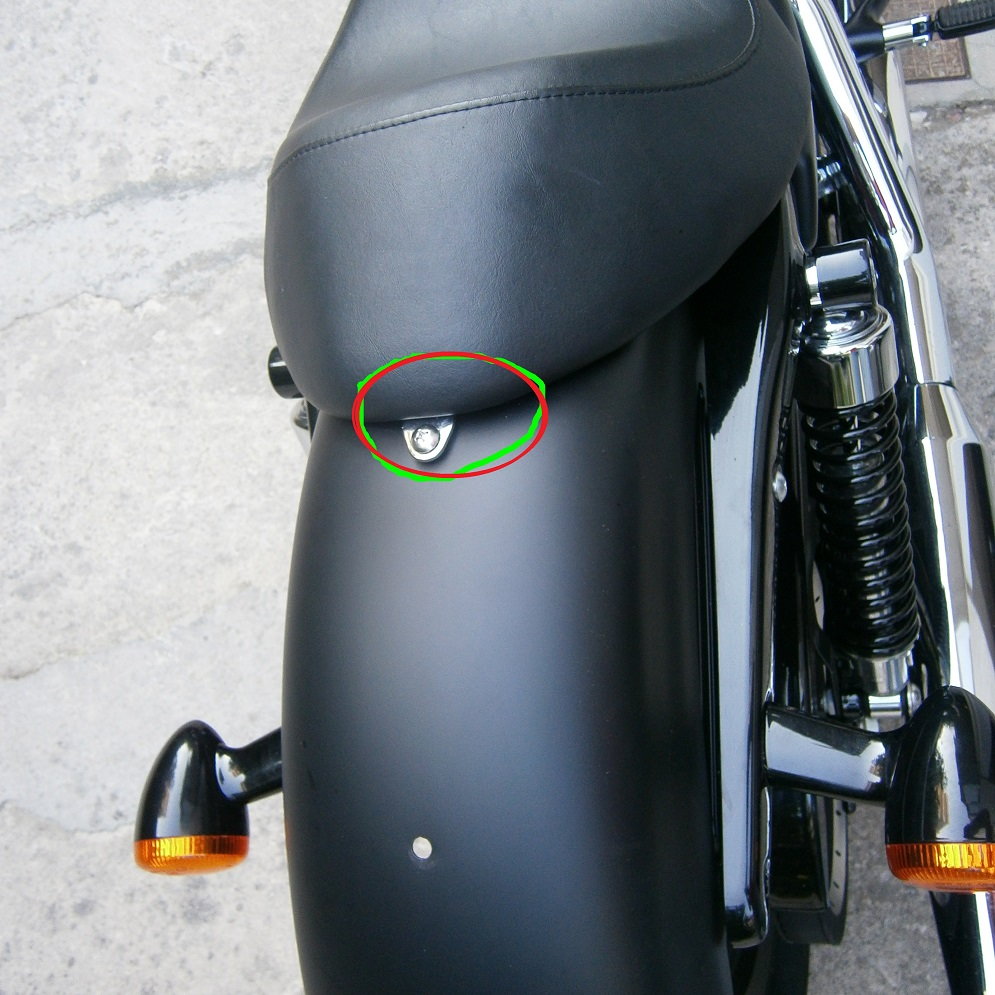
Step 1 – Remove the seat
Remove the mounting screw at the rear of the seat atop the fender. Press the seat downward and forward, then slightly flex and lift the rear of the seat to disengage the seat keyhole from the seat post. Next, pull the seat slightly up and rearward to disengage the forward tongue from under the fuel tank. This procedure might be slightly different if a custom seat has been fitted. The battery is behind the left side cover.
Pro Tip
There may be a Phillips head screw, socket head or hex head bolt depending on modifications.
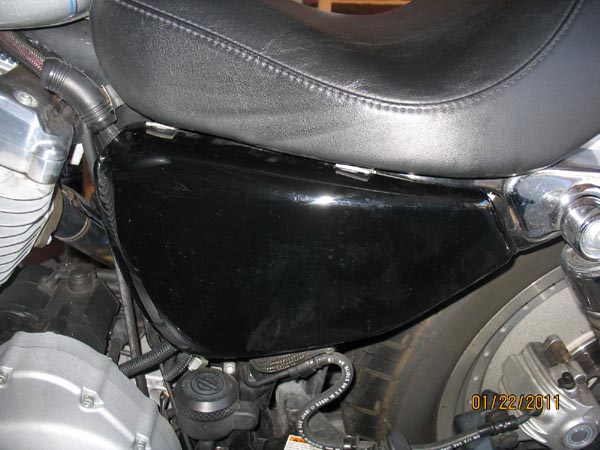
Step 2 – Remove the left side cover
Once the seat has been removed and set aside, access to the side cover retaining clips is provided. No tools are needed for this step.
The left side cover does not need to be completely removed from the vehicle to access the battery or fuses. Grasp the left side cover at the upper corners and gently pull away from the frame. Disengage the front clip first for easier opening. While rotating the top of cover out away from motorcycle, slide the cover down slightly so mounting slot slides down from mounting tab on battery tray. Let the cover rest on the left foot peg.
Pro Tip
Place a shop cloth or other clean, dry cloth over left passenger foot peg to avoid damaging the side cover finish.
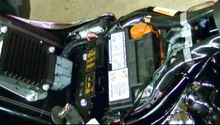
Step 3 – Remove the main fuse
You will see the main fuse housing, so pull the fuse block aside and remove cover for the main fuse, then the fuse itself.
Note: If your bike is a keyless model equipped with an alarm, make sure that fob is nearby and turn the ignition switch to RUN before removing main fuse or disconnecting battery. The alarm has an internal battery of its own and disconnection of the main battery is one of the triggers that will cause it to sound. With the ignition switch in the RUN position, and the fob within range, the alarm is canceled. Once the fuse is removed, you can leave the switch in the run position until you're finished with the job.
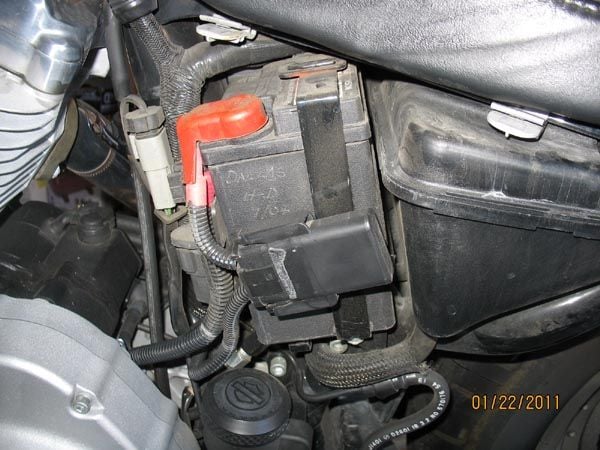
Figure 3. Here is the main fuse holder. 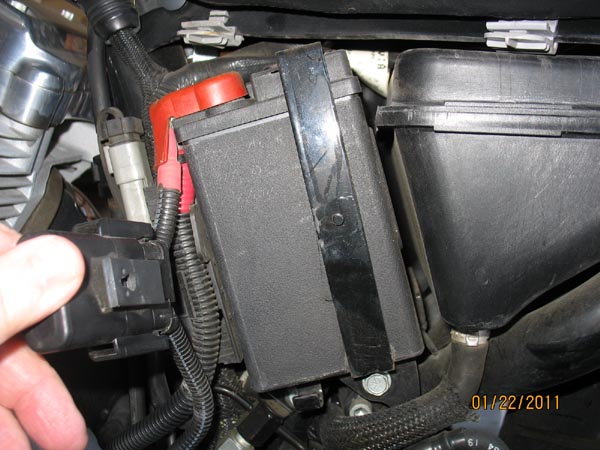
Figure 4. Un-clip the main fuse holder from the battery strap.
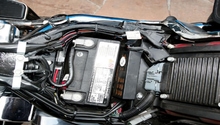
Step 4 – Disconnect negative battery cable first
Using a 10mm box or open end wrench, remove the negative (black) battery cable bolt. It is important to remove this cable first to avoid short circuits or shocks when removing the positive battery cable. Unfortunately, the negative cable is to the right side of the bike behind the oil tank. It's a bit of a tight fit and, on some models, it may be necessary to pull the battery as far to the left as possible to access the negative terminal. If there's not enough slack in the cables to reach it, you may have to disconnect the positive cable first. If so, do this only with the main fuse already removed and with care, so as not to contact any part of the frame with the wrench when touching the positive terminal.
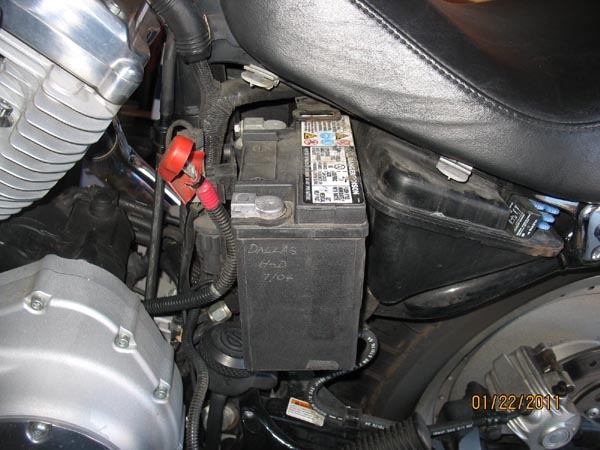
Step 5 – Disconnect positive battery cable
Using the 10mm wrench again, now remove the positive battery cable. The nut for the positive cable will be protected under a red rubber cover. Lift the cover until the bolt is accessible. There may be other accessories connected to the battery terminal, so observe carefully the position of any cables or washers and take care not to drop them into the nether regions of the bike.
Pro Tip
Position or pull back the disconnected positive cable end to avoid it inadvertently recontacting the positive battery terminal.
Step 6 – Remove battery retaining strap and battery
Unhook battery strap from the battery tray mount on top of the battery. Remove battery from battery tray by sliding it to the left and out from its compartment.

Pro Tip
Now, with the old battery out of the way, is a good time to use a wire brush to clean both the positive and negative cables. Make sure to remove all rust corrosion, acid etc. You want a nice shiny clean metal surface showing.
Step 7 – Install new battery
Installation is the reverse of removal, so slide the new battery in from the left side and secure it with the battery retaining strap. Remember to connect the positive cable first, followed by the negative cable last. Make sure the red flexible cover is replaced over the positive terminal. If your bike has an alarm, remember to turn the key on first, then replace the main fuse and fully seat it. There might be a small spark when this is done. Replace the cover on the fuse holder and clip the holder back into place.
Featured Video: How to Replace Battery
Related Discussions
- Nightster Battery Replacement - HDForums.com
- Sportster Battery - HDForums.com
- Battery Replacement - HDForums.com