Harley Davidson Sportster: How to Replace Stator and Regulator
The Sportster has an electromagnetic stator, a rotor that spins around it to produce AC power, and a regulator/rectifier that turns it on and off as needed to charge the battery, and converts the AC to DC. The vibrations and heat from the motor can and will cause these electrical components to fail occasionally, but fixing them is not hard once you know how.
This article applies to the Harley Sportster (1994-2016).
Your bike's charging system should be putting out 13.5 to 14+ volts to the battery when the motor is running. If it isn't, once you have eliminated a bad battery and circuit breaker or wiring, the stator and regulator are the prime suspects. The regulator is easy to replace, so we'll cover that first. The stator requires further disassembly.

Materials Needed
- Hand tools
- Allen wrenches
- Impact gun or long breaker bar
- 1 1/8 deep impact socket
- 1 3/16 impact socket
- T27 Torx
Step 1 is not required for Steps 2-5. If you know the regulator is good, move to Step 2.
Step 1 – Remove and replace regulator
- Disconnect the negative (black) cable from the battery.
- Remove two screws holding regulator to frame. See Figure 1.
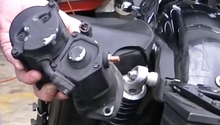
- Disconnect two electrical plugs in regulator wiring. See Figure 2.
- Remove regulator and clean frame where regulator bolts on with sandpaper to get shiny metal.
- Connect two electrical plugs using dielectric grease to seal.
- Install new regulator, using dielectric grease on the surfaces where the regulator bolts to the frame. Tighten screws securely, using star washers on both sides.
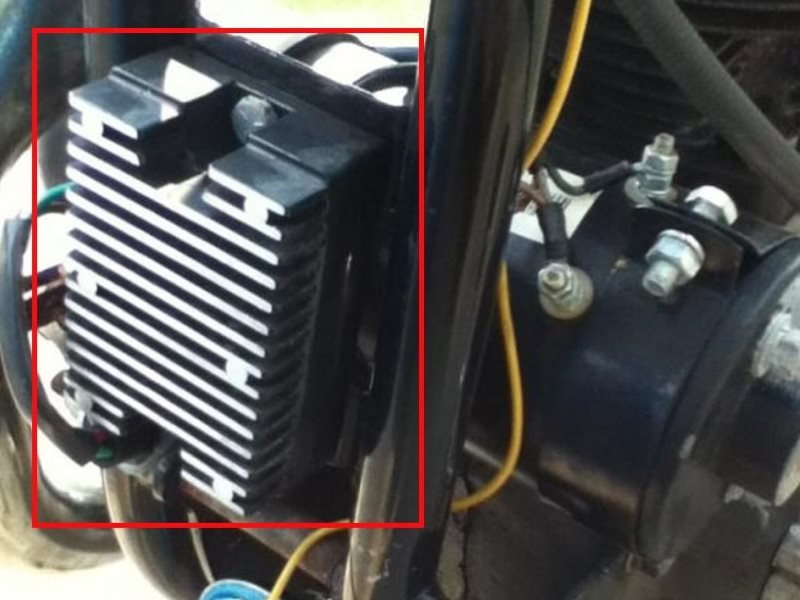
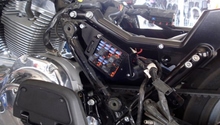
Figure 1. Regulator location in front of motor. 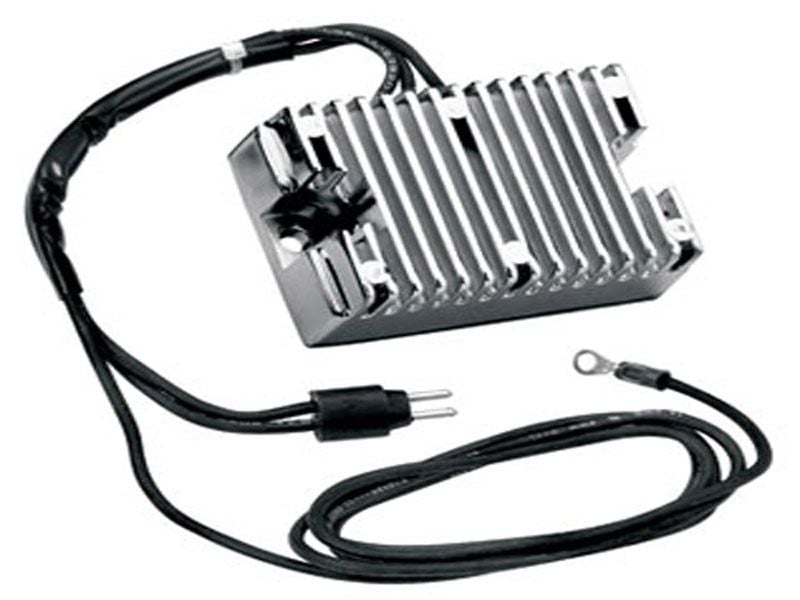
Figure 2. Regulator wiring.
Step 2 – Remove primary cover
- Disconnect the battery's negative (black) cable.
- Remove the shifter and linkage by removing the pinch bolt and prying it off.
- Drain the primary oil and remove the primary cover. Some cover screws are longer than others, so keep track. If you forget, the manual shows which go where.
- Remove the derby cover and clutch adjusting screw locknut and spring. There is no need to disconnect the clutch cable.
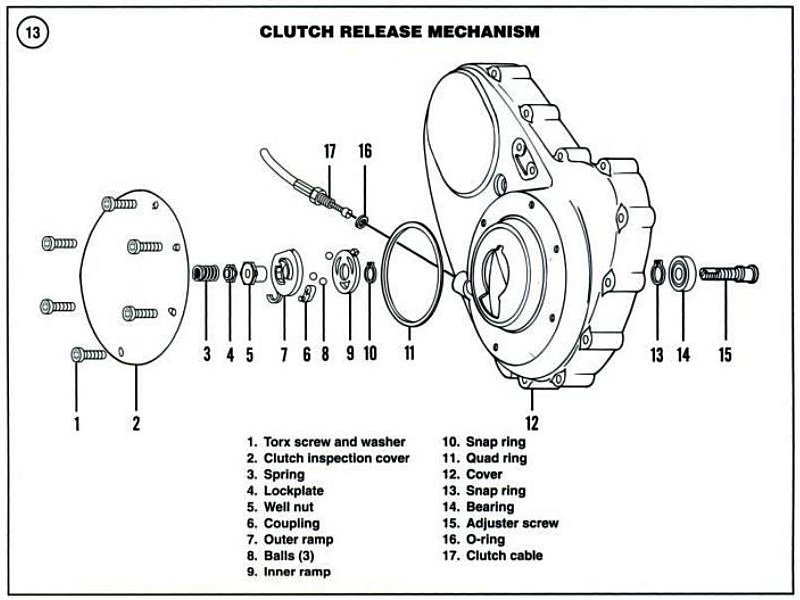
Figure 3. Typical Sportster clutch assembly diagram. 
Figure 4. Primary drive exposed.
Step 3 – Remove the primary chain assembly
The whole clutch, rotor and primary chain assembly has to come off as one assembly.
- Install a locking tool between the sprocket teeth to prevent rotation of the sprockets. A 4" door solid brass hinge works perfectly, and brass won't damage steel sprocket teeth. The angle of the tool depends on whether you are loosening or tightening the bolt. Use your judgement to determine which way prevents rotation.
- Heat the crank and clutch bolts to melt the red Locktite installed by the factory.
- Remove the crank sprocket nut with a 1-1/8" socket, breaker bar, and long pipe. Or, you can use an air impact gun if you have one. The factory spec is over 200 lb-ft on late model bikes.
-
The clutch nut is left-hand threaded, so remove the clutch nut with a 1-3/16" standard socket by turning counterclockwise.

Figure 5. 4" hinge fits into the sprocket perfectly to lock it in place. 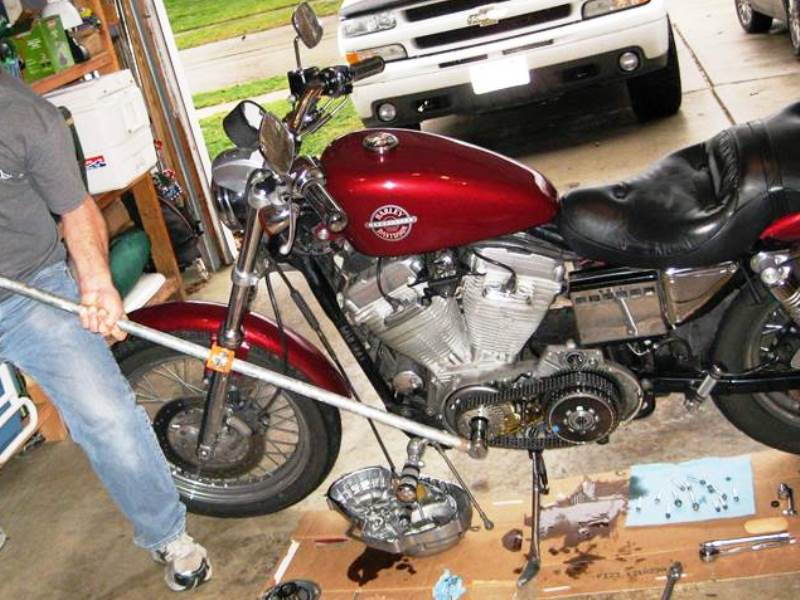
Figure 6. With a long enough lever you can move the Earth. - Newer bikes require clutch disassembly to get at the clutch nut. Once you remove the ball and ramp assembly, you can remove the screw/bearing by taking out a circlip and pull it out. The circlip is the only thing holding it in there.
- Now you should be able to remove the clutch, chain and sprocket/rotor assembly. It just slides off as a unit.
- The stator is shown on the left; the black color is a factory insulating coating. On the right you can see the transmission shift mechanism.
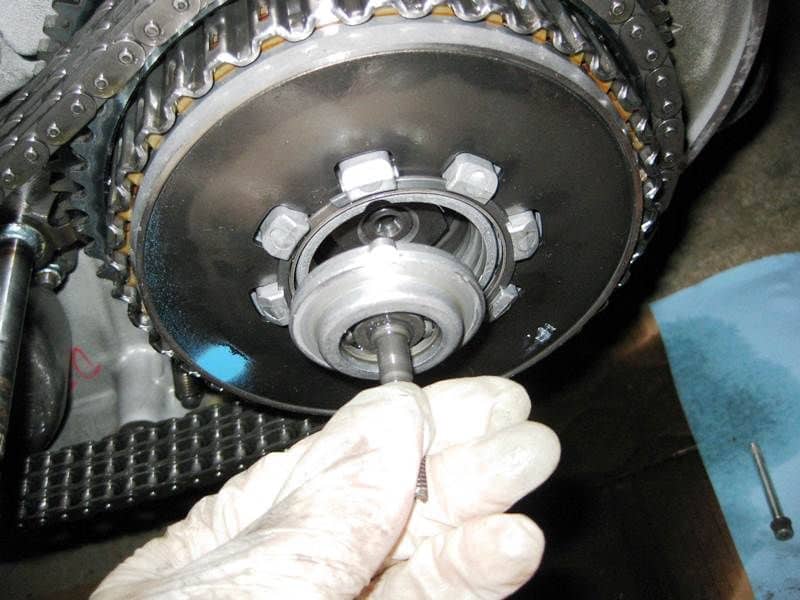
Figure 7. Remove the clutch pushrod. 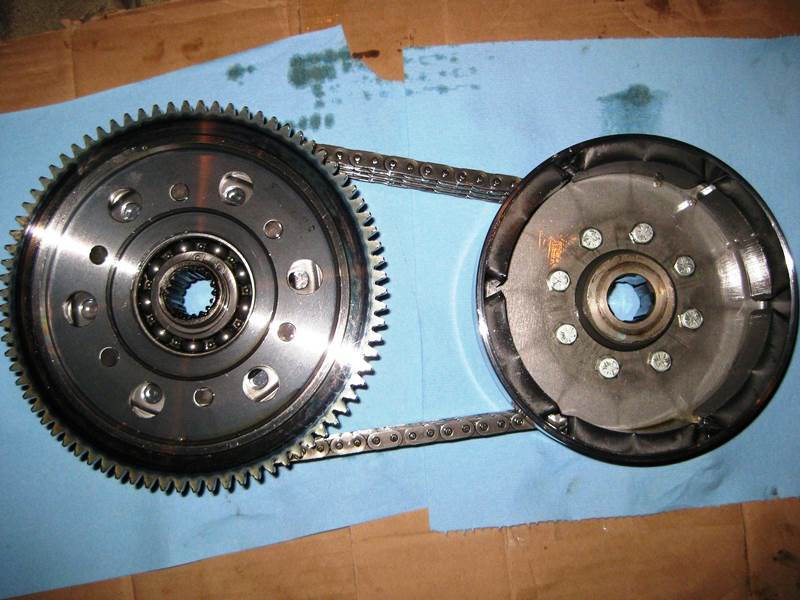
Figure 8. Set aside the primary drive some place where it will stay clean. 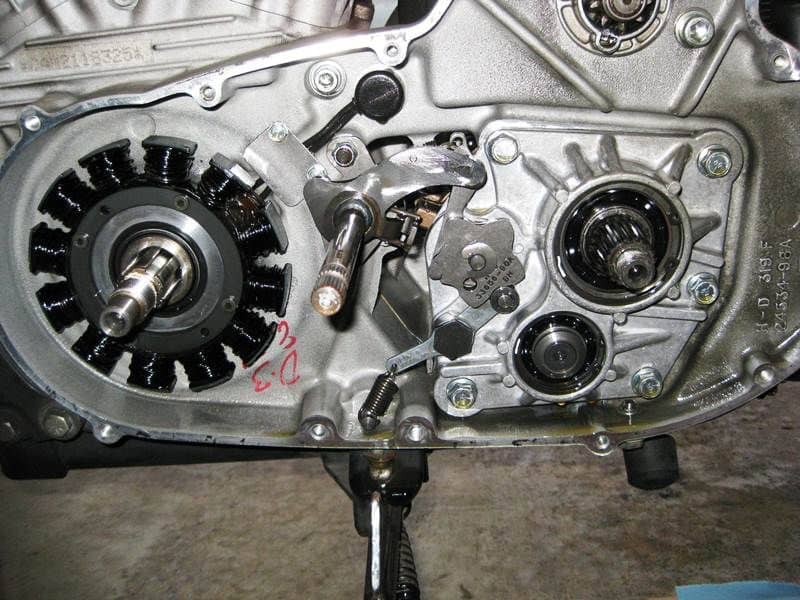
Figure 9. With the primary removed, the stator is easy to get at.
Step 4 – Remove the stator and wiring
- Unplug the regulator connector near the front lower frame of the bike (see Figure 2 above).
- Pry out the plug that seals oil in the primary case.
- Loosen the four bolts holding the stator to the cases.
- Before you pull the stator off, tie a string to the end of the cable by the regulator.
- Pull the string through the hole in the cases as you remove the stator.
- Install the new stator and pull the new cable through with the string you left behind.
- The small stator bolts get tightened to 30-40 in-lbs.
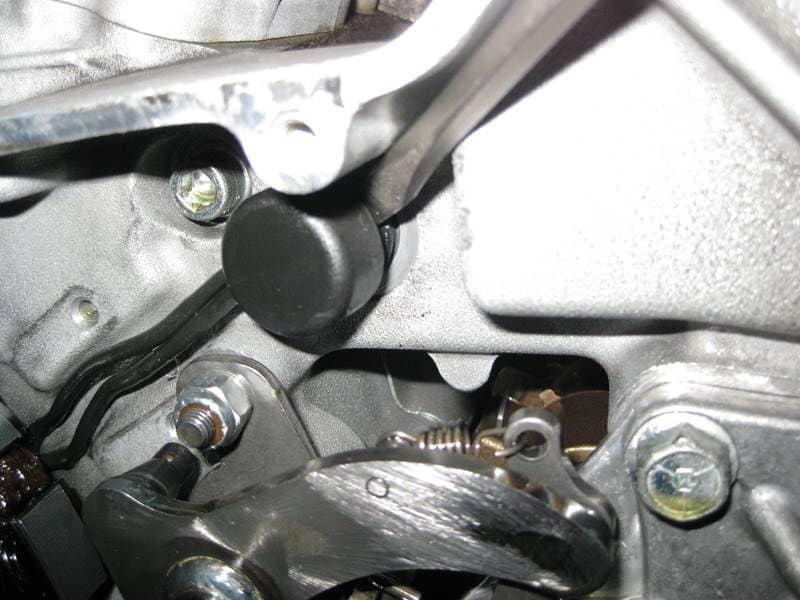
Figure 10. Pry the rubber oil plug out of the cases. 
Figure 11. Shoestring will make the job much easier. 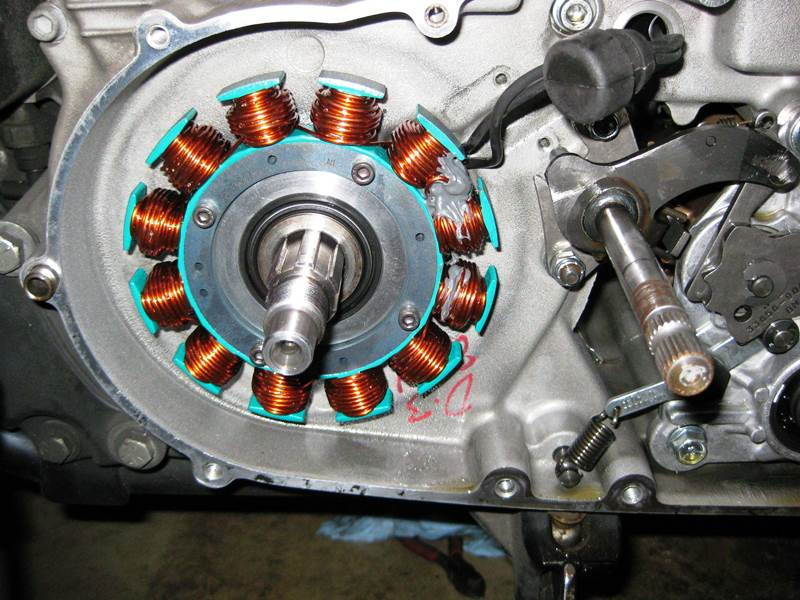
Figure 12. The new stator is nearly installed, just needs to be plugged in.
Step 5 – Reassembly
- Reassembly is simply a matter of repeating the steps in reverse.
- Make sure to add red Loctite to the clutch and crank nuts. A little will suffice, so don't go overboard.
- The torque values vary throughout the years, but you don't have to worry about over-tightening these nuts.
- From here, it's just buttoning everything and filling with fluid.
Featured Video: Stator Change
Related Discussion
- DIY Stator and Regulator Replacement - HDForums.com