Harley Davidson Sportster: Transmission Diagnostic Guide
Shifting problems as well as noises can originate from different areas inside and outside the transmission, including the shifter, linkage, clutch, primary drive and more. Adjustments can be made that often correct shifting problems without digging into the transmission.
This article applies to the Harley Davidson Sportster (1986-2016).
When you pull on the clutch lever, a cable is moved that's connected to the clutch pack assembly beneath the primary cover. The clutch diaphragm springs tension is removed, taking away the friction that holds the clutch disks together. The friction inside the clutch pack transfers the engine's torque to the transmission. Once the clutch is disengaged, torque is removed from the transmission. The shift lever can now be used to select a gear by moving the linkage. This is connected to a shift drum/pawl assembly that moves shift forks to engage shift sleeves onto the selected gear. These parts make up the transmissions shifting operation and must be correctly adjusted/undamaged for normal shifting.

Materials Needed
- Allen wrench set
- Wrench set
- Dial caliper
- Ratchet and socket set
Step 1 – Test the clutch engagement/disengagement
A clutch that is not engaging properly is said to be "slipping." Improper engagement doesn't clamp the clutch discs together with enough force to transfer all the power to the wheel. While cruising at 3,000 rpm in a higher gear, apply a moderate to heavy amount of throttle. If the engine revs without an equal increase in speed, your clutch is slipping.
If power still flows to the transmission even with the clutch pulled in, then you have a disengagement problem. Disengagement problems are often caused by a maladjusted or binding clutch cable/linkage; although, sometimes the discs can get sticky or warped. Hold the clutch lever in and place the transmission in first gear with the bike at a standstill. There should be no engine power transferring to the rear wheel.

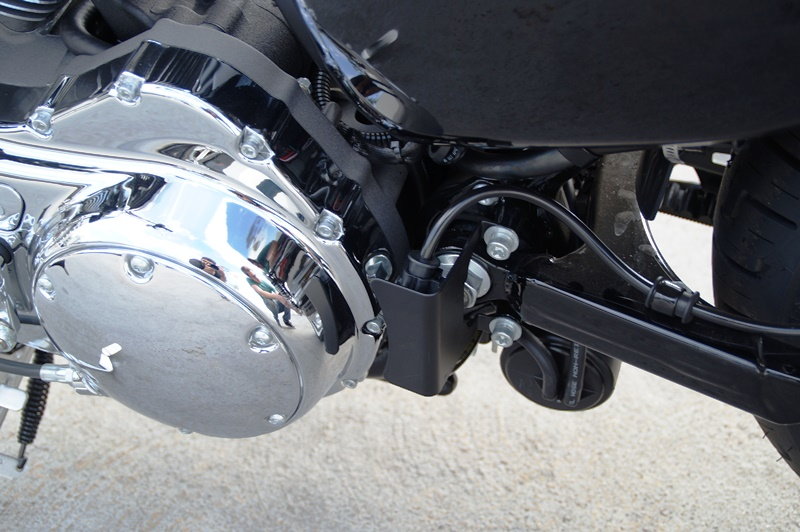
Step 2 – Check the transmission/primary fluid level
The fluid level is easily checked through the derby cover or dipstick on some models. With the bike leveled, there should be enough oil in the primary so it is just below the the opening behind the derby cover. Refer to the article How to Change Transmission Fluid for more information. Remember to replace your transmission fluid every 5,000 miles.
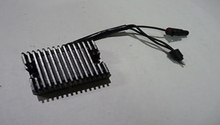
Step 3 – Adjust primary chain
An improperly tensioned primary chain can cause noise, loss of power, and chain damage. Remove the primary chain inspection cover and measure the amount of chain play. The specification is half an inch. Rotate the rear tire and measure the chain in three different areas. Adjust the chain at the closest measurement to spec. Hold the Allen screw stationary with the correctly sized Allen wrench while loosening the jam nut counterclockwise. Rotating the Allen screw clockwise reduces the free play. It is better to be a little too lose than to be too tight. Once the spec is reached, hold the Allen key stationary again and tighten the jam nut.
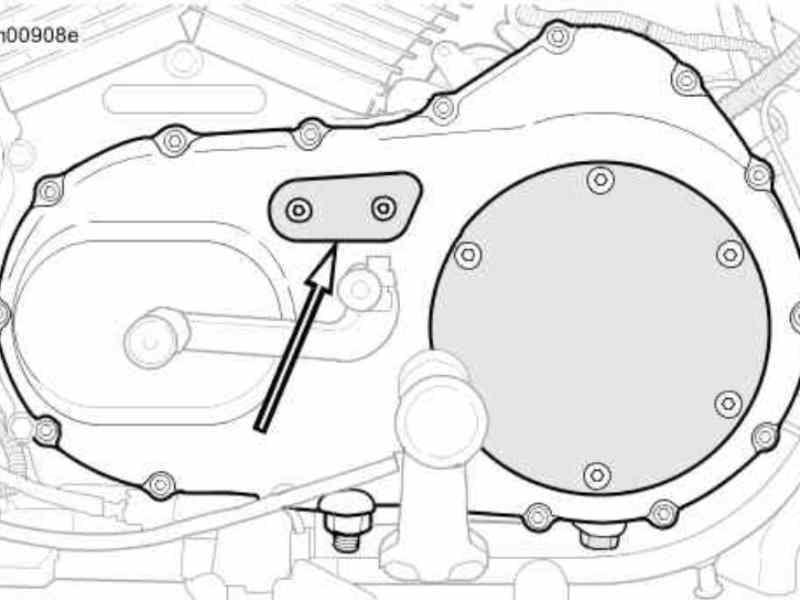
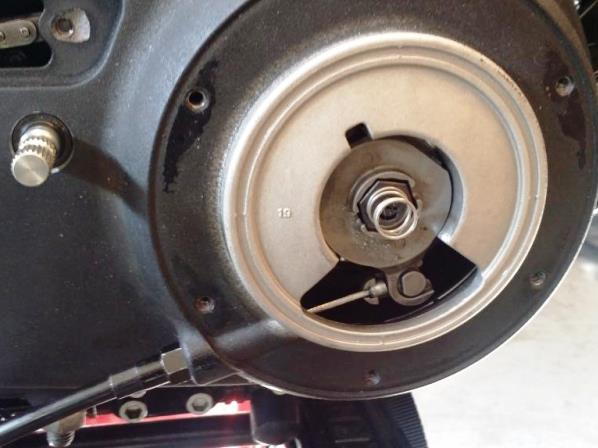
Figure 3. Sportster primary inspection cover. 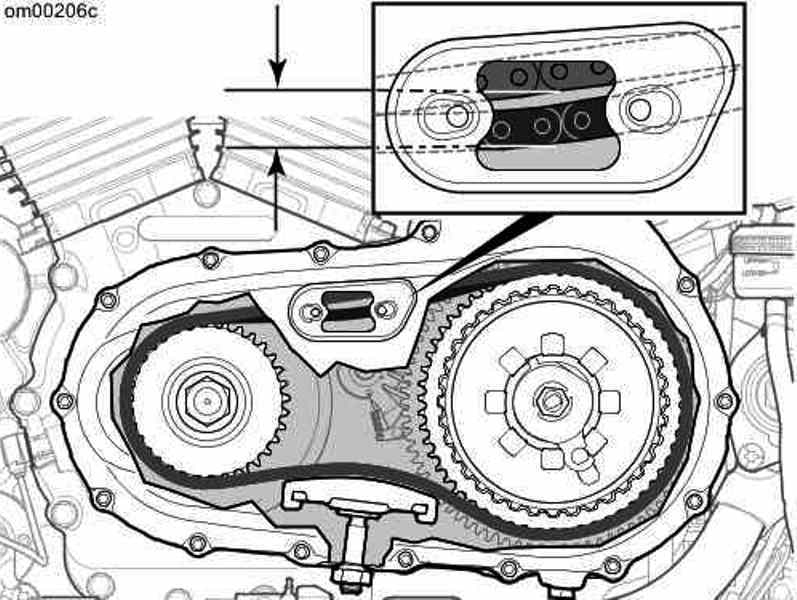
Figure 4. Primary chain play measurement. 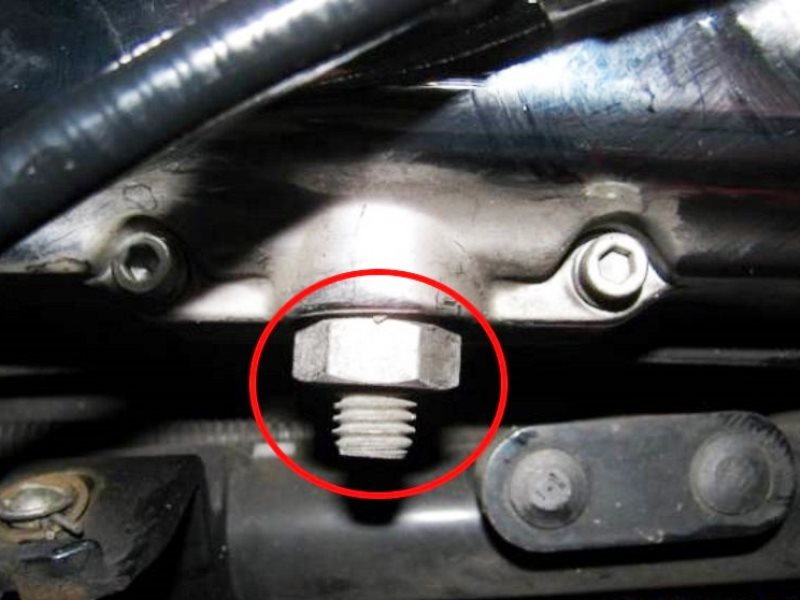
Figure 5. The primary chain adjustment Allen screw and jam nut.
Step 4 – Adjust the clutch cable/linkages and forward controls (if equipped)
There must be 1/16th of an inch free play measured in the clutch cable at the lever. There is usually an adjustment thumb screw at the lever or down at the transmission. Refer to the article How to Replace Clutch Cable for detailed adjustment instructions.
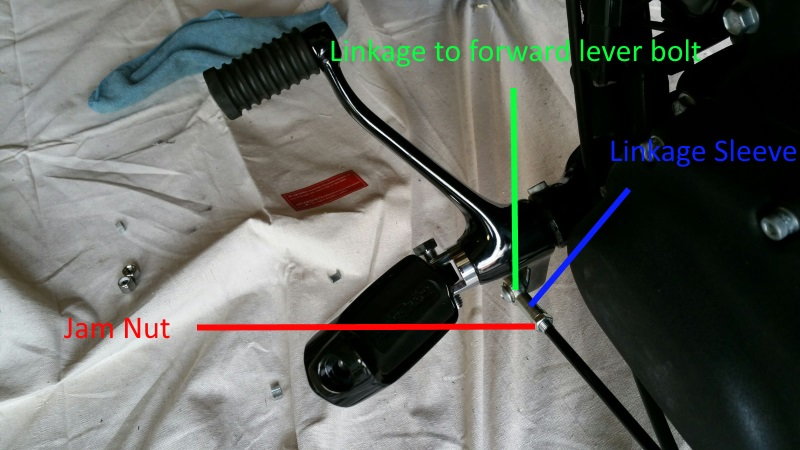
If your having problems shifting, and you have forward controls, adjust the linkage by loosening the jam nut and removing the bolt connecting the linkage to the shift lever. Turn the linkage sleeve clockwise to shorten the rod and decrease the amount of lever travel required to complete a shift. If you feel a gear being selected without moving the lever, you've adjusted the linkage to short. Rotate the linkage sleeve counterclockwise to increase the lever travel. Tighten the jam nut once the adjustment is made.
Step 5 – Adjust the clutch pack disk clearance
Too little clearance in the clutch pack can create the slipping condition described in Step 1. Too much clearance will cause shifting issues. Refer to the article How to Replace Clutch Cable for detailed instructions.
This adjustment is made by removing the clutch inspection cover/derby cover, and then loosening the adjustment screw lock nut. Hold the adjustment screw stationary with an Allen wrench while turning the lock nut counterclockwise with a wrench. Once the nut is loose, turn the adjustment screw clockwise to increase the disk clearance. Decrease the clearance by turning the screw counterclockwise while holding the lock nut stationary until resistance to turning is felt. Turn the adjustment screw clockwise one quarter of a turn to adjust the clearance.
Step 6 – Adjust the shift drum/shift pawl
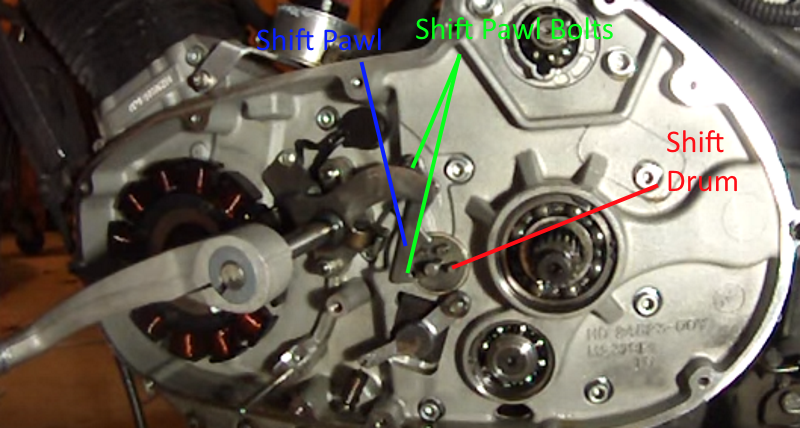
You'll need to dig deeper into the transmission for this last one. Remove the clutch basket and detent plate to make this adjustment. This is also a good time to check the clutch pack thickness with a caliper and inspect the friction plate/steel disk assembly. You'll find the clutch pack thickness specification in your service manual or with your clutch manufacturer. Inspect the steel plates for grooves, warping, and heat discoloration (blue markings). More information can be found in the article How to Replace Clutch. The detent plate is held in place by a retaining ring. On some year models, these retaining rings have been known to come loose inside the transmission. Some owners have replaced the retaining ring with an e-clip and washer for added strength. With the transmission in third gear, the two teeth on the shift pawl should be equal distances from the two pins on the shift drum. Rotate the shift drum each direction until the pawl contacts the pins. With the center point found, carefully loosen the two shifter pawl bolts and create equal spacing between the shift pawl teeth and pins. Carefully re-tighten the two bolts.
Featured Video: Shift Pawl Adjustment
Related Discussion
- Slipping Clutch or Spinning Tire? - HDForums.com