Harley Davidson Touring: Exhaust Review and How-to
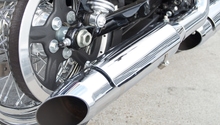
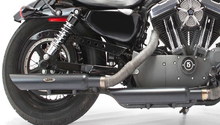
Nothing distinguishes a Harley more than that V-Twin rumble. Unfortunately, the stock exhaust system is whisper quiet and really strangles that classic Harley sound. There are other benefits to be had by swapping exhaust systems on your Haley bagger, besides just that sweet music.
This article applies to Harley Davidson Touring models (2000-2015).
Over the years, the intake and exhaust systems on Harley big twins have become restricted to meet EPA noise and smog law requirements. As a result, much of the traditional pushrod V-Twin sound is muted and performance suffers. Fortunately, the aftermarket is booming with replacement exhaust systems to restore your bike's bellowing roar. With improved sound, increased performance, and refined aesthetics, it is no wonder why an exhaust system is the #1 modification performed by Harley owners. If you are still riding around with your stock exhaust, but have the itch for a new system, this article will give you an outline of the installation procedure as well as a brief review of several exhausts for Harley Davidson Touring models.
Table of Contents
How to Replace Your Exhaust

Materials Needed
- Flat head screwdriver
- 5/16" nut driver
- Wire cutters
- 1/2", 7/16", 9/16", 5/8" wrenches
- American Allen wrench set
- 3/8" drive ratchet and 9" extension
- 1/2", 7/16", 9/16", 5/8" sockets
- Pliers
- Torque wrench
- Anti-seize paste
- Penetrating oil
Aftermarket exhaust systems for Harley bagger can be grouped into two broad categories: 1) Slip-ons, and 2) Full systems. A slip-on replaces just the mufflers, while the full system includes the head pipes, crossovers, and of course the mufflers, and sometimes dramatically changes the look of the bike. Installing either starts out the same, but with the slip-ons, you can skip a lot of the middle steps.
Step 1 – Remove saddlebags
Removing the saddlebags will free up additional room to work around the exhaust system to aid in muffler removal.

Step 2 – Remove mufflers
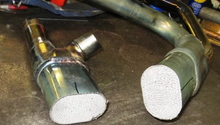
With the saddlebags removed from the bike, the mufflers can now be removed. Each muffler has an exhaust clamp securing it to the head pipe as well as a small muffler support bracket.
- Using a 9/16" socket or wrench, loosen the muffler clamp. In some cases a bit of penetrating oil can help to breakdown any corrosion that has developed on the clamp.
- Remove the muffler bracket bolts using a 1/2" socket or wrench.
- With the clamp loosened and the bracket bolts removed, the muffler can be slid off of the head pipe.
- Work the muffler off with a twisting and pulling motion. The mufflers have a very snug fit, so do not be discouraged if they seem overly tight.
- Repeat procedure for the other muffler.
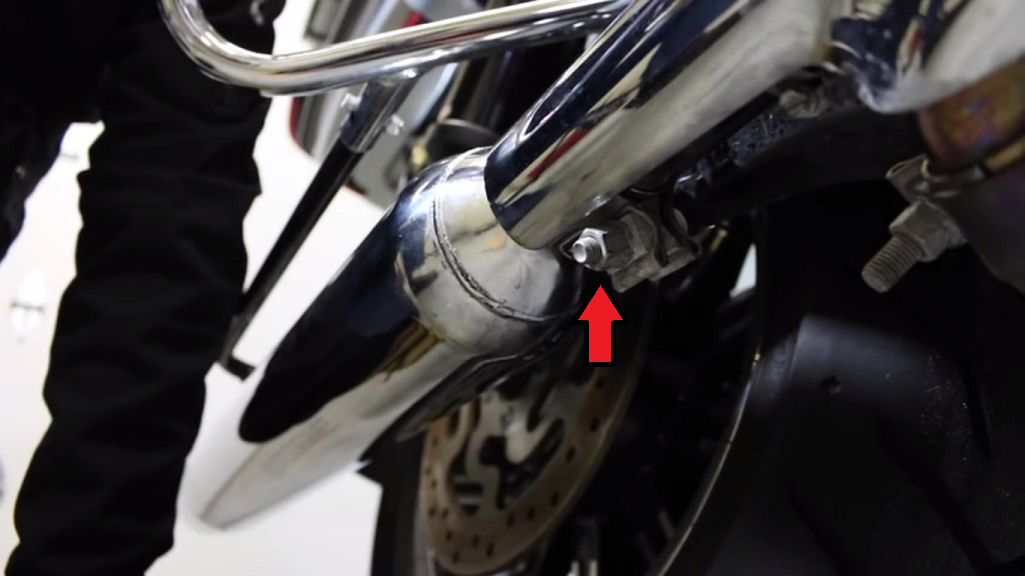
Figure 2. Muffler clamp nut. 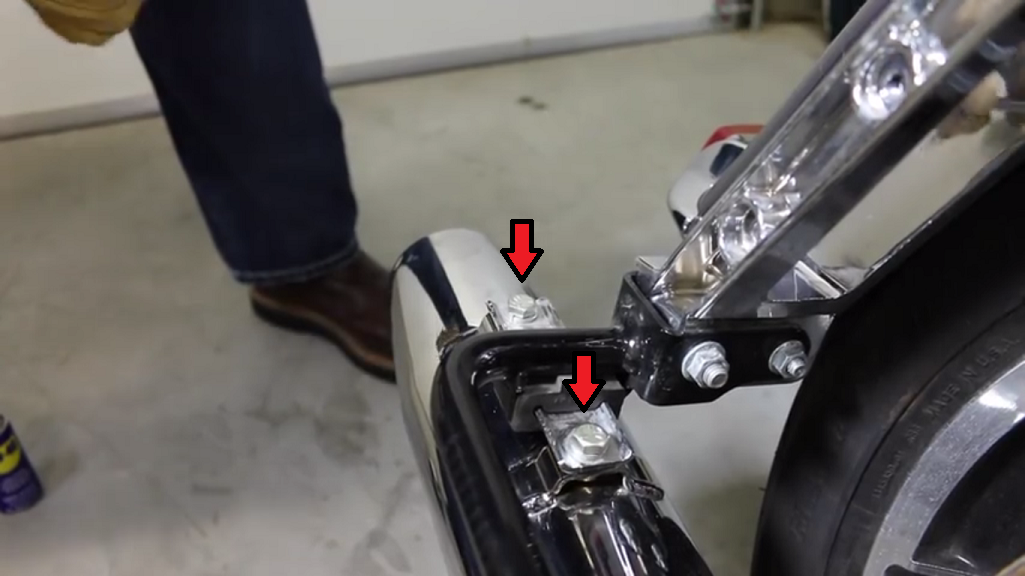
Figure 3. Muffler bracket bolts. 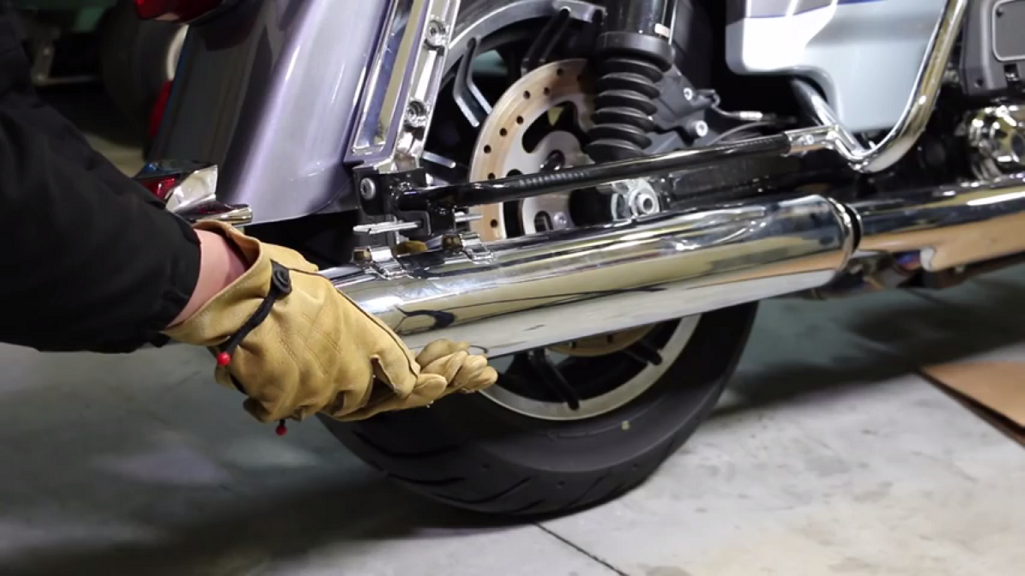
Figure 4. Separating muffler from head pipe.
If installing a set of slip-on mufflers, skip to Step 8.
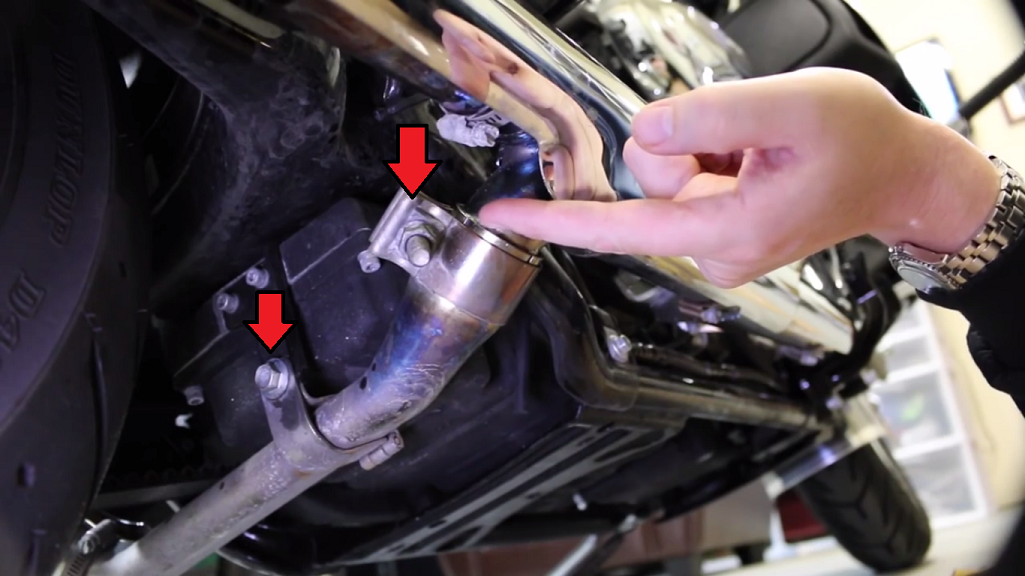
Step 3 – Remove crossover pipe
The crossover pipe is attached to the head pipe with an exhaust clamp similar to that of the muffler clamps. Additionally, a small bracket just in front of the rear wheel supports the pipe.
- Using a 5/8" socket or wrench, loosen the exhaust clamp.
- Remove the support bracket using a 1/2" wrench before sliding the bracket off of the pipe.
- With the bracket removed and clamp loosened, remove the crossover pipe using a twisting motion.
Step 4 – Remove right floorboard and exhaust heat shields
To allow for removal of the exhaust head pipe, the right floorboard should be removed. Similarly, the entire footrest assembly can be removed from the frame. The heat shields must also be removed from the exhaust.
- Using a 3/16" hex (Allen) wrench and 7/16" wrench or socket, remove the bolts securing the floorboard to the footrest bracket. Set floorboard aside.
- The heat shields are held in place with worm-type hose clamps. Using a 5/16" nut driver or socket, undo the hose clamps on the backside of the head pipe and remove the shields.
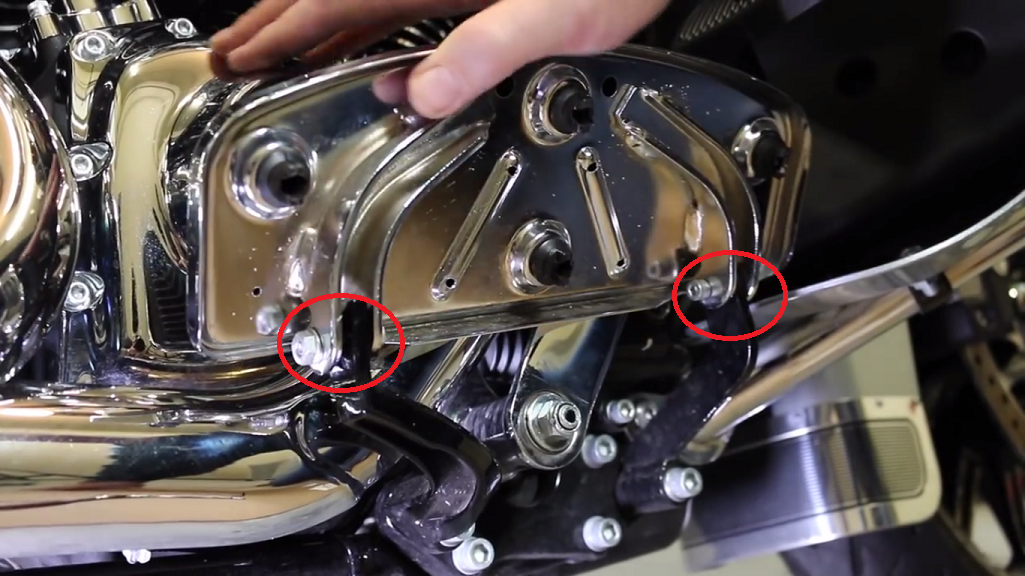
Figure 6. Floorboard removal. 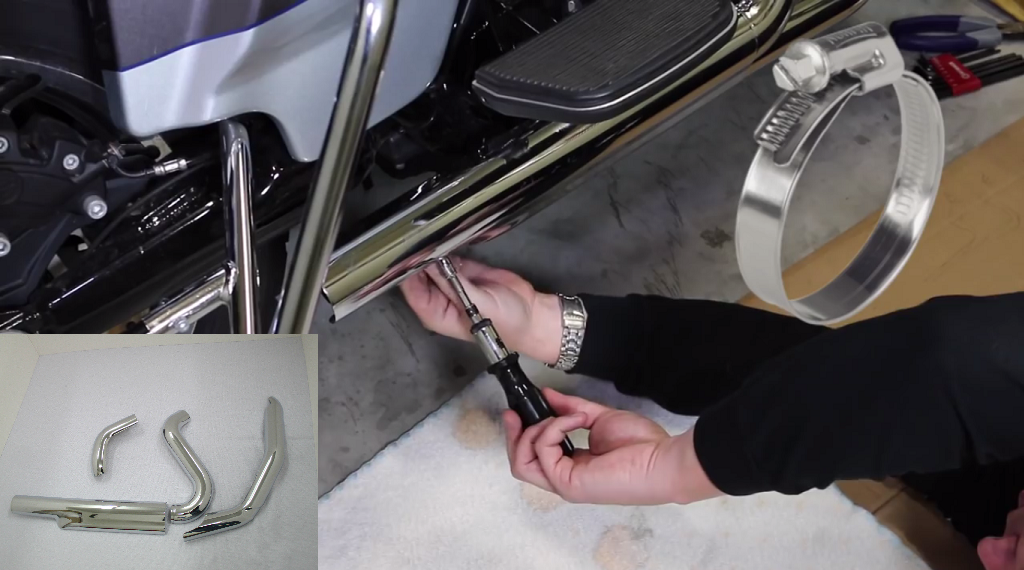
Figure 7. Heat shield clamp removal.
Step 5 – Disconnect oxygen sensors (if applicable)
Underneath the side cover are the oxygen sensor harness plugs that must first be disconnected before removing the head pipe.
- With the side cover removed, disconnect the oxygen sensor plugs. With the plugs disconnected, cut any wire ties securing the sensor wiring to the frame and route the wires free from the bike.
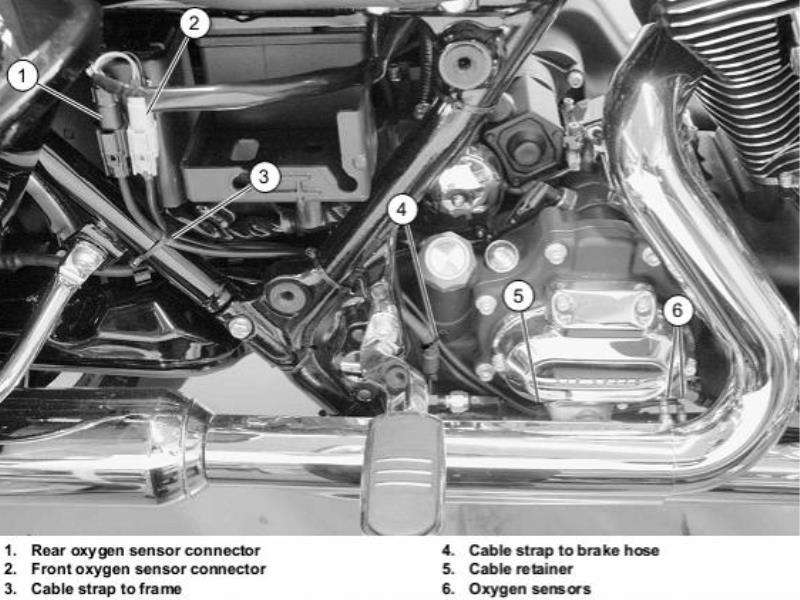
Note
The grey plug is for the front sensor and the black plug is for the rear. These sensors must not be mixed up during re-installation.
Step 6 – Remove head pipe
- Remove the head pipe support bolt using a 9/16" socket. The bolt has a tendency to move upwards as the nut is being loosened, so use a small object like a screwdriver or extension to hold the bolt down while the nut is removed.

- Remove the head pipe flange nuts from each cylinder using a 1/2" wrench and socket as needed.
- The head pipe can now be removed. In some instances, the floorboard support bracket may need to be removed to allow for additional movement of the exhaust.
- Be sure to retrieve the old crush gaskets from the exhaust ports.
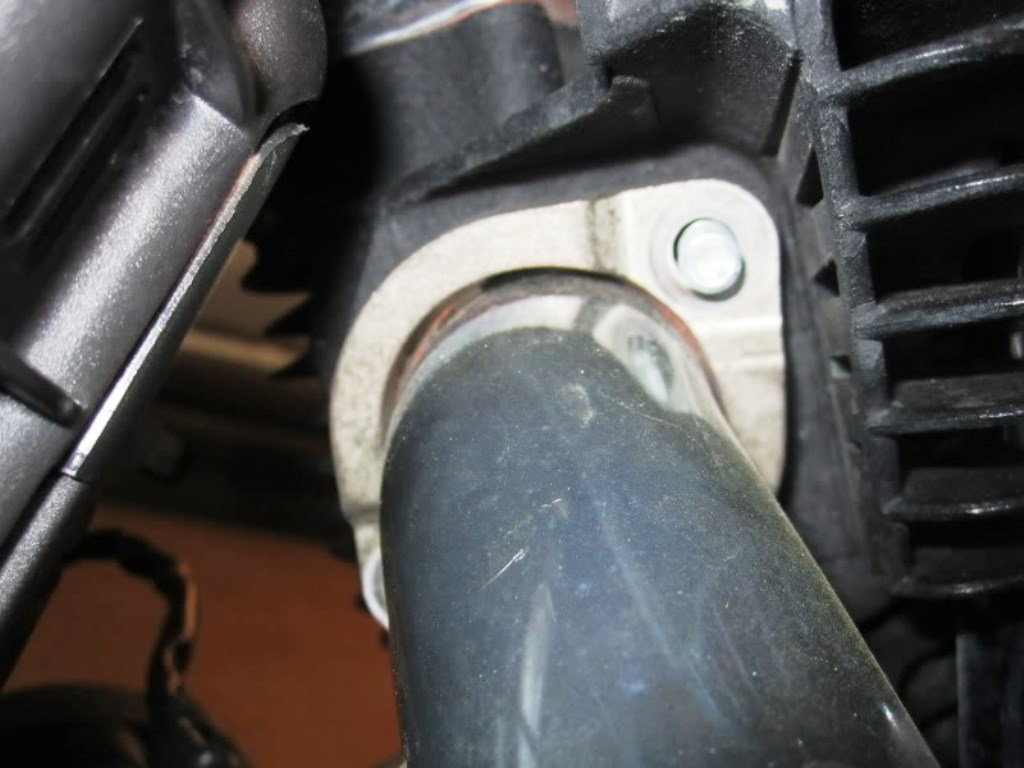
Figure 10. Rear cylinder exhaust flange. 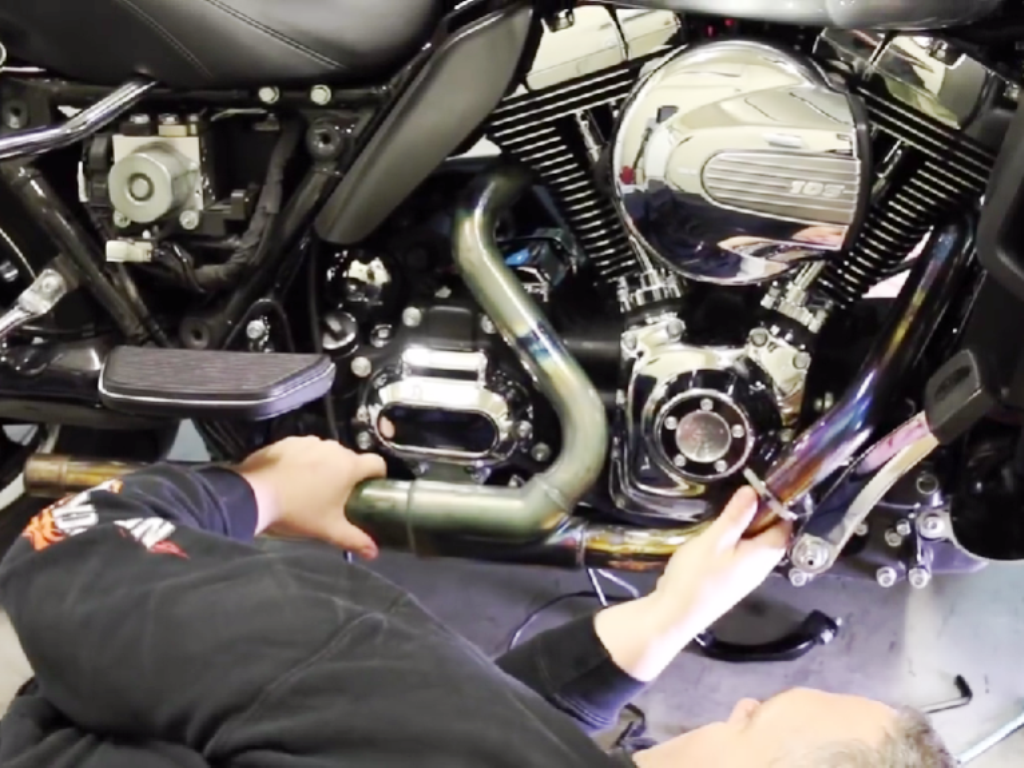
Figure 11. Removing head pipe from motorcycle. 
Figure 12. Exhaust gasket removal.
Step 7 – Install new exhaust head pipe
After the stock exhaust system has been removed, any old components can be transferred to the new system and re-installed onto the bike.
- Remove the oxygen sensors from the stock exhaust using a 9/16" wrench and install them into the new system (if applicable). Apply a small amount of anti-seize paste to the threads before installation.
- If your new exhaust does not come with flanges, remove the circlips from the stock exhaust with a set of pliers. Slide the flanges off of the old pipe an onto the new exhaust and refit the circlips.
- Many exhaust systems come with a new support bracket to hold head pipe in place. If applicable, remove the support bracket using a 1/4" hex (Allen) key. Install the new support bracket and torque the fasteners to 13-16 ft/lbs.
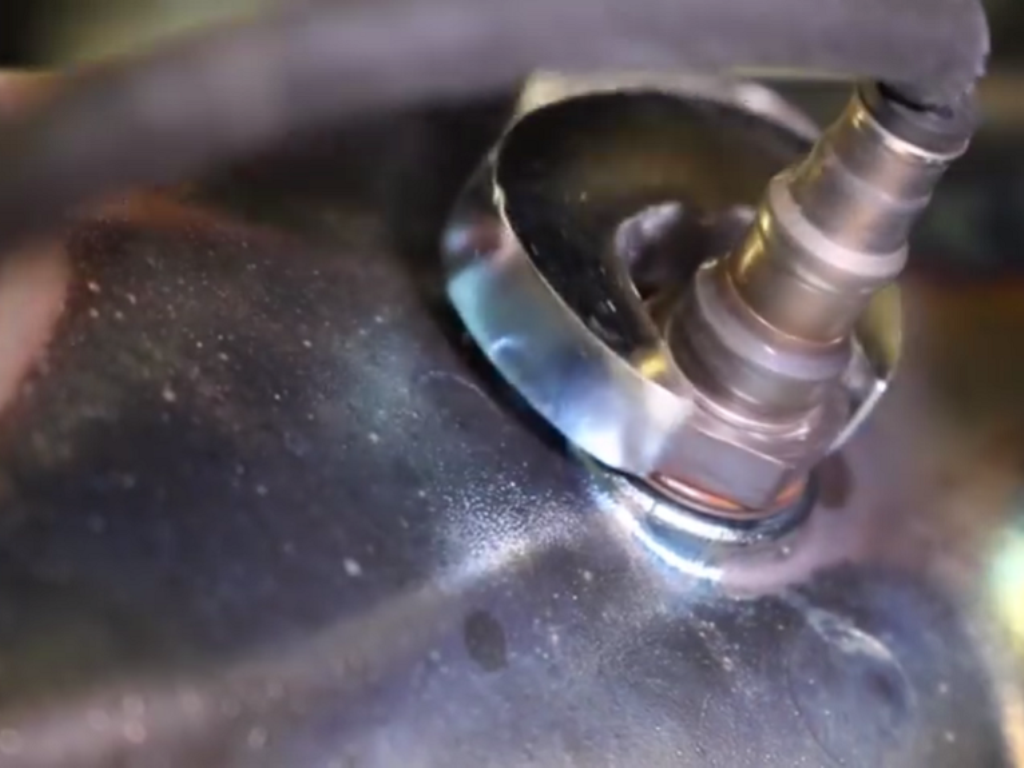
Figure 13. O2 sensor removal. 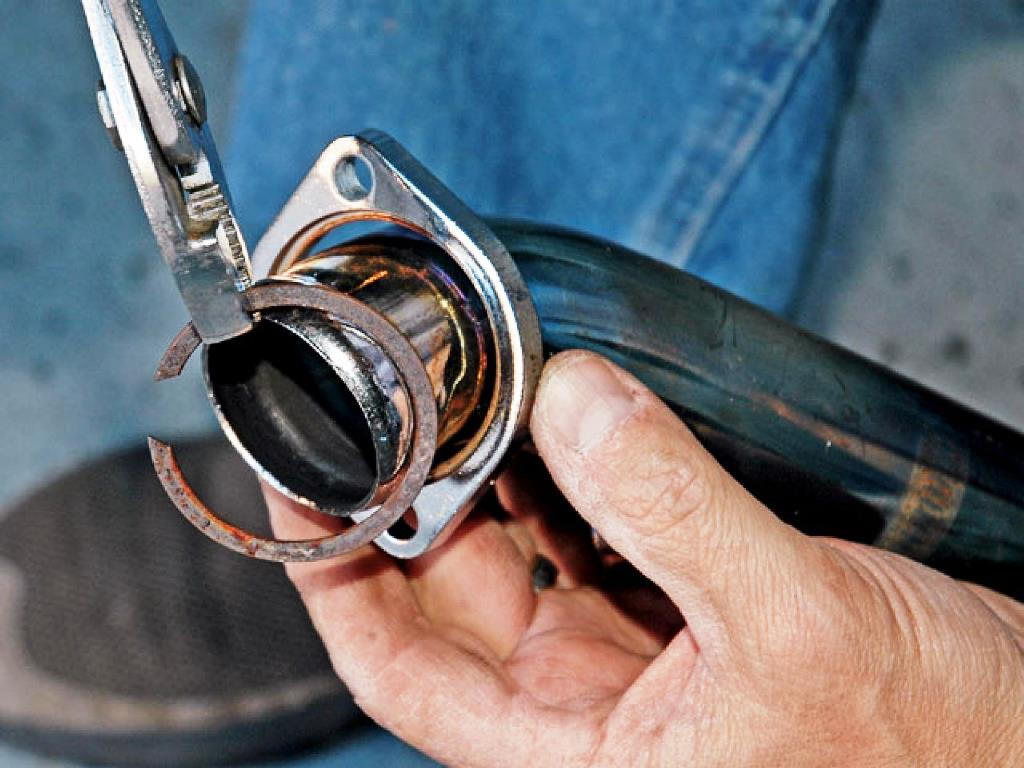
Figure 14. Circlip and flange removal. 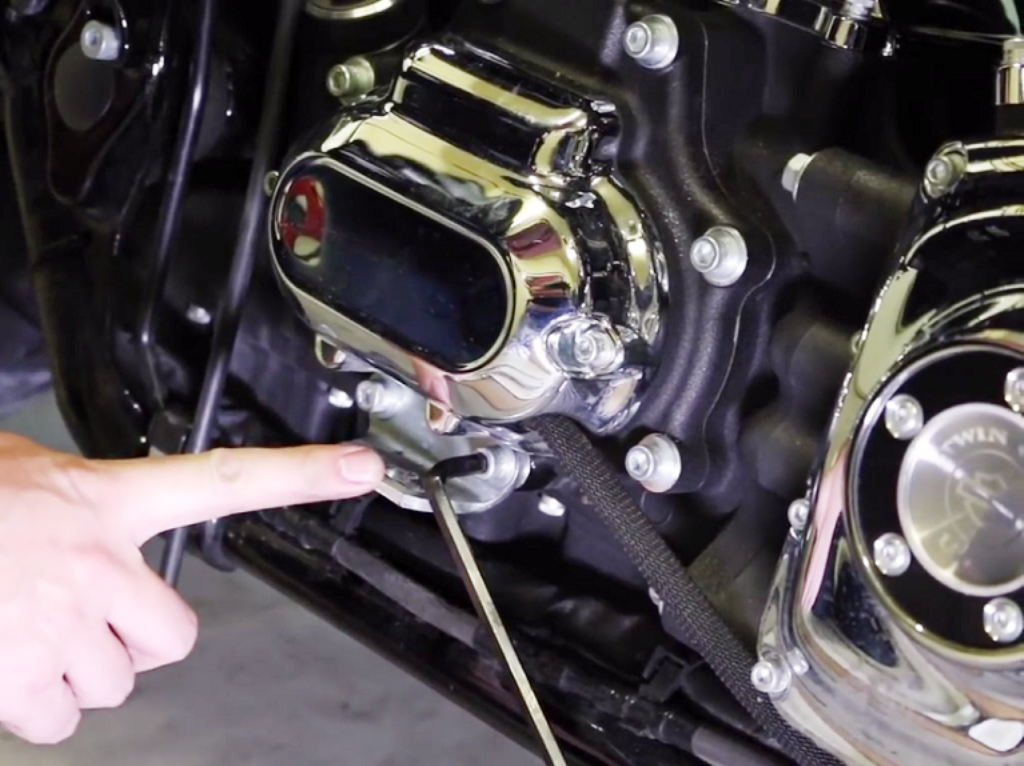
Figure 15. Head pipe support bracket.
- Install new crush gaskets into each exhaust port, making sure they are fully seated.
- Slide the new head pipe into place and fasten the exhaust flanges. Tighten the exhaust flange nuts evenly and to a torque of 60-80 in/lbs. Additionally, tighten the head pipe support bracket bolt(s) as indicated in the exhaust manufacturer's instructions.
- Route the oxygen sensor wiring back to their respective plugs and secure with wire ties as necessary.
- Attach and tighten any included exhaust heat shields.
- Reattach the footboard and footboard support brackets if necessary.
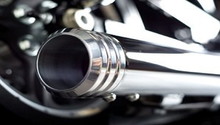
Step 8 – Install new muffler(s)
Whether swapping out the stock mufflers or installing a new system, the final step is to position the new muffler(s) onto the head pipe.
- Slide the muffler(s) onto the head pipe assembly along with the necessary exhaust clamp(s).
- If necessary, swap the muffler brackets from your old mufflers to the new mufflers before fastening the muffler to the support bracket.
- With the muffler(s) in place, tighten the exhaust clamp(s) to 45-60 ft/lbs and fully tighten the muffler bracket bolts.
Step 9 – Wipe the exhaust clean, start bike, and check for exhaust leaks
After installation has been completed, take a few moments to wipe down the exhaust system. This will ensure that any grease, oils, or other contaminants are not burned into the pipes when the engine is started. With the exhaust system clean, start the engine and listen as well as feel for exhaust leaks at each joint and near the head pipe flanges. If no leaks are present, re-install the saddlebags and side cover.

Note
A set of slip-on mufflers does not require tuning of the ECM on fuel-injected touring models; however, fueling adjustments are a must if a full system has been installed. Because of the increase in exhaust flow, Harley and exhaust manufacturers warn against riding the bike as a lean air-fuel mixture can occur and lead to potential engine damage. Tuning can be completed at any Harley dealership or with an aftermarket EFI controller.
Featured Video: How to Change Touring Model Exhaust
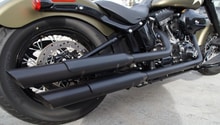
Exhaust Review
When exhaust shopping, owners have the choice of a full system or simple slip-on replacement mufflers. A full system is the more costly option, as it includes performance tuned head pipes along with freer flowing mufflers. Although slip-on mufflers are cheaper, they do not quite offer the same boost in performance as a full system, but they are a great way to enhance the sound of your bike without breaking the bank. Additionally, a set of slip-ons will not require the computer to be remapped as is often necessary with a full system. There are literally thousand of exhaust systems on the market to choose from, but this review will provide a small taste of what is available.
Rinehart Racing Slip-ons |
KC International Slip-on |
Vance & Hines Hi-Output |
Bassani True Dual Crossover |
Freedom Performance Sharp Radius | |
|---|---|---|---|---|---|
Price |
$550-700 | $170-225 | $1499 | $1099 | $675-750 |
Type |
Slip-on mufflers |
Slip-on mufflers |
Full system |
Full system | Full system |
Style |
2 into 1 with crossover pipe | 2 into 1 with crossover pipe | 2 into 1 | 2 into 2 | 2 into 2 |
Sound |
Medium w/ deeper tone than stock | Medium w/ deeper tone than stock | Loud | Deep, Throaty, Loud | Crisp, Blatty, Loud |
Best Value: KC International
Rinehart Racing Slip-Ons
Price – $550-700
Type – Slip-on mufflers
Style – 2 into 1 with crossover pipe
Sound –Medium with deeper tone than stock
Rinehart Racing mufflers are considered by many to be the gold standard of slip-on mufflers. The fit and finish of their mufflers are top notch and they look as good as they sound. One can expect a moderate increase in overall volume as well as a rich, deep exhaust note. While Touring models equipped with catalytic converters in the head pipe do muffle the exhaust a bit more than traditional head pipes do, many feel the Rinehart's hit the sweet spot by improving the exhaust sound without being overly obnoxious. Owners agree that the Rinehart mufflers come in at a pretty good value, considering some muffler setups can reach the $1,000 mark which puts them in the ballpark of a full system. Recommended for owners wanting style and sound without stepping up to a full system.
KC International Slip-ons

Price – $170-225
Type – Slip-on mufflers
Style – 2 into 1 with crossover pipe
Sound – Medium with deeper tone than stock
If you are shopping for a set of slip-on mufflers, you would be hard-pressed to not consider the offerings from KC International. These "budget" mufflers are anything but, and are often compared directly to slip-ons from manufacturers such as Rinehart and CFR. A touch over $200 gets you a set of megaphone mufflers with your choice of milled aluminum tips, removable baffles, and pipe finish. These mufflers improve upon the whisper quiet stock units without going overboard. They tend to get louder as miles accumulate and the packing burns out. The only real complaint is that the aluminum tips can overheat and discolor when fitted to a bike with catalytic converters, but the discoloration can be easily fixed with some high temp exhaust paint. Overall, these mufflers punch well above their weight class and are a real threat at their ridiculously low price point. Recommended for owners concerned with price and the sound of their bike, not the brand name.
Vance & Hines High Output

Price – $1,499
Type – Full system
Style – 2 into 1
Sound – Loud
Vance & Hines main focus has always been on performance and their Hi-Output 2-into-1 full exhaust system embodies this mindset. Finished in a brushed stainless steel, this exhaust ditches the dual muffler setup in favor of a single free-flowing muffler that exits on the right side of the bike. The 2-into-1 look is not for everyone, as some claim it makes the bike look a little off-balance compared to other systems. That being said, Vance & Hines claim to have spent countless hours on the dyno perfecting the flow characteristics of this system, so you can bet it is one of the top performing system available. Additionally, Vance & Hines also offers their proprietary Fuelpak tuning software to optimize your bike for this exhaust. Recommended for those who want a significant performance increase.
Bassani True Dual Crossover

Price –$1,099
Type – Full system
Style – 2 into 2
Sound – Deep, throaty, loud
The exhaust style that has recently gained popularity is the true dual system that routes the rear head pipe around the rear cylinder and down below the left saddlebag. Bassani offers several different exhaust systems in this configuration to combine looks and performance. The Bassani brand does not have the following of Vance & Hines or Rinehart, but owners who have purchased their systems regularly comment on their unique sound that tends to be deep and throaty. Bassani has patented their true-dual design and claim they are the only manufacturer offering equal length head pipes with best in class performance. One complaint that has occasionally popped up is that the pipes can discolor from heat; however, Bassani claims this is a tuning issue caused by too lean of a fuel mixture, not related to the quality of their products.Recommended for owners wanting a more unique exhaust with great sound.
Freedom Performance Sharp Radius

Price –$675-750
Type – Full system
Style – 2 into 2
Sound – Crisp, blatty, loud
Freedom Performance has gained recognition in the Harley exhaust world for their good looks, increased performance, and being 100% American made. While they offer various exhaust systems, arguably their most eye-catching offering is the sharp radius system. This exhaust gives a custom look by eliminating the traditional mufflers in favor of sharp curved head pipes. With a lack of mufflers, a radius system is bound to be one of the louder types of exhaust you come across. Many question if there is any performance increase due to a lack of back pressure, but others argue that Touring models are for cruising and looking good, not outright performance. If your are searching for an exhaust system that breaks the 'cookie-cutter' mold of a traditional muffler setup, this exhaust is for you. Recommended for a custom look and loud exhaust note.
Related Discussions
- Touring Exhaust- HDForums.com
- Quieter Exhaust Than Stock? - HDForums.com
- Do I Have to Remap With Just Adding Slip-ons - HDForums.com
- Exhaust Install - HDForums.com