Harley Davidson Touring: How to Replace Front Forks
You've invested in chrome do-dads all over your bike. The next thing you want are custom wheels and rotors. But the stock fork sliders will look terrible next to those nice wheels. You can fit chrome fork sliders if you have a service manual and follow these steps.
This article applies to the Harley Touring Models (2000-2013).
Harley Touring bikes have used the same basic front forks since the 1980's, all of them based upon the first Duo-Glide forks in the 1960's. It's a simple thing to remove for service, or for an upgrade. This article applies to the non-air forks, but air forks are similar.

Materials Needed
- Hand tools (including 3/8 drive socket set and ratchet)
- 1 3/8" wrench or socket (adjustable is OK)
- 6mm deep Allen wrench socket
- Impact gun (optional)
- 1 1/2" PVC pipe 24" long with coupler
- Fork holder or soft jaws for vice
- Fork oil measuring tool or other means to measure height of oil in forks
- Torque wrenches for ft-lbs and in-lbs
Step 1 – Remove the fairing, windshield and headlights
If you are tackling the fork, chances are you are already pretty knowledgeable about working on your Harley. If you need a step-by-step how-to on getting the fairing, headlights and windscreen off, check out our article here: How to Replace Headlight and Fog Lights.
Step 2 – Remove front wheel and fender
- Raise the front wheel several inches off the floor. For best results, use a bike jack on a level surface.
- Cut zip ties and disconnect ABS as well as front fender light wires (if applicable) from left brake hose.
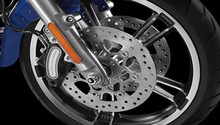
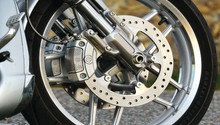
- Remove brake caliper mounting screws and slide both brake calipers off rotors. Support the calipers on the front crash bar with wire or cord.
- Push a large screwdriver through the hole in the right side of the axle and remove the axle nut as well as washer.
- Loosen the two nuts at the bottom of the right side fork slider. Support the front wheel and pull the axle out from the right side. Do not lose the spacers between the wheel and fork sliders, or the ABS sensor if equipped.
- Disconnect the fender tip light wire from the connector.
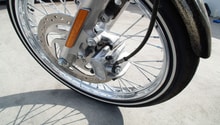
- Bend tabs on lock plates away from the bolts holding the fender to the forks. Remove bolts and lock plates, then remove fender.

Figure 2. Caliper bolts and axle nut. 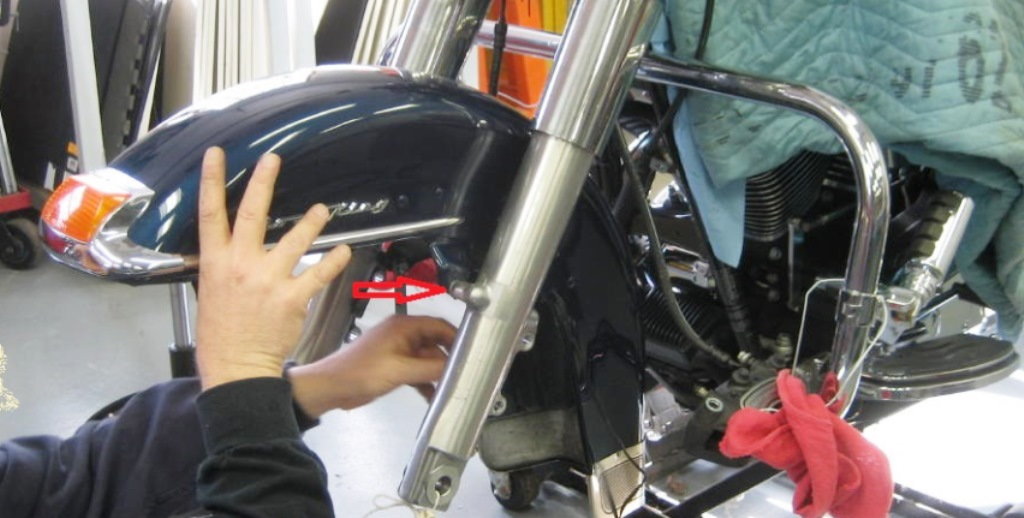
Figure 3. Fender bolts.
Step 3 – Remove fork tubes
- Loosen left fork cap bolt from fork tube plug at top of fork tube, but do not remove.
- Loosen pinch bolt (with lock washer) on left side of lower fork bracket, but do not remove.
- For older bikes, spray glass cleaner or WD-40 on fork tube above the rubber fork stop. After lubricating surfaces, move fork stop up fork tube until it contacts bottom of upper fork triple tree.
- Holding fork slider to prevent fork from dropping, remove fork cap bolt from fork tube plug. Slide fork tube down and out of upper fork triple tree, fork stop, lower fork triple tree, and slider cover.
- Thread fork cap bolt back into fork tube plug to prevent loss of fork oil while handling.

Pro Tip
If fork tubes don't slide out easily, spray top and bottom triple trees with WD-40 or other lubricant. Remove pinch bolt and drive a screwdriver into the slot to release pressure on the fork tube.
Step 4 – Fork disassembly
- Remove two nuts and axle retainer from right side fork slider.
- Remove fork top cap as well as the drain screw and drain fork oil.
- Remove 6mm Allen screw from bottom of fork slider to release damper tube inside slider. An impact gun may be required to break it free, especially if the damping tube is turning inside with the bolt.
- Remove fork tube top plug and fork spring. Depending on model, there may be spring pressure on the plug. Be prepared to hold it.
- Turn fork over and drain remaining oil. The 2006 and up fairing models have a damper valve under the spring that will fall out. Be prepared to catch it. Remove the damper tube assembly from bottom of fork slider.
- Slide up dust cover and remove retainer clip from top of fork slider.
- Using a sliding hammering motion, extend the fork tube and slider fully, to drive out the top bushing and separate the fork tube and slider.
- Remove seal, spacer and bushing from fork tube.
- Using a screwdriver remove lower leg bushing from recessed area on fork tube.
- Remove lower fork stop from fork slider.
- Clean all parts with mineral spirits, it will take a while to get the slider and tube clean.

Figure 5. 6mm Allen screw. 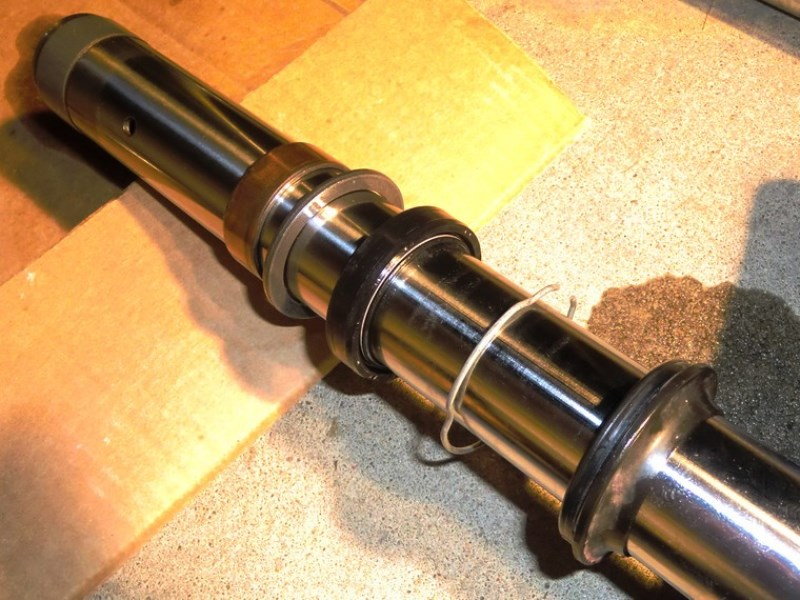
Figure 6. Most Touring bikes will have a dust cover, retaining clip, seal, and other parts (from top to bottom).
Step 5 – Reassembly
- All the parts needed to rebuild your forks are available as a kit from Harley and the aftermarket.
- Liberally coat all parts with fork oil before assembly.
- Expand lower fork leg bushing with a flat screwdriver and slip over the end of the fork tube.
- Install new wear ring in groove at top of damper tube. Install rebound spring on opposite end.
- With wear ring at top, slide damper into fork tube, so it drops out of the bottom of the tube. Install lower stop at end of damper tube.
- Install drain screw into slider with new copper crush ring.
- Slide fork tube into fork slider. Slide top bushing down fork tube, and drive into the bore of the slider using a piece of 1.5" PVC tube as a slide hammer.
- Slide spacer and then fork seal down fork tube, and drive the seal into the bore of the slider using the PVC until retaining clip groove is visible.
- Install retaining clip in the fork slider.
- Temporarily install spring in fork tube. Turn fork assembly upside down and compress fork spring enough to prevent the damper from turning.
- Install new 6mm screw with new copper crush ring into bottom of fork slider and damper tube. Tighten to 132-216 in-lbs. Remove spring.
- Fill fork tube with 11 oz of fork oil. Work fork in and out until resistance is felt then pump a few more times.
- All models except Road King: Install new wear ring on damper valve. Insert damper valve into fork tube with spring side up. Push down to bottom with fork spring, then remove spring. Pump fork in and out a few times to discharge air from damper valve.
- Fully compress fork tube into slider and measure oil level. It should be 5.6 in from top of tube on all models except Road King, and 5.24 in from top of tube on Road Kings. Adjust as necessary. Fork oil level gauge can be used to easily measure and adjust oil level.
- Install fork spring into tube with tighter wound springs at the bottom.
- Install o-ring on fork tube plug and install plug into top of fork tube. Tighten to 60-70 ft-lbs.
- Install new quad ring on fork cap bolt and temporarily install cap bolt into fork tube plug.
- Repeat for other fork. For right fork, loosely install axle retainer and nuts.
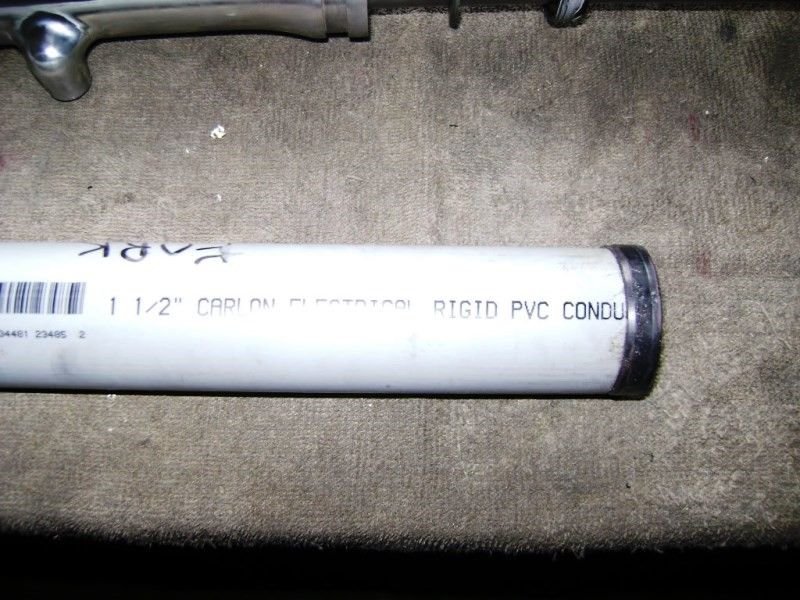
Figure 7. PVC pipe fork tool. 
Figure 8. Fork seal retainer clip.
Step 6 – Install forks on bike
- Install slider covers (tin cans) onto lower triple tree.
- Remove fork cap bolt and slide fork tube up through slider covers and lower triple tree. Slide fork stop (if equipped) onto fork tube and continue to slide tube into upper triple tree.
- Install fork cap bolt and tighten to 60-70 ft-lbs.
- Tighten lower triple tree pinch bolt to 53-57 ft-lbs.
- Repeat for other side.
Step 7 – Reinstall front fender and wheel
- Install fender and tighten fender bolts to 16-20 ft-lbs. After installing fender bolts, bend corners of lock tab to keep bolts from coming loose.
- Place wheel in position with valve stem on the right side of bike.
- Apply a light coat of anti-seize and slide axle through right fork slider and external spacer, through wheel and into front wheel sensor (ABS) or external spacer, and left fork slider. If you have an ABS sensor, make sure alignment pin is in slot in fork slider.
- Install washer and axle nut, then tighten to 60-65 ft-lbs. Put a screwdriver through the hole in the right side of axle to hold it stationary.
- Push right fork slider against spacer and tighten axle holder nuts to 132-180 in-lbs.
- Re-install brake calipers and tighten bolts to 17-19 ft-lbs.
- If equipped, re-connect front fender light wire connector. Using zip ties, attach ABS cable and fender light wire to left side brake line, if equipped.
See pictures in Step 2
Step 8 – Reinstall fairing or headlight nacelle
Just bolt everything back up, and your are ready to ride.
Featured Video: Fork Cartridge Kit Install
Related Discussions and Video
- How Do You Remove the Front Fork? - HDForums.com
- How to Remove Street Glide Forks - HDForums.com
- Replacing Stock Sliders with Chrome - YouTube.com