
Street Glide Fairing Removal
#1
 03-30-2011, 02:00 AM

Join Date: Mar 2011
Location: Nebraska
Posts: 2
Likes: 0
Received 0 Likes
on
0 Posts
I searched the internet for a step by step guide to remove the front fairing on a Street Glide and couldn't find anything. So I decided to do it myself. This is my first post and I wanted to make a more detailed front fairing removal guide, so here goes!
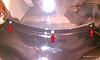
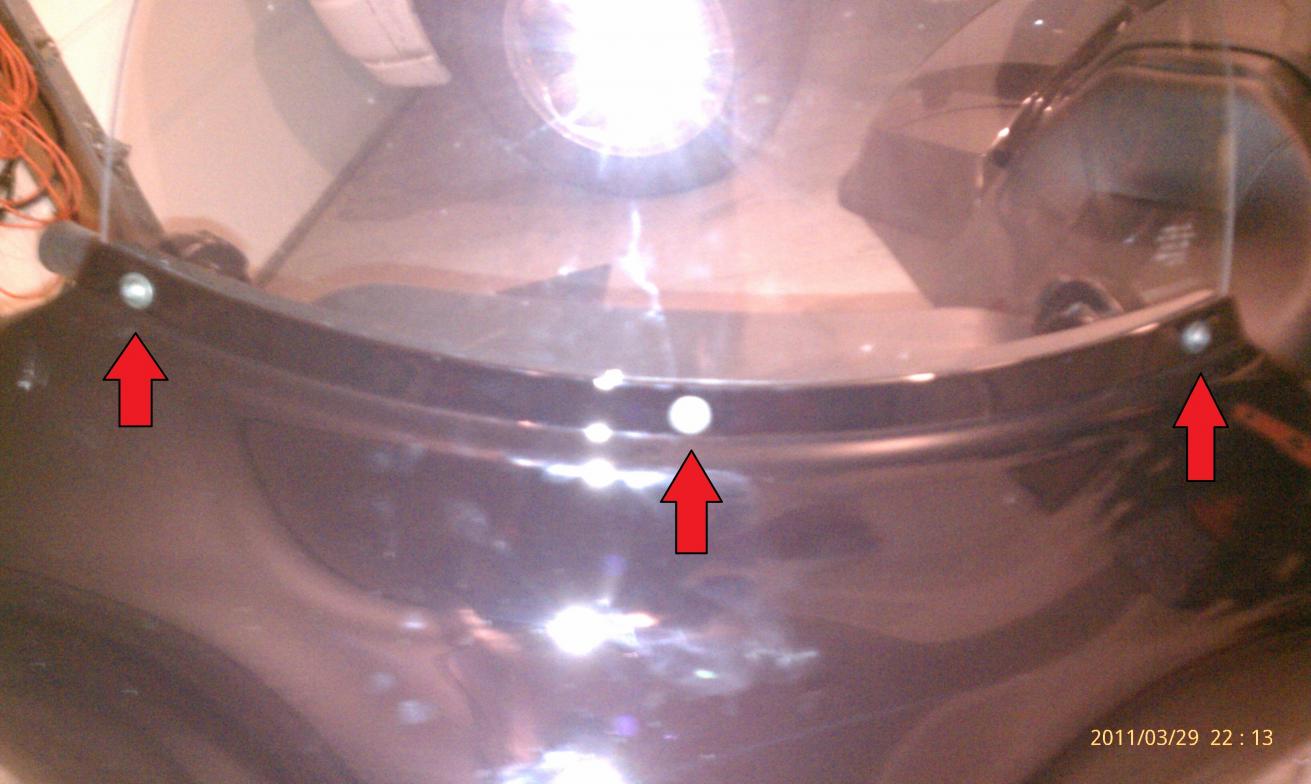
#1 You will need a T-27 for all 7 screw removal. Remove the windsheild as to make it easier to handle the fairing. There are three screws you must take out. Pull the winsheild toward the front fairing to create a gap for it to slip over the bolt holes. After the windsheild is removed, replace the middle screw on the fairing for support.
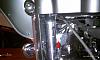
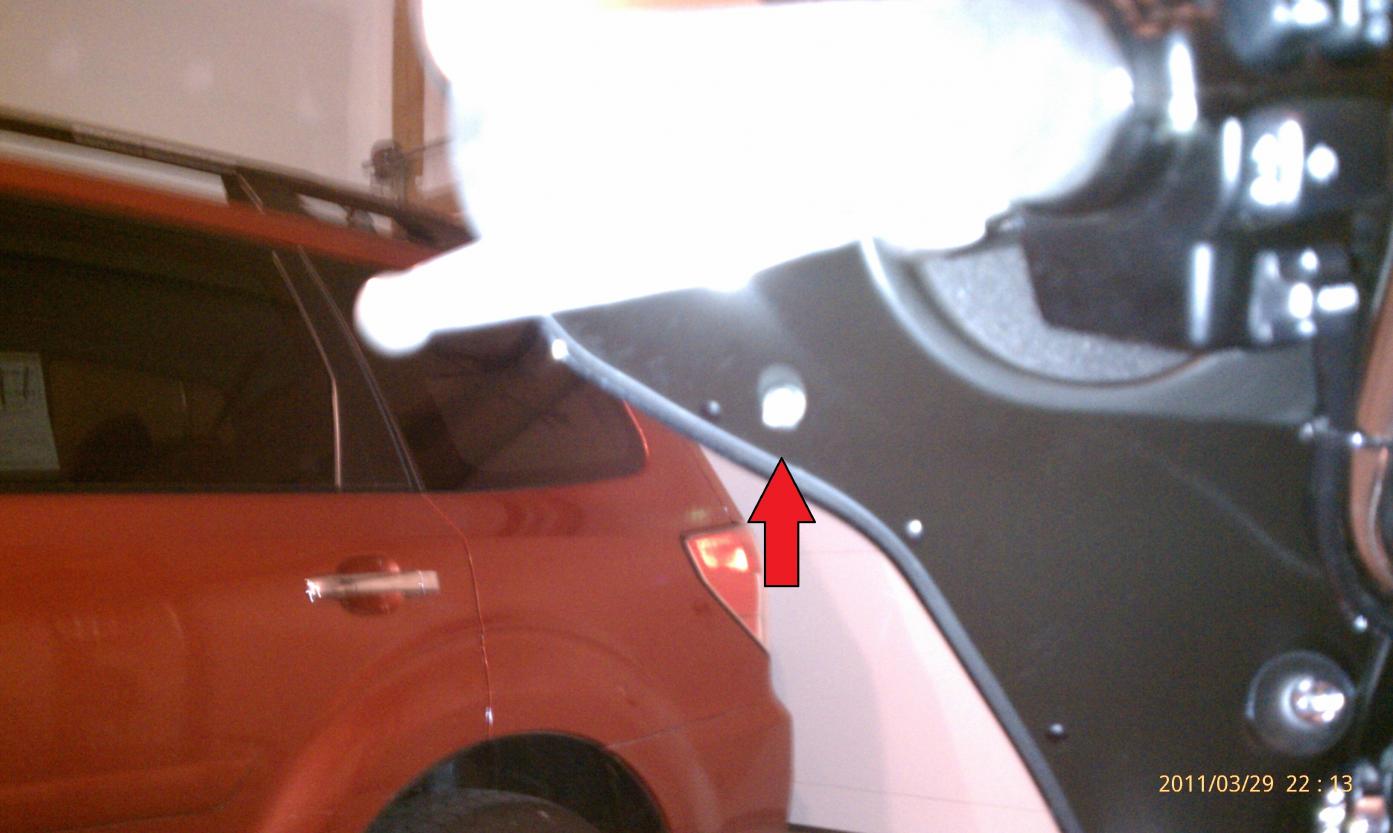
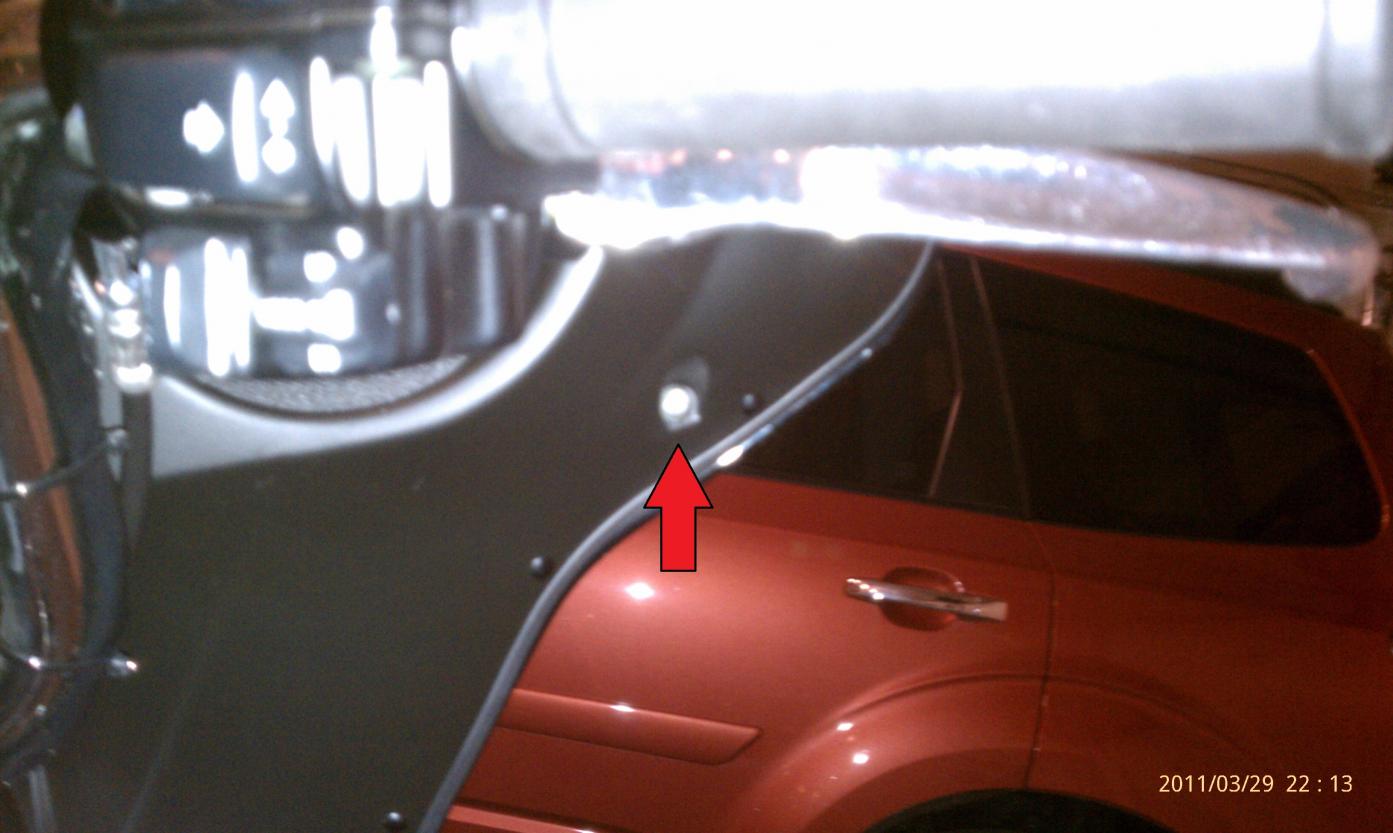
#2 Locate and remove the screws on the left and right hand side below the mirrors.


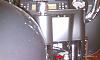
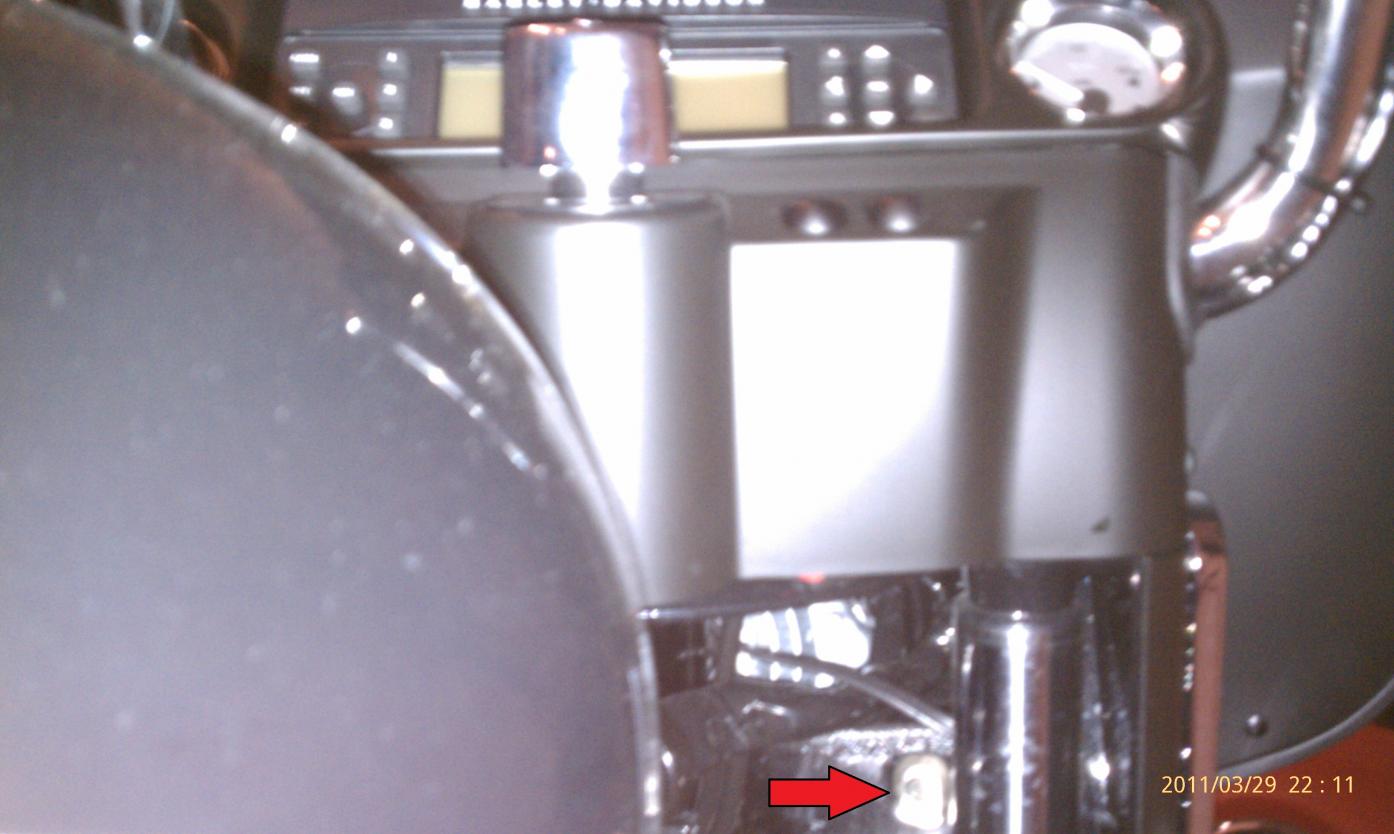
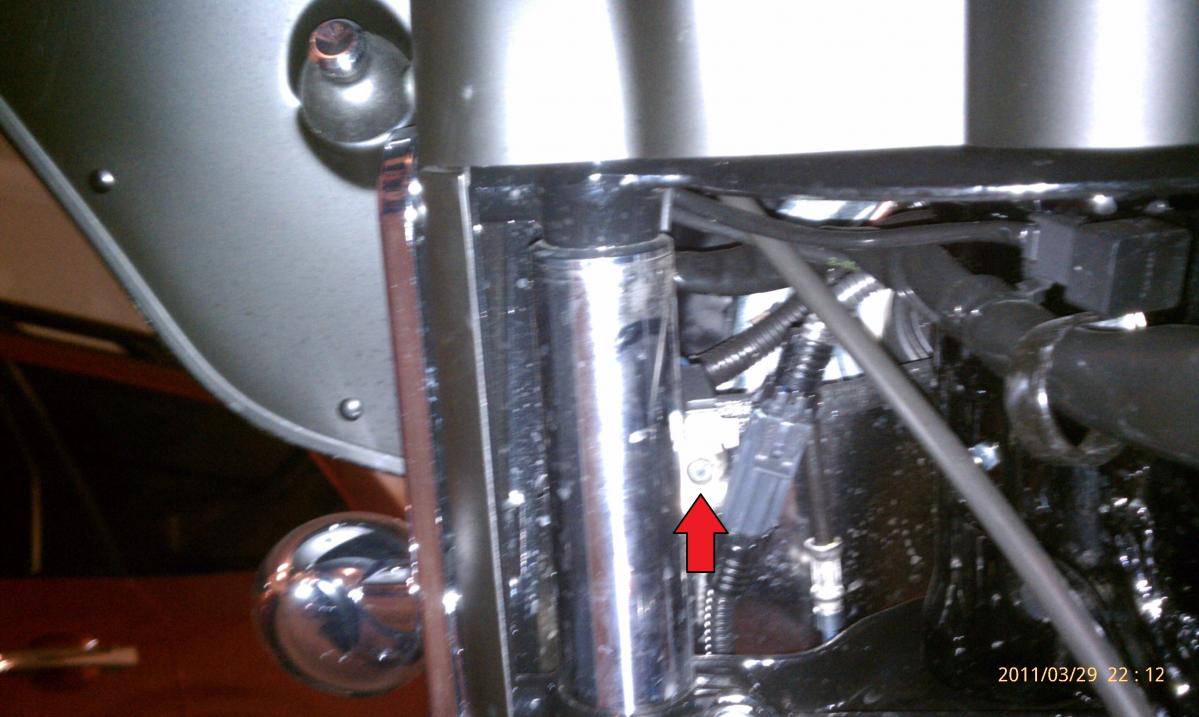
#3 Locate and remove the screws that are just inside the forks on the left and right below the inner fairing.
#4 You should have six screws removed with the seventh being the one that was reinstalled in step one. It is suggested that you put something over your front fender to protect it during fairing removal. While supporting the fairing, remove the last screw that was reinstalled in step #1.
#5 Pull the fairing from the bike and unplug the headlight from its cord.
Follow in reverse order for easy installation.
Hope this makes it easy for anyone wanting to remove the front fairing!
#1 You will need a T-27 for all 7 screw removal. Remove the windsheild as to make it easier to handle the fairing. There are three screws you must take out. Pull the winsheild toward the front fairing to create a gap for it to slip over the bolt holes. After the windsheild is removed, replace the middle screw on the fairing for support.
#2 Locate and remove the screws on the left and right hand side below the mirrors.
#3 Locate and remove the screws that are just inside the forks on the left and right below the inner fairing.
#4 You should have six screws removed with the seventh being the one that was reinstalled in step one. It is suggested that you put something over your front fender to protect it during fairing removal. While supporting the fairing, remove the last screw that was reinstalled in step #1.
#5 Pull the fairing from the bike and unplug the headlight from its cord.
Follow in reverse order for easy installation.
Hope this makes it easy for anyone wanting to remove the front fairing!
#2
03-30-2011, 02:15 AM


#6
06-01-2011, 06:50 AM
Seasoned HDF Member
Join Date: Oct 2007
Location: Western South Dakota
Posts: 55,887
Received 70,434 Likes
on
21,388 Posts
#7
06-01-2011, 08:32 AM
Extreme HDF Member
Trending Topics
#8
06-01-2011, 12:29 PM
mikebaby
#9
06-01-2011, 12:36 PM
Good tip. Another good tip I learned from here is if you have passing lights use pair of old tube socks and cover them as well.
#10
07-14-2011, 08:16 PM
Thanks Man, I was missing those lower screws at first, your post cleared that issue up in a big hurry.
Unfortunately the code on the radio that said speakers open, I did not find this to be the actual physical case, off to the dealer tomorrow to see if the extended warranty really works!!!!
Unfortunately the code on the radio that said speakers open, I did not find this to be the actual physical case, off to the dealer tomorrow to see if the extended warranty really works!!!!