Intiminators go in today, I hope...
#1
 03-18-2013, 09:00 AM

Hey everybody, I have reserved today to install the Ricor Intiminators into my 2012 Fat Bob. I thought it would be fun to post during the install and answer/read any inputs from anybody interested in the subject.
Some thoughts/ notes before I get started:
This is mainly for riders like me who 6 months ago when I bought my first Harley, would have never imagined doing this myself - thanks to the many Forum wrentches that have given me confidence especially Rooti. All the pros out there will probably be bored with this mod.
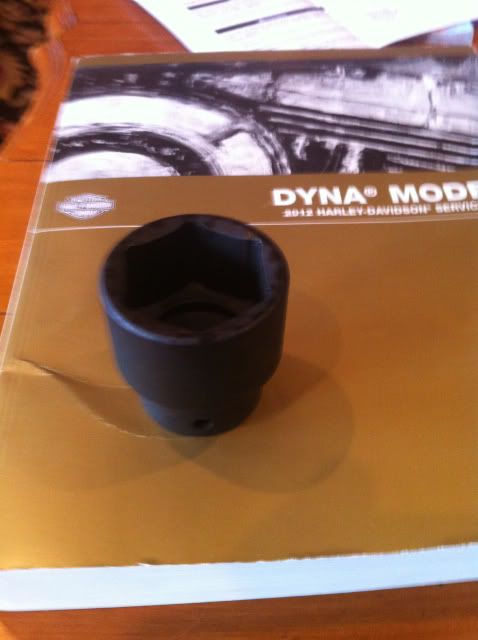
My first mistake: bought a 1 3/8 inch fork cap socket on Ebay advertised for all big twin Harleys - did not fit. Returned it and purchased the correct 35 mm socket. If you do the math conversion, it is surprising to me that the first socket did not work - a hair too small.
In the 2012 Dyna Service Manual the Fork Oil Volume for the FXDF is listed at 120 mm or 4.92 inches - again if you do the math HD is wrong, 120 mm is 4.72 inches, not a big deal but a learning point to check everything you can.
Ok, need to get started.
Some thoughts/ notes before I get started:
This is mainly for riders like me who 6 months ago when I bought my first Harley, would have never imagined doing this myself - thanks to the many Forum wrentches that have given me confidence especially Rooti. All the pros out there will probably be bored with this mod.
My first mistake: bought a 1 3/8 inch fork cap socket on Ebay advertised for all big twin Harleys - did not fit. Returned it and purchased the correct 35 mm socket. If you do the math conversion, it is surprising to me that the first socket did not work - a hair too small.
In the 2012 Dyna Service Manual the Fork Oil Volume for the FXDF is listed at 120 mm or 4.92 inches - again if you do the math HD is wrong, 120 mm is 4.72 inches, not a big deal but a learning point to check everything you can.
Ok, need to get started.
#3
03-18-2013, 10:30 AM
#4
03-18-2013, 11:25 AM
I am planning on cutting the stock spacer down at least 1/2" which is the width of the fat section of the Intiminators. Rooti cut his 3/4" and wishes he had gone 1". So I am a little undecided about the exact cut off for me. My sag is 1 5/16" with me sitting on bike, I do not know the % yet until I get the forks off and measure max travel - this may help my decision. I have read sag should be somewhere between 25% - 33% of total fork travel, so soon I will know where I am.
#5
03-18-2013, 12:52 PM
I think I took 5/8" off? Whatever length the Intiminators are. It ended up putting my sag back where it was before the install, I think somewhere in that 25-33% range. Those fork caps were a real forkin' pain to get on though. First time I had forks off and clamped in a vise. .had to stand on a chair, put paint cans underneath the fork for support, and lean in with everything I had. .if I woulda just cut the spacers would have been easier. Second time I left forks on bike as I was just R&R'ing the spacers. .for some reason the right one went right on, left one refused to get threaded but finally got it.
Btw the socket I ordered specifically for the job didn't fit either. Had to get a big fat one from the auto store and it turned out to be useful to be able to lean on the socket wrench while twisting the giant socket with my other hand to get things started.
Matt
Btw the socket I ordered specifically for the job didn't fit either. Had to get a big fat one from the auto store and it turned out to be useful to be able to lean on the socket wrench while twisting the giant socket with my other hand to get things started.
Matt
#6
03-18-2013, 01:15 PM
Ok, My Photobucket just recovered:
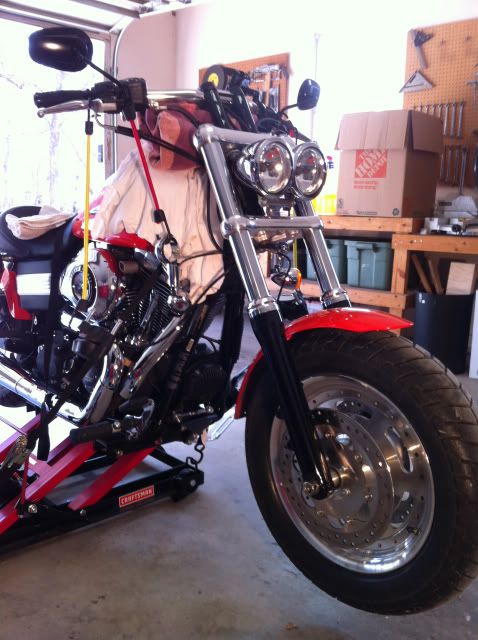
Bike up on my red modified Sears lift, tied down on front side for the loss of weight when front wheel comes off.
Towels to protect fuel tank and to keep the forks from moving back and forth while I work.
Turn signals from a relocate and brake calipers hanging by bungees.
Axel covers off. Wheel next.
Back to Lowes for the 2nd time - thought I had a 3/8" to 1/2" socket but thought wrong! Need this for that big 35mm fork cap socket.
#7
03-18-2013, 02:36 PM
The axel nut was pretty tight, but by luck I already had a nice big wrentch that size.
The guy that installed the front fender must have dipped the 4 bolts into the Loctite bucket - they were very hard to remove for their size. Will have to spend time cleaning those up.
Loosened the top pinch nuts and then loosened the fork caps while still on the bike.
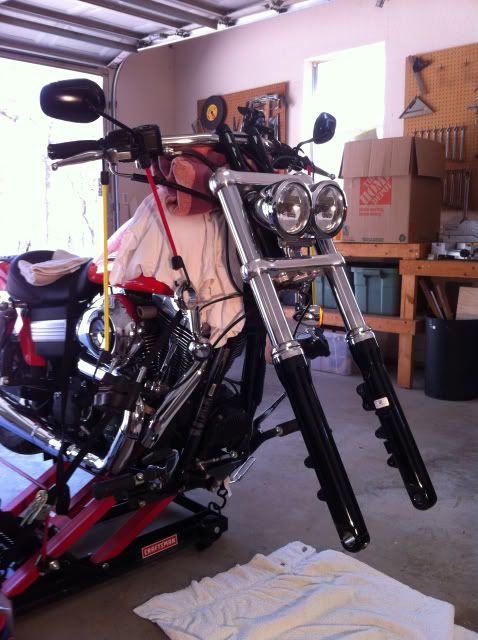
Time to pull the forks out!
The guy that installed the front fender must have dipped the 4 bolts into the Loctite bucket - they were very hard to remove for their size. Will have to spend time cleaning those up.
Loosened the top pinch nuts and then loosened the fork caps while still on the bike.
Time to pull the forks out!
Trending Topics
#9
03-18-2013, 03:22 PM
I have a tip I picked up here that really helps during reassembly.
With the springs OUT take the fork cap and set it on the tube. Turn it till the threads just barely catch. Mark the spot on the tube and the cap where the treads start with a grease pencil (or similar). Now when you are under spring tension you won't have to guess where to position the cap before starting to mate the threads. Makes it easier and less likely to cross thread.
BTW, my front fender had a wad of Loctite on it as well...
#10
03-18-2013, 03:53 PM
I have a tip I picked up here that really helps during reassembly.
With the springs OUT take the fork cap and set it on the tube. Turn it till the threads just barely catch. Mark the spot on the tube and the cap where the treads start with a grease pencil (or similar). Now when you are under spring tension you won't have to guess where to position the cap before starting to mate the threads. Makes it easier and less likely to cross thread.
BTW, my front fender had a wad of Loctite on it as well...
With the springs OUT take the fork cap and set it on the tube. Turn it till the threads just barely catch. Mark the spot on the tube and the cap where the treads start with a grease pencil (or similar). Now when you are under spring tension you won't have to guess where to position the cap before starting to mate the threads. Makes it easier and less likely to cross thread.
BTW, my front fender had a wad of Loctite on it as well...
Ok, both forks off, oil out - time to cut spacer, I think I will cut 5/8" using my new 12" metal blade in my miter saw.
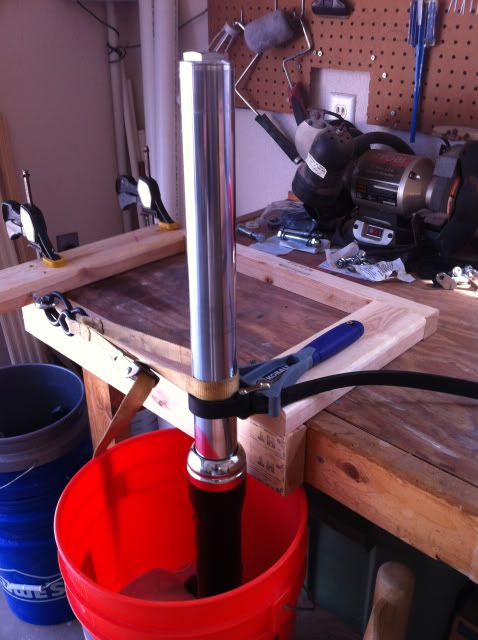
Here is a pic of my fork holder, inspired by Muds' holder with a twist of using a round rubber clamp instead of the 2 tie down straps. I did use 1 tie down strap to keep the proper tension direction on the round clamp.