I bought the Phase 7 Kuryakyn LED Truck Light headlights and passing lights for my '04 Roadking. The headlight works fine, plug and play, easy peasy. The passing lights however are not compatible. Please see the photo. Any idea what I can do here? I am not a technician or an electrician, I have no idea what I'm doing.
The black wire in your bucket is the ground, the white/black wire is power. The plug on the Trucklite has two wires, black and red, so the two black wires need to be connected and the red wire to the white/black. Voila!
You have a spade connector on the end of the bike's black wire and if you disconnect the bulb, there is a similar one inside that black sleeve. You can buy those connectors at any auto parts store and I recommend you buy the crimping tool as well. You can probably buy a kit including the tool plus a selection of the connectors. Cut off the black plug on your Trucklite, crimp the matching connectors, plug the correct wires together and you are done. You need a decent pair of wire cutters, a stripper is also a good idea. Make sure you insulate the connectors, to prevent unintentional grounding.
You can find guidance on doing this on-line, probably a video as well. This is similar to the kit I have, that tool being suitable for everything you need.
That was very helpful thank you! I have a couple questions.
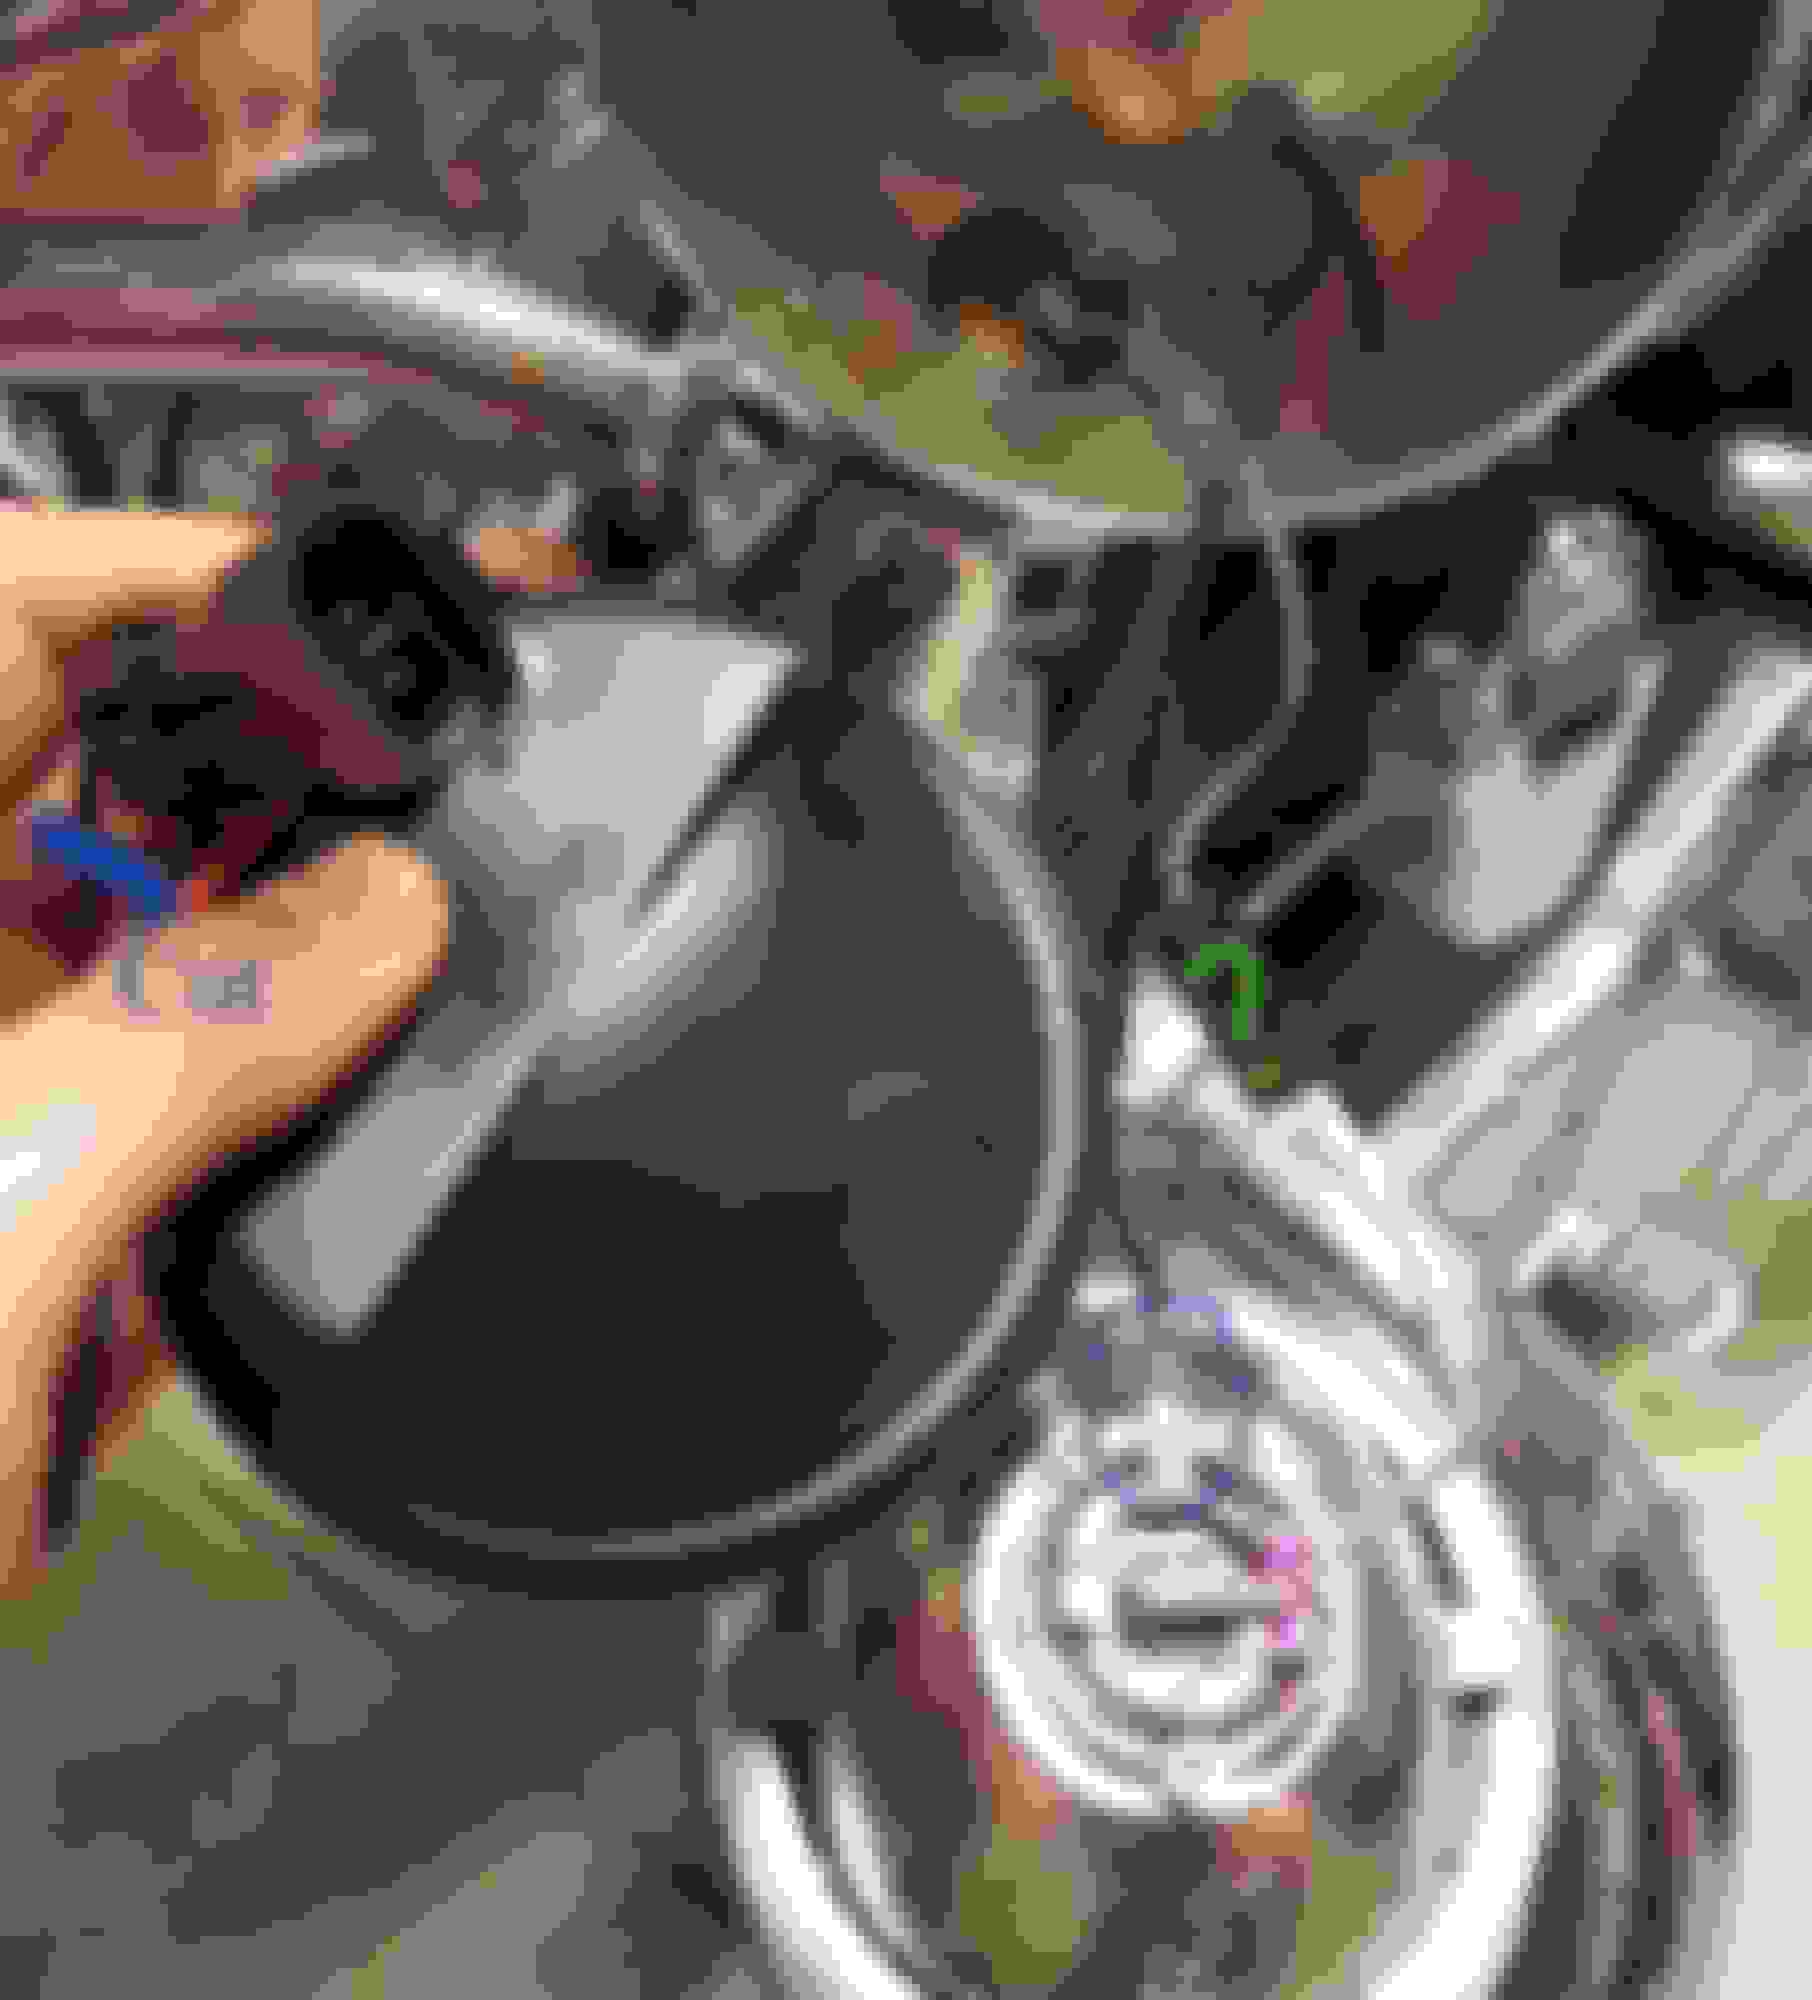
The spade connecter at the end of the bike's black wire is where I have circled in blue on the photo, correct? I'm not sure what you mean by there is a similar one inside that black sleeve. What black sleeve are you talking about, is that where I have the green question mark?
So in my photo I have cut off the black plug from the truck lite, and then I'm supposed to crimp the matching connectors and plug the correct wires together.... Does that mean I am supposed to take the cut black wire from the truck lite and connect it to the spade which is circled in blue? Do I carefully remove the spade so it is still intact, or do I just cut the black wire above the spade? And then to open up the black sleeve by the green question mark and connect that to the red wire on the truck lite? What happens with the white wire between the green and pink question marks?
The white wire at your pink '?' is an integral part of the bulb, so can be left as it is.
Turning to your green '?', you are quite right, there is a connector inside. Hold the black sleeve and carefully pull on the white wire, which will detach it from the black sleeve. Then pull on the black wire, at your blue circle, which will detach the light unit from the bike. Take care, or use an extra pair of hands, to avoid dropping it!
These connectors are used widely in the automotive industry and the one on the black wire is similar to this (we'll call it Type A):
The one on the white wire is similar to this (Type B):
Having cut off the black connector on the Trucklite, you now have two bare wires. The black one needs a Type B connector and the red one requires a Type A. Once you have fitted them connect the two black wires together and the red and white wires. You only need a total of two of each type of connector and they only cost a few pence, but you also need that tool mentioned above, hence my earlier suggestion to buy a kit.
If you are still uncertain, it will take a neighbour or friend just a few minutes to help you complete what needs to be done and get your new lights working. Then you'll be an expert!
Good tips from Graham,I would recommend the heat shrinkable style of those same crimp connectors to keep the corrosion out,only a few cents more at your local parts store.
 06-30-2016, 12:05 AM