2014-2023 Touring Models This Section Is For Rushmore/2014-2023 Touring Models
Sponsored by:
Sponsored by:

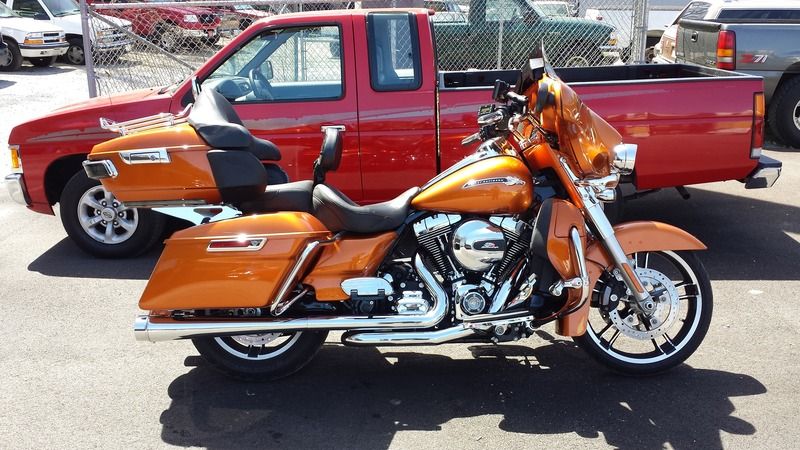
Rushmore King Tour Pak with everything.

Thread Tools
 
Search this Thread
 
  #11  
Old 12-20-2016, 12:18 PM
Roadie13's Avatar
Roadie13
Roadie13 is offline
Stellar HDF Member

Join Date: Mar 2013
Location: In a house
Posts: 2,337
Received 1,005 Likes on 497 Posts
Default

What did you make the template out of and how did it work? Doing mine over the winter but don't have the intestinal fortitude to drill yet. What did you use to cut the big hole for the harness plug?
 
  #12  
Old 12-20-2016, 12:27 PM
Don Don's Avatar
Don Don
Don Don is offline
Novice
Join Date: Feb 2016
Location: memphis tn
Posts: 21
Received 2 Likes on 2 Posts
Default

One of the most enjoyable reads in a while thanks for posting....really giving me something to think about.
 
The following users liked this post:
Super08 (12-20-2016)
  #13  
Old 12-20-2016, 03:24 PM
Super08's Avatar
Super08
Super08 is offline
Supporter
Thread Starter
Join Date: Jun 2015
Location: Alberta
Posts: 1,046
Received 69 Likes on 59 Posts
Default

Originally Posted by Roadie13
What did you make the template out of and how did it work? Doing mine over the winter but don't have the intestinal fortitude to drill yet. What did you use to cut the big hole for the harness plug?
I just used three sheets of regular 8.5x11 printer paper. I did the each side first and then the middle last taping them together into one piece. I trimmed around the edge with a sharp Xacto knife. It worked good, I measured one of the bikes at the dealers and it had the top of the light bar 16mm down from the top edge of the tour pack. You need to be very precise putting it on and drilling the holes. I lucked out and it was a perfect fit first try. As for the big hole I drilled a bunch of 1/4" holes around the edge and then used a Dremel tool with a 1/8" router tip to join the holes so the center part would fall out. Then I changed to a 1/4" general use tip and tidied up the edges.
 

Last edited by Super08; 12-20-2016 at 03:27 PM.
The following users liked this post:
JoeFLHX (01-22-2018)
  #14  
Old 12-20-2016, 03:52 PM
Roadie13's Avatar
Roadie13
Roadie13 is offline
Stellar HDF Member

Join Date: Mar 2013
Location: In a house
Posts: 2,337
Received 1,005 Likes on 497 Posts
Default

Originally Posted by Super08
I just used three sheets of regular 8.5x11 printer paper. I did the each side first and then the middle last taping them together into one piece. I trimmed around the edge with a sharp Xacto knife. It worked good, I measured one of the bikes at the dealers and it had the top of the light bar 16mm down from the top edge of the tour pack. You need to be very precise putting it on and drilling the holes. I lucked out and it was a perfect fit first try. As for the big hole I drilled a bunch of 1/4" holes around the edge and then used a Dremel tool with a 1/8" router tip to join the holes so the center part would fall out. Then I changed to a 1/4" general use tip and tidied up the edges.
Thanks for the tips and great write up. Much appreciated.
 
  #15  
Old 12-20-2016, 09:08 PM
glcash's Avatar
glcash
glcash is offline
Road Warrior
Join Date: May 2009
Location: Bluegrass State
Posts: 1,769
Received 32 Likes on 27 Posts
Default

NICE!!!!!!!!!!! I installed the light bar on my rushmore chopped pak! Best mod ever!
 
  #16  
Old 12-21-2016, 03:02 PM
TomboAT65's Avatar
TomboAT65
TomboAT65 is offline
Tourer
Join Date: May 2011
Location: Central Valley, CA
Posts: 472
Received 49 Likes on 33 Posts
Default

Super08, very nice write up. I will be undertaking this soon. I dont think I will go for the light bar though.

My only question is why didn't you use this kit for the speakers, http://www.harley-davidson.com/store...-enclosure-kit. It comes with a harness that connects in the fairing to the rear speaker connector and runs back to the seat.
 
  #17  
Old 12-21-2016, 03:27 PM
Super08's Avatar
Super08
Super08 is offline
Supporter
Thread Starter
Join Date: Jun 2015
Location: Alberta
Posts: 1,046
Received 69 Likes on 59 Posts
Default

I did use that kit and have that harness. I need the AM/FM harness to run back to the radio antenna. The one on a regular Road Glide and Road Glide Special is shorter than the one that comes with an Ultra.
 
  #18  
Old 12-21-2016, 03:36 PM
TomboAT65's Avatar
TomboAT65
TomboAT65 is offline
Tourer
Join Date: May 2011
Location: Central Valley, CA
Posts: 472
Received 49 Likes on 33 Posts
Default

Originally Posted by Super08
I did use that kit and have that harness. I need the AM/FM harness to run back to the radio antenna. The one on a regular Road Glide and Road Glide Special is shorter than the one that comes with an Ultra.
Ah, it sounded like you needed more for the speakers not the antenna. Thanks again for the write up.
 
  #19  
Old 12-21-2016, 05:03 PM
cycle7447's Avatar
cycle7447
cycle7447 is offline
Seasoned HDF Member
Join Date: Jan 2005
Location: Lake Orion, MI
Posts: 5,131
Received 1,698 Likes on 1,030 Posts
Default

WOW - what a difference. You did a really nice job.
 
The following users liked this post:
Super08 (12-21-2016)
  #20  
Old 12-21-2016, 08:53 PM
pswomack's Avatar
pswomack
pswomack is offline
Road Master
Join Date: Apr 2011
Location: Ringgold, Georgia
Posts: 1,100
Received 130 Likes on 98 Posts
Default

Super08, you will have to have the radio flashed at the Dealer to turn the rear speakers on, had to do that when I made my old 14 SG into an Ultra.


Quick Reply: Rushmore King Tour Pak with everything.


All times are GMT -5. The time now is 03:02 PM.