Solo Spring Seat setup on 2000-2006 FXST/C/B
#1
 10-26-2010, 06:49 PM

Hi All
Over the past year , I got a number of PM's asking me about my solo spring seat setup, so I hope you do not mind if I post a detailed view of the setup here so it can be available for everyone, it is strange that this is not done often for Softails.
This is my setup on my 01 FXST, all of you 2000-2005 FXST/B/C and even FL Softails after that (no wide tires) can do the same, I guess with wide tires you can go with the Harley kit.
Total parts cost should be around 200$ for the VTwin kit (a bit pricey ), 25$ for the front bracket, 30$ for good set of springs (you may buy another set as you change length), 10$ Extra washers/Studs, $150-$250 for good quality Seat., hope you have some velcro, duct tape and any home drill with steel pits laying around
  .
.
As you can see, at around 350$, not the cheapest Mod, it is still cheaper than most Mustang/Lepera seats out there .
Here are the parts
.
Over the past year , I got a number of PM's asking me about my solo spring seat setup, so I hope you do not mind if I post a detailed view of the setup here so it can be available for everyone, it is strange that this is not done often for Softails.
This is my setup on my 01 FXST, all of you 2000-2005 FXST/B/C and even FL Softails after that (no wide tires) can do the same, I guess with wide tires you can go with the Harley kit.
Total parts cost should be around 200$ for the VTwin kit (a bit pricey
), 25$ for the front bracket, 30$ for good set of springs (you may buy another set as you change length), 10$ Extra washers/Studs, $150-$250 for good quality Seat., hope you have some velcro, duct tape and any home drill with steel pits laying around .As you can see, at around 350$, not the cheapest Mod, it is still cheaper than most Mustang/Lepera seats out there .
Here are the parts
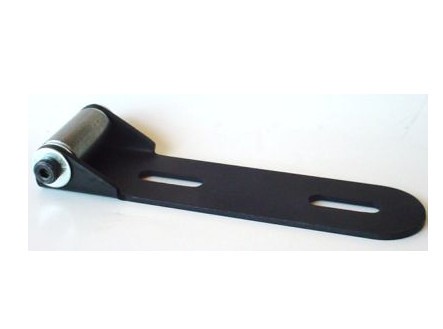
- VTwin Manfucturing Seat kit (a bit expensive but worth it) 31-0942
- The kit is great, but you can throw away the springs, and the bracket , keep the hinge.
- Then get a nice low profile bracket from ebay, and work it to fit the hinge that comes with the kit. this is what I am talking about, around 20$ shipped (to canada) from Ebay.
- While you are on ebay, time to shop for a seat .
- These guys are my favorite Seat/pan guys, they can custom your order
- My advice is if this is your first seat, buy used and cheap because you will never know what you really want until you install the first one and realize what works and what does not.
- Sinsiter Seats on Ebay as I said are good prices, good seats (only for seat pans and fully assembled seats) they did a custom one for me and both my latest seats from them and you can not beat the prices including shipping to my lonely Canadian address
- here are 3 adjustable drilled spots in the kit for the front hinge (where the bracket will attach to), and the rear springs you can drill your own (I definitely did a lot of that see photo
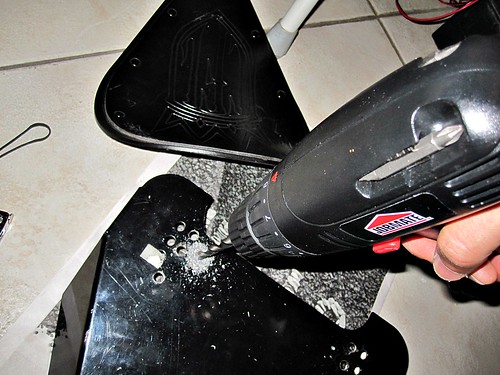
- You will notice the area rounded near where I am drilling, I had to file a little bit out of the metal to clear the rear turn signal wires/plastic thingies !.
- To cover the drilling for different spots as I was experimenting, and because the black metal sucks, go to any leather factory near by and get 10$ rabbit sking or cheap skin black, some uses bandanas, and cover that ugliness under the seat .
- Depending on your seat and the installation here are the variables
- you can move the hinge/springs forward/backward up to your comfortt depending on your pegs/boards/bars.
- you can get higher springs not to slide if you are aggressive
- Certain seats give you more up lip back, please avoid the flat ones they suck on acceleration and fatigue your arms (just my opinion).
- Check those two seats , the old and the new on the kit
- As you can see the beauty is you can do most of this work at home.. while bike waits in the Garage
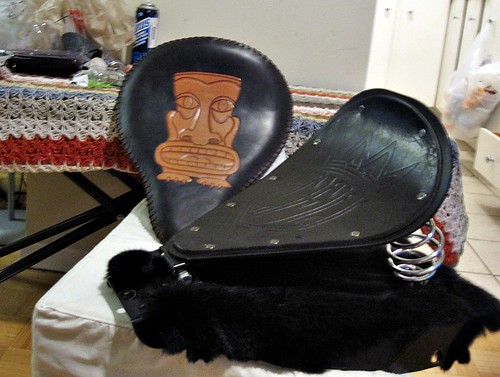
- In this previous photo you can see the 'hinge' and the bracket attached to it under the seat, installed forward for that seat that worked great, but for the new seat (seen next to it) I had to pull the hinge back (drill new holes for it), and that gave me the desired angle. you can see the photo below the seat has the hinge almost mid way under it to give it more of a slope.

- Now you get the picture
- There are electronics in the back (my bike is carbed), so what I did to cover it is simple.
- Wrap the electronice with black duct tape , the tape will be covering from the struts to cover the whole thing so no Rain will get through.
- Stick a piece of Velcro over the duct tape.
- Another piece of velcro on the sheep/rabbit fur that covers the seat base in the back.
- Once you put the seat, you velcro the sheep/rabbit fur to the back so it is totally covered and seamlessly comes to the rear fender.
- You can go back and get another seat and install it whenever you like, I know I changed 3 seats already
- This is my current beauty
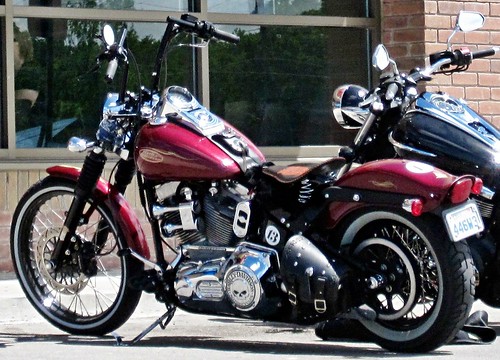
- If you compare this photo to my signature (2 months apart) you will notice that the seat did come back and down a little bit, all by moving the front hing and rear springs location and changing spring sizes.. the great flexibility was welcomed but it meant I am busy drilling and wrestling with springs an hour or so every now and then, the first time you do it is hardest, then it becomes easy .
- Keep lots of washers, buy extra nylon nuts, and Extra Bolts to give you more options as you go along, a couple of trips to the local store (Canadian Tires in my case) is always helpful.
.
Last edited by klf33; 11-03-2010 at 12:59 PM.
#3
10-26-2010, 08:32 PM
#5
10-26-2010, 08:55 PM
glad to help ..You know the first time I put two up seat that has some back support I found myself letting the rear loose on every traffic light, you hands adjust for the lack of back support. amazing what your muscles will learn !
#6
02-21-2011, 06:43 PM
#7
02-22-2011, 10:17 AM
Trending Topics
#8
05-24-2011, 10:25 AM
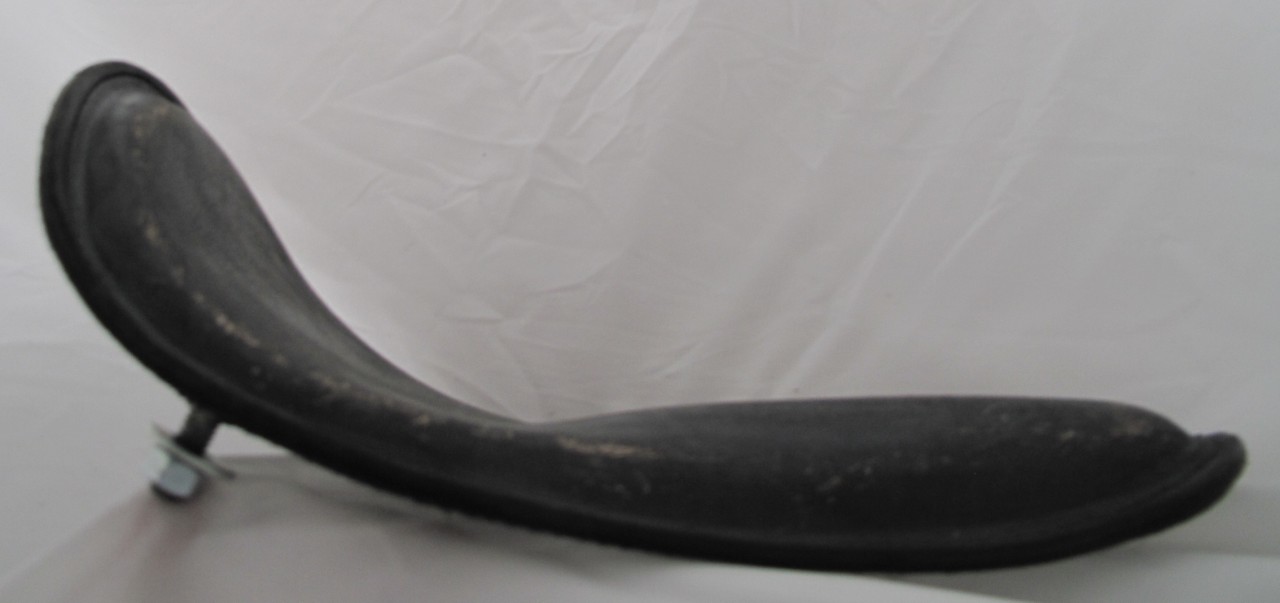
I have finally changed the seat to lower the springs a bit more ..
The result is 1.5" lower sitting position which is great and greater back support while accelerating
http://cgi.ebay.ca/Blk-Dis-Banana-Solo-Seat-Chopper-Harley-Sportster-Frame-/290553989336?pt=Motorcycles_Parts_Accessories&hash =item43a65e08d8
The result is 1.5" lower sitting position which is great and greater back support while accelerating
http://cgi.ebay.ca/Blk-Dis-Banana-Solo-Seat-Chopper-Harley-Sportster-Frame-/290553989336?pt=Motorcycles_Parts_Accessories&hash =item43a65e08d8
#9
10-21-2014, 12:33 PM

1st Gear
Join Date: Sep 2014
Location: Cape Town, South Africa
Posts: 5
Likes: 0
Received 0 Likes
on
0 Posts
#10
10-23-2014, 10:41 AM
Best drop combination if you ask me is
1 - Lepera barebones (for short rides and even 200 miles).
2 - Add AirHawk pad which is wonderful up to 600 miles days. and you just strap and unstrap.
3 - Lower your bike (422's is cheap 1" drop with moderate comfort, or 1.2" with moderate discomfort, you can go ShotGun which will give you 2-3" drop with decent comfort).
But this setup is mostly for the look of it, next year I will releather the seat in white and try it again on my new paint and fenders


Thread
Thread Starter
Forum
Replies
Last Post
CZshooter
Sportster Models
2
08-28-2015 09:39 AM