
Extended Fender+Extended Saddlebags 2006 in detail
#1
 01-20-2014, 01:31 AM

Join Date: Oct 2008
Location: Northern Nevada
Posts: 132
Likes: 0
Received 0 Likes
on
0 Posts
So I decided to go down the path of the fat rear end look on a budget. Usually these terms mean disaster however in this case....minus being overly critical of finish it worked out very well. I went with the Mutazu bags and fender. The Bags were fairly straight forward on assembly and fitment was just like stock. The material used is ABS but the durometer (thickness) of the material compared to stock is significantly less. If you want stock go with Sinister bags, they are much closer to stock. Im lucky in a sense because I have a Vivid black Road King.. So I opted for the painted parts over the raw or flat finish.
The bags are not at all flat...when it comes to Black its simply un forgiving, and these have ripple and some amount of fish eye in the finish. Perhaps I am being extremely critical, considering the cost offset and that my RK is not a "show bike" I'm ok with the somewhat apparent flaws in the finish. Stock lid gaskets were the only thing I had to obtain from Mo-co to make these bolt up.
The fender overlay...well here is where we take 3 days of careful fabrication to install. Mind you I don't do this every day, and I certainly have never done a stretched fender overlay before. Upon initial trial install it looked like everything would fit just fine, that would later change. The fender has a re-sessed area for the license plate, this causes some challenges with ground clearance and linear look to the back of the fencer if it is snugged up under the factory fender "as is".
I ended up shorting my factory fender by cutting slices from the bottom of the fender to the fender support bar that goes between the two saddle bag support rails, then bending the cut tabs upwards. This allowed for an additional 2.5 inches of clearance and a more flowing look to the angle of the bags and bottom of the fender.
Once completed I was able to locate the 2 factory rider back rest bolt locations, and seat retainer nut installed in the underlying stock fender with relatively little difficulty. Using small drill bits to poke holes in the ABS I was able to drill in the appropriate places so the 3 mounting places were easy to secure the two pieces together.
Next came the challenge of exhaust cut out locations and size. I have Rinehart true Duals on this ride. They are 3.5 inch diameter mufflers and now have the slat back tips distributed by Eastern Performance in Zigglerville PA. These tips are just about flush with the bags and fender when installed.
I decided on a 4.25 inch cut out for the tips to allow for cooling, and variance in spacing. I used a compass and cardboard template for the cut outs once located on the fender by marking the angle of the pipes with a pencil. I used a Dremmel tool with a vertical cutting bit and jigsaw to make the openings.
Once cut out the fender laid against the stock fender fairly flat. It was evident that the stock tail light chrome base and circuit board would have to be removed to accommodate the new overlay. There was some trimming that had to be done along the side rails as well to allow use of the stock passenger backrest docking hardware. Newer bikes you won’t have to be as concerned with this as all your docking points protrude from the edges. Again the 6 pin plug needed to connect to the tail light assembly had to be obtained from a dealer, along with the pins needed for the tail lights. I decided to use a redidly available adapter to act as my brake/stop/running lamp controller. Kuryakyn worked well with a inline module that converted the turn signals into brake and turn lights. The higher priced and more feature rich version would have been the Custom Dynamics.
After the pipes were cut I moved on to the LED tail lights. There are a few places making HUGELY overpriced lights for this type of install however I don't like spending 4X the amount necessary for the intended purpose. Yes possibly a chrome shroud looks fantastic when you don't cut a straight opening, however I was lucky and took my time and saved valuable beer money! I used commercially available LED modules intended for HOT RODS and trailer usage. The ones I chose are 6.5 inches long by 3/4 of an inch wide in a clear housing. They are also offered in Red lenses. They are a 3 wire connection usually with Running, bake and ground wires. Since we have the brake light module well only need to connect two of the wires for our set up.
I've decided to go with a very available license plate frame with plate light, running light and brake function built in too. They are marketed as a side mount for most 1" axle Harley and custom bikes. Eyeballing it says this plate setup will fit in the opening made by the manufacturer...and it indeed did!
The two holes used to hold on the side mount were replicated with redressed bolt location on the opposite side of the backing plate using the holes for the State issued plate. once completed and hardware located the plate frame was aligned up on the fender opening and drilled respectively in place. 1/4-20 stainless hardware was chosen for this and nuts were attached to the bolts going through the plate to space the frame off from the fender and allow for mounting into the ABS fender itself. Ny-lock nuts with washers were used to affix the assembly to the fender.
I now carefully located the LED tail lights on either side of the fender, and cut the opening for them. Luckily they have a rectangular openings that wasn't hard to obtain quality lines with. I used a marker, ruler, jig saw, masking tape and a half round file to obtain the correct dimensions for the openings.
After the lights were installed and secured to the fender with stainless hardware, it was time to wire the lights for the fender plug. Reasonably I could have cut and spliced and heat shrunk the wires to the fender but what happens when I have to take it off for service? I like keeping things retro fit-able. There are only a few connections needed on this plug. Stop, run, right turn, left turn. 4 of 6 functions available on the plug from the main harness. The grounds from all three lights were run together and soldered with a single feed. Since we are using all LED light the current draw is significantly less than standard incandescent lights and shouldn't be an issue running them all to one smaller lead. The plug and crimp on AMP connectors should be available at your local dealer. (FYI this is the opposite connection and gender than the one used to connect the turn signals on a Road King up front on the main harness)
All said and done it was a fairly easy conversion and one that sure did make the back of the bike look clean. Subsequently if you have the 97-2007 model you'll need to remove the chrome covers on the rear frame rail, and remove the "grab bar" that usually connects the two frame horns in the back and mounts your license plate. There are a few commercially available kits to accomplish this. Just search eBay to find them.
I found that the bottom of the fender had a little wobble to it. I used the rear fender cross connect bar to run a piece of metal down and connect behind the license plate that made it stop. your results may vary depending.
There is the 99 cent tour on how I accomplished my sleek rear end. Your results and ideas may vary, hopefully the end result will be the same! If you are insistent on retaining your tour pack mounting location on the 97-07 FLH look to BAD DAD as they have a kit that includes a template of where to cut the fender to allow use of the new pack mounting hardware.
https://www.facebook.com/media/set/?...1&l=9c9def3d9a
Last edited by TheStinger; 01-20-2014 at 01:38 AM.
#5
01-20-2014, 02:08 AM
Road Warrior
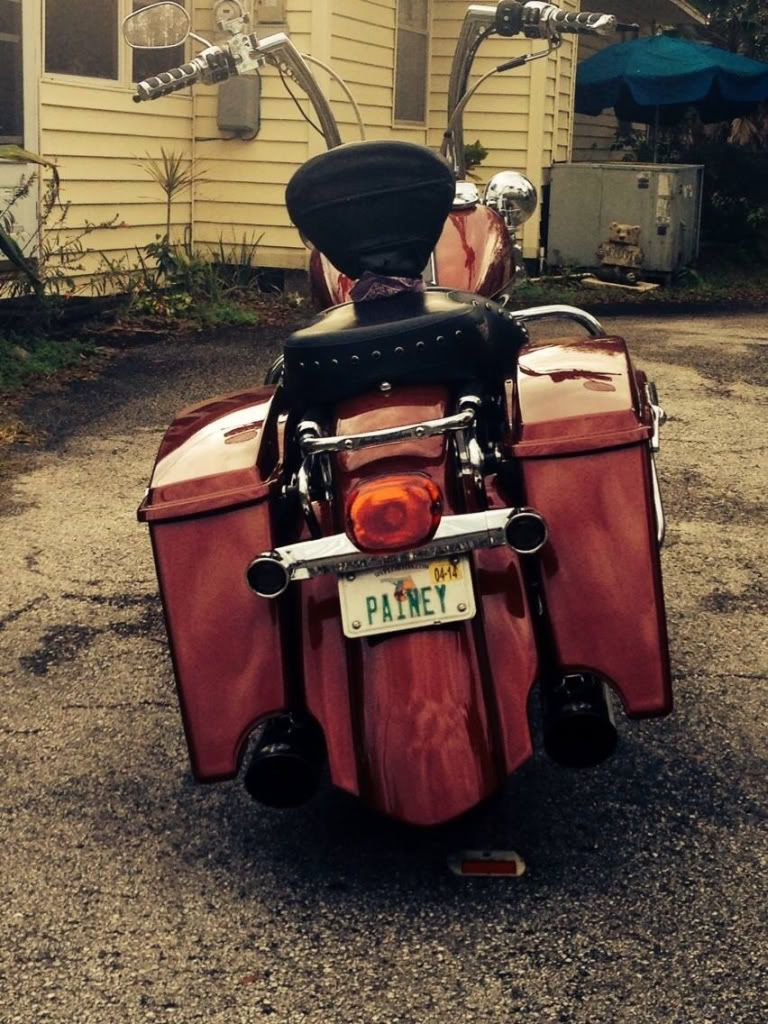
Went a slightly different route, CVO stretched bags and a fender extension moulded to my existing fender, kept original narrow light bar with Custom dynamics turn signals to keep the Road King looks.
From this:
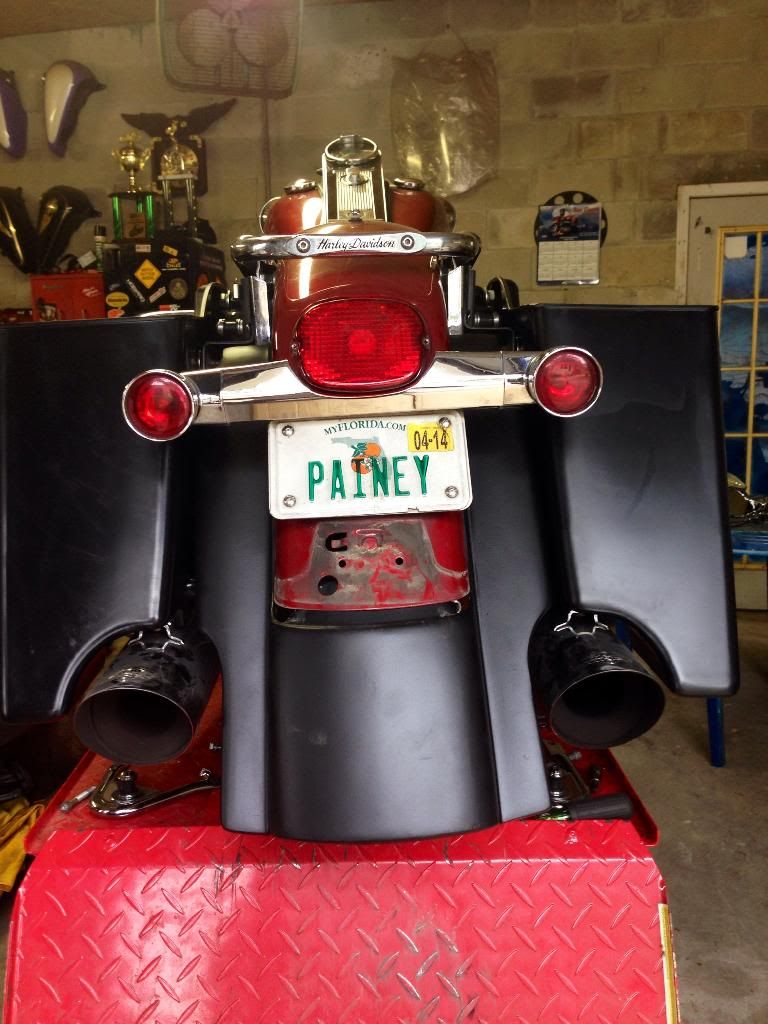
To this
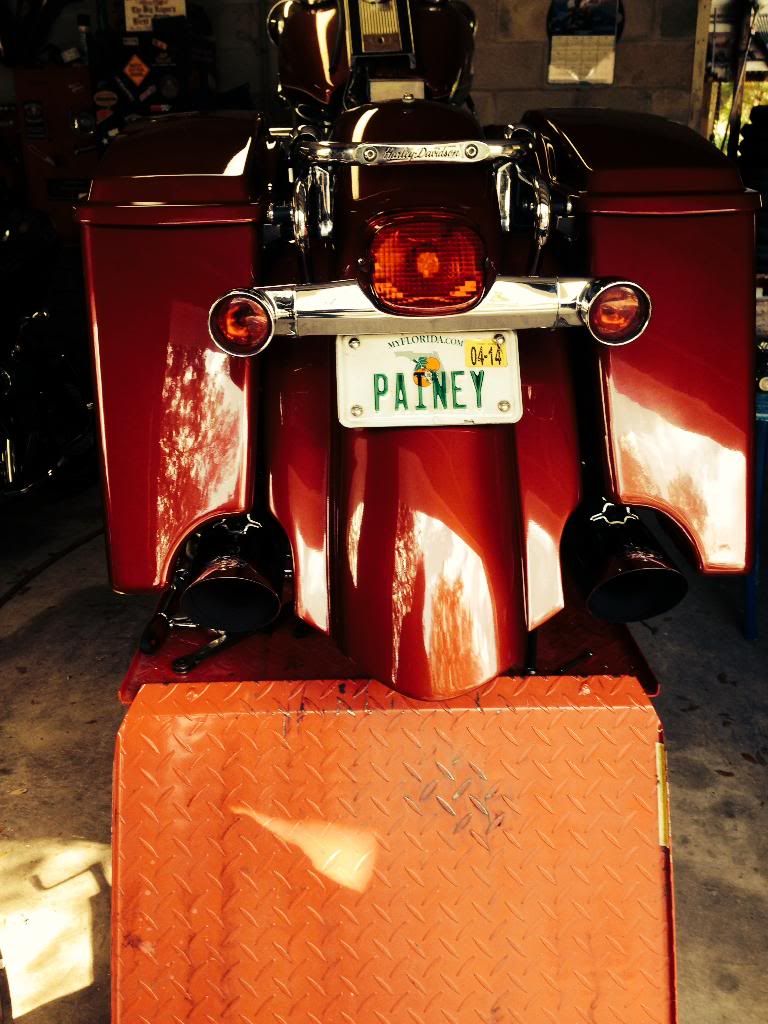
Finished, sorry not the best pic, paint and finish is amazing
From this:

To this

Finished, sorry not the best pic, paint and finish is amazing

Last edited by painey; 01-20-2014 at 02:11 AM.
#6
01-20-2014, 02:13 AM
Join Date: Oct 2008
Location: Northern Nevada
Posts: 132
Likes: 0
Received 0 Likes
on
0 Posts
#7
01-20-2014, 06:19 AM
Road Warrior
Trending Topics
#8
01-20-2014, 03:02 PM

#9
01-20-2014, 09:39 PM
Join Date: Oct 2008
Location: Northern Nevada
Posts: 132
Likes: 0
Received 0 Likes
on
0 Posts
#10
01-20-2014, 09:48 PM
Ultimate HDF Member