
* HOW TO * under fifty bux *


Stellar HDF Member
Joined: Mar 2006
Posts: 3,124
Likes: 255
From: From Long Island, now in So. Cal
Thanks JRK5892, its a simple inexpensive little detail.....
Citoriplus,
These are the products I use in no specific order; Simple Green, CD2 Engine Detailer, Zaino products (Z2, Z7, Z8, Z16), and a leaf blower.
I usually just wipe the bike down with Zaino's Z8, and wash and detail the bike three or four times a year. The bike has around 18,000 miles in the above photos. It is a real nice clean ride, even though some think it is just a overgrown Sporty owned and modified by a smart azz.
Zaino:
https://www.hdforums.com/forum/4631359-post9.html
CD2 Engine Detailer:
http://www.amazon.com/CD-2-Engine-De.../dp/B0002JMAOS
HOLY CH!T WS6 Formula. That has to be "THE" numero uno cleanest bike I have ever seem outside of a magazine.
I doubt mine has been that clean since it left the factory assembly line in York PA.
What do you use on it and how long did it take you to get it that nice looking?
I doubt mine has been that clean since it left the factory assembly line in York PA.
What do you use on it and how long did it take you to get it that nice looking?
These are the products I use in no specific order; Simple Green, CD2 Engine Detailer, Zaino products (Z2, Z7, Z8, Z16), and a leaf blower.
I usually just wipe the bike down with Zaino's Z8, and wash and detail the bike three or four times a year. The bike has around 18,000 miles in the above photos. It is a real nice clean ride, even though some think it is just a overgrown Sporty owned and modified by a smart azz.
Zaino:
https://www.hdforums.com/forum/4631359-post9.html
CD2 Engine Detailer:
http://www.amazon.com/CD-2-Engine-De.../dp/B0002JMAOS
Elite HDF Member
Joined: Aug 2006
Posts: 3,863
Likes: 21
From: Kennewick, WA
For antone that needs balljoints they can be purchased from a John Deere dealer under part number RE13035. Price will vary by dealer.

Intermediate
Joined: Jan 2009
Posts: 42
Likes: 0
From: Austin, TX
I posted about this when I first joined the forum. Here's a step-by-step through my google.docs. Member, Up in Minot, gave me the idea, but this version requires no cutting of metal.
I figured I'd add it here so it is easier to find.
Cost - approx. $15 bucks for LED license plate bolts
-EVE
I figured I'd add it here so it is easier to find.
Cost - approx. $15 bucks for LED license plate bolts
-EVE

Stellar HDF Member
Joined: Mar 2006
Posts: 3,124
Likes: 255
From: From Long Island, now in So. Cal
I added or changed the plastic covering (conduit) on the wires from my handlebar controls to a mesh covering and it looks much better.So now I wanted to do the same thing to the turn signals and here's what I came up with.
Thanks to Mr. Mud's help I went to FRY.Com and ordered 4 different sizes of the mesh. Its identical to the stuff that Harley uses on the Wideglide and much nicer looking than the smooth plastic junk that the factory uses.
Here's the part numbers and sizes I ordered and all four of them cost about $35 delivered.
2281378 1/8" X 20'
2281388 1/4" X 16'
22813981/2" X 10'
22814083/4" X 8'
Each piece is only $6.99 and all together there's enough to do at least 2 complete bike's.
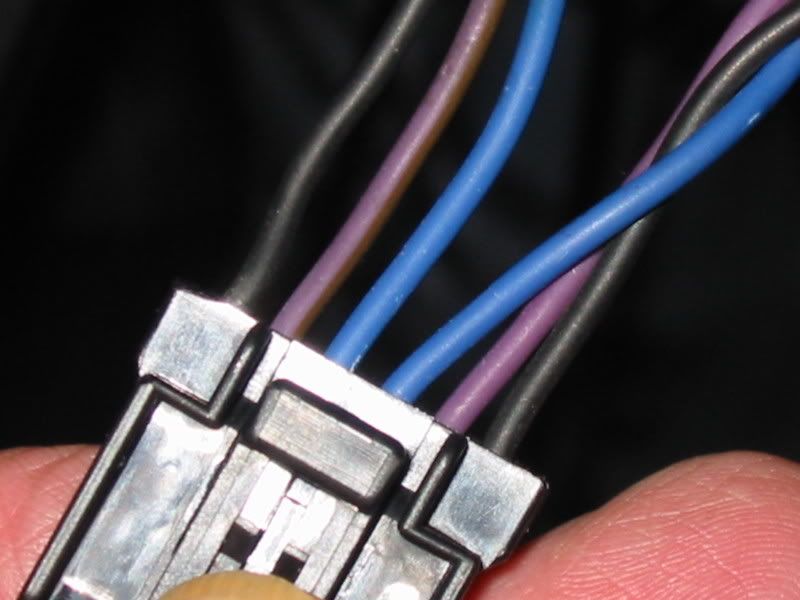
This is the plug that is used on my Softail and its probably the same on the Dyna's.
You'll notice that the pinouts are mirror images and I suggest that you only take the pins out of one side at a time. That will eliminate the possability of itgetting missplaced or lost on you and you'll have a ready guide to putting the pins back in properly. Just remember its exactly oppisite an you won't have a problem.
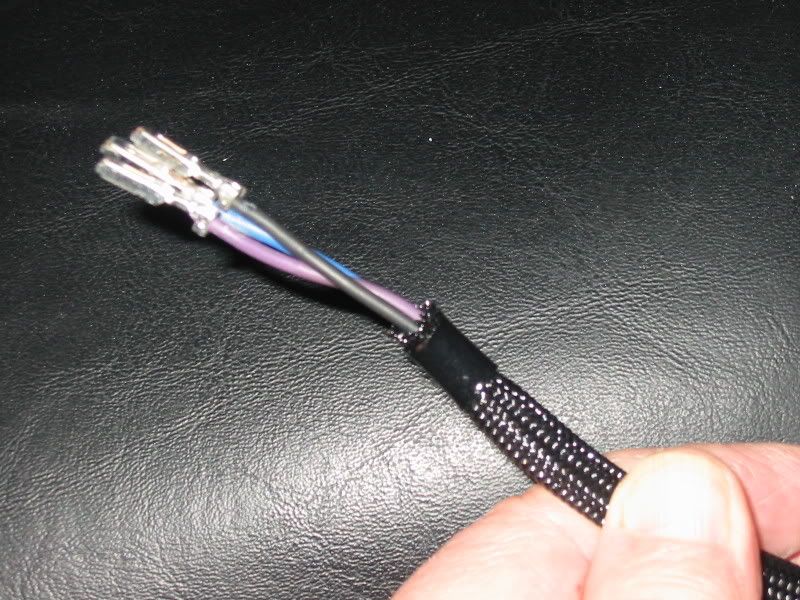
For the turn signals I used the 1/8" stuff so it would fit snugly over the original covering. First thing is to put a piece of tape over the pin plugs. It will make iteasier to slip the mesh over them. Onceyou have enough on so that its about 4" to 6" from the signal cut the mesh about 1" below the pins.
That should be more than enough to cover it and with it not completely on yet it will let you slidetwo short pieces of shrink tubing on much easier.
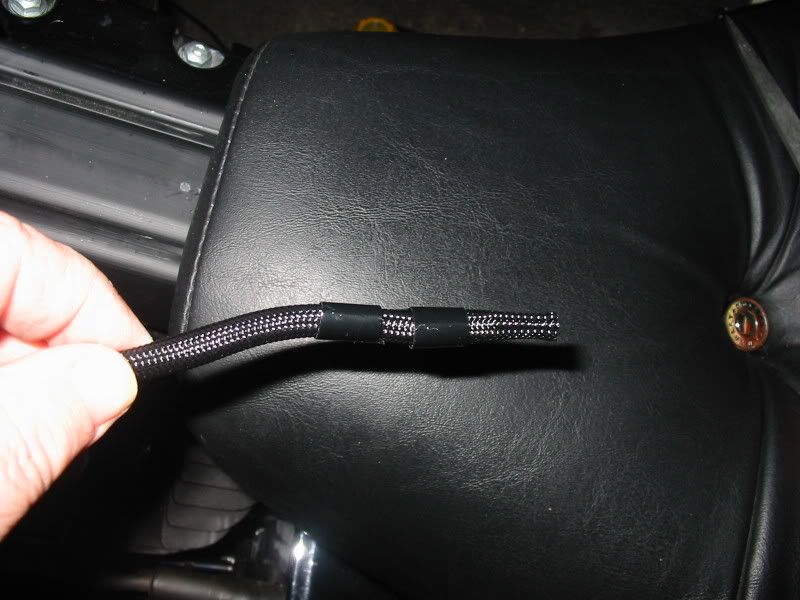
Once its all the way up it will look like this.
Because the mesh has a fairly low melting point you should put a short piece of electrical tape, enough for a little over one wrap around the end first. Then slide one piece of the shrink tube up and shrink it over the end. The shrink tube will keep the mesh from fraying or unraveling and give it a more 'finished' look.

Then do the same to the other end. You don't need the elecrical tape here because its going to be hidden under the tank. But its up to you.
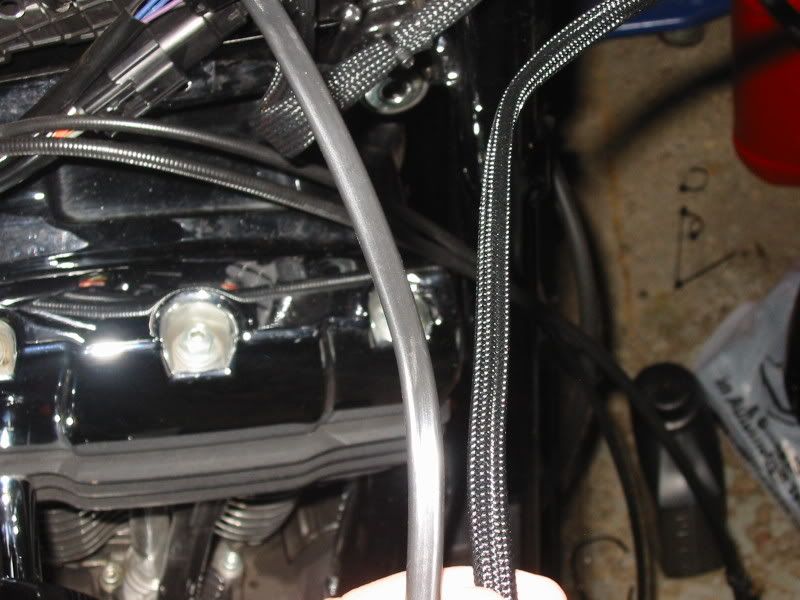
Here's what the cable looks like before on the left, and the after on the right.
Now for my next trick, the headlight cable.
Good luck and ride safe
Frank
Thanks to Mr. Mud's help I went to FRY.Com and ordered 4 different sizes of the mesh. Its identical to the stuff that Harley uses on the Wideglide and much nicer looking than the smooth plastic junk that the factory uses.
Here's the part numbers and sizes I ordered and all four of them cost about $35 delivered.
2281378 1/8" X 20'
2281388 1/4" X 16'
22813981/2" X 10'
22814083/4" X 8'
Each piece is only $6.99 and all together there's enough to do at least 2 complete bike's.
This is the plug that is used on my Softail and its probably the same on the Dyna's.
You'll notice that the pinouts are mirror images and I suggest that you only take the pins out of one side at a time. That will eliminate the possability of itgetting missplaced or lost on you and you'll have a ready guide to putting the pins back in properly. Just remember its exactly oppisite an you won't have a problem.
For the turn signals I used the 1/8" stuff so it would fit snugly over the original covering. First thing is to put a piece of tape over the pin plugs. It will make iteasier to slip the mesh over them. Onceyou have enough on so that its about 4" to 6" from the signal cut the mesh about 1" below the pins.
That should be more than enough to cover it and with it not completely on yet it will let you slidetwo short pieces of shrink tubing on much easier.
Once its all the way up it will look like this.
Because the mesh has a fairly low melting point you should put a short piece of electrical tape, enough for a little over one wrap around the end first. Then slide one piece of the shrink tube up and shrink it over the end. The shrink tube will keep the mesh from fraying or unraveling and give it a more 'finished' look.
Then do the same to the other end. You don't need the elecrical tape here because its going to be hidden under the tank. But its up to you.
Here's what the cable looks like before on the left, and the after on the right.
Now for my next trick, the headlight cable.
Good luck and ride safe
Frank
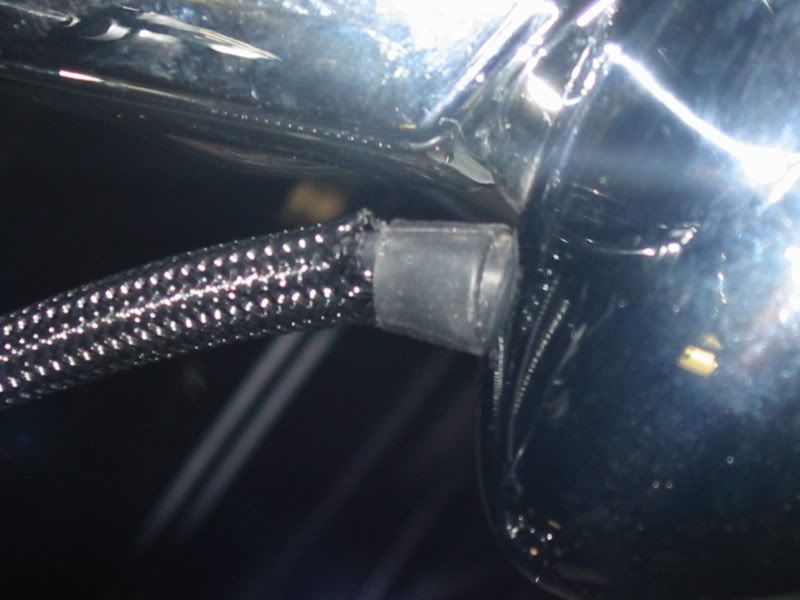
You can make a more flexible and smaller bundle if you remove all of the factory sleeving, pull the braid on over itself to double it up so you can't see any wiring through the braid, and pull the wire and braid through the factory grommets on the headlight and signals for a more professional finished look like below.

Cleaning up the wire harness: https://www.hdforums.com/forum/dyna-glide-models/165942-cleaning-up-the-wire-harness.html
.
May our Moderator Rest in Peace
Joined: Sep 2006
Posts: 11,386
Likes: 35
From: Rochester, NY
You can make a more flexible and smaller bundle if you remove all of the factory sleeving, pull the braid on over itself to double it up so you can't see any wiring through the braid, and pull the wire and braid through the factory grommets on the headlight and signals for a more professional finished look like below.
Cleaning up the wire harness: https://www.hdforums.com/forum/dyna-...e-harness.html
Cleaning up the wire harness: https://www.hdforums.com/forum/dyna-...e-harness.html
When I nearly destroyed the grommet trying to get the two separated I figured I better quit while I was ahead.
I can't think of any good reason for them to use two different setups for Softails and Dyna's. So how did you get the sleeving out of the grommets?
Stellar HDF Member
Joined: Mar 2006
Posts: 3,124
Likes: 255
From: From Long Island, now in So. Cal
Very nice, I like that better than what I did. But when I tried to get the sleeving off the turn signal wires it 'appeared' to be either molded over, or vulcanized to the grommet on the end.
When I nearly destroyed the grommet trying to get the two separated I figured I better quit while I was ahead.
I can't think of any good reason for them to use two different setups for Softails and Dyna's. So how did you get the sleeving out of the grommets?
When I nearly destroyed the grommet trying to get the two separated I figured I better quit while I was ahead.
I can't think of any good reason for them to use two different setups for Softails and Dyna's. So how did you get the sleeving out of the grommets?
Intermediate
Joined: Jan 2009
Posts: 42
Likes: 0
From: Austin, TX
We all love the call of the open road, but I eventually tire of the roar of the wind. I've tried earbuds and an iPod with my helmet, but they shred my ears when I pull the helmet off. If you wear a helmet, here's a cheap trick to rig it with stereo without damaging, gluing, or taping anything to the helmet.
I know this isn't a bike mod, but it helped me enjoy the commute to work every morning a little more. Click Here for the step-by-step.
I know this isn't a bike mod, but it helped me enjoy the commute to work every morning a little more. Click Here for the step-by-step.
Cruiser
Joined: Mar 2009
Posts: 108
Likes: 0
From: IN
I have been lurking for a couple weeks and have to say this thread is addicting. Especially to a guy with metal shavings in his blood. I just bought a 05 FXDLI and have already started the madness. I'll try to get some pics added if I can figure it out.
1st- I took out the lower tree bolts to hold the tubes.
2nd-Tig Welded a 3/8 - 16 x 1-1/2 hex head bolt to a 5/16-24 x 1 bolt,Head to Head.
.
.
http://i511.photobucket.com/albums/s...s/100_1744.jpg
.
.
3rd- Took off the signals and the old hardware.
4th- Installed the 5/16 nuts from the old hardware onto the new bolts.
5th- Threaded the bolts into the signal housing as far as possible. Dont over turn them because I think they will actually hit the buld housing and could break the case. Just finger tight.
6th- Install the boots purchased from A-dvance Auto. (They are from a 97 Ford pickup- caliper pin boots)
7th- Thread the 3/8 side into the tree.
As you thread the 3/8 bolt in the 5/16 bolt will be un-threading from the signal. Mine came all out but a couple threads. Enought to tighten the jam nut against the signal housing. Torque down the 3/8 bolts. Slide the boot back over it and done.
Bfore
.
.
http://i511.photobucket.com/albums/s...s/100_1745.jpg
.
.
After
.
.
http://i511.photobucket.com/albums/s...ters/After.jpg
.
.
Last edited by mud; Mar 30, 2009 at 10:40 PM. Reason: link to oversize pictures