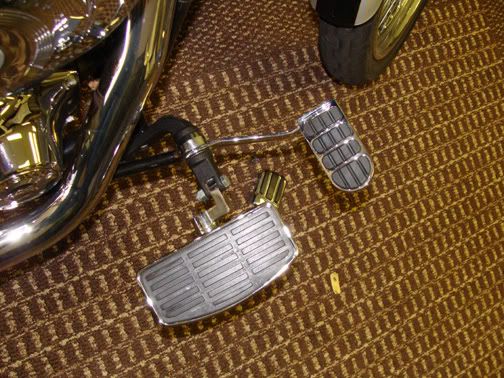
Just finished installing forward controls on my '09 Super Glide...
#1
 08-29-2009, 12:59 AM


Join Date: Aug 2009
Location: Baltimore, MD
Posts: 14
Likes: 0
Received 0 Likes
on
0 Posts
...and I can't believe the difference in comfort. I didn't realize really how awkward the mid-controls were until just a few minutes ago.
If you're planning to do it, make sure you've got the service manual for torque info/patterns as well as the tool to stabilize the inner primary. You'll also need quite a few ratchet extensions, a torque wrench, and a 1-3/16" socket.
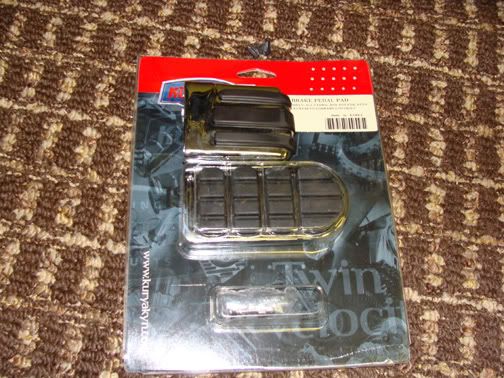
It was also my first after-market modification. I used genuine Harley Davidson parts. My only disappointment is the cheap, black rubber brake pedal. Guess I'll need to upgrade pedals, pegs, and grips next!
If you're planning to do it, make sure you've got the service manual for torque info/patterns as well as the tool to stabilize the inner primary. You'll also need quite a few ratchet extensions, a torque wrench, and a 1-3/16" socket.
It was also my first after-market modification. I used genuine Harley Davidson parts. My only disappointment is the cheap, black rubber brake pedal. Guess I'll need to upgrade pedals, pegs, and grips next!
#2
08-29-2009, 01:19 AM

Tourer
Join Date: Feb 2009
Location: Washington State
Posts: 304
Likes: 0
Received 0 Likes
on
0 Posts
#3
08-29-2009, 02:00 AM
#4
10-03-2009, 10:37 PM

I was wondering if anyone could point me in a direction as to where to get the inner primary stabilizer tool. I want to put forward controls on my 09 super glide and am not really fond with the idea of paying Harley 5 hours of shop time to install them. THe $350 kit will end up costing me $850.... not too cheap, ya know? Anyway, I would appreciate any help.... thanks!!!
#5
10-03-2009, 10:58 PM
Here is a link to what I think I need.... I'm really not sure what I need and this will be my first modification to my super glide:
http://www.denniskirk.com/jsp/produc...fCatId=&mmyId=
This website is kind of slow, but it works.
http://www.denniskirk.com/jsp/produc...fCatId=&mmyId=
This website is kind of slow, but it works.
#6
10-04-2009, 12:27 AM
Stellar HDF Member
I was wondering if anyone could point me in a direction as to where to get the inner primary stabilizer tool. I want to put forward controls on my 09 super glide and am not really fond with the idea of paying Harley 5 hours of shop time to install them. THe $350 kit will end up costing me $850.... not too cheap, ya know? Anyway, I would appreciate any help.... thanks!!!
Read below (Use the 2005 and earlier kit & get a custom shift rod that has heim joints for a 2006 and up Dyna)
Originally Posted by Ws6 formula
You don't have to remove the primary on the 2006 and up Dyna's
The 2006 and up kit instructions requires you to remove the primary to install a longer rear transmission shift lever and to remove the original shifter shaft that goes through the primary cover. Both can be done without removing the primary.
I installed the 2005 kit (P/N 49080-03A)with a longer 2006 custom polished stainless steel shift rod (P/N 33815-06)that comes with the stronger heim joints (they won't break like the original joints). You have to use a longer shift rod with the 2005 kit other wise the front shift lever will hit the primary when you up shift. The custom shift rods are a lot nicer then the cadmium plated shift rod in the kit and the original that came with the bike.
Removing the original shift shaft lever
Get a hacksaw blade and tape each end with duct tape, leaving about two inches exposed in the middle. Also put some duct tape on the primary and cylinder cooling fins. Tape a wrench on one end to get a better grip (on the end of the blade so as you pull on the wrench you will be on the cutting stroke of the blade). Slip the blade between the primary and engine from the bottom of the bike with the wrench end on the bottom. Position the shaft so you can cut about a quarter inch from the lever (not in the welded area). Use your other hand to guide the top of the blade as you cut. After cutting through, the shaft will slide right out, and the lever will just fall to the floor.
Cover for the original shift shaft lever hole
I used a chrome carriage bolt http://www.chromebolt.com/51618-x-134-chrome-carriage-bolt-p-845.html, and put a two inch piece of rubber hose on the threads then added some shrink sleeving on the hose to get a nice snug press fit into the empty shaft hole. If you have a black primary: Paint a unplated carriage bolt. Aluminum cover: Scotch brite a chrome carriage bolt.
Installing the new rear trans shift lever
https://www.hdforums.com/forum/dyna-glide-models/220845-did-the-oem-forward-controls-last-week.html
(Don't do it, leave in the original) Using the original rear transmission shift arm has two benefits, appearance and performance. The shift rod will sit at a more level position, and you will also have a shorter shift throw.
Forward control part numbers here:
http://www.harley-davidson.com/gma/g...bmLocale=en_US
Shift linkage part numbers here:
http://www.harley-davidson.com/brows...bmLocale=en_US
Check prices here:
http://www.chicagoharley.com/shop/
https://www.zanottimotor.com/shopping/partLookUp.html

Larger image here:
http://img56.imageshack.us/img56/276...1020x63bz2.jpg

Larger image here:
http://img56.imageshack.us/img56/437...2008059kp3.jpg
You don't have to remove the primary on the 2006 and up Dyna's
The 2006 and up kit instructions requires you to remove the primary to install a longer rear transmission shift lever and to remove the original shifter shaft that goes through the primary cover. Both can be done without removing the primary.
I installed the 2005 kit (P/N 49080-03A)with a longer 2006 custom polished stainless steel shift rod (P/N 33815-06)that comes with the stronger heim joints (they won't break like the original joints). You have to use a longer shift rod with the 2005 kit other wise the front shift lever will hit the primary when you up shift. The custom shift rods are a lot nicer then the cadmium plated shift rod in the kit and the original that came with the bike.
Removing the original shift shaft lever
Get a hacksaw blade and tape each end with duct tape, leaving about two inches exposed in the middle. Also put some duct tape on the primary and cylinder cooling fins. Tape a wrench on one end to get a better grip (on the end of the blade so as you pull on the wrench you will be on the cutting stroke of the blade). Slip the blade between the primary and engine from the bottom of the bike with the wrench end on the bottom. Position the shaft so you can cut about a quarter inch from the lever (not in the welded area). Use your other hand to guide the top of the blade as you cut. After cutting through, the shaft will slide right out, and the lever will just fall to the floor.
Cover for the original shift shaft lever hole
I used a chrome carriage bolt http://www.chromebolt.com/51618-x-134-chrome-carriage-bolt-p-845.html, and put a two inch piece of rubber hose on the threads then added some shrink sleeving on the hose to get a nice snug press fit into the empty shaft hole. If you have a black primary: Paint a unplated carriage bolt. Aluminum cover: Scotch brite a chrome carriage bolt.
Installing the new rear trans shift lever
https://www.hdforums.com/forum/dyna-glide-models/220845-did-the-oem-forward-controls-last-week.html
(Don't do it, leave in the original) Using the original rear transmission shift arm has two benefits, appearance and performance. The shift rod will sit at a more level position, and you will also have a shorter shift throw.
Forward control part numbers here:
http://www.harley-davidson.com/gma/g...bmLocale=en_US
Shift linkage part numbers here:
http://www.harley-davidson.com/brows...bmLocale=en_US
Check prices here:
http://www.chicagoharley.com/shop/
https://www.zanottimotor.com/shopping/partLookUp.html
Larger image here:
http://img56.imageshack.us/img56/276...1020x63bz2.jpg
Larger image here:
http://img56.imageshack.us/img56/437...2008059kp3.jpg
#7
10-04-2009, 04:33 AM
Road Captain
Join Date: Nov 2008
Location: Everywhere, USA
Posts: 562
Likes: 0
Received 0 Likes
on
0 Posts
I have an 05. I don't know what the difference is between the 91-05 kit and the 06-now kit, but I didn't need any type of special tool. I did end up needing a cap to cover the mid shaft and another Kury part that keeps the now unused front linkage connection point (lever of some kind) from moving around. The photo shows the lever without the anti-rattle part installed.
Trending Topics
#9
10-14-2009, 10:38 AM
Novice
Join Date: Oct 2009
Location: Milan, Italy
Posts: 19
Likes: 0
Received 0 Likes
on
0 Posts