


Newbie here and new shovel owner

Road Captain
Joined: Apr 2010
Posts: 692
Likes: 34
From: Texas
There is no telling as to how much you might be spending - always will be more than you thought.
If you have the time and patience - I would pull the top-end and inspect it and replace all gaskets while you are there (labor and $40 in gaskets for rocker boxes, heads and base);
I would pull the primary cover and pull the clutch hub;
Inspect the clutch components;
Might need to replace the clutch cable ($40-60);
I would isolate the primary from the engine;
Replace all hoses and clamps (probably only $15 in materials but a lot of labor);
Pull the tank and inspect. Look up threads for cleaning and see if it is rusty (next steps are determined by the condition of the tank);
Pull the carb (would have to do this as part of the top-end work) and inspect and get a carb rebuild kit for it ($30 or so). Might need to do some soaking;
If you pull the top-end, go ahead and pull the lifter blocks, tappets, etc (so you can replace the gaskets and inspect the tappets/lifters - you will have gaskets under the blocks and o-rings and other gaskets in the pushrod tubes - if you buy the James top end gasket kit all of those will be with it - but I would buy fire ring gaskets for the heads and maybe the bases);
If you pull the blocks/tappets, pull the cam cover and replace gasket and inspect cam for wear;
Pull your wheels and inspect, probably replace the bearings.
Of course you will be draining and changing fluids.
Be prepared, you will likely have leaks when all is back together. Particularly when it comes to the seal between the trans and the primary.
Take your time. Take pictures as you are tearing down and make sure you have a good parts manual.
That should be a good first day's work (:
Road Captain
Joined: Apr 2010
Posts: 692
Likes: 34
From: Texas
Day two you work on electrical (:
well there are 24 hours in a day - a lot can be accomplished in 24 hours.
do document with pics as much as you can. You could start a bike rebuild thread for your shovel and let the rest of us see how it is going.
Really - while I think you will find there are a lot of upgrades that will make things better, I would try to get it going with what you have in front of you (except for new gaskets, seals and hoses).
I would pull as much as you can in terms of sheet metal, tank, seats, etc. so you can get a good look at your wiring.
Really the first part of the process is the easy part - tearing it down. Putting all of those pieces back together - challenging.
One rebuild I saw, the owner bought a bunch of heavy duty zip lock bags and labeled them for each component and started putting the bolts and small items in those to keep it organized.

Thread Starter
|
Novice
Joined: Jun 2011
Posts: 16
Likes: 0
From: Mid Michigan
I plan to tag and bag everything and photo document as I go. I learned at the age of 13 with my first tear down of my honda 80 3 wheeler that you have to know where the stuff goes to put it back together, that was a hard and expensive lesson to learn but it has lasted me over 20 years now.
For the electrical, after just running it to get power to the engine to get that running bare bones I plan to start over and wire everything which isn't much
For the electrical, after just running it to get power to the engine to get that running bare bones I plan to start over and wire everything which isn't much
Thread Starter
|
Novice
Joined: Jun 2011
Posts: 16
Likes: 0
From: Mid Michigan
my hopes for this bike keep getting better and better. Probably don't have time or the money this season for it but I do have another bike to keep me on the road.
Left the bike for the week with my step-dad, he went through all the components and looked her over really good. The biggest thing he did was to start getting 16 years of dirt, grime and rust off of the bike. And WOW everything is cleaning up great, just need more time and elbow grease and I think I wont have to do much to make this cosmetically appealing.
Since this bike was in the process of being restored before she was lost in the garage all of the internal parts are in excellent condition.
Clutch is beautiful, Brand new points, tranny looks brand new(no oil in it), new solid push rods, primary is spotless. Brakes that are dead I think they only need fluid and bleeding, the Master cylinder on the front looks brand new and I assume the back is in the same condition
The only big problem area is the tank(which isnt a really a big problem), had gas in it at one time and was left with it in it, so it's nasty, sludge and rust inside, but I think it is very salvageable, may only need a major clean out and possibly a recoat with some stuff I keep hearing about to fix funky tanks.
So we took the wiring down to the basics just to see if we can get her to fire. New line to the carb straight from a gas can....no tank involved. Seemed like a stuck float in the carb because gas was just streaming out, got that to stop and kicked her a couple times and BAMM, she speaks to us. We were not able to get her to run but we have a bad battery, carb needs tuned, and timing is probably way off. Great news though is that she turned over and wanted to run. Boy let me tell you after kicking this bad *** for a few minutes two guys with large bellies were spewing sweat and could barely breath.
SHE BREATHES FIRE that is the main part, the engine lives and makes this project doable. Didn't get home until dark and stored in the garage late so pics to follow tomorrow, can't wait to dig in.
Last edited by colvinch; Jun 19, 2011 at 10:07 PM.
Road Captain
Joined: Apr 2010
Posts: 692
Likes: 34
From: Texas
Does sound like good news.
have you figured out what carb it has on it?
As to cleaning out the gas tank. I bought an 883 last year which the previous owner had left gas in for 8 years or so.
Used two strategies. after pulling it off and draining it, I first rinsed it with a garden hose to get as much loose stuff out of there as possible. Once that was done, I put a cork in place of the petcock and then poured a can to half can of chemtool in it and shook it thoroughly (make sure both the gas cap and the cork are sealing good - chemtool is not good for paint). I let it set for a couple of hours, shook it up some more and drained it (again avoid getting it on the paint). Rinsed it again with a water hose and did the chemtool approach one more time.
Then I mixed up a heavy mixture of TSP and very hot water and poured that in the tank (nearly filling it). And let it set until cool. Repeated this process until the water coming out was clean. I then finished it off with that stuff called "heat" that you pour into gasoline to get rid of water.
She was good to go after that.
I don't recommend pouring rocks or bolts or stuff into it. If there is any tank liner still left, that will trash it.
Thread Starter
|
Novice
Joined: Jun 2011
Posts: 16
Likes: 0
From: Mid Michigan
Thanks for the help
Thread Starter
|
Novice
Joined: Jun 2011
Posts: 16
Likes: 0
From: Mid Michigan
pulled the carb last night and cleaning it up, lots of rust and grime in there, and found out no gaskets between the float bowl and main body of carb, all parts look good, will probably just do a full tear down and rebuild with a kit.
Was having a really hard time getting the lower bolt back on and tight from the manifold to the carb body, it has the wire for the gas line there and for some reason I could not get it to sit on there right and tight, after looking at the thread on the carb body they are worn pretty good so I will probably have to clean them out with a tap and die.
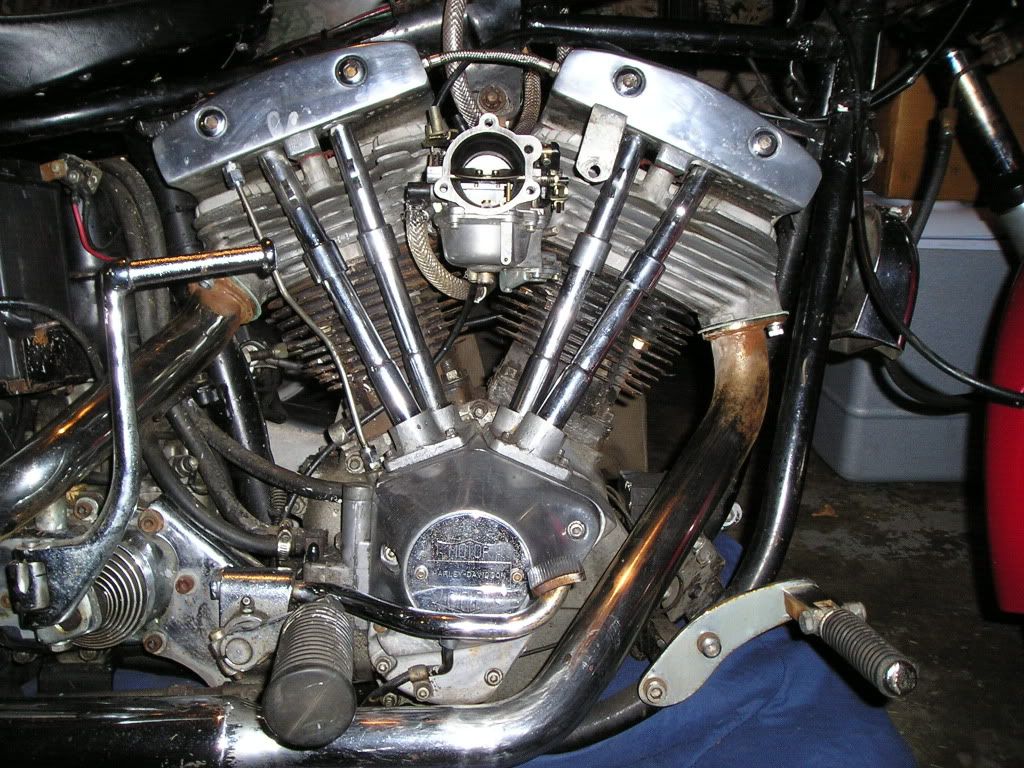
Was having a really hard time getting the lower bolt back on and tight from the manifold to the carb body, it has the wire for the gas line there and for some reason I could not get it to sit on there right and tight, after looking at the thread on the carb body they are worn pretty good so I will probably have to clean them out with a tap and die.
HD Forum Stories
The Best of Harley-Davidson for Lifelong Riders

8 Best Harley-Davidson Motorcycles Ever
Pouria Savadkouei
10 Worst Harley-Davidson Motorcycles Ever
Pouria Savadkouei
Killer Custom's Jail Break Is The Breakout That Refused to Blend In
Verdad Gallardo
Crazy Bunderbike Build Looks Amazing, But Is It Impossible to Ride?
Verdad Gallardo
Harley-Davidson Reveals Super Cool Cafe Racer Concept
Verdad Gallardo
Engraved Rebellion: Inside Bundnerbike's Glam Rock II
Verdad Gallardo
10 Motorcycles You Should Never Buy
Joe Kucinski
10 Things Harley-Davidson Needs to Fix in 2026
Verdad Gallardo
Southpaw Super Glide: A Left-Hand-Drive 1979 Harley FXE Built to Fit the Rider
Verdad Gallardo
Thread Starter
|
Novice
Joined: Jun 2011
Posts: 16
Likes: 0
From: Mid Michigan
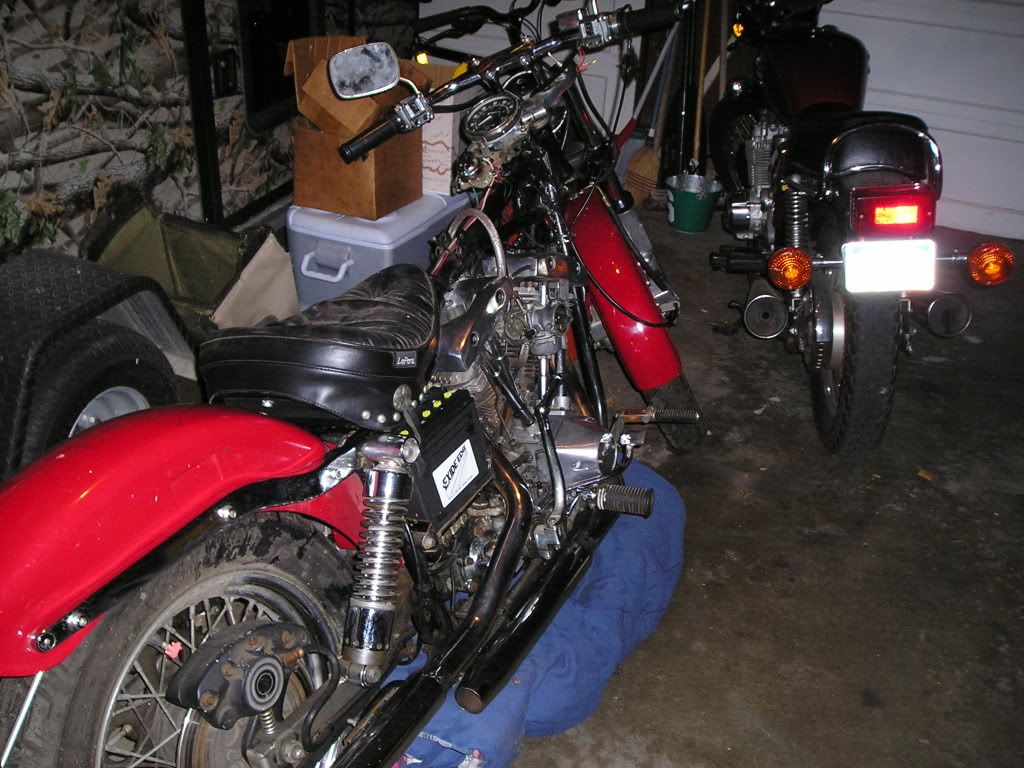
With no time what so ever this summer I somehow keep managing to spend some time in the garage and slowly picking the bike apart.
Almost all of the rust and tarnish is gone, rims cleaned and wow this bike is looking really good.
Gas Tanks: As said before the tanks sat for 16 years with gas in it and it evaporated and what was left over is nasty. The petcock was salvaged after a couple hours of soaking to unclog the reserve line.
The left tank was really the problem tank of the two so it has gotten all of the attention so far. After a bunch of washing with soap to get right of giant chunks of rust and grime it started to look good but still needed something else. Heard about Navel Jelly which is a phosphoric acid that pretty much eats rust. So a little of that a handfull of nuts a little sand and a foot long piece of chain and alot of shake rattle and roll and this tank is looking great. It still has a lot of dirty look to it but that stuff is not coming off. I will look into re-coating the tank with something to keep that stuff attached to the tank and not going into my carb.
Anyone know of what the stuff is called that bonds the stuff to the tank? Hopefully soon I will be able to put the tanks back on and get her started so I can make sure the timing is correct. TIA
