Crossbones Pictures

#362
 05-27-2009, 07:23 AM
Road Master
Join Date: Jul 2008
Location: Ontario
Posts: 914
Likes: 0
Received 0 Likes
on
0 Posts
#363
05-27-2009, 10:01 AM

#365
05-30-2009, 07:51 AM
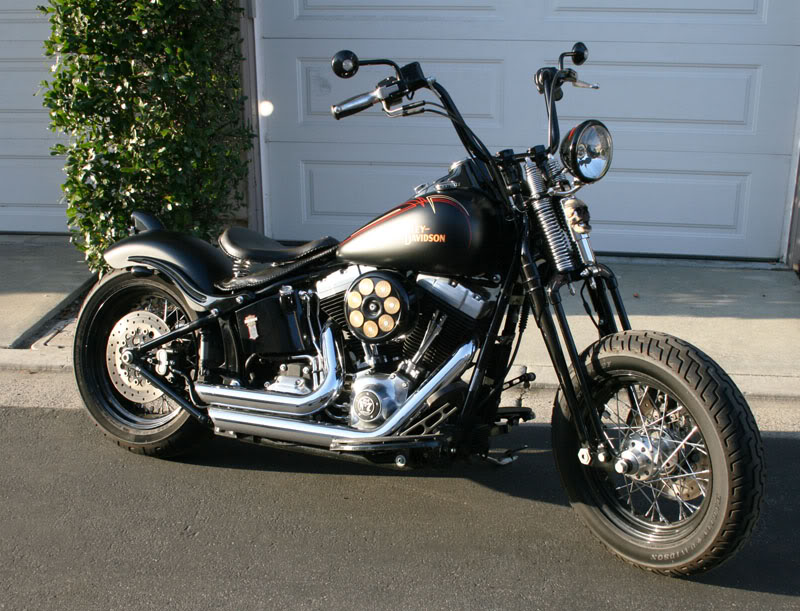
Very simple 10 minute install.
Two ways to get it done, simple and really simple. Remove the headlight bracket from current location, secured with a single allen type bolt. If you have a lift available, you simply lift the bike to remove weight from the front wheel. This unloads the shock. Then remove the lower shock bolt and install the light with the RSD bolt and bracket.
That is the really simple method and was not used by me because my wife's Sportster was utilizing my lift. So I improvised. I took a run of the mill ratcheted loading strap and wrapped it around the top of the spring assembly and the spring fork. Then ratchet the thing down until you "lock in" the compression that exists on the shock. At that point, crack the lower shock bolt loose and it should move freely within the shock mount. This will confirm for you that you can go ahead and pull the bolt.
You will need to cut a few nylon tie-down straps to allow re-routing of the electrical, so have a few medium size black ones available.
$89 and 10 minutes, not bad all in all.
#367
06-01-2009, 10:48 AM
I installed the RSD mount while the bike was on the jiffy stand. The shock stayed in place with no problems.
Very simple 10 minute install.
Two ways to get it done, simple and really simple. Remove the headlight bracket from current location, secured with a single allen type bolt. If you have a lift available, you simply lift the bike to remove weight from the front wheel. This unloads the shock. Then remove the lower shock bolt and install the light with the RSD bolt and bracket.
That is the really simple method and was not used by me because my wife's Sportster was utilizing my lift. So I improvised. I took a run of the mill ratcheted loading strap and wrapped it around the top of the spring assembly and the spring fork. Then ratchet the thing down until you "lock in" the compression that exists on the shock. At that point, crack the lower shock bolt loose and it should move freely within the shock mount. This will confirm for you that you can go ahead and pull the bolt.
You will need to cut a few nylon tie-down straps to allow re-routing of the electrical, so have a few medium size black ones available.
$89 and 10 minutes, not bad all in all.
Two ways to get it done, simple and really simple. Remove the headlight bracket from current location, secured with a single allen type bolt. If you have a lift available, you simply lift the bike to remove weight from the front wheel. This unloads the shock. Then remove the lower shock bolt and install the light with the RSD bolt and bracket.
That is the really simple method and was not used by me because my wife's Sportster was utilizing my lift. So I improvised. I took a run of the mill ratcheted loading strap and wrapped it around the top of the spring assembly and the spring fork. Then ratchet the thing down until you "lock in" the compression that exists on the shock. At that point, crack the lower shock bolt loose and it should move freely within the shock mount. This will confirm for you that you can go ahead and pull the bolt.
You will need to cut a few nylon tie-down straps to allow re-routing of the electrical, so have a few medium size black ones available.
$89 and 10 minutes, not bad all in all.

#369
06-01-2009, 09:34 PM
Intermediate
Join Date: Apr 2009
Location: Philadelphia
Posts: 40
Likes: 0
Received 0 Likes
on
0 Posts

#370
06-02-2009, 05:26 AM