
passenger seat luggage rack complete!


#32
 04-26-2010, 06:45 PM
#33
04-26-2010, 07:54 PM

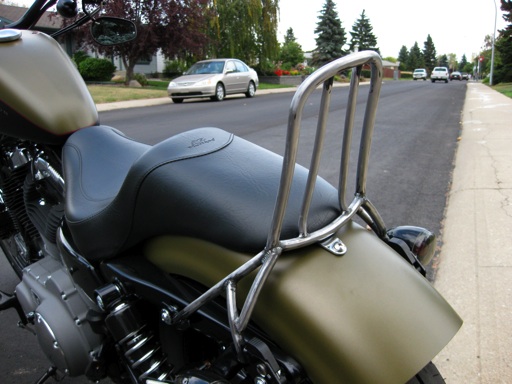
Looks good. Love the color of you bike.
That worked out great. Very solid I'm sure.
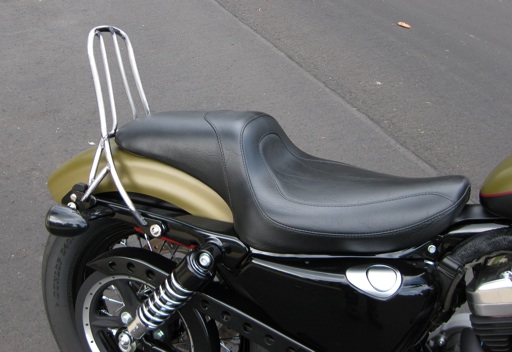
I cut mine up and created something a little different.
Attachment 112473
Attachment 112472
I cut mine up and created something a little different.
Attachment 112473
Attachment 112472
#34
04-26-2010, 08:15 PM


#37
04-26-2010, 08:47 PM
#38
04-27-2010, 01:19 AM
#40
04-27-2010, 01:57 AM
Lots of cutting, grinding, filing, bending, fitting, cursing, re-fitting, welding, more cursing, more bending, more welding (and more filing to make it pretty)
Basically, you cut off the rack portion, flip it over and put it upright. The two extra vertical supports are cut off and re-positioned (and re-shaped) to support it all from the back.
I only threw away less than two inches of extra material.
Access to a hydraulic press was a god send! You need it to re-shape the rear supports and, in my case, re-shape the lower portion of the backrest to accommodate the seat then squeeze it all back together after welding to fit the docking hardware.
Having some extra 1/2" round stock would have made things a bit easier too.
There ya' go, simple as pie!
Basically, you cut off the rack portion, flip it over and put it upright. The two extra vertical supports are cut off and re-positioned (and re-shaped) to support it all from the back.
I only threw away less than two inches of extra material.
Access to a hydraulic press was a god send! You need it to re-shape the rear supports and, in my case, re-shape the lower portion of the backrest to accommodate the seat then squeeze it all back together after welding
Having some extra 1/2" round stock would have made things a bit easier too.
There ya' go, simple as pie!