
how to Install apes?
#11
 03-26-2011, 01:11 PM

One thing of which to be aware - you can break the break light switch REALLY easy when you remove the handbrake assembly from the bars. The way to prevent this expensive ($59 part) mistake is to take a little piece of cardboard and insert it to fill the gap that is created between the brake lever and housing when you pull on the brake lever, and leave it there, as if the brakes are still activated, and leave it there during the entire removal/reassembly process.
The longest parts of this process are generally adding the wiring extensions, and bleeding the brakes. A cheap hand operated brake bleeder from Harbor Freight (like $12?), makes this a snap!
The longest parts of this process are generally adding the wiring extensions, and bleeding the brakes. A cheap hand operated brake bleeder from Harbor Freight (like $12?), makes this a snap!


#13
03-26-2011, 03:54 PM

Advanced
Join Date: Aug 2010
Location: Orlando
Posts: 73
Likes: 0
Received 0 Likes
on
0 Posts
Swapping bars is easy, really. You may need to extend wires, but just do one at a time and you'll be fine.
If you pressure-bleed (rather than gravity-bleed) your brakes, you won't run into any issues.
There's a ton of You-Tube videos on it, but basically you fill the brake lines and reservoir via the bleeder valve in the caliper. This forces all the air up and out as you fill, so the brakes are ready as soon as the fluid is up to the fill line. Close bleeder valve and cap reservoir. Done.
#14
03-26-2011, 04:48 PM

Really, I hope rojuwi was kidding about not using instructions or a manual.There is no way you will get your clutch working right again after you replace the clutch cable without instructions or you find/ask someone who has done it before. I assure you that person learned from someone who knew someone who knew someone who read the instructions!
#15
03-26-2011, 04:55 PM

#16
03-26-2011, 06:55 PM

Elite HDF Member
For internal wires:
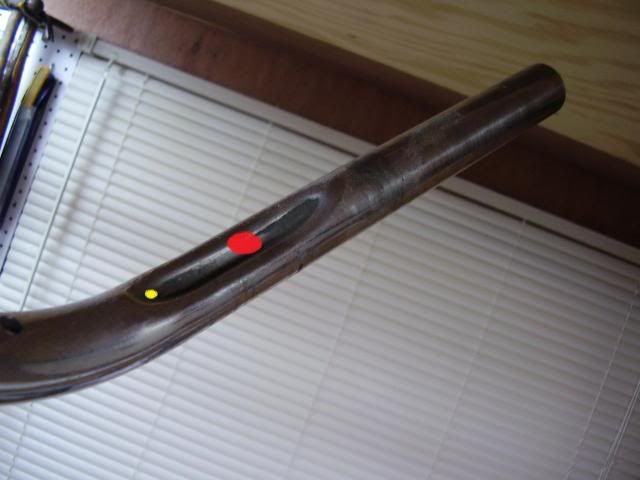
This is what the dimple looks like on the under side of your bars. Drill a hole in the dimple (near the red area) to allow the wires to end up at the switch housing (or at least under the clutch lever/brake perch). If you poke the wires out too far to the end of the dimple (yellow dot), your wires may show depending on your handlebars. Use a sharpie to mark on your handlebars where your switch housing is mounted and go from there.
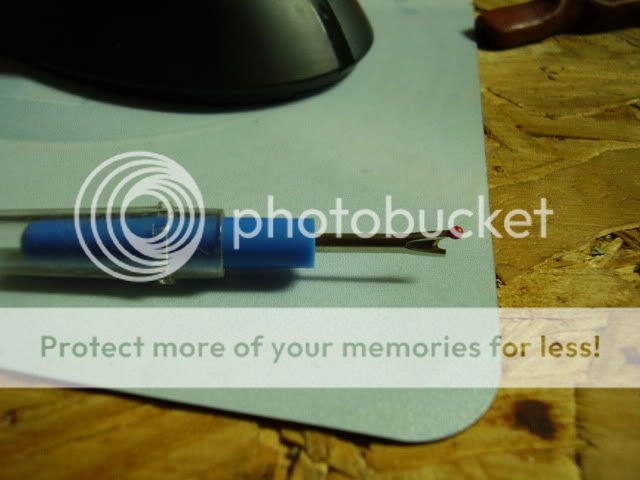
Go to a sewing store or Giant Box Store and get a seam ripper. Use it to cut your existing wire wrap. The little ball goes under the wrap and you just zip on up the line. The ball prevents any wires from being nicked. It's the safest way I've found to cut wire loom.
The sharp point is broken on mine but it still works:
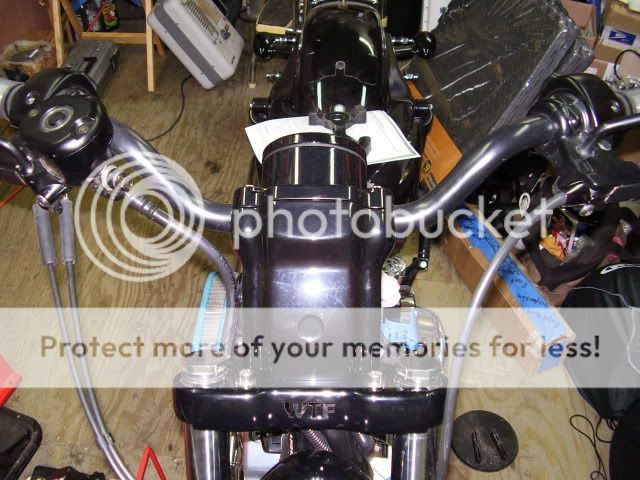
Look Ma, no wires:
Vacuum, or blow, a piece of string through the bars to pull the wires through the holes.
If you splice, stagger your wire splices (to prevent a large bulge) and use shrink tube. Stagger sorta like this:
-----------------//----------------
--------------//-------------------
-----------//----------------------
--------//-------------------------
This is what the dimple looks like on the under side of your bars. Drill a hole in the dimple (near the red area) to allow the wires to end up at the switch housing (or at least under the clutch lever/brake perch). If you poke the wires out too far to the end of the dimple (yellow dot), your wires may show depending on your handlebars. Use a sharpie to mark on your handlebars where your switch housing is mounted and go from there.
Go to a sewing store or Giant Box Store and get a seam ripper. Use it to cut your existing wire wrap. The little ball goes under the wrap and you just zip on up the line. The ball prevents any wires from being nicked. It's the safest way I've found to cut wire loom.
The sharp point is broken on mine but it still works:
Look Ma, no wires:
Vacuum, or blow, a piece of string through the bars to pull the wires through the holes.
If you splice, stagger your wire splices (to prevent a large bulge) and use shrink tube. Stagger sorta like this:
-----------------//----------------
--------------//-------------------
-----------//----------------------
--------//-------------------------
#17
03-26-2011, 07:30 PM
Road Master
Join Date: Aug 2010
Location: Central FL
Posts: 1,039
Likes: 0
Received 0 Likes
on
0 Posts
Found this site a while back, has an awesome reverse bleeder technique!!
http://www.moccsplace.com/images/bra...er/bleeder.htm
http://www.moccsplace.com/images/bra...er/bleeder.htm

#20
03-27-2011, 12:15 AM