
My DIY 1250 conversion thread: EFI version


#22
 02-04-2012, 01:52 AM
Well, I got tired of waiting for my service manual to arrive so I could get going on the good part, the engine tear down, so I started tonight anyways.
I did a lot of searching on the net and a lot of reading and found the clymer version of the tear down. I would rather have the current HD manual but I think I will be fine with what I have for now. Armed with that and having read several other informative pages I began.
Unfortunately all the information I have found including the clymer version has been specific to carbed bikes not EFI.
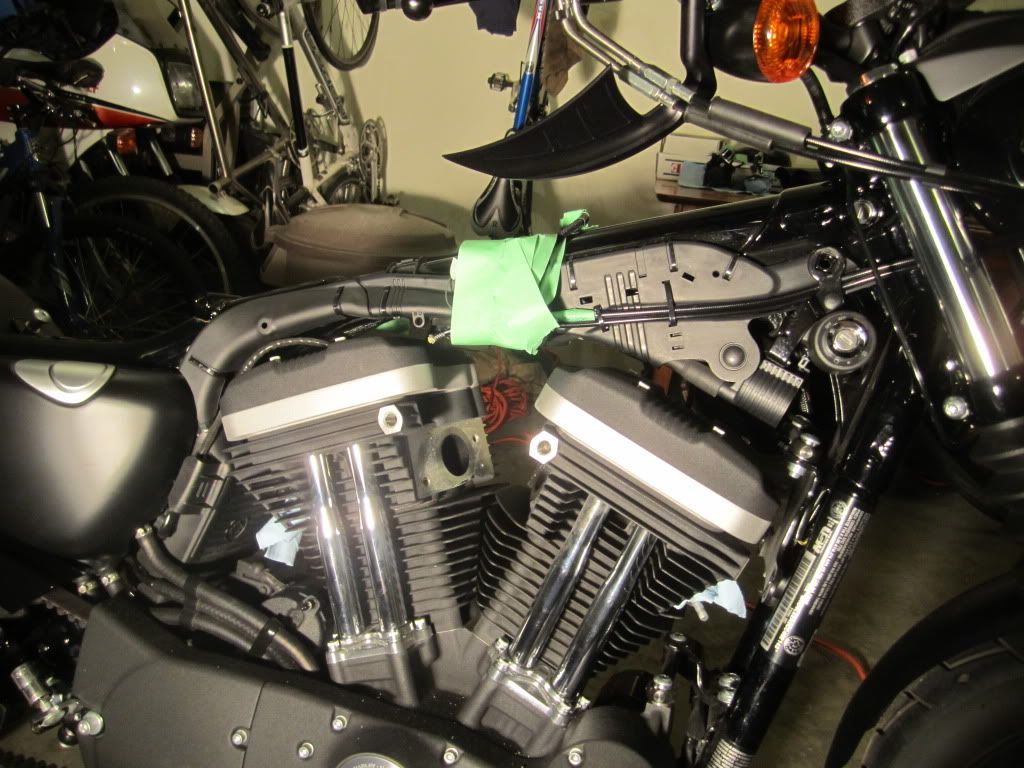
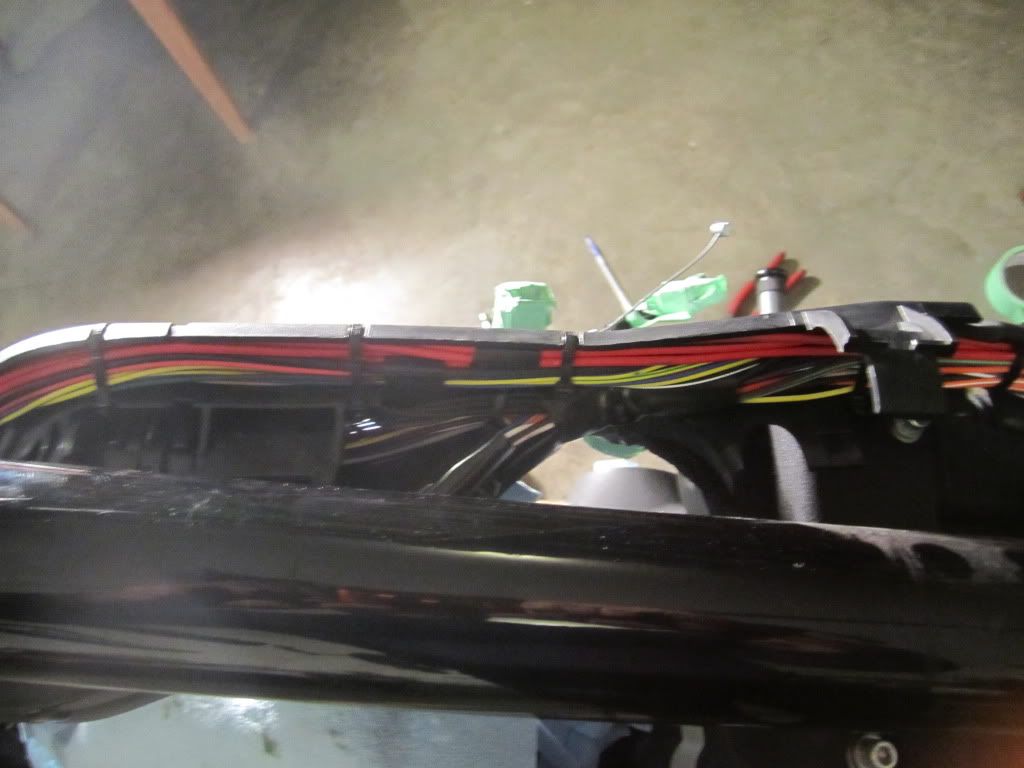
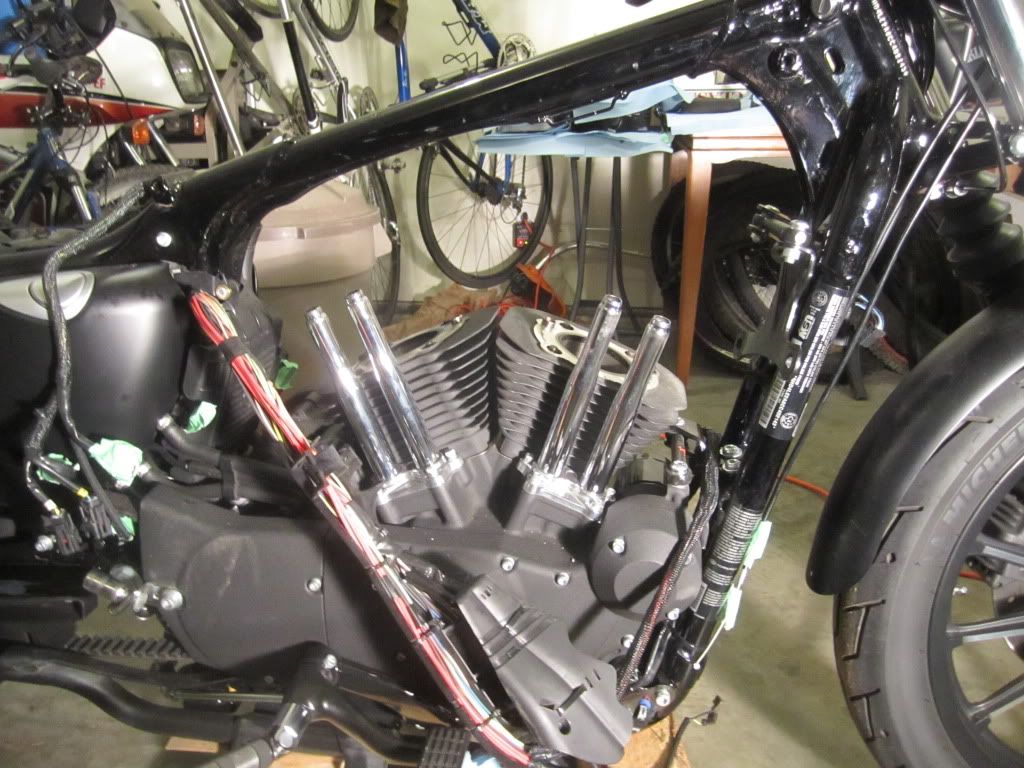
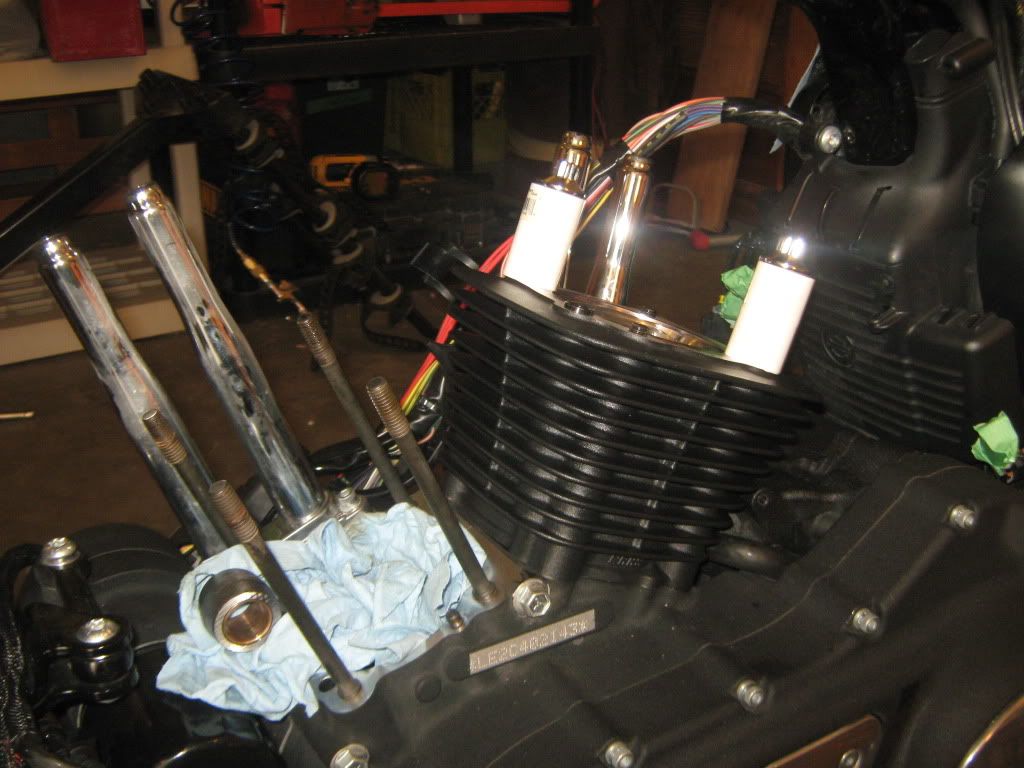
So this is the last pic I took, showing how I wrapped all the cables and wires up so that they would not be in the way:
Well, forget about that idea. It became evident quite quickly, as soon as I tried to remove the outer rocker covers that it was going to be too tight.
I was able to remove the front outer rocker cover but it was so tight that I knew I would be unable to reinstall it with the gaskets in place. Also, I was unable to acces the torx screw that holds the breather valve in place.
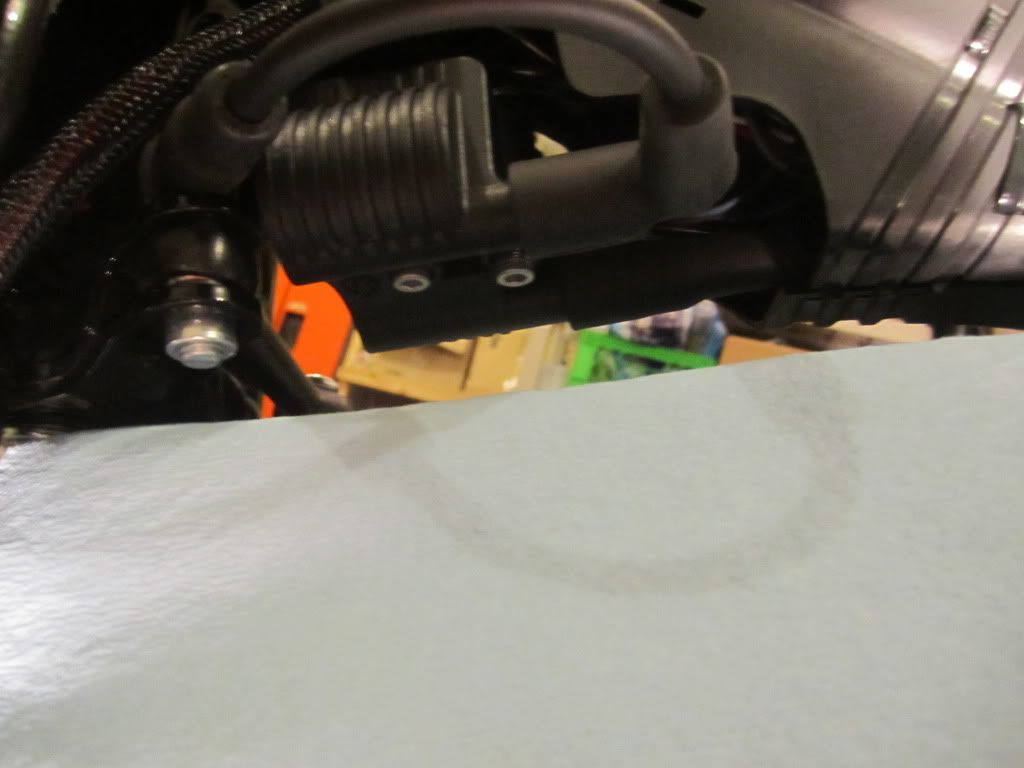
First I removed the 2 bolts that hold the coils in place:
EDIT: I found the easier proper way to remove the coils, instead of removing the two bolts in the pic, just remove the single screw that holds the mounting bracket together and the coils still attached to the bracket will come loose without removing the coils from the bracket. Hope that makes sense.
then I followed the routing of the plug wires, unclipping where necessary to free them up so that I could remove the coil:
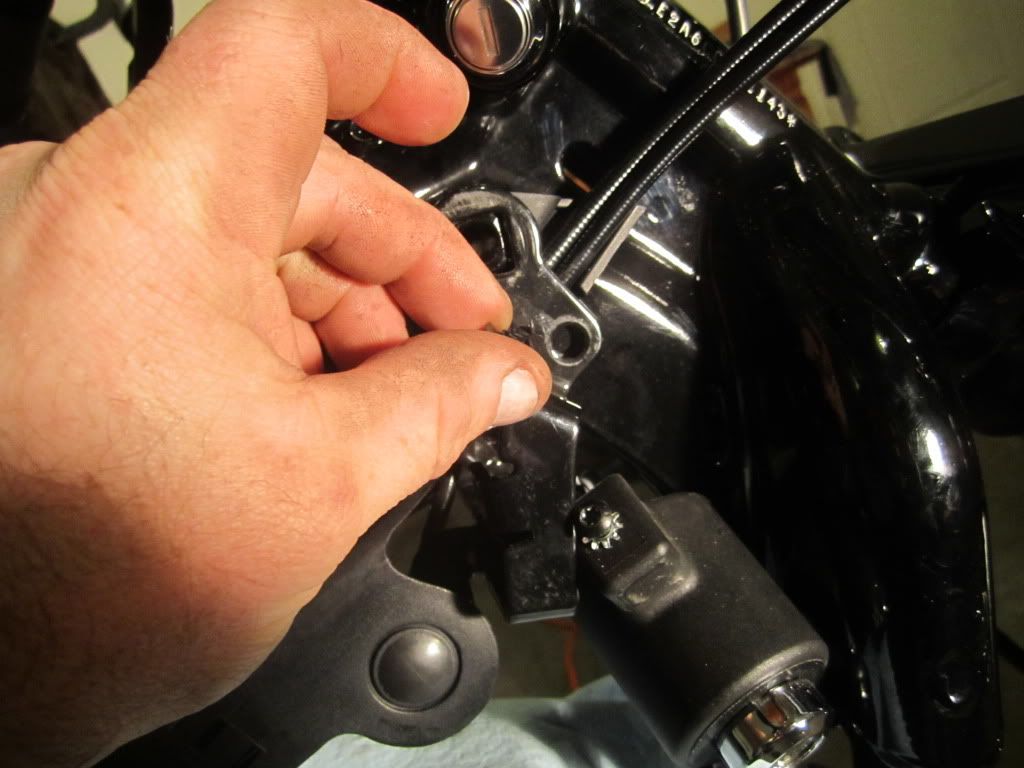
I also could see that the ignition and the bracket that holds the coil and ignition was probably going to have to come off as well.
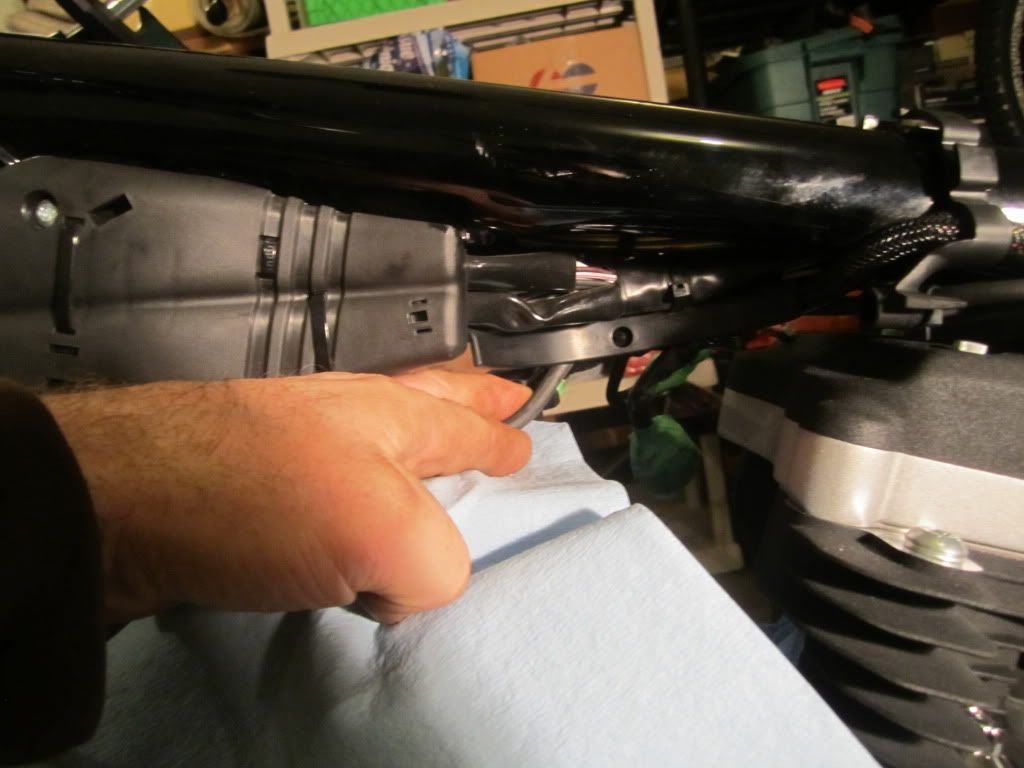
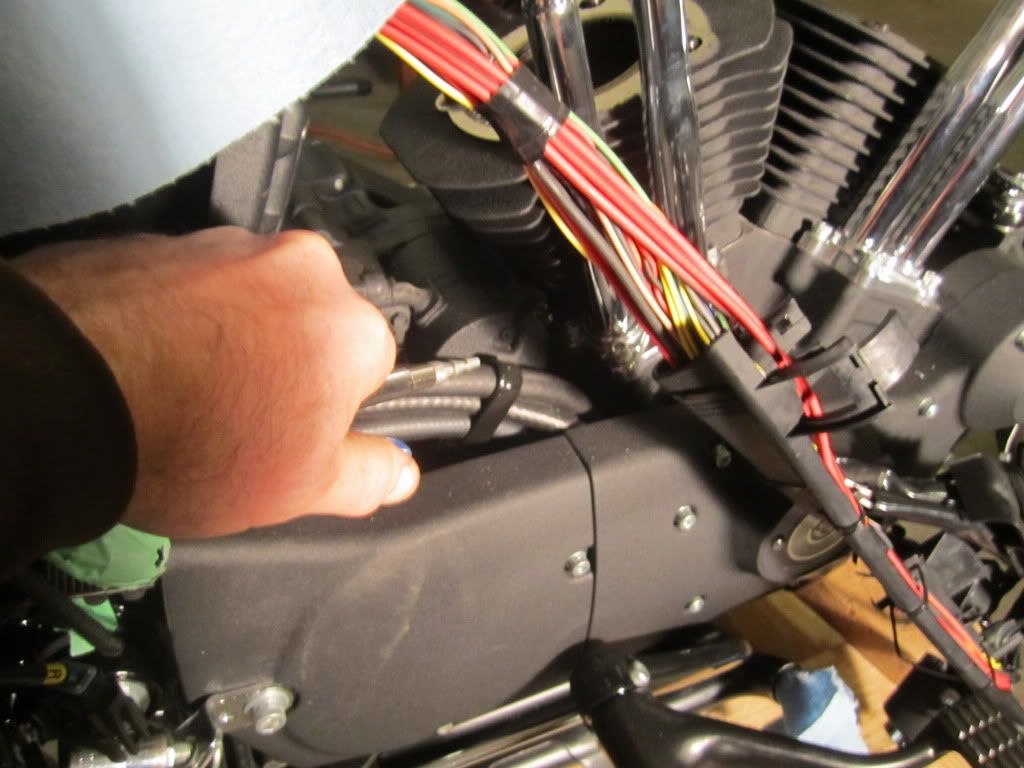
See the little plastic clip I am pointing at? There are several of those that have to come out when disconnecting the harness. I am sure there is a tool to remove them, which I of course do not have, so I used a flat head screw driver to pry them out:
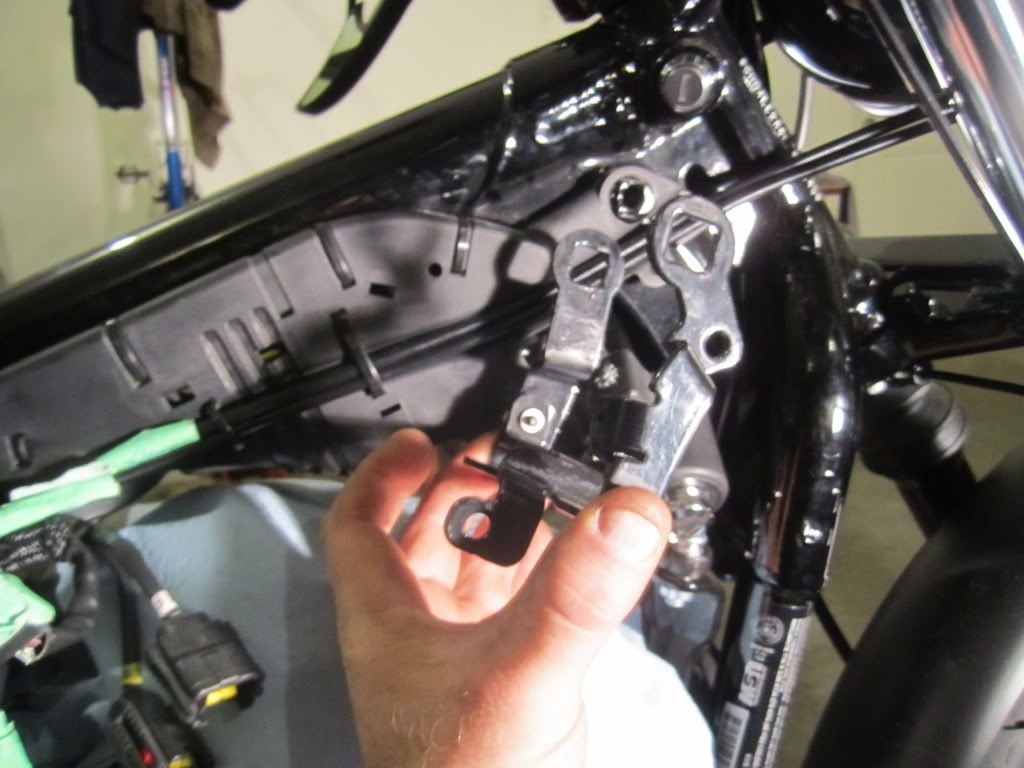
and the bracket is free:
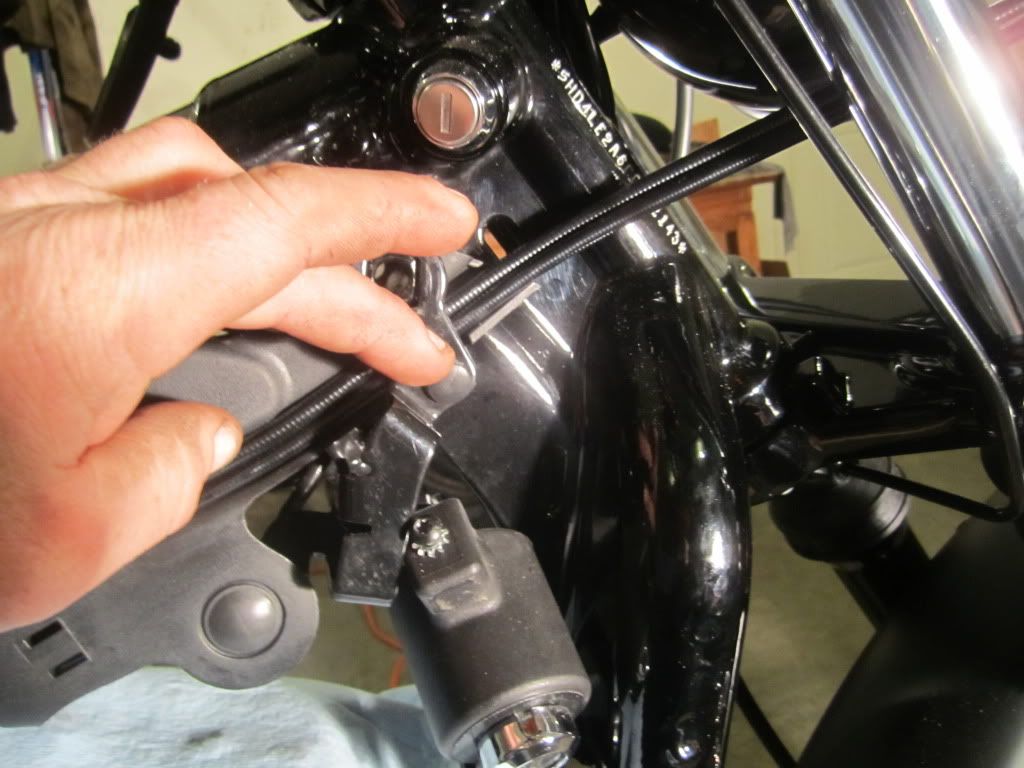
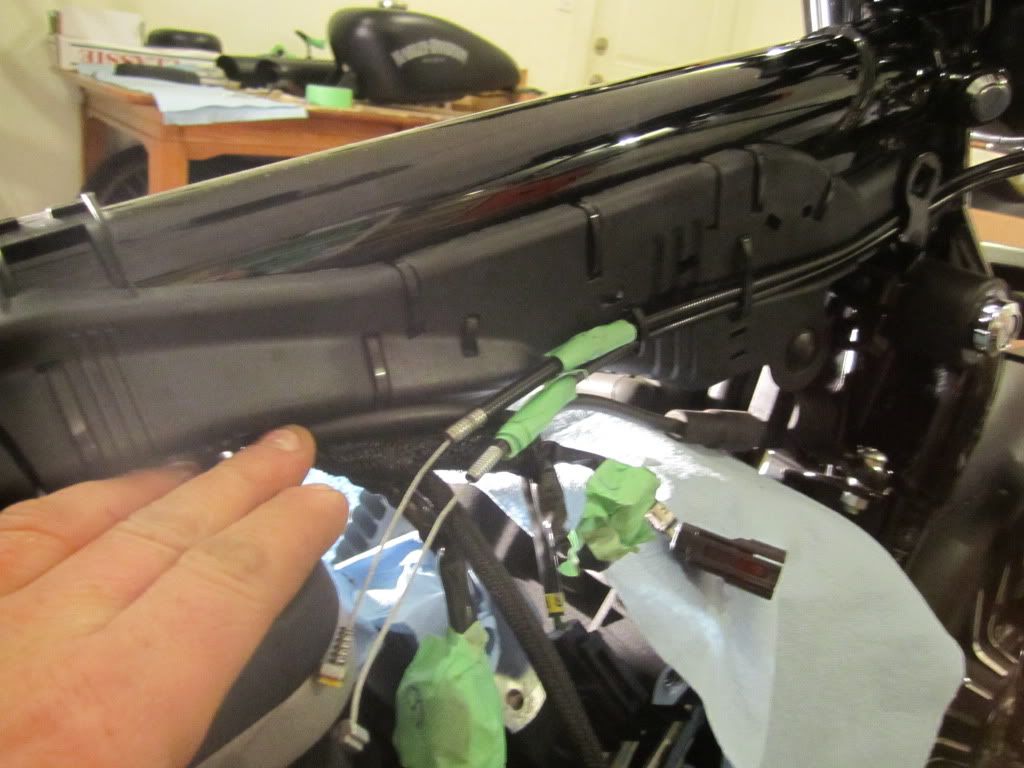
These are the black zip ties that have to be cut to free up the throttle cables and some of the wires. I did not have to cut all of them, only a few:
The more I looked at the wiring harness the more of a nightmare it appeared to be. Everything is so neat and tidy and I had a feeling that I would never get everything back together as neat as it was. I took lots of pictures so that I hopefully will get it back together again. I think that reassembling this wiring will be the hardest part of the whole conversion. Label the connections and as I said, take lots of pics.
I had to unclip a lot of connections to get the main wiring harness to fall away from the top tube. I also had to cut several of the black zip ties that hold the wires tight inside the harness and also hold the throttle cables in place.
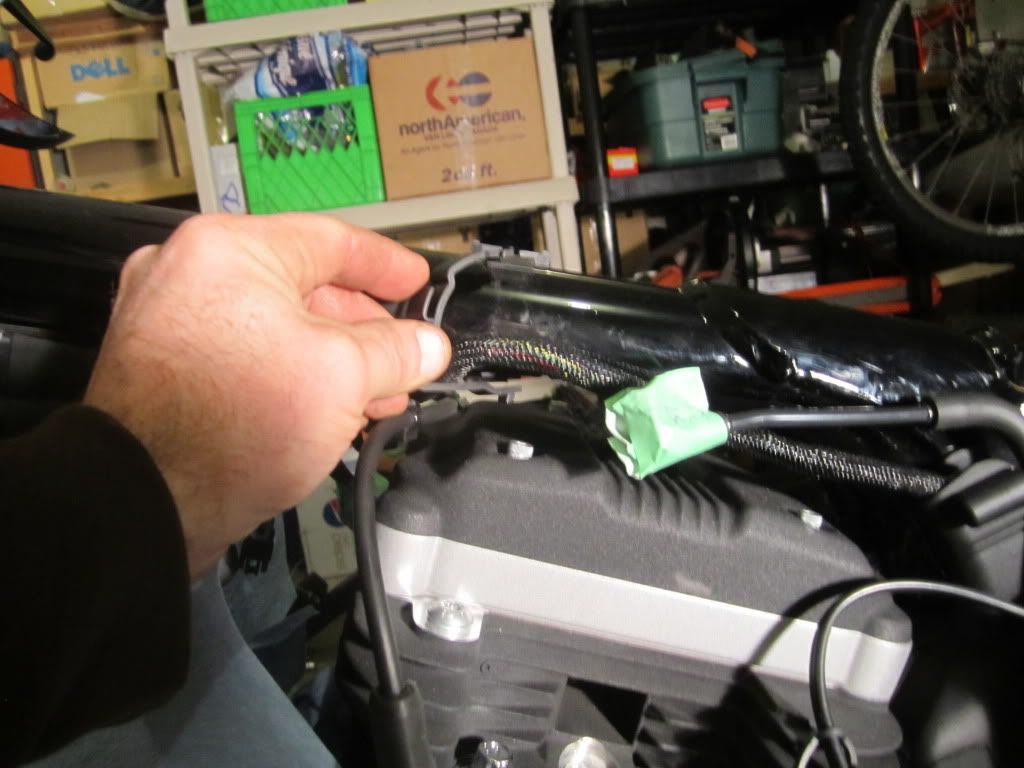
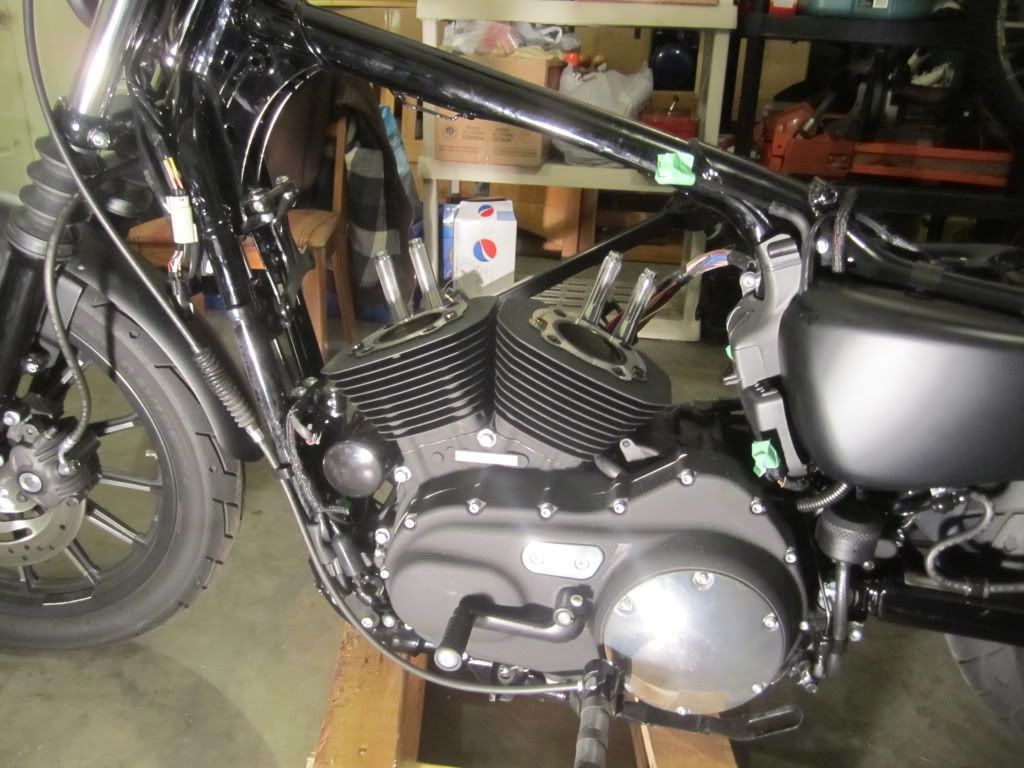
So after some trial and error, I finally had the harness out of the way:
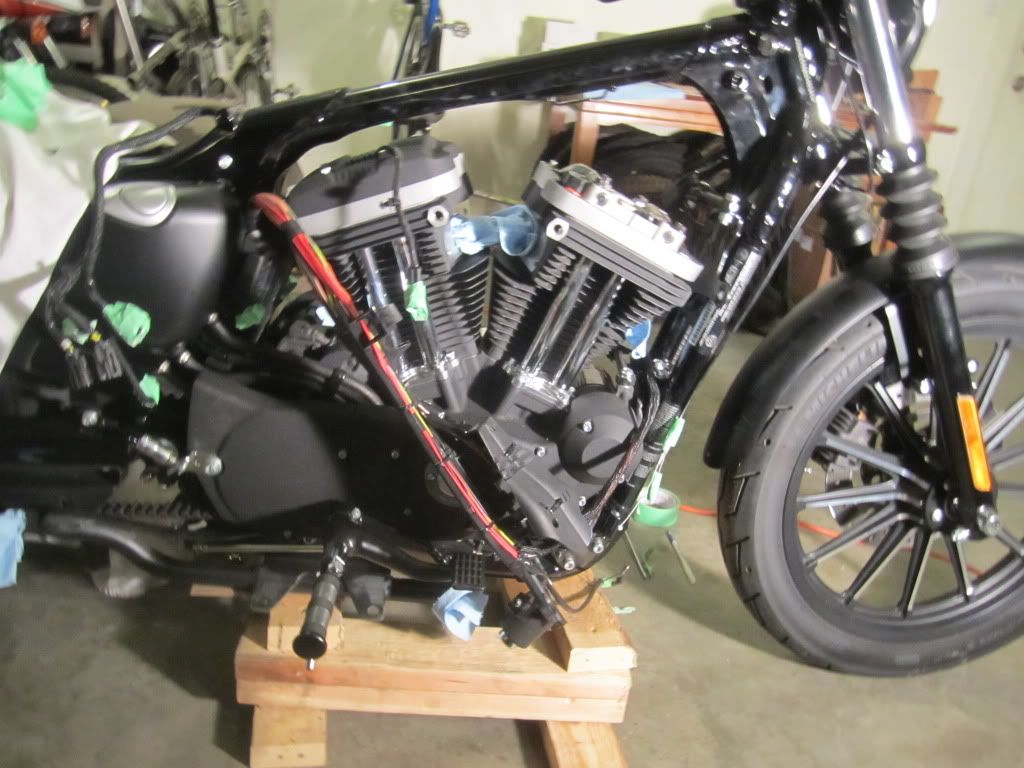
As you can see, there is now lots of room to work on the engine.
Let me say, at this point I believe it is very important to have a service manual or at least have good instructions on how to properly remove the rockers and heads so that you do not damage any of the components.
I started by removing the 4 bolts that hold each of the rocker covers on. I am not sure if it matters but I undid the bolts using the same cross pattern that I will use to remove the head bolts, 1/4 turn at at time until they were loose then I removed them. Once the bolts were removed I gently tapped the covers and they came right off.
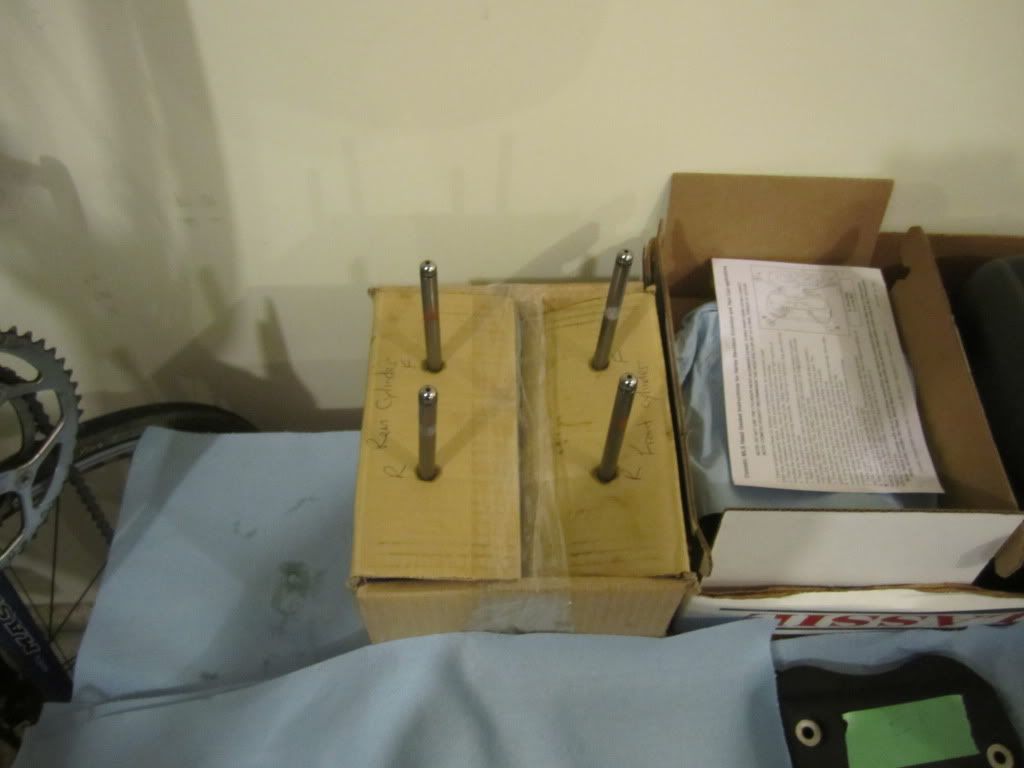
I should also add at this point that I have cardboard with sketches of the bolt placement and orientation and as I remove a bolt I put it into its proper location on the carboard sketch. I will include pics of these tomorrow.
Once the Upper rocker covers are off, you will see this:
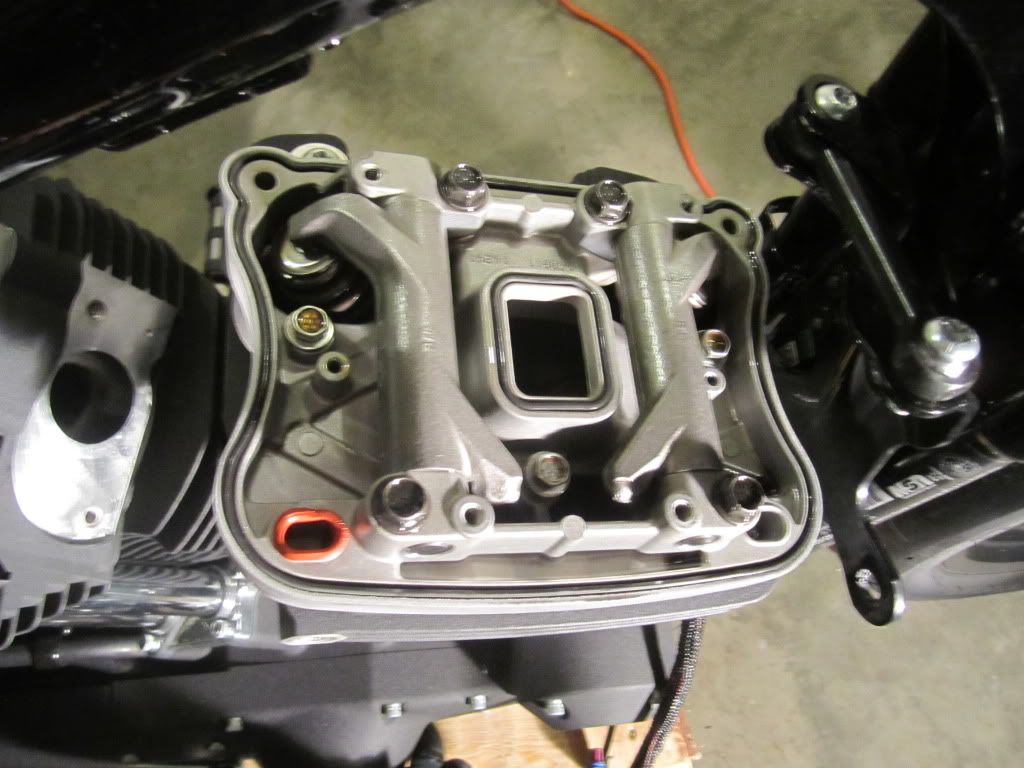
Unfortunately I forgot to take a pic as soon as the cover came off. See the orange piece in the lower left corner? There is a breather valve in each of the rockers that needs to be removed. One small torx bolt holds it in place, simply remove the bolt and pull the valve off. There is a small sponge in it, if it falls out just put it back in. I will update a photo tomorrow of the rocker with valve installed. The front cylinder valve is black and the rear cylinder valve is brown.
There are 9 bolts holding down each of the rockers. I highly recommend that you become familiar from a proper manual on how to remove these bolts properly, the order and technique. In the photo above you will only see 7 bolts, I have already remove the 2 smallest bolts that belong on the left side of the engine, these are the first 2 you remove.
It is most important before you start loosening these bolts that you take all the pressure off of the springs and pushrods and that the valves are closed. What i did was rotate the rear wheel in 5th gear watching the springs and rocker arms. When both springs and rocker arms were at their highest points I took a flashlight and looked into both the manifolds to confirm that the valves were closed. I also was able to put my fingers on the pushrods and spin them with my fingers. At this point I figured I was good to go.
So the 2 smallest allen bolts on the left side are removed first, then there are 3 bolts, 2 in the middle top and bottom and 1 on the right side, mine were 7/16". I loosened these bolts a quarter turn at a time until they were loose then I removed them. Lastly and most important were the final 4, 1/2" bolts. I carefully undid these bolts, 1/8 of a turn at a time in a cross pattern until they were all loose then I removed them.
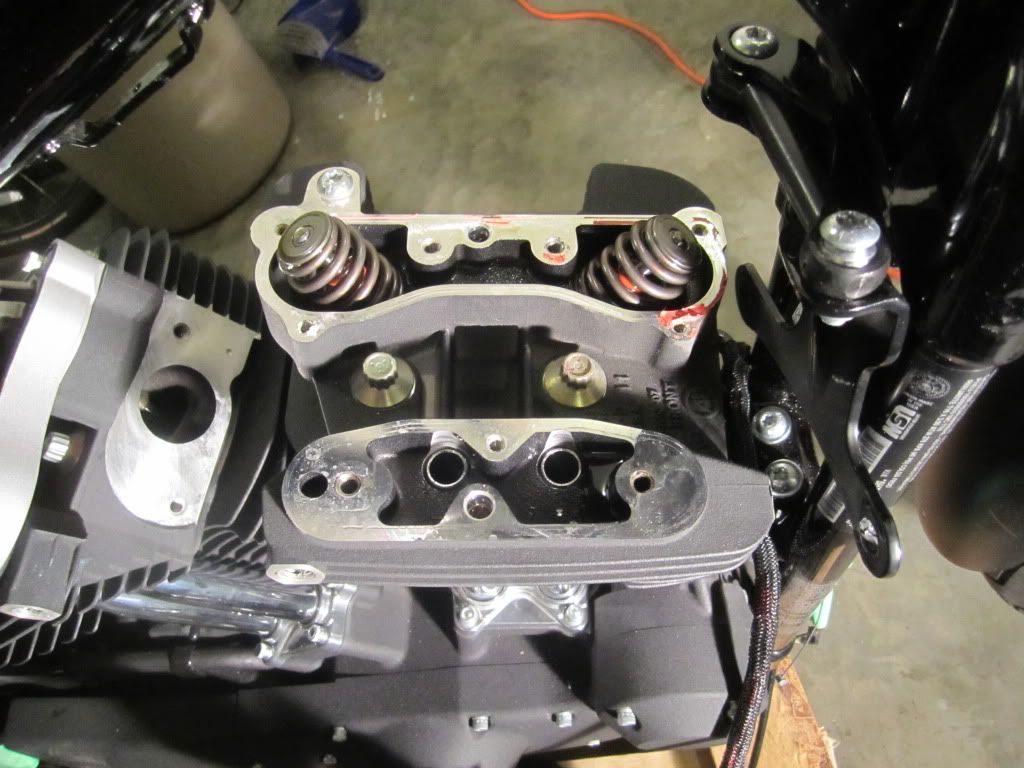
The inner rocker is ready to come off. I wiggled it with my hands and it would not budge so I very, very gently tapped up on it with a rubber mallet and it came loose. I lifted on it and pulled it off.
Here it is with the inner rocker off and as you can see it came off quite cleanly with only a little residue from the gasket left behind:
I repeated the same procedure for the rear cylinder, making sure that all the pressure was off the springs and rocker arms again before I started loosening the bolts.
Once the heads were exposed I pulled the push rods out and put them into a labeled cardboard jig so that I would know where they came from when it comes time to put them back. I will include a pic of that tomorrow when I show my cardboard sketches.
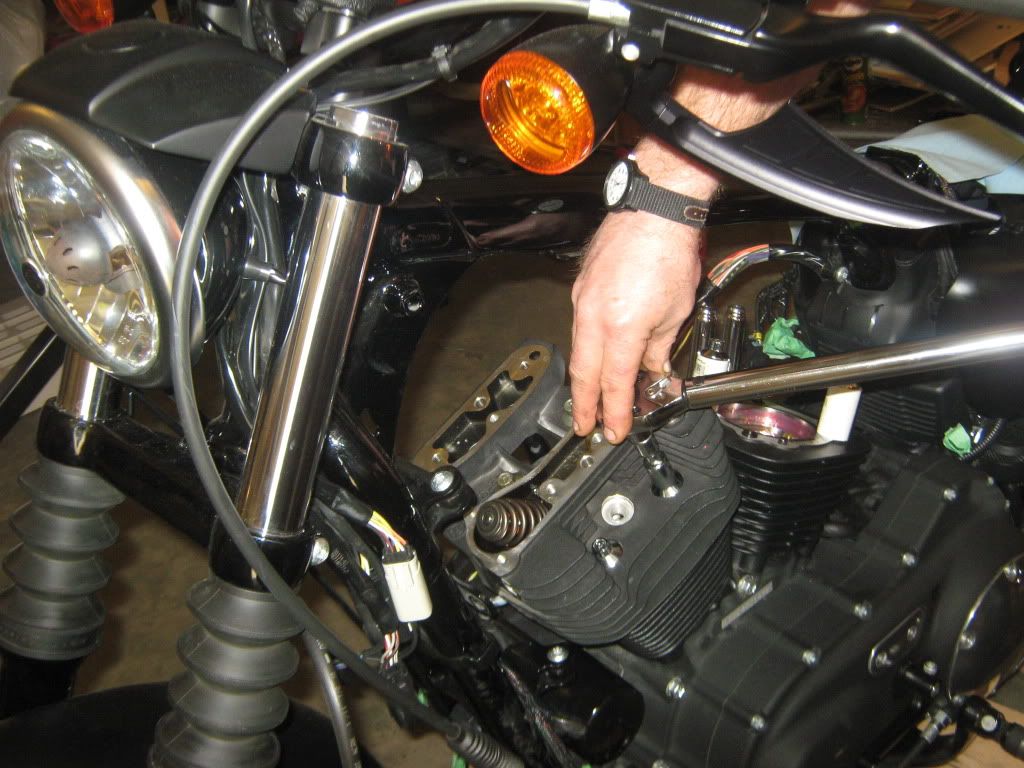
So, lastly it is time to remove the heads. There is a very specific pattern that needs to be followed when undoing these head bolts. The front and rear cylinders have a different pattern. Make sure you know this pattern before you start.
I followed the pattern and slowly undid the 4 head bolts 1/8 of a turn the first couple of turns then 1/4 of a turn following the pattern until they were loose. Once the bolts were removed the heads and gaskets came off very easily. The fact this bike only has 3800kms is definately making this easier than it could be.
Here it is heads removed:
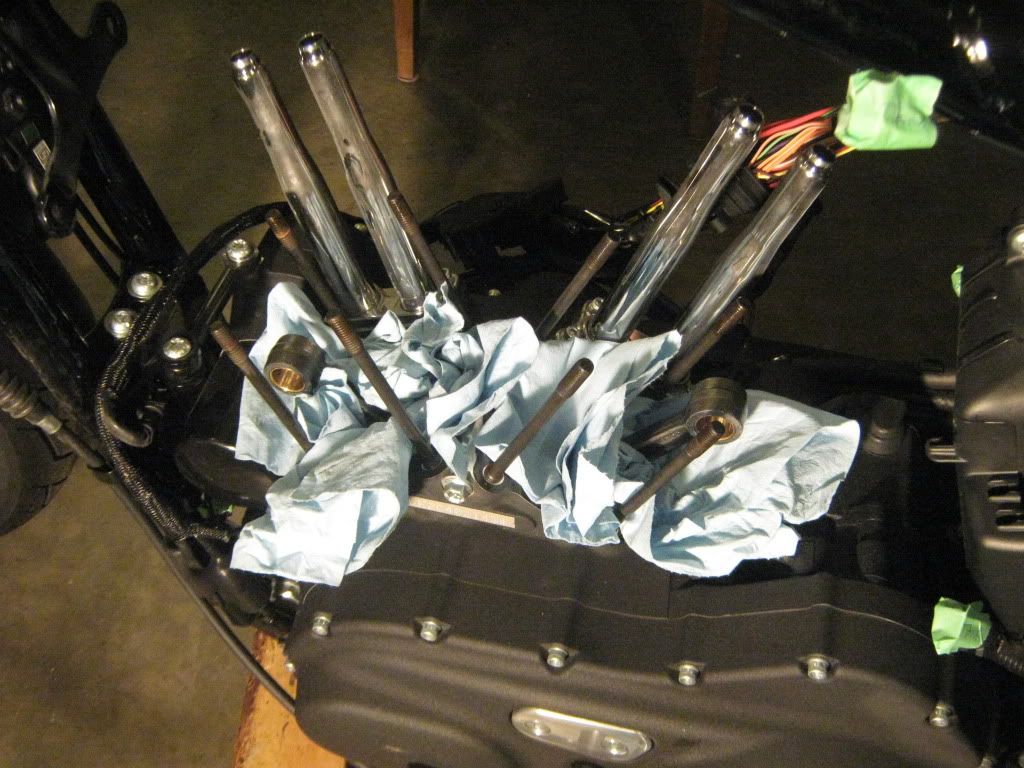
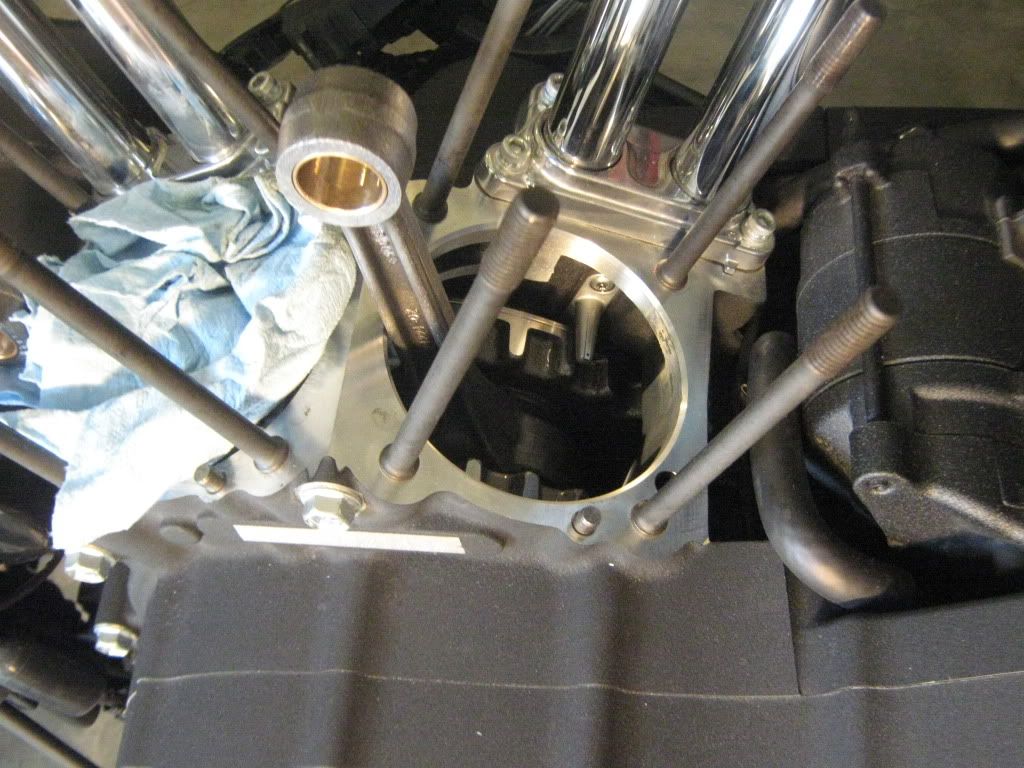
I am leaving the pushrod tubes in place as there seems to be lots of room to work with then still installed:
Tomorrow I will be removing the 883 cylinders and pistons and installing the the new NRHS 1250 pistons and cylinders. Hopefully I will also be checking the squish. My buddy was supposed to drop off his torque wrench but forgot so I hopefully can get it tomorrow to continue.
I did a lot of searching on the net and a lot of reading and found the clymer version of the tear down. I would rather have the current HD manual but I think I will be fine with what I have for now. Armed with that and having read several other informative pages I began.
Unfortunately all the information I have found including the clymer version has been specific to carbed bikes not EFI.
So this is the last pic I took, showing how I wrapped all the cables and wires up so that they would not be in the way:
Well, forget about that idea. It became evident quite quickly, as soon as I tried to remove the outer rocker covers that it was going to be too tight.
I was able to remove the front outer rocker cover but it was so tight that I knew I would be unable to reinstall it with the gaskets in place. Also, I was unable to acces the torx screw that holds the breather valve in place.
First I removed the 2 bolts that hold the coils in place:
EDIT: I found the easier proper way to remove the coils, instead of removing the two bolts in the pic, just remove the single screw that holds the mounting bracket together and the coils still attached to the bracket will come loose without removing the coils from the bracket. Hope that makes sense.
then I followed the routing of the plug wires, unclipping where necessary to free them up so that I could remove the coil:
I also could see that the ignition and the bracket that holds the coil and ignition was probably going to have to come off as well.
See the little plastic clip I am pointing at? There are several of those that have to come out when disconnecting the harness. I am sure there is a tool to remove them, which I of course do not have, so I used a flat head screw driver to pry them out:
and the bracket is free:
These are the black zip ties that have to be cut to free up the throttle cables and some of the wires. I did not have to cut all of them, only a few:
The more I looked at the wiring harness the more of a nightmare it appeared to be. Everything is so neat and tidy and I had a feeling that I would never get everything back together as neat as it was. I took lots of pictures so that I hopefully will get it back together again. I think that reassembling this wiring will be the hardest part of the whole conversion. Label the connections and as I said, take lots of pics.
I had to unclip a lot of connections to get the main wiring harness to fall away from the top tube. I also had to cut several of the black zip ties that hold the wires tight inside the harness and also hold the throttle cables in place.
So after some trial and error, I finally had the harness out of the way:
As you can see, there is now lots of room to work on the engine.
Let me say, at this point I believe it is very important to have a service manual or at least have good instructions on how to properly remove the rockers and heads so that you do not damage any of the components.
I started by removing the 4 bolts that hold each of the rocker covers on. I am not sure if it matters but I undid the bolts using the same cross pattern that I will use to remove the head bolts, 1/4 turn at at time until they were loose then I removed them. Once the bolts were removed I gently tapped the covers and they came right off.
I should also add at this point that I have cardboard with sketches of the bolt placement and orientation and as I remove a bolt I put it into its proper location on the carboard sketch. I will include pics of these tomorrow.
Once the Upper rocker covers are off, you will see this:
Unfortunately I forgot to take a pic as soon as the cover came off. See the orange piece in the lower left corner? There is a breather valve in each of the rockers that needs to be removed. One small torx bolt holds it in place, simply remove the bolt and pull the valve off. There is a small sponge in it, if it falls out just put it back in. I will update a photo tomorrow of the rocker with valve installed. The front cylinder valve is black and the rear cylinder valve is brown.
There are 9 bolts holding down each of the rockers. I highly recommend that you become familiar from a proper manual on how to remove these bolts properly, the order and technique. In the photo above you will only see 7 bolts, I have already remove the 2 smallest bolts that belong on the left side of the engine, these are the first 2 you remove.
It is most important before you start loosening these bolts that you take all the pressure off of the springs and pushrods and that the valves are closed. What i did was rotate the rear wheel in 5th gear watching the springs and rocker arms. When both springs and rocker arms were at their highest points I took a flashlight and looked into both the manifolds to confirm that the valves were closed. I also was able to put my fingers on the pushrods and spin them with my fingers. At this point I figured I was good to go.
So the 2 smallest allen bolts on the left side are removed first, then there are 3 bolts, 2 in the middle top and bottom and 1 on the right side, mine were 7/16". I loosened these bolts a quarter turn at a time until they were loose then I removed them. Lastly and most important were the final 4, 1/2" bolts. I carefully undid these bolts, 1/8 of a turn at a time in a cross pattern until they were all loose then I removed them.
The inner rocker is ready to come off. I wiggled it with my hands and it would not budge so I very, very gently tapped up on it with a rubber mallet and it came loose. I lifted on it and pulled it off.
Here it is with the inner rocker off and as you can see it came off quite cleanly with only a little residue from the gasket left behind:
I repeated the same procedure for the rear cylinder, making sure that all the pressure was off the springs and rocker arms again before I started loosening the bolts.
Once the heads were exposed I pulled the push rods out and put them into a labeled cardboard jig so that I would know where they came from when it comes time to put them back. I will include a pic of that tomorrow when I show my cardboard sketches.
So, lastly it is time to remove the heads. There is a very specific pattern that needs to be followed when undoing these head bolts. The front and rear cylinders have a different pattern. Make sure you know this pattern before you start.
I followed the pattern and slowly undid the 4 head bolts 1/8 of a turn the first couple of turns then 1/4 of a turn following the pattern until they were loose. Once the bolts were removed the heads and gaskets came off very easily. The fact this bike only has 3800kms is definately making this easier than it could be.
Here it is heads removed:
I am leaving the pushrod tubes in place as there seems to be lots of room to work with then still installed:
Tomorrow I will be removing the 883 cylinders and pistons and installing the the new NRHS 1250 pistons and cylinders. Hopefully I will also be checking the squish. My buddy was supposed to drop off his torque wrench but forgot so I hopefully can get it tomorrow to continue.
Last edited by Mich; 03-09-2012 at 08:36 PM.
#23
02-04-2012, 09:26 AM
#24
02-04-2012, 09:47 AM
#25
02-04-2012, 09:49 AM
Outstanding HDF Member
#26
02-04-2012, 09:57 AM
#27
02-04-2012, 10:51 AM
I never changed the oil before starting. The oil in the engine right now only has about 1200 miles on it and I was given the advice by an experienced mechanic to leave my current oil in until my heat cycles are complete. So I have new oil and filter ready and waiting. As soon as my heat cycles are finished I will drain and replace the oil for the 500 mile break in.
As you can see from the pics I have removed everything that could be in the way except for the pushrod tubes. I believe that I can work around them. I will update later today how it goes, I will be putting the cyclinders on, checking the squish and retorquing the heads down.
As far as fuel goes, in december when I took the bike off the road, I filled the tank with fresh 94 octane fuel and added fuel stabilizer at that time. On start up it will have fresh high octane gas.
#28
02-04-2012, 03:05 PM
#29
02-04-2012, 05:30 PM

Elite HDF Member
#30
02-04-2012, 05:31 PM
So here are the pics of my cardboard bolt holders:

Here is the pushrod box I made:
The bike is pretty clean but before I removed the stock cylinders I used my compressor to blow any debris and dirt from the engine:
When pulling the cylinders off I made sure not to let the connecting rod fall against the case bore. I then stuffed rags in the case openings and removed the c clips holding the wrist pins in. The rear wrist pin pushed out fairly easily with my fingers. But the front wrist pin would not budge. You have to be careful not to put pressure in the connecting rod so I held the piston firmly in one hand and used a long tapered spike to gently push the wrist pin out. This worked great.
A pic of the spike and how I pushed the pin out:
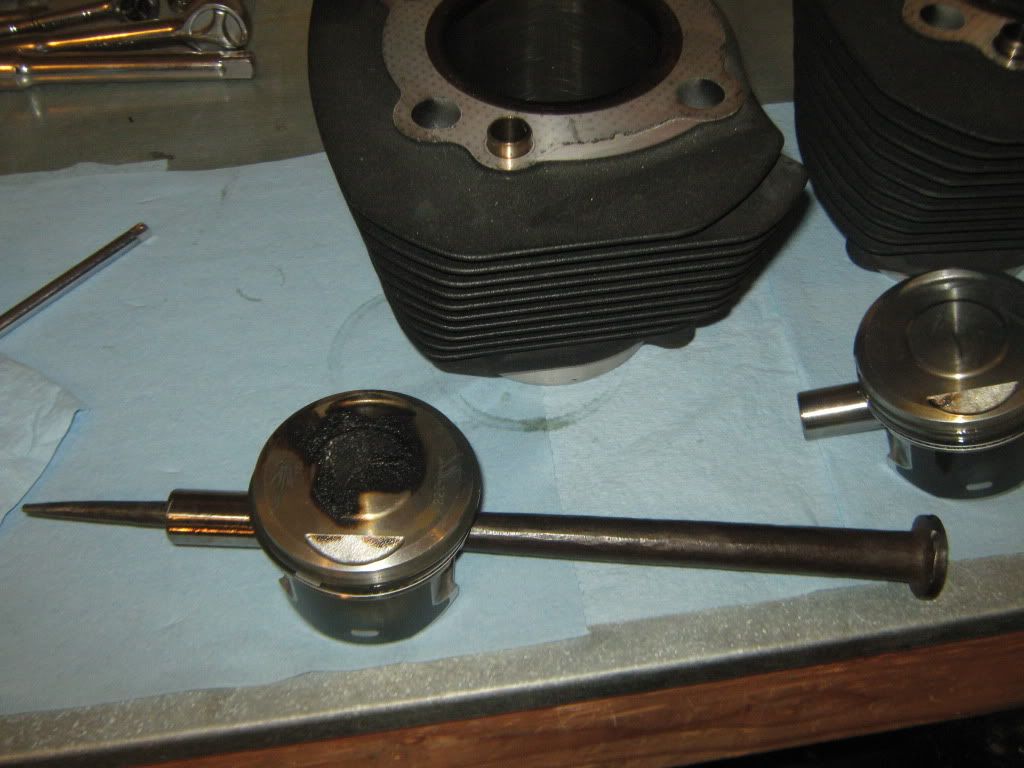
Here is the engine with the old pistons are removed:
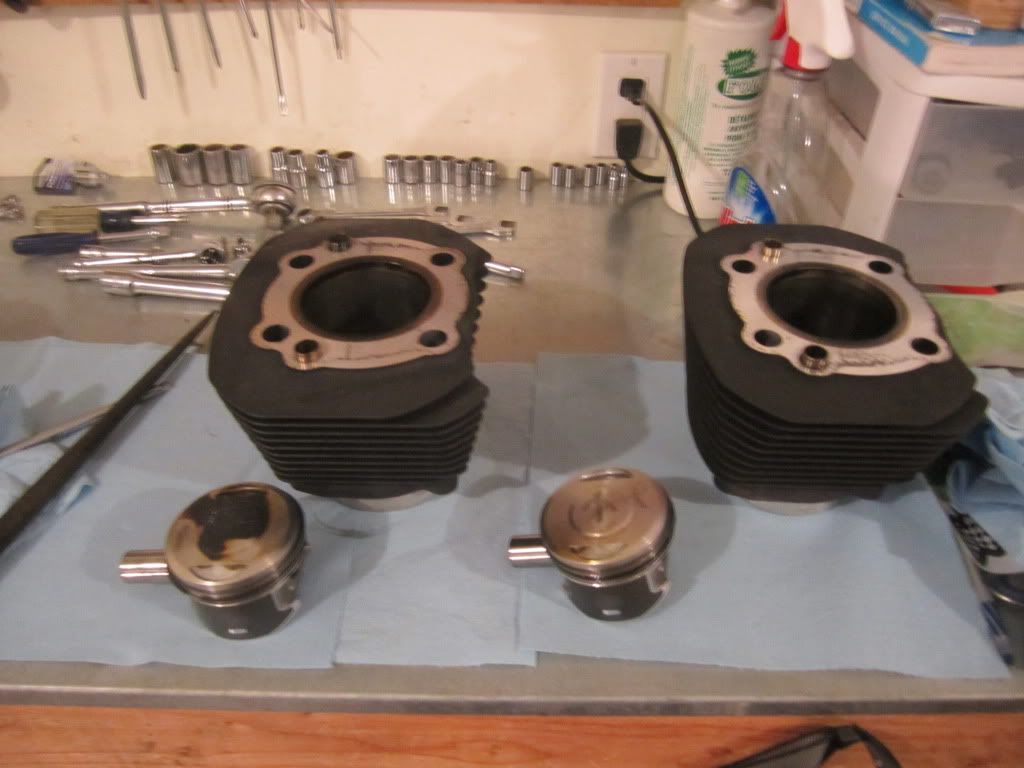
Here are the stock pistons and cylinders after removal:
the rear piston looked clean but the front piston had a lot of carbon build up already. I was quite surprised since there is only about 2200 miles on them. Can anyone explain if that is normal and what causes it?
The most time consuming part to this point was cleaning the case surfaces in preperation of the new cylinders. There was not a lot of residue but there was some and I wanted to get it all off. I used some brake cleaner on a rag and a cut up plastic card to scrape it off.
All cleaned up now:
Time to get the new NRHS cylinders ready for install. I gently pushed the pistons to the bottom of the bore, then pushed the piston out the bottom just until the wrist pin hole cleared. I had NRHS gap and install the rings and place the pistons in the cylinder I did not want them piston rings accidently coming out the bottom:
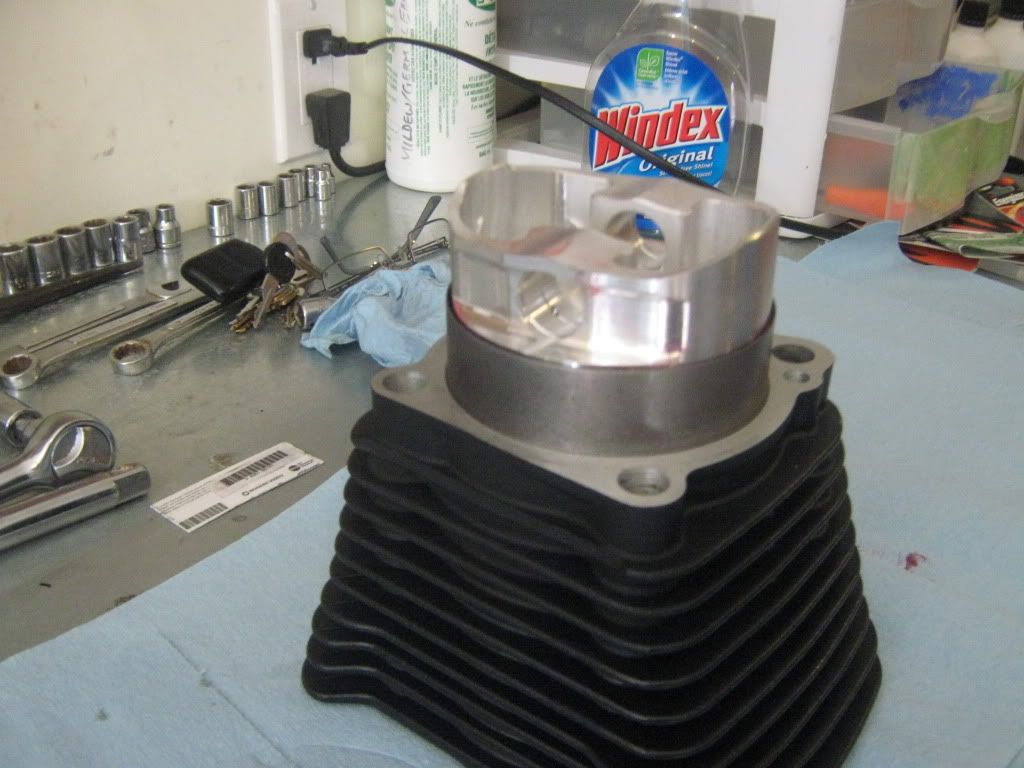
I then carefully inserted the c clip into the pushrod side of the piston, then put some assembly lube on the wrist pin and pushed the wrist pin into the hole without it's clip installed so that it would not interfere with the connection rod when it is put into place.
I put the base gasket in place and put some shop towels back into the case to prevent the clip or anything else from falling in.
Here is my buddy Rick holding the cylinder as we slip it down onto the connecting rod. Note the wrist pin already inserted:
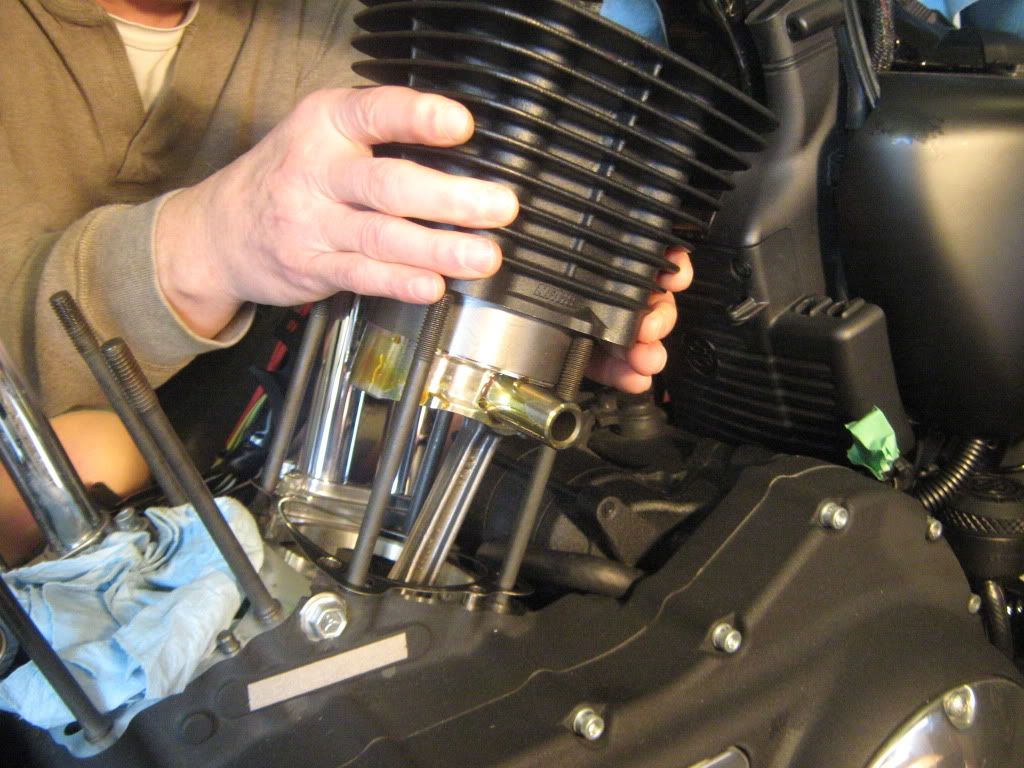
Once the pin and connecting rod were lined up we gently wiggled the two parts until the wrist pin slid all the way in. Once it was in I carefully pushed the c clip in to place, double and triple checking that it was seated all the way around.
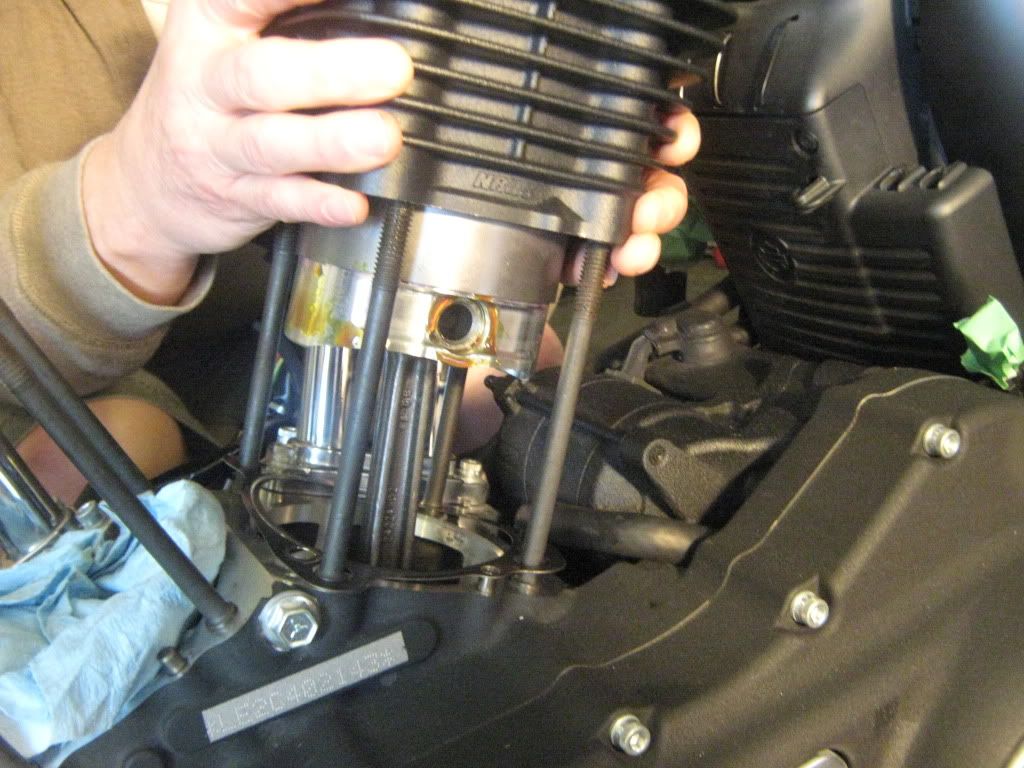
We now removed the shop towels and carefully pushed the new cylinder down to the case. Once it got there we carefully lined up the cylinder into the hole making sure that the alignment pin seated properly:
I had picked up 2, 1/2" pvc connections to hold the cylinder in place while we worked on the second cylinder. What I found when I went to install them was that the mounting bolts were not centered in the cylinder holes and it looked like I would not be able to fit the head bolts in. I noticed that there was still a small gap under the cylinder, as I wiggled the cylinder I was able to get the 2 shorter head bolts to center in the holes and I lightly tightened down the cylinder. EDIT: Before I used any of the head bolts, I made sure that the threads on the long cylinder bolts were totally clean and also made sure the head bolts were clean and well oiled. Clean and well oiled bolts will ensure an accurate torque reading.
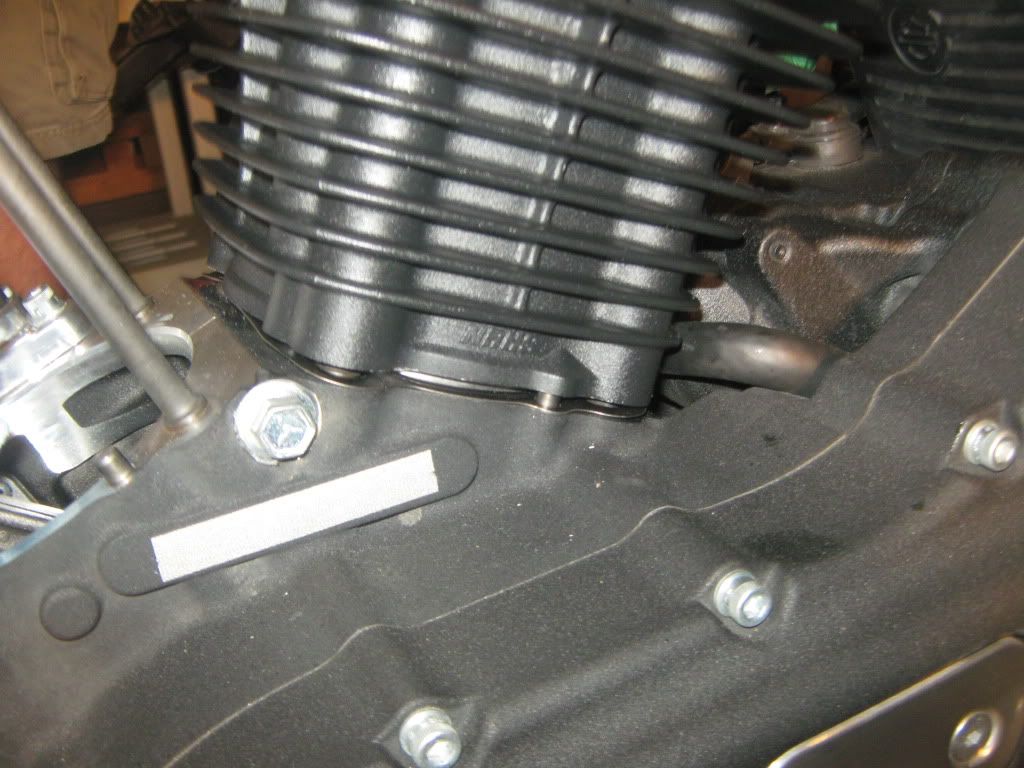
The rear cylinder temporarily bolted down with pvc:
I then repeated the above procedure and installed the front cylinder and piston. The front cylinder seemed to go a little easier, the head bolt holes seemed to line up with the long engine bolts better.
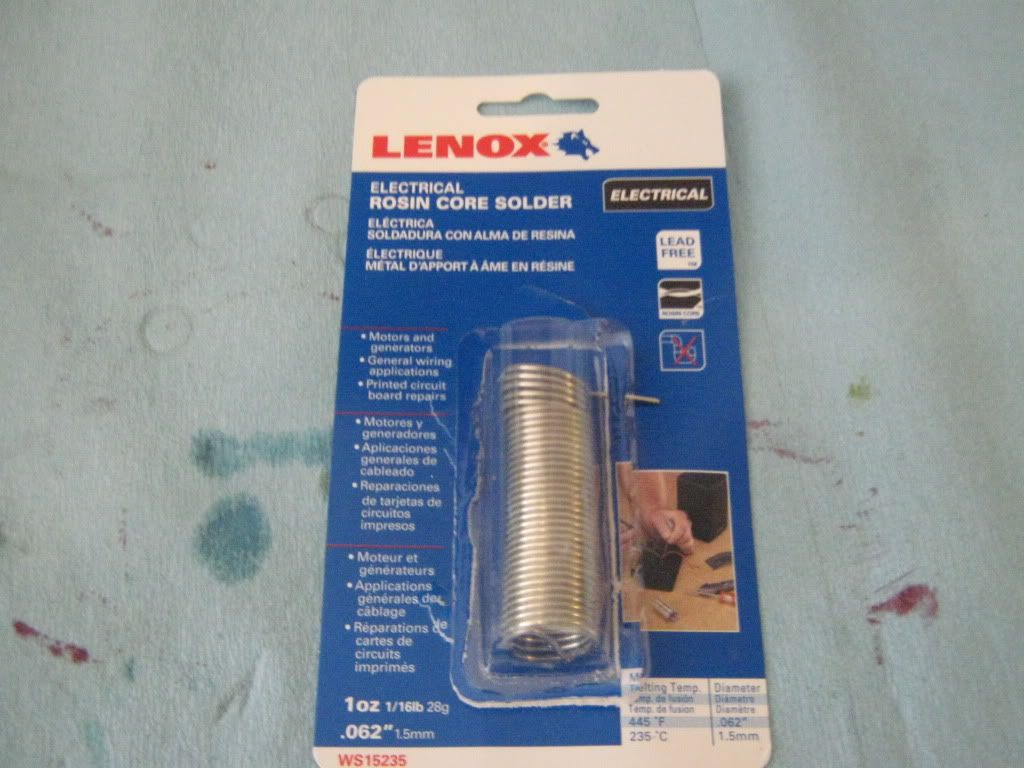
time to check the squish. I had bought some .062" resin core solder for this purpose:
I would like to note that while it is possible to check the squish of both cylinders at the same time, I did mine seperately.
I installed pieces of the solder around the top of the piston using grease to hold it in place. At first I tried a bit of assembly lube but it was too sticky and regular grease worked much better.
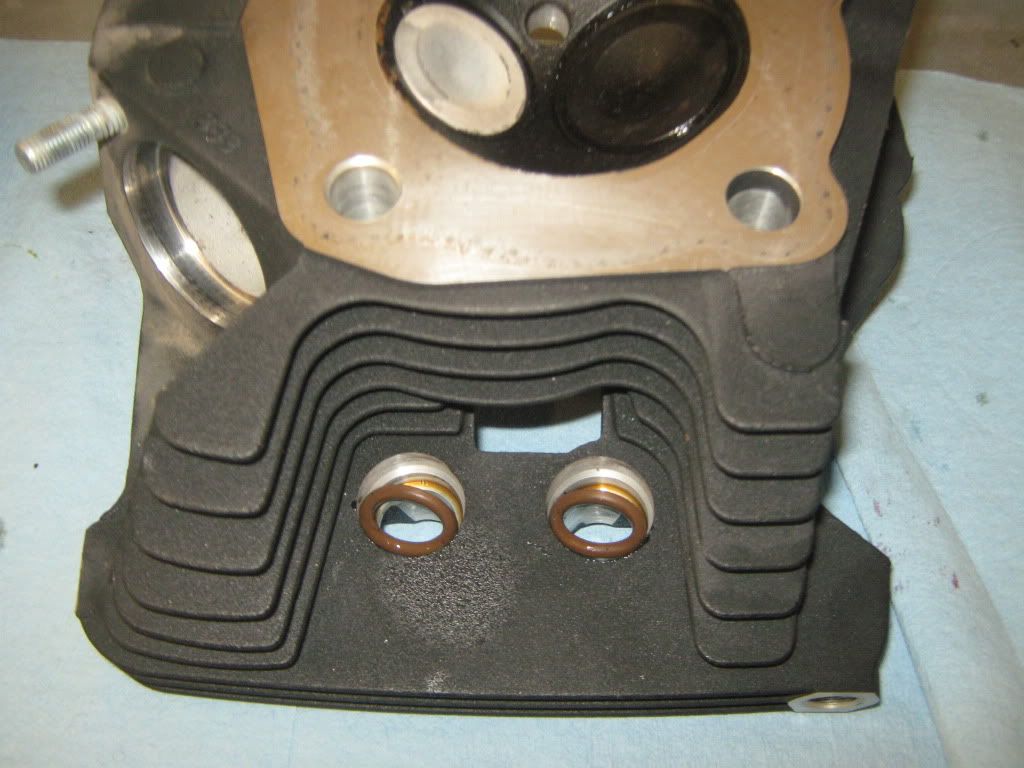
Next step was to put the head gasket on, and put the head in position for tightening. Make sure you remove the old pushrod orings and install the new ones. You can see that I also removed the old exhaust manifold gaskets at this time.
Removing the old pushrod orings:
I carefully place the head onto the cylinder, making sure the pushrods lined up properly and also making sure the gasket was lined up properly. there is a small rivet on each side of the Cometic gasket, make sure this is not being pinched between the head and cylinder. If it is you have to cut it off. When torquing down the head make sure that you follow the tightening procedure exactly.
Torquing down the head:
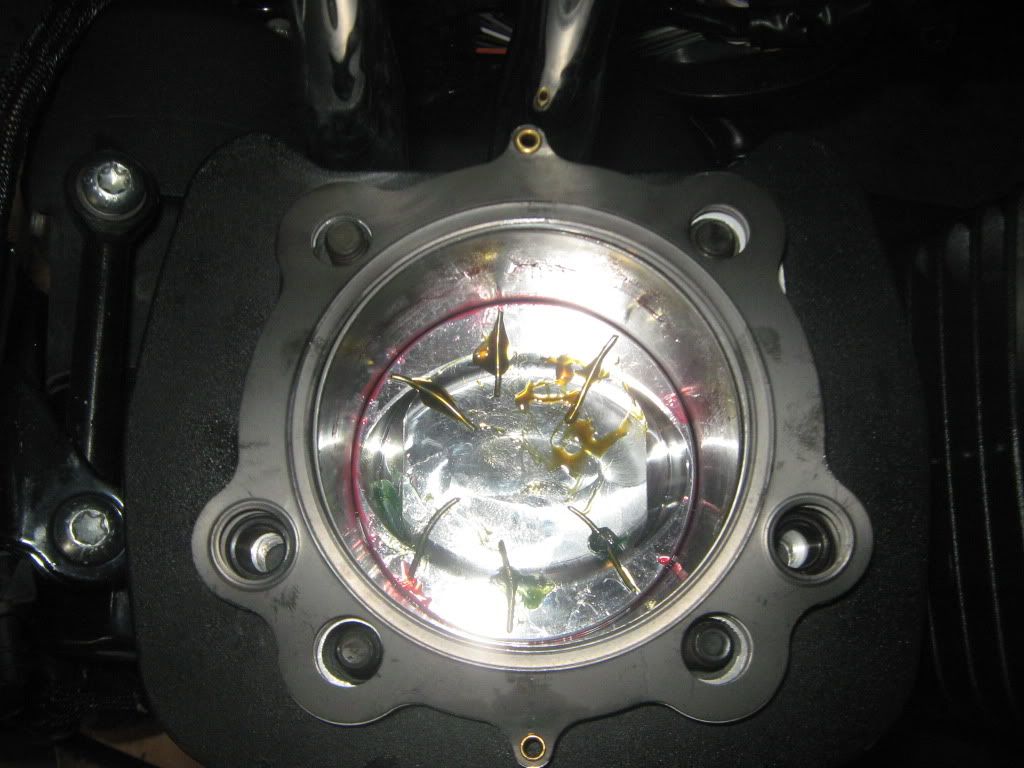
After the head was properly torqued, I rotated the rear wheel moving the piston through one compression stroke. I then removed the head in the reverse procedure I used for tightening it and once the head was removed, I pulled out the pieces of solder and measured the squished end of them all.
Measuring the squish:
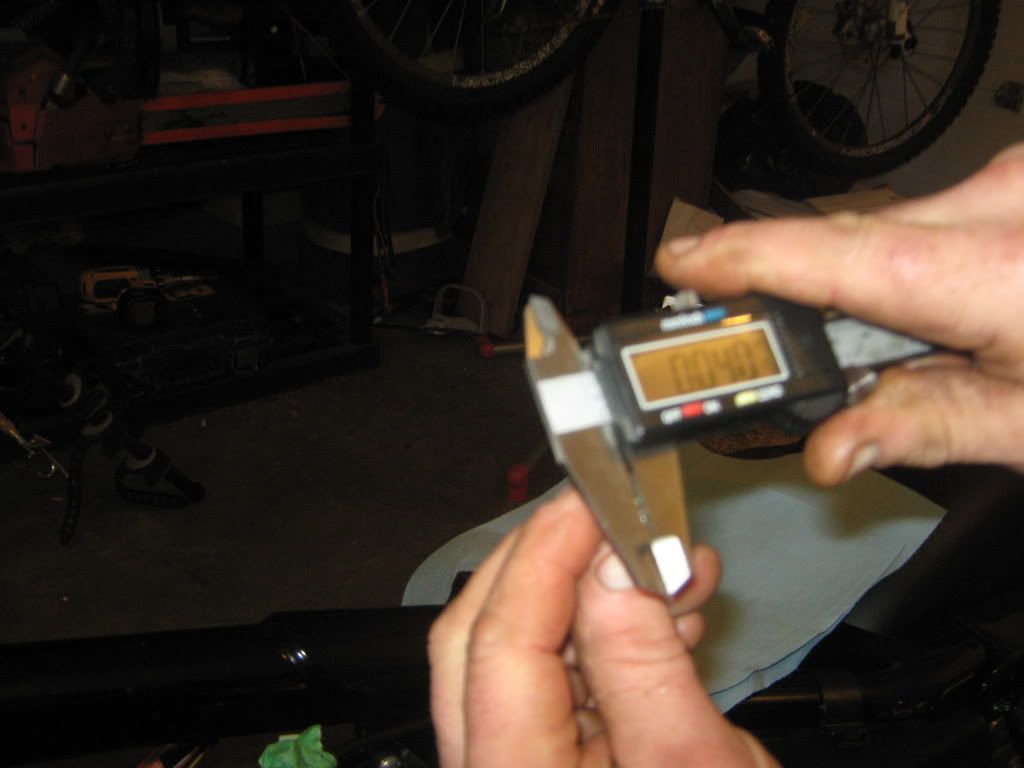
Now, the ideal squish is between .03" - .035" . An average stock bike will be about .05" . My squish was right around .04 . I decided to check the front cylinder again and sure enough it was between .039" - .041" I then checked the rear cylinder and it was about the same. I contacted Dan at NRHS to get his opinion and he let me know my options. I could change to a thinner base gasket ( meaning I would have to remove the cylinders) or I could leave it the way it was, since it wasn't too far off. He said I may realize a 1-2 HP loss at the absolute worst. My decision is to leave the gaskets the way they are and continue the build.
That will likely be it for today.
Here is the pushrod box I made:
The bike is pretty clean but before I removed the stock cylinders I used my compressor to blow any debris and dirt from the engine:
When pulling the cylinders off I made sure not to let the connecting rod fall against the case bore. I then stuffed rags in the case openings and removed the c clips holding the wrist pins in. The rear wrist pin pushed out fairly easily with my fingers. But the front wrist pin would not budge. You have to be careful not to put pressure in the connecting rod so I held the piston firmly in one hand and used a long tapered spike to gently push the wrist pin out. This worked great.
A pic of the spike and how I pushed the pin out:
Here is the engine with the old pistons are removed:
Here are the stock pistons and cylinders after removal:
the rear piston looked clean but the front piston had a lot of carbon build up already. I was quite surprised since there is only about 2200 miles on them. Can anyone explain if that is normal and what causes it?
The most time consuming part to this point was cleaning the case surfaces in preperation of the new cylinders. There was not a lot of residue but there was some and I wanted to get it all off. I used some brake cleaner on a rag and a cut up plastic card to scrape it off.
All cleaned up now:
Time to get the new NRHS cylinders ready for install. I gently pushed the pistons to the bottom of the bore, then pushed the piston out the bottom just until the wrist pin hole cleared. I had NRHS gap and install the rings and place the pistons in the cylinder I did not want them piston rings accidently coming out the bottom:
I then carefully inserted the c clip into the pushrod side of the piston, then put some assembly lube on the wrist pin and pushed the wrist pin into the hole without it's clip installed so that it would not interfere with the connection rod when it is put into place.
I put the base gasket in place and put some shop towels back into the case to prevent the clip or anything else from falling in.
Here is my buddy Rick holding the cylinder as we slip it down onto the connecting rod. Note the wrist pin already inserted:
Once the pin and connecting rod were lined up we gently wiggled the two parts until the wrist pin slid all the way in. Once it was in I carefully pushed the c clip in to place, double and triple checking that it was seated all the way around.
We now removed the shop towels and carefully pushed the new cylinder down to the case. Once it got there we carefully lined up the cylinder into the hole making sure that the alignment pin seated properly:
I had picked up 2, 1/2" pvc connections to hold the cylinder in place while we worked on the second cylinder. What I found when I went to install them was that the mounting bolts were not centered in the cylinder holes and it looked like I would not be able to fit the head bolts in. I noticed that there was still a small gap under the cylinder, as I wiggled the cylinder I was able to get the 2 shorter head bolts to center in the holes and I lightly tightened down the cylinder. EDIT: Before I used any of the head bolts, I made sure that the threads on the long cylinder bolts were totally clean and also made sure the head bolts were clean and well oiled. Clean and well oiled bolts will ensure an accurate torque reading.
The rear cylinder temporarily bolted down with pvc:
I then repeated the above procedure and installed the front cylinder and piston. The front cylinder seemed to go a little easier, the head bolt holes seemed to line up with the long engine bolts better.
time to check the squish. I had bought some .062" resin core solder for this purpose:
I would like to note that while it is possible to check the squish of both cylinders at the same time, I did mine seperately.
I installed pieces of the solder around the top of the piston using grease to hold it in place. At first I tried a bit of assembly lube but it was too sticky and regular grease worked much better.
Next step was to put the head gasket on, and put the head in position for tightening. Make sure you remove the old pushrod orings and install the new ones. You can see that I also removed the old exhaust manifold gaskets at this time.
Removing the old pushrod orings:
I carefully place the head onto the cylinder, making sure the pushrods lined up properly and also making sure the gasket was lined up properly. there is a small rivet on each side of the Cometic gasket, make sure this is not being pinched between the head and cylinder. If it is you have to cut it off. When torquing down the head make sure that you follow the tightening procedure exactly.
Torquing down the head:
After the head was properly torqued, I rotated the rear wheel moving the piston through one compression stroke. I then removed the head in the reverse procedure I used for tightening it and once the head was removed, I pulled out the pieces of solder and measured the squished end of them all.
Measuring the squish:
Now, the ideal squish is between .03" - .035" . An average stock bike will be about .05" . My squish was right around .04 . I decided to check the front cylinder again and sure enough it was between .039" - .041" I then checked the rear cylinder and it was about the same. I contacted Dan at NRHS to get his opinion and he let me know my options. I could change to a thinner base gasket ( meaning I would have to remove the cylinders) or I could leave it the way it was, since it wasn't too far off. He said I may realize a 1-2 HP loss at the absolute worst. My decision is to leave the gaskets the way they are and continue the build.
That will likely be it for today.
Last edited by Mich; 02-05-2012 at 10:33 AM.
The following users liked this post:
Mr_Taipan (01-13-2017)