Removing the Tri-Glide Body - Photos & Video
#1
 04-12-2018, 12:37 PM

Join Date: Nov 2010
Location: Red Banks, Mississippi
Posts: 17,466
Received 3,941 Likes
on
2,296 Posts
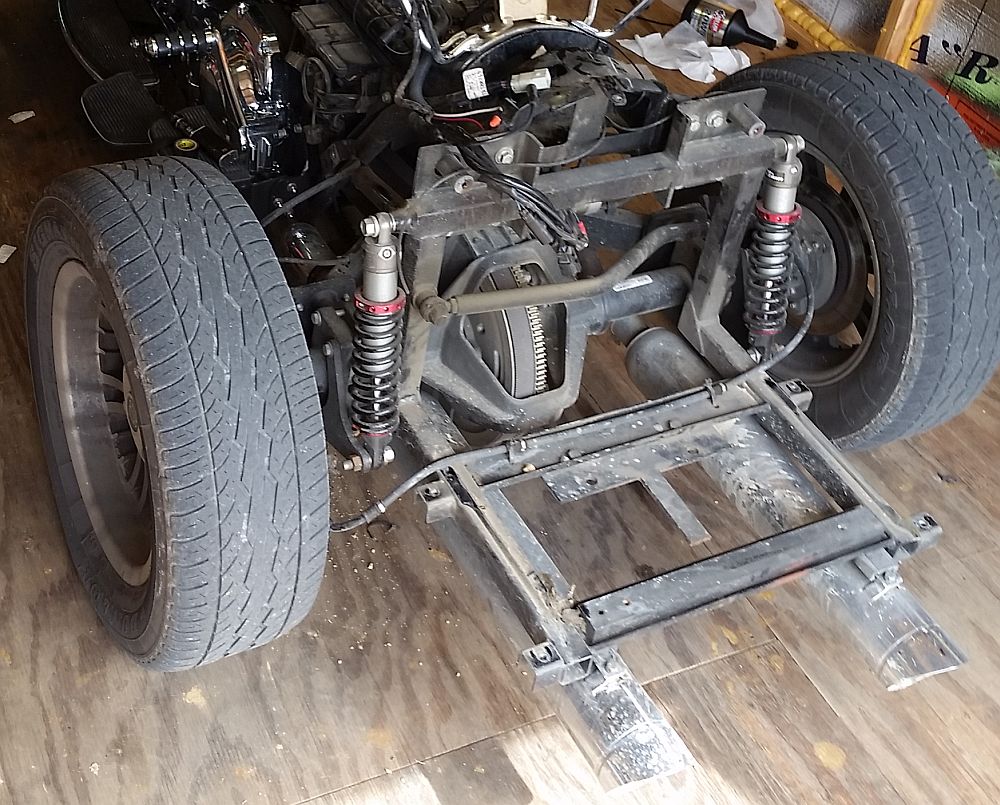
Before our upcoming summer trip I wanted to replace the heim joints on my panhard rod. To do this, removing the body is required.
There are only 8 bolts and some wires that need disconnecting.
Here are some photo's from yesterday-
...body sitting on some sawhorses...yeah, it's filthy, needs a good cleaning, and some wax.

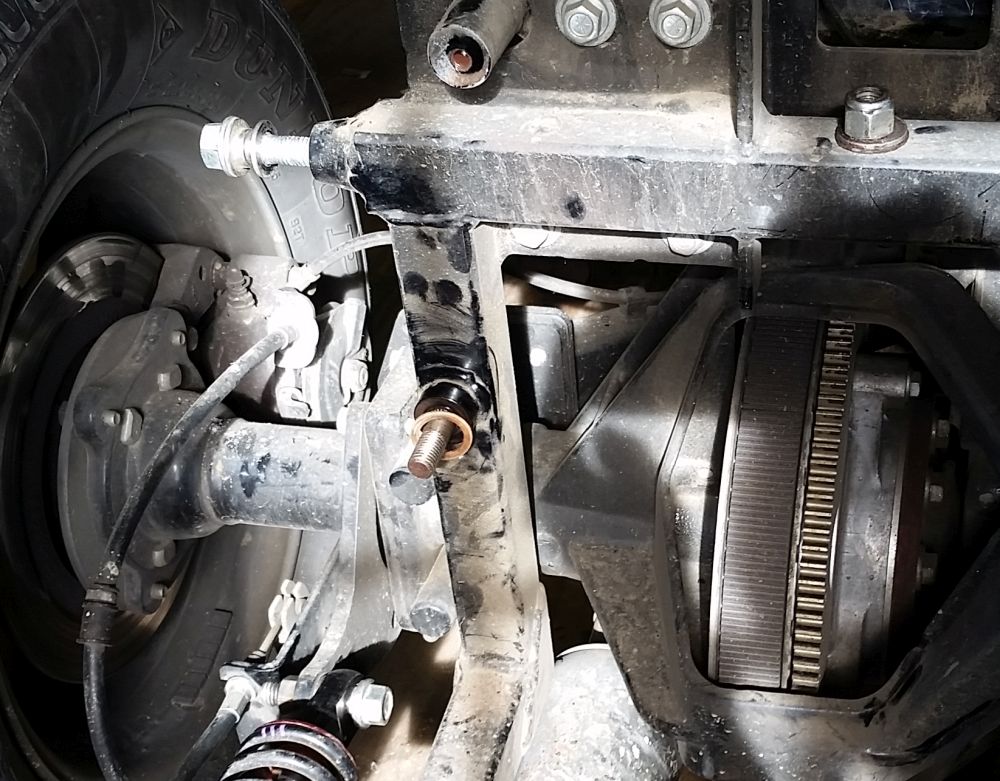
Here you can see one end of the panhard rod, where the dealership sprayed some sort of lubricant that really attracted a lot of road dirt.

Panhard rod removed-
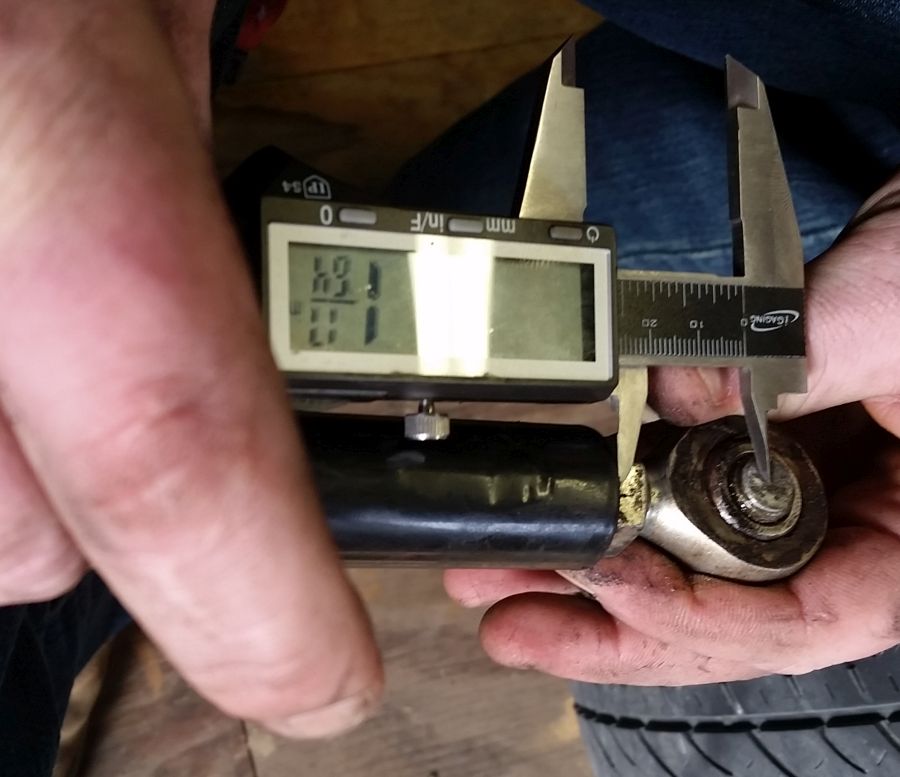
Panhard rod reinstalled with new heim joints.

The old heim joints had quite a bit of play in them, so it will be nice to ride it without that slack in them.
I also left the body off, sometime in the next few days I'll be mounting the video camera to the rear of the frame and taking some video to watch the 14" Trike Series Shocks in action while riding. Will post it up here when done.
There are only 8 bolts and some wires that need disconnecting.
Here are some photo's from yesterday-
...body sitting on some sawhorses...yeah, it's filthy, needs a good cleaning, and some wax.
Here you can see one end of the panhard rod, where the dealership sprayed some sort of lubricant that really attracted a lot of road dirt.
Panhard rod removed-
Panhard rod reinstalled with new heim joints.
The old heim joints had quite a bit of play in them, so it will be nice to ride it without that slack in them.
I also left the body off, sometime in the next few days I'll be mounting the video camera to the rear of the frame and taking some video to watch the 14" Trike Series Shocks in action while riding. Will post it up here when done.

The following 5 users liked this post by DK Custom:
Casper (04-12-2018),
mctraveler (04-25-2018),
merlin 2 (04-13-2018),
Oogie Wa Wa (04-12-2018),
so60 (04-12-2018)
#2
04-12-2018, 01:03 PM


Kevin, as usual a very good and useful post. I think the video from the rear with the suspension working will be very interesting and informative.
As you said, good time to give all that rear area a good cleaning and wax on painted stuff. It does appear that changing the Panhard bar is very easy with the body off. Do the heim joints come installed on the rod? I suppose they are easy to adjust?
As you said, good time to give all that rear area a good cleaning and wax on painted stuff. It does appear that changing the Panhard bar is very easy with the body off. Do the heim joints come installed on the rod? I suppose they are easy to adjust?
#3
04-12-2018, 01:58 PM
Join Date: Nov 2010
Location: Red Banks, Mississippi
Posts: 17,466
Received 3,941 Likes
on
2,296 Posts
Kevin, as usual a very good and useful post. I think the video from the rear with the suspension working will be very interesting and informative.
As you said, good time to give all that rear area a good cleaning and wax on painted stuff. It does appear that changing the Panhard bar is very easy with the body off. Do the heim joints come installed on the rod? I suppose they are easy to adjust?
As you said, good time to give all that rear area a good cleaning and wax on painted stuff. It does appear that changing the Panhard bar is very easy with the body off. Do the heim joints come installed on the rod? I suppose they are easy to adjust?
I used the same panhard rod, just replaced the threaded in heim joints on each end. Taking apart and putting back together is simple. The manual outlines a relatively simple method for adjusting it to the proper length, via how far the heim joints are threaded in.
#4
04-12-2018, 03:24 PM
Outstanding HDF Member
#5
04-12-2018, 04:03 PM
Join Date: Nov 2010
Location: Red Banks, Mississippi
Posts: 17,466
Received 3,941 Likes
on
2,296 Posts
#6
04-12-2018, 11:48 PM

Road Master
Thanks, great info.
While it's apart, if you can, please get and post a few more shots of the whole rear end at a few different angles and directions. That might be really handy for folks to be able to see before they stick their hands up in there for stuff not requiring body removal. I know I'd appreciate it, it's unusual to get those kinds of views normally. Thanks.
While it's apart, if you can, please get and post a few more shots of the whole rear end at a few different angles and directions. That might be really handy for folks to be able to see before they stick their hands up in there for stuff not requiring body removal. I know I'd appreciate it, it's unusual to get those kinds of views normally. Thanks.
#7
04-13-2018, 08:11 AM
Outstanding HDF Member
Trending Topics
#8
04-13-2018, 09:59 AM
Tourer
#9
04-13-2018, 12:14 PM
Join Date: Nov 2010
Location: Red Banks, Mississippi
Posts: 17,466
Received 3,941 Likes
on
2,296 Posts
Thanks, great info.
While it's apart, if you can, please get and post a few more shots of the whole rear end at a few different angles and directions. That might be really handy for folks to be able to see before they stick their hands up in there for stuff not requiring body removal. I know I'd appreciate it, it's unusual to get those kinds of views normally. Thanks.
While it's apart, if you can, please get and post a few more shots of the whole rear end at a few different angles and directions. That might be really handy for folks to be able to see before they stick their hands up in there for stuff not requiring body removal. I know I'd appreciate it, it's unusual to get those kinds of views normally. Thanks.
But it definitely is a short cut in getting the adjustment done.
Appears my rambunctious riding has worn the rear wheel bearings out...they have some play in them.
I never use a pressure washer, so it's not like I blew the grease out of them.
While the bearings have not completely failed, they have enough play that I am not comfortable going on our upcoming trip without replacing them.
We'll measure the slop and post it here, once I get the axles pulled.
The following 2 users liked this post by DK Custom:
mctraveler (04-25-2018),
Oogie Wa Wa (04-14-2018)
