Harley Davidson Dyna Glide: How to Replace Starter
An engine that fails to crank, or cranks slowly, is a major inconvenience. Many individuals procrastinate when it comes to replacing their starter, as it can be a pricey fix if taking it to the local dealer. Fortunately, there are replacement starters readily available and you can change it from the comfort of your garage at a fraction of the cost.
This article applies to Harley Davidson Dyna Glide models (1996-2016).
Much like a car, the starter motor on various Harley Davidson models cranks the engine over via a geared shaft that engages the teeth on the clutch sprocket. When battery voltage is supplied to the starter solenoid, the starter interlocks with the clutch sprocket and uses the primary drive setup to spin the engine over. Unfortunately, cranking over a big V-twin has a tendency to take its toll on the starter motor. Many individuals experience a starter that fails to engage or crank the engine without a bit of encouragement from a hammer.

Materials Needed
- SAE Hex (Allen) key set
- SAE wrench/socket set
- Torx bit set
- 1/4" drive ratchet and extension
- Screwdriver or chisel
- Rubber mallet (optional)
- Pliers
- Threadlocker (blue and red)
- Torque wrench
- Catch pan
- Shop rags
It is always a good idea to properly diagnose a starter issue by first inspecting for loose or corroded wiring connections at the starter button, battery and starter solenoid, as well as a burnt or damaged starter relay. If those check out, you likely have a starter or solenoid that is the culprit to your motorcycle's starting issues; this article will provide a walk-through for starter removal and replacement on various Harley Davidson Dyna Glide models.
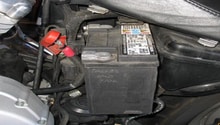
Step 1 – Disconnect and remove battery
For safety purposes, disconnect the battery prior to removing the starter. While the starter can often be replaced with the battery and battery tray in place, Harley recommends they be removed for additional working room.
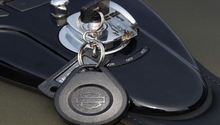
- Remove the seat, typically with just a thumb turn screw at the back of it.
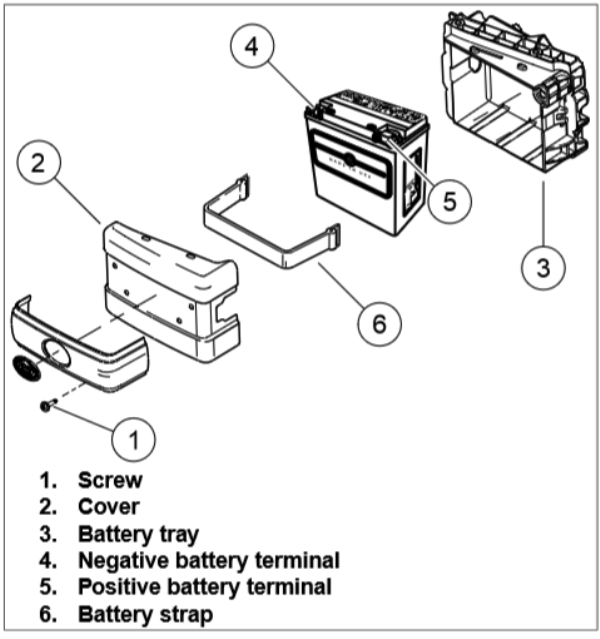
- Remove the outer battery cover fastener (1) and pull the battery cover (2) away from the battery tray (3).
- Disconnect both battery cables, beginning with the negative (black) terminal.
- Undo the battery strap (6) and remove the battery from the battery tray.
- With the battery removed, undo the battery tray fastening screws. Guide the battery cables through the tray as it is removed from the bike.
If you have a Dyna made in 2007 or later, you can skip ahead to Step 4, as you don't have to deal with the jackshaft.
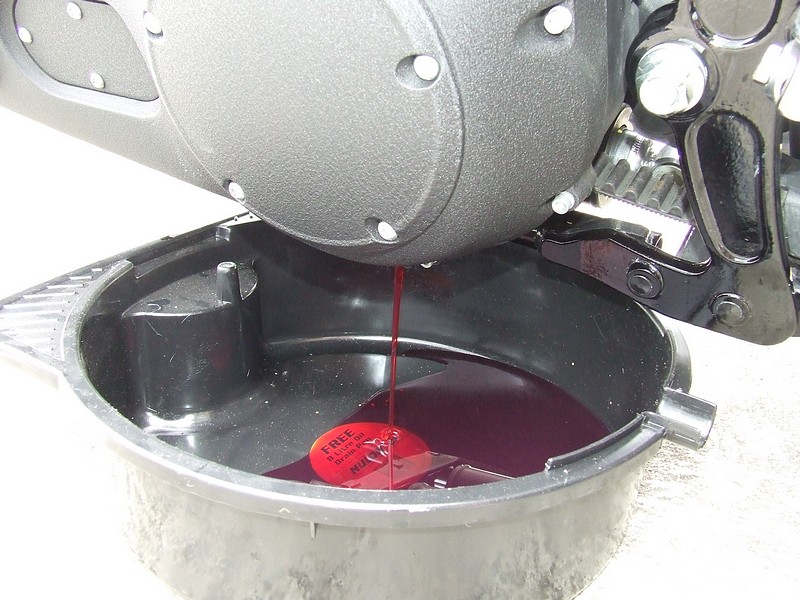
Step 2 – Drain primary (pre-2007 only)
Prior to 2007, removal of the starter requires that the starter jackshaft inside of the primary cover first be removed.
- Remove the primary drain plug located at the rear of the primary cover and allow the oil to drain into a suitable catch-pan. Be sure to retrieve the drain plug O-ring.
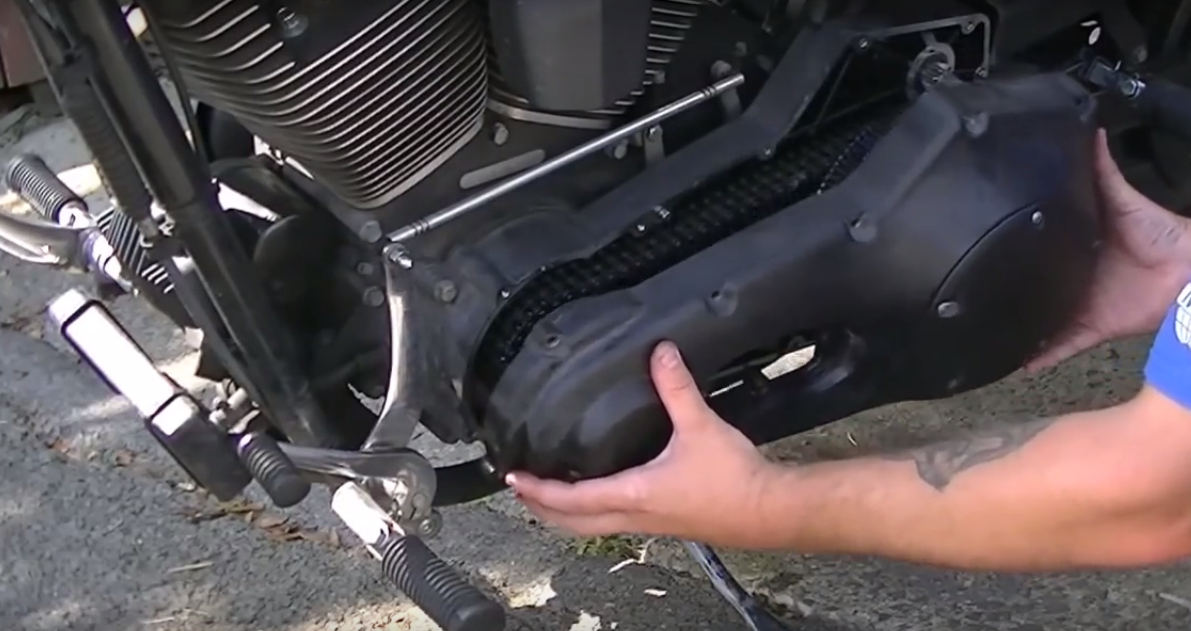
- After the oil has drained, remove the primary cover fasteners. Note that several of the fastening bolts are longer, so take note of their location during removal.
- Remove the primary cover and gasket. A small screwdriver or pry bar can be used to separate the cover if it is stuck in place. Similarly, a light tap with a rubber mallet can easily free the cover.
Step 3 – Remove starter jackshaft (pre-2007 only)
- Using a small screwdriver or chisel, bend the lock washer tab open to allow access to the starter jackshaft bolt.
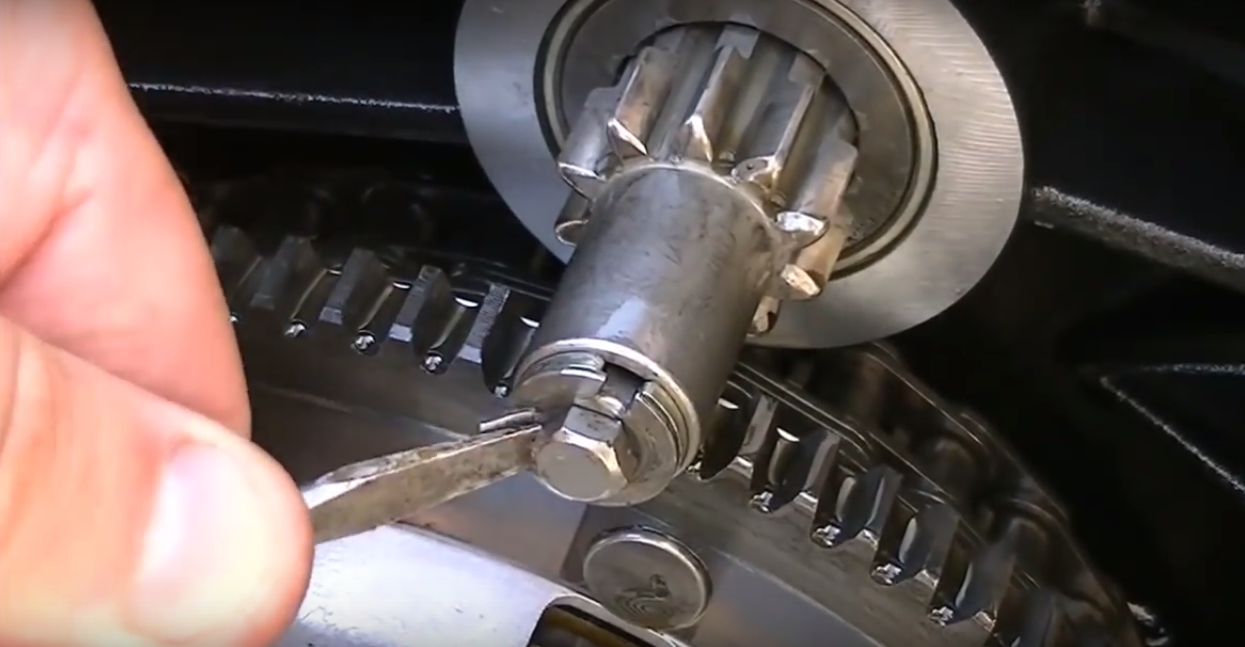
- Place a wedge or similar tool between the starter gear and clutch sprocket before removing the jackshaft bolt.
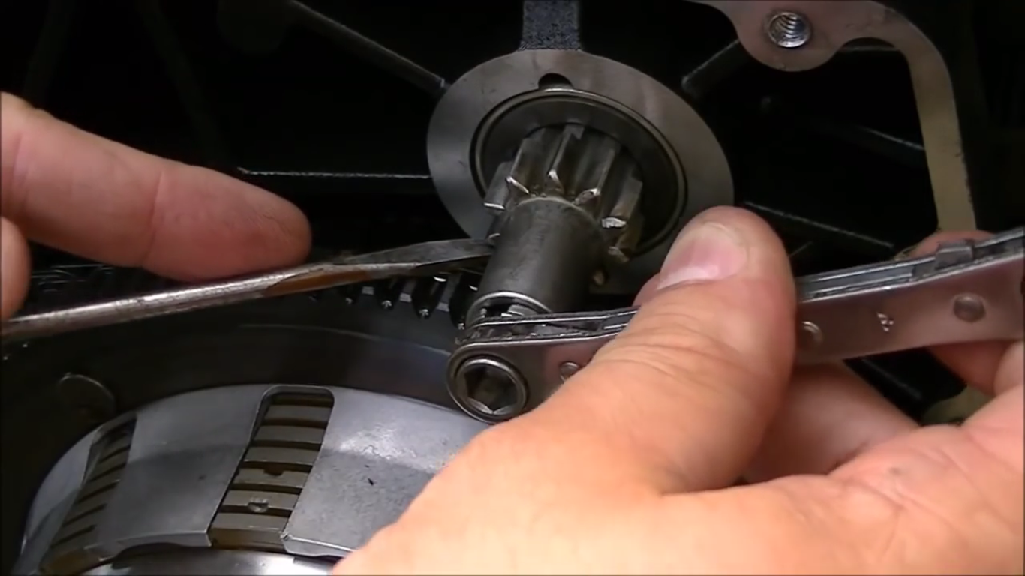
- Be careful, and make sure to collect the ball as well as spring when removing the jackshaft. If you drop it, the ball is guaranteed to roll away and hide.
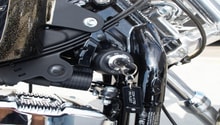
Step 4 – Disconnect and remove starter assembly
- Pull back the protective rubber boot and disconnect the positive battery cable from the terminal (yellow arrow in Figure 8).
- Disconnect the solenoid electrical plug (blue arrow).
- Remove the (2) starter mounting bolts (red circles) and remove the starter from the motorcycle. Be sure the retrieve and discard the starter housing O-ring.
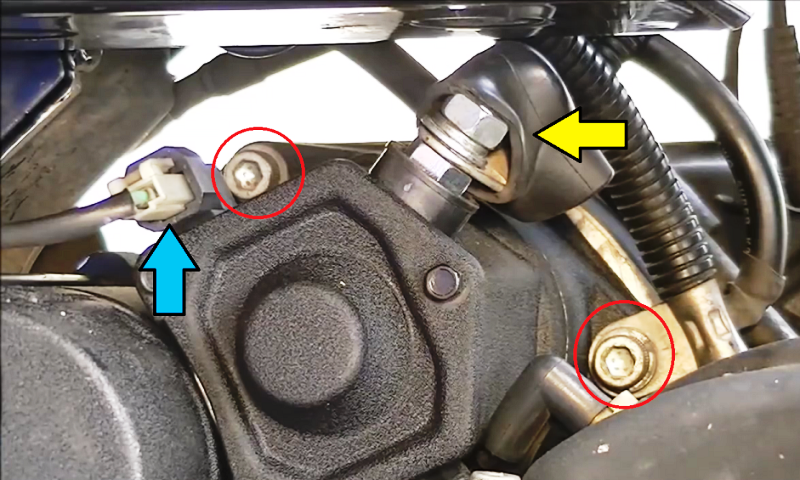
Figure 8. Starter mounting bolts and electrical connections. 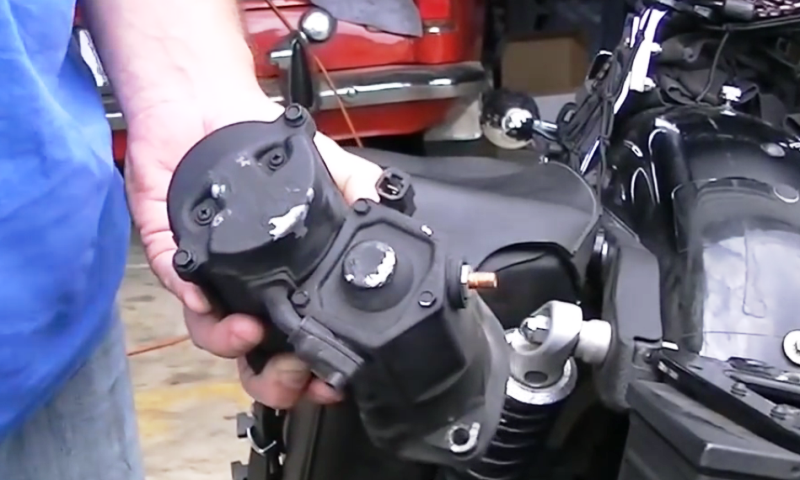
Figure 9. Starter removed.
Step 5 – Install new starter
Installation of the new starter is straightforward and is simply the reverse procedure of the removal process.
- Using a new starter O-ring, slide the starter into place.
- Apply Threadlocker (blue) to the mounting bolts and reinsert, tightening until they are sufficiently tight (torque to 27-33 ft/lbs according to the factory).
- Re-connect the starter solenoid electrical plug. Connect the positive battery cable to the terminal and tighten, but don't break it off (torque the nut to 65-85 in/lbs according to the manual). Be sure the rubber protective boot covers the terminal.
For Pre-2007 models:
- Install the jackshaft, spring, ball, new lock-washer, and jackshaft bolt.
- Torque to 72-84 in/lbs.
- Using a pair of pliers or similar, bend the lock-washer to sit against a flat side of the bolt head.
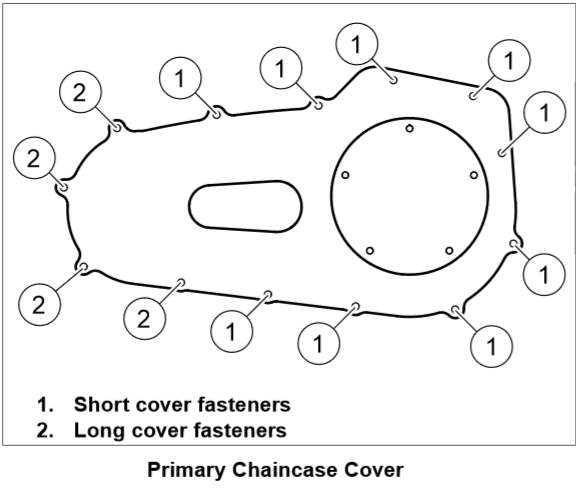
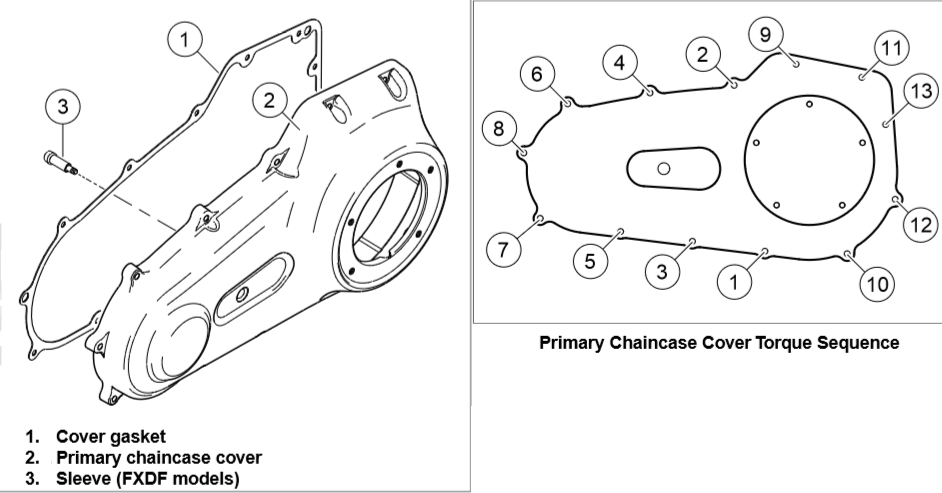
- Re-install the primary cover using a new gasket.
- On FXDX models, apply red Threadlocker to the alignment sleeve as shown in Figure 10 and torque to 15 to 19 ft/lbs.
- With all of the cover bolts correctly in place, torque the cover to 108 to 120 in/lbs in the sequence shown below (Figure 10). Using a new O-ring, install and torque the primary cover drain bolt to 14 to 21 ft/lbs.
- Fill the primary with one liter of your choice of oil.
- Reinstall the battery tray.
- Slide the battery into the tray, then re-connect the battery terminals before installing the battery cover and seat unit.
- With everything assembled, start the bike to ensure proper starter operation.
Pro Tip
Starter operation can be tested with the primary cover off. This will allow for detection of improper starter engagement that may otherwise go unnoticed if the primary cover is installed.
Featured Video: Starter Replacement
Related Discussions
- Removing the Starter Motor - HDForums.com
- Need to Change Starter Advice - HDForums.com
- 1996 Dyna Wide Glide Starter Dead - HDForums.com