Harley Davidson Softail: How to Replace Speed Sensor
The speed sensor reads the RPM of the transmission output sprocket electronically and sends that information to the computer and speedometer. If the bike's computer misreads how fast you are going, all sorts of issues can be caused, but luckily, fixing it is an easy job.
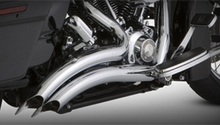
This article applies to the Harley Davidson Softail (2000-2016).
The speed sensor in your Harley Davidson Softail is designed to tell the bike's computer how fast you are moving, which in turn sends that information to the speedometer, the turn signal auto cancel feature, and the ignition as well as fuel injection maps. When the speed sensor goes bad, you can experience one of two issues: your speedometer could start acting strange, where it fluctuates in a mad matter, or your speedometer could stop working completely. You may also notice your turn signals no longer turn themselves off after a turn. Erratic idling has been reported, as well. Replacing it isn't hard if you have small hands, and only a little more time consuming if they are normal sized.

Material Needed
- 3/16 Allen wrench with extension
Step 1 – Locate the speed sensor
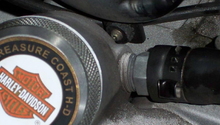
If you have never worked on a Harley before, you might assume the speed sensor is on the front or back wheel, but that would make things easy. The speed sensor on the Harley Davidson Softail is located in the transmission, at the back, and below the starter motor. Getting to it isn't easy, but replacing it is once you are there.
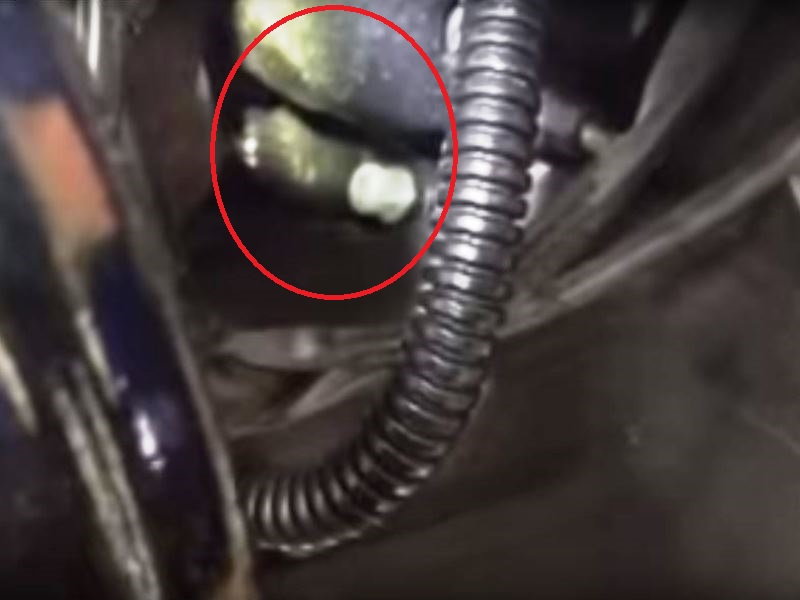
Figure 2. Harley Davidson Softail VSS location. 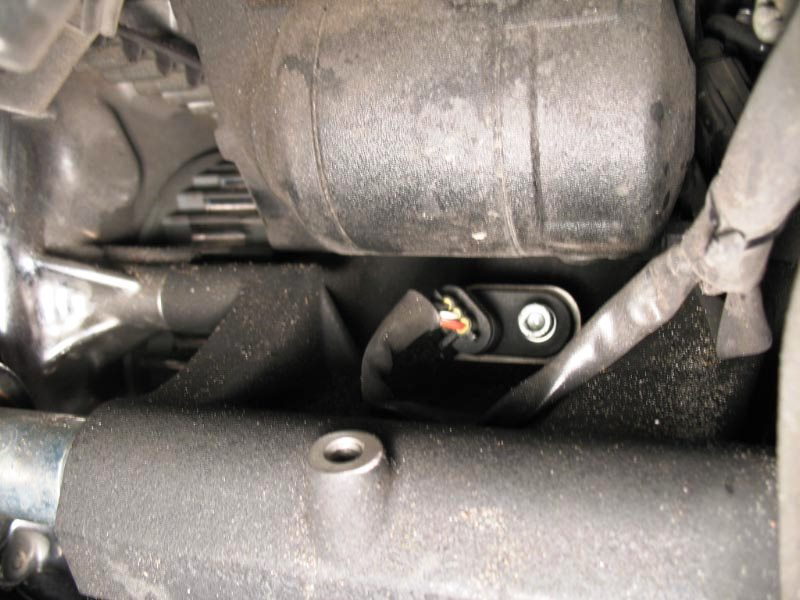
Figure 3. View of VSS after removal of splash guard.
Step 2 – Remove splash guard
The inner portion of the rear fender is a plastic splash guard that is easy to remove. On the bottom of the splash guard there is a 3/16 Allen bolt, so remove it using your wrench. Pull the splash guard to release the plastic clips and slide it on top of the tire, out of the way.
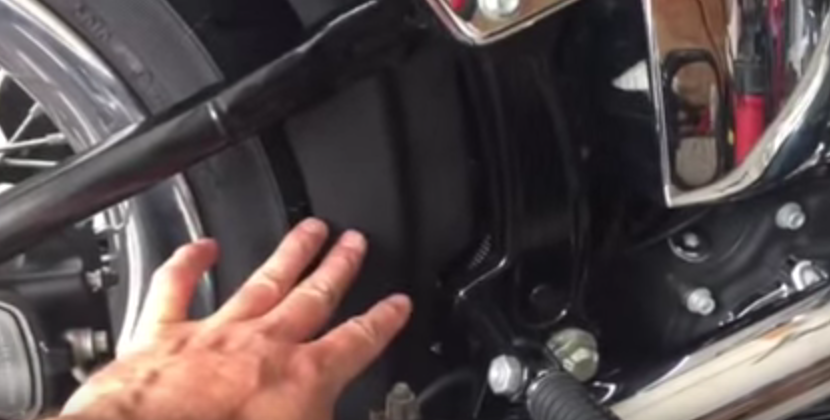
Figure 4. Remove splash guard. 
Figure 5. Remove Allen bolt to remove splash guard.
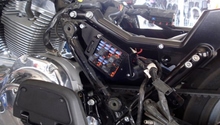
Step 3 – Remove electrical components
The speed sensor is still hidden behind another plastic piece with several electrical components mounted to it. Use your 3/16 Allen wrench and remove the two upper and one lower bolt holding it in place. There should be enough slack to move this out of the way.
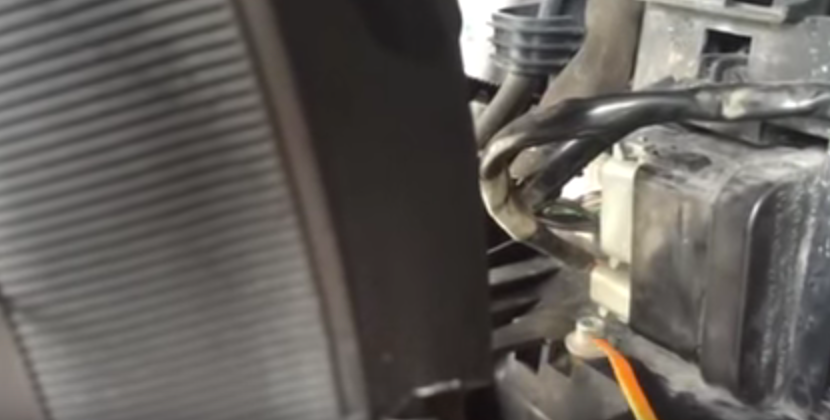
Figure 6. Electrical components lower bolt. 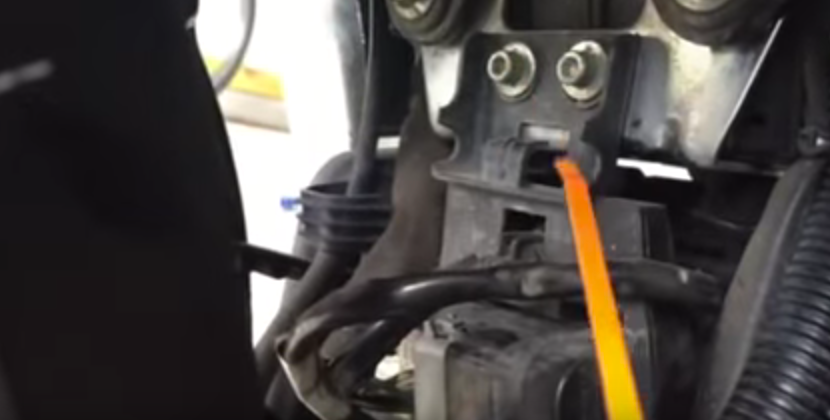
Figure 7. Electrical components two upper bolts.
Step 4 – Remove the speed sensor
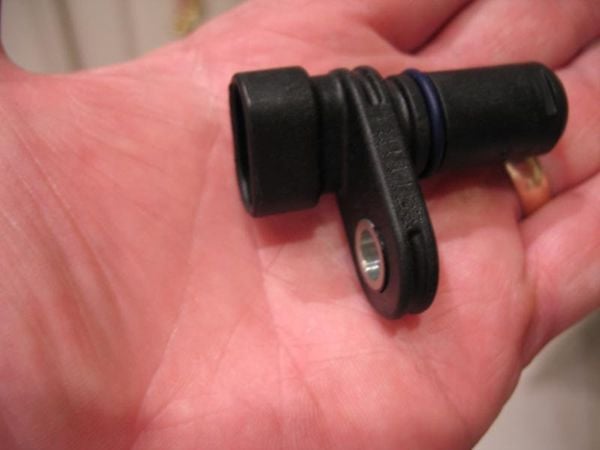
Now you can easily reach the last 3/16 Allen bolt that holds the speed sensor to the transmission. You may need to pull the sensor out with pliers because the O-ring provides a tight fit. Just grip is firmly and pull straight back. Be careful not to damage the electrical connector when you remove it by pushing it backwards.
Step 5 – Install new speed sensor
Installation is the reverse of removal. You may want to wipe some oil on the O-ring of the new part to make is easier to fit it in the hole. Press firmly until it pops in, don't expect the Allen bolt to do the work for you.
Replace the electrical components and tighten the three bolts.
Install the splash guard and tighten the Allen bolt on the bottom of it.
Featured Video: Speed Sensor Removal and Replacement
Related Discussions
- Speed Sensor - HDForums.com
- Replace Speed Sensor - HDForums.com