Harley-Davidson Restoration: ’33 VL Engine Preparation Part 2

Once the engine cases were finished, I moved on to cleaning and repairing the internal engine parts. Where possible, I chose to replace worn out parts with new replacements from Eastern Motorcycle Parts. These included the pistons, crank pin, pinion shaft, sprocket shaft, valves, valves springs and a variety of nuts, shims and washers. Still, I was left with plenty of original parts that needed a lot of attention.
I started with the cam cover, which on a V-series engine is not just a shiny cover. Unlike modern Harleys, V-series cam covers don’t just cover the cam chest, they also house two oil pumps and the timer. My cam cover was by far the dirtiest engine part and required a good scrubbing with lacquer thinner before it was disassembled and put in the blasting cabinet.

Once the cam cover and all its associated parts had been blasted, wire brushed and cleaned with lacquer thinner, I moved on to the cams. Similar to a modern Sportster, the V-series uses four gear driven single lobe cams. I was lucky enough to have a “matched set” which means my four cams have been together since they left the HD factory. When HD technicians assembled my engine back in 1933, they hand matched all four cams so that they fit the engine properly and their gears meshed together correctly. You can use a set of mismatched cams for your engine without any mechanical issues, but a matched set will run smoother and quieter. The one issue I had was that my #4 cam was damaged. If you look closely at the following picture, you can see that some of the threads are broken on the end of the shaft. These threads act as a worm gear and drive the oil pump, so they had to be repaired.
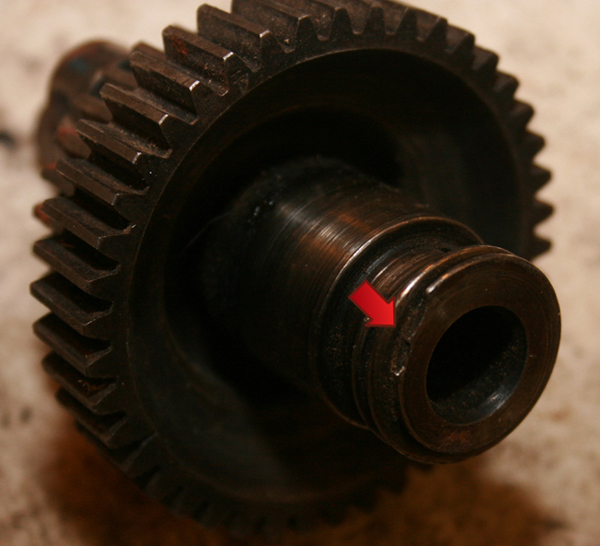
When I first discovered those broken threads, I thought “there goes my matched set of cams”, but it turns out that V-series cams have an interesting design feature. That feature being that the shaft is a separate piece and can be removed. All it took was finding a replacement shaft and then pressing out the damaged shaft and pressing in the new one. Check out my article on cam repairs to see the entire process: Cam Repairs
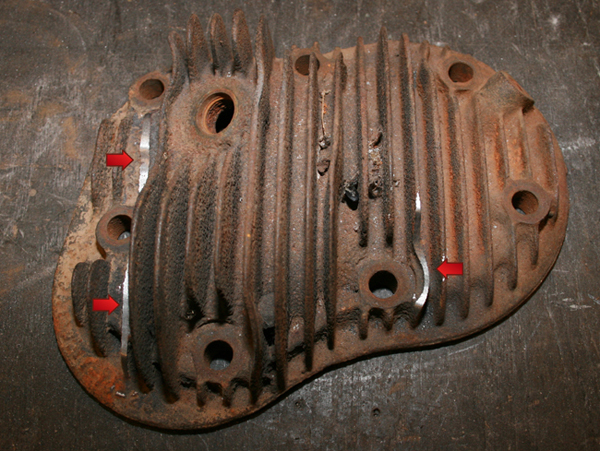
Working my way up the motor, I next turned my attention to the heads and cylinders. My cylinders were in good shape without any broken fins and only a slight overbore (.010″ and .005″). All they required was some time in the blasting cabinet to clean off the old paint and then a fresh coat of aircraft primer. The heads, while perfectly usable, were not in the same pristine condition. Flathead engines tend to build up carbon in the combustion chamber, so every so often you need to remove the heads and clean them up. This is not a big deal since the only thing in the heads is the spark plugs (the valves are located in the cylinder, hence the name sidevalve), but if your not careful removing the head bolts you can break off the cooling fins. That was the case with my heads, which both were missing parts of several fins.
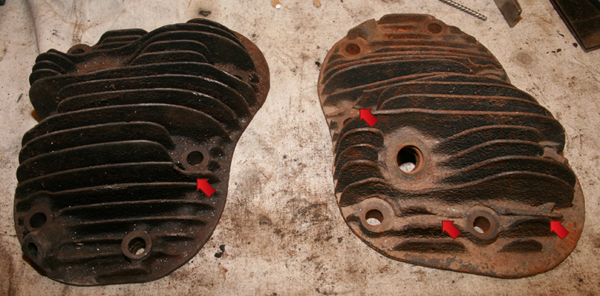
It is possible to weld new metal onto the heads to rebuild the fins, but mine really weren’t in that bad of shape. Instead I chose to use a grinding wheel to smooth out the broken edges and blend them visually with the other fins. Once their painted black and installed you’ll hardly notice the “massaged” fins.
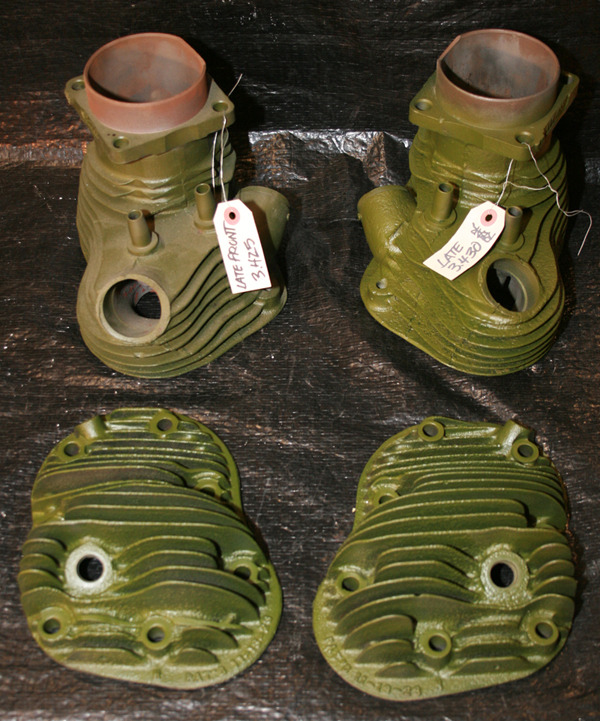
With the fins repaired, the heads also were sent to the blast cabinet for cleaning before getting a nice coat of aircraft primer. They are green now, but will be top coated with black before assembly. This part of the process is covered in more detail in the following article: Head and Cylinder Prep
Still remaining in the clean up pile were my tappets, fly wheels, connecting rods and intake manifold. These all needed a thorough cleaning, but thankfully, no repairs. So they got the same treatment as all the other parts, blast cabinet followed by wire brushing and a lacquer thinner wash down to finish. Here’s how they all turned out.

What a difference a little elbow grease can make on a pile of old parts! Next it’s on to rebuilding the three speed transmission.
Sponsored By
 |
|||
 |

|
||
 |
 |
 |
 |
 |
 |
 |
 |
 |
 |
 |
 |
 |
 |
 |
 |
 |
 |
 |
 |
 |
 |
 |
|