Generator 75 Ironhead
#1
 02-16-2014, 08:37 PM

Join Date: Jan 2010
Location: Spokane Washington
Posts: 19
Likes: 0
Received 0 Likes
on
0 Posts
I am trying to put a new generator in my Ironhead and have a couple of questions. First I need to get the gear off of the old one and am not sure how without damaging anything and second I need to know how to polarize it correctly. Any feedback would help.
Thanks!
OLD =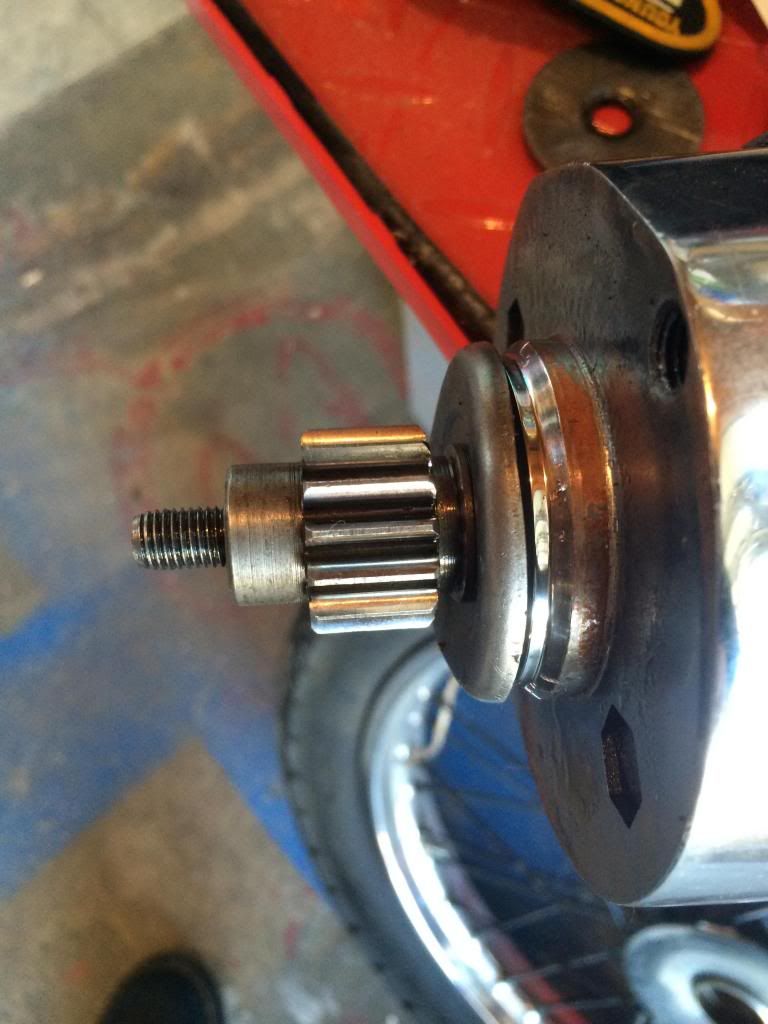
NEW =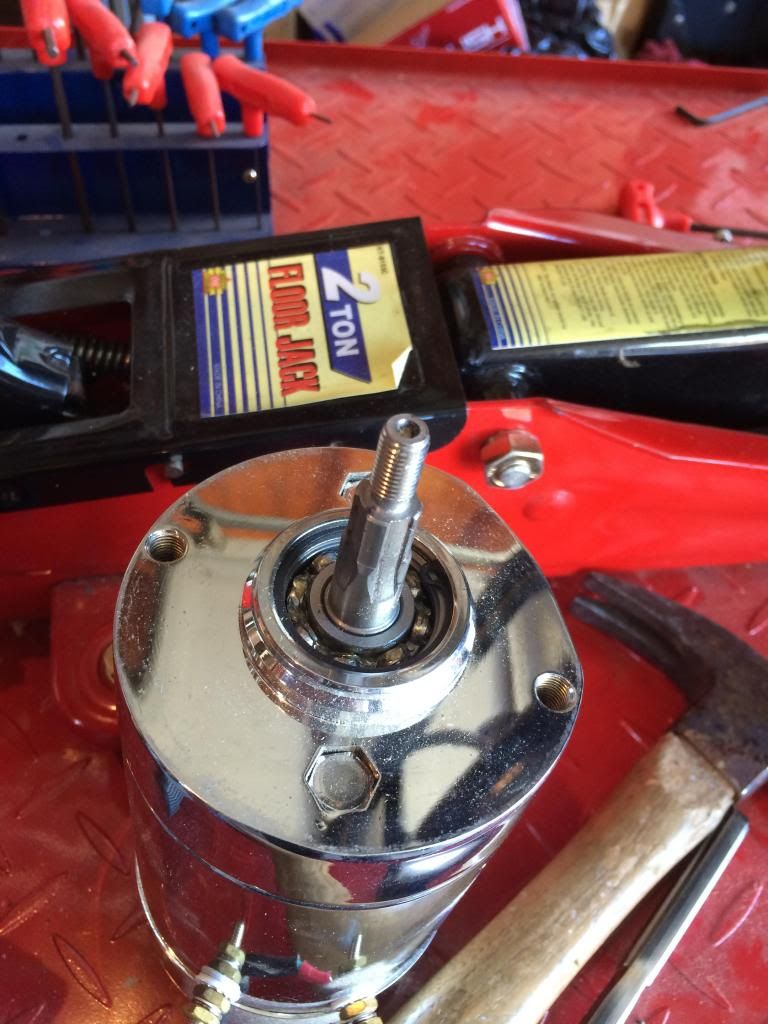
Thanks!
OLD =

NEW =

#2
02-16-2014, 10:18 PM
Use a 2-jaw or 3-jaw puller. Buy at Princess Auto or Harbor Freight. I use a 2-jaw model. If there is a cheap one and a high priced one get the latter - if the gear is on tight the cheapie will self destruct.
Before removal note carefully the direction in which it is installed. It will not go on in reverse and the gen will get wrecked if you try too hard.
Some notes re: polarizing the gen ...
10. Polarizing the Generator
With the generator fully installed in the bike, all connections made, ignition off; connect one end of a jumper wire to the gen A, and momentarily touch the other end to the battery +ve terminal.
I keep a jumper permanently on my workbench for this. About 3 ft long with an alligator clip on one end for the A terminal.
Usually [but not always they say], you will get a spark at the battery terminal and a light clunk sound from the gen[listen closely for this].
11. Polarizing the Generator - The Complete Story
1. with the gen on the bench
[i] jumper the gen A to batt +ve
[ii] momentarily jumper from gen F to batt -ve
Note: This can be done the other way around,
[i] jumper gen F to the -ve batt
[ii] momentarily jumper gen A to batt +ve
2. with the gen on the bike, wires not connected
[i] jumper from gen F to a good ground
[ii] momentarily jumper from gen A to batt +ve
Note: This technique is preferred over #3 because the good ground is better than relying on grounding the F thru the reg.
Note: As with #1 this can be done the other way around.
3. with the gen on the bike, all wires connected
[i] momentarily jumper gen A to batt +ve
Note: This is technically the same as techniques #1 and #2 as the F is grounded thru the reg.
4. For bikes with a mechanical reg [1959 to 1977]
Momentarily jumper between BAT and GEN on the reg.
Note: this is technically the same as all of the other techniques as BAT is connected to batt +ve and GEN is connected to gen A.
5. For bikes with a Cycle Electric Generator/Regulator
On the Cycle Electric DGV-5000 generators you have to remove the brush cover and touch a wire from the positive terminal of the battery to the positive brush lead of the generator to polarize it. You can't polarize the generator from the external terminals. (One of the terminals is the battery terminal, and the other has an internal diode.)
You have to try pretty hard to reverse the polarity on those generators and they rarely need to be polarized.
For clarification: Cycle Electric does have a voltage regulator (the CE-540) which looks very similar. It will bolt up to a standard Model 65A generator and has external leads which connect externally between the regulator and the generator.
The CE-500 bolts to a Cycle Electric DGV-5000 generator and the regulator is internally wired to the generator.
- With the CE-540 setup the generator can be polarized by running a lead from the battery + to the "A" terminal.
- With the CE-500 you need to polarize the generator at the positive brush lead.
#3
02-17-2014, 05:27 AM
Seasoned HDF Member
#4
02-17-2014, 06:34 PM

Road Captain
Use a 2-jaw or 3-jaw puller. Buy at Princess Auto or Harbor Freight. I use a 2-jaw model. If there is a cheap one and a high priced one get the latter - if the gear is on tight the cheapie will self destruct.
Before removal note carefully the direction in which it is installed. It will not go on in reverse and the gen will get wrecked if you try too hard.
Before removal note carefully the direction in which it is installed. It will not go on in reverse and the gen will get wrecked if you try too hard.
+1
I also use a socket slightly larger then the threads on the Armature, to protect the threads from damage if I think the Arm is still ok, when using the puller to remove the gear.
then fix the first unit and keep it as a spare.
s
Last edited by scottfisher; 02-17-2014 at 06:39 PM.
#5
02-18-2014, 11:48 AM
Join Date: Jan 2010
Location: Spokane Washington
Posts: 19
Likes: 0
Received 0 Likes
on
0 Posts
#6
02-18-2014, 01:19 PM
Road Captain
To my knowledge, Cycle Electric has never produced a chrome genny. Based on the quality of work they produce, I doubt if they would.
Chrome will hold heat; heat kills gennys.
This leads me to wonder where your genny was manufactured.
Hopefully it will last you a long time. When it fails, put Made in USA parts into it...it will last even longer next time.
Some genny mount regulators are great...really great actually, they will monitor the genny and reduce the output if the genny is working too hard. Others...not so much. Again, the quality seems to be in the Made in USA equipt.
s

Thread
Thread Starter
Forum
Replies
Last Post