
Nightster Winter Makeover
#1
 11-11-2011, 09:42 PM

I'm starting this thread to document over the coming months the complete make over of my Nightster. I don't know if anyone is going to follow my ramblings with any interest but in the best tradition of this forum, my intent is to share what I'm doing periodically, in as much detail as possible, so that others can evaluate my methods, approach and techniques and either learn from them or have a good chuckle at my fumbling, bumbling ineptitude as I try to make the bike my own. And don't worry, I will post pics along the way.
A bit of history to start this off. I started riding in my teens about 40 years ago. My first bike was a Kawasaki 100 dirt bike and the following year I graduated to a 250cc Green Streak and raced TT scrambles and flat track for three years. I owned a couple of bikes after that, both enduro and street bikes but when I got out of the service and got married sold them all and basically went about 20 years without doing any significant riding. My kids grew up, moved out and I got the itch to ride again. I bought the Nightster in June of this year, my first Harley. It's an 07 and it had 150 miles on it. That's right - 150 miles. According to the owner, he bought it from a dealer in 09 who stated the original owner bought it for his wife who quickly decided she didn't like it and sold it back to the dealer. The guy I bought it from brought it home, parked it and the next day rolled his car, broke his back and was laid up for over a year recovering. When I found it the bike had been sitting in an unheated barn since then. I looked it over pretty good, wary of the length of time it had been sitting idle. It started right up and ran great. I took it for a short spin on the guys property (this was a rural area) and it ran without a hitch. Everything looked good so I bought it for $6500.
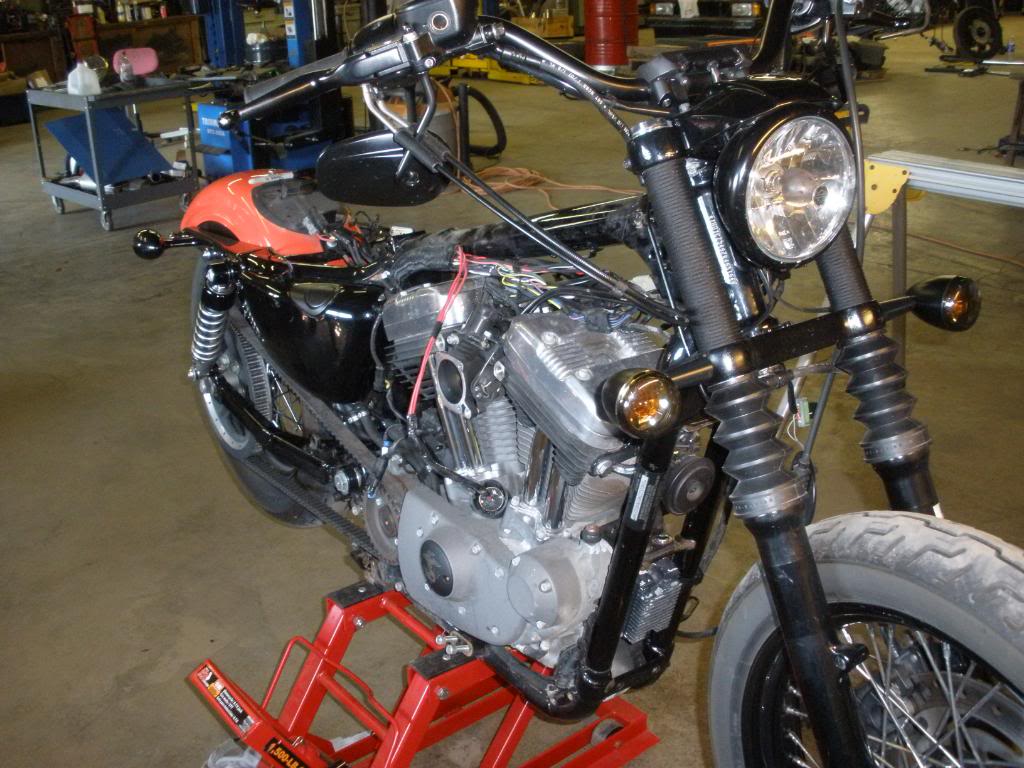
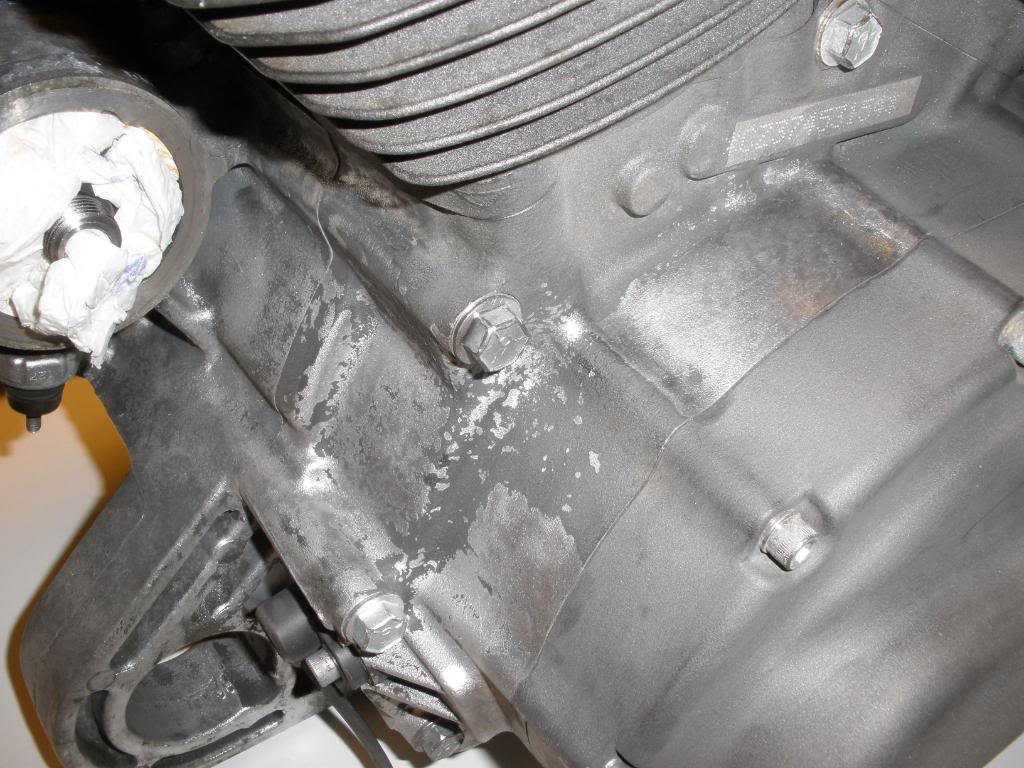
And it has been a great bike. I put almost 1500 miles on it over the summer. But it didn't take long to discover a problem, the only problem -the finish on the engine and frame is severely compromised. Apparently, sitting in the unheated barn for two years really phuckted with the paint. I probably should have figured that. After a few weeks of riding I discovered several areas on the frame and swing arm where the paint was chipping away with rust underneath it. Then the paint on the lower triple clamp started pealing away, with severe oxidation of the aluminum. To top it off, the engine has the same oxidation problem, particularly the entire bottom of the engine, where the paint was bubbling and pealing from all the oxidation.
Ok, so I know at that point that I'm gonna have to do some work to refinish it. Which is fine, because I only had to spend a few weeks reading the posts on this forum to know that I wanted to make some significant modifications to the stock Nightster anyway. I love the orange on black paint scheme but I quickly decided I was going to go for the blacked out look overall. I did a bunch of the easy and typical mods over the course of the summer - flipped the mirrors, painted the stock A/C black, wrapped the upper fork tubes with black paracord, removed the reflectors on the forks and painted the rear refectors black. Got a set of highway pegs off of ebay and painted them black. Moved the turn signals off the bars with the HD relocation kit, smoked lenses from ebay. Bought a set of black SE slipons and painted the heat shields black. Eventually, I did the mreed A/C mod, using a mounting bracket with integrated breathers, also an ebay purchase, then removed the front fender. And because my wife wants to ride along on occasion I got the HD pillion seat and quick detachable sissy bar that only go on (5 minute install) when we go 2-up.
That took care of the summer, but with winter fast approaching I started seriously thinking about a major makeover, mainly to take care of the finish on the engine and frame, but also to really make it mine. I like the fat front tire look and started exploring that mod, and it will be the center piece of the whole bike make over. I've pm'd both mreed and joebotics, both of whom have offered some great advise and insight over the weeks and months. And in September I started putting the parts together to do this. I'm also going blacked out as much as possible, keeping the orange and black colore scheme. I really like the solo bobber look to, but for this bike I have to keep the 2-up capability so I can take the wife for a ride on occasion. I'm hoping my next build will be a hardcore hardtail, but for now I have to make some compromises to ensure domestic tranquility.
One last note - I am not a mechanic. I am handy with a tool box, do most of my own plumbing, electrical and construction work around the house. In my college days I did some auto mechanic and machine shop work, tinkering with engines and trannys, doing some welding and minor fabricating. I can turn a wrench, but I don't know much about actually tearing into an engine and making it run. And I don't know squat about Harleys. I am learning as I go.
So, let me show you where I am so far:
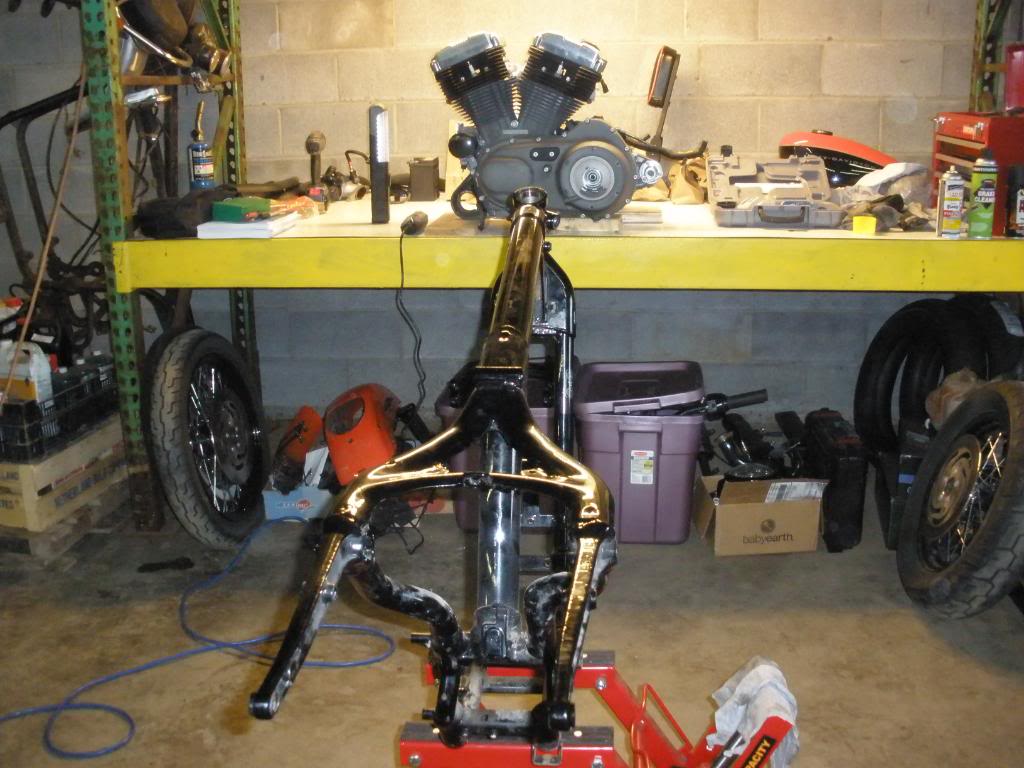
The first week in October I put the bike in my son-in-law's shop and tore it down to the bare frame.
This was kinda scarey because aside from the paint/oxidation problem, the bike ran great. I still lay awake at night wondering if I will ever get this thing back together AND running. But, I put my fears aside and pressed on.
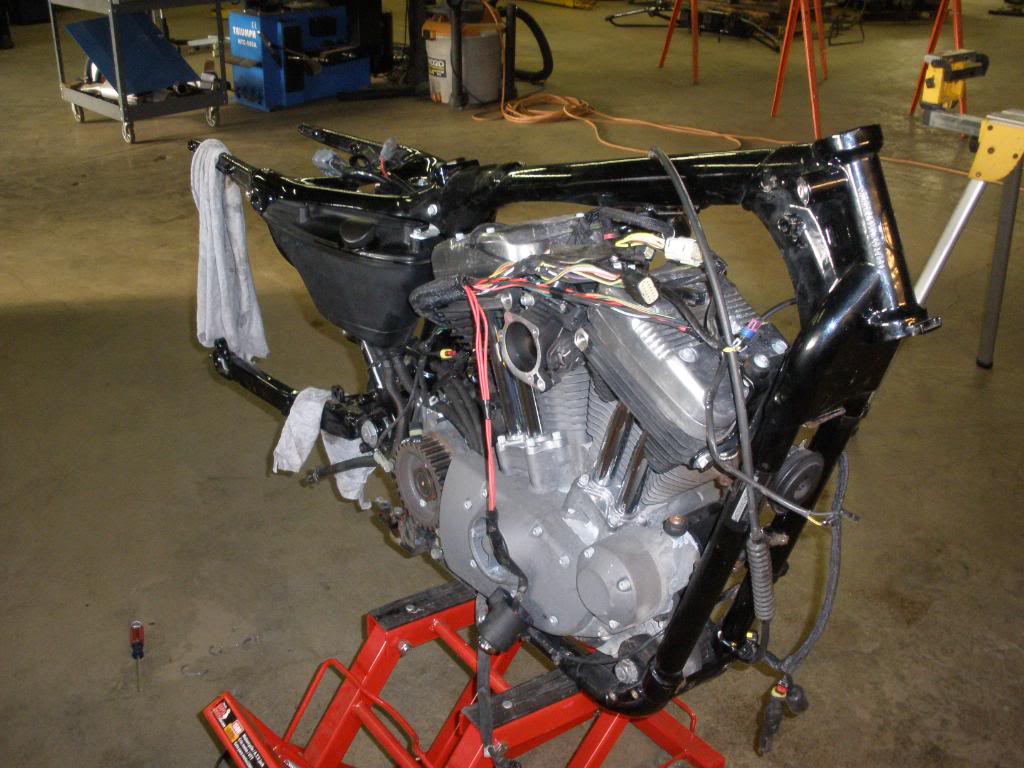
Took me about 6 hours over 2 days to tear it down to the bare frame.
Here's my work area in one corner of the shop.
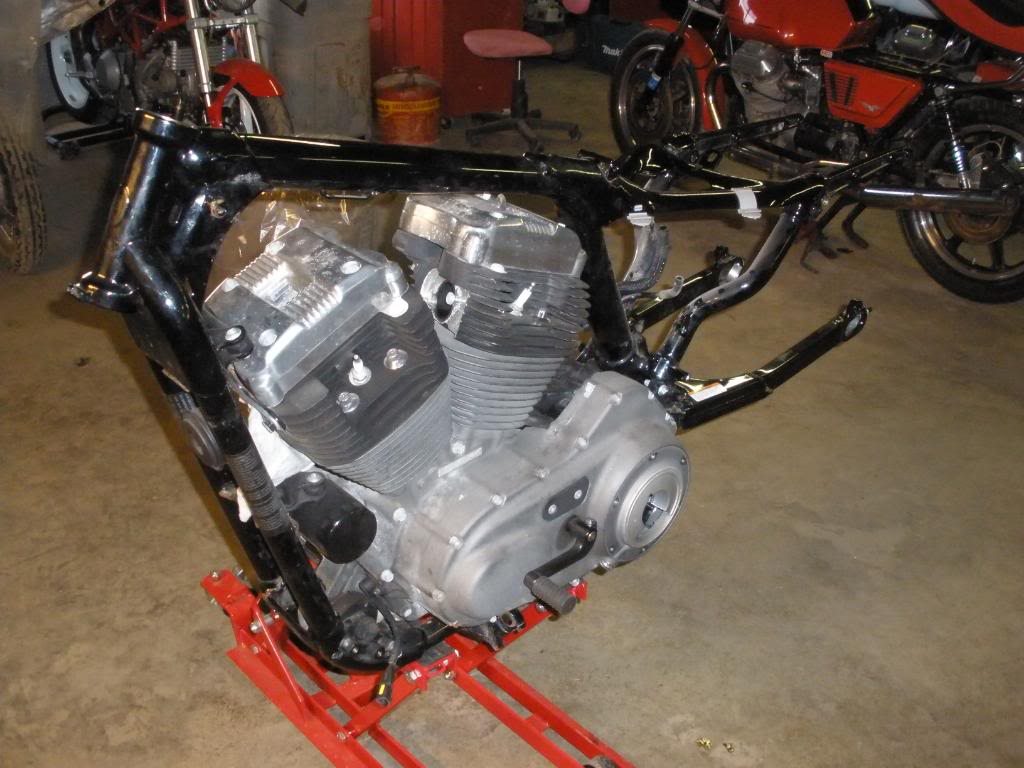
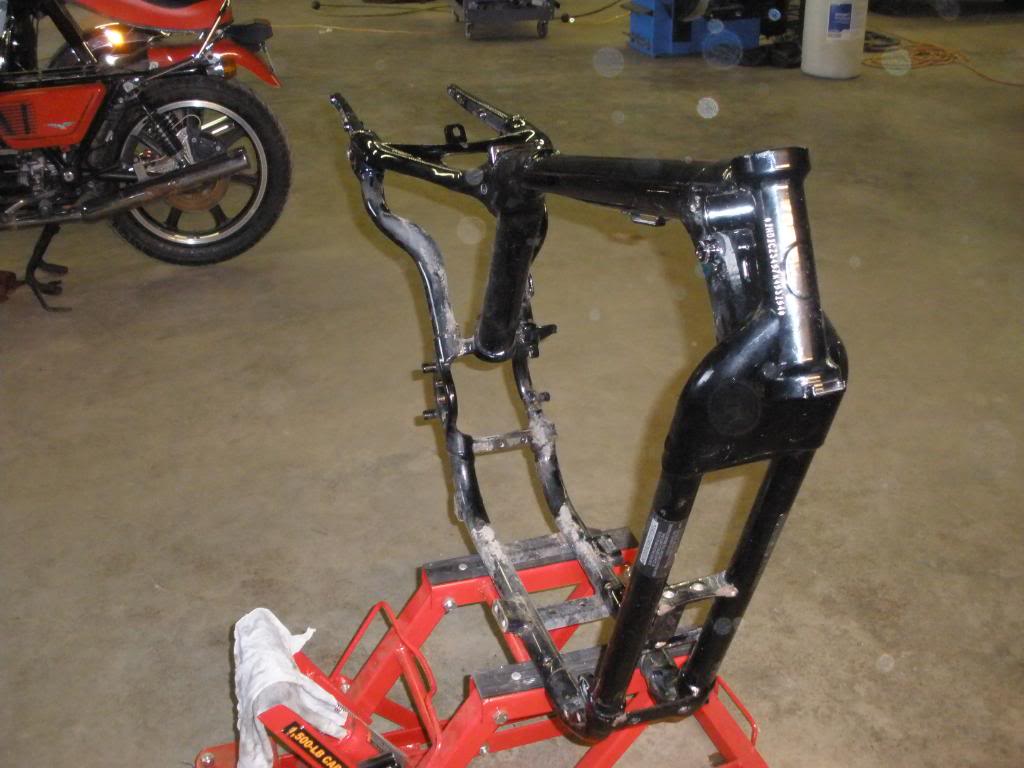
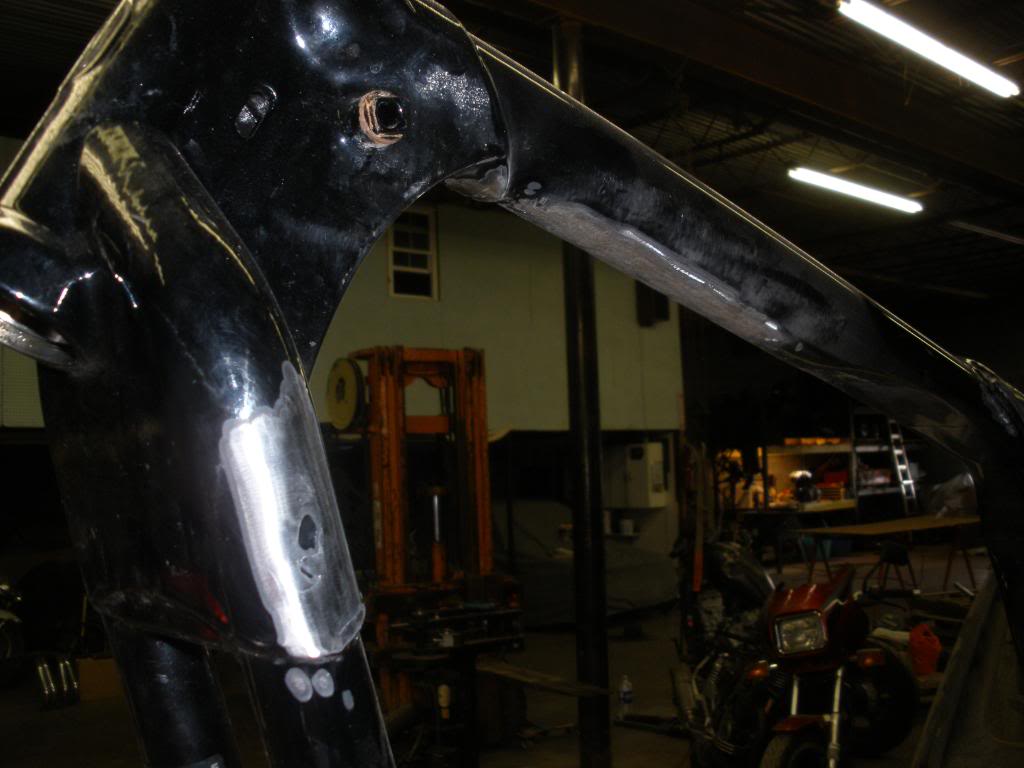
I spent a few hours cleaning up the frame.
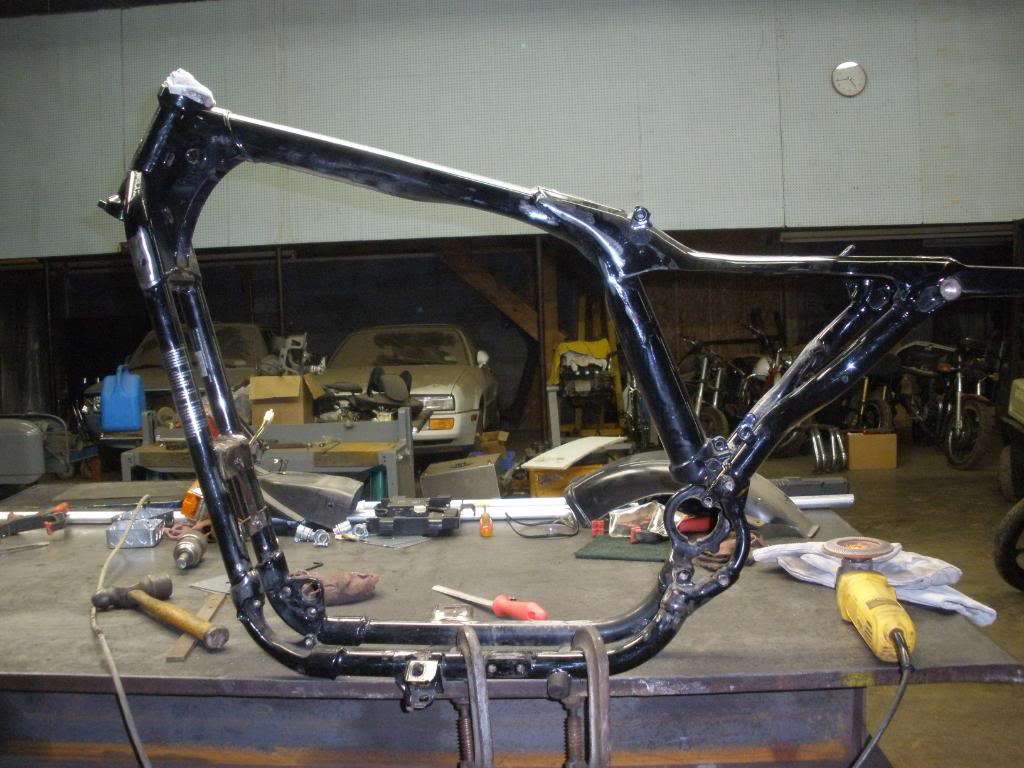
Cut off the little bracket under the main tube that as far as I can see served no purpose, and smoothed out some of the crappy HD welds.
I've spent some time cleaning up the engine, trying to get the bad paint and oxidation off and down to the bare aluminum. This is a royal pitb.
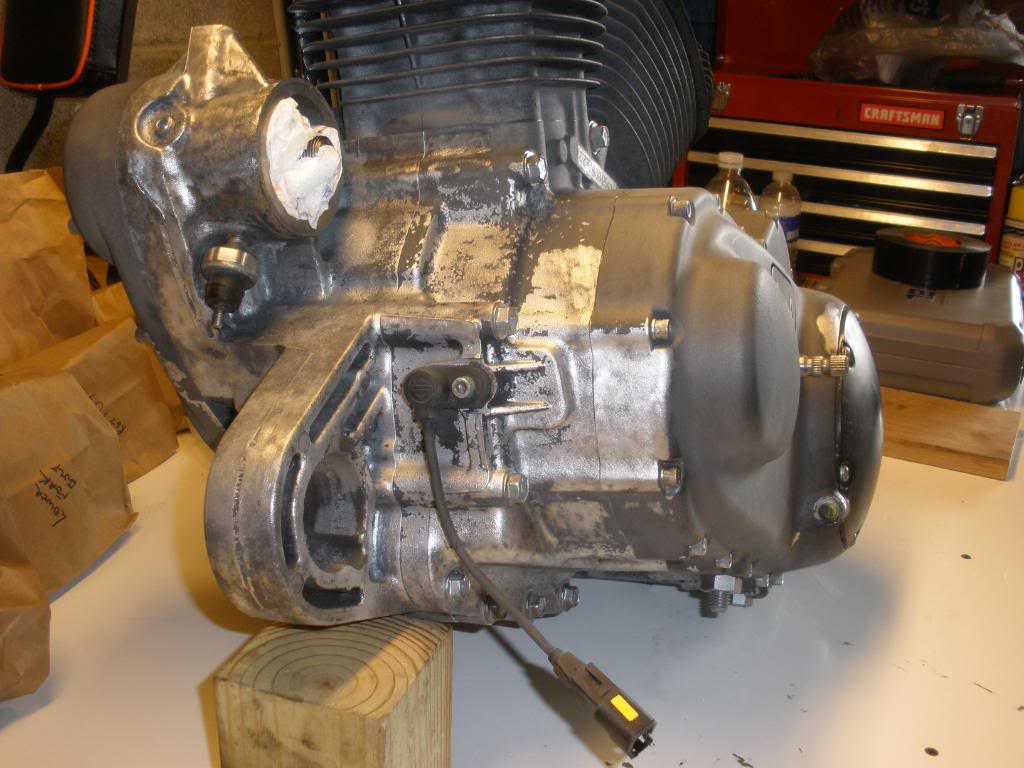
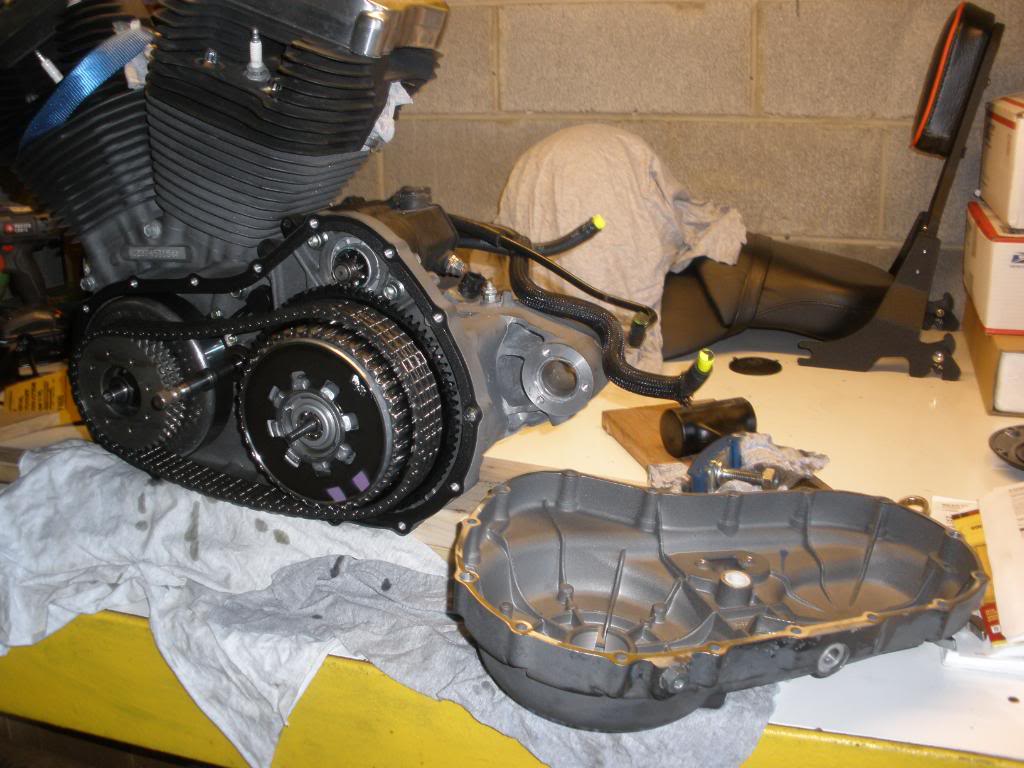
I pulled the primary cover...
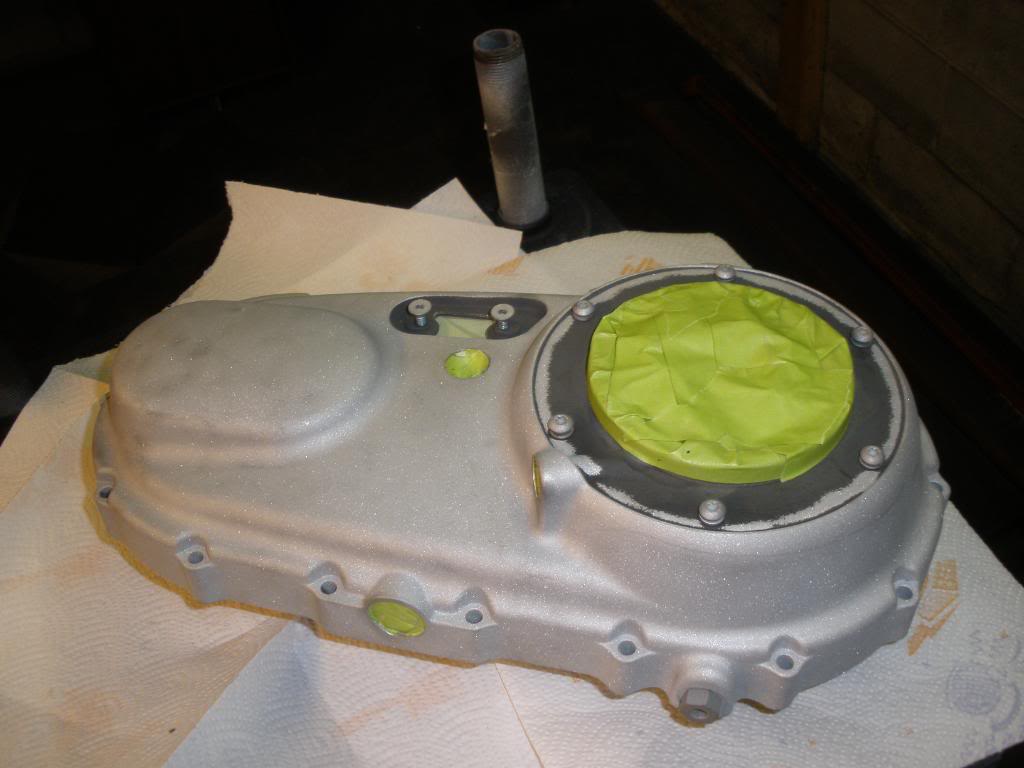
Sandblasted it...

And then attempted to paint it with HD wrinkle black engine paint.
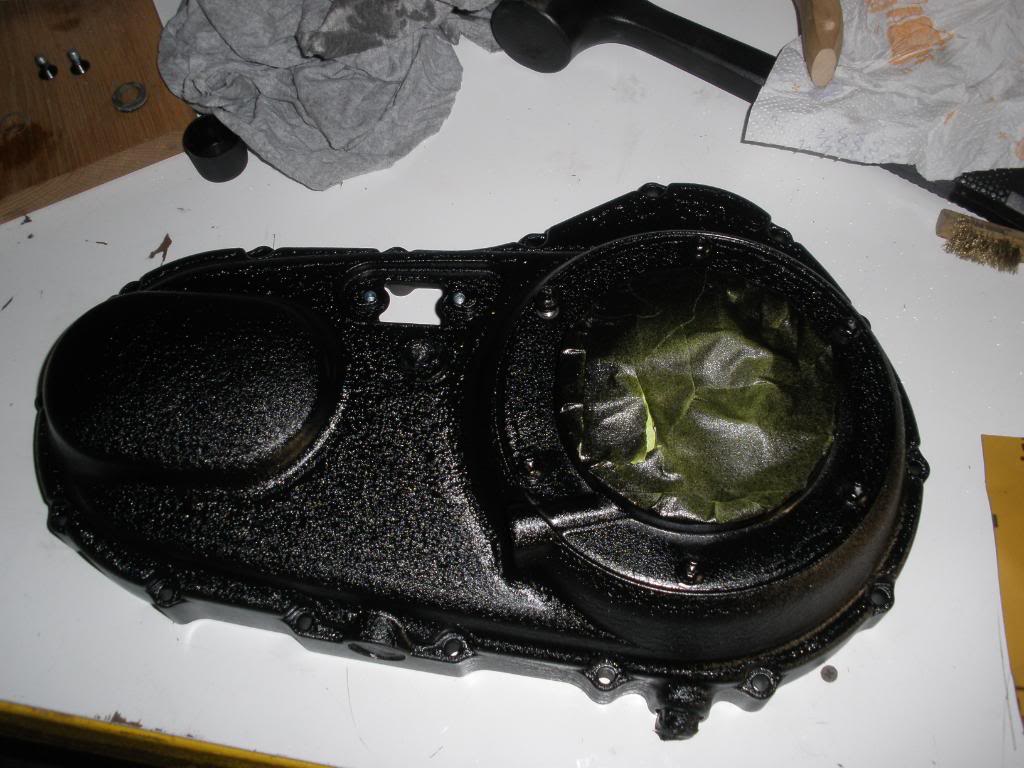
I really didn't like the way this turned out, so my plan now is to reblast it and have it powder coated, along with the primary cover and a host of other parts.
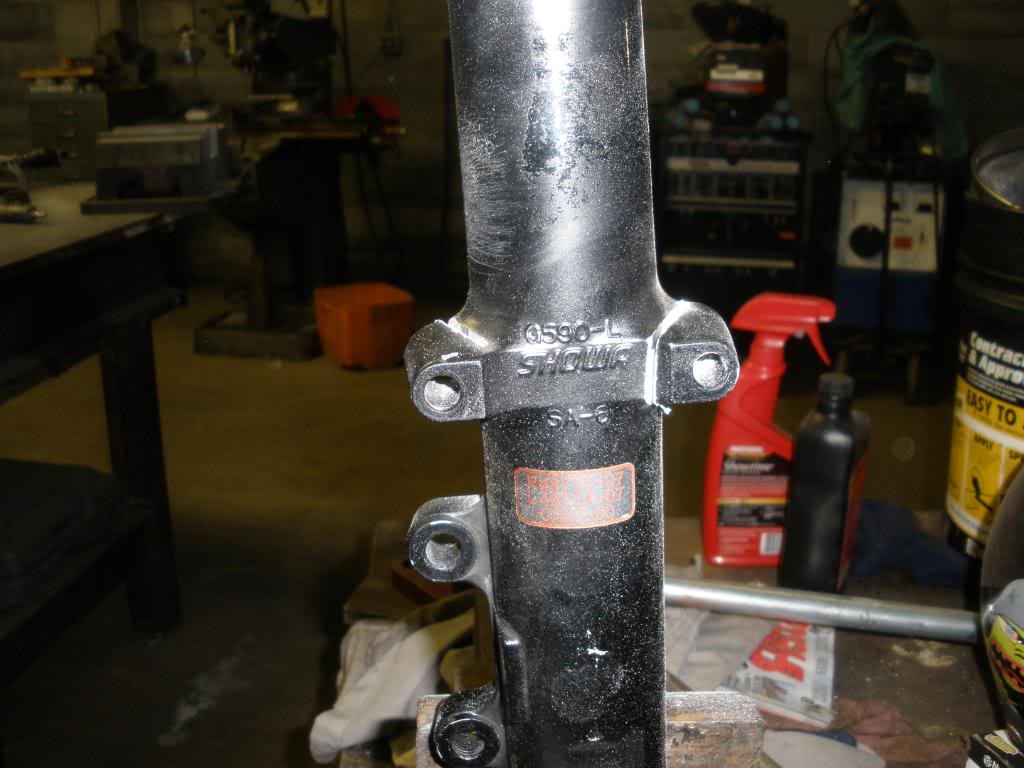
Already at the powder coater are the wheels and lower fork tubes. Since I've decide I won't be running a front fender I took the fender mounts off the fork tubes before I dropped them off for powder coating.
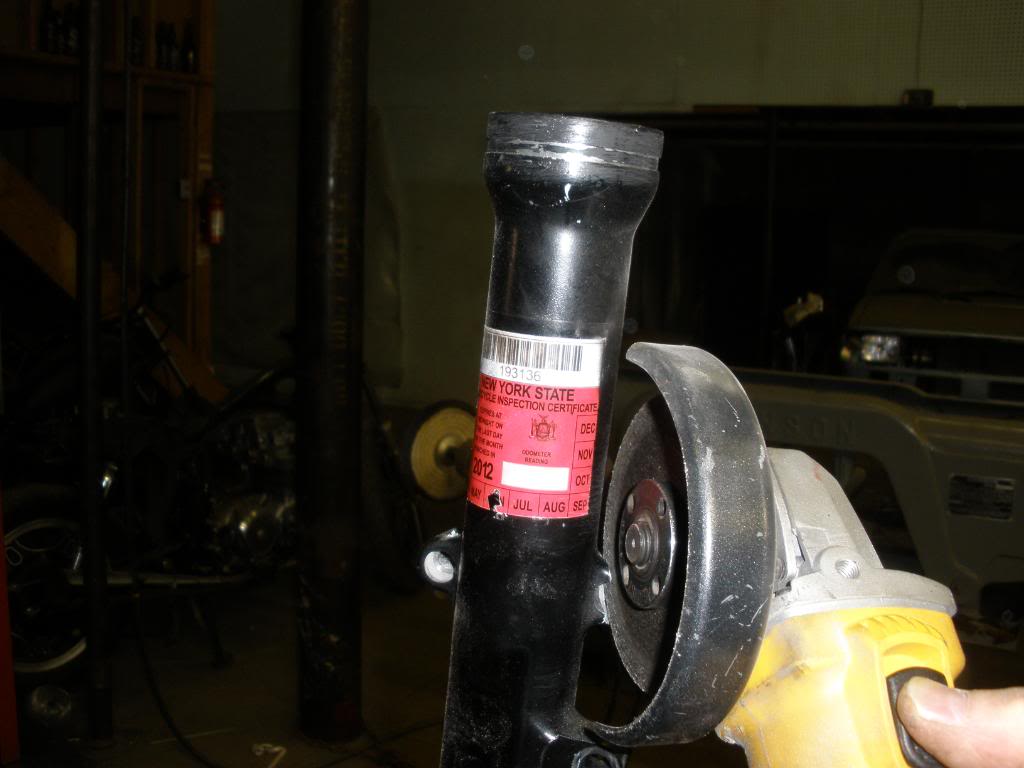
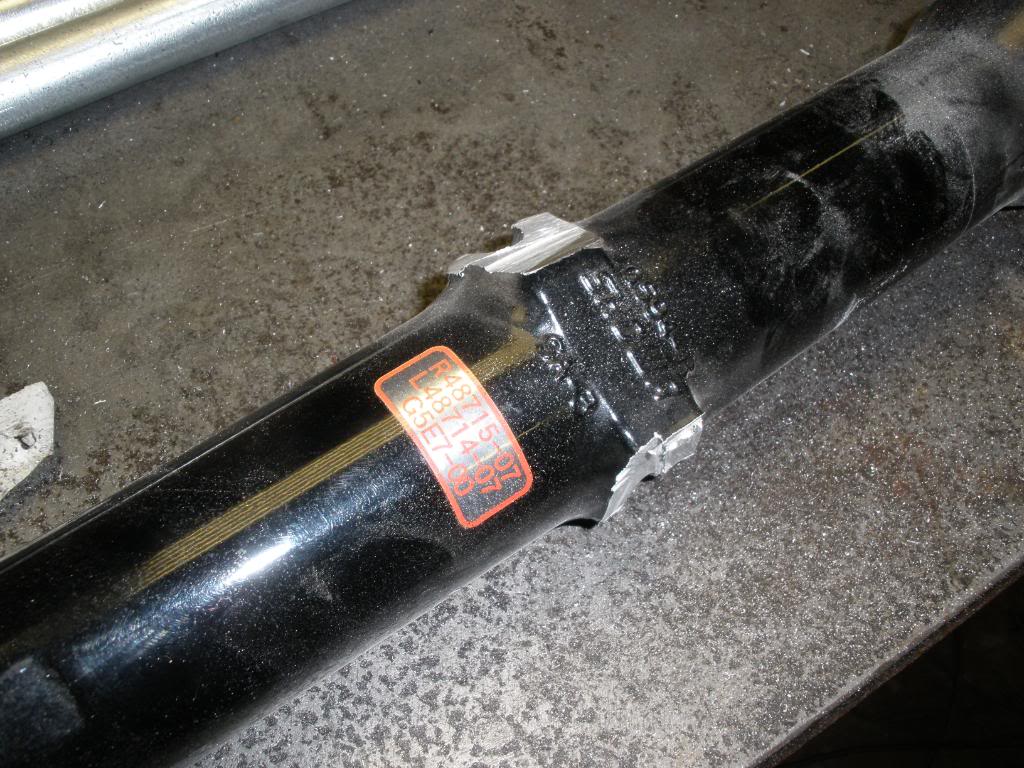
I used a grinder with a cutoff wheel for the rough cut, then a grinder with grinding wheel to get it down close to the tube.
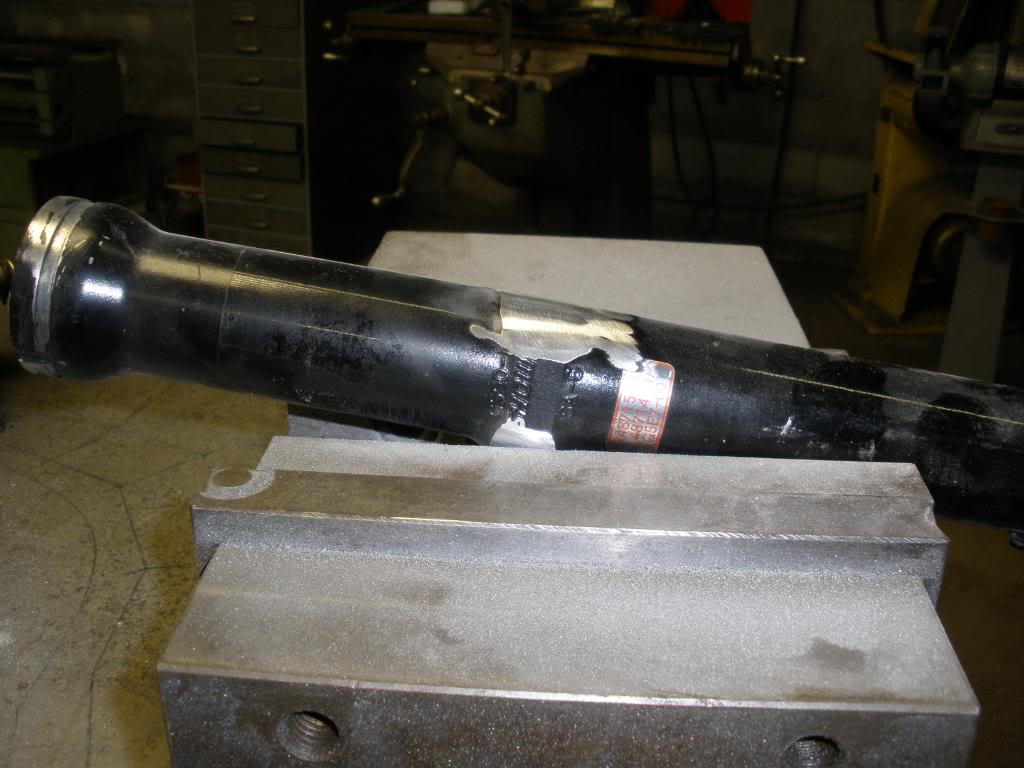
Then I used a file and smoothed it down to the tube diameter by hand.
And finally, I chucked them up in the lathe and finished them off with some emery paper.
Here's the finished product, ready to go to the powder coater.

Ok, that's it for now. This is a complex project with lots of details. I've already done quite a bit and I will update this thread with more detail later on (today I chopped the sproket cover and it turned out great! Pics to follow in a few days). On the agenda for tomorrow - we're gonna chop the frame and add 3 degrees of rake to the front end. Well, I'm not doing it actually. I'll be assisting my son-in-law, the machine shop owner and bonefide motorcycle mechanic/welder/fabricator extrodinaire. Understand, I've done all the work so far on this makeover myself. But chopping the frame is out of my league and he was gracious enough to offer to do it. The plan is to get it done tomorrow and if necessary finish up on Sunday. Over the next couple of weeks I want to get the frame done and into the powder coater. At that point I can get the new front end on it and start rebuilding. I will keep you posted on the progress.
Coming up in future updates:
A bit of history to start this off. I started riding in my teens about 40 years ago. My first bike was a Kawasaki 100 dirt bike and the following year I graduated to a 250cc Green Streak and raced TT scrambles and flat track for three years. I owned a couple of bikes after that, both enduro and street bikes but when I got out of the service and got married sold them all and basically went about 20 years without doing any significant riding. My kids grew up, moved out and I got the itch to ride again. I bought the Nightster in June of this year, my first Harley. It's an 07 and it had 150 miles on it. That's right - 150 miles. According to the owner, he bought it from a dealer in 09 who stated the original owner bought it for his wife who quickly decided she didn't like it and sold it back to the dealer. The guy I bought it from brought it home, parked it and the next day rolled his car, broke his back and was laid up for over a year recovering. When I found it the bike had been sitting in an unheated barn since then. I looked it over pretty good, wary of the length of time it had been sitting idle. It started right up and ran great. I took it for a short spin on the guys property (this was a rural area) and it ran without a hitch. Everything looked good so I bought it for $6500.
And it has been a great bike. I put almost 1500 miles on it over the summer. But it didn't take long to discover a problem, the only problem -the finish on the engine and frame is severely compromised. Apparently, sitting in the unheated barn for two years really phuckted with the paint. I probably should have figured that. After a few weeks of riding I discovered several areas on the frame and swing arm where the paint was chipping away with rust underneath it. Then the paint on the lower triple clamp started pealing away, with severe oxidation of the aluminum. To top it off, the engine has the same oxidation problem, particularly the entire bottom of the engine, where the paint was bubbling and pealing from all the oxidation.
Ok, so I know at that point that I'm gonna have to do some work to refinish it. Which is fine, because I only had to spend a few weeks reading the posts on this forum to know that I wanted to make some significant modifications to the stock Nightster anyway. I love the orange on black paint scheme but I quickly decided I was going to go for the blacked out look overall. I did a bunch of the easy and typical mods over the course of the summer - flipped the mirrors, painted the stock A/C black, wrapped the upper fork tubes with black paracord, removed the reflectors on the forks and painted the rear refectors black. Got a set of highway pegs off of ebay and painted them black. Moved the turn signals off the bars with the HD relocation kit, smoked lenses from ebay. Bought a set of black SE slipons and painted the heat shields black. Eventually, I did the mreed A/C mod, using a mounting bracket with integrated breathers, also an ebay purchase, then removed the front fender. And because my wife wants to ride along on occasion I got the HD pillion seat and quick detachable sissy bar that only go on (5 minute install) when we go 2-up.
That took care of the summer, but with winter fast approaching I started seriously thinking about a major makeover, mainly to take care of the finish on the engine and frame, but also to really make it mine. I like the fat front tire look and started exploring that mod, and it will be the center piece of the whole bike make over. I've pm'd both mreed and joebotics, both of whom have offered some great advise and insight over the weeks and months. And in September I started putting the parts together to do this. I'm also going blacked out as much as possible, keeping the orange and black colore scheme. I really like the solo bobber look to, but for this bike I have to keep the 2-up capability so I can take the wife for a ride on occasion. I'm hoping my next build will be a hardcore hardtail, but for now I have to make some compromises to ensure domestic tranquility.
One last note - I am not a mechanic. I am handy with a tool box, do most of my own plumbing, electrical and construction work around the house. In my college days I did some auto mechanic and machine shop work, tinkering with engines and trannys, doing some welding and minor fabricating. I can turn a wrench, but I don't know much about actually tearing into an engine and making it run. And I don't know squat about Harleys. I am learning as I go.
So, let me show you where I am so far:
The first week in October I put the bike in my son-in-law's shop and tore it down to the bare frame.
This was kinda scarey because aside from the paint/oxidation problem, the bike ran great. I still lay awake at night wondering if I will ever get this thing back together AND running. But, I put my fears aside and pressed on.
Took me about 6 hours over 2 days to tear it down to the bare frame.
Here's my work area in one corner of the shop.
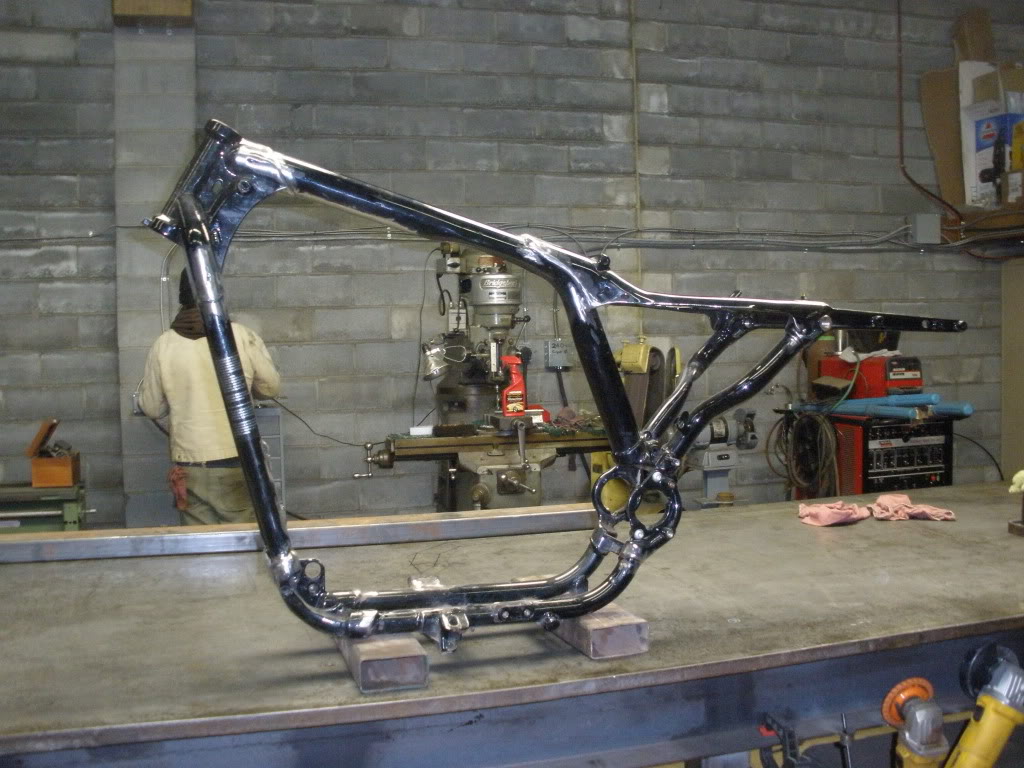
I spent a few hours cleaning up the frame.
Cut off the little bracket under the main tube that as far as I can see served no purpose, and smoothed out some of the crappy HD welds.
I've spent some time cleaning up the engine, trying to get the bad paint and oxidation off and down to the bare aluminum. This is a royal pitb.
I pulled the primary cover...
Sandblasted it...
And then attempted to paint it with HD wrinkle black engine paint.
I really didn't like the way this turned out, so my plan now is to reblast it and have it powder coated, along with the primary cover and a host of other parts.
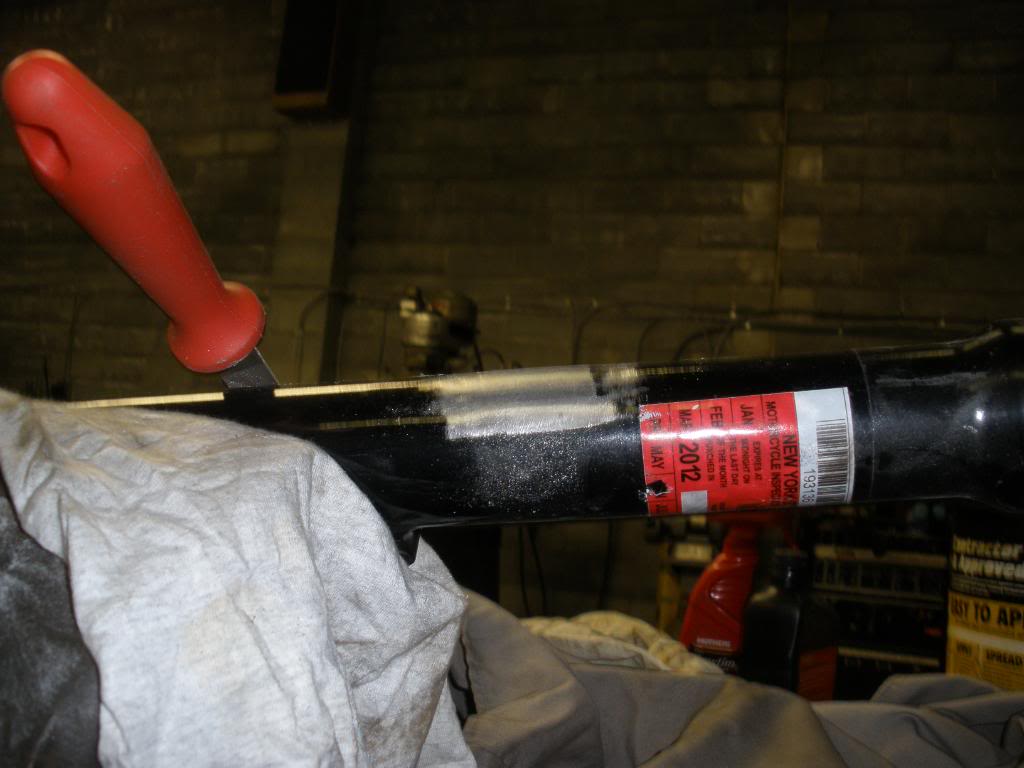
Already at the powder coater are the wheels and lower fork tubes. Since I've decide I won't be running a front fender I took the fender mounts off the fork tubes before I dropped them off for powder coating.
I used a grinder with a cutoff wheel for the rough cut, then a grinder with grinding wheel to get it down close to the tube.
Then I used a file and smoothed it down to the tube diameter by hand.
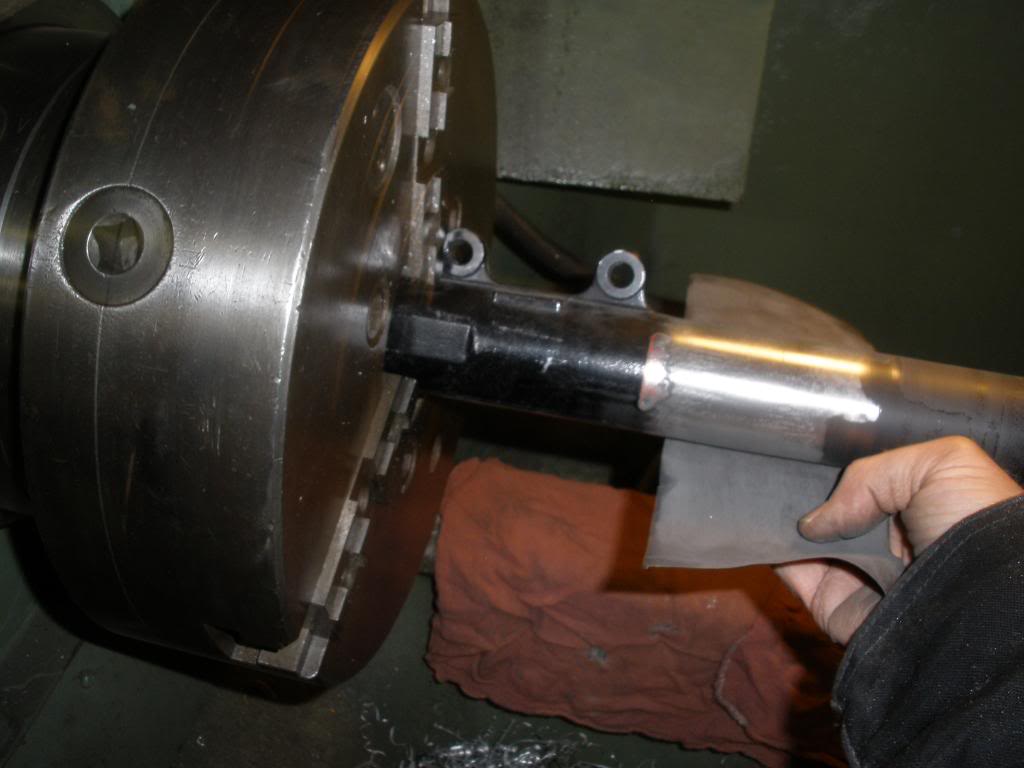
And finally, I chucked them up in the lathe and finished them off with some emery paper.
Here's the finished product, ready to go to the powder coater.
Ok, that's it for now. This is a complex project with lots of details. I've already done quite a bit and I will update this thread with more detail later on (today I chopped the sproket cover and it turned out great! Pics to follow in a few days). On the agenda for tomorrow - we're gonna chop the frame and add 3 degrees of rake to the front end. Well, I'm not doing it actually. I'll be assisting my son-in-law, the machine shop owner and bonefide motorcycle mechanic/welder/fabricator extrodinaire. Understand, I've done all the work so far on this makeover myself. But chopping the frame is out of my league and he was gracious enough to offer to do it. The plan is to get it done tomorrow and if necessary finish up on Sunday. Over the next couple of weeks I want to get the frame done and into the powder coater. At that point I can get the new front end on it and start rebuilding. I will keep you posted on the progress.
Coming up in future updates:
- Cam cover chop, using the Joebotics thread as my tutorial.
- Powder coating both side engine covers, rocker covers and some other parts.
- The wide glide front end conversion - I already have the trees/parts/tires, Avon Venom 150/80-16's front and rear.
- Stripping and refinishing the engine -this has been and will continue to be a difficult task.
- Custom tank lift, ignition and coil relocation.
- Wire reroute - I'm gonna try to run the wiring harness through the frame to hide as much of the wires as possible.
- RK shocks, custom cut to 10.75".
- Custom solo seat. I still don't know if I'm gonna buy one (can't find one I really like) or make my own.
- Forward controls.
- Drag bars...I think...
- Chop the rear fender, as much as possible and still keep the 2-up capability.
- New paint on the tins.
- Probably a bunch of other stuff.
#3
11-12-2011, 12:08 AM

Platinum Sponsor
Join Date: Nov 2010
Location: Red Banks, Mississippi
Posts: 17,464
Received 3,940 Likes
on
2,295 Posts


#5
11-12-2011, 09:10 PM
Spent 9 hours in the shop today...wife is out of town. 
Long day. This is how we started off at 10am. We're doing the frame on a 6'x12' 1" thick plate steel welding table. Nice platform to build a one off frame jig.
The jig involves a lot of measuring, cutting, milling and welding. Most of the day was focused on crafting a jig to hold the steering head in place and in line with the frame during the chop. We're using 3/4" threaded rod that runs through the steering head, held there with two billet aluminum cones, turned on a lathe, that fit into the bearing races and bolted top and bottom.
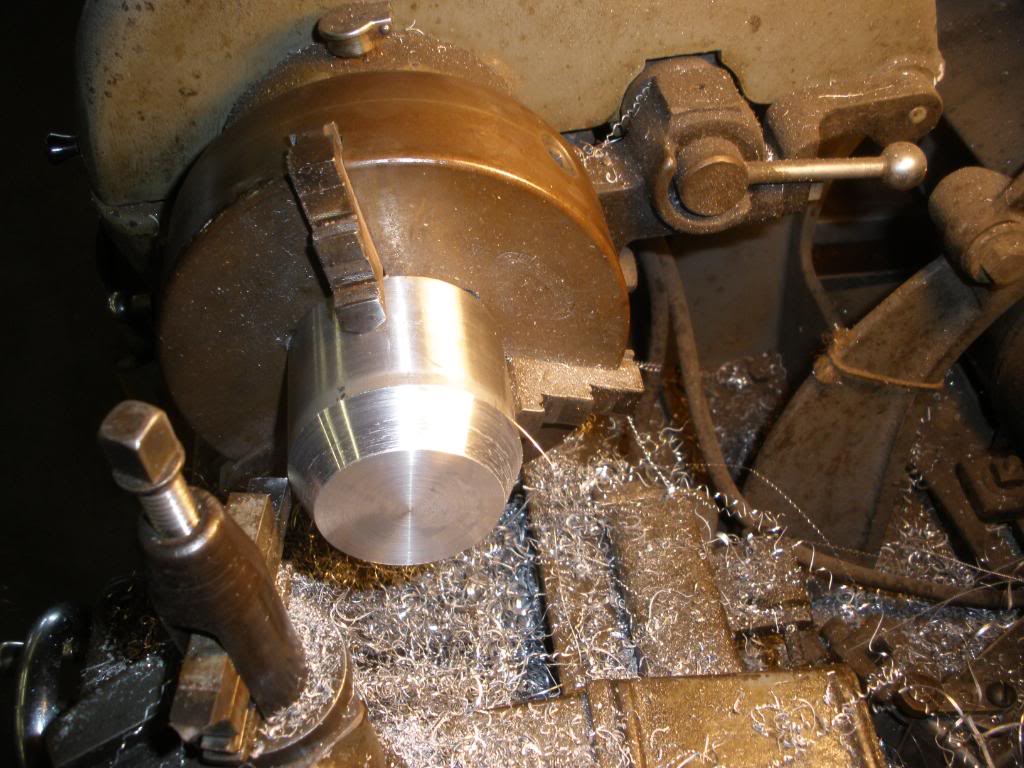
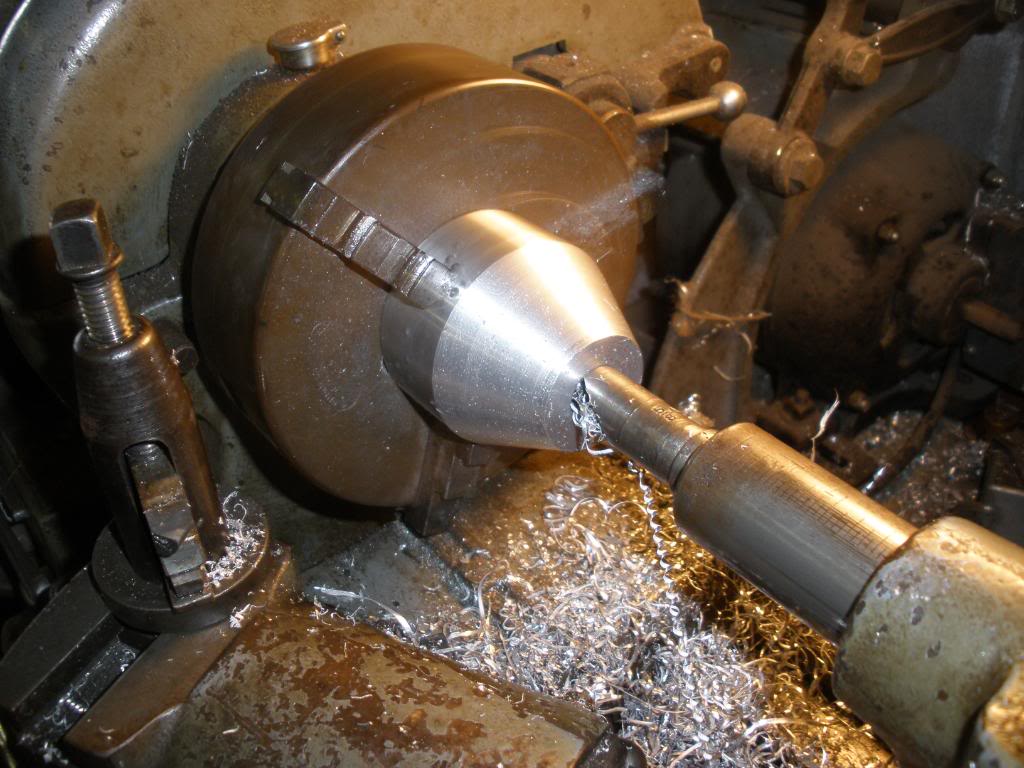
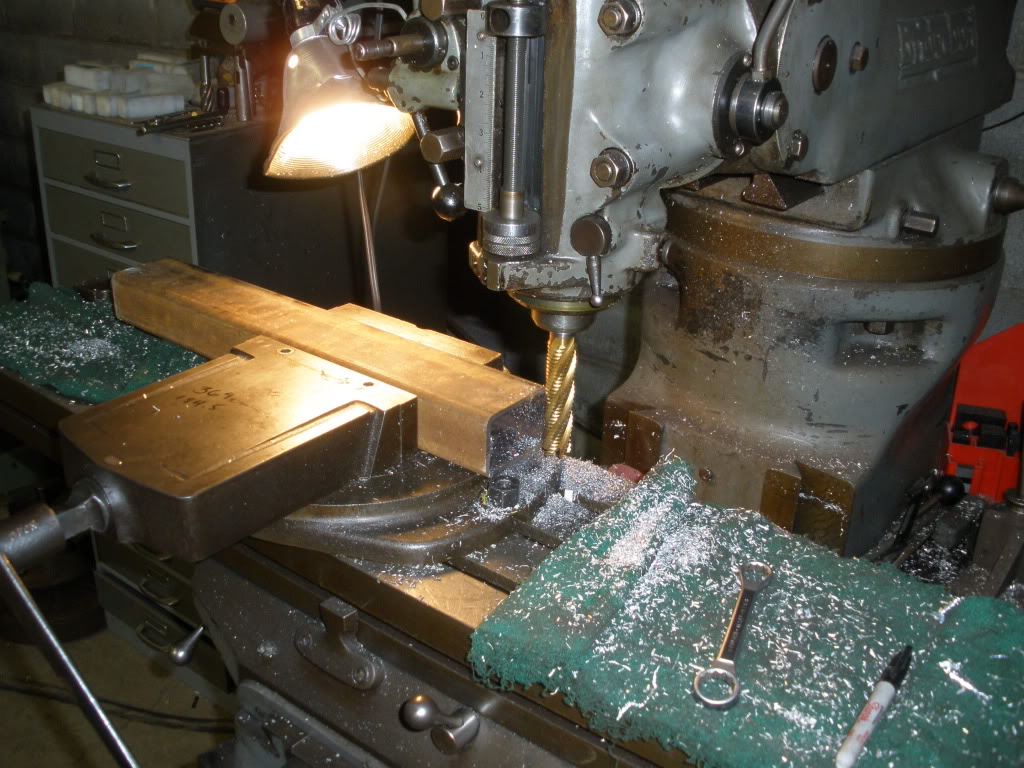

The threaded rod is welded to the aluminum cylinder that is mounted in a 2x4 piece of box steel (above). I know I'm not explaining this very well but hopefully you'll get the idea from the pics. The important thing is that everything has to be as square and level as possible. The heavy steel table and a milling machine makes that an easier task than would otherwise be possible.
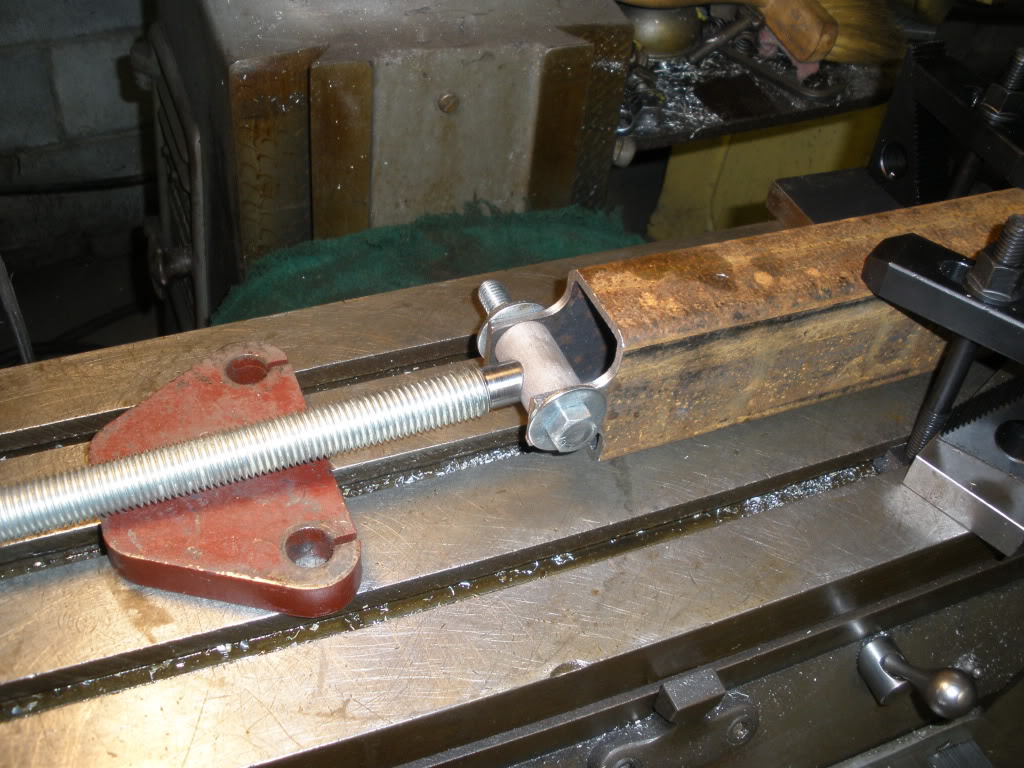
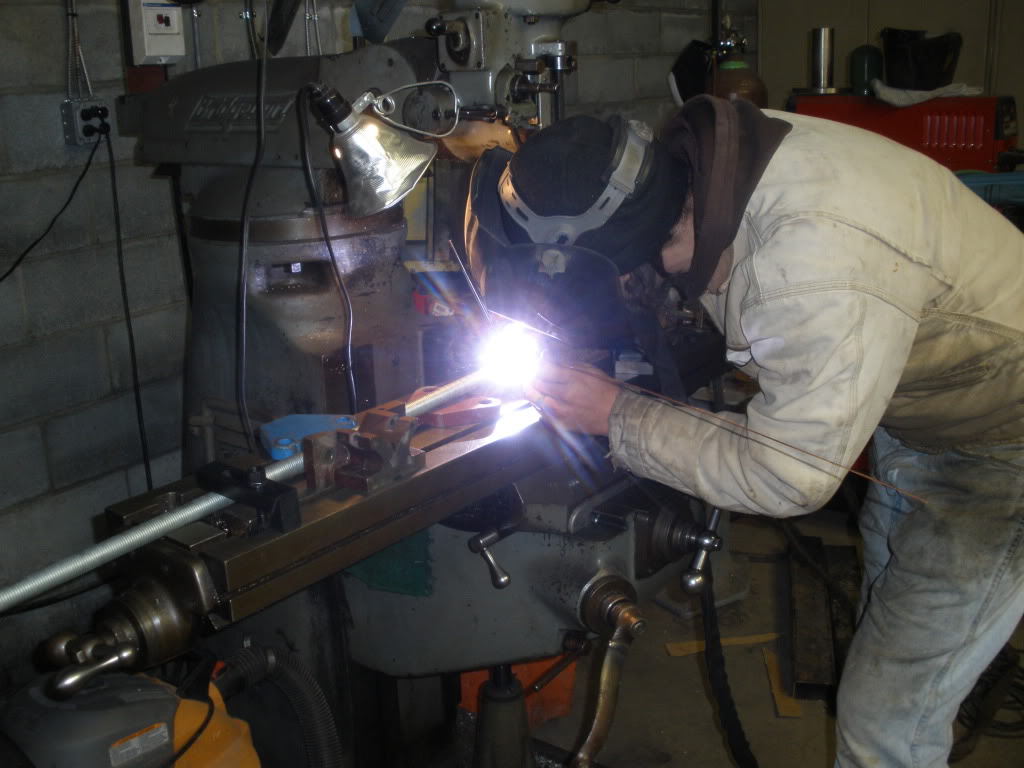
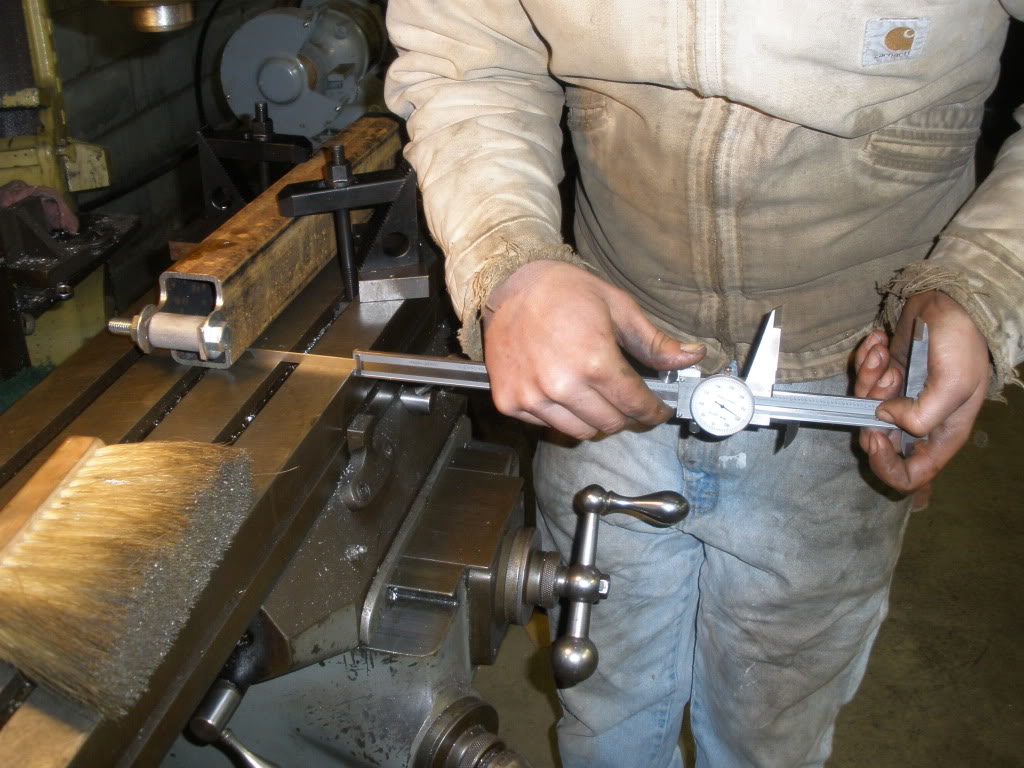
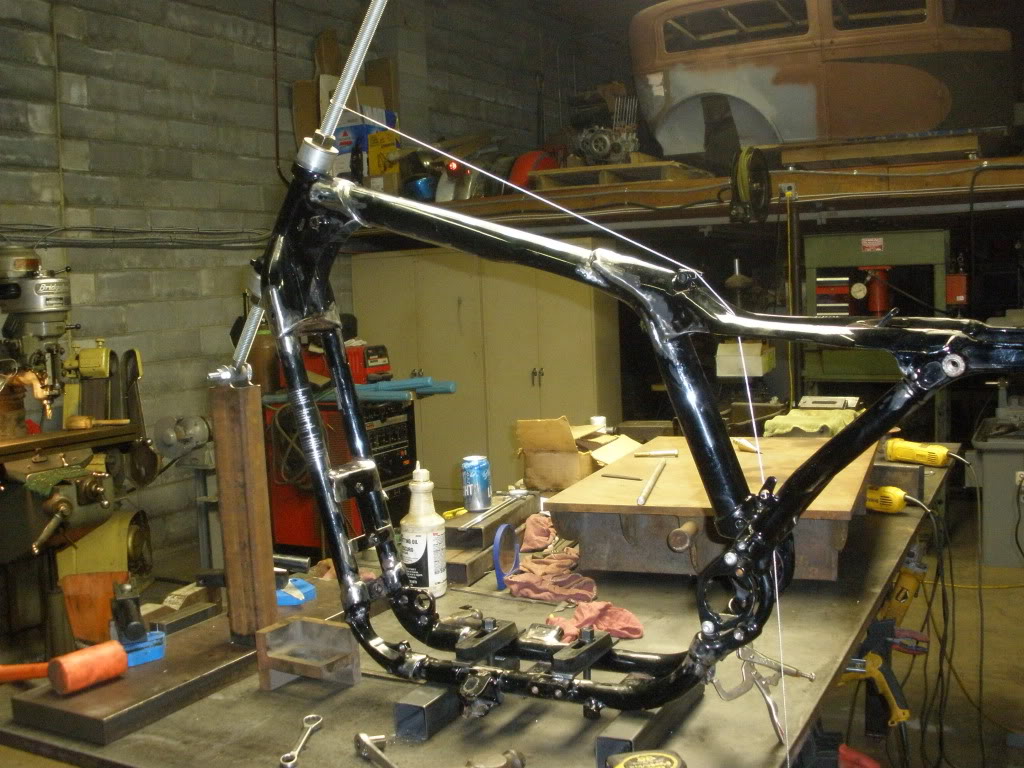
Here's the finished configuration with the steering head bracket welded to an inch and a half steel plate which is clamped to the welding table. Everything is aligned and then the frame is also clamped to the table.
I hope this all makes sense. It was 7pm when we got everything aligned and clamped down, so we called it a night and will pick up again tomorrow morning to begin cutting the frame. Finally. I'll try to post an update tomorrow...
Long day. This is how we started off at 10am. We're doing the frame on a 6'x12' 1" thick plate steel welding table. Nice platform to build a one off frame jig.
The jig involves a lot of measuring, cutting, milling and welding. Most of the day was focused on crafting a jig to hold the steering head in place and in line with the frame during the chop. We're using 3/4" threaded rod that runs through the steering head, held there with two billet aluminum cones, turned on a lathe, that fit into the bearing races and bolted top and bottom.
The threaded rod is welded to the aluminum cylinder that is mounted in a 2x4 piece of box steel (above). I know I'm not explaining this very well but hopefully you'll get the idea from the pics. The important thing is that everything has to be as square and level as possible. The heavy steel table and a milling machine makes that an easier task than would otherwise be possible.
Here's the finished configuration with the steering head bracket welded to an inch and a half steel plate which is clamped to the welding table. Everything is aligned and then the frame is also clamped to the table.
I hope this all makes sense. It was 7pm when we got everything aligned and clamped down, so we called it a night and will pick up again tomorrow morning to begin cutting the frame. Finally. I'll try to post an update tomorrow...
#7
11-13-2011, 06:59 AM
Trending Topics
#8
11-14-2011, 07:31 AM
Ok, so let's cut to the chase - we didn't finish the job on Sunday. It took more time than anticipated. Better to go slow and careful then rush things and make a mistake. And we took it slow. But we made good progress and what we've got done so far has turned out well.
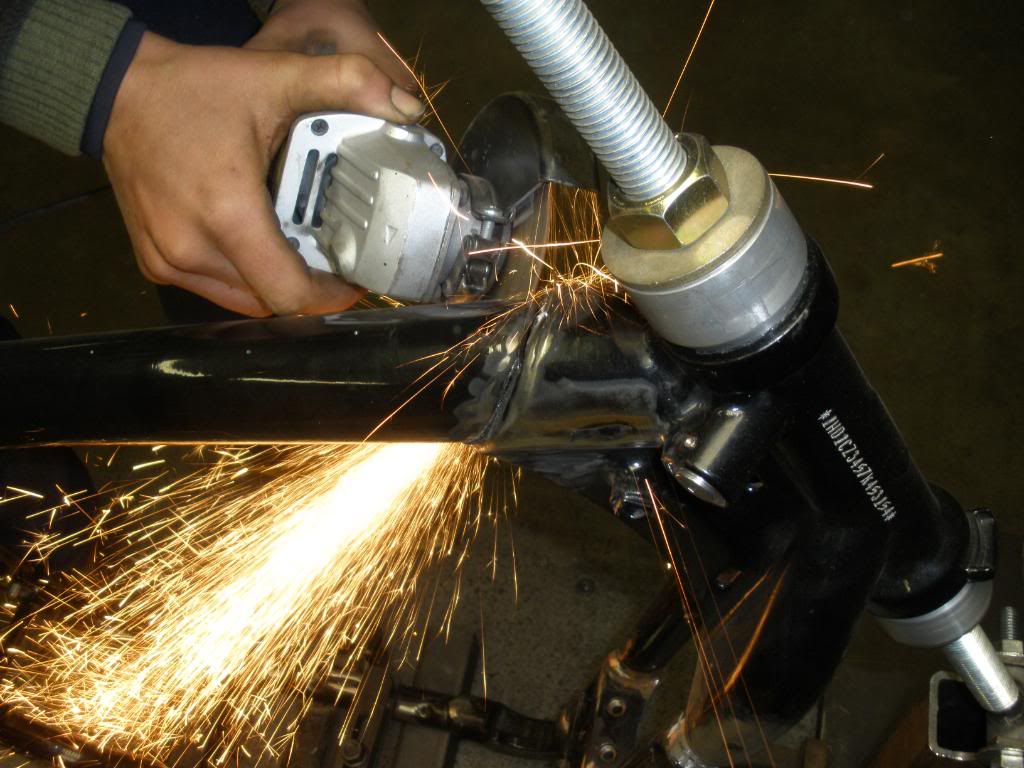
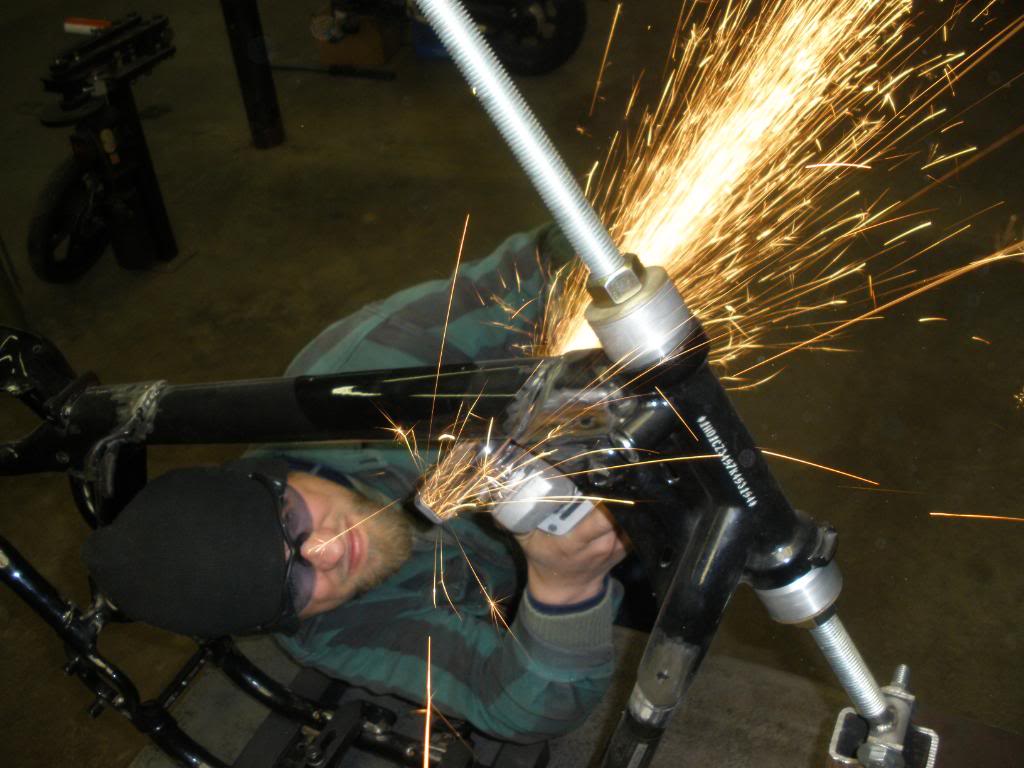
Here's what we did accomplish. We chopped it. Made cuts just below the steering head casting on each down tube.
Then cut the main tube just behind the casting.
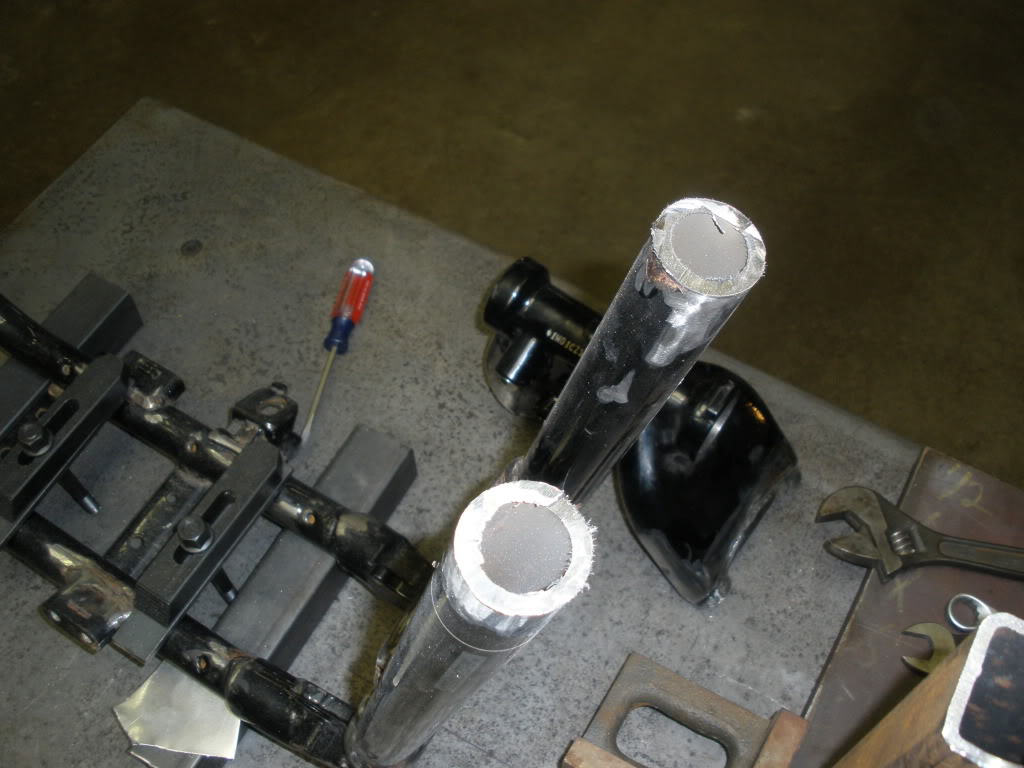
And here's how it looked with the steering head casting removed. We took a break to eat lunch after that...
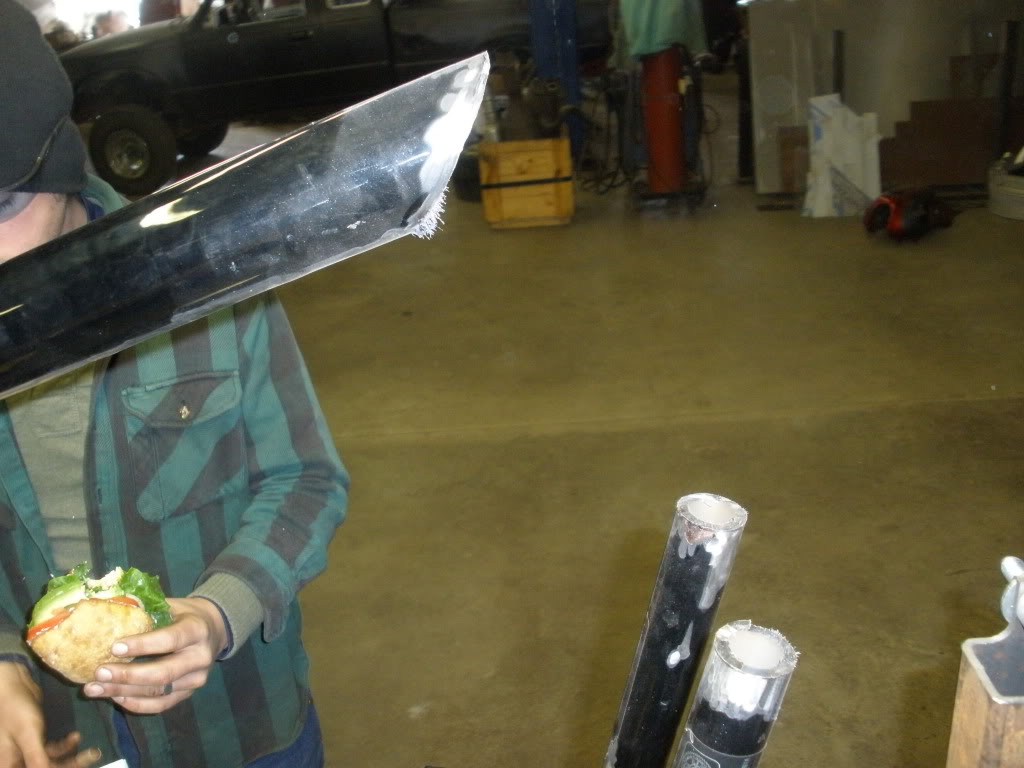
Harley uses some thick walled tubing for their frames.
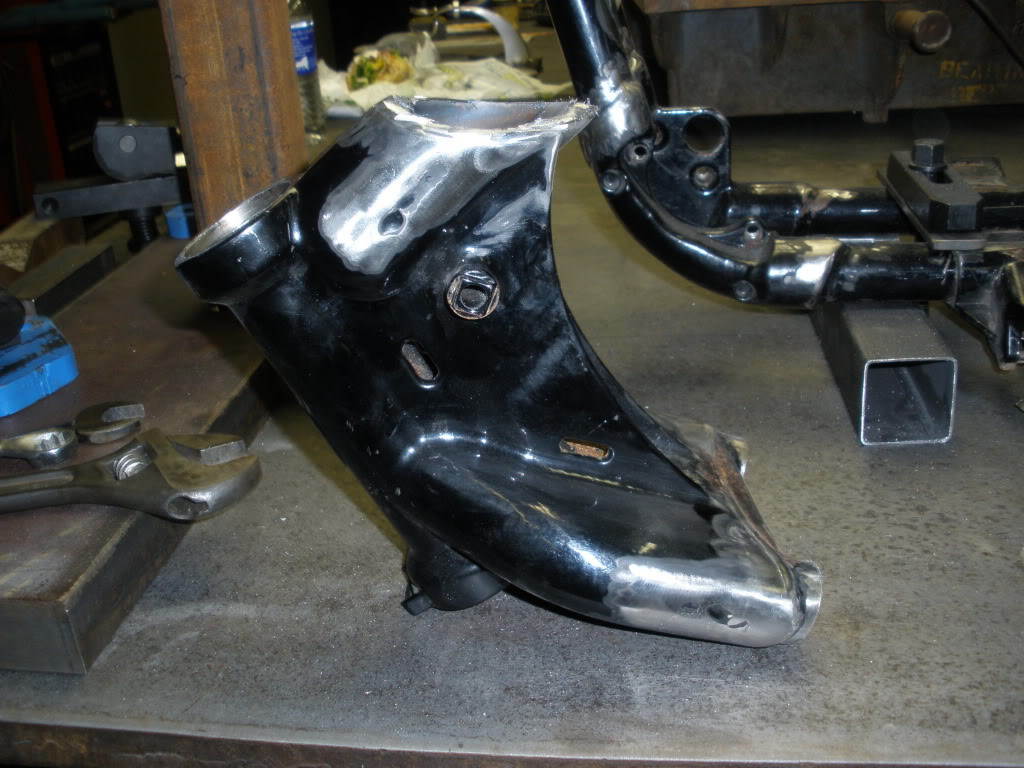
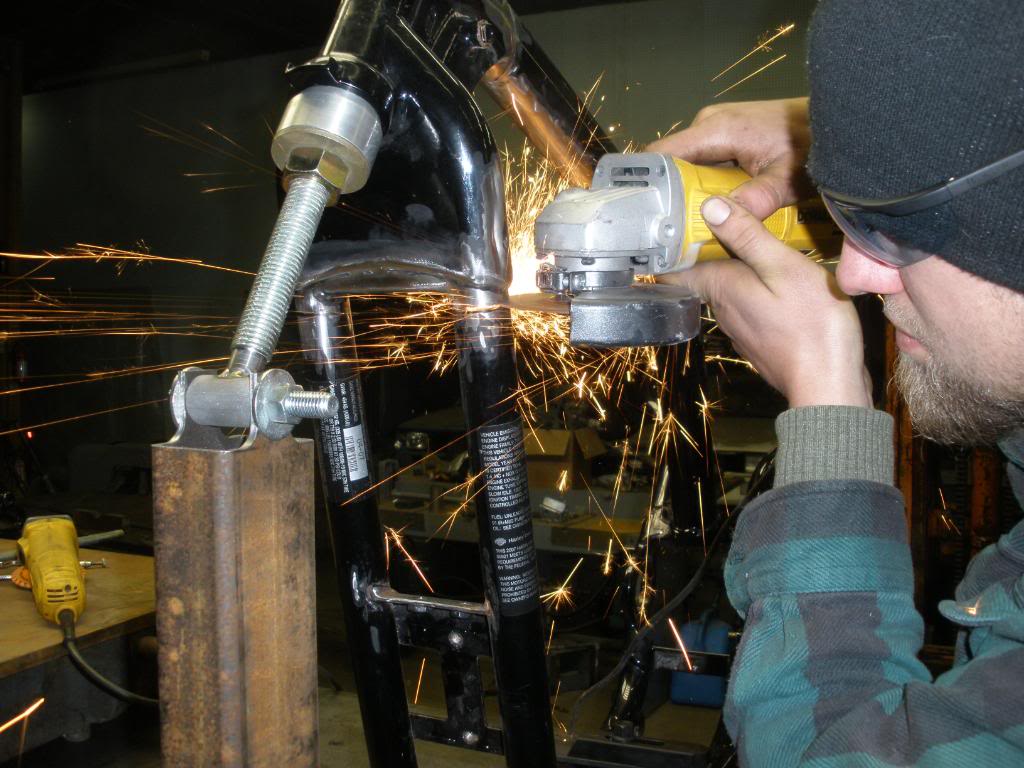
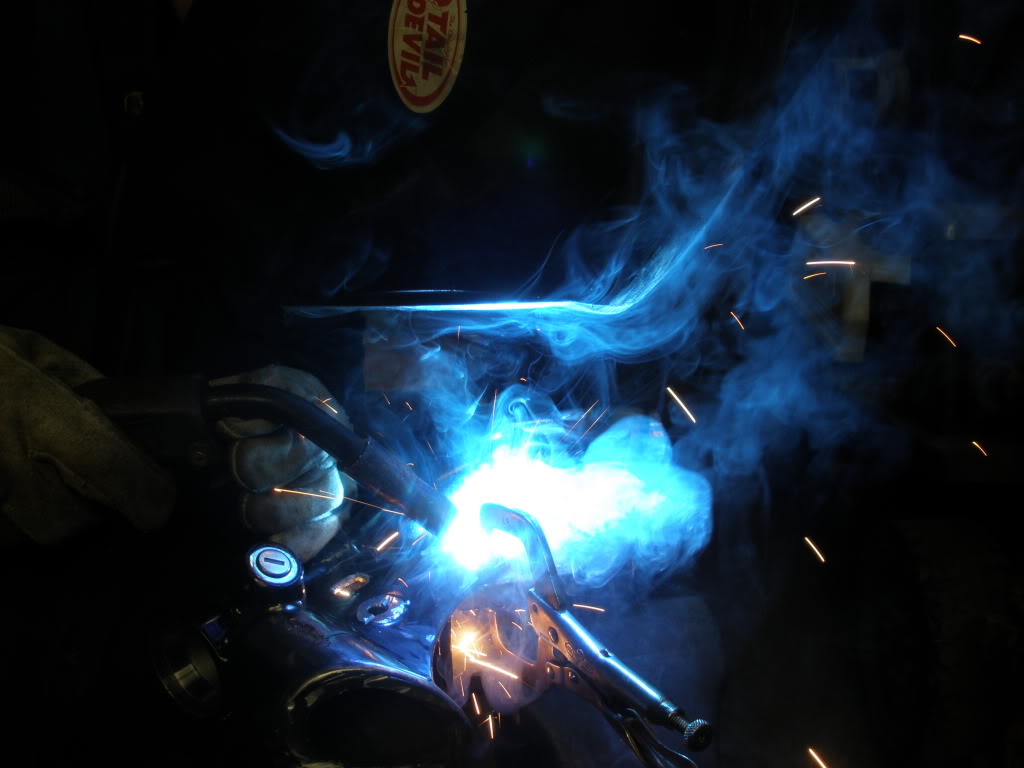
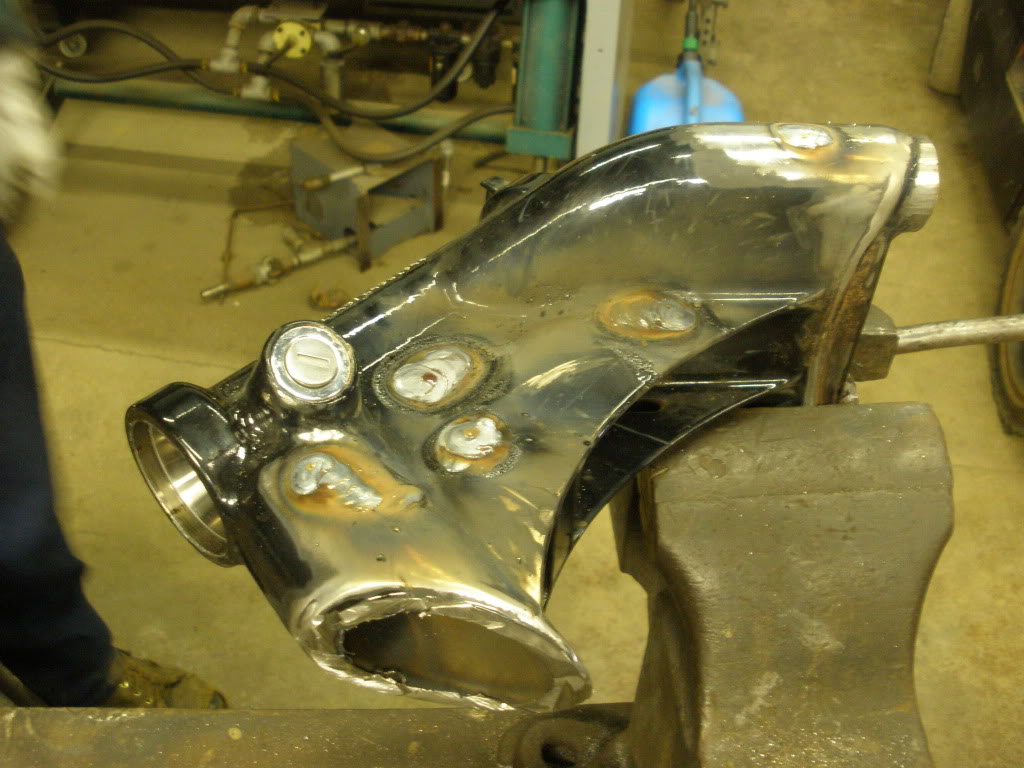
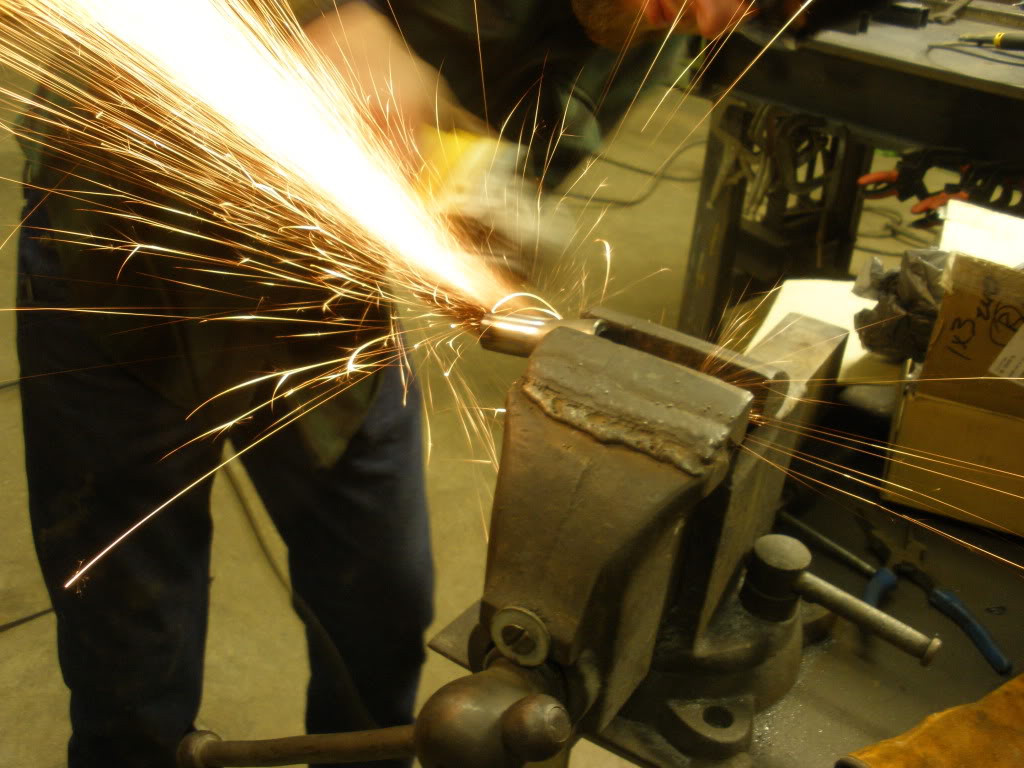
Next we cleaned up the steering head. First, we cut off the old front tank mount holes and filled them with weld. I also wanted to get rid of the holes in the side flanges...I don't know what they're there for...maybe to zip tie the plastic electrical harness covers to the frame? So we filled those with some weld also. And we added some weld to the ugly dimples on the side of the casting left over from the original factory weld job. Lots of cutting and grinding and welding ensued.
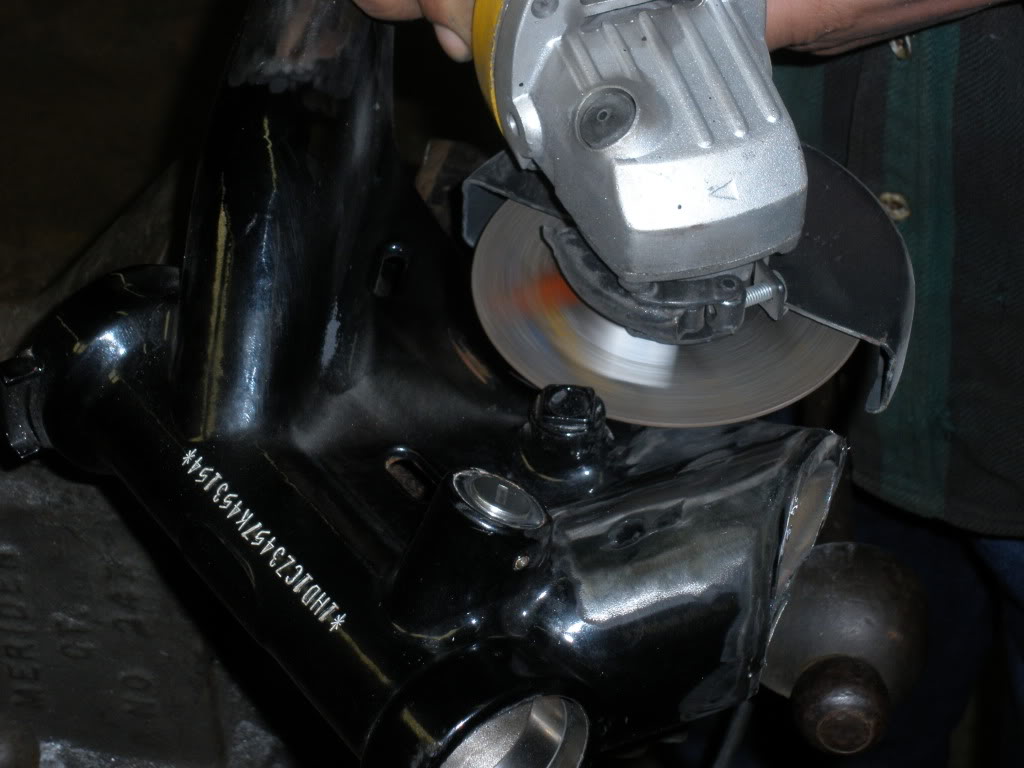
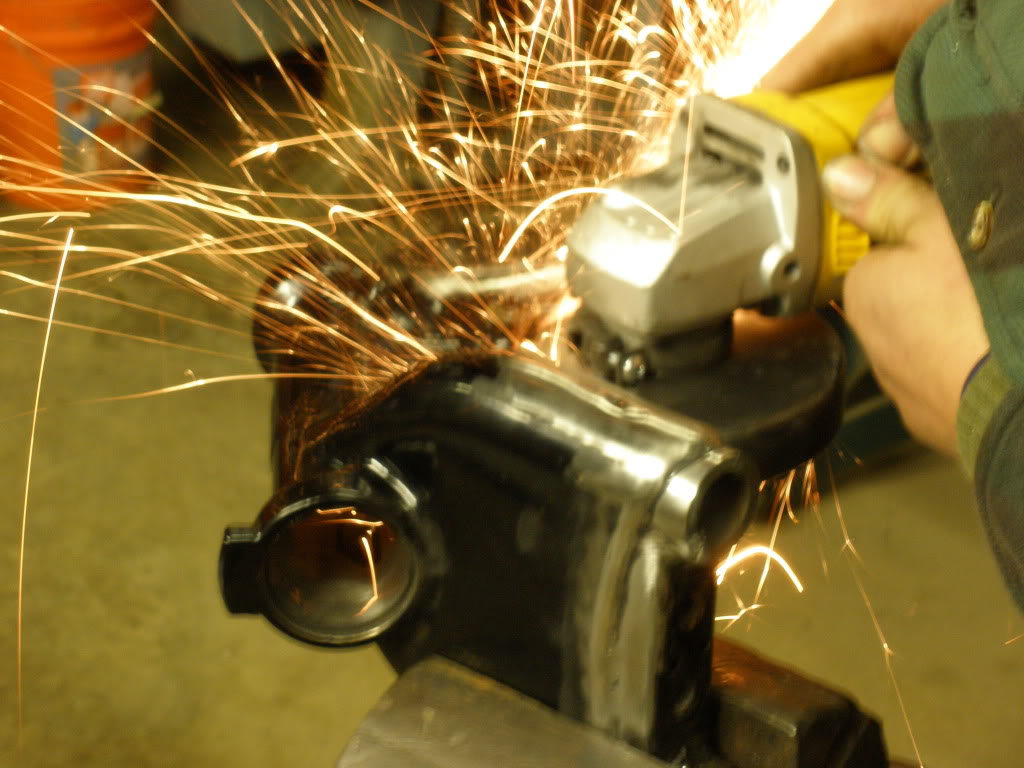
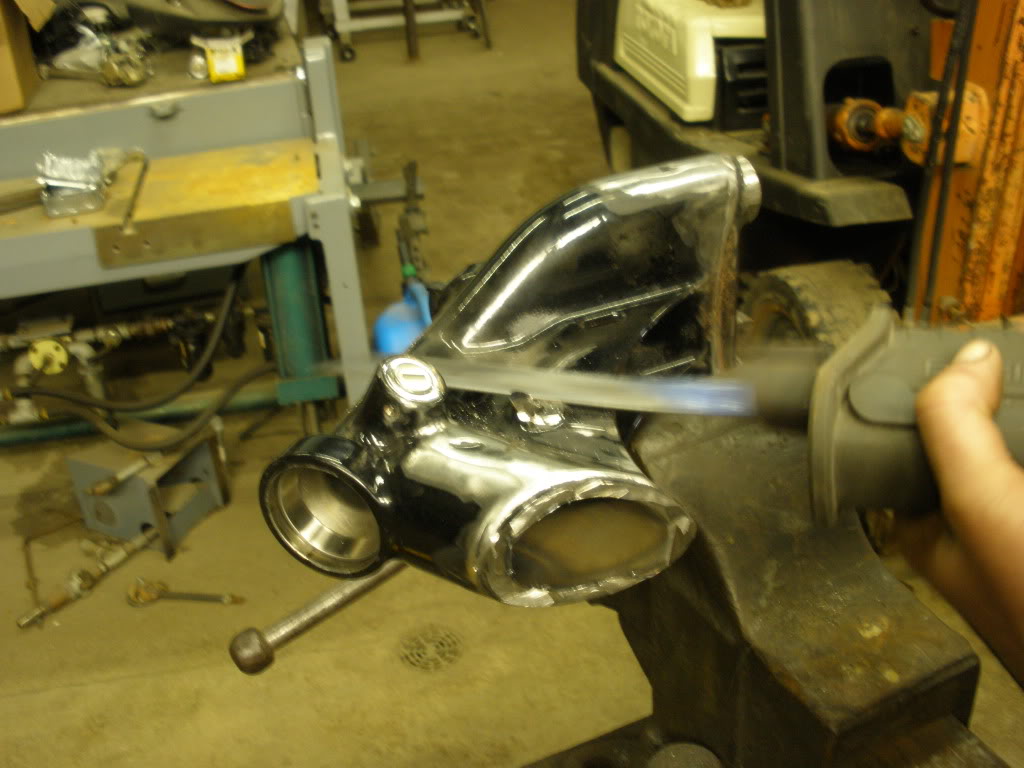
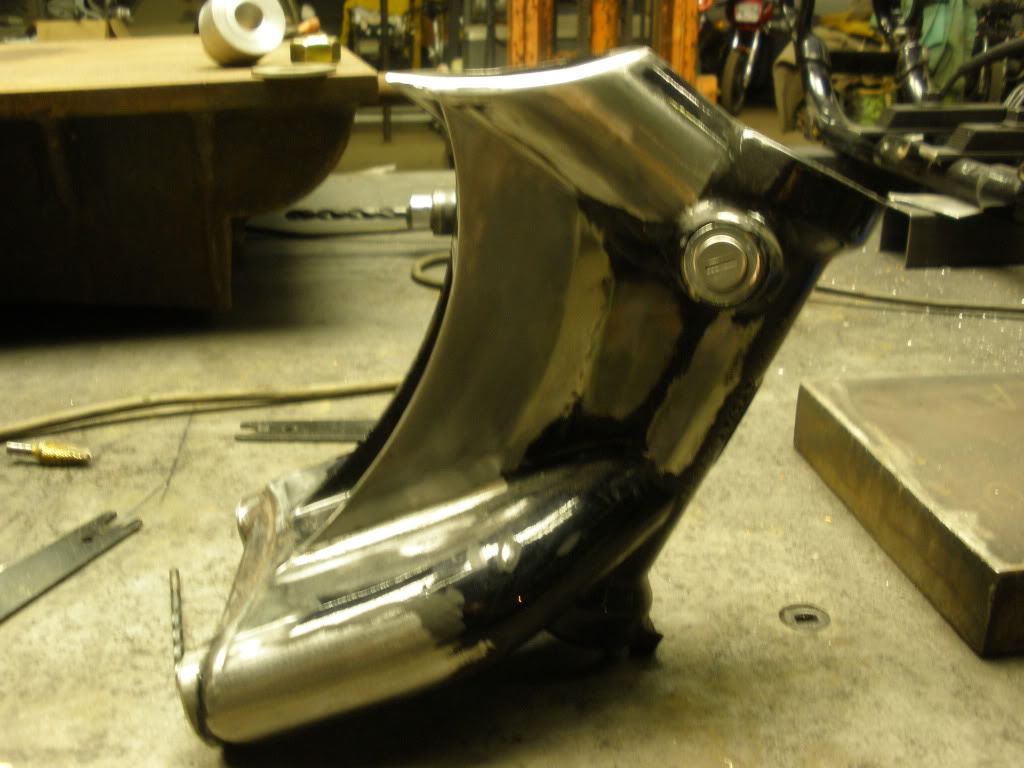
After a lot of grinding and sanding we ended up with this.
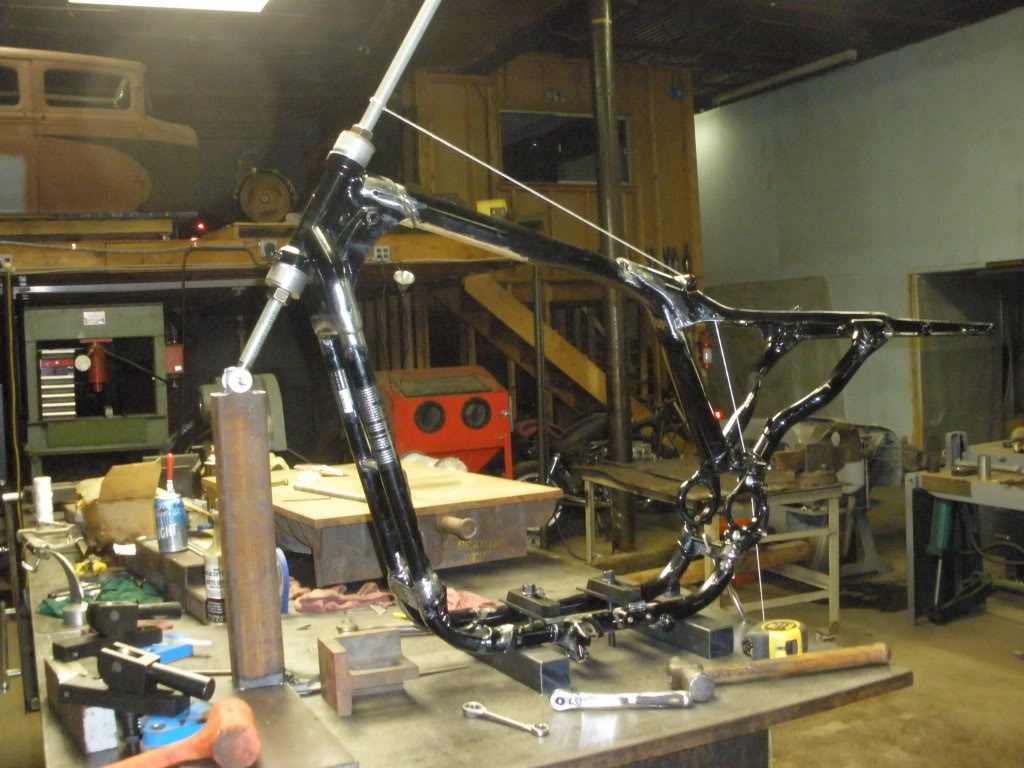
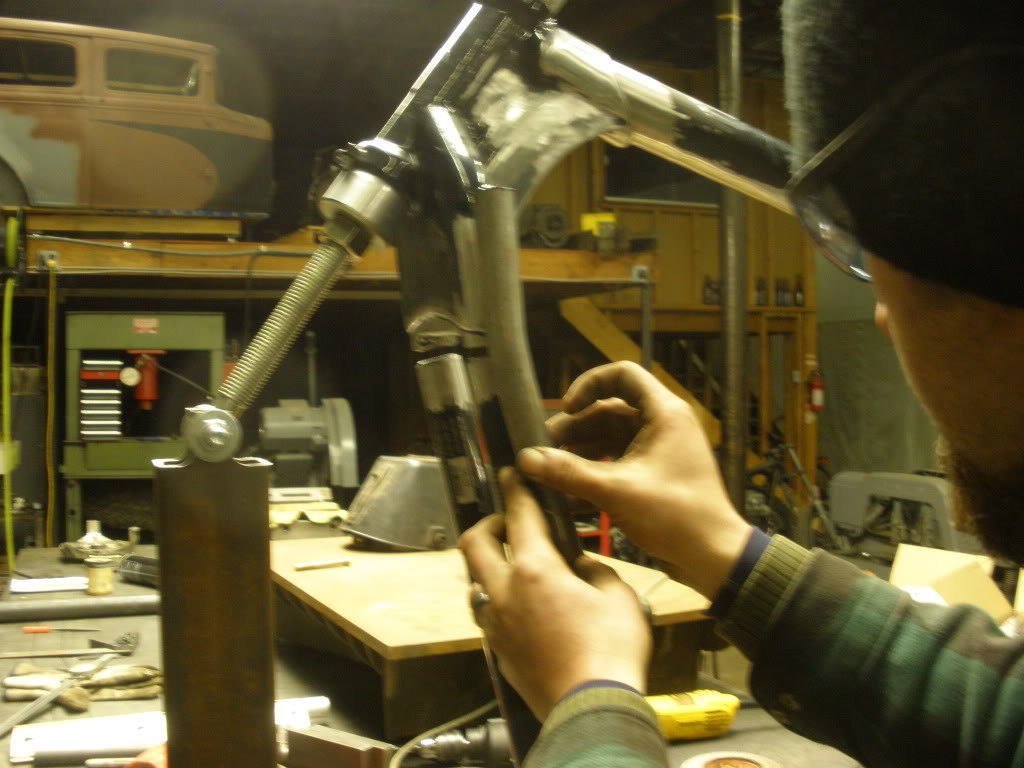
The steering head then went back in the jig to start adding the rake. To get to the rake angle I wanted we cut about a quarter of an inch (or so) from the main tube, keeping it at the same angle as the steering head. Then we adjusted the steering head in the jig so that it sat at the appropriate angle and lined up with the down tubes.
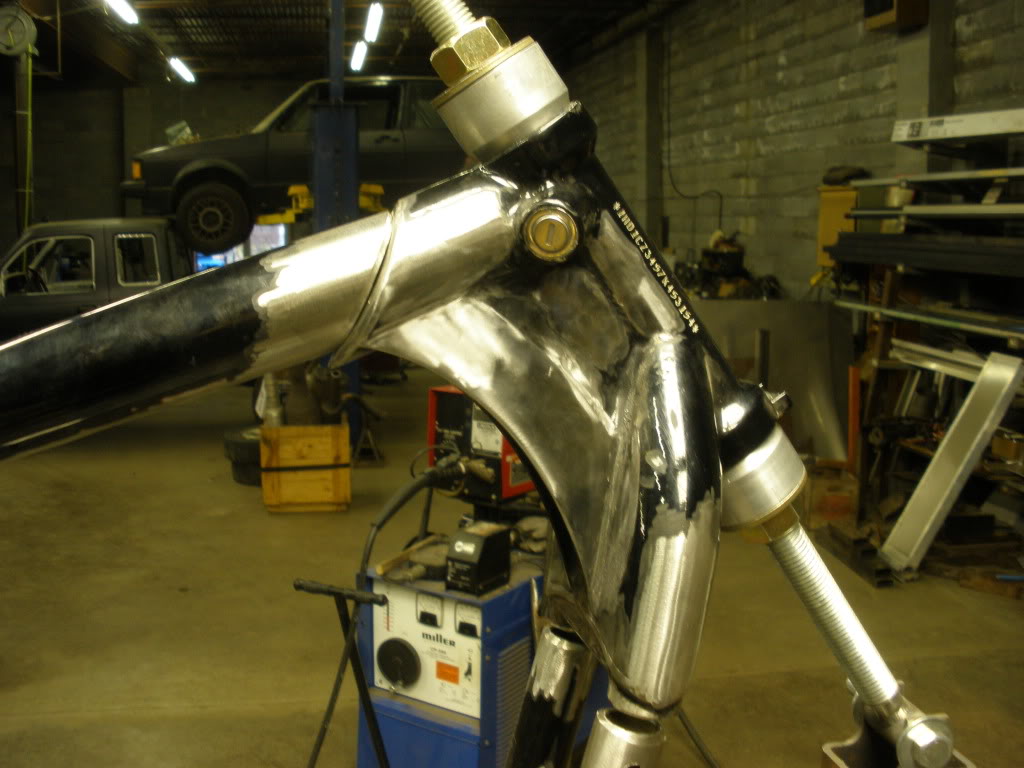
Finally, and this is as far as we got last night, we cut, bent and grinded some (I think it was 3/4 inch) tubing to fit into the down tubes and the steering head casting.
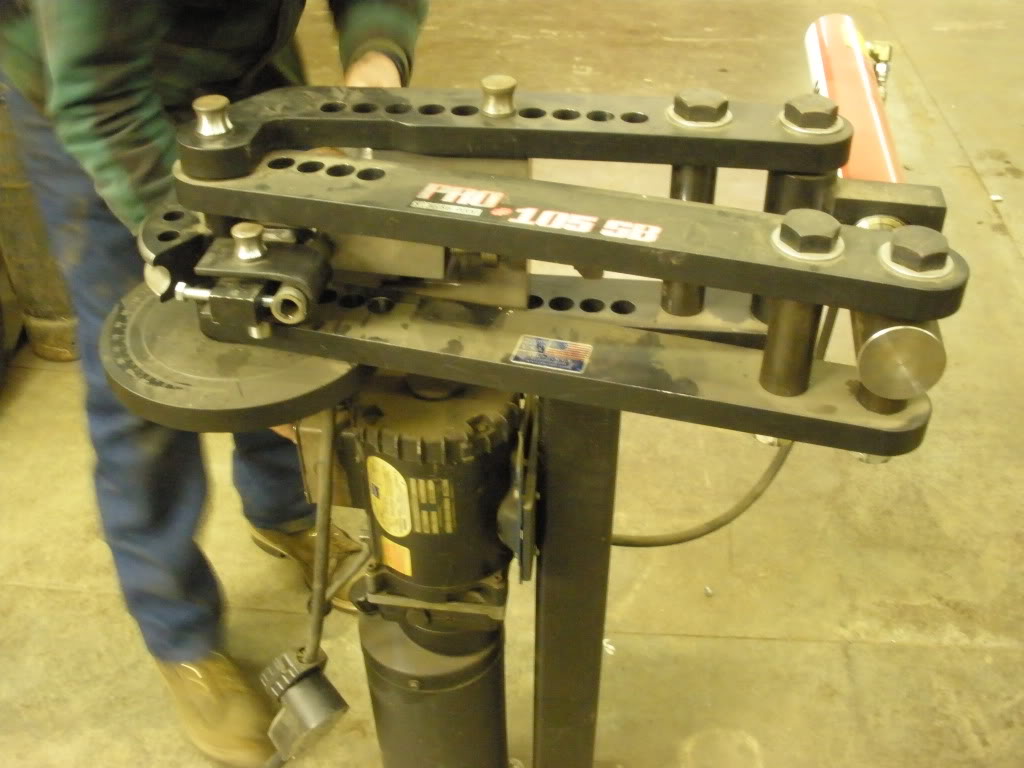
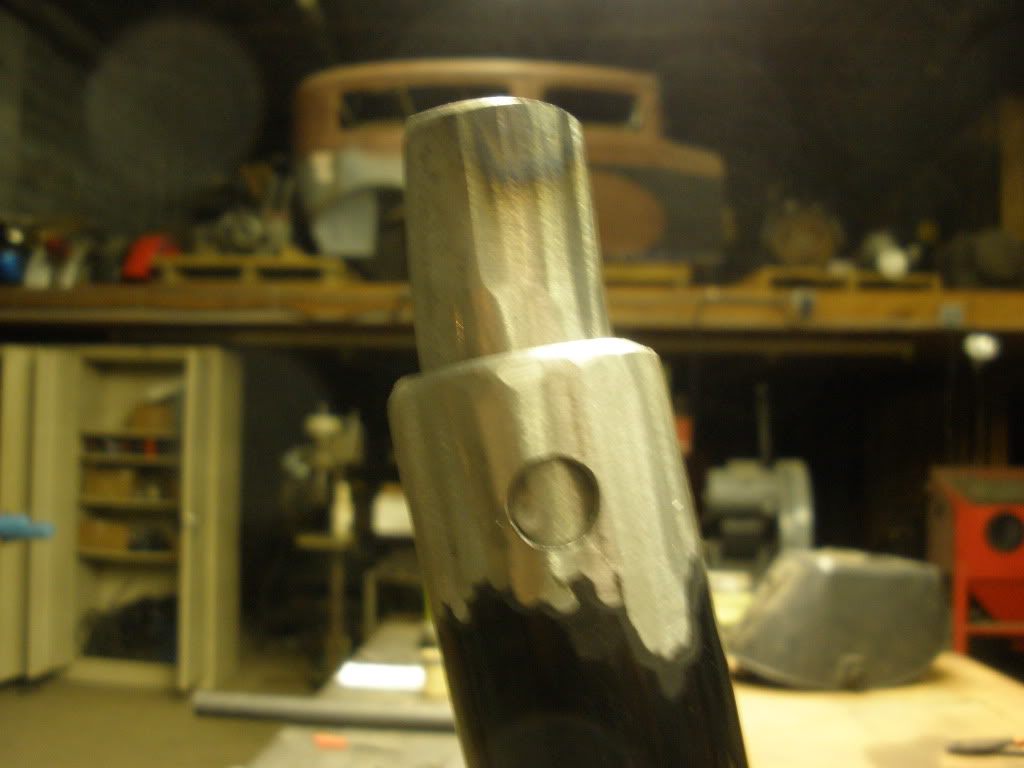
We had to drop everything at that point and run to a family dinner (for which we were unfashionably late). But you get the idea. We'll do the same for the larger main tube, using some bigger tubing and then slip the steering head back in the jig, sliding it onto those inserted tubes and adjust to the proper angle. Once everything is adjusted and locked down, it's gets welded back together.
I don't know when we are gonna get back to it. We are both pretty busy right up to Thanksgiving but the plan is to fit some time in before then and at least get everything welded back together. I am not fond of the idea of leaving the chopped frame on the welding table unwelded for any length of time, so hopefully it will be sooner rather than later.
Thanks for watching...
Here's what we did accomplish. We chopped it. Made cuts just below the steering head casting on each down tube.
Then cut the main tube just behind the casting.
And here's how it looked with the steering head casting removed. We took a break to eat lunch after that...
Harley uses some thick walled tubing for their frames.
Next we cleaned up the steering head. First, we cut off the old front tank mount holes and filled them with weld. I also wanted to get rid of the holes in the side flanges...I don't know what they're there for...maybe to zip tie the plastic electrical harness covers to the frame? So we filled those with some weld also. And we added some weld to the ugly dimples on the side of the casting left over from the original factory weld job. Lots of cutting and grinding and welding ensued.
After a lot of grinding and sanding we ended up with this.
The steering head then went back in the jig to start adding the rake. To get to the rake angle I wanted we cut about a quarter of an inch (or so) from the main tube, keeping it at the same angle as the steering head. Then we adjusted the steering head in the jig so that it sat at the appropriate angle and lined up with the down tubes.
Finally, and this is as far as we got last night, we cut, bent and grinded some (I think it was 3/4 inch) tubing to fit into the down tubes and the steering head casting.
We had to drop everything at that point and run to a family dinner (for which we were unfashionably late). But you get the idea. We'll do the same for the larger main tube, using some bigger tubing and then slip the steering head back in the jig, sliding it onto those inserted tubes and adjust to the proper angle. Once everything is adjusted and locked down, it's gets welded back together.
I don't know when we are gonna get back to it. We are both pretty busy right up to Thanksgiving but the plan is to fit some time in before then and at least get everything welded back together. I am not fond of the idea of leaving the chopped frame on the welding table unwelded for any length of time, so hopefully it will be sooner rather than later.
Thanks for watching...
