Tax-Time Bike Upgrades - Project Completed!
#1
 02-19-2017, 10:12 PM

Hey Crew,
Got my IRS refund, did some serious upgrades to the inside of my primary case. Installed a BAKER compensator and "Attitude Adjuster", and while I was in there, decided to throw in a BARNETT clutch plate kit. Total cost for all the parts was just over a thousand bucks. No special tools were needed, but I did purchase a 1 1/2" socket to install the new compensator nut, and I made a primary locking tool out of a 6" piece of steel.
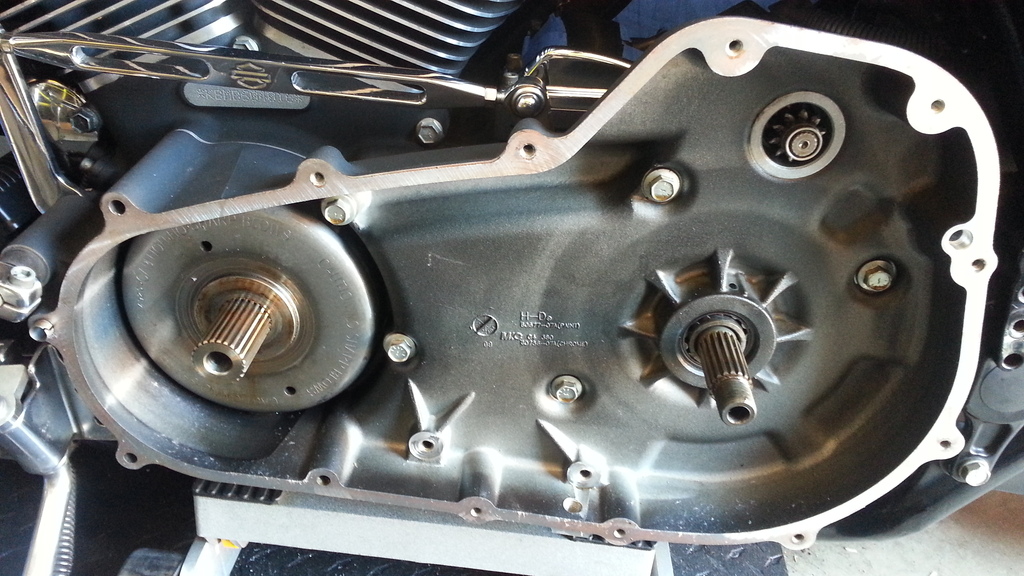
Here is the primary case WITHOUT any components:
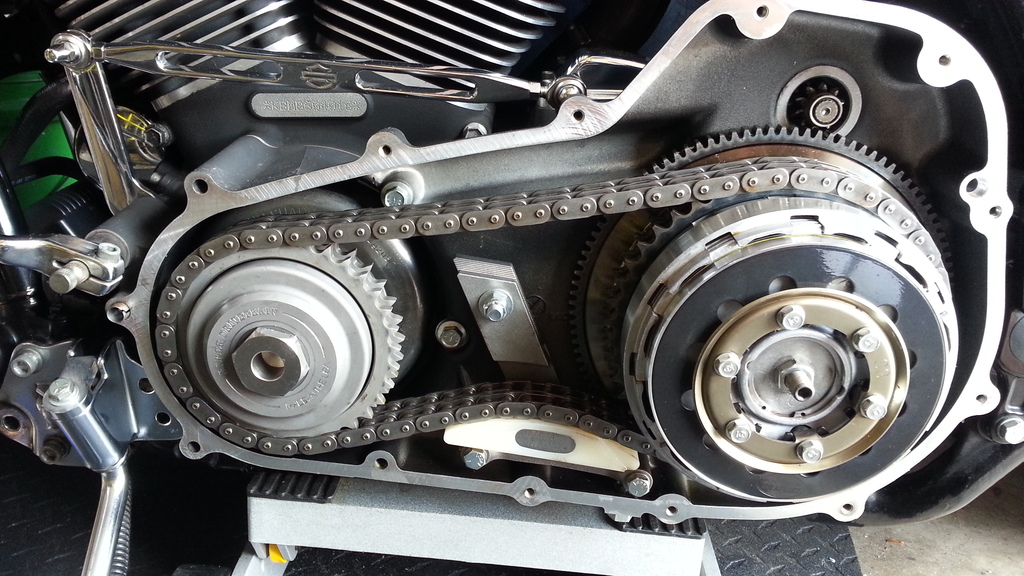
And this is what it looks like with the new clutch, and BAKER compensator and chain adjuster installed.
After riding the bike with the new compensator, I'm sorry that I waited so long to do this project. My primary doesn't GROWL at me anymore! And there are other noticeable improvements to the way the bike acts, I'm not even sure which components should get most of the credit. But TOGETHER, they ALL totally ROCK!
Got my IRS refund, did some serious upgrades to the inside of my primary case. Installed a BAKER compensator and "Attitude Adjuster", and while I was in there, decided to throw in a BARNETT clutch plate kit. Total cost for all the parts was just over a thousand bucks. No special tools were needed, but I did purchase a 1 1/2" socket to install the new compensator nut, and I made a primary locking tool out of a 6" piece of steel.
Here is the primary case WITHOUT any components:

And this is what it looks like with the new clutch, and BAKER compensator and chain adjuster installed.

After riding the bike with the new compensator, I'm sorry that I waited so long to do this project. My primary doesn't GROWL at me anymore! And there are other noticeable improvements to the way the bike acts, I'm not even sure which components should get most of the credit. But TOGETHER, they ALL totally ROCK!
#2
02-19-2017, 10:42 PM
Oh, and Bert asked if I would make some videos of the install, because he's getting ready to do this project on his Street Glide. Sorry, Bert, I was not able to make any videos, but here's some links to a few of the MANY videos that I watched before doing this project. And HEY, BERT, look who's in this first video! The guy we talked to at Ft. Myers Bike Nite!
Bert, this one shows the visual difference in the older rotors. He's working on a '07 bike. So when you look at yours, you'll know right away if you need to upgrade. If it looks like mine (top photo), you are good to go.
I think this one was also helpful, but it was sooooo long. I had to jump ahead just to see the parts I was interested in.
And last but not least, this video shows the history of the Harley compensator, and how it has evolved into the current version.
#3
02-20-2017, 10:54 PM
Florida Crew Moderator
Join Date: May 2012
Location: Port St Lucie Florida
Posts: 11,396
Received 3,389 Likes
on
1,560 Posts
#4
02-22-2017, 11:52 AM
Oh, and Bert asked if I would make some videos of the install, because he's getting ready to do this project on his Street Glide. Sorry, Bert, I was not able to make any videos, but here's some links to a few of the MANY videos that I watched before doing this project. And HEY, BERT, look who's in this first video! The guy we talked to at Ft. Myers Bike Nite!

Thread
Thread Starter
Forum
Replies
Last Post
jcorso1111
Primary/Transmission/Driveline/Clutch
0
06-27-2007 02:07 PM
missouri traveler
General Harley Davidson Chat
2
06-24-2007 01:08 PM