Harley Davidson Touring: Suspension Performance Diagnostic Guide
You've been riding your Harley Touring bike for many miles and it seems fine to you. Then you ride a newer bike, and now yours doesn't seem as tight as you thought. Here a few things you can do to fix or upgrade your bike.
This article applies to the Harley Davidson Touring Models (1995-2016).
The Harley Davidson Touring's suspension is pretty basic. The front forks and rear air shocks have been the same since the 1995 to 1997 model years. This article is a brief overview of the many things you can do that will modernize your suspension.

Materials Needed
- Motorcycle jack or lift
- Soapy spray
- Hand tool set (various sockets and wrenches, etc.)
- Shop manual for your bike
- Sharp razor blade
Step 1 – Ensure tire pressures are correct
This may seem crazy, but that is the primary cause of many ill-handling bikes. With the rear tire mostly hidden by the fender and saddlebags, it is easy to miss a tire that has low air pressure.
(Related Article: How to Check Tire Pressure - HDForums.com)
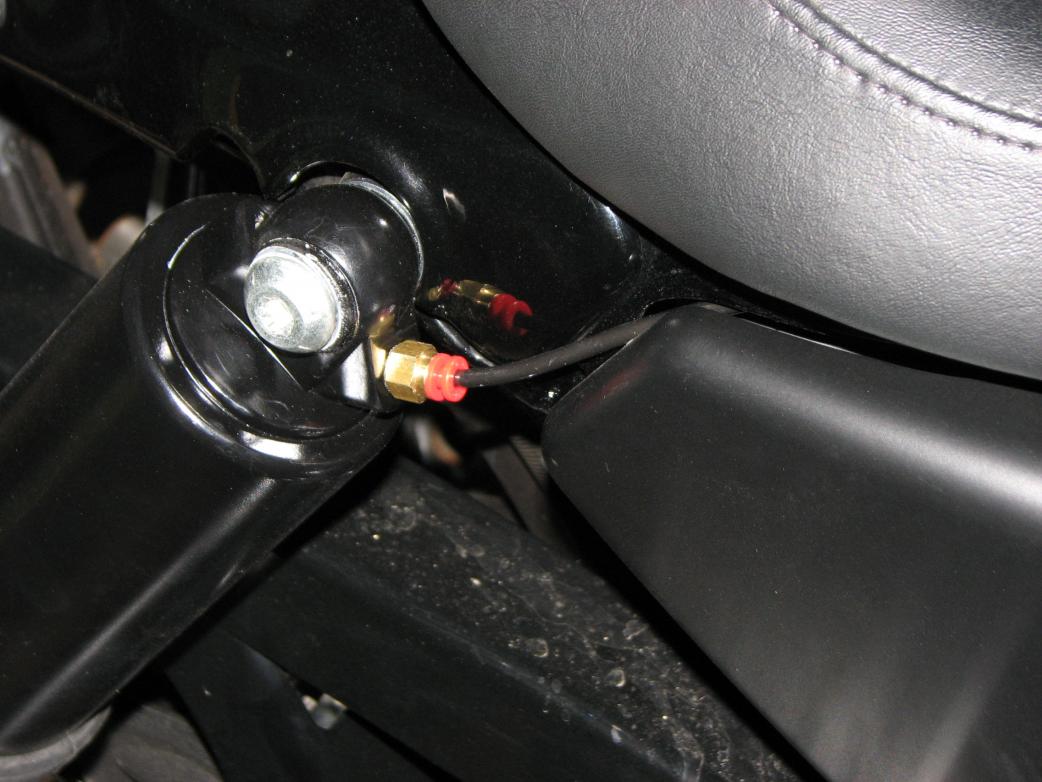
Step 2 – Check air shocks for leaks
If you have to add air to your shocks more than once a month, they probably have leak. Low air pressure affects bike handling on bumpy roads and in the corners.
Remove the seat and saddlebags according to your owner's manual, so you can get to the shocks better. Add air to bring your shocks up to the pressure recommended in your owner's manual for two-up riding. Leave the cap off the fill valve. Spray the fill valve and hose fittings on it with soapy water and look for bubbles. Spray the hose fitting on each shock. If bubbles form, there is a leak. Try gently tightening the valve or fittings.
If the leak is coming from where the hose inserts into the fitting, remake the connections as follows:
- Remove all the air from the shocks.
- Press in the red end of the fitting to release the hose.
- Remove the hose and cut about 1/4" off the end with a sharp razor blade.
- Insert the fresh end into the fitting.
- Gently tug on the hose to ensure it is seated.
- Re-fill the shocks with the recommended air pressure.
- Re-check the hose for leaks.
Step 3 – Check front and rear suspension for loose bolts
Critical attachment bolts should not loosen by themselves, but check to make sure they haven't or weren't left loose after service.
For the purpose of this article, a simple check is all that is required. Refer to the service manual for your bike for correct torque values.
- Check the rear shock's upper and lower attachment bolts; they should not move when you attempt to tighten them.
- Check the rear axle nut; it should be extremely tight.
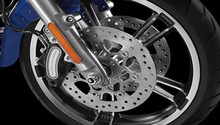
- Check the front axle nut; it should not move when you attempt to tighten it.
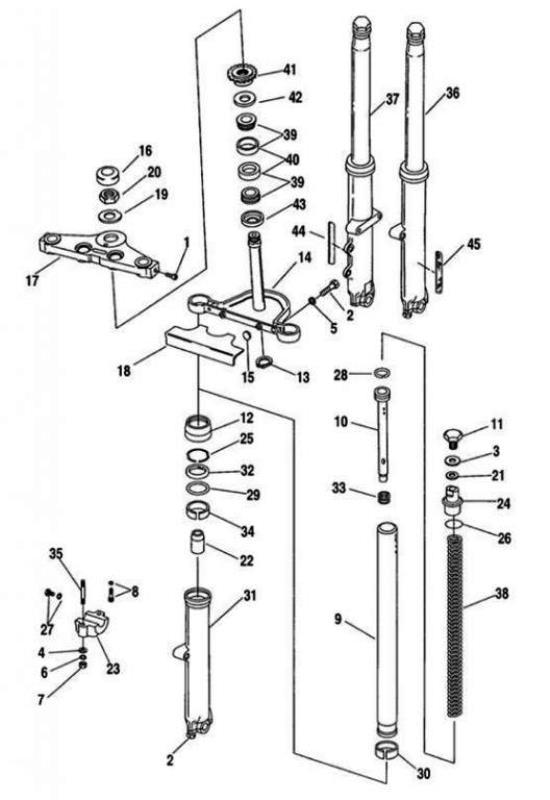
- Check the front axle retaining nuts on the bottom of the right fork slider. They are supposed to be tightened to 11 to 15 foot pounds. Use gentle pressure to see if they are loose. Do not over-tighten. See Figure 2, item 10.
- Reach up into the fairing or nacelle and attempt to tighten the fork tube pinch bolts on the lower fork tree. They should not be loose. See Figure 2, item 2.
Pro Tip
The following procedures require modifications to your bike. If you are not comfortable doing so, take your bike to a trained mechanic.
Step 4 – Bagger wobble (install a stabilizer link)
The rear swing arm on Harley Touring bikes is attached to the transmission and engine assembly, which is rubber mounted to the frame.
Worn rubber mounts can allow more play. Side-to-side motion is possible at the rear mount, which can cause a wobble, especially at higher speeds. It is easy to add a stabilizer link to eliminate that play.
True-Track and Progressive Suspension are the most common stabilizer kits for Touring bikes. They both attach differently and each comes with detailed installation instructions. The Progressive unit replaces the rear motor mount with one that includes a mounting tab and a bracket that bolts to the bottom of the transmission, the brace connects these two. True-Track mounts to the frame's crossmember and to the bottom of the transmission.
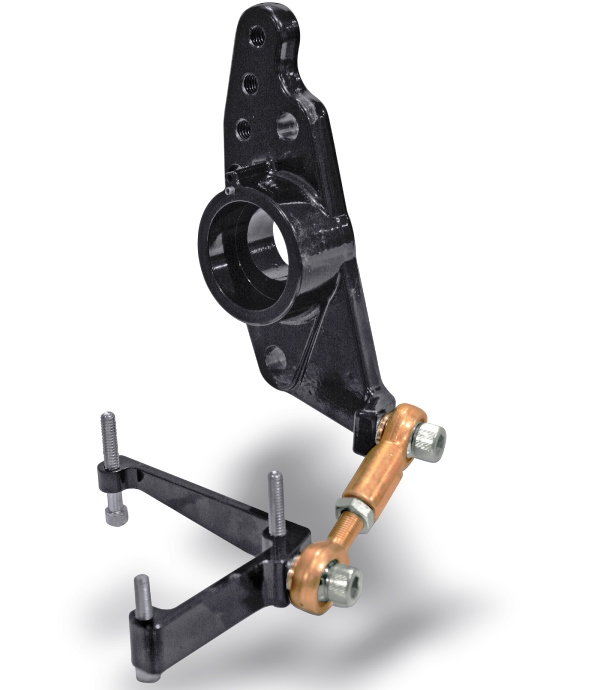
Figure 3. Progressive Suspension stabilizer link. 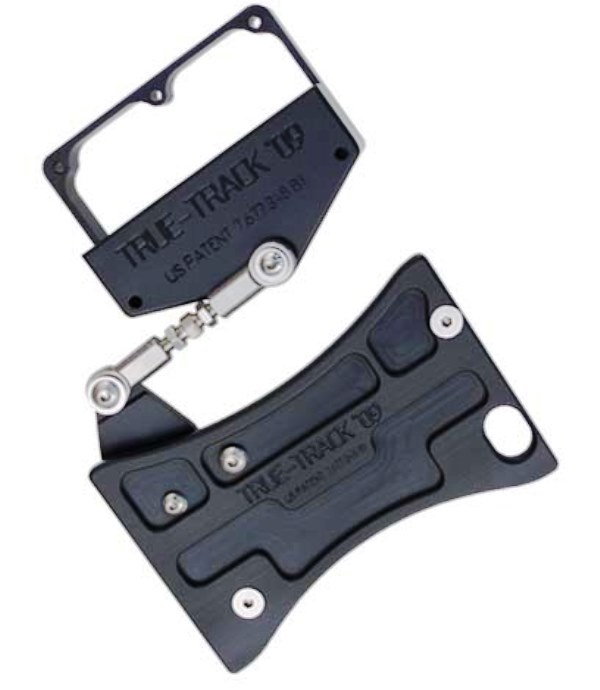
Figure 4. True-Track rear stabilizer link.
Pro Tip
Upgraded front forks and rear shocks can totally transform your bike. There are dozens of possibilities, limited only by your budget. Shocks are easier to install than fork upgrades.
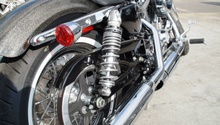
Step 5 – Rear shock upgrades
The rear shocks are a basic design, dating back to the 1980's. While air adjustment for varied loads is convenient, they don't do a particularly good job absorbing bumps or controlling the rear wheel travel.
Both Harley Davidson and the aftermarket provide shocks that are an upgrade over the basic air shock on most Touring bikes. Shock replacement is pretty straightforward, just undoing a few bolts and nuts, with the wheel supported off the ground. Most shocks come with good instructions.
- Support the bike on a jack or lift so the rear wheel is just off the ground. Remove the saddlebags.
- Release the air pressure, then remove the air hoses and fittings.
- Remove the lower, then upper bolts holding the shock to the bike and remove the stock shock.
- Install the shocks according the manufacturer's instructions. This usually involves checking alignment and shimming to ensure they do not bind in their travel. Install and torque the mounting bolts.
- Reinstall the saddlebags and lower the bike off the jack or lift.
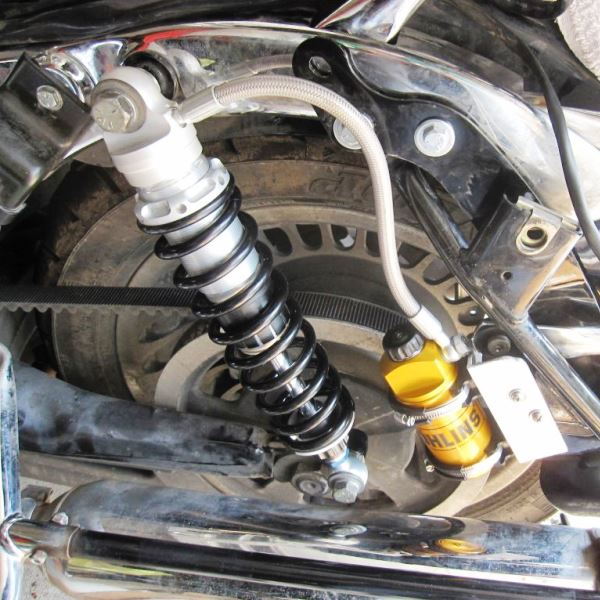
Figure 5. Ohlins remote reservoir shock; the gold standard of suspension upgrades. 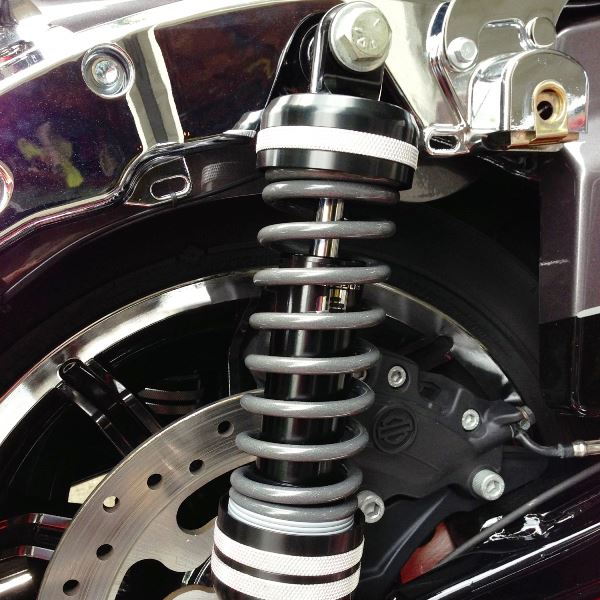
Figure 6. Progressive 944 rear shock. 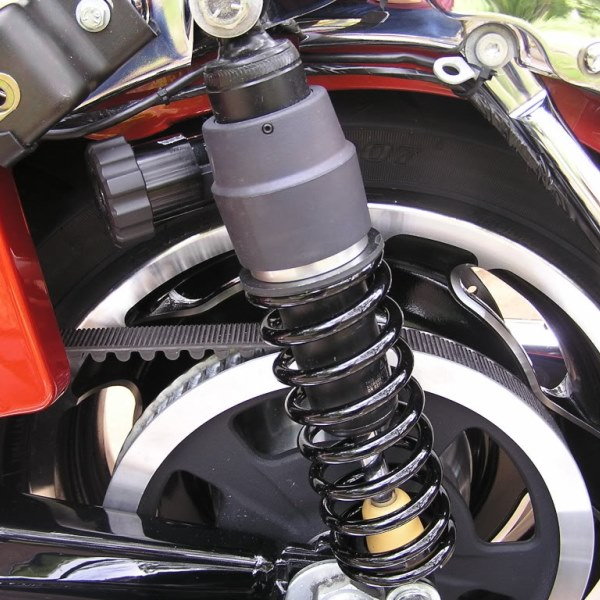
Figure 7. Harley Premium adjustable shock.
Pro Tip
Fork changes require complete tear down of the front end of your bike. It is critical that it is done correctly. If you are not a very experienced Harley mechanic, you should bring your bike to a professional.
Step 6 – Front fork upgrades
Here is where you have the most variations in upgrades, from simply changing the oil to spring and valve changes to cartridges to complete fork replacement.
Taking it all apart is easy, but putting the front end back together correctly is critical if you want a safe-handling bike afterwards. Removal of the fairing is required to upgrade your front forks, no matter what you do. Follow the procedures in the shop manual for your bike. The front forks consist of rigidly mounted tubes with lower sliders that move when the wheel hits a bump. That motion is controlled by oil, valves and springs. Adjusting any or all of these has a great impact on front fork performance. What follows is an overview of things you can do, from simple to most complex, once you have exposed the top of your forks.
Drain the oil and refill with heavier oil - Harley ships these bikes with 5W oil, or something similar in the tubes to provide a soft ride. Thicker oils are available to slow down the fork action and help with a wallowing ride. Try 10W or even 15W, as it is a cheap and easy modification. The fill is at the top, but be careful because the springs are under the caps and can shoot out. Check your manual or online for exactly how much your bike needs. A little extra oil will also stiffen the front spring action.
Stiffer or progressive rate replacement springs - In conjunction with heavier oil, remove the spring and install one matched to your weight and riding style. There are even progressively wound springs that start off soft, but get stiffer as they compress. This is also a easy and not expensive modification that most people can do themselves.
Install upgraded top tree - Aftermarket upper triple trees are readily available for most bikes and will hold the fork more securely. The result is a more confident feel at the bars, and more precise cornering. Charging it out is as simple as unbolting one and bolting up the new piece. The CCE top tree pictured does require you to change the fork tubes though, in order to facilitate its longer engagement portion. It also comes with fork spring pre-load spacers to make up the difference with stock springs.
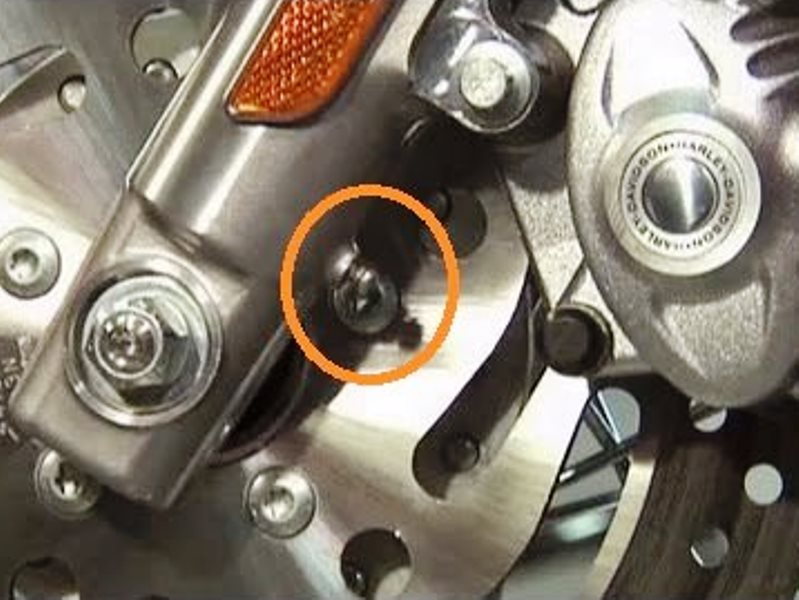
Figure 8. Oil drain screw. 
Figure 9. Front spring replacement. 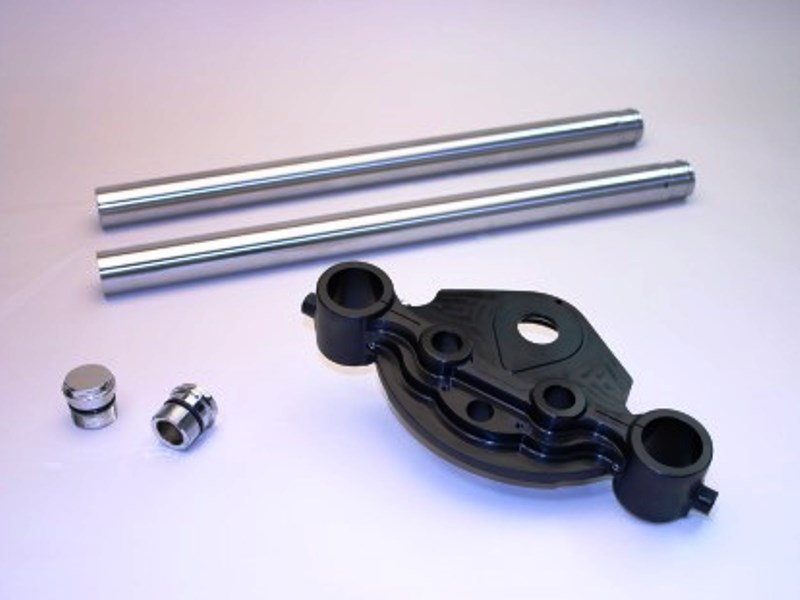
Figure 10. CCE top triple tree and fork tubes.
Damping valve upgrade - In conjunction with the above, removing the damping valves and install ones designed for better oil control will vastly improve the ride. This process requires a much deeper dive into disassembling the front forks, and putting the back together. It isn't hard, but it is complicated. RIcor and Race Tech are two companies well respected for their valve upgrade kits. Check out the video link at the end for a detailed change over.
Cartridge fork upgrade - Doing a cartridge fork upgrade replaces everything inside the forks with new pieces. The modern cartridge style setup is the current state of the art, and comes stock on many 2014 and newer Harley Touring bikes. In many ways, it is actually easier to do than the valve upgrades, but is is much more expensive.
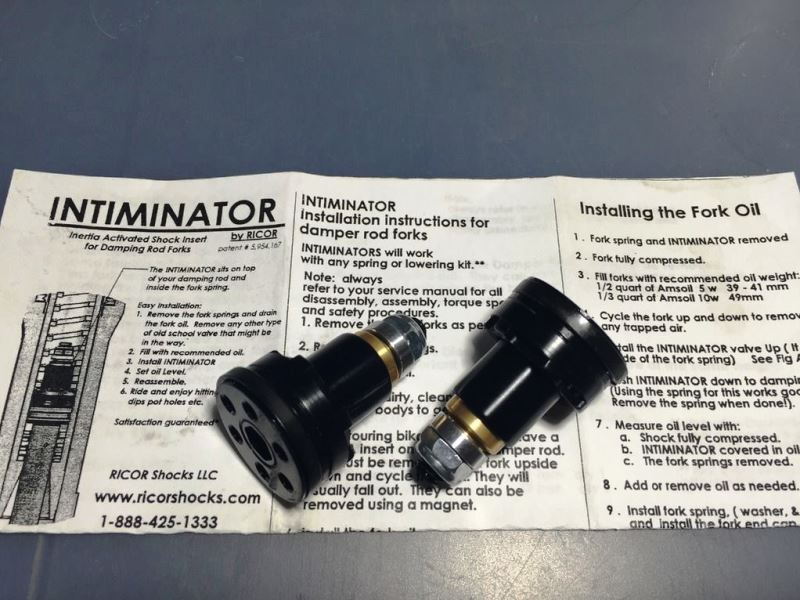
Figure 11. Ricor intiminator valves. 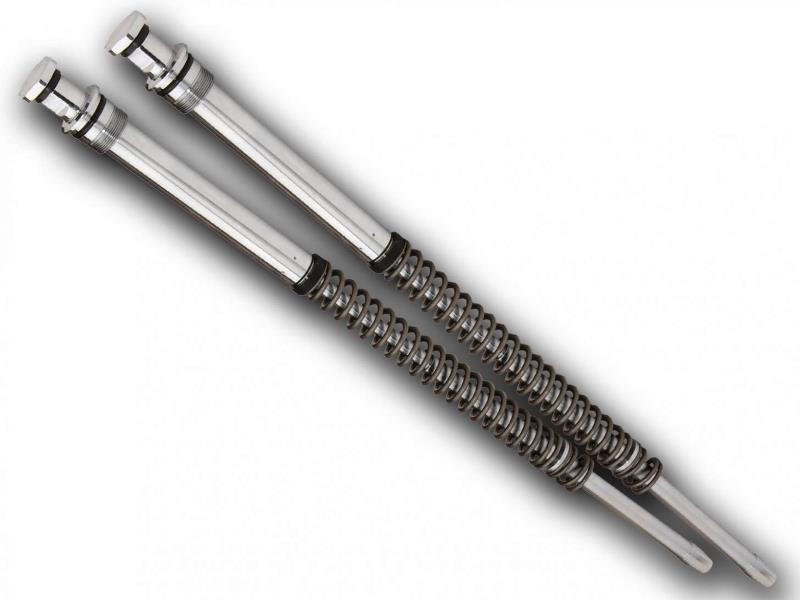
Figure 12. Progressive monotube cartridges.
Related Discussions and Video
- Fix for the Touring Wobble - HDForums.com
- Best Front Suspension Upgrade - HDForums.com
- Fitting Gold Valve Emulators to Harley - YouTube.com