Harley Davidson Touring: How to Replace Shocks and Shock Reviews
Harley Davidson Touring bikes have had air shocks since 1983. At that time, the ability to adjust your shocks for different loads with air pressure was considered cutting edge. Unfortunately, their ability to provide a good ride and handling has not improved much since then. Fortunately, there are many other shocks that provide a better ride.
This article applies to Harley Davidson Touring models (1983-present).
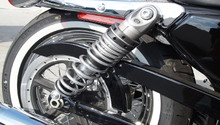
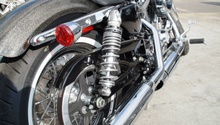
Harley Davidson touring bikes come in many sizes and models, but the basic air suspension hasn't changed much since 1983. They have two hydraulic dampers with an air chamber that is pressurized to support the load with (usually) a single fill valve. The ability to vary air pressure allows the shocks to support everything from a relatively lightweight Road King with a solo rider to a fully loaded Ultra with a heavy rider and passenger aboard. The problem is there are no adjustments on the hydraulic part of the shock, so the dampening properties cannot be varied to suit various loads and road conditions. This means the shock is usually too harsh or too soft for most conditions. For lowered bikes like Street Glides, it is even worse, because those model shocks have only two inches of travel, compared to the three inches on the rest of the line. That means it doesn't take much to bottom these bikes out on bumps, sending a shock up the rider's and passenger's spine.
Fortunately, both Harley and the aftermarket offer better shocks that can be tailored to your particular needs, with both load capacity and hydraulic damping adjustments. Most premium shocks can be ordered with two or more different spring rates, and the vendor or manufacturers have their own guidelines to picking the correct spring for their shock. This will take into consideration your particular bike, whether you ride solo or with a passenger, and how much you and your gear weigh. It is very important to have conversation with the seller to ensure you are starting off with the right spring.
Table of Contents
How to Replace Your Rear Shocks
Materials Needed
- Two new shocks
- Bike jack or center stand
- Loctite - blue
- Socket set with ratchet - 3/4" for shock mounting bolts, 7/16 or 1/2" to remove air valve mount.
- Torque wrench to read 35-40 ft-lbs.
- Two 1/8" pipe plugs (optional)
- Tape measure
Step 1 – Prepare the bike
First, raise the bike on a stable bike jack just enough to support the weight of the bike. The jack should contact both lower frame tubes near the rear crossmember. Do not jack on the crossmember, oil pan or motor. The rear wheel should be raised slightly off the ground. If your bike has a center stand, that can be used too. Verify the bike is stable by carefully shaking it side-to-side. Then, remove the seat and both saddlebags as described in your owner's manual. This usually involves only a few screws or quick disconnect fasteners.

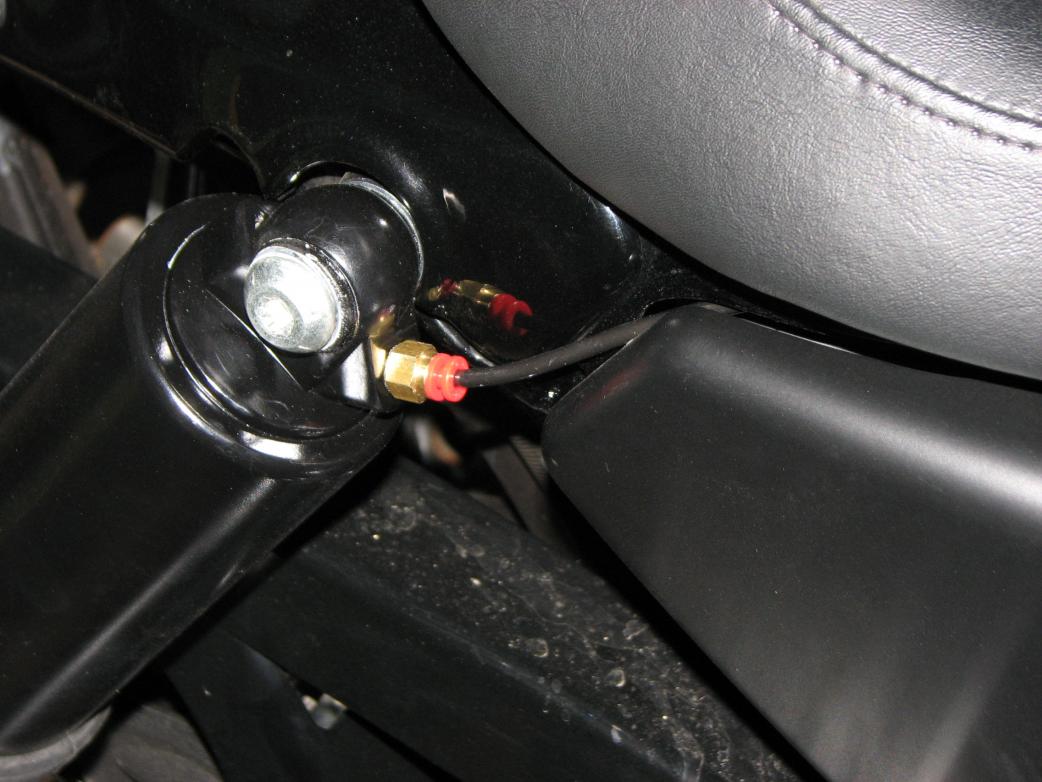
Step 2 – Remove air fill valve and hoses
- First, add two or three pounds of air to the shocks to clear the lines of any shock oil that may have traveled up them.
- Then, bleed all of the air from the shocks by depressing the center pin in the fill valve.

- The air hoses can now be removed from the valve and shocks by pushing the red part of the fitting in with your fingers and gently pulling on the hose.
- Remove the bolt holding the air valve bracket in place. Remove bracket and reinstall bolt.
Step 3 – Remove the shock absorbers, one at a time
- Remove and retain the lower bolt and washers from one shock, then remove and retain the upper bolt and washers. Keep the shock upright to prevent oil from spilling out of the air hose fitting.
- Support the rear wheel as you remove the lower bolt and washers from the other shock. Gently lower the wheel to the ground. Then, remove the upper shock bolt and washers, keeping the shock upright as you do.
To prevent the oil from leaking out while the shocks are in storage, reinsert the hoses; Or, you can remove the air hose fittings and insert a 1/8" pipe plug in the shocks.
Step 4 – Install the new shocks
- Assemble the shocks (if required) according to the manufacturer's directions. Some shocks provide various spacers and sleeves to size the shock to your mounting bolts.
- Clean and put a drop of blue Loctite on each shock mounting bolt. Hold the new shock in position and loosely install the upper mounting bolt, spacers and washers. Raise the wheel (easier with a helper) to align the hole and install the lower shock mounting bolt.
- Install the other shock in the same way, remembering to clean and put a drop of blue Loctite on each mounting bolt.
Note
Tighten all four mounting bolts to 35 to 40 foot-pounds.
Pro Tip
Many aftermarket shocks have solid mounting bushings and do not tolerate misalignment. Check the alignment by slowly sliding the shock towards the bike until the shock contacts either the frame or the swingarm. If there is a gap at the other end of the shock, install a suitable washer to fill the gap. This will prevent side loading the shock which will adversely affect the shock's ability to absorb bumps and may increase wear.

Step 5 – Setting sag and initial shock setting
Setting initial sag is the most important adjustment you can make to get the most from your investment. All shocks have what's called 'preload' adjustment. This adjustment puts pressure on the spring to compensate for the weight of the bike and load. You want to have the shocks compress, or sag, only about 1/3 of their total travel with you (and your passenger) sitting on the bike with a normal load. For stock Harley shocks this is about an inch, but the paperwork with your shocks should give their actual travel dimension. Simply divide that number by three to get your desired sag.
- Reinstall the seat but leave the saddlebags off for now. If you normally carry a lot of weight in the bags, you may want to put the equivalent weight on the seat for these adjustments.
- Because Harley shocks are nearly vertical you can just measure and write down the distance from one shock mounting bolt to the other. This is your unloaded dimension; the shocks are fully extended.
- Lower the bike off the jack or center stand and sit on the bike, using as little pressure as you can to balance the bike upright. Have a helper measure and write down the distance from one shock mounting bolt to the other. The difference between this dimension and the unloaded dimension is your solo sag.
- If the solo sag is not 1/3 of the shock travel, add or remove preload according to the shock manufacturer's instructions and repeat the step above until you get the correct sag. Usually this involves turning a ring above or below the spring. Mark the position of the adjuster with a marker or paint pen.
- If you normally ride with a passenger, have her sit on the bike with you, feet on the foot boards or pegs. Hold the bike upright using as little pressure as you can and have your helper measure and write down the distance between shock mounting bolts again. The difference between this dimension and the unloaded dimension is your two-up sag.
- Increase the preload adjustment until the two-up sag is back to 1/3 of the shock travel. Mark this position as well.
- Now you have two reference points for quick changes from riding solo to with a passenger. You can also repeat the procedure and mark another position with the bike fully loaded if you like. But that will involve more complicated measurements and installing and removing the saddlebags a few times.
Other shock adjustments. Hydraulic dampening adjustments are possible with many shocks, and the capabilities and procedures vary between different shocks. Here's where reading the instructions that came with the shocks will be required. Start out leaving them alone until the shocks break in, about 500 miles. Then, change one thing at a time and test ride on a familiar road until you get the ride and handling you like.
Featured Videos
-
How to Change Shocks on a Touring
-
Öhlins Shocks in Action
Shock Absorbers Review
The aftermarket is full of choices for shocks that fit Harley Touring bikes. There are many brands and many models within brands to choose from. Here are some of the more popular shocks available.
Shock construction is a good indication of quality and cost. The most basic shock moves oil from an inner to an outer tube. This has no means to prevent the oil from foaming under heavy use, which lessens the shock's ability to dampen bumps. Most modern motorcycle shocks have one tube with holes in the piston to provide dampening. They use pressurized nitrogen to prevent foaming, but some of the nitrogen gets into the oil and forms an emulsion. This also reduces the dampening under hard use. To prevent this, better shocks have a piston that floats on the oil to separate the nitrogen. Top-of-the-line shocks have a remote oil reservoir that keeps shock performance consistent under hard use.
Note: Prices are for 2009-up Touring bikes.
Shock Brand and Model |
List Price |
Construction |
Length Available (Stock is 13" except Street Glide is 12") |
Adjustments | Springs Available | Warranty |
|---|---|---|---|---|---|---|
| Harley Premium Ride Hand Adjustable | $549.95 | Dual Tube | 13" and 12" | Preload only | Standard | 1 year |
| Progressive 412 |
$299.95 |
Emulsion |
11.5" to 13.5" by 1/2" |
Preload only | Standard or Heavy Duty | 1 year |
| Progressive 444 | $624.95 | IAS valve Emulsion | 11.5" to 13.5" by 1/2" | Preload only | Standard or Heavy Duty | Lifetime |
| Progressive 970 | $1,249.99 | Remote | 13" and 12" | Preload and Compression | Standard or Heavy Duty | Lifetime |
| Öhlins HD 022/ HD 039 (#2) | $649 | Emulsion | 13" and 12 1/8" | Preload only | Custom | 2 year |
| Öhlins HD 159 (#3) | $955 | Separated | 13 +-1/8" | Preload, Ride Height and Rebound | Custom | 2 year |
| Öhlins HD 357 (#6) | $1,574 | Remote | 13 1/8" | Preload, Rebound and Compression | Custom | 2 year |
| Hagon Standard Road Shocks 32032 | $219 | Emulsion | 11.4" to 13.8" by 10mm (0.4") | Preload only | Custom | 2 year |
| Hagon Adjustable Shocks 2810 | $329 | Emulsion | 11.4" to 13.8" by 10mm (0.4") | Preload and Compression+ Rebound | Custom | 2 year |
| Hagon Nitro Shocks SN016 | $549 | Emulsion | 11.4" to 13.8" by 10mm (0.4") | Preload and Compression+ Rebound | Custom | 2 year |
Best Value: Hagon
Harley Premium Ride Hand Adjustable

- Offers enhanced compression and rebound damping compared to the Original Equipment-style air adjustable shocks
- Provides a controlled yet plush ride with less bottoming
- Larger chambers (40mm diameter pistons and 14mm rods) allow these shocks to react more quickly to impacts - this keeps the tires tracking while minimizing harshness transmitted through the frame
- Knob behind the left saddlebag allows the rider to conveniently modify the spring preload via a hydraulic adjuster
- Available in Standard Ride Height and Low Ride Height versions
If you can get low mileage take offs from CVO models, they are a good improvement over the stock air shocks. For list price there are better shocks available. These shocks are often available as take-offs from CVO models for as little as $100.
Progressive 412
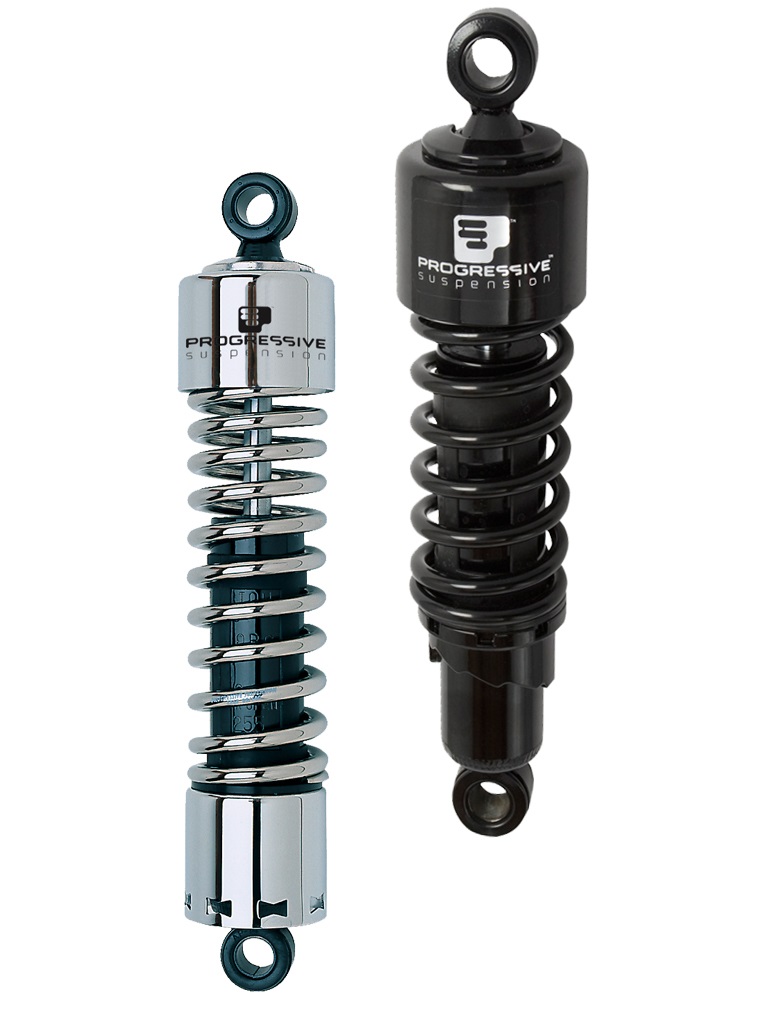
- All steel double wall damper with multistage velocity sensitive damping
- 5-position cam style preload adjuster
- High pressure gas charged for consistent damping performance
- Standard or heavy-duty progressive rate springs in either chrome or black
- Optional full show chrome covers on select applications
Progressive shocks are an alternative to pricier Öhlins shocks, with three levels of performance, but somewhat inferior than the equivalent Öhlins versions. The 412s are very basic shocks but at a very low price point. People like them better than stock, but there are better shocks available.
Progressive 444
- Frequency Sensing Technology (FST) allows the shocks to sense the frequency of a bump and automatically adjust damping for superior ride quality
- Deflective disc valving
- Adjust spring pre-load by hand, no special tool needed
- Progressive rate spring
- Standard or heavy duty spring rate and black or chrome finish
- Lifetime Limited Warranty & made in USA
These have a better construction and more features than the 412. Many owners would consider them the minimum that they'd use on a bike.
Progressive 970

- High pressure gas Monotube
- Progressive rate springs are adjusted via threaded pre-load adjusters
- Deflective disk dampening
- Remote reservoirs mount in front of the bags and allow for easy compression adjustment
- 20 clicks of compression adjustment
This is Progressive's top-of-the-line shock. But at this price, you should probably consider buying Öhlins.
Öhlins

- Premier comfort performance and control
- Available in several configurations
- Top-of-the-line handling
Öhlins USA now has shocks for Harley-Davidson Touring models. Shocks are available in several configurations, starting with the exceptionally priced, HD 022/039 shock, a single-tube emulsion-style damper with pre-load adjustability. For riders looking for mid-line performance and pricing is the HD 159 shock, with an internal piston for perfected damping, and adjustability for pre-load, ride-height, and rebound. Or move all the way up to HD 357 high-performance shocks with remote reservoirs and full adjustability.
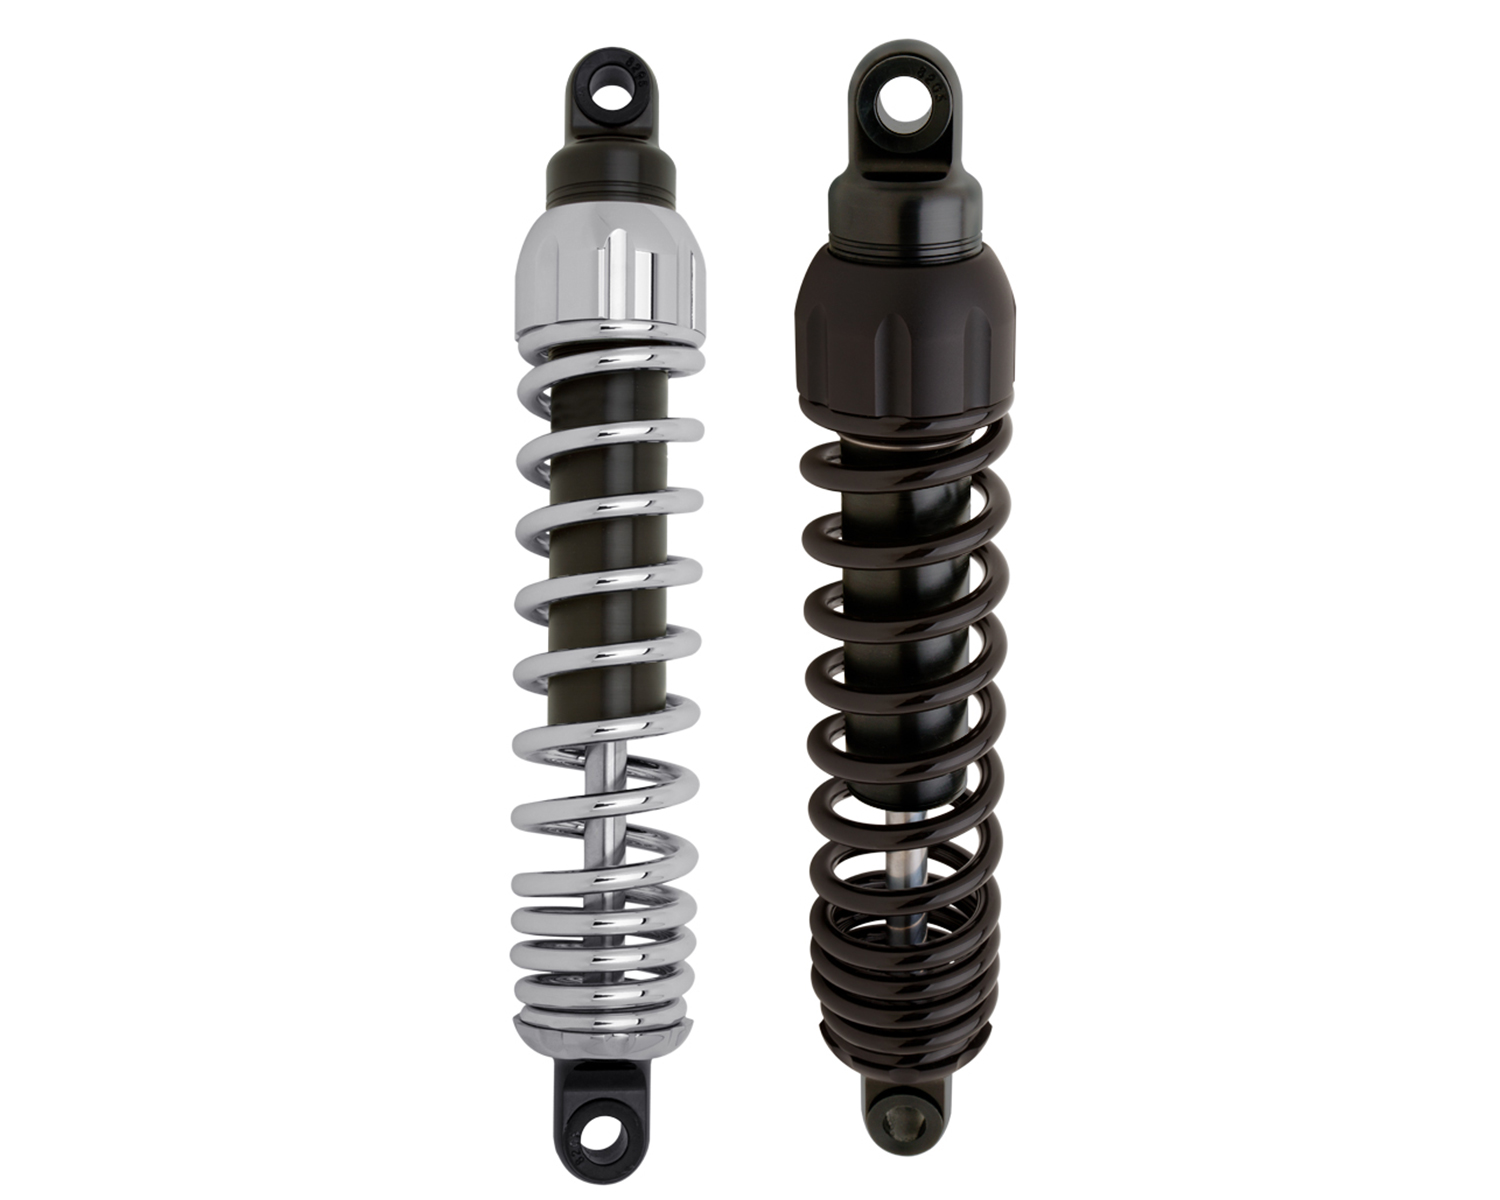
Hagon Road Shocks

- Feature black body with choice of black or chrome springs
- Quadrate progressive action springs (except 30kg/cm and above) adjustable by conventional stepped cam ring
- Double sealed nitrogen cell, automatic compression & rebound damping control with hard chrome piston rod
- Supplied in complete pairs with spring adjuster spanner
Hagon is a British company that has been making shocks since 1985. Over the years they have expanded their line to include most bikes made since 1952. Their Road Shocks are their basic shocks, and come in various lengths, spring rates and dampening rates. They have had good reviews on Dynas and Sportys, aren't used so much on Touring Harleys.
Hagon Adjustable 2810

- Feature black body with choice of chrome or blacksprings
- Quadrate progressive action springs (except 30kg/cm and above) adjustable by conventional stepped cam ring
- 10 position damping control with automatic compression & rebound balance
- Hard chrome piston rod
- Supplied in complete pairs with spring adjuster spanner
An adjustable version of the Hagon shock, with a single knob that controls both compression and rebound dampening. It can be ordered in different lengths with various spring rates. Their sales staff will help you to pick what is right for you.
Hagon Nitro

- Stainless steel body and spring
- 18mm hard chrome piston rod
- Choice of anodised color for alloy parts (Blue, gold, black and silver)
- 38mm piston
- 10 click adjustable damping
- Fully adjustable spring preload
- Hi-tech shim stack system for improved damping
Hagon's top-of-the-line shock, which also comes in various lengths and spring rates, is the Nitro. This product has an excellent value.
Pro Tip
Once you've upgraded the rear shocks on your Touring Bike, you will soon notice the shortcomings of the front forks.
Related Discussions and Sites
- Ohlins Harley Page - Ohlinsusa.com
- Progressive Suspension Harley page - Progressivesuspension.com
- Hagon Shocks Website - Hagonshocksusa.com
- Ohlins Shock Install Advice - HDforums.com
- Progressive 412 Shock Review - HDforums.com
- Hagon Shocks Review - HDforums.com
- Motorcycle Metal HD Touring Ohlins page - Motorcyclemetal.com