

Custom Stereo Installation, tips, tricks, how-to, 2007 Streetglide

Cruiser
Joined: Apr 2008
Posts: 154
Likes: 0
From: Shorewood,IL/Mesa,AZ
yup, no complaints on my end, known the guy for 14 years, and has been worse... was the last straw, have to learn to feed people with a long handled spoon...lol
any particular thing i should elaborate more on, or explain better... im trying to go back through the thread, will do it after i explain the quick connect process...
any particular thing i should elaborate more on, or explain better... im trying to go back through the thread, will do it after i explain the quick connect process...


Thread Starter
|
Road Master
Joined: Feb 2008
Posts: 802
Likes: 0
From:
cool, its not tha bad to do, just most people feel like that, before they get startd, ill do the install thread asap and pm you...
Thread Starter
|
Road Master
Joined: Feb 2008
Posts: 802
Likes: 0
From:
I know what you are saying!!! I had a buddy(was a buddy) that I loaned some money and did some work on his house and he screwed me out of the money and just stopped talking to me so he wouldn't have to deal!!! Buddies like that I don't need and after 20 years of being friends!!!Plenty of people out there that would appreciate your work!!!! AWESOME work by the way!!!!
Thread Starter
|
Road Master
Joined: Feb 2008
Posts: 802
Likes: 0
From:
and no there are many ways to install the radio, i just like this one the best... i made the last two that were on my bike, out of wood... then painted the wood, satin black... looked pretty clean... used two blocks (shaved down) drilled the holes in the wood to allow it to be screwed into the side of the radio, then screwed it in place through the factory holes for the radio in the inner fairing, made the front piece to flush the front of the radio...
the first kit i made looked like this
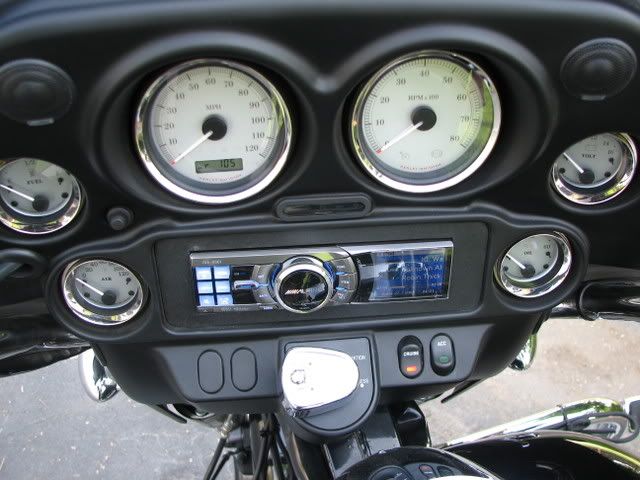
as many times as i know i am going to change the radio on this bike, i wanted something that was durable... the hawg-wired kit is made out of metal, and fits in the bike perfectly. it is the sturdiest that i have seen and haven't had any problems with the radio falling through the fairing, etc.
if i do a bike and charge money, its not worth me making one, i would prob charge the same, cause of the time it would take to make it right... now i do have an extra fairing that i am putting a radio in and some 6.5s, i may make that one, cause it isnt going on a bike... just gonna sit in the garage, or at a friends store... he wanted me to do one so he could put some of my work on display
Thread Starter
|
Road Master
Joined: Feb 2008
Posts: 802
Likes: 0
From:
ok, i will try to explain the rest of the install, by using my bike as an example...
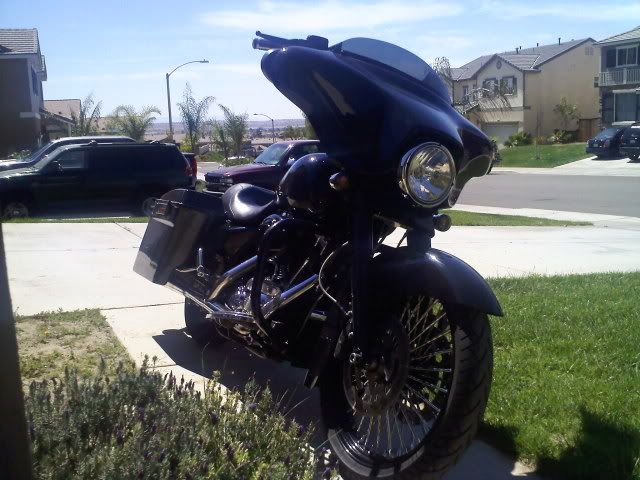
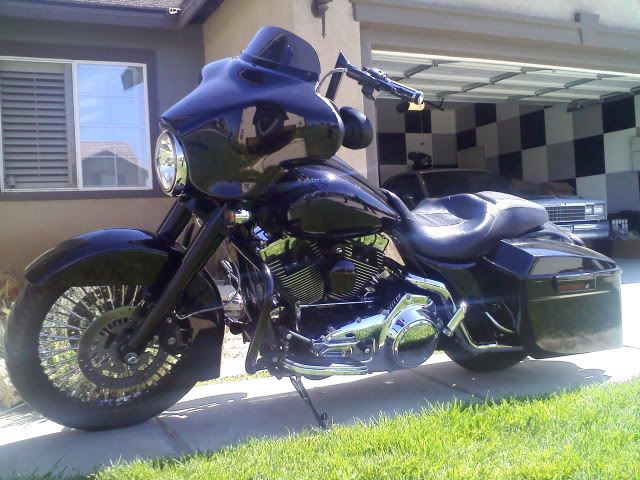
lets start off with a pict or two of my baby...

after all of the above is completed, "prep" the bags for speaker install, in this case would be 2 6x9s... you need a drill bit or unibit, paper or card board to make a template and some wood (to space the 6x9 away from the bag, for excursion)... in this case i used my pioneer 6x9s (the ones that replaced the yellow cones)...they are the best sounding 6x9s i have heard so far, i am trying to get a pair of hertz, or try some other brand, but havent found anything nicer yet...
i cut a 6x9 "ring" out of card board...
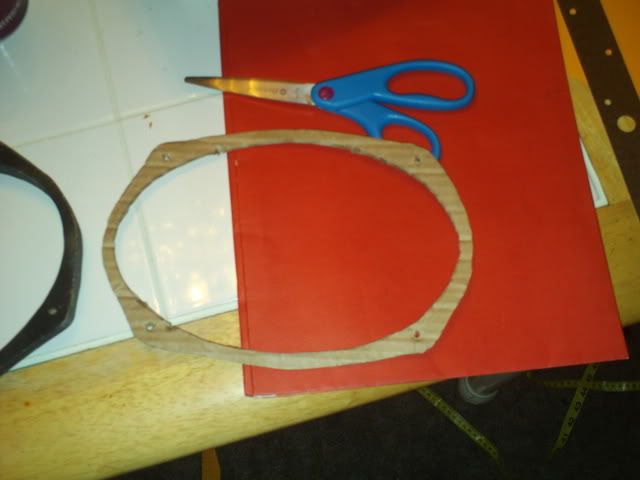
then used the card board to trace and cut (2) 6x9 rings out of wood (mdf)
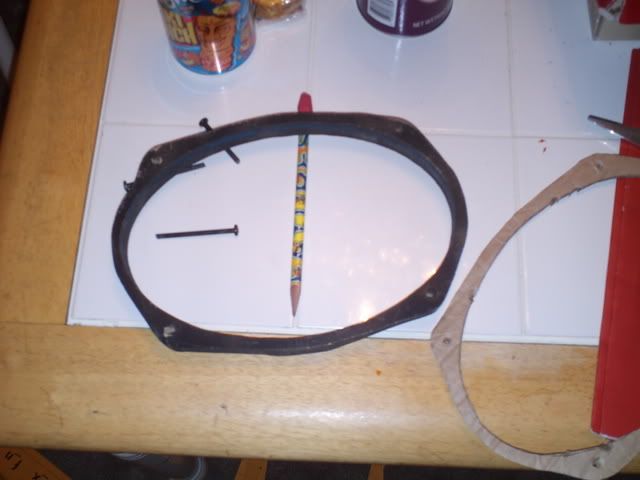
the 6x9 is to be mounted towards the rear of the bike/bag, if you were going to put (2) in each bag, you need to modify the ring, to go over the hump in the bag...
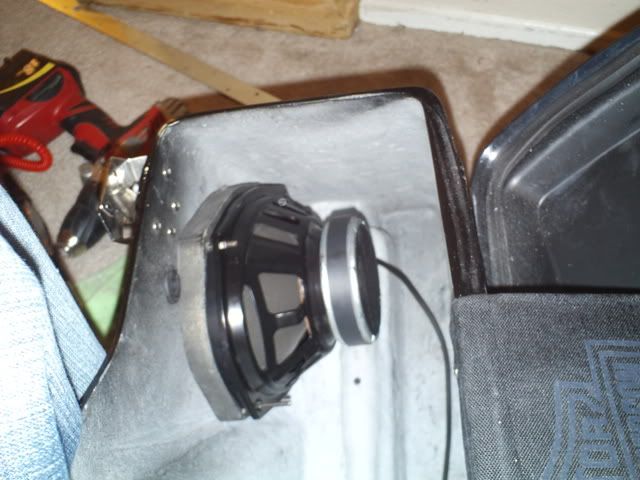
anyhow after making sure the ring fits flush in the bag and on the 6x9, i pre-fit it in, painted the ring black and mounted it in the bag (without drilling the holes in the bag)...
this allows you to use the holes (for mounting the 6x9 and ring in the bag) to align the ring to the outside and mark you area for drilling the hole...
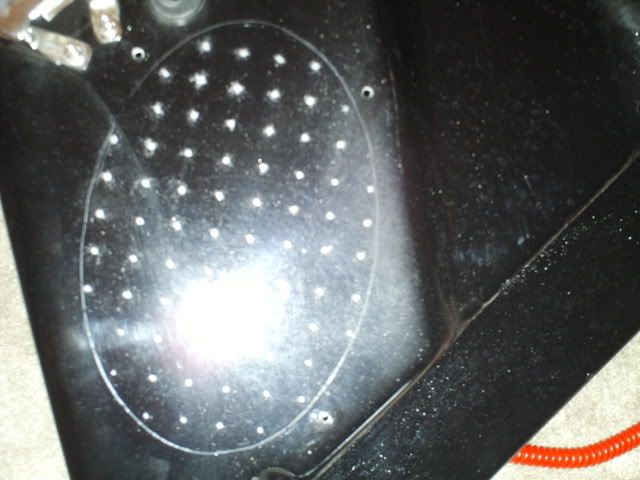
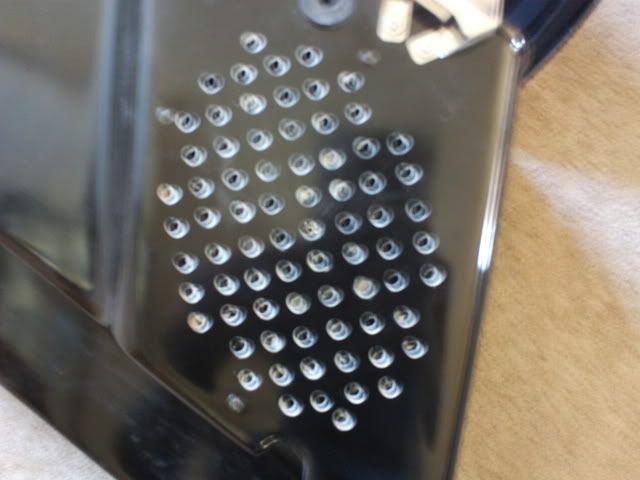
drilled the holes and cleaned the bag up... i did it this way, to try and get the bags to be uniform and look a little nicer than what i have seen, but there are many patterns that can be done, i wanted air/music to be unrestricted, but didnt want to cut the entire area out (which would be the best), the way i have done it allows for some protection, another way i was going to do this, was to cut the area out and mold a grill into the bag (metal), then cover that with material... after some trial (before i had less holes, then listened to it and drill out to see if it made a difference in sound, which it did), i ended up with this
lets start off with a pict or two of my baby...
after all of the above is completed, "prep" the bags for speaker install, in this case would be 2 6x9s... you need a drill bit or unibit, paper or card board to make a template and some wood (to space the 6x9 away from the bag, for excursion)... in this case i used my pioneer 6x9s (the ones that replaced the yellow cones)...they are the best sounding 6x9s i have heard so far, i am trying to get a pair of hertz, or try some other brand, but havent found anything nicer yet...
i cut a 6x9 "ring" out of card board...
then used the card board to trace and cut (2) 6x9 rings out of wood (mdf)
the 6x9 is to be mounted towards the rear of the bike/bag, if you were going to put (2) in each bag, you need to modify the ring, to go over the hump in the bag...
anyhow after making sure the ring fits flush in the bag and on the 6x9, i pre-fit it in, painted the ring black and mounted it in the bag (without drilling the holes in the bag)...
this allows you to use the holes (for mounting the 6x9 and ring in the bag) to align the ring to the outside and mark you area for drilling the hole...
drilled the holes and cleaned the bag up... i did it this way, to try and get the bags to be uniform and look a little nicer than what i have seen, but there are many patterns that can be done, i wanted air/music to be unrestricted, but didnt want to cut the entire area out (which would be the best), the way i have done it allows for some protection, another way i was going to do this, was to cut the area out and mold a grill into the bag (metal), then cover that with material... after some trial (before i had less holes, then listened to it and drill out to see if it made a difference in sound, which it did), i ended up with this
Last edited by Gtsdesigns; Apr 12, 2009 at 07:27 PM.


Thread Starter
|
Road Master
Joined: Feb 2008
Posts: 802
Likes: 0
From:
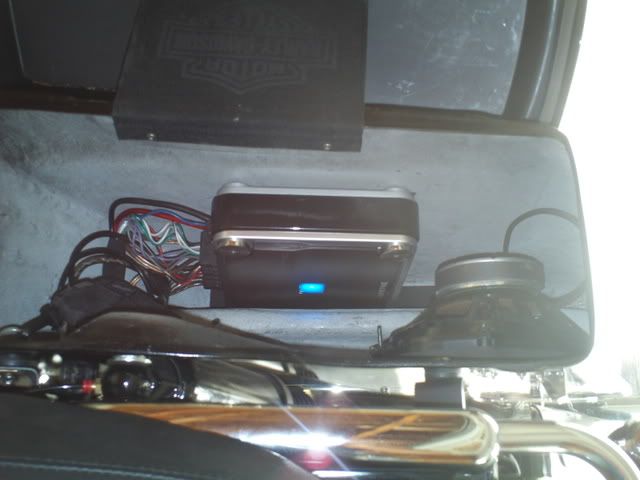
there are many ways to mount the amp... if you are only running one 6x9 in each bag the is plently of room for an amp in one of the bags, in my case, the alpine and many other amps, will fit inside of the extra space in my bag (extended portiion) for example:
Thread Starter
|
Road Master
Joined: Feb 2008
Posts: 802
Likes: 0
From:
my bags are going to be upholstered, when i settle on a color and theme for my bike, so this makes for a nice clean install and wires will be covered nicely... but to make a simple amp baffle for you amp, you just need some wood and screws, or bolts, depending on your comfort level