
2014 FXDB Forward Control Install + Peek Inside the Primary

Thread Starter
|
Tourer
Joined: Jun 2012
Posts: 427
Likes: 6
From: Memphis, TN
I installed forward controls on my 2014 Street Bob this weekend. I did a little here and a little there since there were several family functions going on.
I was originally going to just cut the old shift lever off, but ultimately decided just to do the whole thing "by the book." I'm glad I did. It was a hell of a lot of fun (believe it or not).
Since the 2014s have a new compensator and I hadn't seen a detailed write-up, I thought I'd try my best at a how-to of sorts. I may have missed a picture here and there, but this ought to show most of the major details.
(Please correct me if I get anything wrong.)
...
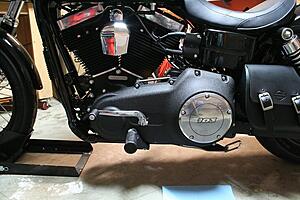
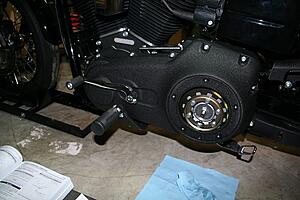
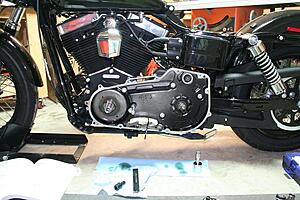
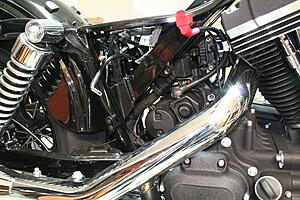
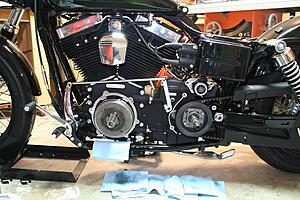
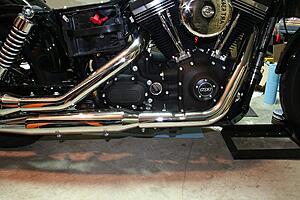
Here's the left side before getting started.
A peek at the primary fluid level.
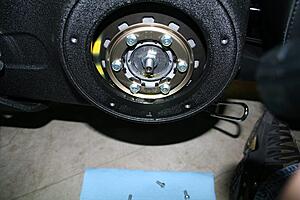
Behind the derby cover.
Metal shavings on the drain plug after only a few hundred miles.

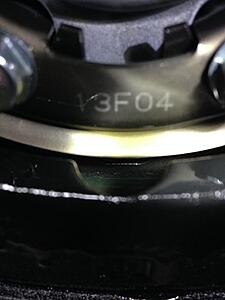
Hah! Someone at the factory or dealer tore this bolt up.
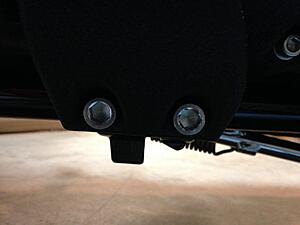
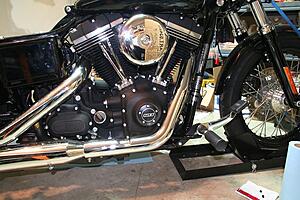
Before removing the shift lever and foot rest.
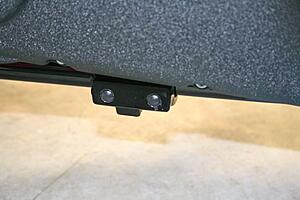
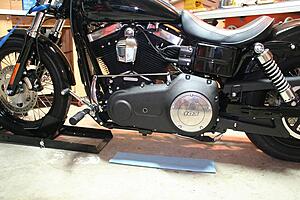
Foot rest removed and holes plugged.
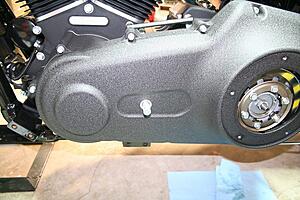
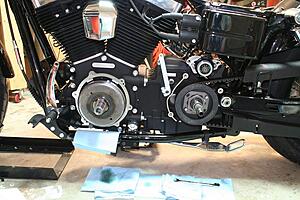
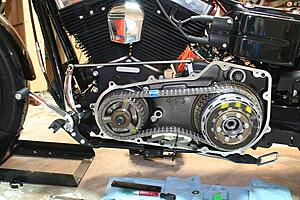
Ready to remove the outer primary cover.
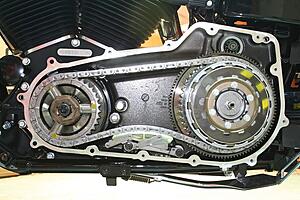
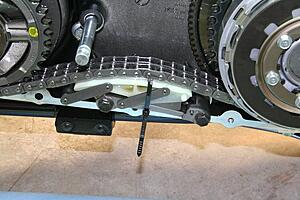
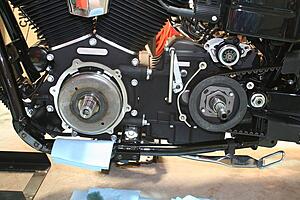
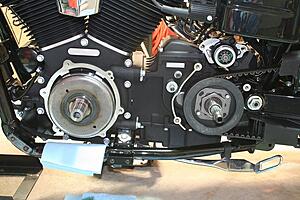
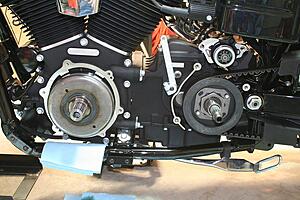
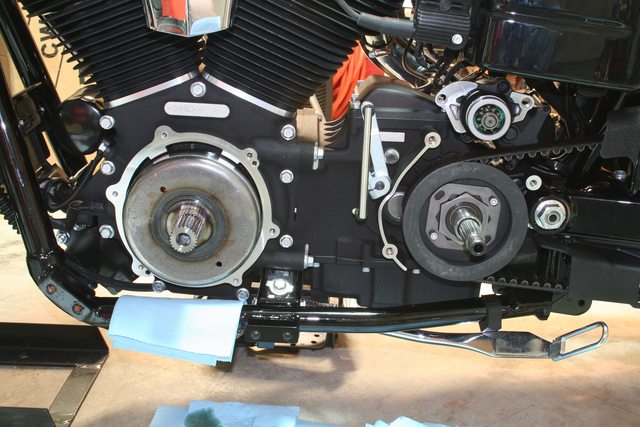
Inside the primary. Compensating sprocket on the left and clutch basket on the right. Starter at top right. Primary chain tensioner bottom center.
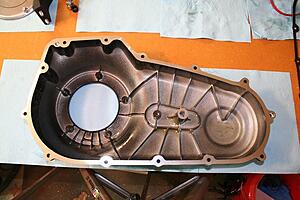
Back side of 2014 Dyna primary cover. New webs in the casting on upper right coincide with new compensator design for 2014.
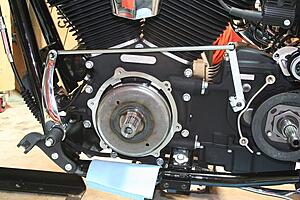
Tensioner zip tied to keep it from flying apart when the drive components are removed.
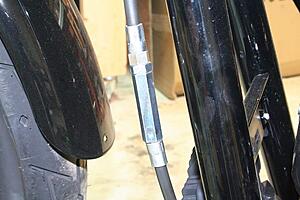
Clutch cable adjusted for full slack.
Drive components removed. After starter bolts are removed, the inner primary cover is ready to come off.
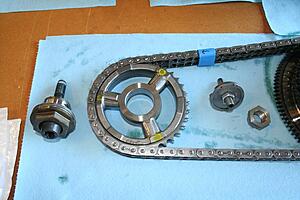
Primary drive components. Part of the new compensator on the left. Clutch basket on the right. Clutch adjustment mechanism in the middle along with the 1-3/16" nut that holds the clutch basket on.
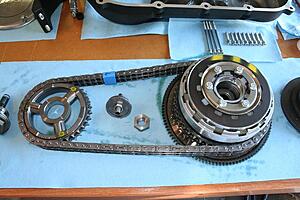
Outer part of the compensator on the far left. This T70 Torx bolt must be replaced every time the compensator is removed for service. It's torqued to 175 ft-lbs. I was expecting it to be quite difficult to remove, but it didn't give me any trouble.
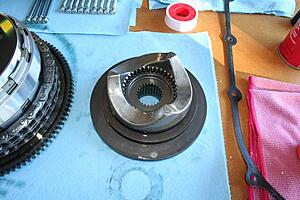
Inner part of the new compensator.
I was originally going to just cut the old shift lever off, but ultimately decided just to do the whole thing "by the book." I'm glad I did. It was a hell of a lot of fun (believe it or not).
Since the 2014s have a new compensator and I hadn't seen a detailed write-up, I thought I'd try my best at a how-to of sorts. I may have missed a picture here and there, but this ought to show most of the major details.
(Please correct me if I get anything wrong.)
...
Here's the left side before getting started.

A peek at the primary fluid level.

Behind the derby cover.

Metal shavings on the drain plug after only a few hundred miles.

Hah! Someone at the factory or dealer tore this bolt up.

Before removing the shift lever and foot rest.

Foot rest removed and holes plugged.

Ready to remove the outer primary cover.
Inside the primary. Compensating sprocket on the left and clutch basket on the right. Starter at top right. Primary chain tensioner bottom center.

Back side of 2014 Dyna primary cover. New webs in the casting on upper right coincide with new compensator design for 2014.

Tensioner zip tied to keep it from flying apart when the drive components are removed.

Clutch cable adjusted for full slack.

Drive components removed. After starter bolts are removed, the inner primary cover is ready to come off.

Primary drive components. Part of the new compensator on the left. Clutch basket on the right. Clutch adjustment mechanism in the middle along with the 1-3/16" nut that holds the clutch basket on.

Outer part of the compensator on the far left. This T70 Torx bolt must be replaced every time the compensator is removed for service. It's torqued to 175 ft-lbs. I was expecting it to be quite difficult to remove, but it didn't give me any trouble.

Inner part of the new compensator.

Thread Starter
|
Tourer
Joined: Jun 2012
Posts: 427
Likes: 6
From: Memphis, TN
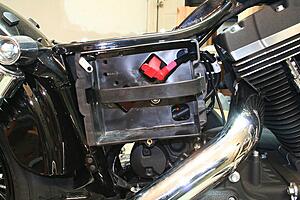
Removed battery box to get to the starter bolts.
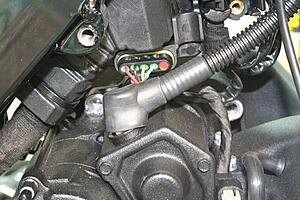
Both starter bolts removed. Noticed the positive battery cable boot needs to be seated on the starter.
Inner primary cover removed.
Old shift linkage and transmission shift lever removed.
New transmission shift lever installed.
Foot rest and more of the shift linkage installed.
The rest of the new shift linkage installed.
Old shift lever and peg reinstalled.
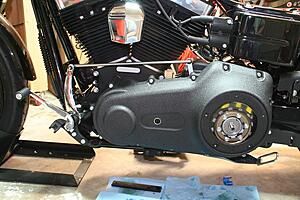
Inner primary cover and drive components back on.
Outer primary cover back on and the older shift lever hole plugged.
Old foot peg reinstalled.
Battery box back on.
Before removal of old brake lever, brake pushrod, and foot rest.

Everything removed. This side is easy compared to the other side.
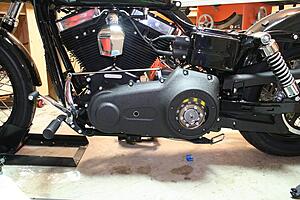
New brake lever, new brake pushrod, new brake pedal, new foot rest, and old foot peg installed. All done over here.
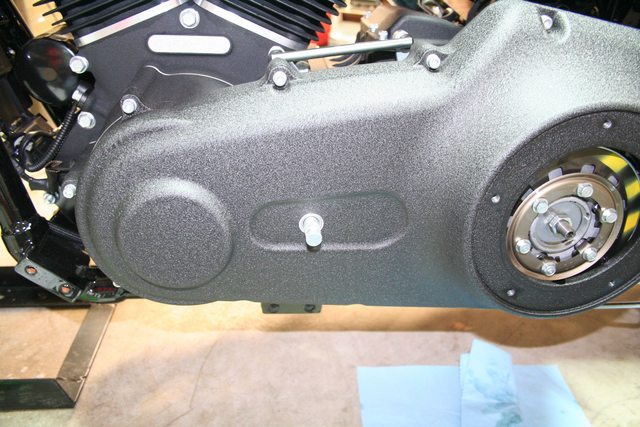
Derby cover reinstalled. All done over here too.
...
I originally ordered the black forward control kit. I was told it was on back-order with no availability date. I liked the stock look with wrinkle black and polished components better anyway, so I bought some parts off a forum member and ordered the rest of what I needed. Here's a list of what I ended up with:
...
I hope y'all find this interesting and/or helpful. I really enjoyed this little project. Oh, and $644 + tax saved. Dealer quoted 7 hours labor @ $92/hour. Ha!

Both starter bolts removed. Noticed the positive battery cable boot needs to be seated on the starter.

Inner primary cover removed.
Old shift linkage and transmission shift lever removed.

New transmission shift lever installed.

Foot rest and more of the shift linkage installed.

The rest of the new shift linkage installed.

Old shift lever and peg reinstalled.

Inner primary cover and drive components back on.

Outer primary cover back on and the older shift lever hole plugged.

Old foot peg reinstalled.

Battery box back on.

Before removal of old brake lever, brake pushrod, and foot rest.

Everything removed. This side is easy compared to the other side.

New brake lever, new brake pushrod, new brake pedal, new foot rest, and old foot peg installed. All done over here.

Derby cover reinstalled. All done over here too.

...
I originally ordered the black forward control kit. I was told it was on back-order with no availability date. I liked the stock look with wrinkle black and polished components better anyway, so I bought some parts off a forum member and ordered the rest of what I needed. Here's a list of what I ended up with:
- Compensator Screw 10500031
- Black Inner Primary Gasket Kit 25700337
- Primary Hole Plug 6943
- Tower Gasket 63869-06
- Primary Cover Gasket 60547-06
- Washer 6702
- Screw (4) 4512A
- Shift Lever 33900004
- Frame Hole Plugs (4) 90493-83
- Shifter Rod 34887-06
- Shift Lever 33789-12
- Acorn Nut 7330
- Spring Washer 34625-90
- Brake Pushrod 41955-03A
- Screw 4339A
- Brake Pedal Pad 42532-06
- Rear Brake Pedal Pivot Shaft 42665-03
- Shifter Assembly Bearing (2) 33708-94
- Brake Lever 42542-06
- Footpeg Support, Left, Black Wrinkle 33693-03
- Clevis, Footrest Mount, Black Wrinkle 42663-03A
- Footpeg Support, Right, Black Wrinkle 42481-03A
...
I hope y'all find this interesting and/or helpful. I really enjoyed this little project. Oh, and $644 + tax saved. Dealer quoted 7 hours labor @ $92/hour. Ha!
Last edited by camden; Oct 20, 2013 at 11:11 PM.


Very nice write up and look at the 14 inner.
Thanks for taking the time to post this up!
Thanks for taking the time to post this up!


Stellar HDF Member
Joined: May 2009
Posts: 2,066
Likes: 97
From: Northern VA
You're more meticulous with your work habits than I'd be. .think I can learn something there. Did you remember to tape up the splines of your mainshaft when R&R'ing that inner primary cover?
Thread Starter
|
Tourer
Joined: Jun 2012
Posts: 427
Likes: 6
From: Memphis, TN
Thanks everyone!
I did tape the main shaft.
Trending Topics
Stellar HDF Member
Joined: May 2009
Posts: 2,066
Likes: 97
From: Northern VA
Just making sure 
Good job. I'm going into mine for the first time this winter. .new compensator, Hayden M6 tensioner, replacing seals.
Good job. I'm going into mine for the first time this winter. .new compensator, Hayden M6 tensioner, replacing seals.

