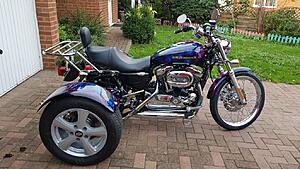
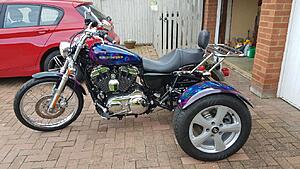
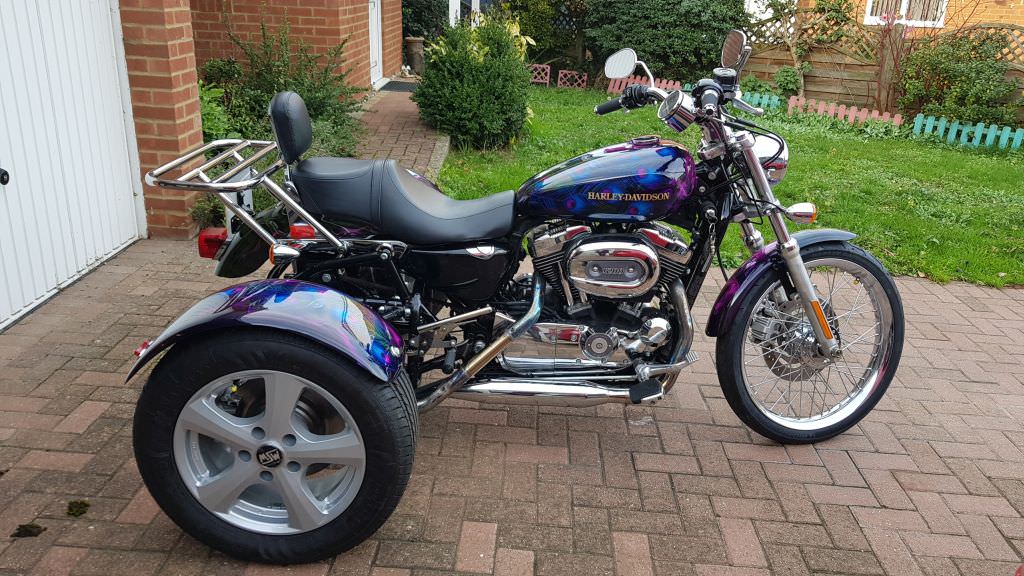
What did you do to your sportster... I converted it to a trike
#1
 11-22-2018, 08:44 AM


Hi All
This is Cindy and Andy's project to build Cindy a trike.
On one of our holidays to America we visited a Harley Davidson dealer just to look at the bikes. Apparently the thought of owning one stayed with Cindy.
Around the end of 2016 Cindy started getting interested in the thought of getting a motorcycle and join one of the many groups of riders as a way to increase our social circle. As the weather got warmer in 2017 it was decided based on the activity on social media to get a Harley Davidson and in particular a Sportster.
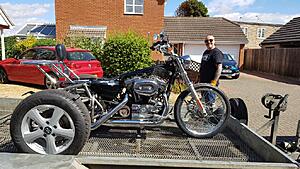
We visited our "local" dealer, Black Bear in Newmarket and got introduced to James. We discussed what we wanted and tried on a few bikes for size. We went back a couple of days later with some cobbled together gear so I could test ride the bike I was interested in. Oh yes I have the bike license but have not ridden a bike in maybe 30 years but Cindy can't wait to get on the back. So in May 2017 she is the owner of a Sportster SuperLow with me as the taxi driver!
Now after some really nice ride outs and what not with many hours sat chatting to some great people Cindy decides she wants her own freedom but as she doesn't have a bike license and no confidence to ride a 600lb bike she decides on transforming a Sportster into a trike is the way to go.
It is February 2018 and I have decided to retire. My last day at work will be the 4th May.
I say to Cindy, "If you want a trike then you will have to sell your car."
empty garage where trike will live.
No problem says she as she has pretty much found the bike of interest and they are willing to take her car in part exchange.
We now have a donor bike and are starting to look for the kit to convert it. It has to have independent suspension and it has to be a bolt on kit.

bike enters garage.
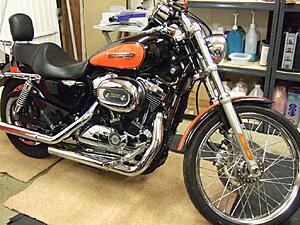
side view of bike.
After much searching Cindy found there were three companies that seemed to fit the bill; The Trike Shop, Trike Designs and Casarva. Looking at what was available the kit was complete except for the parts that join it to the bike. I can't weld so we would either have to find one or get the company to do the build.
We visited Casarva in March and met with Steve. We went through our requirement but only to be let down gently by the fact they couldn't start work on the conversion until the end of September. But we have a plan. Casarva have been able to make a jig from a Sportster that will allow them to complete all the welding so that on delivery the kit will bolt straight on plus Casarva would undertake the additional fabrication of the exhausts and the cut and shut of the half shafts. We discuss what is in the build and the time scales involved.
The only alarm bells at this point is I can find nothing posted from Casarva owners. Every search only brings up the company website and no forums. We don't have a lot to go on.
Cindy and I discuss what we could purchase and what we need from Casarva. I don't want to get the wrong parts so decide that we will get everything from Casarva.
Cindy meets Steve a second time to discuss some finer details of what she wants and places the order at the beginning of April.
We had a look at all the parts required to make a trike to which I will detail later but for now we decided to place the order for what should be a complete set of parts.
Delivery is around 6 weeks which will work out very well.
We get a rather strange email from Casarva that although a member of staff has a family problem the company is not about to fold.
The donor bike is a 2008 Sportster Custom XL1200C. The choice was a rubber mounted engine and EFI so any bike from 2007 would do but this looked a good bet.
ready to start work on bike.
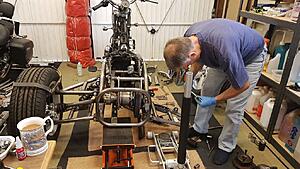
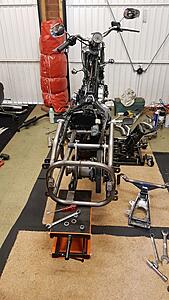
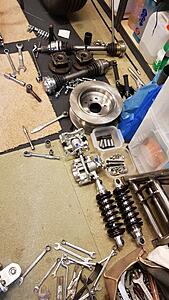
The strip down...
Not much to describe here, just the removal of all the parts that are not needed, get in the way or are going to receive some treatment.
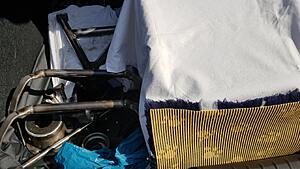
Exhaust system, seat, back wheel, swingarm, rear master cylinder, rear shock absorbers, pillion pegs, rear mudguard, front mudguard, tank, belt and belt protectors all came off.

bike on stand, a few bits removed.
wheel gone.
lights gone and rh shock absorber.
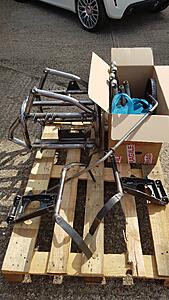
a pile of bits.
mudguard gone.
swingarm gone.
tank gone.
pipes gone.
another pile of bits
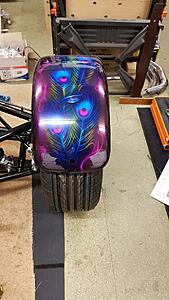
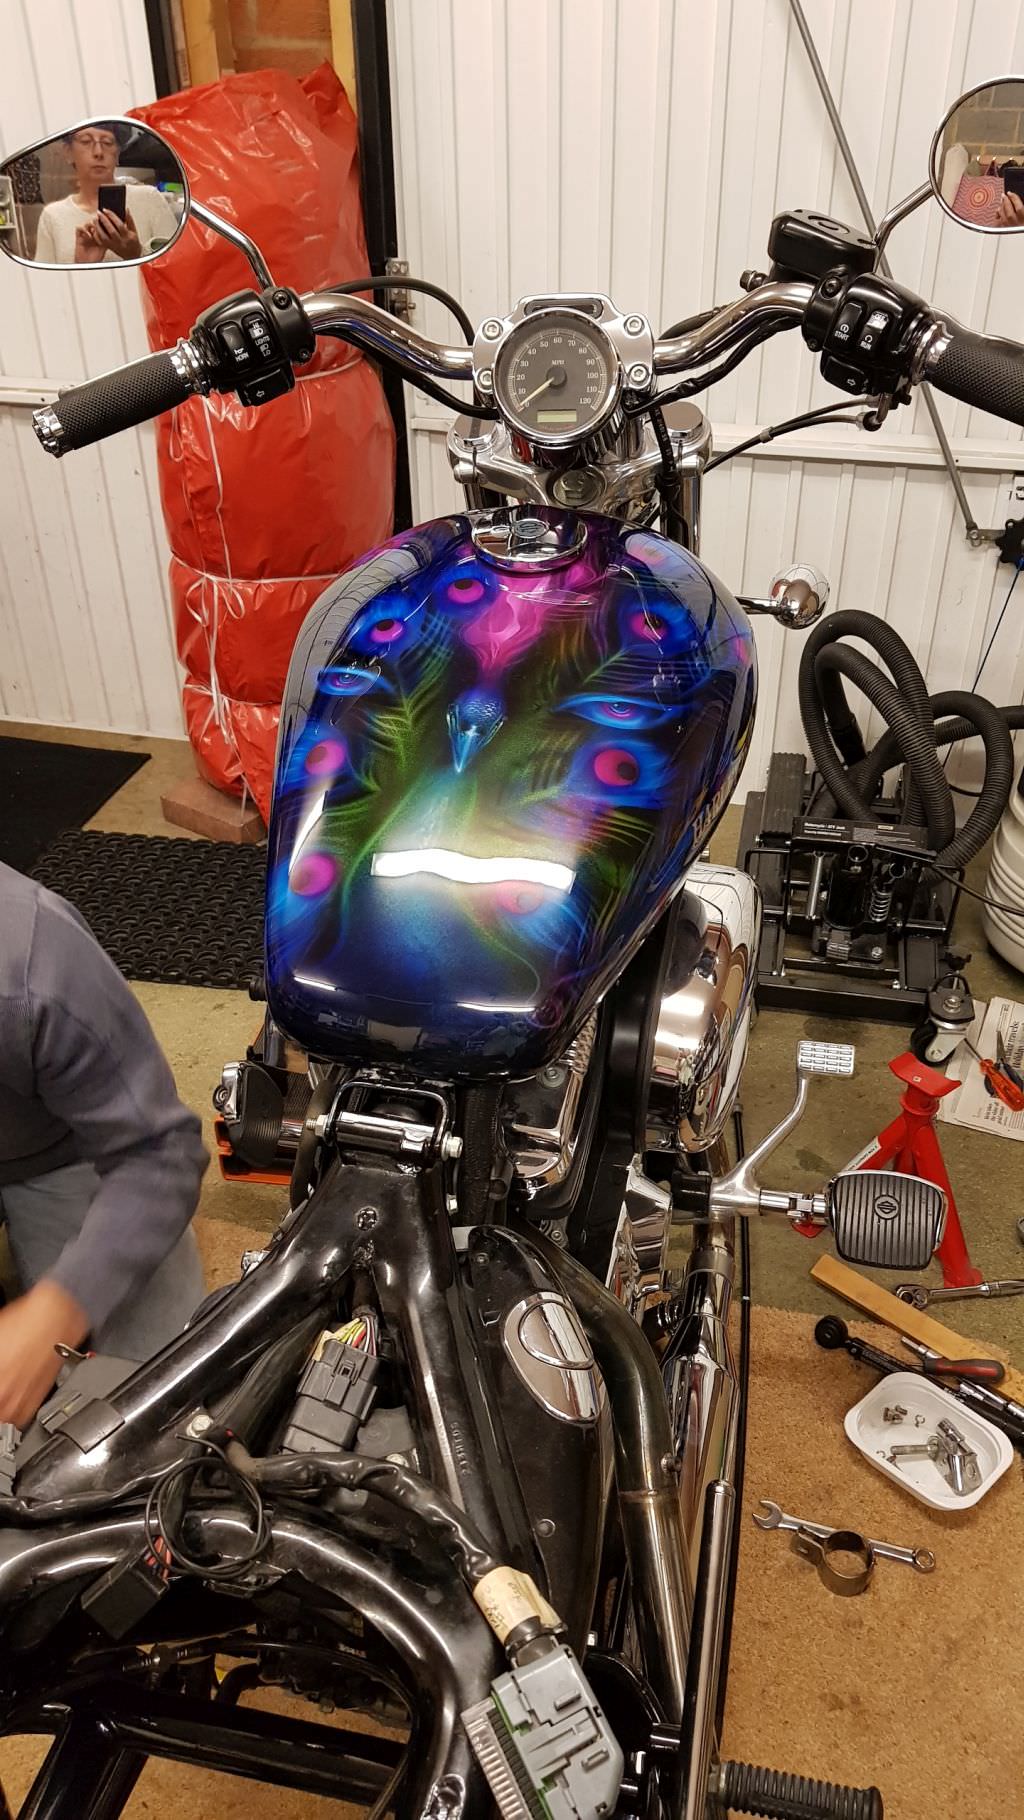
Cindy is having a custom paint scheme else the tank and front mudguard would of stayed on.
What did we get for our money?
Casarva Jigged Rubber Mount Belt Drive Trike conversion kit - �2995
Casarva Anti Roll Bar - EN43 Spring Steel - �220
2 x Casarva Preotech shocks 700lb springs - �370
2 x E39 Type half shafts - shortened length to be advised - �180
2 x BMW E39 hubs used - �120
2 x Alloy brake calpers and EBC Golf Mk4 pad set - �260
2 x Solid E39 type brake disks - �80
1 x 3 piece brake lines length to be advised (part payment) - �90
1 x rear brake master cylinder and reservoir used �90
2 x mudguards smooth type gel coat �150
1 x Trigger handbrake kit �240
2 x MSW OZ 5 spoke Alloy wheels 225 55 16 tyres with bolts - �440
1 x hazard warning relay kit - �40
2 x LED stop tail lights and front facing marker lights �140
1 x header exhaust works when the trike is delivered in as a rolling chassis - �290
1 x 600 x 300 rack - �348
A total of �6053
I could of saved �100 on the wheels and I could of saved �100 on the LED lights. The Sportster has hazard warning lights so the relay kit is returned for a refund. The rest will be discussed during the mock up and final build.
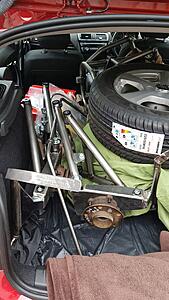
bits in car
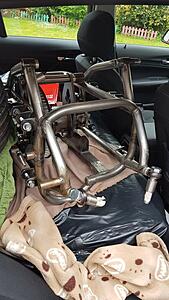
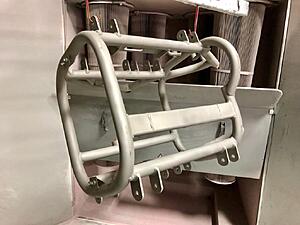
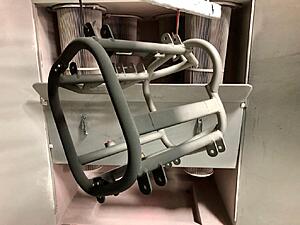
the cradle
This is Cindy and Andy's project to build Cindy a trike.
On one of our holidays to America we visited a Harley Davidson dealer just to look at the bikes. Apparently the thought of owning one stayed with Cindy.
Around the end of 2016 Cindy started getting interested in the thought of getting a motorcycle and join one of the many groups of riders as a way to increase our social circle. As the weather got warmer in 2017 it was decided based on the activity on social media to get a Harley Davidson and in particular a Sportster.
We visited our "local" dealer, Black Bear in Newmarket and got introduced to James. We discussed what we wanted and tried on a few bikes for size. We went back a couple of days later with some cobbled together gear so I could test ride the bike I was interested in. Oh yes I have the bike license but have not ridden a bike in maybe 30 years but Cindy can't wait to get on the back. So in May 2017 she is the owner of a Sportster SuperLow with me as the taxi driver!
Now after some really nice ride outs and what not with many hours sat chatting to some great people Cindy decides she wants her own freedom but as she doesn't have a bike license and no confidence to ride a 600lb bike she decides on transforming a Sportster into a trike is the way to go.
It is February 2018 and I have decided to retire. My last day at work will be the 4th May.
I say to Cindy, "If you want a trike then you will have to sell your car."
empty garage where trike will live.
No problem says she as she has pretty much found the bike of interest and they are willing to take her car in part exchange.
We now have a donor bike and are starting to look for the kit to convert it. It has to have independent suspension and it has to be a bolt on kit.

bike enters garage.

side view of bike.
After much searching Cindy found there were three companies that seemed to fit the bill; The Trike Shop, Trike Designs and Casarva. Looking at what was available the kit was complete except for the parts that join it to the bike. I can't weld so we would either have to find one or get the company to do the build.
We visited Casarva in March and met with Steve. We went through our requirement but only to be let down gently by the fact they couldn't start work on the conversion until the end of September. But we have a plan. Casarva have been able to make a jig from a Sportster that will allow them to complete all the welding so that on delivery the kit will bolt straight on plus Casarva would undertake the additional fabrication of the exhausts and the cut and shut of the half shafts. We discuss what is in the build and the time scales involved.
The only alarm bells at this point is I can find nothing posted from Casarva owners. Every search only brings up the company website and no forums. We don't have a lot to go on.
Cindy and I discuss what we could purchase and what we need from Casarva. I don't want to get the wrong parts so decide that we will get everything from Casarva.
Cindy meets Steve a second time to discuss some finer details of what she wants and places the order at the beginning of April.
We had a look at all the parts required to make a trike to which I will detail later but for now we decided to place the order for what should be a complete set of parts.
Delivery is around 6 weeks which will work out very well.
We get a rather strange email from Casarva that although a member of staff has a family problem the company is not about to fold.
The donor bike is a 2008 Sportster Custom XL1200C. The choice was a rubber mounted engine and EFI so any bike from 2007 would do but this looked a good bet.

ready to start work on bike.
The strip down...
Not much to describe here, just the removal of all the parts that are not needed, get in the way or are going to receive some treatment.
Exhaust system, seat, back wheel, swingarm, rear master cylinder, rear shock absorbers, pillion pegs, rear mudguard, front mudguard, tank, belt and belt protectors all came off.

bike on stand, a few bits removed.

wheel gone.


lights gone and rh shock absorber.

a pile of bits.

mudguard gone.

swingarm gone.

tank gone.

pipes gone.

another pile of bits
Cindy is having a custom paint scheme else the tank and front mudguard would of stayed on.
What did we get for our money?
Casarva Jigged Rubber Mount Belt Drive Trike conversion kit - �2995
Casarva Anti Roll Bar - EN43 Spring Steel - �220
2 x Casarva Preotech shocks 700lb springs - �370
2 x E39 Type half shafts - shortened length to be advised - �180
2 x BMW E39 hubs used - �120
2 x Alloy brake calpers and EBC Golf Mk4 pad set - �260
2 x Solid E39 type brake disks - �80
1 x 3 piece brake lines length to be advised (part payment) - �90
1 x rear brake master cylinder and reservoir used �90
2 x mudguards smooth type gel coat �150
1 x Trigger handbrake kit �240
2 x MSW OZ 5 spoke Alloy wheels 225 55 16 tyres with bolts - �440
1 x hazard warning relay kit - �40
2 x LED stop tail lights and front facing marker lights �140
1 x header exhaust works when the trike is delivered in as a rolling chassis - �290
1 x 600 x 300 rack - �348
A total of �6053
I could of saved �100 on the wheels and I could of saved �100 on the LED lights. The Sportster has hazard warning lights so the relay kit is returned for a refund. The rest will be discussed during the mock up and final build.

bits in car

the cradle
#2
11-22-2018, 08:45 AM
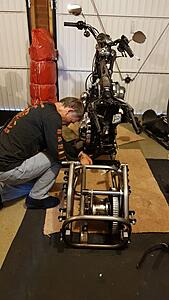
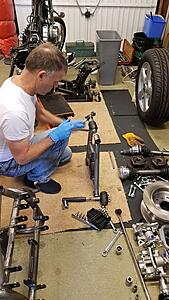
The mock up...
I get started at the end of May during the bank holiday.
getting ready to fit the cradle.
raising it up on a jack.
struggling to work out how to get it to go on.
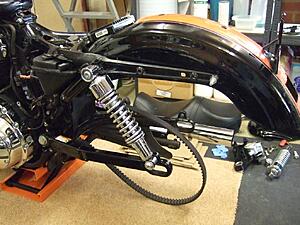
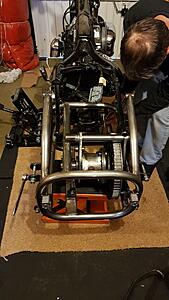
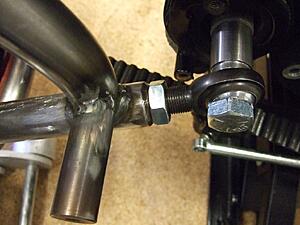
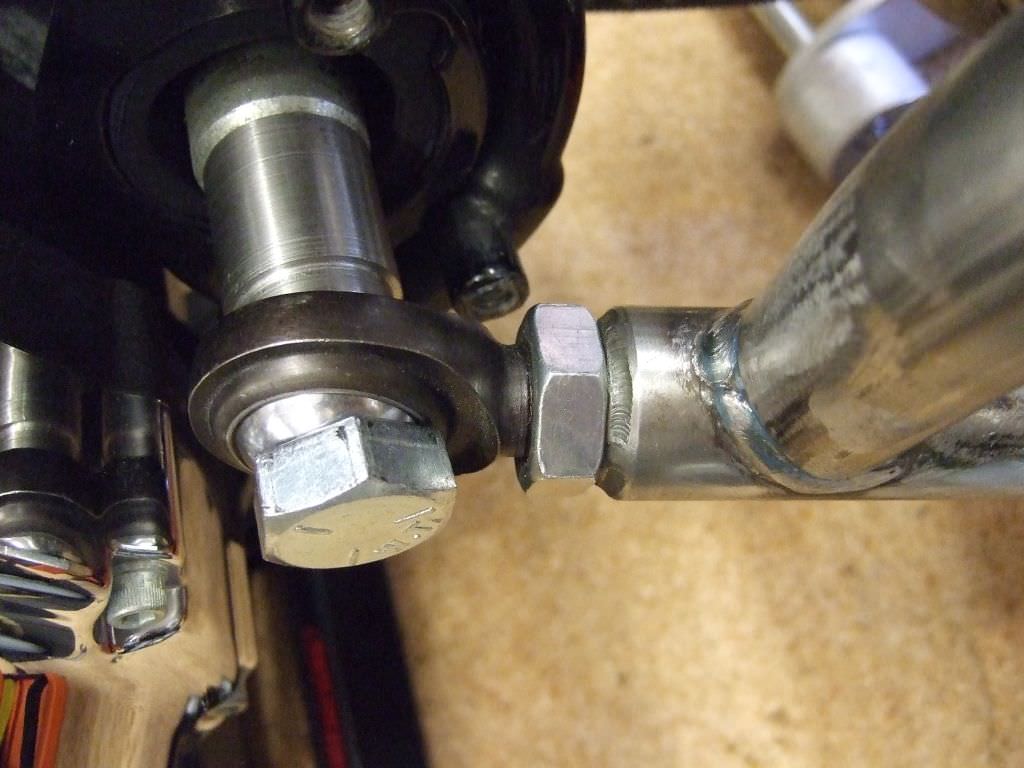
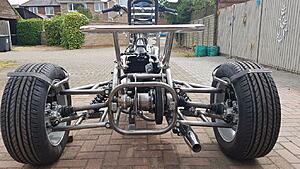
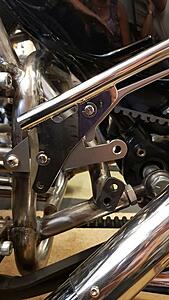
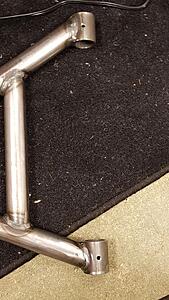
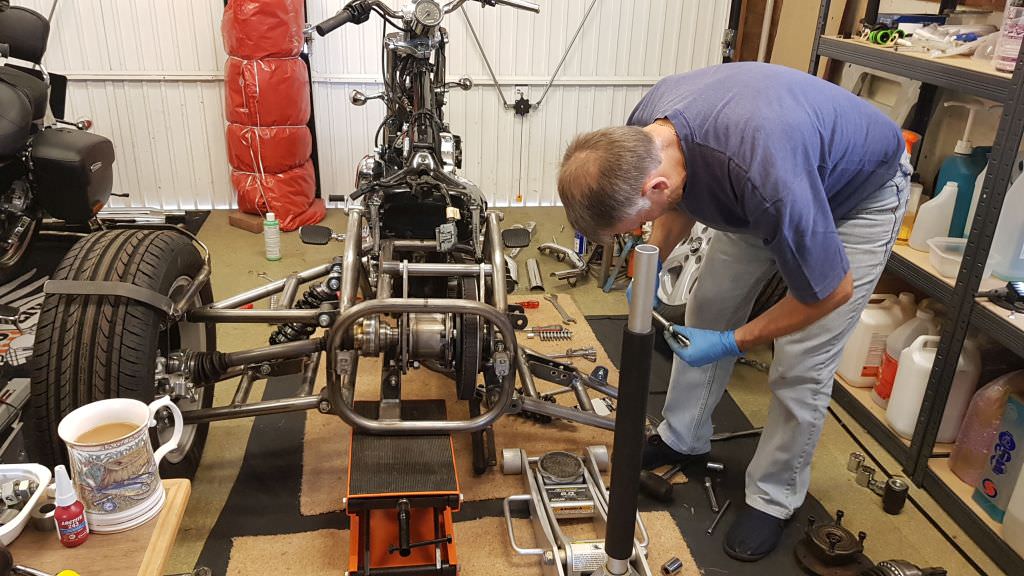
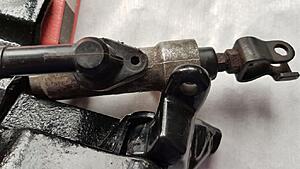
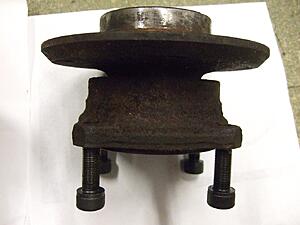
With the bike ready the first job is to attach the cradle. It mounts using the shock absorber mounting points and the swingarm pivot. Ordinarily these are the points you would have to fabricate yourself. After attaching at the top and by making sure the cradle is not touching the bike frame the rose joint bearings are adjusted so the bolts line up with the pivot and go in with the least amount of force.
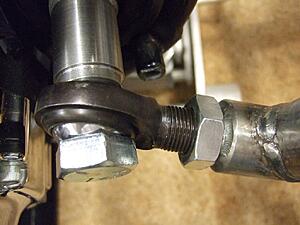
left rose joint
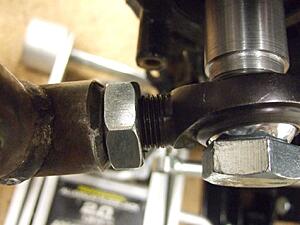
right side rose joint.
cradle clear of bike frame.
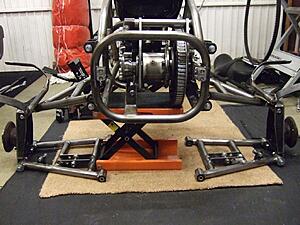
cradle fitted and the wishbones laid out the wrong way round.
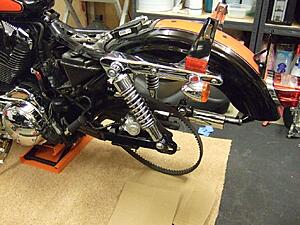
The differential is already assembled with our belt pulley. The pulley is reworked to slim it down, fit an insert and make provision for the mounting bolts. At this point it has dummy spacers that will need to be changed to get the belt pulleys to align correctly.
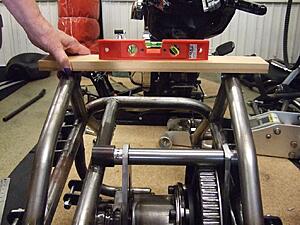
I get the bike up right and put a level on the front belt pulley. I then check the rear one is also perpendicular. Houston we have a problem! I don't think this is going to work.
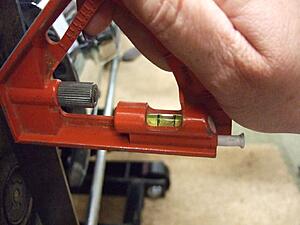
front belt pulley.
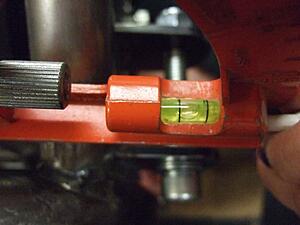
rear belt pulley.
I send an email to Steve. He asks me to phone the next day when Matt will be available to talk me through it.
After speaking to Matt and following his suggestions I decide there is something wrong and the bike and cradle need to be at Casarva for them to fix it.
I make some measurements...
I get the cradle level across the top
measure to floor on right side.
measure to floor left side and see a difference.
The trike is with Casarva around the 5th June. I cannot remember for how long but obviously it has to fit in with production work. The main thing is the fault is fixed. Matt admits there is something wrong with his jig. It was pointed out that the mounts on the bike might be out or the bike may not be square and a couple of other reasons for why the cradle wasn't square are offered up. He had to rework all 4 mounting points. He also left me with these different lengths to the rose bearings explaining it would of taken a week to get new inserts from the supplier.
At this point I suggest to Cindy we are probably guinea pigs in the supply of this particular Sportster kit.
Back home and �200 lighter for transport costs we carry on...
Seconds out, round two!
Cradle attached and belt pulleys checked...
cradle on bike after rework
right side rose

left side rose
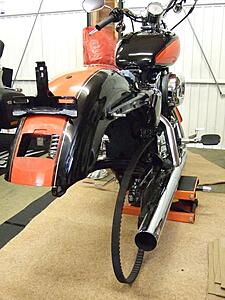
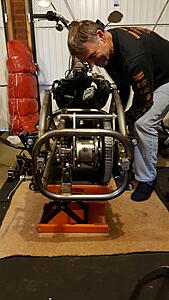
Moving on and building up to a rolling chassis. Then it will be ready to get the exhaust pipes fitted.
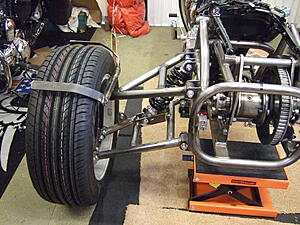
left side
right side
wheels off to fit the brake calipers.
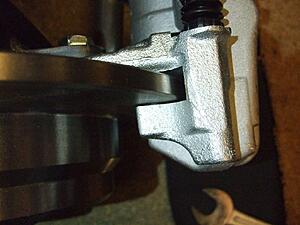
good brake caliper
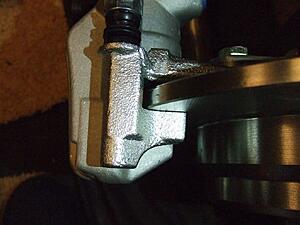
bad caliper top
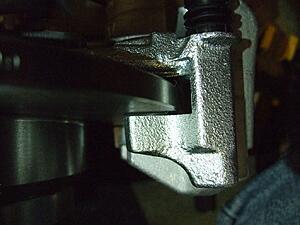
bad casliper bottom
The rolling chassis is booked in with Casarva at the beginning of July for the exhaust pipe work but before it goes I discover another problem, the right hand brake caliper is not parallel with the disc. I send an email with my discovery but also show my disappointment with how Matt had done the cradle fix albeit a month late.
ready to go to Casarva
I get started at the end of May during the bank holiday.

getting ready to fit the cradle.

raising it up on a jack.

struggling to work out how to get it to go on.
With the bike ready the first job is to attach the cradle. It mounts using the shock absorber mounting points and the swingarm pivot. Ordinarily these are the points you would have to fabricate yourself. After attaching at the top and by making sure the cradle is not touching the bike frame the rose joint bearings are adjusted so the bolts line up with the pivot and go in with the least amount of force.

left rose joint

right side rose joint.

cradle clear of bike frame.

cradle fitted and the wishbones laid out the wrong way round.
The differential is already assembled with our belt pulley. The pulley is reworked to slim it down, fit an insert and make provision for the mounting bolts. At this point it has dummy spacers that will need to be changed to get the belt pulleys to align correctly.
I get the bike up right and put a level on the front belt pulley. I then check the rear one is also perpendicular. Houston we have a problem! I don't think this is going to work.

front belt pulley.

rear belt pulley.
I send an email to Steve. He asks me to phone the next day when Matt will be available to talk me through it.
After speaking to Matt and following his suggestions I decide there is something wrong and the bike and cradle need to be at Casarva for them to fix it.
I make some measurements...

I get the cradle level across the top

measure to floor on right side.

measure to floor left side and see a difference.
The trike is with Casarva around the 5th June. I cannot remember for how long but obviously it has to fit in with production work. The main thing is the fault is fixed. Matt admits there is something wrong with his jig. It was pointed out that the mounts on the bike might be out or the bike may not be square and a couple of other reasons for why the cradle wasn't square are offered up. He had to rework all 4 mounting points. He also left me with these different lengths to the rose bearings explaining it would of taken a week to get new inserts from the supplier.
At this point I suggest to Cindy we are probably guinea pigs in the supply of this particular Sportster kit.
Back home and �200 lighter for transport costs we carry on...
Seconds out, round two!
Cradle attached and belt pulleys checked...

cradle on bike after rework

right side rose
left side rose
Moving on and building up to a rolling chassis. Then it will be ready to get the exhaust pipes fitted.

left side

right side

wheels off to fit the brake calipers.

good brake caliper

bad caliper top

bad casliper bottom
The rolling chassis is booked in with Casarva at the beginning of July for the exhaust pipe work but before it goes I discover another problem, the right hand brake caliper is not parallel with the disc. I send an email with my discovery but also show my disappointment with how Matt had done the cradle fix albeit a month late.

ready to go to Casarva
#3
11-22-2018, 08:47 AM
When we get there I get a feeling Steve is now no longer happy to see me so just to make his day I also point out the mudguard carrier on the right hand side is not square.
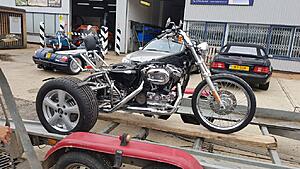
The trike is ready for collection near the end of July.
Continuing...
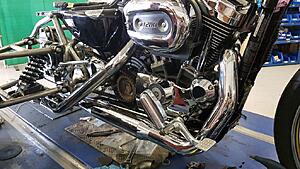
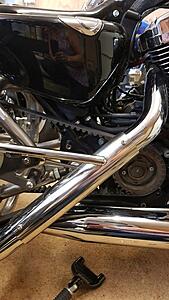
exhausts fitted.
On initial inspection all looks okay but the handbrake lever is very close to the exhaust. An extra bit has been added to the front handbrake mount. We don't notice immediately but the handbrakse lever is pulled up.
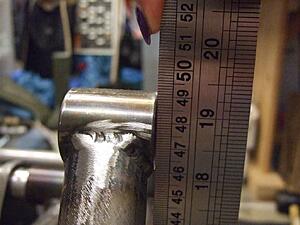
I point out the way the front heatshield overlaps the muffler meaning the muffler heatshield will no longer fit. The front header has had abount 25mm cut off it but the burrs were left! I only discovered this when I took them off after doing the mock up.
Steve points out I can cut it! He tells me it wasn't cut because it would go rusty. I point out he hasn't seen that Matt has cut the rear heatshield and not protected the cuts so they will go rusty. Baring in mind this cost �300 for an incomplete job as I see it, why should I be completely happy?
home
also with the half shafts and rack fitted
Back to Casarva to get the mounting of the handbrake changed.
Handbrake in off position
We end up with this crazy bracket at the third go at the front handbrake mount
Now there is an exchange of emails where I point out the attention for detail shown by Casarva is not so great and get ones in return of how condescending I am. I have to point out I am a customer and why shouldn't I point out that my expectations are not being met. It is also pointed out that the user of the trike should always wear gloves so their hand cannot directly touch the exhaust. I point out Harley Davidsons have always had the pipes on the same side and it seems rather strange that the handbrake had not been positioned on the left hand side.
Nearly there. Cindy asks about the pillion pegs...
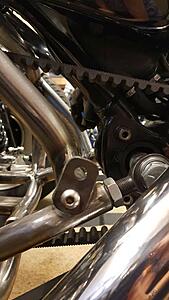
Now it is my turn for a **** up and hadn't given a thought for the pillion pegs. Needless to say the one on the right hand side is not going to fit because of the handbrake lever.
right side peg isn't going to fit
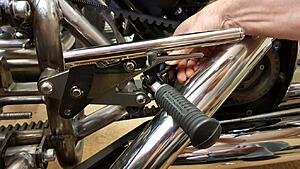
We conclude the handbrake needs to be raised somehow at the front...
new position required for handbrake
A fellow Sportster Sickness friend Terry helps us with the transportation
The trike is booked in again for Casarva to apply a fix. On arrival Matt is not expecting us but it is pointed out the trike was there for the day only and the handbrake mount had to be changed to accommodate the pillion peg. I could argue that as experts Casarva would make provision for such a trivial thing.
Mock up complete but no final picture of it.
All done!
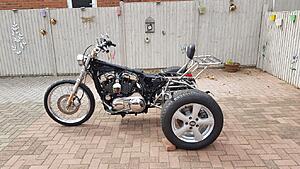
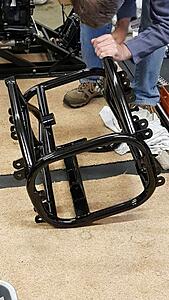
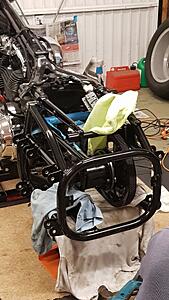
... and then we take it all apart again for powder coating!
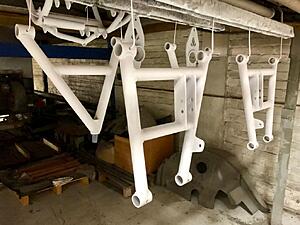
a pile of bits
remove poly bushes

drill and tap wishbones for grease nipples
one down 3 to go
differential
I have trouble getting the differential apart but eventually manage it to find this collection of screws holding the belt pulley on. There are formulea for thread penetration and maybe it doesn't matter.
screws that hold belt pulley on.
There is a potential problem here that hanger can make contact with belt pulley. This will be addressed when parts come back from powder coating.
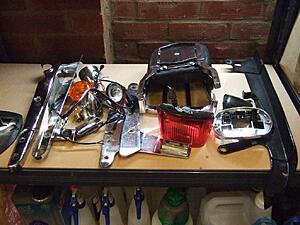
I do a few little jobs on the bike...
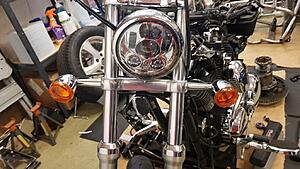
relocate the front indicators and fit daymaker headlight
change switch caps and twiest grip
It is now I discover the muppet who had the bike before had busted the stop light switch and lost the brass ends that go on the throttle cables. I get a new brake light switch at the second attempt with long enough wires to reach the connector under the tank.
I cannot get the adjusters to shift on the throttle cables so get new ones.
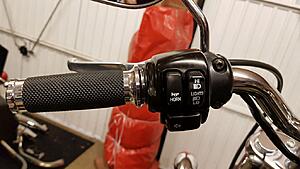
change switch caps on left side
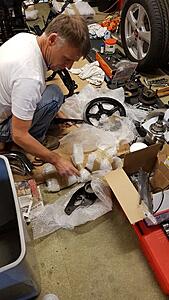
We load up the car to get the bits for powder coating...
bits in car for powder coating.
... and unload them...
off loaded at the powder coaters.
The trike is ready for collection near the end of July.
Continuing...

exhausts fitted.
On initial inspection all looks okay but the handbrake lever is very close to the exhaust. An extra bit has been added to the front handbrake mount. We don't notice immediately but the handbrakse lever is pulled up.
I point out the way the front heatshield overlaps the muffler meaning the muffler heatshield will no longer fit. The front header has had abount 25mm cut off it but the burrs were left! I only discovered this when I took them off after doing the mock up.
Steve points out I can cut it! He tells me it wasn't cut because it would go rusty. I point out he hasn't seen that Matt has cut the rear heatshield and not protected the cuts so they will go rusty. Baring in mind this cost �300 for an incomplete job as I see it, why should I be completely happy?


home

also with the half shafts and rack fitted
Back to Casarva to get the mounting of the handbrake changed.

Handbrake in off position
We end up with this crazy bracket at the third go at the front handbrake mount

Now there is an exchange of emails where I point out the attention for detail shown by Casarva is not so great and get ones in return of how condescending I am. I have to point out I am a customer and why shouldn't I point out that my expectations are not being met. It is also pointed out that the user of the trike should always wear gloves so their hand cannot directly touch the exhaust. I point out Harley Davidsons have always had the pipes on the same side and it seems rather strange that the handbrake had not been positioned on the left hand side.
Nearly there. Cindy asks about the pillion pegs...
Now it is my turn for a **** up and hadn't given a thought for the pillion pegs. Needless to say the one on the right hand side is not going to fit because of the handbrake lever.

right side peg isn't going to fit
We conclude the handbrake needs to be raised somehow at the front...

new position required for handbrake

A fellow Sportster Sickness friend Terry helps us with the transportation
The trike is booked in again for Casarva to apply a fix. On arrival Matt is not expecting us but it is pointed out the trike was there for the day only and the handbrake mount had to be changed to accommodate the pillion peg. I could argue that as experts Casarva would make provision for such a trivial thing.
Mock up complete but no final picture of it.
All done!
... and then we take it all apart again for powder coating!


a pile of bits

remove poly bushes

drill and tap wishbones for grease nipples

one down 3 to go

differential
I have trouble getting the differential apart but eventually manage it to find this collection of screws holding the belt pulley on. There are formulea for thread penetration and maybe it doesn't matter.

screws that hold belt pulley on.
There is a potential problem here that hanger can make contact with belt pulley. This will be addressed when parts come back from powder coating.

I do a few little jobs on the bike...

relocate the front indicators and fit daymaker headlight
change switch caps and twiest grip
It is now I discover the muppet who had the bike before had busted the stop light switch and lost the brass ends that go on the throttle cables. I get a new brake light switch at the second attempt with long enough wires to reach the connector under the tank.
I cannot get the adjusters to shift on the throttle cables so get new ones.

change switch caps on left side
We load up the car to get the bits for powder coating...

bits in car for powder coating.
... and unload them...

off loaded at the powder coaters.
#4
11-22-2018, 08:49 AM
It will take maybe 3 to 4 weeks for the parts to be finished. They will go for media blasting. When back they will be zinc primed first and then powder coated.
I turn my attention to the right hand caliper that will be used for the handbrake.
I have to make the hole bigger to accept the cable. On one of my visits to Casarva I asked Mike about the ball end of the cable being a bit too big to locate fully and says it will require the arm to be bent out a bit. In one of my emails to Steve he points out that nothing needs to be bent and sends me a picture. So the workshop says one thing and the boss says something else!
As I start on the caliper I find that it is seized on the pins. I remove the rubber boots and discover the pins are solid with rust. I look at the other caliper and it is seized as well. Brand new out of the box and full of rust.
I send an email to Steve. I also decide to send a picture of the screws from the differential. In shear frustration at yet another thing wrong I basically point out I am not getting the service for which I think I paid a lot of money.
Just over a week goes by and we hear nothing. Cindy sends an email and is informed a staff member has come off his bike and so nothing has been done with the calipers. Steve is going to send us two new ones. They arrive but I now have 2 left hand side ones and they too are stuck with rust.
I ask Cindy to email Steve and ask if he is now trying out to be a comedian. She declines!
I take a look at the brake master cylinder. It is clearly not going to work!
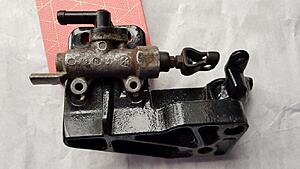
master cylinder on bracket
and cylinder has a screw missing.
I should point out but didn't capture it but on delivery the master cylinder was caked in dirt and looked really messed up compared to the above pictures.
Cindy takes a drive to Casarva to get the calipers sorted out and takes the master cylinder for a refund.
Now we have all heard it before from suppliers but this is a first for Casarva. I could point out it is twice for us as the replacements are also rusty and initially were stuck on the carrier pins.
Matt finds some new pins and cleans up the carriers. One of the calipers does not slide with the same ease as the other. The calipers and carriers do appear to be a cheap Golf look alike but apparently are not Golf replacements. They do not have anti rattle plates but I am told that is what I get and they are fit for purpose.
I look on ebay and find a much cleaner master cylinder for �26.
The basic problem is the Harley has holes spaced at 50mm and the Nissin has holes on 45mm centres. I don't know if it can be safely machined and still be strong enough. I make a 'phone call to Dave at Northants V-Twin who kindly invites me over to see if he can help with fitting it. After a few days we have this.
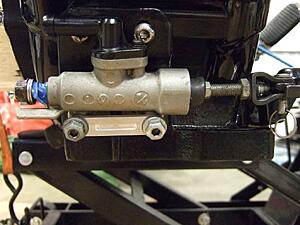
brake master cylinder fitted to trike
The parts will be back from powder coating soon...
Powder coating...


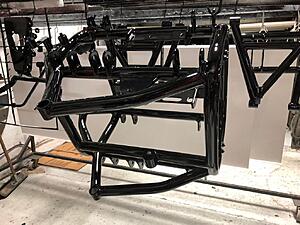
The parts from media blasting are zinc primed. The black powder goes on and then the clear coat over the top.
Before going in the oven they are white. As they bake they turn black.
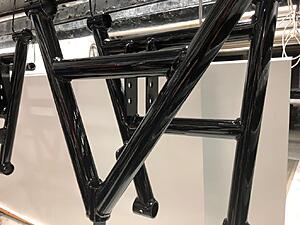
The parts are back and are all black and shiny!
Unfortunately we are missing a bit that cannot be found. Fortunately Steve sends us the bit. Unfortunately the screw holes don't line up and need to be massaged to fit.
Once the plate is in place I show Cindy that it is not made correctly and you can hear the bearing inner rubbing on the plate. I take the dremel to it!
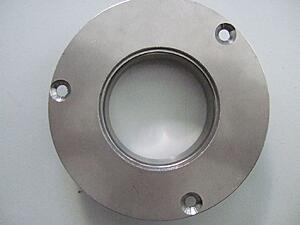
plate wrong
although not a very good circle the plate no longer touches the inner race of the bearing.
I turn my attention to the right hand caliper that will be used for the handbrake.
I have to make the hole bigger to accept the cable. On one of my visits to Casarva I asked Mike about the ball end of the cable being a bit too big to locate fully and says it will require the arm to be bent out a bit. In one of my emails to Steve he points out that nothing needs to be bent and sends me a picture. So the workshop says one thing and the boss says something else!
As I start on the caliper I find that it is seized on the pins. I remove the rubber boots and discover the pins are solid with rust. I look at the other caliper and it is seized as well. Brand new out of the box and full of rust.
I send an email to Steve. I also decide to send a picture of the screws from the differential. In shear frustration at yet another thing wrong I basically point out I am not getting the service for which I think I paid a lot of money.
Just over a week goes by and we hear nothing. Cindy sends an email and is informed a staff member has come off his bike and so nothing has been done with the calipers. Steve is going to send us two new ones. They arrive but I now have 2 left hand side ones and they too are stuck with rust.
I ask Cindy to email Steve and ask if he is now trying out to be a comedian. She declines!
I take a look at the brake master cylinder. It is clearly not going to work!

master cylinder on bracket

and cylinder has a screw missing.
I should point out but didn't capture it but on delivery the master cylinder was caked in dirt and looked really messed up compared to the above pictures.
Cindy takes a drive to Casarva to get the calipers sorted out and takes the master cylinder for a refund.
Now we have all heard it before from suppliers but this is a first for Casarva. I could point out it is twice for us as the replacements are also rusty and initially were stuck on the carrier pins.
Matt finds some new pins and cleans up the carriers. One of the calipers does not slide with the same ease as the other. The calipers and carriers do appear to be a cheap Golf look alike but apparently are not Golf replacements. They do not have anti rattle plates but I am told that is what I get and they are fit for purpose.
I look on ebay and find a much cleaner master cylinder for �26.
The basic problem is the Harley has holes spaced at 50mm and the Nissin has holes on 45mm centres. I don't know if it can be safely machined and still be strong enough. I make a 'phone call to Dave at Northants V-Twin who kindly invites me over to see if he can help with fitting it. After a few days we have this.

brake master cylinder fitted to trike
The parts will be back from powder coating soon...
Powder coating...


The parts from media blasting are zinc primed. The black powder goes on and then the clear coat over the top.
Before going in the oven they are white. As they bake they turn black.
The parts are back and are all black and shiny!


Unfortunately we are missing a bit that cannot be found. Fortunately Steve sends us the bit. Unfortunately the screw holes don't line up and need to be massaged to fit.
Once the plate is in place I show Cindy that it is not made correctly and you can hear the bearing inner rubbing on the plate. I take the dremel to it!

plate wrong

although not a very good circle the plate no longer touches the inner race of the bearing.
#5
11-22-2018, 08:50 AM
Differential...
As I am about to assemble the differential it occurs to me there is nothing stopping the hanger from being pushed into the belt pulley.
Cindy sends an email asking if a spacer might be missing. The reply is not so helpful in that the top spacer is used to determine the spacing and the differential should be assembled in the reverse order of disassembly. Now this all depends on which end you put on first. I re reply and ask about repeatability and what does Casarva do about the variability of paint thickness.
We get a quite rude reply and I am informed that I am not a customer and my questions will no longer be answered.
Cindy is now stressed out and is thinking of finding out if the whole kit can be returned for a refund. We discuss what else could be wrong that would stop us from assembling the kit. She reminds me that I will not be building a second trike.
I have my own engineer take a look at the differential and doing my best not to influence him he makes some suggestions on how the design could be changed to get repeatable results on assembly and not rely on a spacer that once was bare metal and now has a very thick layer of powder coating on it.
Cindy makes our findings known to Steve who immediately dismisses them as the way it was supplied it is fit for purpose. We are hearing this phrase alot now!
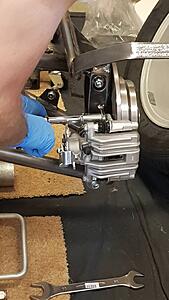
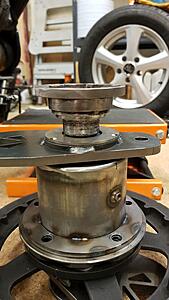
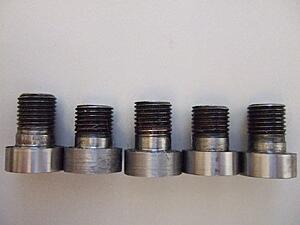
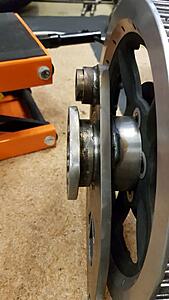
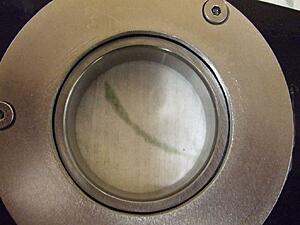
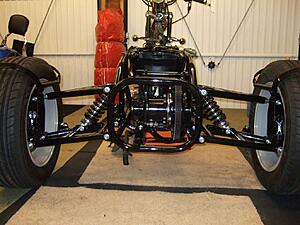
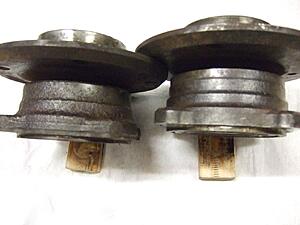
The differential is the satellite gear housing from a BMW E39. The crown gear is removed and the end is machined by Casarva to take the belt pulley.
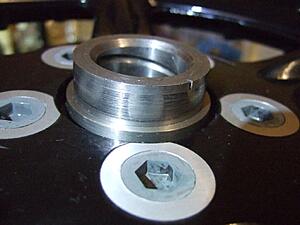
On closer inspection the differential satellite gear housing is machined to take a bearing 18mm wide. The supplied bearings in the hangers are 16mm wide. The housing has been machined to take the plate and the belt pulley and it looks like no more can be machined off that end which leaves the bearing and hanger off the end by between 2mm and 3mm. No-one will convince me this is good engineering even when using good bearing fit adhesive. I get a collar made that will always stop the hanger 0.5mm from touching the belt pulley.
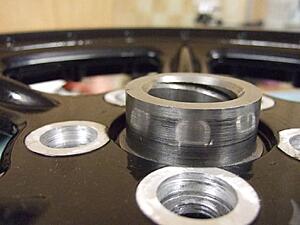
collar to stop hanger touching pulley.
Without the collar nothing stops the hanger from going on too far as the differential is machined to take a 18mm wide bearing.
This is what is required but if you machined it so the end of the housing would likely fall off!
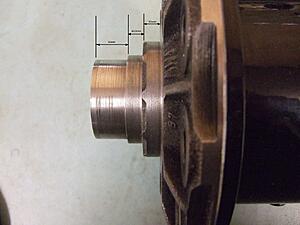
16mm from end to step. Then 13.5 mm for belt pulley plus 0.5mm. 10mm for final step for plate that holds belt pulley.
In my haste I got a collar made for the other end to remove 2mm so the bearing is flush at the end but it is not required. By the time I had thought this through I had already put the hanger on with bearing fit so was not about to try and get it off. This requires a new long spacer to be made that goes between the hangers. I don't mind as the one supplied in the kit touches the belt pulley.
Whilst the parts were away I got some new rear engine mounts (isolators in HD speak). When I fit them it is obvious the old ones are worn. Another email exchange with Steve doesn't do us any good only that any work will cost us �72 an hour.
The kit is now bespoke to the worn isolators so I have to put them back on. I ensure I can get the cradle to fit and whilst doing that see there is some adjustment and so for one more try put the new isolators in. I can't make them work. I am getting good and fast now and have the old isolators back in.
For anyone embarking on converting a Harley Davidson Sportster or like the Sportster with rubber engine mounts, put new ones in before you start.
I put the differential back in the cradle, not forgetting the drive belt, very carefully wrapped up in a towel and with cloths and tape on the cradle to stop metal hitting metal. I put in the top bolt to secure it. The differential is now full of grease but is very tight. I am unable to turn a flange.
I now attach the cradle to the bike.
When it is time for the differential hanger bearings to be changed it is going to be a pig of a job as the whole shebang is going to have be detached from the bike frame. The differential only goes in one way and it ain't out the back!
I carry out my spirit level test and am relieved that the pulleys are parallel.
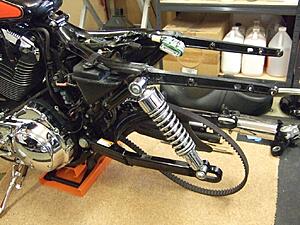
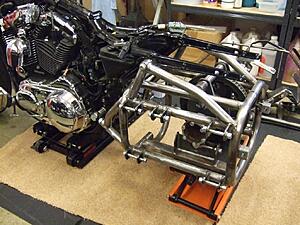
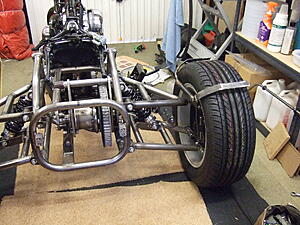
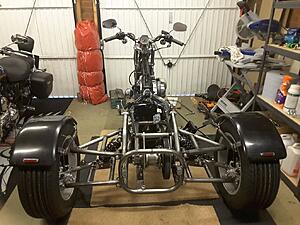
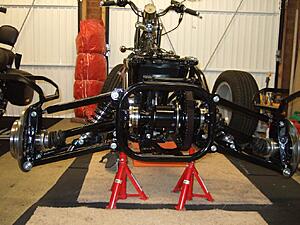
Bit by bit we are heading back to a rolling chassis again.
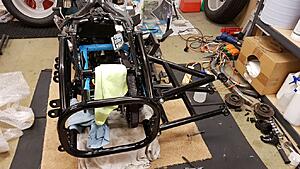
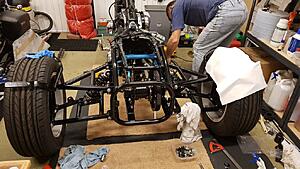
a rolling chassis again
When we got the kit it was unpainted and everything fitted together. Now it has a layer of zinc primer, the black powder coat and a lacquer coat it is very thick. None of this is taken into account and as this is my first go I didn't even think about how it was going to affect the assembly. The upper and lower wishbones require the paint removing, all the holes need to be cleaned out to get the bolts to fit, etc. I give the surfaces a coat of primer and a thin coat of black paint.
Before you send your kit away to be powder coated find out how thick it is going to be and make the adjustments accordingly such that the pain I am going through now will not bite you.
As I fit one of the wheel hubs and attach the disc I feel some play. I put the wheel on and now it is very apparent there is play in the bearing. I tell Cindy of yet another problem.
wheel hub as supplied
wheel hubs after 15 years of dirt removed
I fit the one on the other side and it has no play.
Another email to Steve but unlike the calipers we are not looking to have them assesed but would like to return them for a refund.
With that we find and order new ones.
Now the trike is standing up for itself so to speak I look to get the spacers for the differential set. Again as everything is covered in paint nothing is as it was during the mock up. That work was a waste of time and could of should of been left until now.
The top spacer that sets the alignment of the belt pulleys has actually worked out fine and after a few test spins of the pulleys the belt is running in the middle of the front pulley. A little further in than when it was a bike so that is good.
The one on the left hand end is now way too thick with me adding an additional 2mm to the overall length by moving the hanger to the end of the differential housing. being made of aluminium I can sand it down.
The bottom spacers need remaking. They are made of steel so I go and see my engineering man and get new ones made. I think this is the third go at this. If you force the bottom spacers in you are likely to rack the differential. Without the ring I had made for the belt pulley side forcing the bottom spacer in here could push the hanger into the pulley.
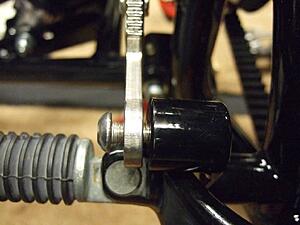
I fit the handbrake lever and pillion peg...
This is how the handbrake mount ended up
I put in the rear screw...
A bit of a gap. I didn't know this before paint so I am not going to start grinding metal. I will have to fit a washer here.
lever and peg fitted
Now I find the peg mounting bracket is touching the handbrake mount so I take a grinder to the handbrake mount to create some clearance.
I am told by Steve I should be appreciative of the solutions provided to the problems largely of Casarva's own making.
Back on stands to fit the half shafts
and fit the brake calipers
The brake calipers are fitted. The shoes over hang the disc. I have read it isn't a problem but it will be a slight reduction in braking efficiency.
After bleeding the brakes one of them is binding badly and I cannot turn the wheel.
I will leave it for now and wait until after I get the engine running.
Before fitting the exhausts I changed the exhaust port gaskets but I have not done it totally correct. These things are compressed steel wool and damage very easily. I have got some concerns over how they look but at �8 each I will hope they don't leak. The method of fitting in the manual uses the header to push them in and everyone else fits them first.
The way the trike is on stands the rear muffler is hitting the frame. Putting the wheel on and compressing the suspension the bottom wishbone clears the muffler. The trike will have to be jacked up carefully if the muffler is not to get hit.
Cindy sends an email of her concerns that on uneven pot holed roads the muffler may get hit. She is assured this won't happen. Well it has been noted.
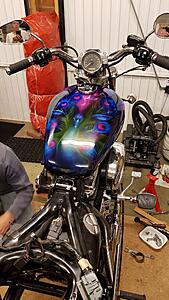
The tank is on and connected up but the design is a secret for now.
All of the existing wiring is connected up. A new fully charged battery is installed. The maxi fuse is installed and I turn on the ignition.
The lights, indicators, hazards and horn all work as they should.
I turn on the run switch and the fuel pump primes. I press the starter button momentarily and the engine turns over. The fuel pump primes again.
I press the start button for only a short period and the engine bursts into life.
After filling the garage with exhaust fumes I kill the engine. It is raining so a trial run will have to wait for now.
Handbrake cable is fitted and adjusted. The cable as supplied needs to be cut down which is fine but when done the end needs careful cleaning and deburring. I didn't do this so when the outer is pulled away from the half shaft the inner jams. After cleaning up the end the cable now works.
I hope 2 cable ties is good enough for the MOT for securing the cable out of the rotating parts?
The mudguards are fitted with Silkasil SG-20. It is cold now and so will, according to the datasheet, take quite some time to fully cure. After that body repair aluminium mesh is stuck over the wing carriers with more SG-20.
For the wiring of lights on the mudguards I am using connectors. If this lot has to come off for a differential bearing change you will not be best pleased if you soldered it all in place.
Ready for weighing and MOT.
As I am about to assemble the differential it occurs to me there is nothing stopping the hanger from being pushed into the belt pulley.
Cindy sends an email asking if a spacer might be missing. The reply is not so helpful in that the top spacer is used to determine the spacing and the differential should be assembled in the reverse order of disassembly. Now this all depends on which end you put on first. I re reply and ask about repeatability and what does Casarva do about the variability of paint thickness.
We get a quite rude reply and I am informed that I am not a customer and my questions will no longer be answered.
Cindy is now stressed out and is thinking of finding out if the whole kit can be returned for a refund. We discuss what else could be wrong that would stop us from assembling the kit. She reminds me that I will not be building a second trike.
I have my own engineer take a look at the differential and doing my best not to influence him he makes some suggestions on how the design could be changed to get repeatable results on assembly and not rely on a spacer that once was bare metal and now has a very thick layer of powder coating on it.
Cindy makes our findings known to Steve who immediately dismisses them as the way it was supplied it is fit for purpose. We are hearing this phrase alot now!
The differential is the satellite gear housing from a BMW E39. The crown gear is removed and the end is machined by Casarva to take the belt pulley.
On closer inspection the differential satellite gear housing is machined to take a bearing 18mm wide. The supplied bearings in the hangers are 16mm wide. The housing has been machined to take the plate and the belt pulley and it looks like no more can be machined off that end which leaves the bearing and hanger off the end by between 2mm and 3mm. No-one will convince me this is good engineering even when using good bearing fit adhesive. I get a collar made that will always stop the hanger 0.5mm from touching the belt pulley.

collar to stop hanger touching pulley.
Without the collar nothing stops the hanger from going on too far as the differential is machined to take a 18mm wide bearing.

This is what is required but if you machined it so the end of the housing would likely fall off!

16mm from end to step. Then 13.5 mm for belt pulley plus 0.5mm. 10mm for final step for plate that holds belt pulley.
In my haste I got a collar made for the other end to remove 2mm so the bearing is flush at the end but it is not required. By the time I had thought this through I had already put the hanger on with bearing fit so was not about to try and get it off. This requires a new long spacer to be made that goes between the hangers. I don't mind as the one supplied in the kit touches the belt pulley.
Whilst the parts were away I got some new rear engine mounts (isolators in HD speak). When I fit them it is obvious the old ones are worn. Another email exchange with Steve doesn't do us any good only that any work will cost us �72 an hour.
The kit is now bespoke to the worn isolators so I have to put them back on. I ensure I can get the cradle to fit and whilst doing that see there is some adjustment and so for one more try put the new isolators in. I can't make them work. I am getting good and fast now and have the old isolators back in.
For anyone embarking on converting a Harley Davidson Sportster or like the Sportster with rubber engine mounts, put new ones in before you start.
I put the differential back in the cradle, not forgetting the drive belt, very carefully wrapped up in a towel and with cloths and tape on the cradle to stop metal hitting metal. I put in the top bolt to secure it. The differential is now full of grease but is very tight. I am unable to turn a flange.
I now attach the cradle to the bike.

When it is time for the differential hanger bearings to be changed it is going to be a pig of a job as the whole shebang is going to have be detached from the bike frame. The differential only goes in one way and it ain't out the back!
I carry out my spirit level test and am relieved that the pulleys are parallel.
Bit by bit we are heading back to a rolling chassis again.


a rolling chassis again
When we got the kit it was unpainted and everything fitted together. Now it has a layer of zinc primer, the black powder coat and a lacquer coat it is very thick. None of this is taken into account and as this is my first go I didn't even think about how it was going to affect the assembly. The upper and lower wishbones require the paint removing, all the holes need to be cleaned out to get the bolts to fit, etc. I give the surfaces a coat of primer and a thin coat of black paint.
Before you send your kit away to be powder coated find out how thick it is going to be and make the adjustments accordingly such that the pain I am going through now will not bite you.
As I fit one of the wheel hubs and attach the disc I feel some play. I put the wheel on and now it is very apparent there is play in the bearing. I tell Cindy of yet another problem.

wheel hub as supplied

wheel hubs after 15 years of dirt removed
I fit the one on the other side and it has no play.
Another email to Steve but unlike the calipers we are not looking to have them assesed but would like to return them for a refund.
With that we find and order new ones.
Now the trike is standing up for itself so to speak I look to get the spacers for the differential set. Again as everything is covered in paint nothing is as it was during the mock up. That work was a waste of time and could of should of been left until now.
The top spacer that sets the alignment of the belt pulleys has actually worked out fine and after a few test spins of the pulleys the belt is running in the middle of the front pulley. A little further in than when it was a bike so that is good.
The one on the left hand end is now way too thick with me adding an additional 2mm to the overall length by moving the hanger to the end of the differential housing. being made of aluminium I can sand it down.
The bottom spacers need remaking. They are made of steel so I go and see my engineering man and get new ones made. I think this is the third go at this. If you force the bottom spacers in you are likely to rack the differential. Without the ring I had made for the belt pulley side forcing the bottom spacer in here could push the hanger into the pulley.
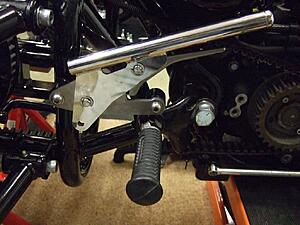
I fit the handbrake lever and pillion peg...

This is how the handbrake mount ended up
I put in the rear screw...

A bit of a gap. I didn't know this before paint so I am not going to start grinding metal. I will have to fit a washer here.

lever and peg fitted
Now I find the peg mounting bracket is touching the handbrake mount so I take a grinder to the handbrake mount to create some clearance.
I am told by Steve I should be appreciative of the solutions provided to the problems largely of Casarva's own making.

Back on stands to fit the half shafts
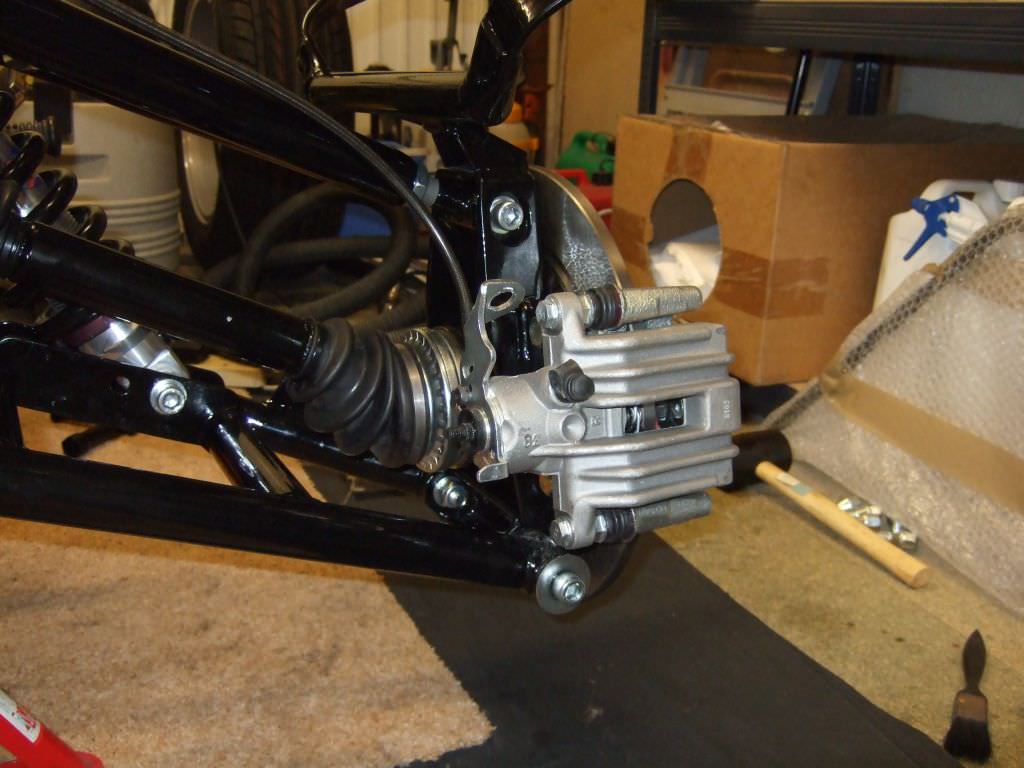
and fit the brake calipers
The brake calipers are fitted. The shoes over hang the disc. I have read it isn't a problem but it will be a slight reduction in braking efficiency.
After bleeding the brakes one of them is binding badly and I cannot turn the wheel.
I will leave it for now and wait until after I get the engine running.
Before fitting the exhausts I changed the exhaust port gaskets but I have not done it totally correct. These things are compressed steel wool and damage very easily. I have got some concerns over how they look but at �8 each I will hope they don't leak. The method of fitting in the manual uses the header to push them in and everyone else fits them first.
The way the trike is on stands the rear muffler is hitting the frame. Putting the wheel on and compressing the suspension the bottom wishbone clears the muffler. The trike will have to be jacked up carefully if the muffler is not to get hit.
Cindy sends an email of her concerns that on uneven pot holed roads the muffler may get hit. She is assured this won't happen. Well it has been noted.
The tank is on and connected up but the design is a secret for now.
All of the existing wiring is connected up. A new fully charged battery is installed. The maxi fuse is installed and I turn on the ignition.
The lights, indicators, hazards and horn all work as they should.
I turn on the run switch and the fuel pump primes. I press the starter button momentarily and the engine turns over. The fuel pump primes again.
I press the start button for only a short period and the engine bursts into life.
After filling the garage with exhaust fumes I kill the engine. It is raining so a trial run will have to wait for now.
Handbrake cable is fitted and adjusted. The cable as supplied needs to be cut down which is fine but when done the end needs careful cleaning and deburring. I didn't do this so when the outer is pulled away from the half shaft the inner jams. After cleaning up the end the cable now works.
I hope 2 cable ties is good enough for the MOT for securing the cable out of the rotating parts?
The mudguards are fitted with Silkasil SG-20. It is cold now and so will, according to the datasheet, take quite some time to fully cure. After that body repair aluminium mesh is stuck over the wing carriers with more SG-20.
For the wiring of lights on the mudguards I am using connectors. If this lot has to come off for a differential bearing change you will not be best pleased if you soldered it all in place.
Ready for weighing and MOT.

#6
11-22-2018, 08:51 AM
I now find the brake calipers are leaking from the bleed nipples. On closer inspection the plating has gone where it makes contact with the caliper. I buy new bleed nipples and it seems to of cured it. After a short test ride the calipers are leaking but I don't know from where.
The caliper that won't release properly is full of brake dust so something is a miss there.
On the basis of other parts that got returned for a refund Cindy sends an email about the fault and asks for a refund.
This is met with a rude and sarcastic reply. Steve will not tell us who the supplier is so I will do a search for something that looks similar.
They will need to be returned so that they can be sent to the supplier for testing.
Now these things cost arounf �35 so I can't see a supplier that must turn over hundreds of different caliers wasting time testing them but I have no choice.
I find that Audi A4 C5 calipers are much the same thing and the carriers for the same car look like what I have been supplied.
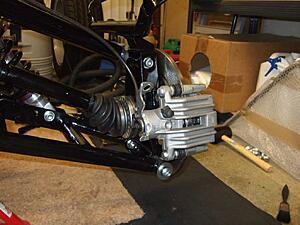
New calipers and carriers fitted and brakes bled.
There is brake fluid weeping from the banjo connectors. After checking what I can tighten the bolts to I tighten them a bit and then a bit more. One side is now good but the other isn't.
The surface on the caliper doesn't look so good so I flatten that off with fine paper.
After ordering copper crush washers find the manufacture wants aluminium ones to be used with their alloy banjo connectors so place an order for some of them as well.
I cannot get a socket and torque wrench in so remove the caliper to tighten the banjo bolt. The spec is 20 to 25 ft-lbs (27Nm to 33Nm). Using Newton Metres I set my torque wrench to 30. Once I start to tighten the bolt I feel afraid that it might snap. Once I get it all back together I am relieved that the leak has stopped.
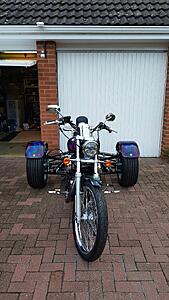
After a few little bling bits and changes to the foot pegs the trike is finished.
It has passed its MOT and is now officially a trike, taxed and ready to go.
The epilogue
I was accused of asking lots of repetitive and irrelevant questions and alot of other things beside. If you feel after spending �6000 you cannot ask as many questions as you like as many times as you like or criticise what has been supplied then I would suggest you don't go to Casarva. In one exchange of the many email exchanges with Steve he adds "Without prejudice" to the subject in his reply. Perhaps Casarva have had disgruntled customers who have threatened legal action?
It might make interesting reading to publish the email exchanges Cindy and I have had with Casarva and let the reader make up their own mind.
In summing up the kit is questionable, although the welding looks very good to a layman. The design is no good from a maintenance point of view to the differential.
I would suggest from my list above you find as many parts as you can as you will save quite a lot of money.
If you have the skill then getting the cradle square on your bike frame will not be an issue.
If you have the skill I will pop round and you can measure up and make the complete thing yourself!
If you want to convert a Sportster in the way I did then first change the engine mounts. If the cradle is then skewed like mine was atleast when Casarve do the remedial work you will be able to change the mounts if required.
Have the handbrake fittings added last so you know it will work first time.
With what I know now I wouldn't mind building another trike.
In my travels I have only seen one Casarva trike on the road. Since joining this forum I have only read of 2 having Casarva trikes. Where are all the people who have these things?

The caliper that won't release properly is full of brake dust so something is a miss there.
On the basis of other parts that got returned for a refund Cindy sends an email about the fault and asks for a refund.
This is met with a rude and sarcastic reply. Steve will not tell us who the supplier is so I will do a search for something that looks similar.
They will need to be returned so that they can be sent to the supplier for testing.
Now these things cost arounf �35 so I can't see a supplier that must turn over hundreds of different caliers wasting time testing them but I have no choice.
I find that Audi A4 C5 calipers are much the same thing and the carriers for the same car look like what I have been supplied.
New calipers and carriers fitted and brakes bled.
There is brake fluid weeping from the banjo connectors. After checking what I can tighten the bolts to I tighten them a bit and then a bit more. One side is now good but the other isn't.
The surface on the caliper doesn't look so good so I flatten that off with fine paper.
After ordering copper crush washers find the manufacture wants aluminium ones to be used with their alloy banjo connectors so place an order for some of them as well.
I cannot get a socket and torque wrench in so remove the caliper to tighten the banjo bolt. The spec is 20 to 25 ft-lbs (27Nm to 33Nm). Using Newton Metres I set my torque wrench to 30. Once I start to tighten the bolt I feel afraid that it might snap. Once I get it all back together I am relieved that the leak has stopped.
After a few little bling bits and changes to the foot pegs the trike is finished.
It has passed its MOT and is now officially a trike, taxed and ready to go.
The epilogue
I was accused of asking lots of repetitive and irrelevant questions and alot of other things beside. If you feel after spending �6000 you cannot ask as many questions as you like as many times as you like or criticise what has been supplied then I would suggest you don't go to Casarva. In one exchange of the many email exchanges with Steve he adds "Without prejudice" to the subject in his reply. Perhaps Casarva have had disgruntled customers who have threatened legal action?
It might make interesting reading to publish the email exchanges Cindy and I have had with Casarva and let the reader make up their own mind.
In summing up the kit is questionable, although the welding looks very good to a layman. The design is no good from a maintenance point of view to the differential.
I would suggest from my list above you find as many parts as you can as you will save quite a lot of money.
If you have the skill then getting the cradle square on your bike frame will not be an issue.
If you have the skill I will pop round and you can measure up and make the complete thing yourself!
If you want to convert a Sportster in the way I did then first change the engine mounts. If the cradle is then skewed like mine was atleast when Casarve do the remedial work you will be able to change the mounts if required.
Have the handbrake fittings added last so you know it will work first time.
With what I know now I wouldn't mind building another trike.
In my travels I have only seen one Casarva trike on the road. Since joining this forum I have only read of 2 having Casarva trikes. Where are all the people who have these things?


 And an awesome thread. Great job!
#8
11-22-2018, 09:35 AM
Thank you.
There was quite a few pauses while waiting for parts but it is quite a quick build when everything is worked out.
Cindy wants mid mounts fitted as a way of getting on and off plus the front pipe needs the heat shield fitting.
Will have to see how it goes but it might need the front fork rake angle increasing to lighten the steering.
Cindy hasn't ridden it yet. I took it to the testing station and then we have to wait for the paperwork to come back with the registration.
#9
11-22-2018, 09:51 AM
The following users liked this post:
Andy from Sandy (11-22-2018)
#10
11-22-2018, 10:42 AM
Thank you.
I have no clue how much time I have spent on the build. The build has been spread over 6 months. In that time I know I didn't do anything for 2 months waiting for Casarva and the powder coaters.
I would also order something online and have to wait a couple of days before I could carry on. Wire, connectors, tools, grease, new screws, etc.
The price of the kit was �6000 which included extra welding work that I couldn't do like cutting the half shafts down to size.
The bike was a fully road going taxed and tested 2008 XL1200C. I didn't want a donor bike that I had to do any work on plus I thought a rubber mount with EFI engine would be best. There was a great number for sale and they were all around �5000 to �5500 from traders. We went this route as the trader took a car in part exchange.
The paint was �1500. Obviously not required and you could spend any amount on very complex designs and paint type.
I have probably spent another �1500 on parts and tools.
Last edited by Andy from Sandy; 11-22-2018 at 10:44 AM.