
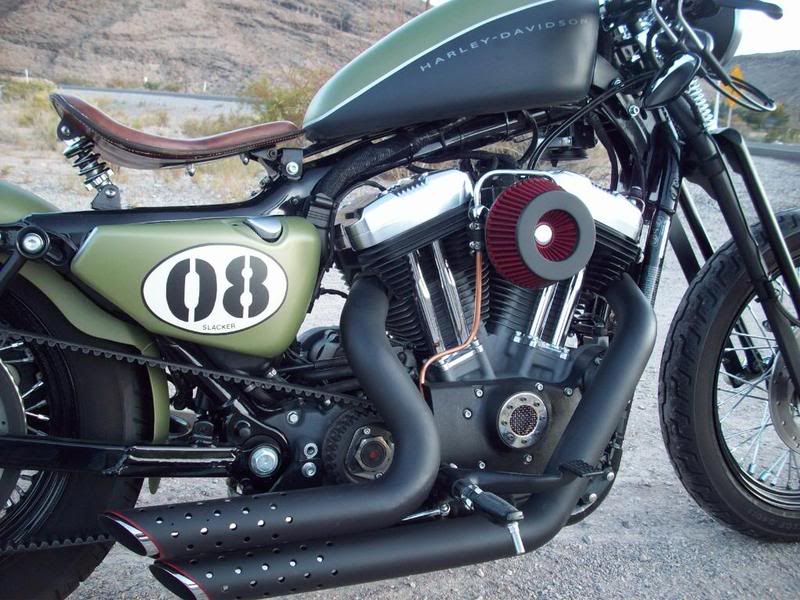
My cheapo air cleaner (inspired by Slackster)
#11
 11-21-2009, 05:43 PM

Road Captain
#12
11-21-2009, 07:59 PM
Road Captain

#14
11-21-2009, 08:14 PM
Wow! I don't know how I missed this thread. That looks hella neat. Somewhere on the thread I did someone said that it will look better once it starts to look a bit more gruddy. well it's starting a tad bit and it still looks awsome. I as well have a little cover piece that i'm dying to put on, but i'm just not sure how to go about it yet.
I don't know if I mentioned it before, but I used a hypercharger Spacer. That's exactly what it's called. You can get one out of jpcycles for about $20
I don't know if I mentioned it before, but I used a hypercharger Spacer. That's exactly what it's called. You can get one out of jpcycles for about $20
Last edited by Slackster; 11-21-2009 at 08:19 PM.
#15
11-21-2009, 09:48 PM
Outstanding HDF Member
#16
11-22-2009, 01:40 AM
Thanks for the compliments!
Yeah, I feel the same way about the seat. I've tried 4 different seats. I may just make one. I've mentioned it before but there's a kick *** leather place near me that specializes in bike seats. I could have them gel pad & cover a pan that I form.
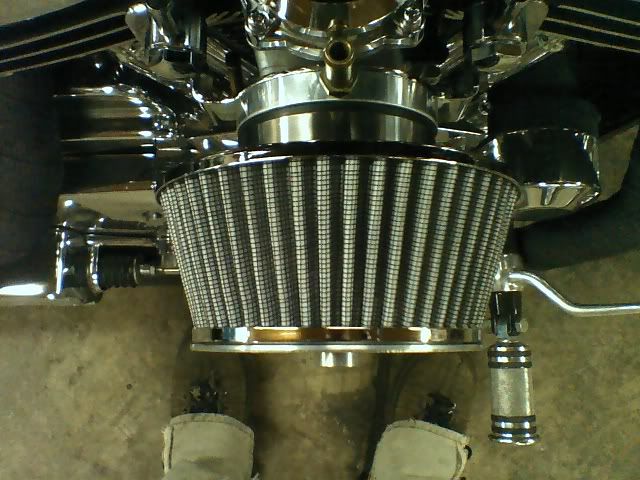
I didn't see that Hypercharger spacer but I probably would've made my own piece if I saw it anyway. But just from looking at a pic of it, it looks to be too big of a diameter to slip my filter boot over. I basically made the same thing but then an adapter sized to fit my filter. Perfect fit.
I want to make more parts. I'm drawing up a pair of old school looking pipe tip inserts. All I have is an OLD bench top Smithy lathe though.
Slackster, the way I'm going to hold my cover on is pretty simple. Pics would be great but I haven't done it yet. I had planned on doing it tonight but I had family over. I was showing off on this little mini Sporty I'm putting together for my nephew
and wrecked into the one owner, 1969 Hurst built AMC SC/Rambler that's sitting in my garage. I was sick to my stomach so I went in for the night.
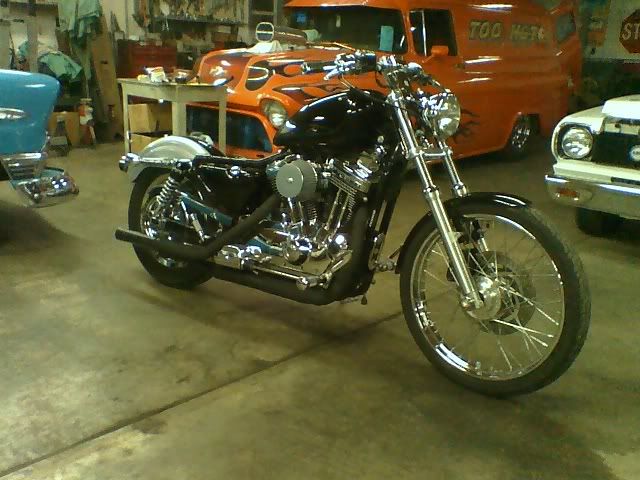
Mini Sporty next to my Nightster:

Where the axle nut hit the side of the car when a wheelie got out of control:
The paint guy is coming to look at it Monday. This car has never had a dent.
Anyway, when I mount the cover I'll post pics.
Thanks again.
Yeah, I feel the same way about the seat. I've tried 4 different seats. I may just make one. I've mentioned it before but there's a kick *** leather place near me that specializes in bike seats. I could have them gel pad & cover a pan that I form.
I didn't see that Hypercharger spacer but I probably would've made my own piece if I saw it anyway. But just from looking at a pic of it, it looks to be too big of a diameter to slip my filter boot over. I basically made the same thing but then an adapter sized to fit my filter. Perfect fit.
I want to make more parts. I'm drawing up a pair of old school looking pipe tip inserts. All I have is an OLD bench top Smithy lathe though.
Slackster, the way I'm going to hold my cover on is pretty simple. Pics would be great but I haven't done it yet. I had planned on doing it tonight but I had family over. I was showing off on this little mini Sporty I'm putting together for my nephew
and wrecked into the one owner, 1969 Hurst built AMC SC/Rambler that's sitting in my garage. I was sick to my stomach so I went in for the night.
Mini Sporty next to my Nightster:
Where the axle nut hit the side of the car when a wheelie got out of control:
The paint guy is coming to look at it Monday. This car has never had a dent.
Anyway, when I mount the cover I'll post pics.
Thanks again.
#17
11-23-2009, 01:29 AM
Spent all day in the garage watching football & cleaning up to better rearrange the cars. Still feeling sick for ripping a hole in one of em...anyway, sun went down, got all of the cars back inside & football was still on so I mounted the cover.
I enlarged the hole in the cover to 5/16". Drilled a hole in the center chrome piece of the a/c. I drilled this hole 3/8" because I missed dead center. In the pic you can also see the *temporary* mounting hardware. I say temporary because after installing it I realized the mounting stud needs to be a single piece incase it loosens (so the carb doesn't suck up anything it doesn't need to).
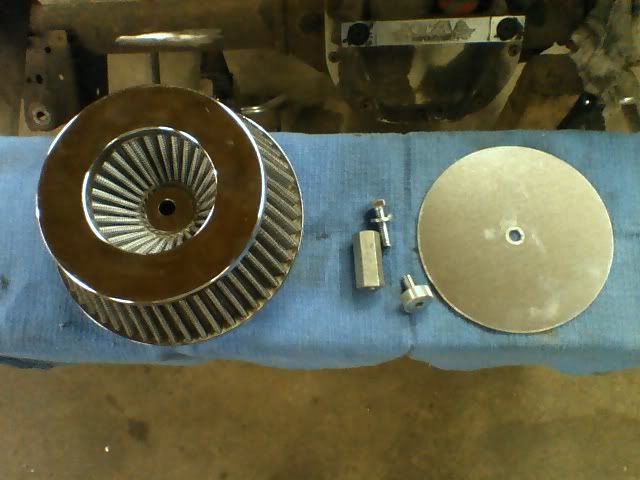
I used a 5/16" x 1 3/4" long all thread connector & shortened it by 5/16".
The stainless bolt inserts from the backside of the a/c and the chrome one from the front. I will find a longer 5/16" bolt to insert from the back of the a/c that extends all of the way through the connector & cover then use an acorn nut to secure it. That way I can better monitor the bolt if it loosens.
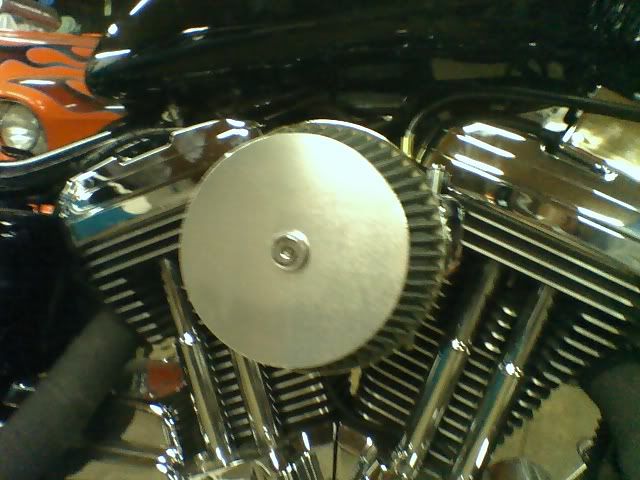
It still needs to be engraved & powdercoated mirror black.
There's a cover being sold on Ebay that will be similar but the diameter is too big...and it's 60 bucks. I may end up having 10 bucks in mine after the engraving (which is the only thing I'm not doing myself).
I enlarged the hole in the cover to 5/16". Drilled a hole in the center chrome piece of the a/c. I drilled this hole 3/8" because I missed dead center. In the pic you can also see the *temporary* mounting hardware. I say temporary because after installing it I realized the mounting stud needs to be a single piece incase it loosens (so the carb doesn't suck up anything it doesn't need to).
I used a 5/16" x 1 3/4" long all thread connector & shortened it by 5/16".
The stainless bolt inserts from the backside of the a/c and the chrome one from the front. I will find a longer 5/16" bolt to insert from the back of the a/c that extends all of the way through the connector & cover then use an acorn nut to secure it. That way I can better monitor the bolt if it loosens.
It still needs to be engraved & powdercoated mirror black.
There's a cover being sold on Ebay that will be similar but the diameter is too big...and it's 60 bucks. I may end up having 10 bucks in mine after the engraving (which is the only thing I'm not doing myself).
#20
11-23-2009, 01:46 PM
Thanks! I bought 2 fenders & a gas tank off of Ebay to have them painted black. I've fitted the frone fender & gas tank )they still need painted...just happened to be black when I got em). Lowered the front fender an inch so it hugs the tire and the tank already has all of the welds & seams smoothed. The rear fender isn't on it yet because I'm shaving the rear brake light & license plate mount holes. I don't want to bob this one. I'm trying to decide on a seat because I may shave the seat mount holes as well.