
Yo Nadz' Custom Forty Eight build thread...
#1
 08-08-2012, 06:57 PM


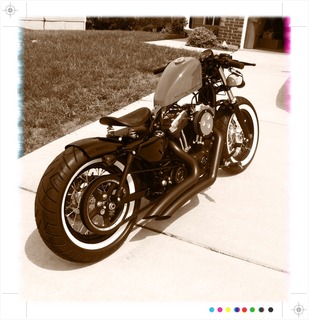
I've been having a blast customizing my new Harley in the 2 months I've had it. Let's just say I have the "disease" real bad. I can't leave **** alone. 100% happy with how things turned out, and since these forums are a plutra of knowledge, I figured I'd share the progress of my bike as step by step as possible. I learned pretty much everything for searching and asking questions on multiple forums.
Questions, comments, and criticism welcome.... here we go....
The full list:
-Vance & Hines Big Radius Pipes
-Vance & Hines FuelPak
-Arien Ness Big Sucker Intake
-Custom Frame/Fender Chop
-Tail Light Relocate
-Biltwell 10" Struts
-Mother Road Customs Distressed Leather Springer
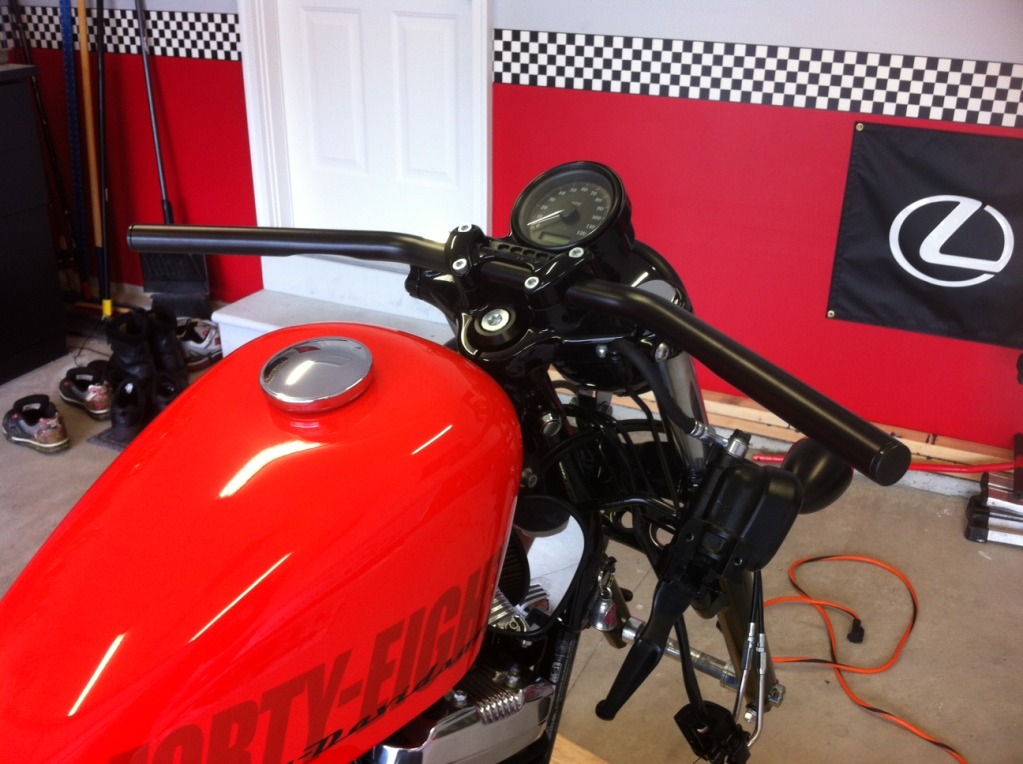
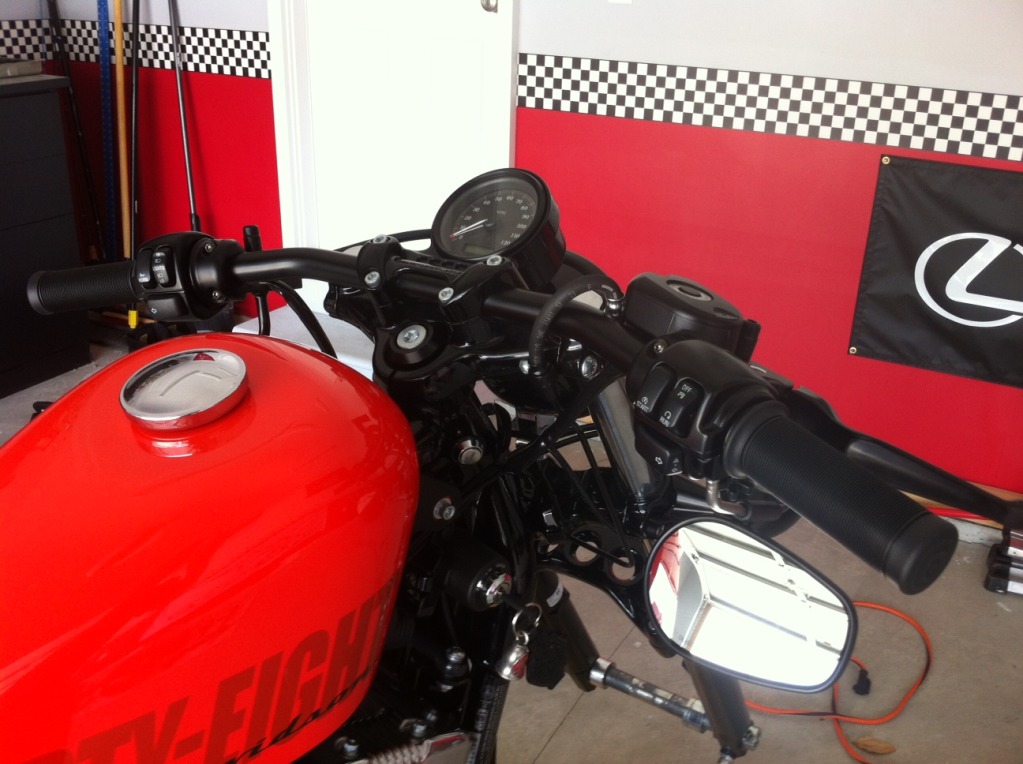
-HD Drag Bars
-Biltwell Kung Fu Grips
-DK Customs 3" Tank Lift, Coil Relocate, and Ignition Relocate
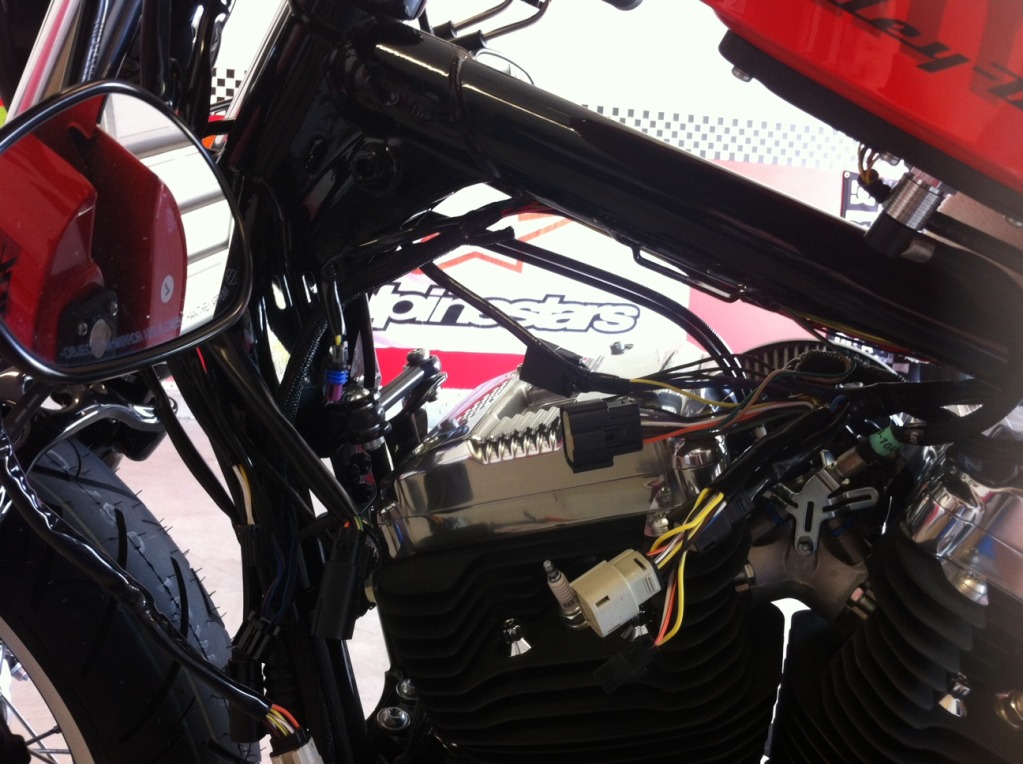
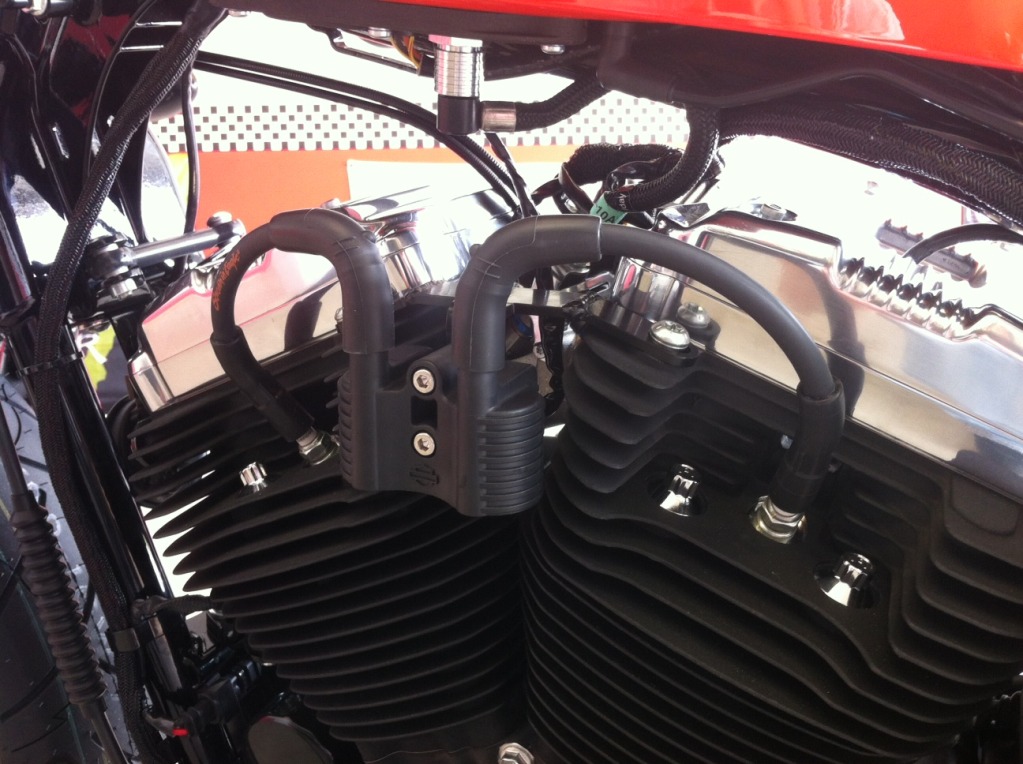
-Wire Tuck
-Shinko White Walls. 170 rear, stock size front
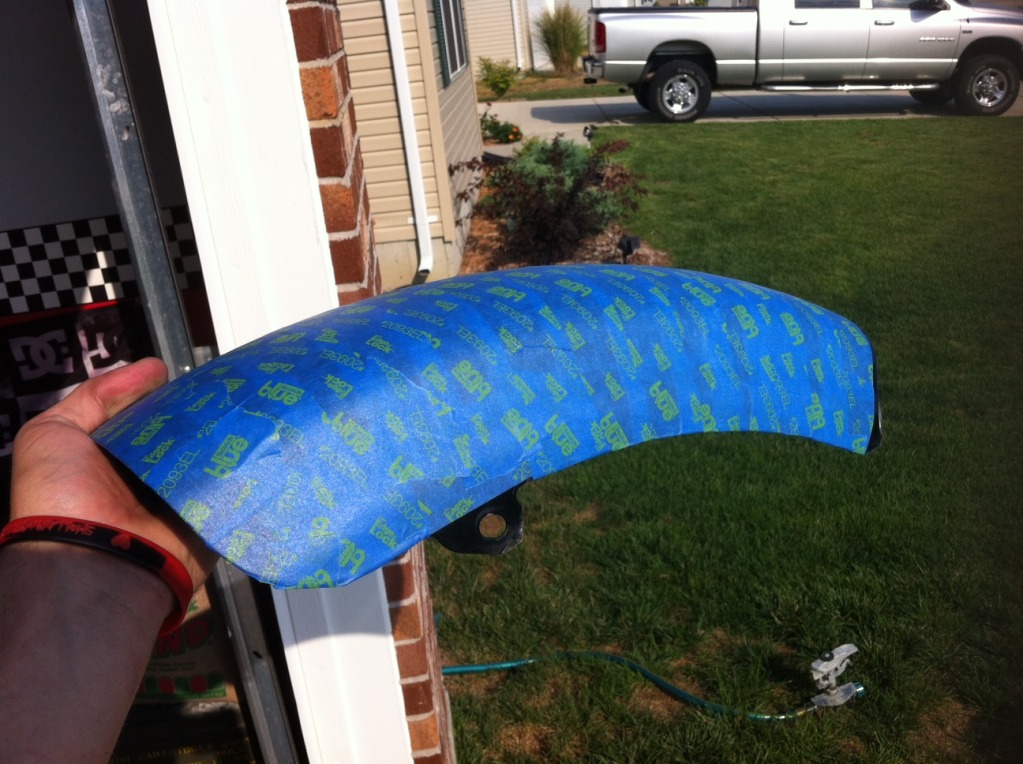
-Front Fender, Belt Guard, and Gear Guard Delete
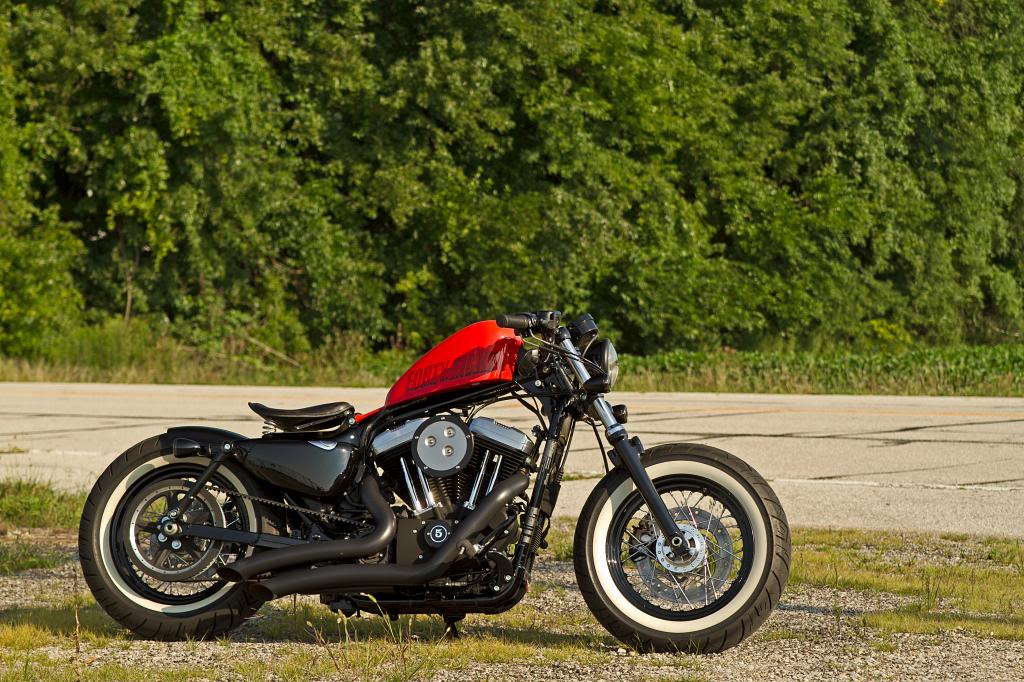
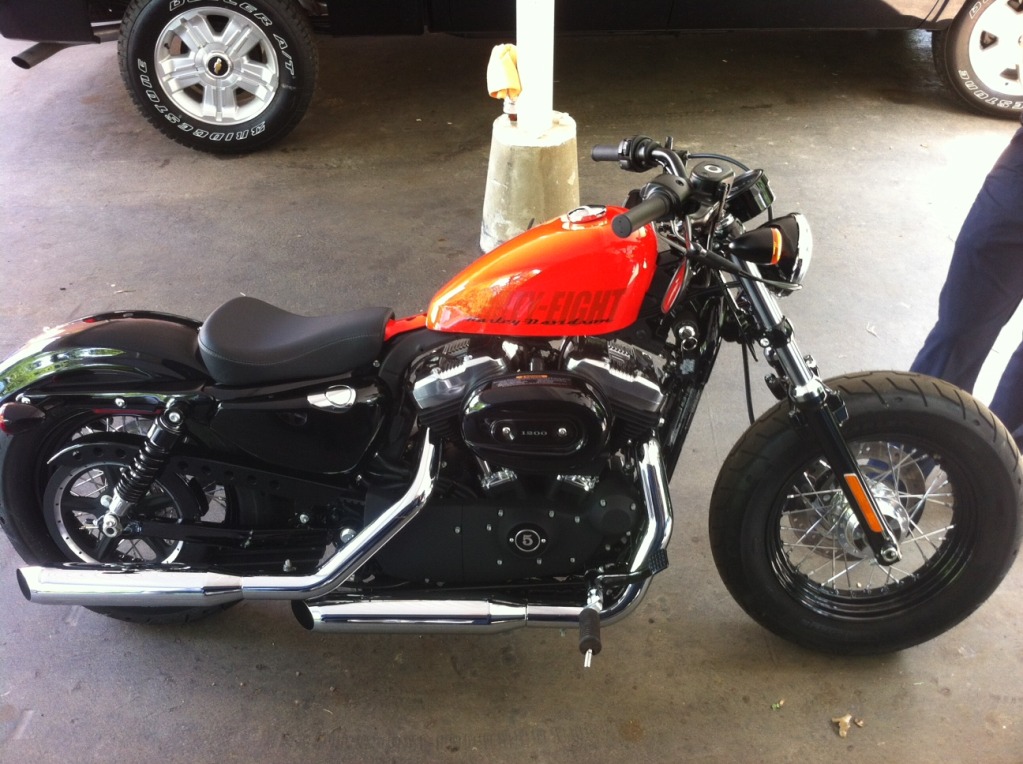
Brand new, bone stock 2012 Forty Eight (minus the gaudy front fender which was removed ASAP). Purchased June 3rd, 2012.
Time to make if sound like a Harley. Installed Vance & Hines Big Radius pipes, Arien Ness Big Sucker intake, and Vance & Hines Fuel Pak fuel management system.
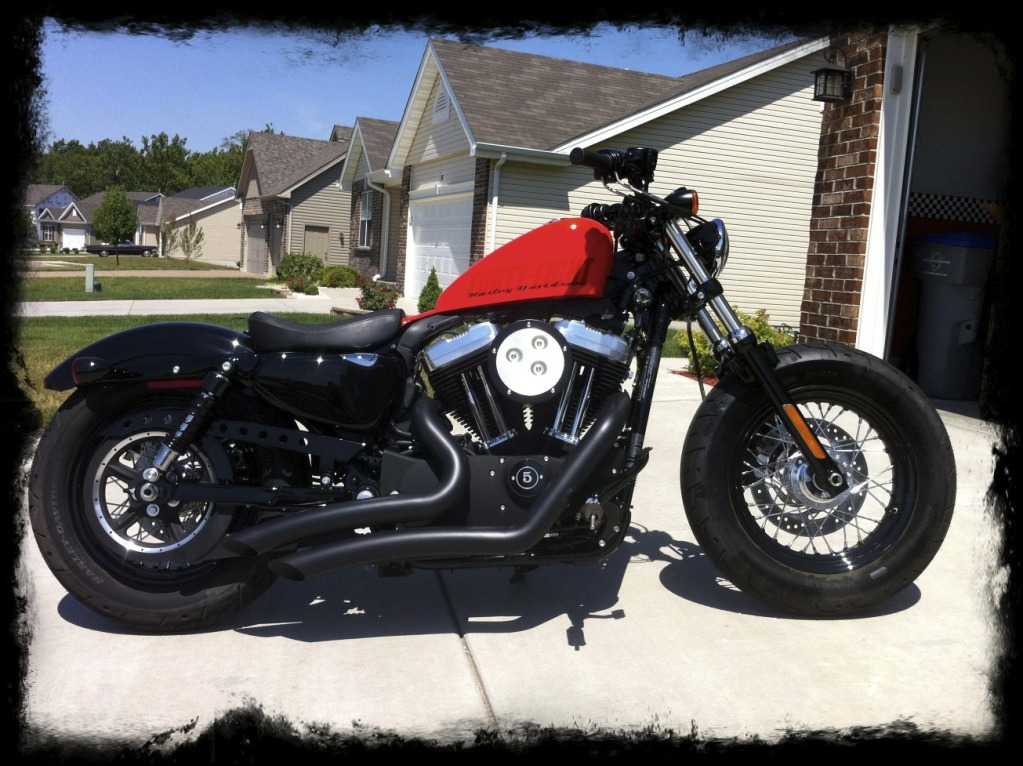
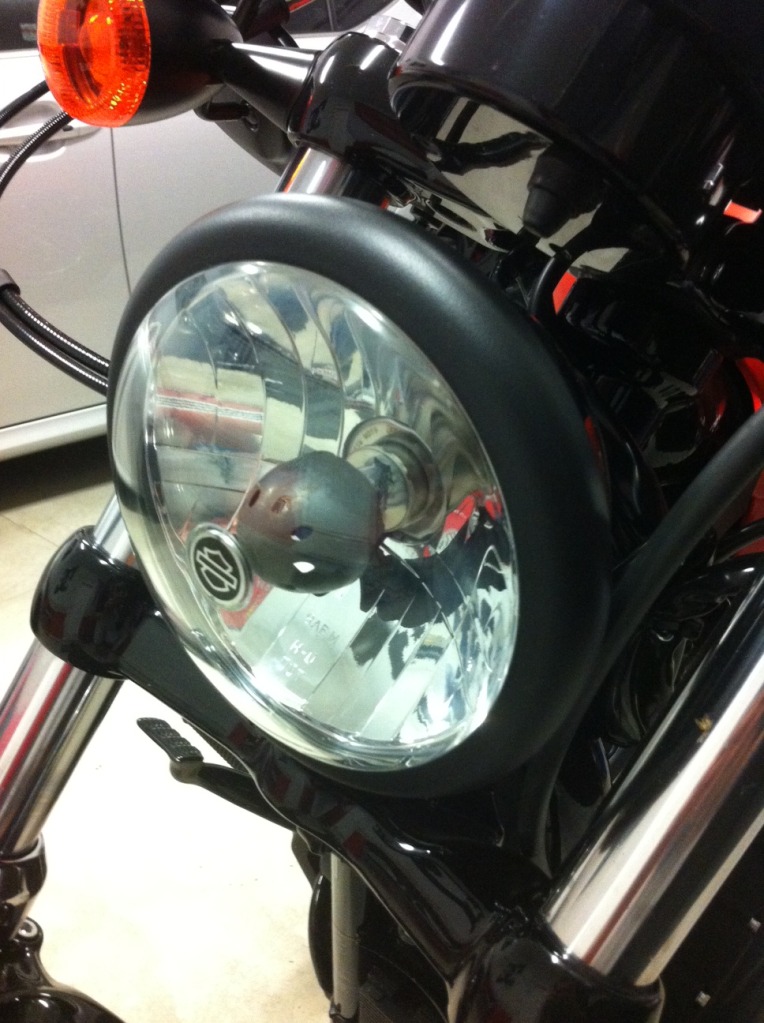
Brought out the good ol' PlastiDip for a few odd jobs including the headlight trim.
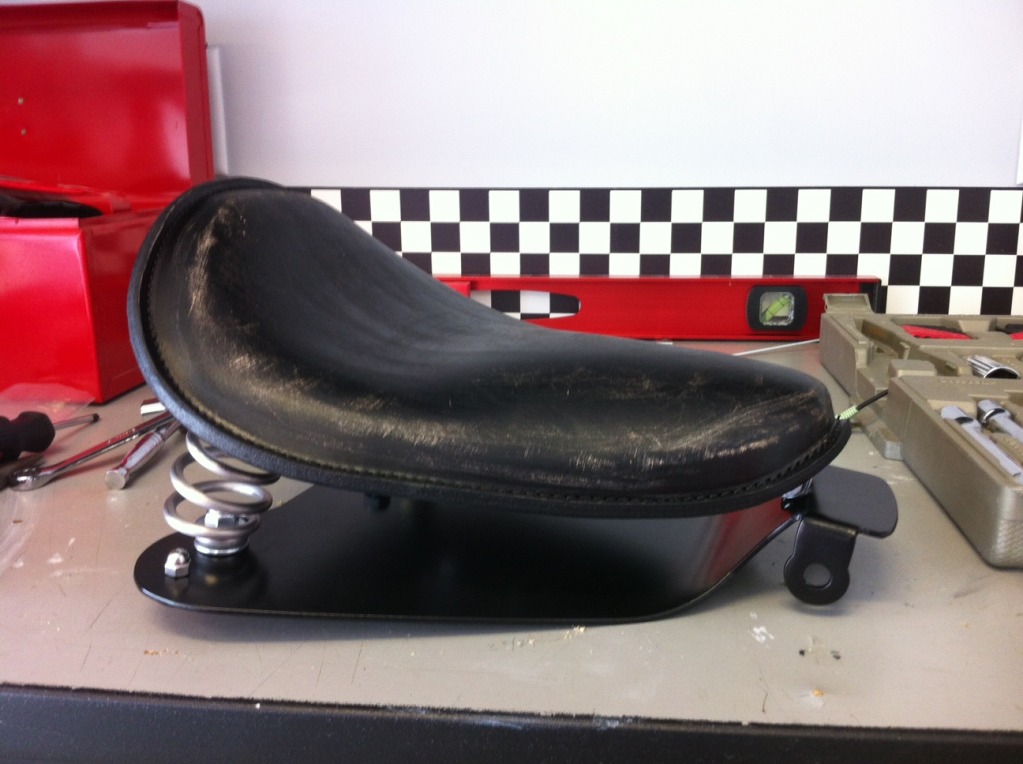
Mother Road Customs Rich Phillips custom distressed leather springer seat.
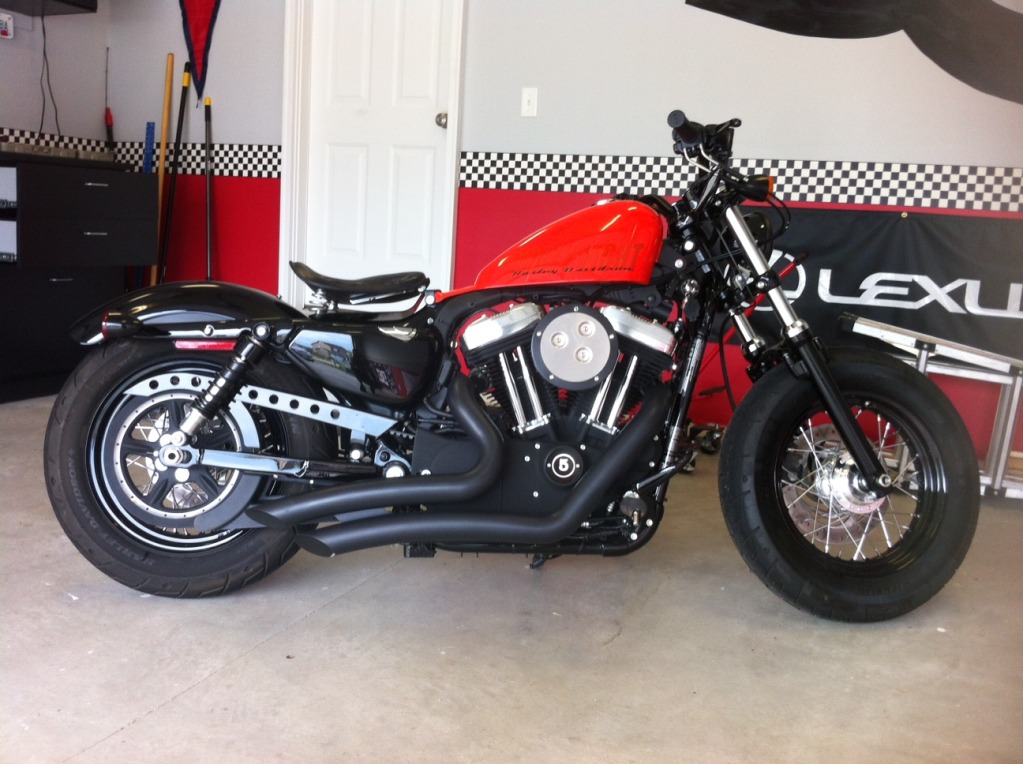
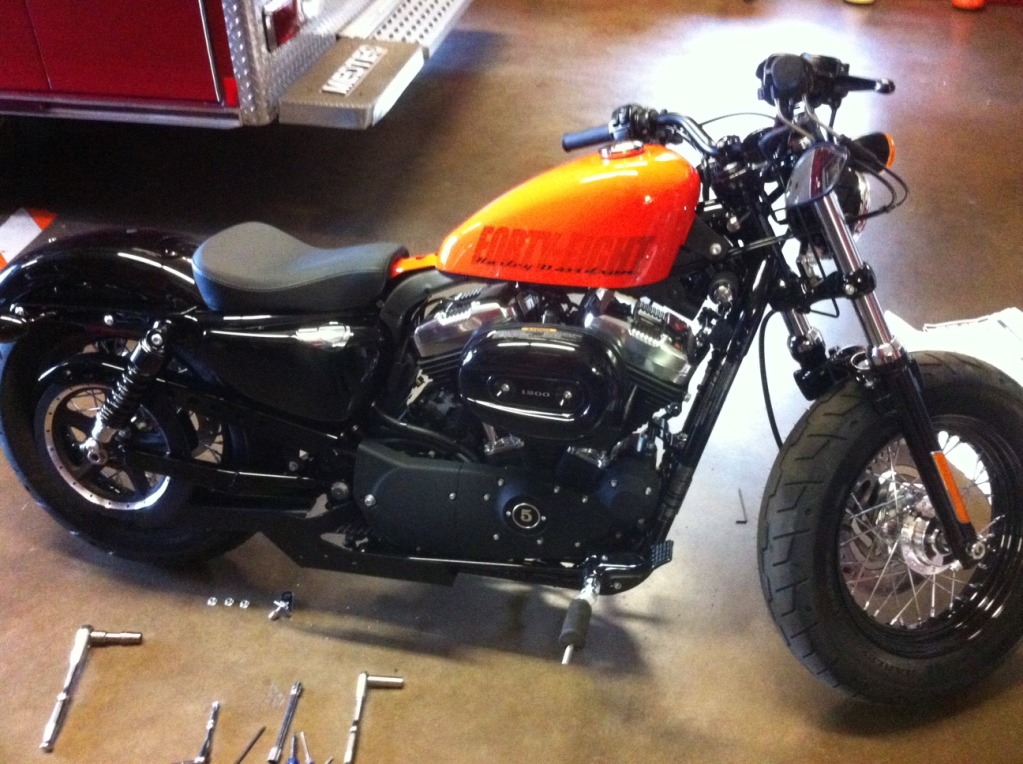
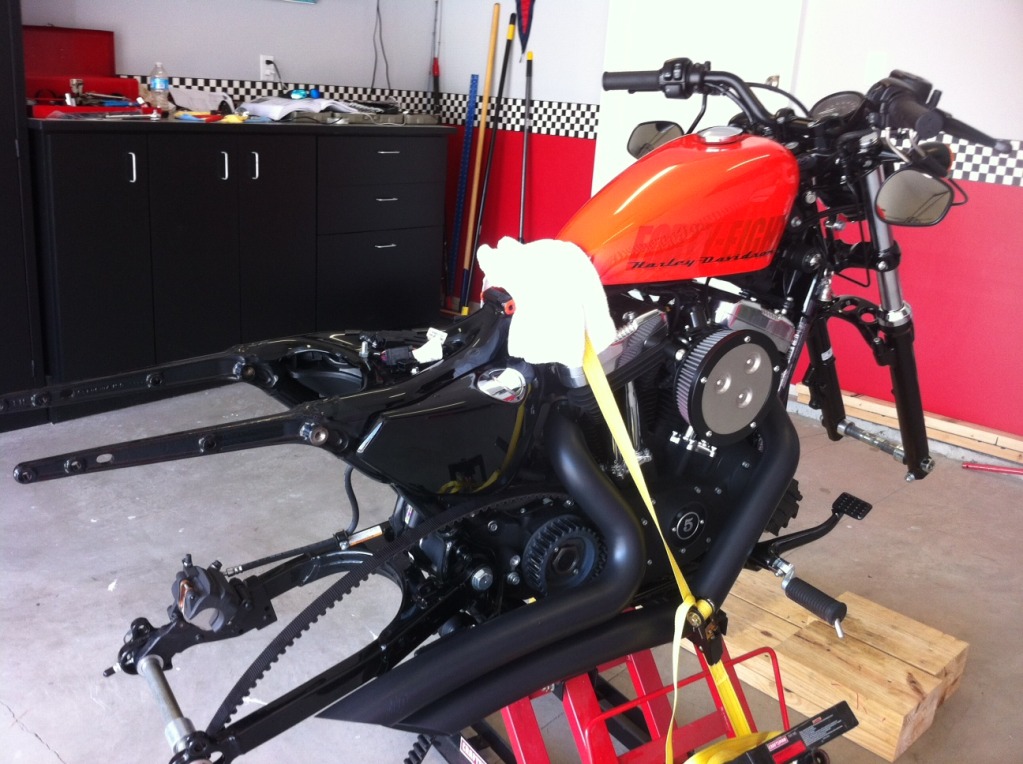
Time to get serious. Let's break this b*tch down..... HD Drag Bars with Biltwell Kung Fu grips installed, belt guards removed.
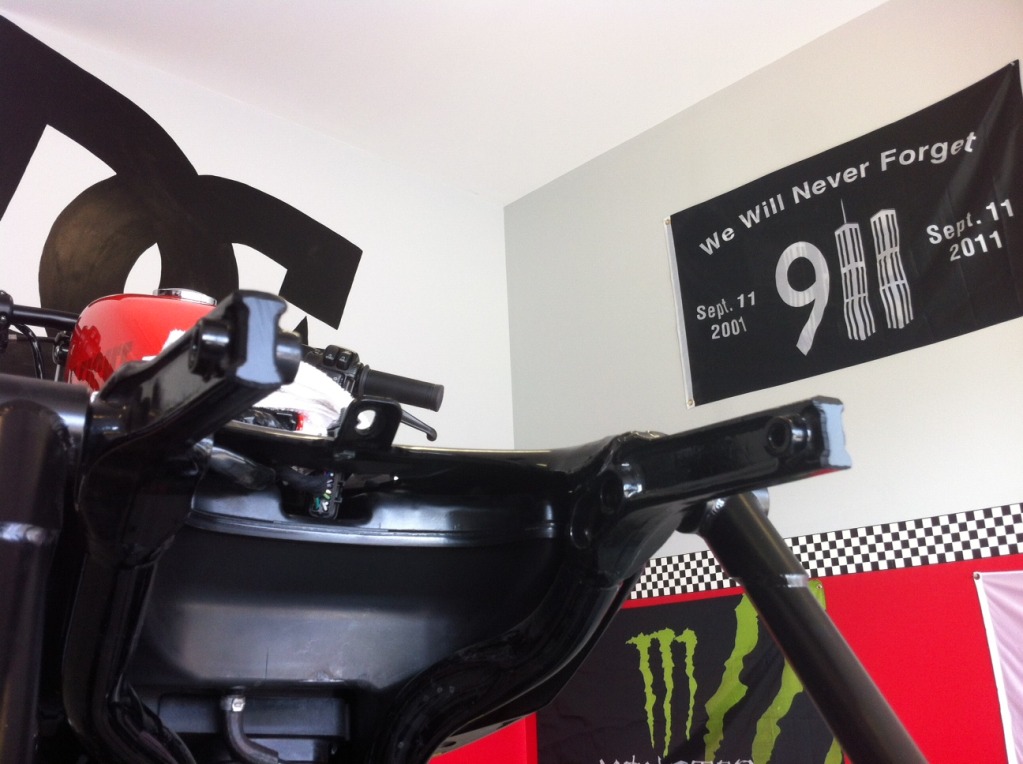
Frame and fender chopped.
Added Biltwell 10" struts, white wall tires, 170/70/16 in the back, relocated tail lights, and pieced it back together. Looks good....but still missing something.
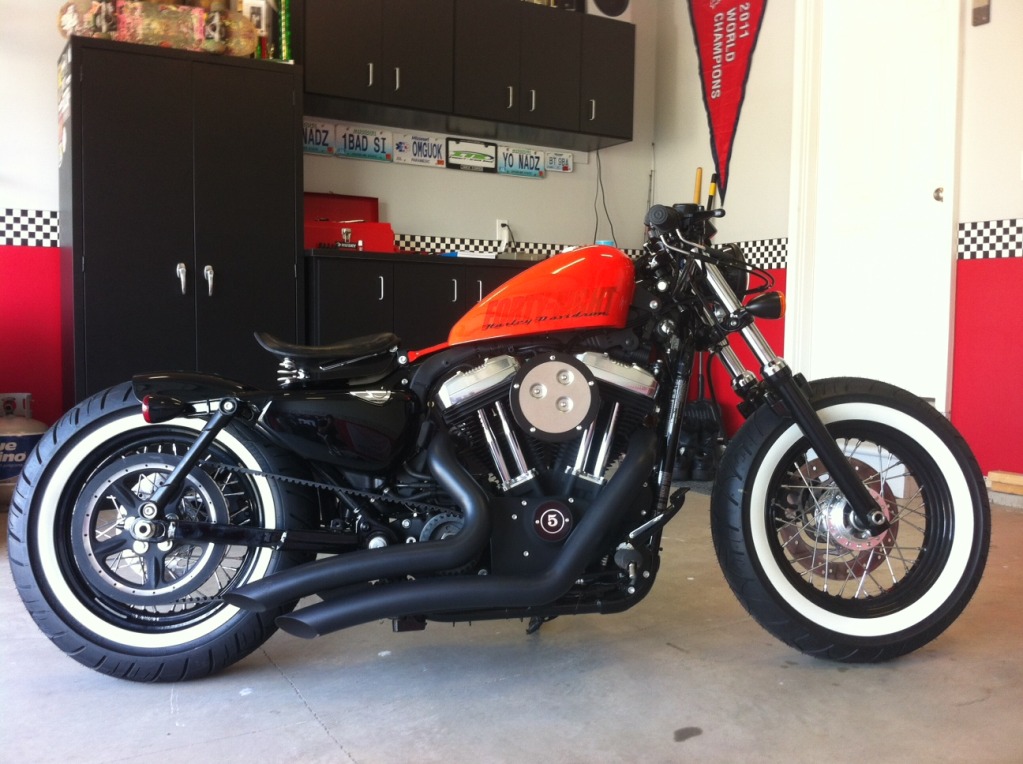
3" DK Customs tank lift, coil relocation, and ignition relocation. Wires wrapped and tucked neatly on the backbone.

DAMN!! That's exactly what it needed!!
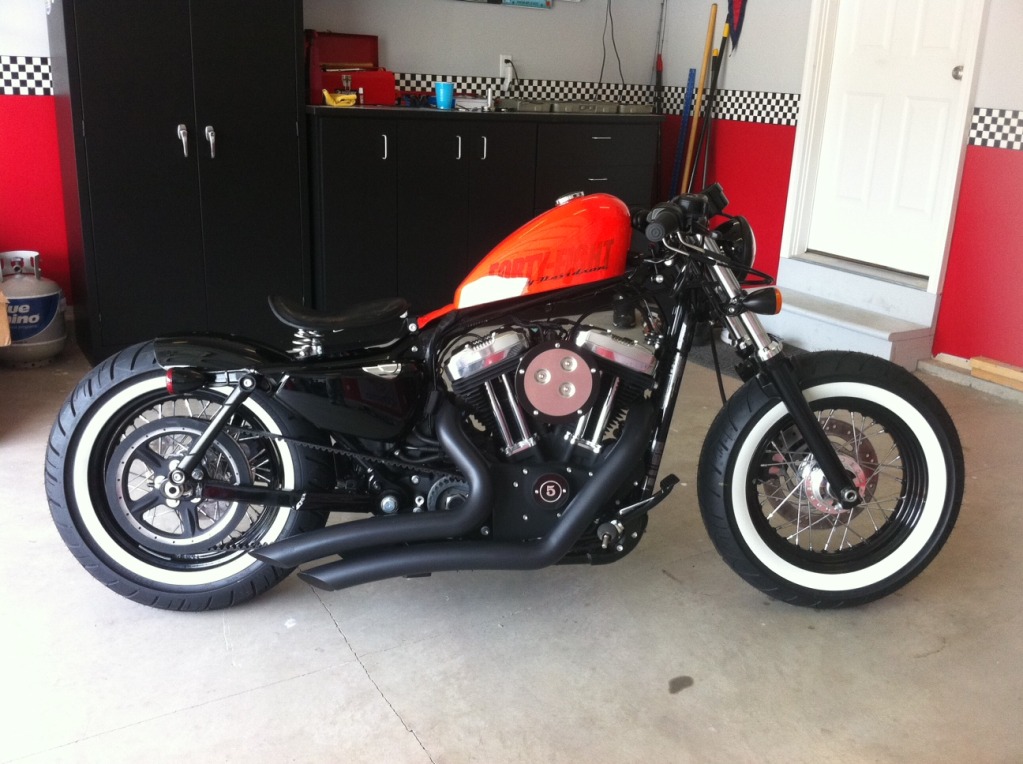
And the final product. Special thanks to my dad for the suggestions, borrowed tools, exchanged curse words, and shoulder to lean on when I thought I'd f'd something up.
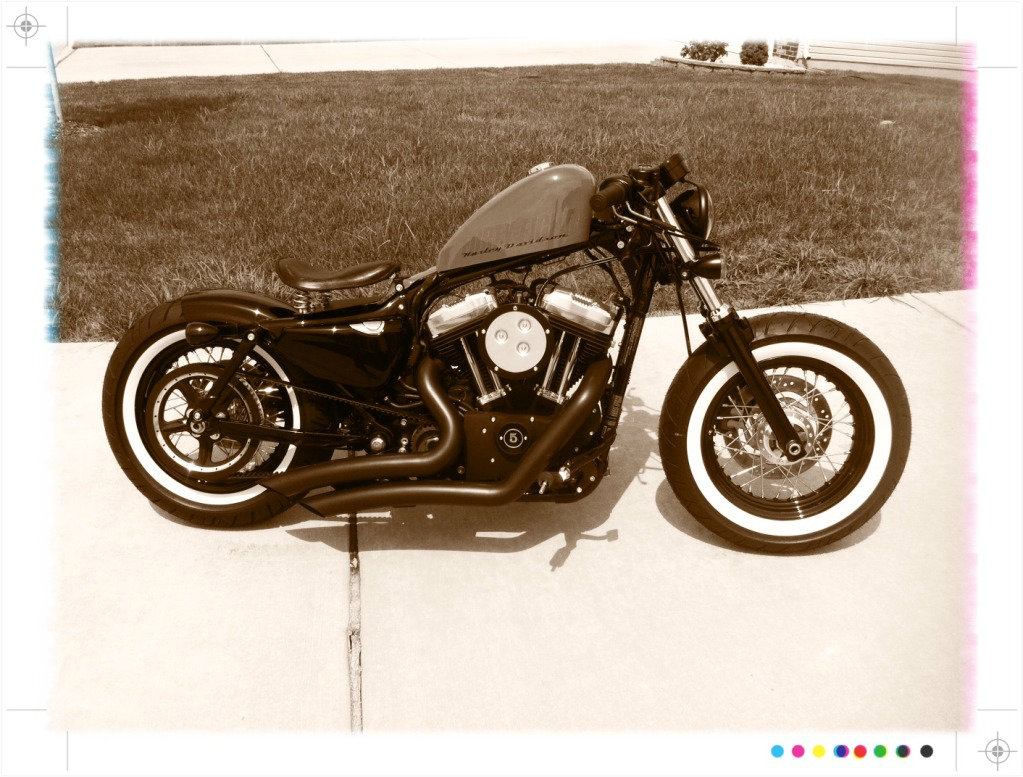
Next in line, strip the tank and clear the bare metal with some pinstripe "Harley Davidson" work.
Thanks for looking. Please discuss...
Last edited by Yo Nadz; 08-20-2013 at 02:55 PM.
#2
08-08-2012, 07:09 PM
Outstanding HDF Member
#3
08-08-2012, 07:17 PM
Platinum Sponsor
Join Date: Nov 2010
Location: Red Banks, Mississippi
Posts: 17,476
Received 3,954 Likes
on
2,306 Posts
Looks like you have been having fun! Liking the results.
__________________
Kevin
Gear Up & Ride in! DK Custom 4th Annual Open House, June 8th. 🏍️ Click HERE For The Lowdown.
DKCustomProducts.com
Kevin
Gear Up & Ride in! DK Custom 4th Annual Open House, June 8th. 🏍️ Click HERE For The Lowdown.
DKCustomProducts.com

#4
08-08-2012, 08:25 PM
Road Master


#7
08-08-2012, 09:31 PM
Novice
Join Date: Aug 2012
Location: reno, NV
Posts: 21
Likes: 0
Received 0 Likes
on
0 Posts
Trending Topics
#8
08-08-2012, 09:35 PM
Thanks for the kind words!
Awesome product, and super easy to install. Thanks again!
a dye grinder worked we for me. tape up the fender so you don't burn the paint. cut from the BACK of the fender and roll it under the seat. test fit, test fit, test fit. I had to make a spacer for under the seat to fill a 3/4" gap between the fender and the hole where the bolt for the stock seat was, ill get a pic tomorrow. and make sure you spray paint any bare metal you get from cutting to avoid rust.
TAKE YOUR TIME!!! It will frustrate the **** outta you, but with patience come excellence
Awesome product, and super easy to install. Thanks again!
TAKE YOUR TIME!!! It will frustrate the **** outta you, but with patience come excellence
#10
08-08-2012, 11:17 PM
Tourer
Join Date: Mar 2010
Location: Martinez, California
Posts: 280
Likes: 0
Received 0 Likes
on
0 Posts