
"DIY MODS" and TRICKS to SAVE $$$$$$


#1053
 07-10-2012, 06:51 PM
I have a really nice, heavy duty bike cover from my last bike. I was trying to figure out a way to use with the antenna on my Ultra. I did not want to just cut holes and have them fray over time.
I went to the big box store and bought 4 of the largest rubber washers they had. These also had the largest center holes.
I took both antenna off and put the cover on. Marking the areas where the connectors were under the cover. I then glued a washer on each side of the hole and then cut the center out.
worked great.
#1054
07-11-2012, 07:17 PM
Road Warrior
seen this done on this forum off and on. basically got to thinking I do not want to suck in hot air into my intake, didn't want to suck in oil (I keep it low but it still sucks it in) etc, etc. So got a kit that was supposed to work on a twin cam...but it really wasn't designed for stage i intakes. so I put a metal cut off blade on my table saw and cut the case vent bolt barrels off my stage one back plate. used a little rubber to fill a small hole and mounted the kit up. I'm going to get a clamp to secure the end of the filter to one of the push rod tube lower cover base bolts. took it for a spin and I like it. I have an extra back plate if I decide I want to undo all this. The filter does get hot so there's definitely a lot of air movinging in and out. The kit I used was " 35-0123-VT Sifton Braided Hose Crankcase Breather Kit for 1993-up Harley Big Twin Evolution & Twin Cam 88 "
#1055
07-12-2012, 09:36 AM
$54.92, a dremel, and a hacksaw is all that is needed to make this A\C.
Step 1:
Remove stock assy.
Step 2:
Follow inner edge with dremel that covers throttle body and CC breather ports. This will make stock look like pic 2.
This step is optional but you will have to replace CC bolts or cut yours down. Without spacers that are part of stock plastic piece they are to long, if you remove spacers to avoid cutting bolts then IMO they are to close to back of A|C.
Step 3:
Cut stock filter in two (through filter material) using a hack saw or surgical shears then cut back plate to look like pic 4, you will need to trim a bit more off once you fit it to the K&N assy. Back plate holes will all be raised to that spacers that go between halves do not move, use dremel to remove raised portion of bolt holes but not CC holes.
Step 4:
Place cut stock plate against back of K&N and mark CC breather holes, use 1\2 bit to make holes so stock holes will go into K&N. Use dremel bit made for metal to "modify" holes in K&N to line up with back plate or use a rat tail file.
Step 5: Trim some of the rubber off K&N filter where it lines up with CC hoses, I did this so that CC hoses would stick through a tad further. Another option is to route CC hoses to their own filter and skip the hole drilling and filter trimming all together.
Step 6: Cut stock bolts in half so that they do not bottom out when installed. Run a nut down on them first then remove after cutting to make sure you made a clean cut and didn't damage bolt.
That's it, I put some RTV between pieces so that when taken apart it would be one piece not two. Not needed due to frequency you remove back plate but nice for future times when assy is removed.
K&N Assy 56-1703
I was asked by another if it sticks out to far and hits leg.
Yes it does, I'm use to that from other bikes but this assy would be better suited for mod (will not stick out as far). I used the assy I all ready had along with two extra filters for it.
K&N Assy 56-1030
Clif
Last edited by Duc; 07-21-2012 at 11:25 AM.
The following users liked this post:
bcop803 (09-16-2017)
#1057
07-16-2012, 10:50 PM
Intermediate
#1058
07-17-2012, 06:43 AM
I replaced the left toggle switch on my RKC with a push button wired to a 12 volt Garage door opener under my seat.
http://www.ebay.com/itm/2pcs-Waterpr...ht_2931wt_1186
http://www.ebay.com/itm/2pcs-Waterpr...ht_2931wt_1186
Last edited by collin; 07-17-2012 at 07:00 AM.
The following users liked this post:
bcop803 (09-16-2017)
#1059
07-20-2012, 06:03 PM
$61.68, a dremel, and a rat tail file is all that is needed to make this A\C.
Step 1:
Remove stock assy.
Step 2:
Follow inner edge with dremel that covers throttle body and CC breather ports. This will make stock look like pic 2.
This step is optional, the new assy will completely cover everything but you will have to replace CC bolts or cut yours down. Without spacers that are part of stock plastic piece they are to long, if you remove spacers to avoid cutting bolts then IMO they are to close to back of A|C.
Step 3:
Use dremel to cut along inner edge to make it look like pic 3. Back plate holes will all be raised so that spacers that go between halves do not move, use dremel to remove raised portion of bolt holes but not CC holes.
Step 4:
Place cut stock plate against back of K&N and mark CC breather holes, use 1\2 bit to make holes so stock holes will go into K&N. Use dremel bit made for metal to "modify" holes in K&N to line up with back plate or use a rat tail file.
Step 5: Cut stock bolts in half (or purchase short ones) so that they do not bottom out when installed. Run a nut down on them first then remove after cutting to make sure you made a clean cut and didn't damage bolt.
That's it.
I put some RTV between pieces so that when taken apart it would be one piece not two. Not needed due to frequency you remove back plate but nice for future times when assy is removed.
K&N Assy 56-1010
Clif
Last edited by Duc; 07-21-2012 at 11:26 AM.
#1060
07-21-2012, 09:54 AM
Advanced
I posted this elsewhere, but will copy it here as well.
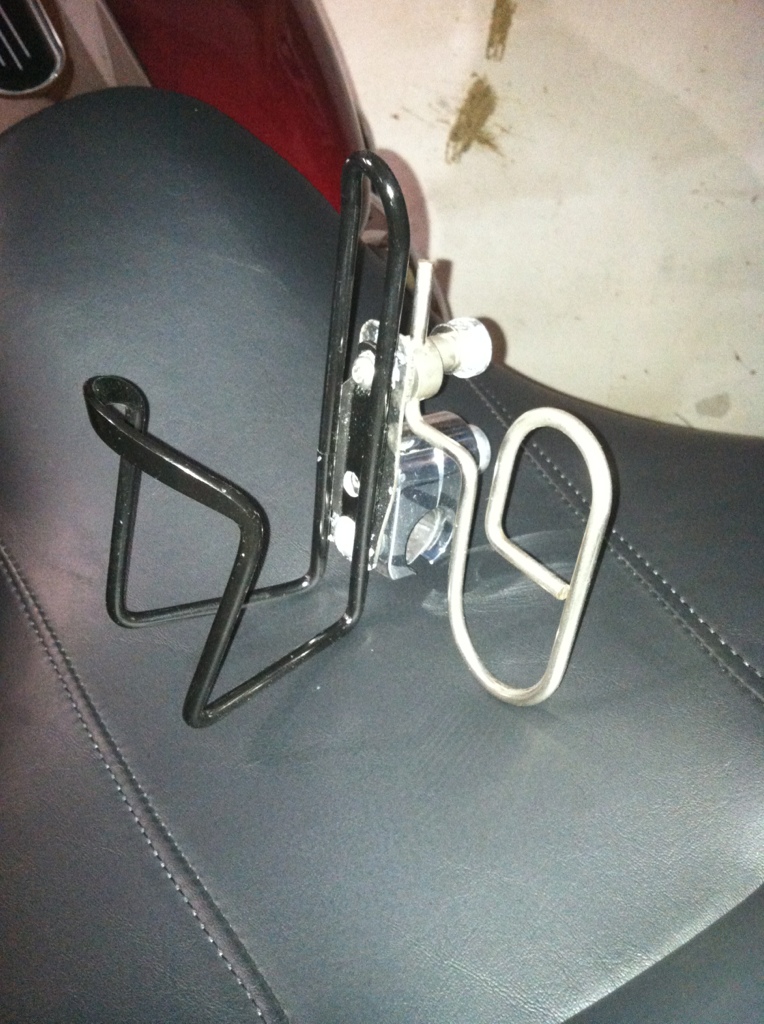
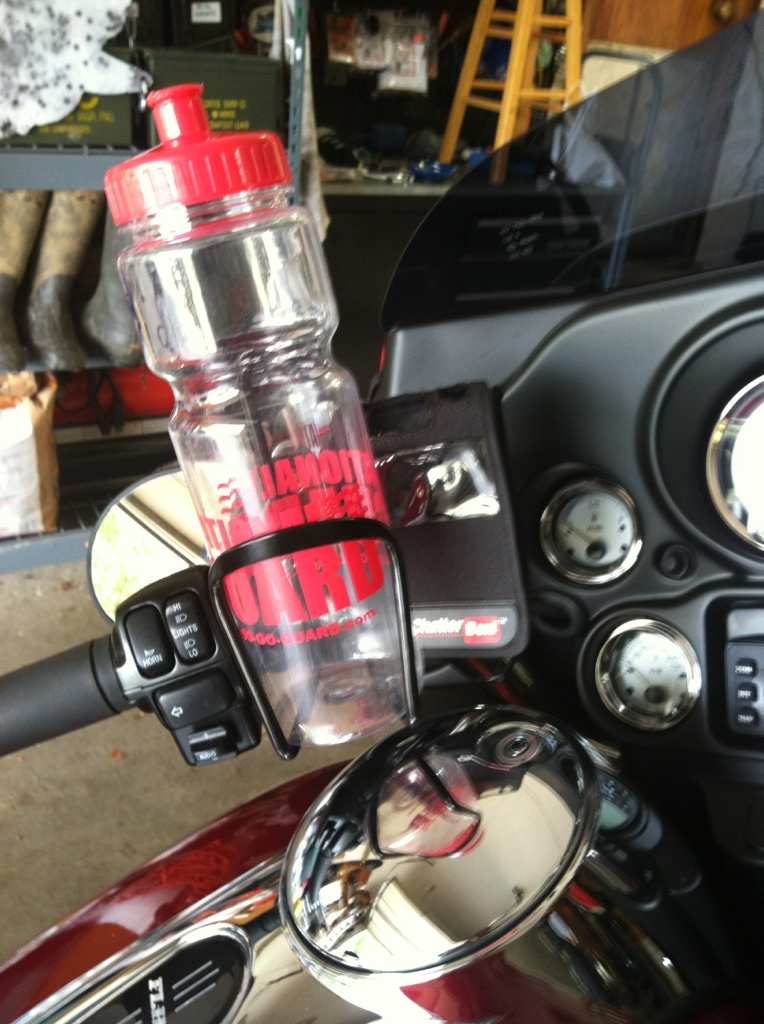
I was running low on time getting my bike ready for it's first trip. The temperatures were in the upper 90's and I hadn't gotten around to mounting my Ipod yet. After scrounging around in the garage and doing a lot of head scratching, I came up with this mount. I took an old highway peg mount, a piece of scrap steel, a bicycle bottle holder, the mount from an old Chatterbox CB radio, some bolts and a few beers and came up with this contraption. All in all it cost me $0 and it worked great! I slid my phone into the bag that my CB was supposed to come in, plugged that into the stereo and found an insulated water bottle to fit. It never moved a bit. It won't be my permanent solution (although it doesn't look bad at all) but I thought it might give someone else some inspiration.
[IMG]http://i987.ph