In this thread, we will be periodically posting write-ups and testing report links, and photos, of various different parts and products that we carry, manufactured by us, or other companies.
We will also be occassionally posting links to ride write-ups by Kevin(The K in "DK"). These are fun to read!
Introduction
The sole purpose of this thread is to share testing information (of our own products and others) with our fellow riders here on HDFourms, helping to enhance their riding experience. Most do not have the luxury of testing parts and products they're interested in, prior to purchasing.
These reports may include our objective findings and our subjective experiences.
Why is testing so crucial to us?
All parts carried by DK Custom Products, whether manufactured here at DK, or by any other company, were put through extensive testing on our own bikesprior to making the decision to make or carry a part.
Over 50% of the parts we tested, did not cut it, and we do not carry them because they simply did not pass the test for reasons that were either subjective, objective, or a combination of both.
There are a few different reasons testing is so very important to us here at DK Custom Products.
Our number one goal is to enhance the overall riding experience for all. We can not accurately give suggestions on our parts, or even parts made by other companies, without torture testing them to see how they do.
All DK Custom Products manufactured parts have a LIFETIME warranty. We cannot comfortably offer this without testing and determining our parts are made to last for the lifetime of the bike.
Lastly, DK Custom Products has a very good reputation of providing 3 things: Quality Parts, Fast Accurate Shipping, and Superior Customer Service.
Without testing, we cannot know if a part is a Quality Part.
Testing and Instructions/Technical Info
Every part sold by DK Custom Products comes with step-by-step installation instructions. During testing, we take notes through the entire installation process, trying to anticipate every possible question one may have, and answer it as clearly and comprehensively as possible in the instructions.
All installation instructions are available for viewing on the website for each part so that the Customer can see exactly what is required during installation prior to purchasing or while waiting for the parts to arrive.
Many of our parts have a 'Technical Info' tab with pictures of each step of installation, as actually seeing each step of install is very helpful when installing certain parts. On some parts' 'Technical Info' tab, there is information explaining how the parts work to help the Customer better understand why certain parts would be beneficial to his or her bike for performance as well as engine longevity.
There are also installation videos of many parts on the 'Technical Info' tab.
We also have quite a few videos on our youtube page...at these links
It's a fact, some parts are better than others, both in looks and performance.
We, at DK Custom Products, like for the Customer to know and understand, under any circumstance, if there is a part or company out there that would be a better option for what You are looking to do with Your bike, we will always suggest the alternative part or the other company.
Our Main Goal is to enhance the overall riding experience for All, even if that means the Customer doesn't purchase from DK Custom.
The first report link with very useful information will be posted soon. Stay tuned!
Please feel free to post any questions you may have about any report, part, or link posted.
Ride Free and Ride Safe from our team at DK Custom Products!
Setting up Your bike for Your comfort and security...one of the first steps of riding that is often overlooked!
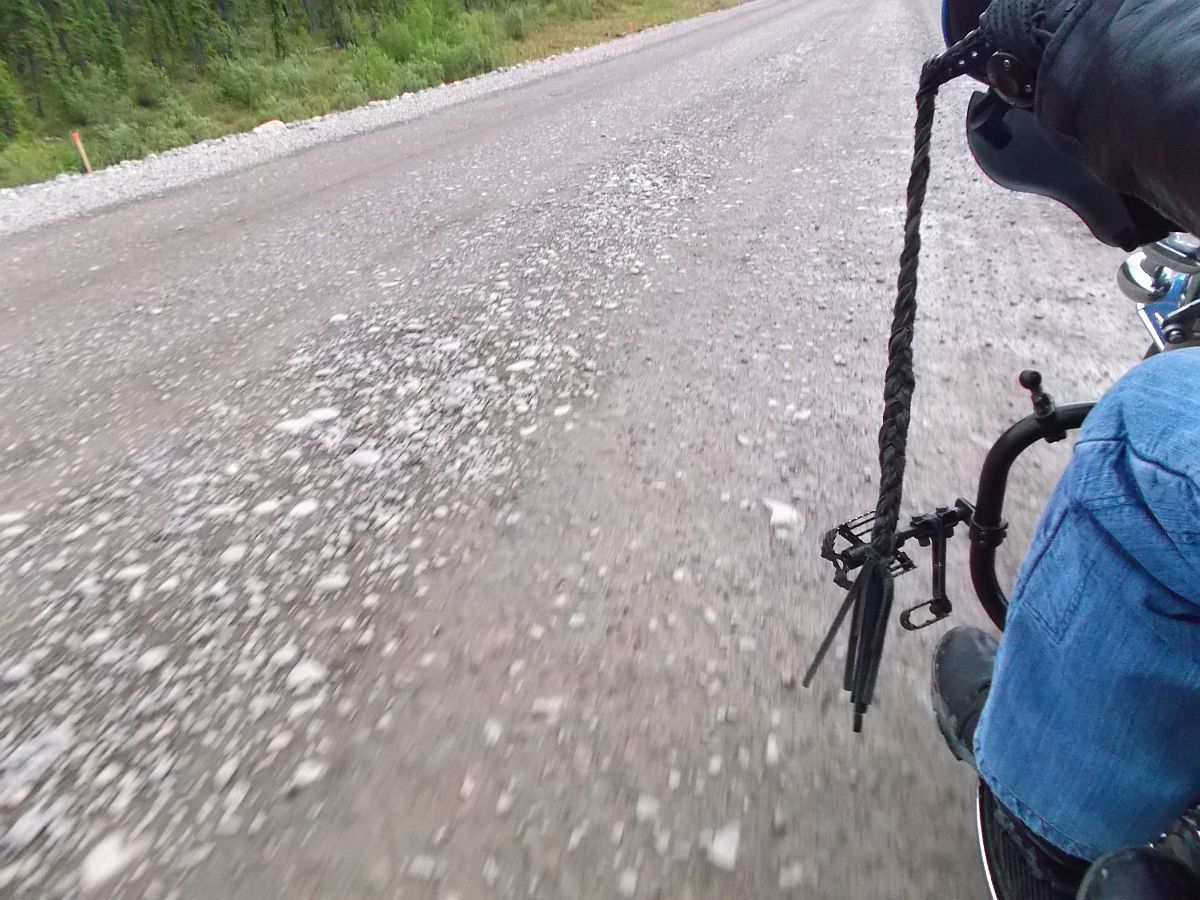
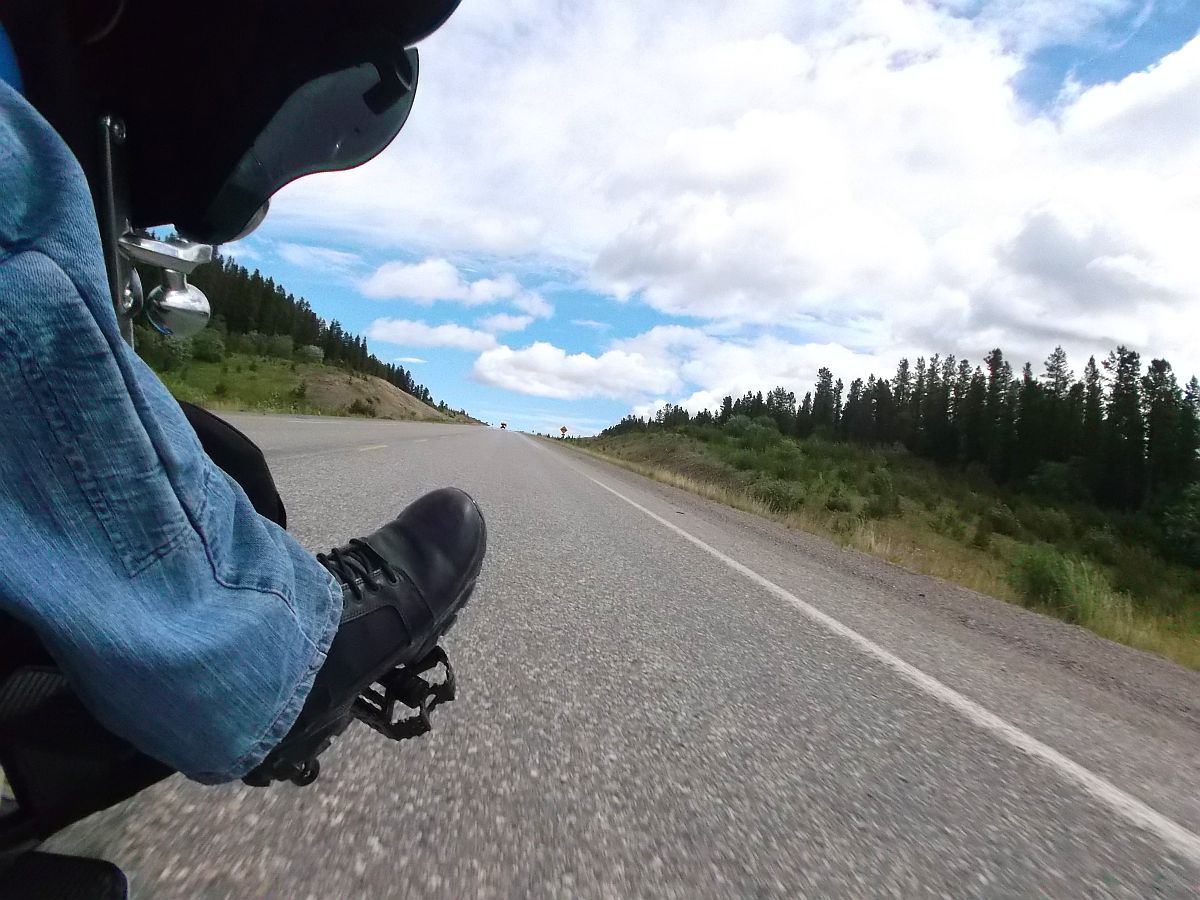
Heel rests on footpegs or highway pegs can make all the difference in comfort. While we were thinking about designing and making some, we found another company already making a nice design of heel rests that would fit with most any existing footpeg.
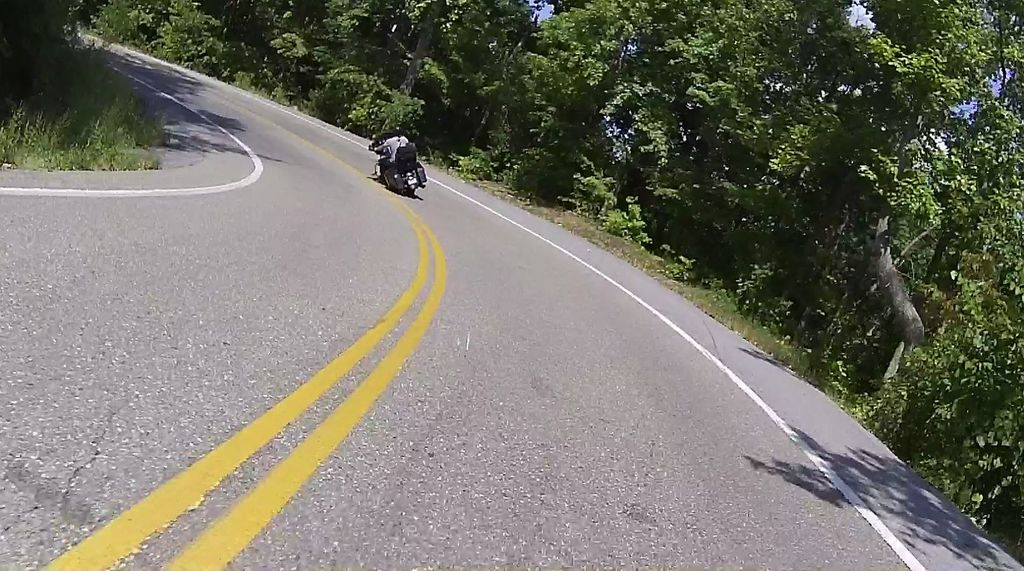
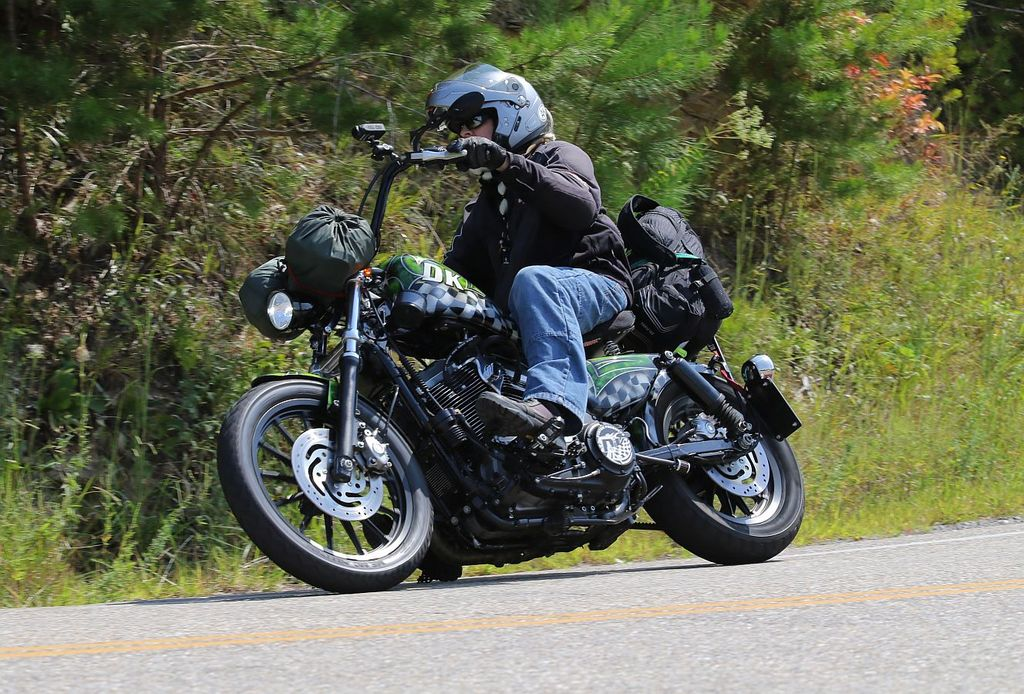
But, before deciding to carry them, Kevin put them thru a torture test on his and Mary's ride from Mississippi up to the Arctic Circle and back. (This is not the only product we tested during this ride. lol)
These pictures are taken from the ride report-
From city travel, to interstate, to the Al-Can highway, thru the Yukon, and the Haul Road up to the Arctic Circle, not only were they comfortable, but they held up perfectly and we were comfortable to carry them and recommend them to our Customers.
We can only get them in Chrome, and we sell them in Chrome. But, we also have lots of folks that like the Blacked-out look, so, we take some apart, sandblast and powder coat them before putting them back together...Blacked out!
You can see this full 10,000+ mile ride report HERE. Very interesting with tons of cool pics!
Ride safe!
Last edited by DK Custom - ST; 05-11-2018 at 03:55 PM.
Because these pegs start as two separate pieces of steel that are welded together, it was imperative to us to test the welds to know for sure that these pegs will never break while riding!
How are they made?
The Knuckle Pegs are made from American Cold Rolled Steel.
Step 1-
This square stock steel will be cut and turned into the clevis that we weld onto the knuckle-
Step 2-
Clevis cut and drilled-
Step 3-
Next, we drill and thread a hole in the end of the clevis for lateral adjustment-
We grind away the edges where the clevis will be welded-
The knuckles are laser cut. The flat, smooth end is where the clevis will be welded on-
Welded, edges ground down, sand blasted, tumbled and ready for powder coat and then onto packaging!-
But first, as every with every other part on our website, they had to be put through the proper torture testing prior to deciding for sure that we would carry these.
Continued in next post...
Last edited by DK Custom - ST; 05-17-2018 at 01:15 PM.
Above Cristy posted a great report on how we make our knuckle pegs, and one of the ways we test them, making sure our design was good and that the weld is the strongest portion of the peg.
Additionally, we spent quite a bit of time testing other factors prior to going into production.
If I recall correctly, we tested over 10 different powder coats. We needed the powder to be durable, look good, and very importantly....give a good grip to the boot.
We also wanted to make sure they were comfortable, and the two different designs would fit forwards, mid's and highway mounts.
Lot's of riding, on different bikes, over a few months time, with the different powder coatings, (along with some sledge hammer tests ) and we were ready to go into production with our Lifetime Warranty.
One other feature that was tested...this peg design was originally requested by a MC. They wanted it with a quick-release and that it would fit the hand well. It took a bit of work to get it to work well as a peg, and also still be comfortable in the hand. Several designs were tried before settling on the one you see above.
Some parts pass the test and others do not! The metal floorboard idea we had was one part designed and tested that did NOT pass!
After some thought and designing, we made a prototype to be put to the test!
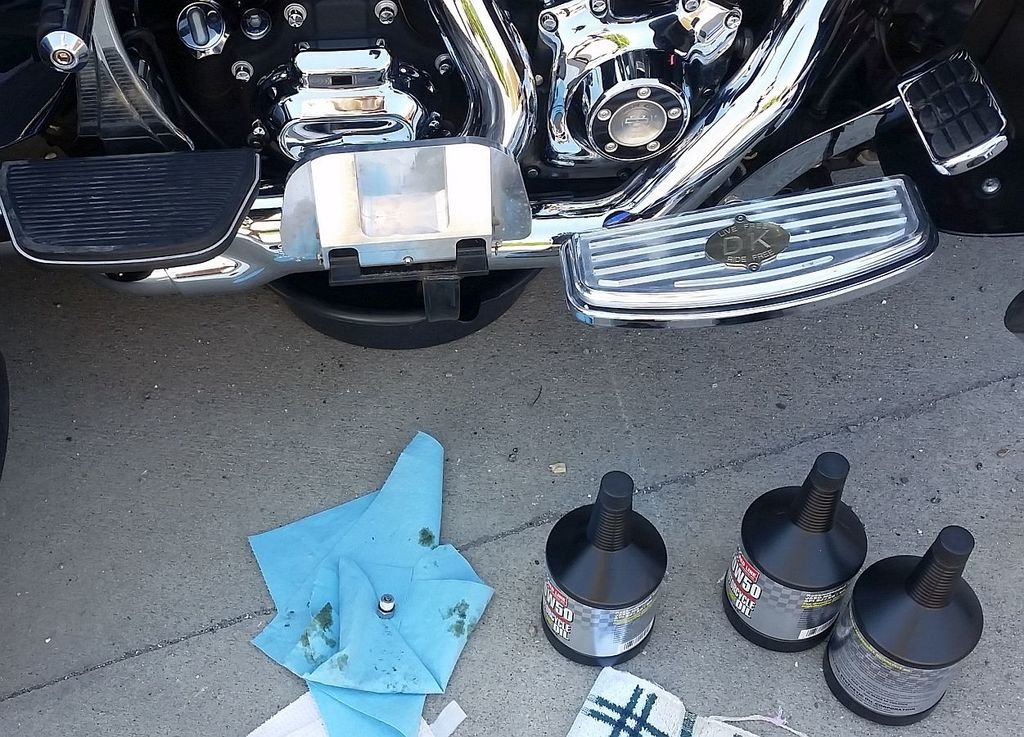
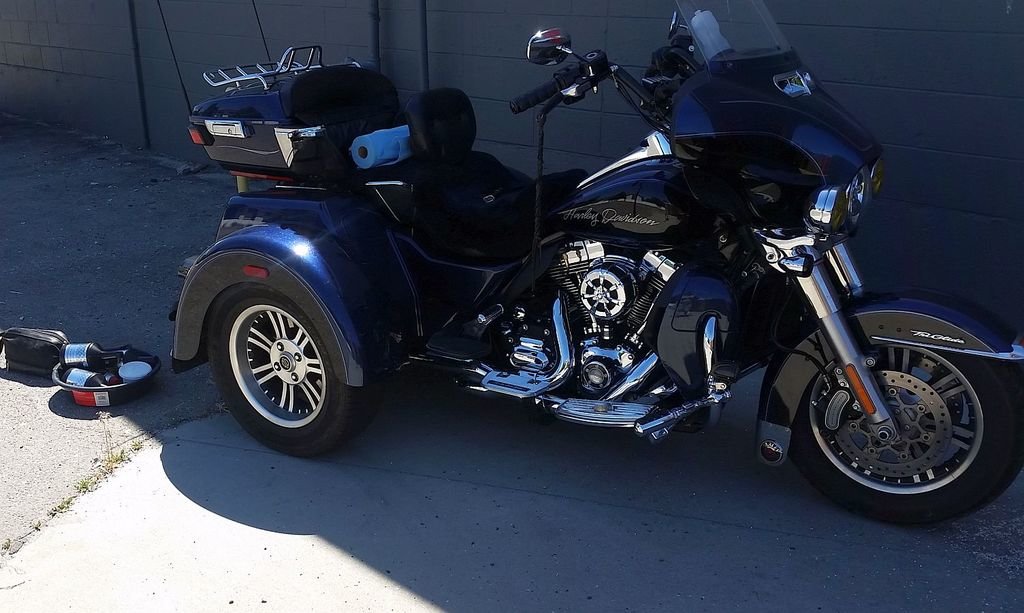
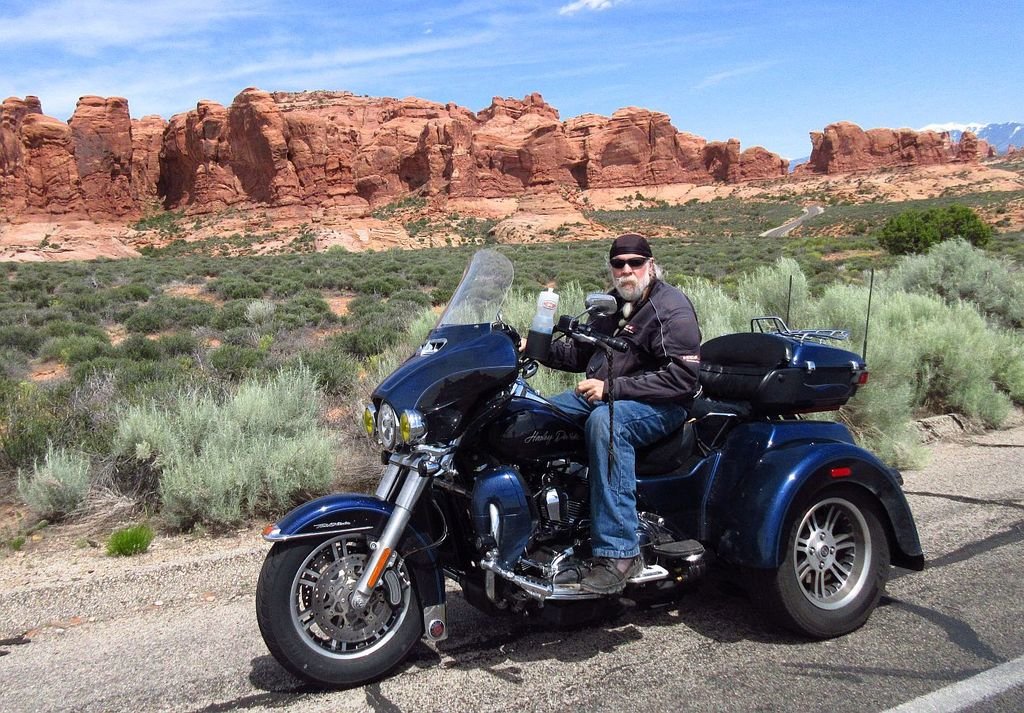
Here�s a few pics of the metal floorboards being put through the proper torture and comfort test on Kevin and Mary�s Cross Country Ride in 2016!
They looked great! (Kevin was changing the oil on his trike)
They were even pretty comfortable!
But with some rain and moisture, there was hardly any grip, which certainly isn�t safe so we decided against them as safety is one of our biggest priorities!
The Metal Floorboards were a No-Go!
Here's a LINK to this 10,000+ mile Fun to Read Ride Report w/ Lots of pics!
*As with the last ride report posted, these were not the only parts tested on this ride.*
There�s no denying it; Most Twin Cam and M8 engines have a heat problem.
With that being said, there�s also no denying, optimal engine temps give the best performance. With these heat issues, performance is sacrificed greatly.
So we started thinking...how can we lower these engine temps? Upgrading cams, heads, adding Stages; all these things for sure will get you a performance increase. BUT, prior do doing so, there are other steps that can be taken first, to get better performance, starting with lower engine temps. One step would be to cool the oil, which by extension, will give cooler engine temps. This is why we came up with the idea for our Oil Filter Relocation Kit.
It�s a given, the factory position of the oil filter blocks air flow.
We wanted to come up with some way of relocating the oil filter to a position that would allow more air flow to the filter, in turn cooling the oil and, by extension, lowering engine temps.
We had also heard of many riders that were, like us, tired of the mess when changing the oil filter.
We had several concerns and several goals:
-Get it out in the wind a bit
-Make sure it did not create any additional felt heat to the rider or passenger.
-Make sure it was not susceptible to road debris damaging the oil lines.
-Make sure the bracket would hold up (not break) from the harmonic vibrations.
-Get it moved somewhere where it could be removed above an oil drain-pan without making a mess.
-Make sure it did not change the oil pressure (up or down) and that it did not put more drag on the oil pump, resulting in less power getting to the rear wheel(s)
-Make sure it looked good, or at least not stick out like a sore thumb.
-Make sure that popular mods (like the adjustable passenger pegs) would still fit.
-Design it for an easy installation.
-On the 2 wheelers, we had to make sure that you could lean all the way over in the curves, far enough to scrape the floorboards, but not the oil filter.
-On the 2 wheelers we also realized the bike needed to be able to be dropped (it happens) and land on the engine guard and the saddlebag guard, and Still not touch the relocated oil filter.
-Manufacture it here in Mississippi, USA and keep the retail price reasonable.
All of the above was no small task. We went thru many variations to get everything to fit, everything routed correctly, and everything looking good.
Over 100 controlled runs on the street, different riding styles and routes, some using cruise control, etc., show a consistent oil temperature drop of 8-10 degrees, just from the Oil Filter Relocation.
There are 4 different bike/trike configurations that we needed to address:
1. Air-cooled only with NO Lowers
2. Air-cooled only With Lowers
3. Air-Cooled & Liquid-cooled (aka, Twin-cooled, waterhead, wethead) With Lowers
4. All three of the above, with or without an already existing oil cooler
Our goals for an oil cooler were simple, but not so easy:
-Cool down the oil, and by extension, the engine temperature
-Have it fit on the Twin-Cool motors.
-Make sure it looked good, or at least not stick out like a sore thumb.
-Make sure it did not create any additional felt heat to the rider or passenger.
-We already knew we would use the Jagg oil cooler HyperFlow technology. We have tested many different oil coolers over the years, and the Jagg technology is the best. They do not affect oil pressure or pump drag, while providing superior cooling.
-Needed to be easy to install.
-Keep the costs, and thus the retail price, down.
-Make sure it would work in conjunction with an existing oil cooler.
Our primary concern was getting it to fit on the Waterheads. There is no oil cooler that fits the waterheads, but they need the oil cooled as much, or more, than the air cooled motors.
We built a bracket that fit the oil cooler to the waterheads, BUT, it did not create as much engine temperature drop as expected. This was because the bracket was blocking some of the flow of air to the engine.
We modified the bracket (patent pending) and now it actually gathers air and shoots it straight onto the cylinder fins! Thus the name Dual-Cool. The oil cooler is working well to cool the oil, and by extension the engine, and the bracket is scooping air that would otherwise not hit the engine and directing it onto the engine, cooling it even more.
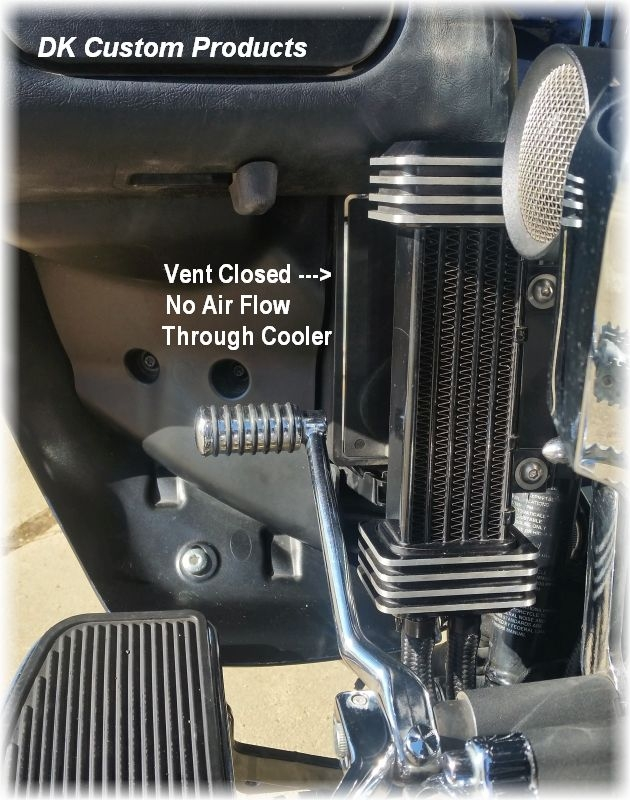
One of the ways we kept the cost down is by positioning the oil cooler directly behind the fairing vent. If the vent is closed, very little air passes over it. If the vent is opened, a concentrated stream of air is pushed thru it. No need (or cost) for a thermostat.
By positioning it behind the fairing vent it blocks access to the traditional (and poorly designed) location of the oil filter.
For all the other (non-wetheads), they, for the most part, already have an oil cooler. The Dual-Cool will install "inline" with the existing oil cooler, giving a nice drop in oil & engine temperatures.
For the non-lowers equipped bikes/trikes (like the Freewheeler) the oil cooler can be mounted off the downtube, not using the Dual-Cool bracket. When doing this, there is still access to the oil filter in the traditional location. This is how Kevin(the K in �DK�) ran his 2011 Tri-Glide for over 50K miles and it was very effective.
However, it is even more effective to relocate the filter and use the Dual-Cool set-up. You gain the cooling of the filter, and the secondary engine cooling of the Dual Cool bracket shooting air onto the fins. Plus, no more mess when changing the oil filter!
Testing Info-
Our tests were conducted on a 2014 Tri-Glide (wethead) and a 2014 Stage IV Street Glide Special (air-cooled only).
We used a test route that is a little over 30 miles each direction, a bit over 60 miles per test.
Before leaving on each test ride the engine temperature was brought up to 180*, measured at the front cylinder head by a Power Vision.
Oil temperature was measured by a dipstick oil temp gauge.
Ambient temp, engine temp and oil temp was measured at the beginning, middle and end of each run.
Even though each of them are equipped with cylinder fans, these were disabled (not running) for all the tests.
The wethead AND the air-cooled were both 30-34 degrees cooler in the oil temperatures.
The Air-Cooled only was 20-30 degrees cooler in head temperature. The wethead, even though it was already running cooler heads, was 5-7 degrees cooler in head temperature.
The testing process was very involved, with well over 200 hours of designing, testing, re-designing and more testing before being released for sale.
There are now thousands installed, with millions of miles ridden at cooler engine temps and easier oil changes.
Photo's-
Oil Filter Relocation:
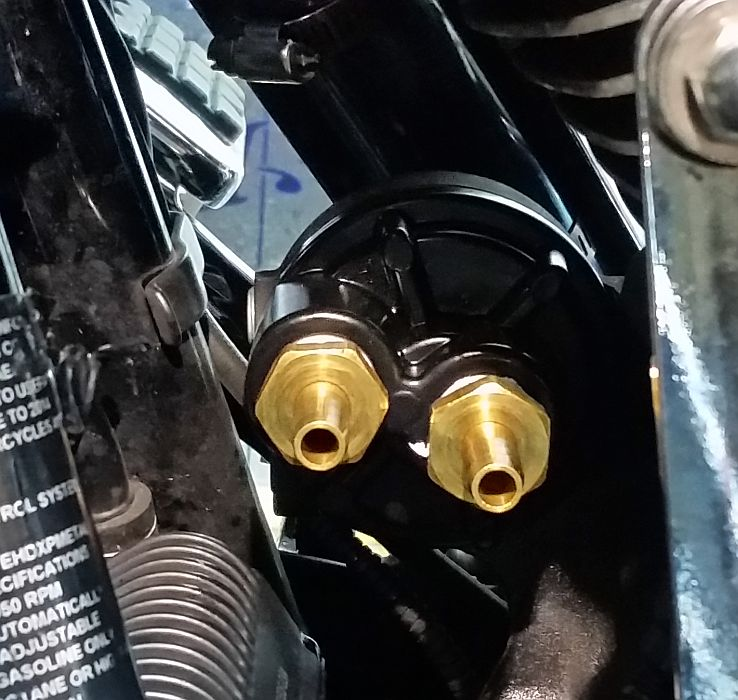
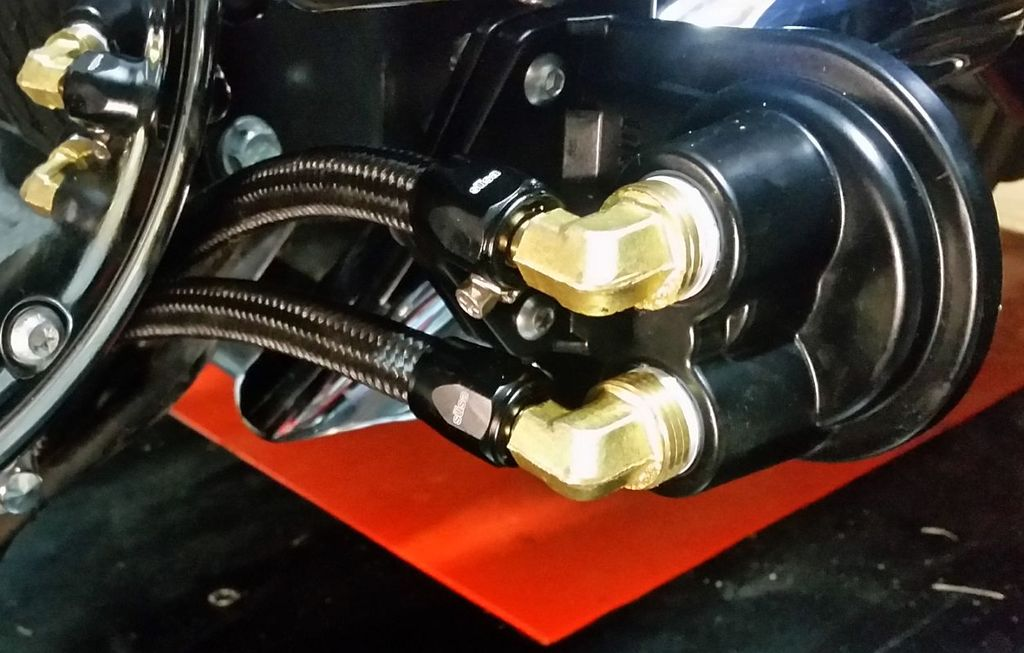
Photo of where the oil filter normally sits. It is replaced by our adapter plates-
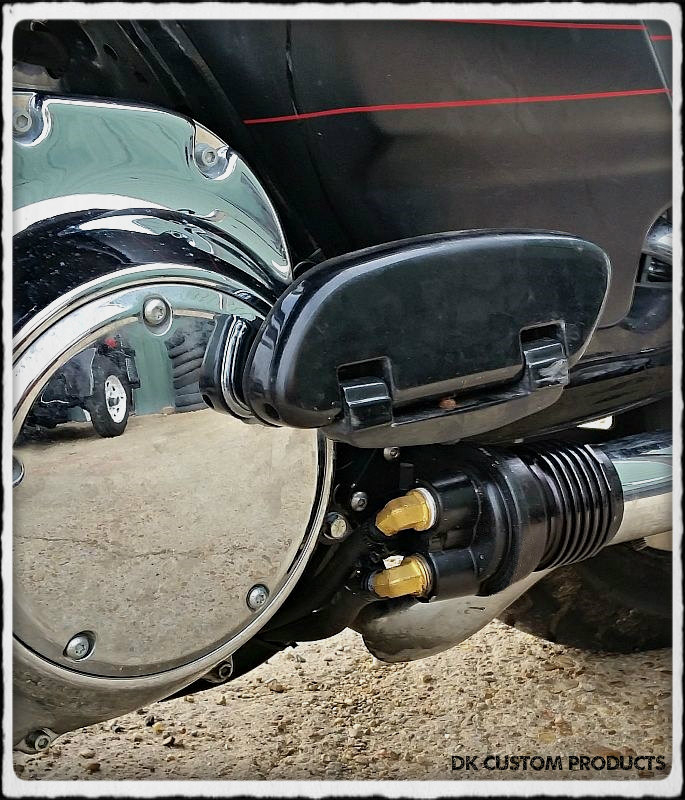
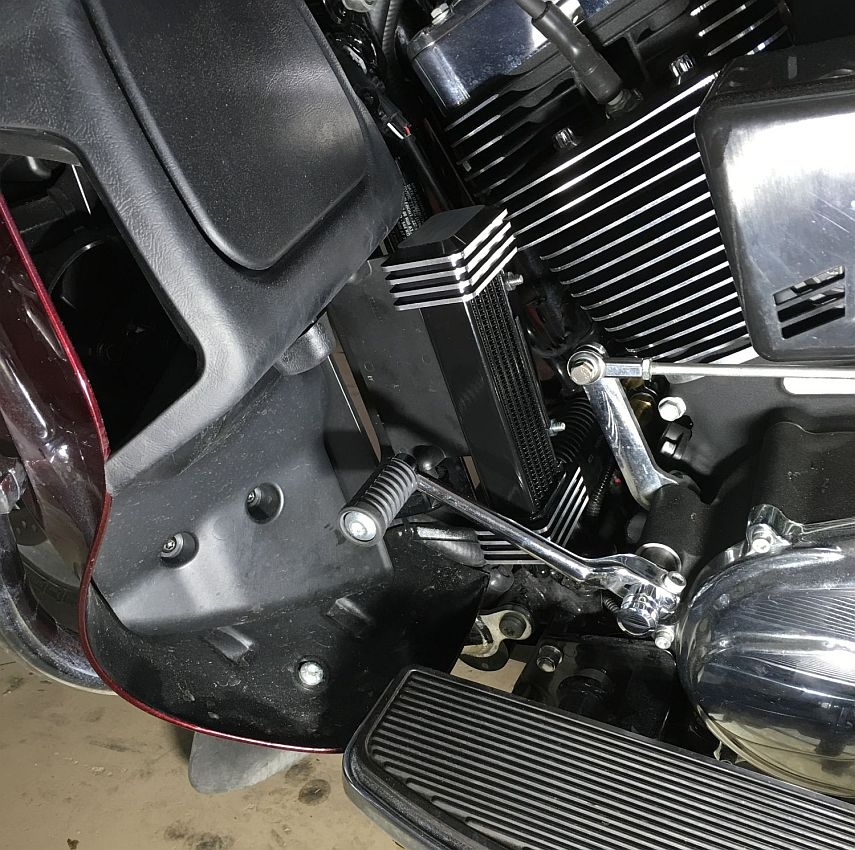
Photo of the new location for the filter, under the passenger floorboard-
In this photo you can barely see the hoses coming off the adapter plate (between the shift arm and the oil cooler)
Photo of the 2 wheeled version, which is tucked in closer and up a bit higher. This allows for leaning over in the curves and not scraping.
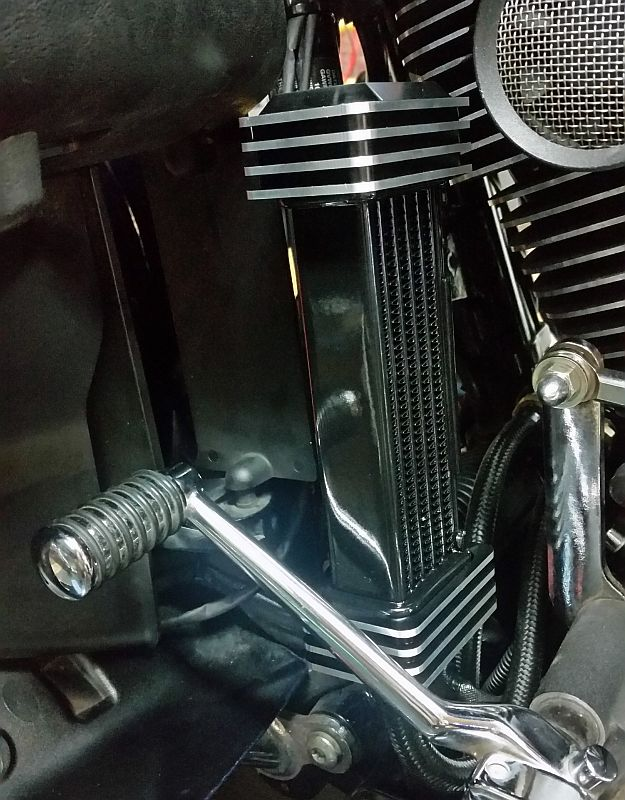
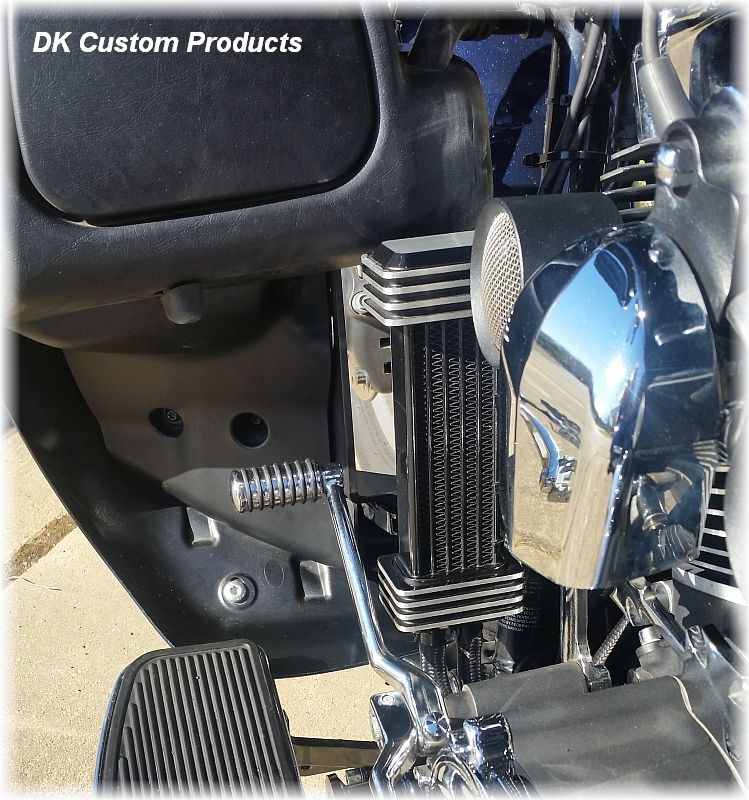
Secondary Oil Cooler-
In this photo you can see the oil cooler is directly behind the lower vent. You can also see the two hoses coming off the bottom of the cooler. One of these hoses goes a short distance to the adapter plate on the engine, the other goes back to the relocated oil filter.
Vent open-
Vent Closed-
Another view. As you CAN'T see, all the hoses are very well tucked in, out of the way of potential hazards.
Oil Filter Relocation and Secondary Oil Cooler write-up continued.....
Here are a few photos from the 2016 Hot Bike Tour, during which these were both tested-
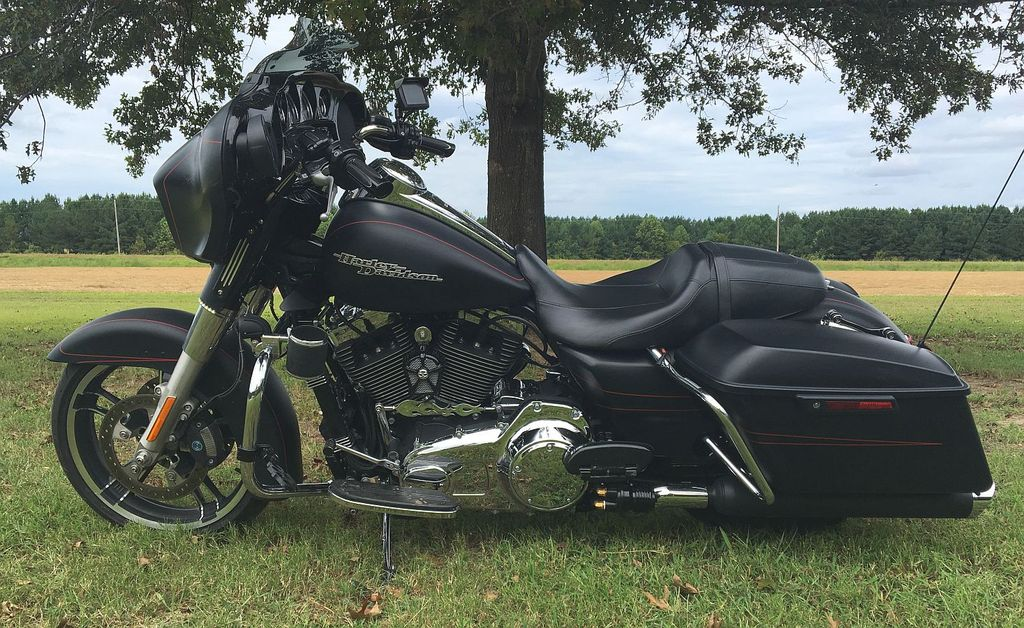
In these 2 photos, you can see the Oil Filter Relocation in it�s new location, along with the Dual Cool Oil Cooler on Devin�s(the D in �DK�) Street Glide Special, ready to be put to the test on the Hot Bike Tour-
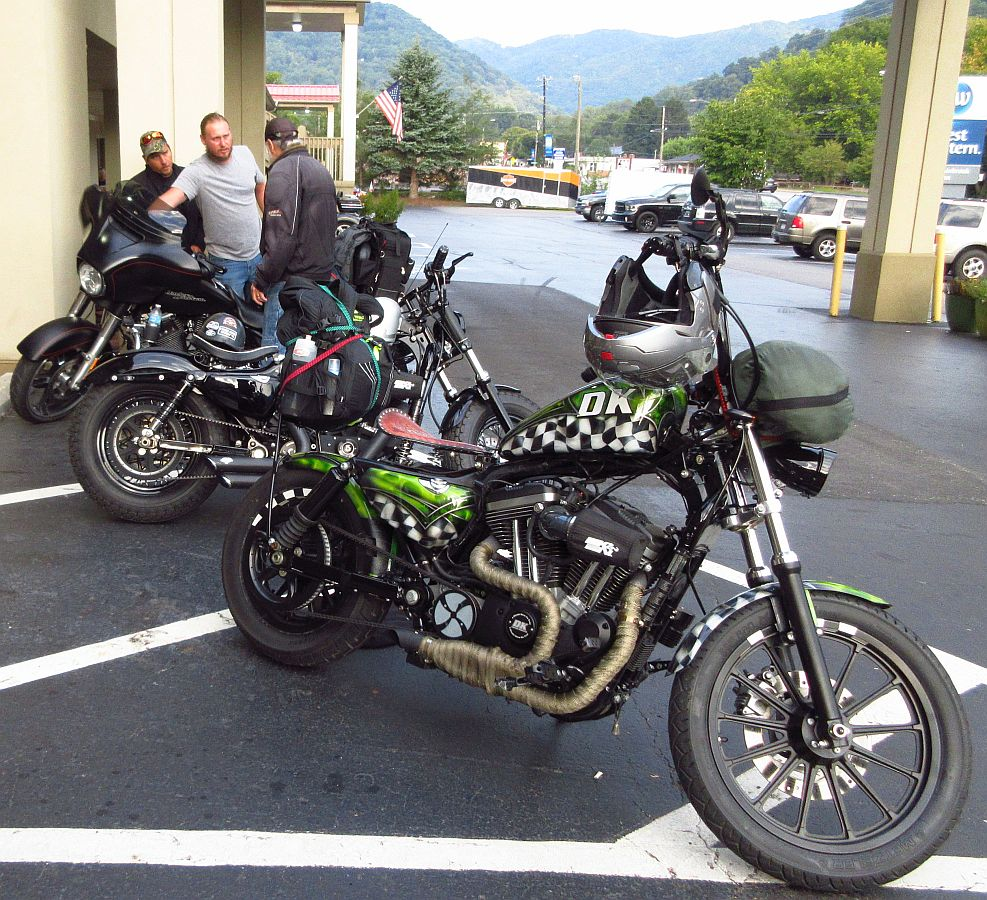
In this photo, you can see the Oil Filter Relo mounted on the downtube of the Sporty, again, ready for the testing of this new location-
In this photo you can see Devin leaning, testing to make sure the Oil Filter Relo doesn�t scrape in the twisties(The Tail Of the Dragon)!
Kevin riding the Dragon-
Devin on the Dragon-
Go HERE to see this Full Ride Report with Lots of Pics!
Here�s our Oil Filter Relo Kit for 2 Wheel Touring Models and Trikes-
The filter mount and filter adapter are made from cast aluminum with brass fittings. We use the brass fittings because these give the best seal.
The magic in our kit are the Patent Pending brackets. There were many different prototypes and designs before finding the perfect design to withstand the wind and vibrations and allowing the oil filter to be tucked in and close to the frame so that there are no issues with scraping and road debris, all while having a Lifetime Warranty.
The brackets are made from American Cold Rolled Steel.
These small pieces of metal are used as a gusset, welded onto our brackets for added strength.
Gusset welded in place. This bracket mounts to the frame.
This bracket is what the oil filter mounts to.
The brackets are now ready for powder coating.
The hose that is supplied with our kit is very high quality; the same as Harley or Jagg hoses.
We include stainless steel hardware in our kits along with acorn nuts for a more finished look. Also, we include, not readily available, black hose clamps.
Why did we build The Clean-n-Cool Remote Oil Filter Set-up?
Two Reasons:
1. We have tried dozens of ways to remove the oil filter without making a mess. Some work better than others, but none work well.
2. Twin Cams run too hot for their own good. A cooler engine runs stronger and lasts longer.
For full details on testing and results, see post above.
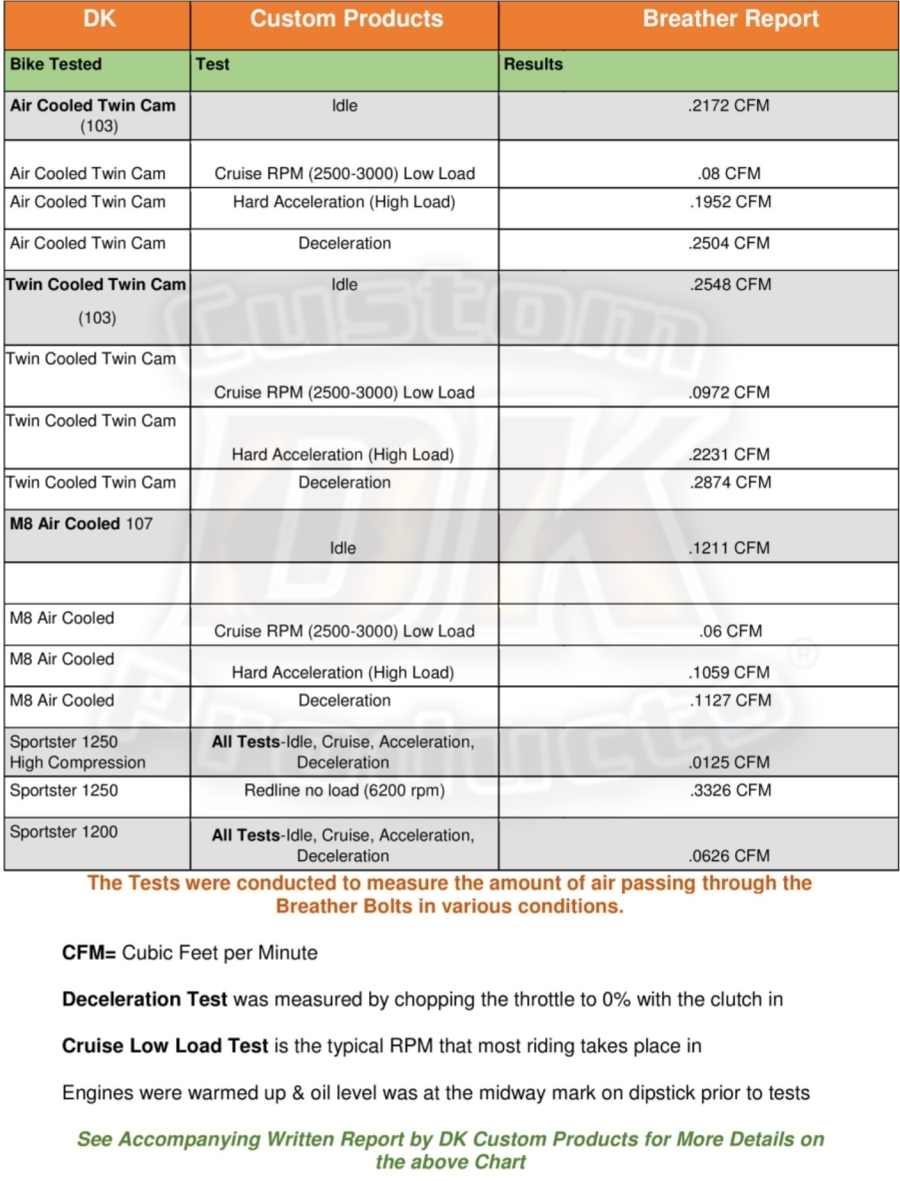
When we embarked on designing our 4 Stage Catch-Can for External Breather Systems (EBS), we decided that the first order of business was to get accurate data on How Much Air passed through the stock Harley Breather Bolts, so we could design the best possible Catch-Can.
We wanted to know how much was passed at idle, under a load, at cruising speeds and on throttle let-off.
We also wanted to know the differences between a variety of HD engines, along with engines that had been hopped up with cams and or higher compression pistons/heads.
See the Full Testing Report HERE, including the chart and testing video below!
 05-09-2018, 02:32 PM


 ) and we were ready to go into production with our Lifetime Warranty.