LOG IN
REGISTER
Forums
New Members & Forum Support
Welcome Area Only
Forum Issues
Harley Davidson Motorcycles
LiveWire
Touring Models
Dyna Glide Models
Softail Models
Sportster Models
Pan America
VRSC Models
Screamin Eagle CVO Models
Tri Glide, RG3 & Freewheeler Models
Harley-Davidson Street
Harley-Davidson X
HD Engines
Classic
Custom Models
Hacked, Conversions and Trailering
General Harley Davidson Chat
Harley Davidson Tech & Mechanical Forum
Detailing
General Topics/Tech Tips
Audio Systems
Primary/Transmission/Driveline/Clutch
Ignition/Tuner/ECM/Fuel Injection
Engine Mechanical Topics
Exhaust System Topics
Electrical/Lighting/Alarm
Oil Archive (no new posts)
Frame/Suspension/Front End/Brakes
Wheels/Tires
Blowers/Turbos/Nitrous Oxide
Carburetor Related
Powdercoat & Paint
Regional Events, Rides and Road Reports
Road Trips
HDForums Mascot
The Patriot Guard Riders
Members Meeting Members
National Events
"The Florida Crew"
"The Georgia Crew"
Northeast
Northeast Tri-State Area
Southeast
Great Lakes
Pacific
Pacific Northwest
Southwest
Mountain - Prairie
Canada
Europe
Other Countries
Sponsoring Vendors
Rockford Fosgate Audio
Parts Giant
J&M Motorcycle Audio
Fuel Moto / Jackpot Mufflers
Harley Davidson Classifieds
Vendor For Sale Classifieds
Vendor Announcements
Motorcycles For Sale
Motorcycle Audio-Buy/Sell/Trade
Want To Buy Motorcycles/Parts/Accessories
Motorcycle Parts For Sale-Misc. Parts
Stock Harley Take Offs
Gear and Other Items For Sale
Good Or Bad Shopping Experiences At HDF
Trades & Freebies (See Subforums for specific models)
Memorial Forums
In Memory Of...
On The Mend...
Prayer Requests
Team Forums
News
Marketplace
Vendor Directory
Become a Vendor
Member Marketplace
Vendor Marketplace
Site Store
Haynes Manuals
New Posts
Tools
Car Payment Calculator
Tire Rim Calculator
Recalls
Technical Service Bulletins (TSBs)
Members List
Live Feed
New Posts
How-Tos
Gallery
View Dark Mode
Please register or login to enable Dark Mode.
Log In
Register
Threads
Google
Threads
Posts
Advanced
Dark Mode
Please register or login to enable Dark Mode.
Log In
Forgot your Password?
By logging into your account, you agree to our
Terms of Use
and
Privacy Policy
, and to the use of cookies as described therein.
or
Login with Google
Login with Facebook
Recent
Commented
Albums
My Pictures
lopezluna's Photos
View Profile
Sort:
Commented
Most Recent
Most Comments
Albums
Photos
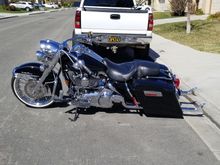
08 Harley Road King Classic with Burly Beach Bars
0
2018/03/09 21:59:11
lopezluna
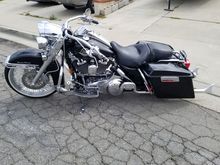
08 Harley Davidson Road King with Burly Beach Bars
0
2018/03/09 21:57:44
lopezluna
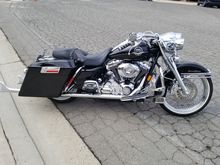
Harley Road King Classic with Burly Beach Bars
0
2018/03/09 21:55:48
lopezluna
Burly bars and 39" fish tail pipes
0
2017/07/09 07:18:45
lopezluna
Heres a different view of the 38.5" Burly beach bars
0
2017/07/09 07:17:42
lopezluna
A different view of the 38.5" Burley beach bars.
0
2017/07/09 07:14:26
lopezluna
38.5" Burly beach bars and 39" fish tail pipes installed
0
2017/07/09 07:12:41
lopezluna
0
2017/07/09 07:11:38
lopezluna
Burly beach bars and 39" fish tail pipes
0
2017/07/09 07:10:11
lopezluna
0
2017/07/03 16:27:04
lopezluna
08 road king with burly beach bars
0
2017/07/03 16:26:09
lopezluna
Burly beach bars installed. These are the 38.5 width bars not the bikini bars. I was going to re-install my H.D heated grips but i would have had to bore the inside left of the bars and i chose not to.
0
2017/07/03 16:21:33
lopezluna
Heres a pic of the burly bars before i replaced the front brake cable.
0
2017/07/03 16:19:42
lopezluna
Crimped on new molex connectors and inserted back in to the connectors. I pulled all the wire harnesses inside the handlebars and tested them.
0
2017/07/03 16:15:53
lopezluna
Used shrink tube
0
2017/07/03 16:15:09
lopezluna
Soldered every wire
0
2017/07/03 16:14:05
lopezluna
Made my wire diagrams
0
2017/07/03 16:12:48
lopezluna
0
2017/06/19 21:51:02
lopezluna
Put some blue loctite on the ends of the bolts. U can put the loctite on after u put the bolt thru the bushings.
0
2017/06/19 21:48:21
lopezluna
Reinstall the washer and ground. Now you can push the bolt up from bottom
0
2017/06/19 21:45:46
lopezluna
Now install the left bolt from bottom. Remember to tilt the washer when putting it back on.
0
2017/06/19 21:42:06
lopezluna
New bushings installed
0
2017/06/19 21:41:13
lopezluna
Install all the bushings
0
2017/06/19 21:39:57
lopezluna
Removing the bottom bushing
0
2017/06/19 21:39:00
lopezluna
Remove top and bottom bushings
0
2017/06/19 21:37:57
lopezluna
Top left side has a washer. Top right has a ground.
0
2017/06/19 21:27:57
lopezluna
Make sure you set the left bolt and hardware separate from right bolt and hardware. Do not mix these up because both sides are different. To remove the bolt on left side you will have to tilt the washer.
0
2017/06/19 21:23:29
lopezluna
Next i loosened both bolts then removed them.
0
2017/06/19 21:21:17
lopezluna
I started bi putting the one piece clamp back on the risers and tightening the four bolts. This i did so the risers dont move, rotate.
0
2017/06/19 21:18:20
lopezluna
Top view of riser, washer, and bushing.
0
2017/06/19 21:15:46
lopezluna
A look from under you can see the riser bolt, washer and bushing. I used a 3/4 inch socket and wratchet to remove the bolts.
0
2017/06/19 21:12:33
lopezluna
0
2017/06/19 21:12:00
lopezluna
The bushings are right under the risers
0
2017/06/19 19:08:38
lopezluna
Riser bushings will be replaced. Looking at the riser bolt.
0
2017/06/19 19:07:13
lopezluna
Handlebars removed.
0
2017/06/19 09:13:22
lopezluna
Remove the 4 bolts holding the clamp with a 1/4 inch allen wrench. Remove the clamp and now you can remove the handlebars.
0
2017/06/19 09:11:04
lopezluna
Now you can apply your fron brake lever and wedge a piece of cardboard so the lever does Not go back to its regular position. This is to protect the little switch that is on your control housing from getting damaged. Now do the same for clutch side. Sorry, i forgot to take pix of this. You will need torx sizes t25 and t27 to remove the levers and switch housings. There are two screws on each (one on bottom and one on top).
0
2017/06/19 09:02:42
lopezluna
0
2017/06/19 09:00:50
lopezluna
0
2017/06/19 09:00:21
lopezluna
Now this is what it looks like with the nacelle removed. You do not have to remove the nacelle but you have much more room to work with if you do. Now you can start unplugging wire harness connectors that pertain to your handlebars
0
2017/06/19 08:56:54
lopezluna
First
Page
1 of 3
Last
Go To
Page
1
2
3
1 of 3
Go To
GO
Go to page
of 3
pages
1
2
3
When you click on links to various merchants on this site and make a purchase, this can result in this site earning a commission. Affiliate programs and affiliations include, but are not limited to, the eBay Partner Network.
© 2026 MH Sub I, LLC dba Internet Brands