You will need:
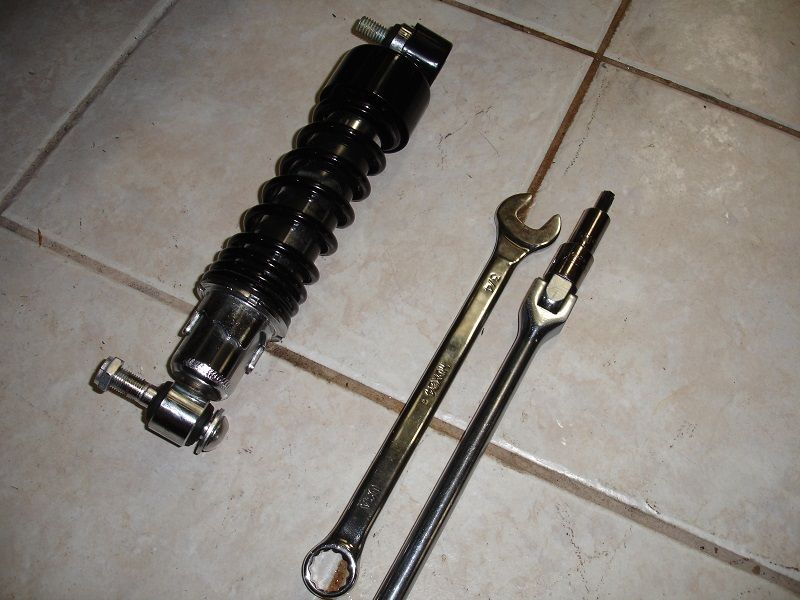
Torx 50 bit with a long handle
3/4" open wrench
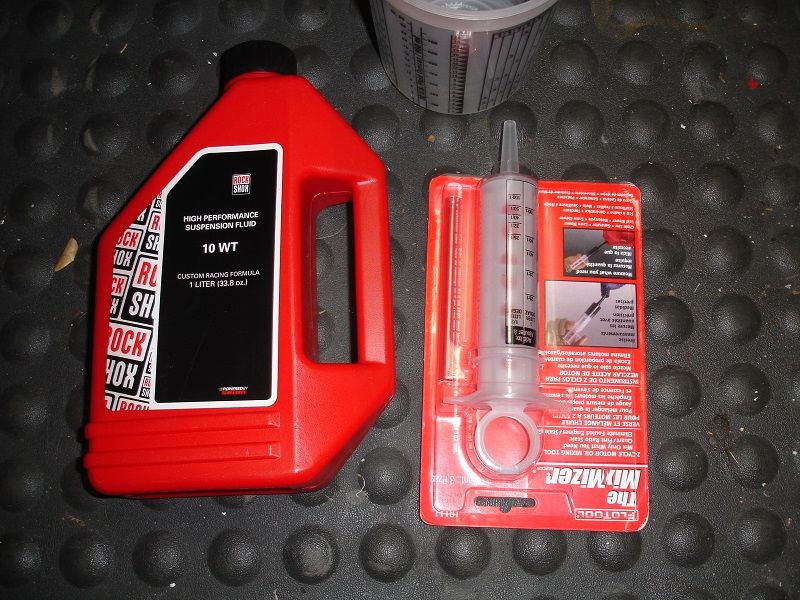
You will also need a syringe to fill the shocks with the new oil
A lift
HD Air pump or something similar to fill the shocks. The HD unit is cool as it will not let air out as you screw or unscrew it from the valve. I had one from my first RGC so that is what I used... if you do not want to pay for the HD unit you could get something like this: Pump:
. But whatever you do, DO NOT USE YOUR COMPRESSOR TO FILL THE SHOCKS... you run the risk of damaging the seal if you use too much pressure.
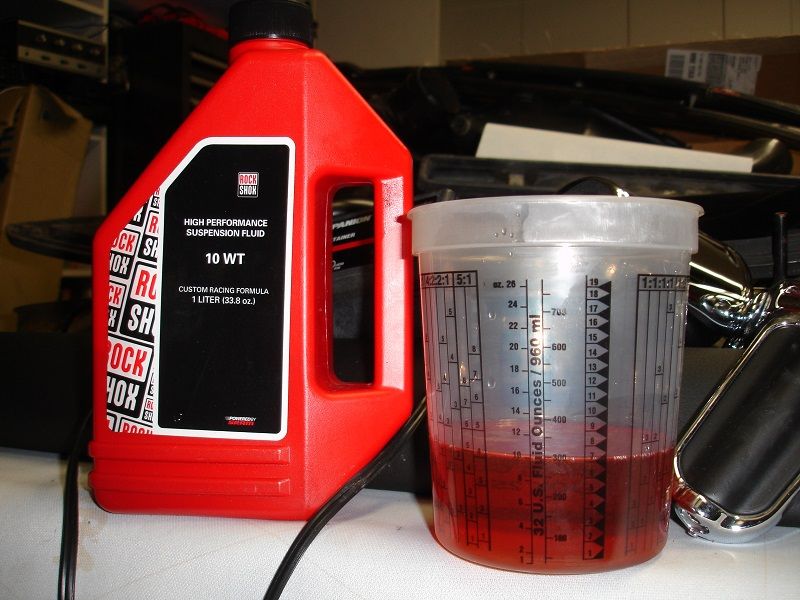
20oz of 10WT Shock oil - I bought a liter of what you see in the photo
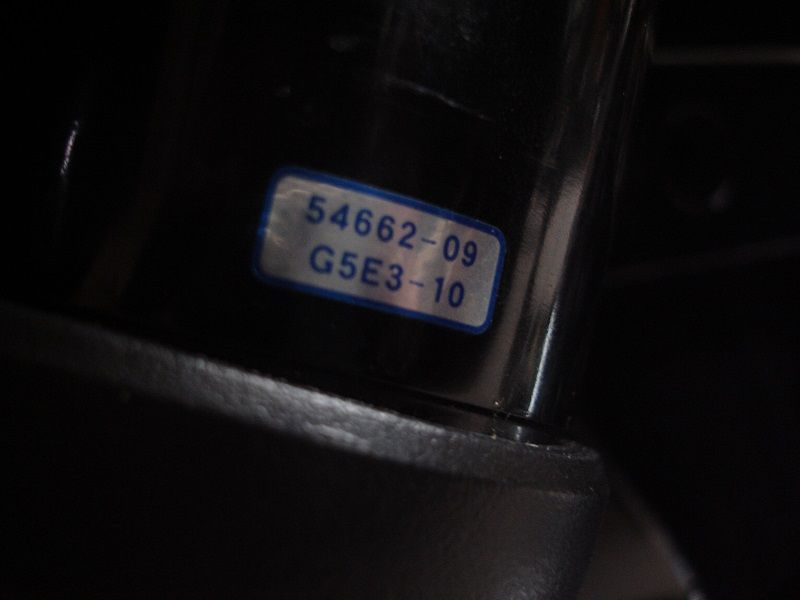
The shocks... When I started researching for this mod, all I read was about Street Glide shocks. Since I had a RGC I knew the shocks on those were shorter than most. Sure enough, the shocks on the RGC are the same as the ones in the Street Glide. They measure 12" and the part number is 54662-09
First step is to replace the oil in the shocks. Why? Most shocks you will be buying used and when these get shipped, unless the seller caps the holes, will leak oil on the way over... or you do not know the mileage they have and it is a perfect opportunity to replace it and know that you are starting with a refreshed shock. For whatever reason, it is easy to do so why not.
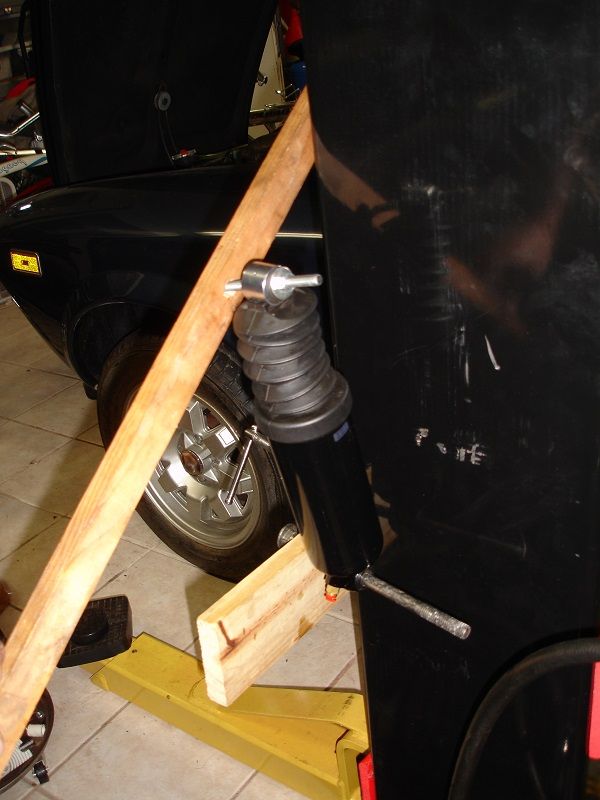
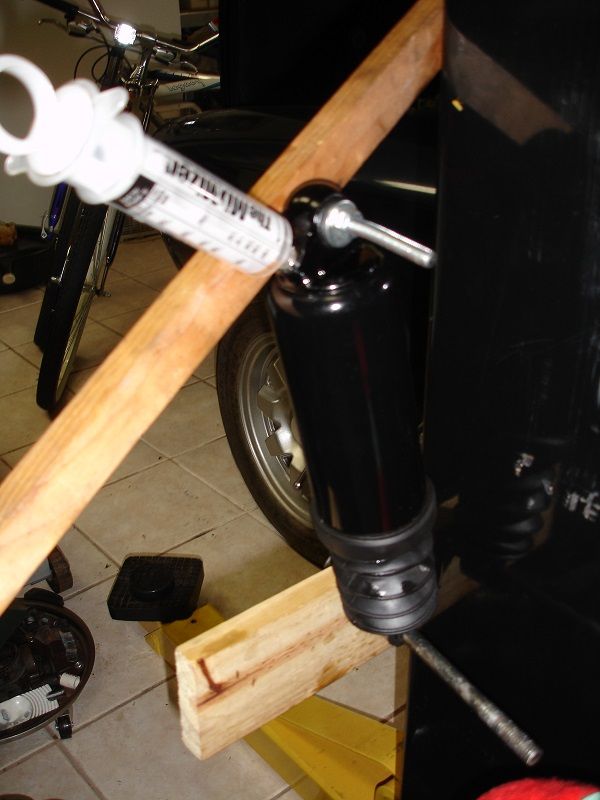
Some folks leave them hanging upside down until all 10oz of oil come out... and for that method, they wait a long time. I did not have the patience to wait for gravity to do its thing. In the links provided you will see some folks making some elaborate jigs to help pump out the oil. Like this one:
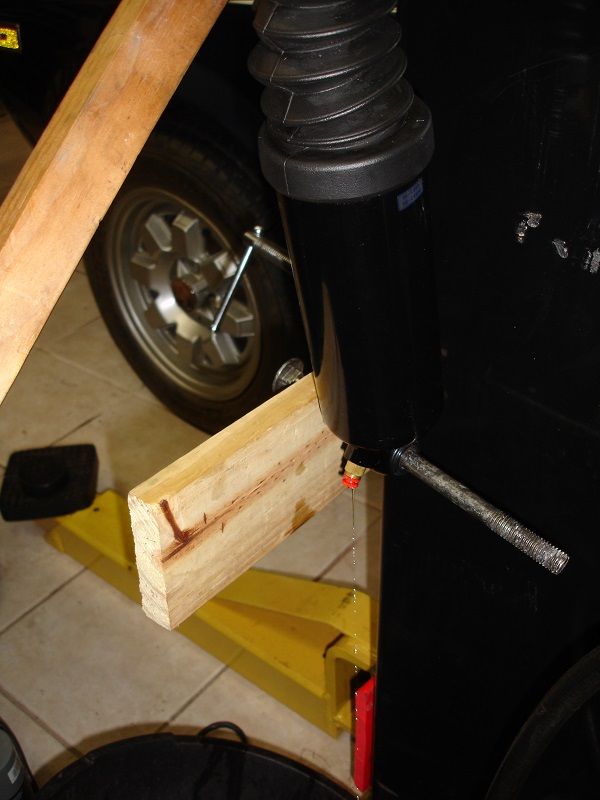
I did a very raw version of that jig. Just two pieces of wood with bolts in them so that I could pump out the oil. 5 minutes on each shock and all the oil was out. Again, turn to the links if you want to build a better jig for this, I just want to do it quickly and the get rid of the setup. The speed at which oil comes out with just applying some pressure, is just drastic.. push a little, oil starts to come out, push to the point of compressing the shock and the oil just rushes out. Pretty cool.
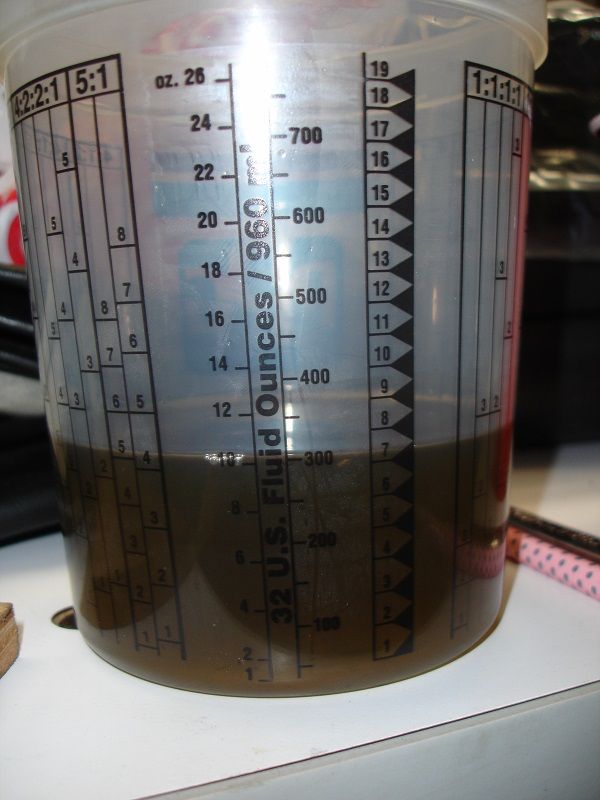
If you had any doubt of how much oil was in each shock...
Once these are empty it is time for filling them with new oil. I removed the hose adapter to make it easier to fill.
Measure 10oz of new fork oil:
Fill the syringe and start filling the shock
Once all 10oz are in, pump the shock a few times to make sure the oil goes down. If you are using the stock setup of one valve and two hose adapters, install those back. If you are using independent valves (you can get these from Grainger - part number 1X361 - Valve Air Tank Filler - Valve : CDI CONTROL DEVICES Valve, Air Tank Filler - Pneumatic Modular FRL Accessories - 1X361|TV12 - Grainger Industrial Supply ). Or you can run them at zero air pressure in which case, just find some plugs that will fit. I got the valves, but at the end, decided to install the stock setup.
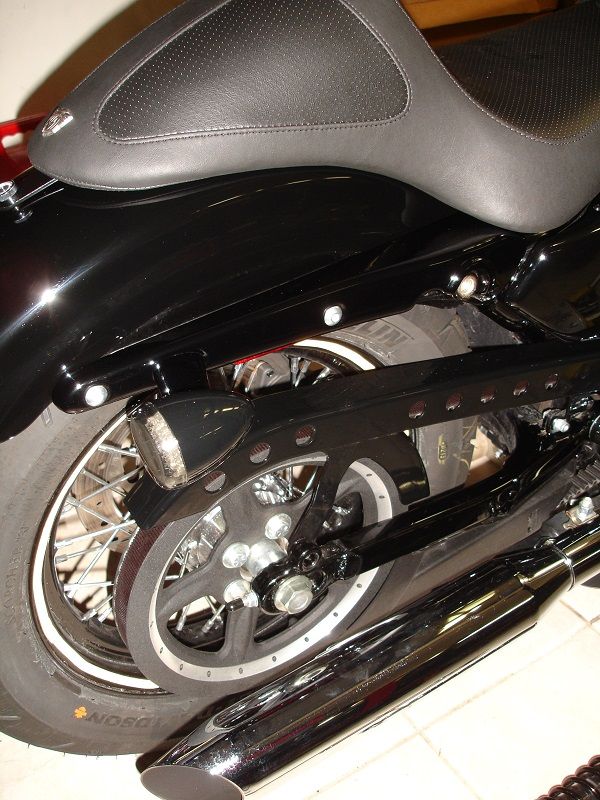
Remove the stock shocks from the bike:
Using the T50 socket and handle, loosen, but don't remove,the top bolt. Using the same setup plus the 3/4" wrench, loosen the bottom bolt. DO NOT mix the bolts. Bottom bolt is fine thread, top bolt is coarse thread. Last thing you want is to mix them and find yourself having to tap the top threads because you inserted the wrong bolt in the hole... Remove bottom bolt, then remove top bolt. Shock should be out after that.
Install the new shocks. You will need to install two washers between the shock and the mount to allow clearance with the belt guard.
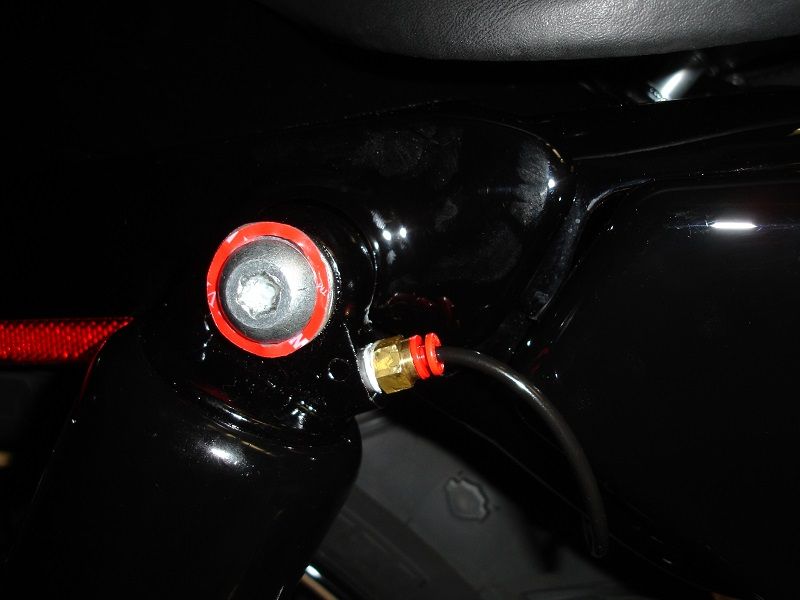
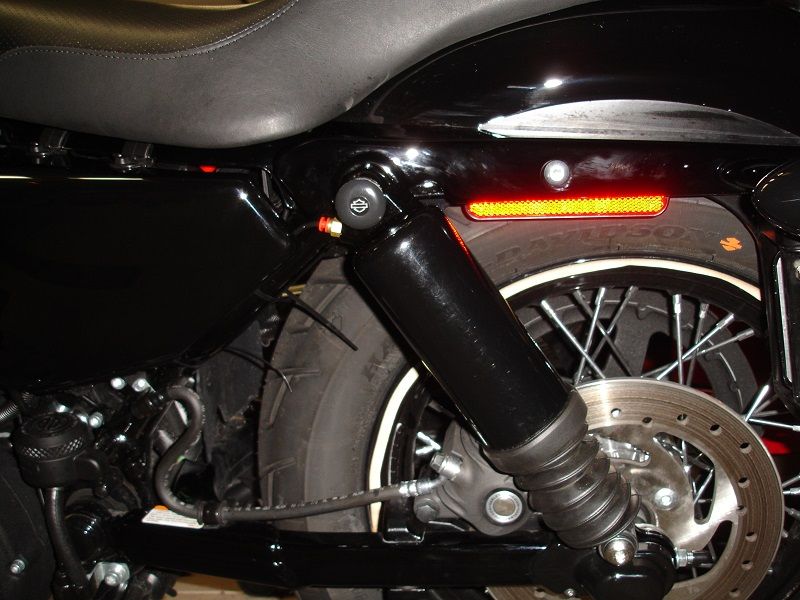
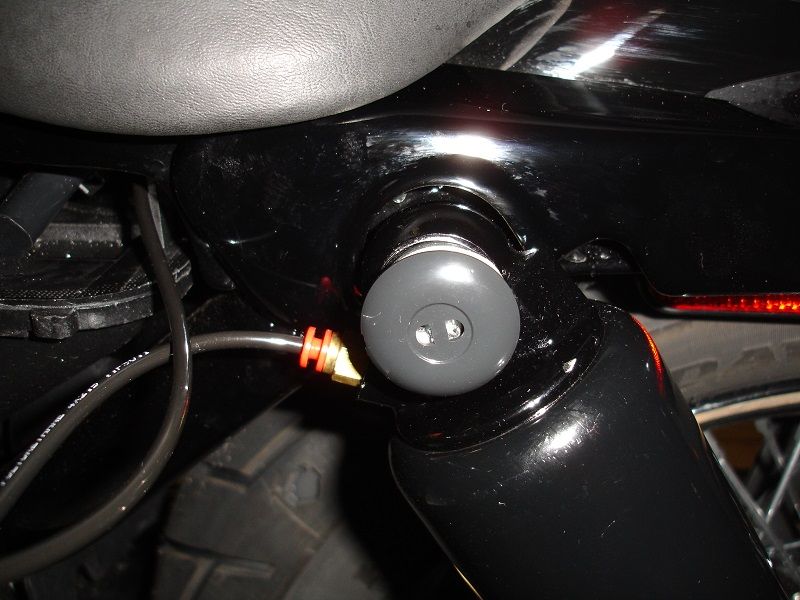
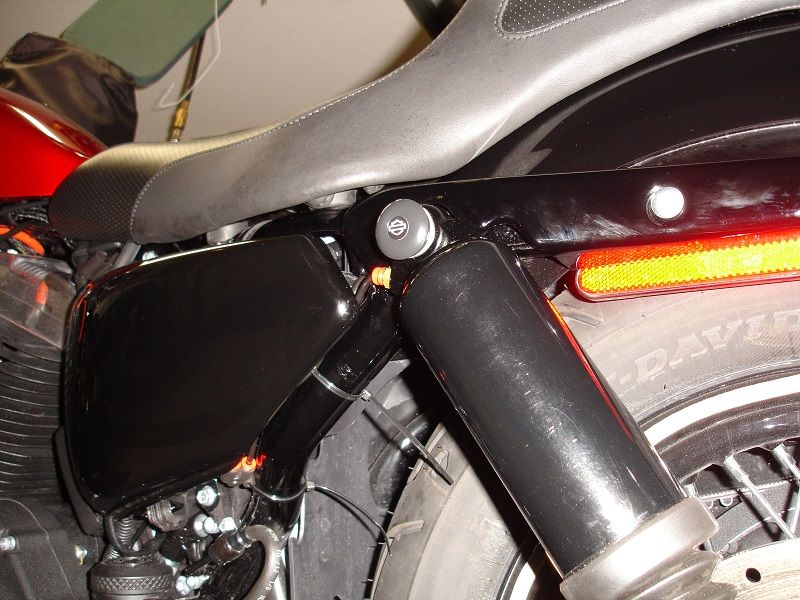
Run the lines (remember to fully insert the line into the adapter or it will not build pressure as you try to fill them)
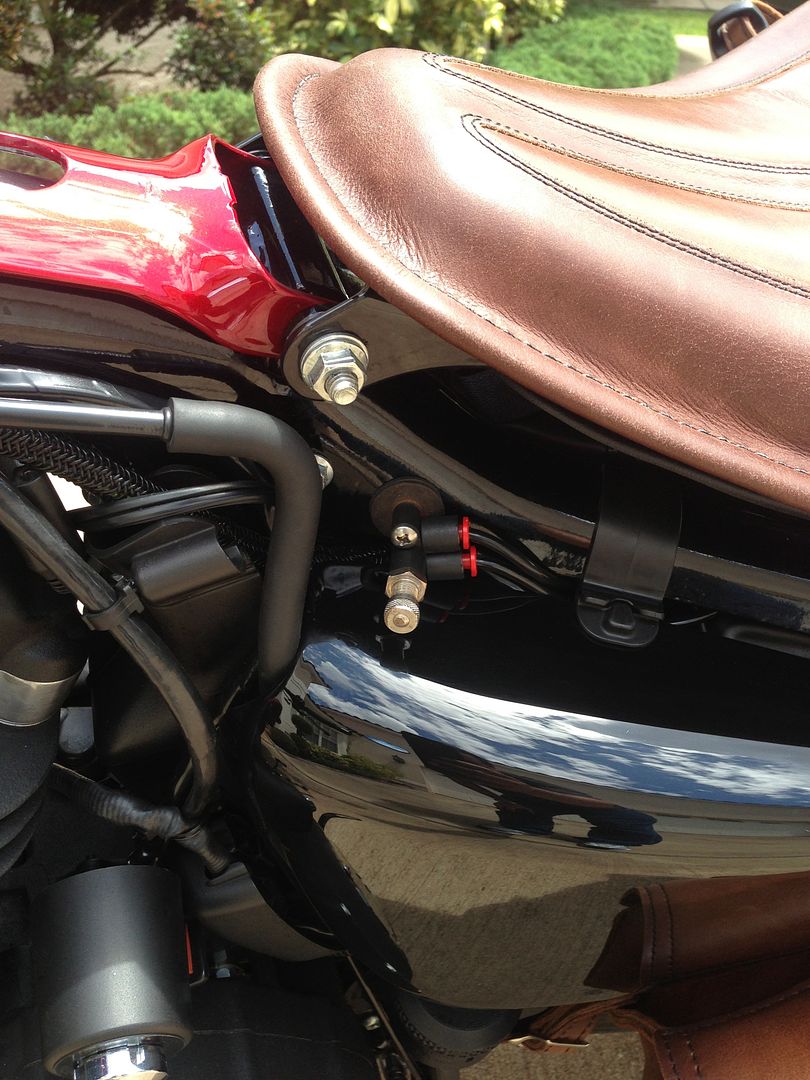
For now I just held the valve in place with tie-wraps. I will find a spot for it and post photos later.
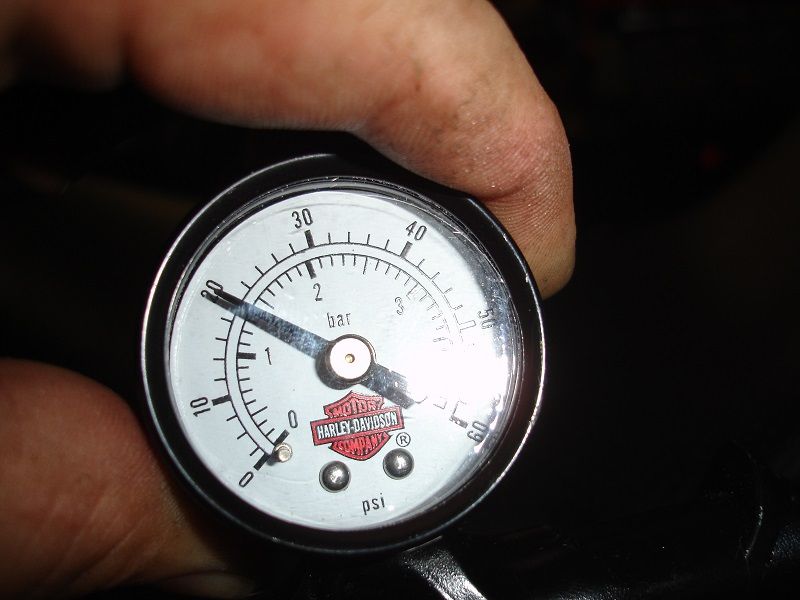
I started with 20lbs of air, but adjusted to 10lbs and that felt better...
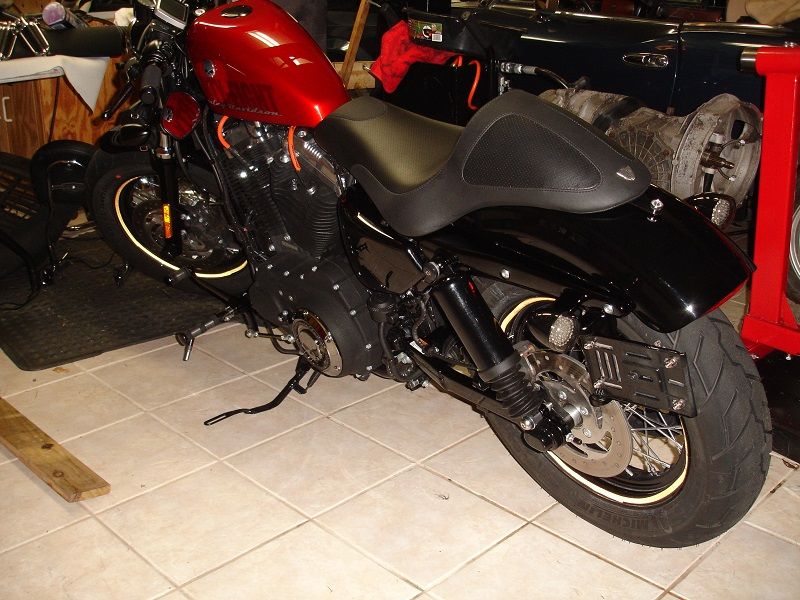
Go have a few glasses of your favorite installing fluid and admire your work:
Great write up Wachuko!! I got the ones I had on my Nighty from Ebay and didnt know about draining and refilling (was 07) and the ones I got for the wife's Nighty came from the dealer. I was thinking of draining and refilling, just dont have the time.
As far as lowering blocks go I have to agree with Rog48...DONT CHEAP OUT!! I used the Tamarcks on mine and none on the wife's (looks low enough), and with 1" we did bottom out even with 40lbs of pressure (Im 250 though). The ones from DK look about the same so those would be good too.
i have something similar to those blue
iv not heard of any1 talking about them cracking
but i have not researched for info on that
mine look like those but are a lil differ
and i dont remember where i got them -
they seem very very sturdy to me ,
but again iv not looked into them breaking -
i have not hit bottom with these shocks yet...
again im runnin 0psi
all i know is i dont know why i waited so damn long lol
those should be fine but reasearch into them breaking as he posted
or just get the ones he said from dk
I researched it a little and couldn't find any of them cracking, anyone have any personal experience with the adjustable lowering blocks?
Blue, I bought these: $32.00
No issues, 1 inch, can find adjustable in aluminum at 1-3" adjustment but be careful of the ElCheapoz, you get what you pay for there, thin metal is little when you consider what they are to do.
I wnet with AFT with seal conditioner, had leakage, after this and the spacers no issues, great shock "upgrade" makes the bike so much more ride-able.
cheers,
.
Last edited by DavidStiebel; 11-22-2014 at 05:31 AM.
No issues, 1 inch, can find adjustable in aluminum at 1-3" adjustment but be careful of the ElCheapoz, you get what you pay for there, thin metal is little when you consider what they are to do.
I wnet with AFT with seal conditioner, had leakage, after this and the spacers no issues, great shock "upgrade" makes the bike so much more ride-able.
cheers,
.
Davidstiebel, where did you get those from? Do they offer them in black?
I would like a little more than 1", like the lower than stock look. Do they have the 1.75"

 11-11-2014, 06:54 AM