
How to: Changing the spark plugs (w/non-dealership plugs) and extra service
#1
 10-24-2011, 05:58 PM

I thought while I was changing the plugs in the Nightster, why not photograph the steps to help others who may not be mechanically inclined. This can potentially save you hundreds of dollars... yup,hundreds! Called my local dealership just to see what they said- Plugs were $64.98 a pair (for STANDARD plugs!) and installation was $120. YIKES! Thankfully, I had already bought the plugs and WILL post the interchange as well as the price for those interested. Here goes.
Task: Changing the plugs and weatherproofing the harnesses.
Time for task: .5 - 1.0 hours for most, plug change is about 1 minutes of it for most. It took me about fifteen minutes for everything, which can be expected for the expert technician.
Total cost:
$15 give or take for iridium, $5 or so for standard plugs.
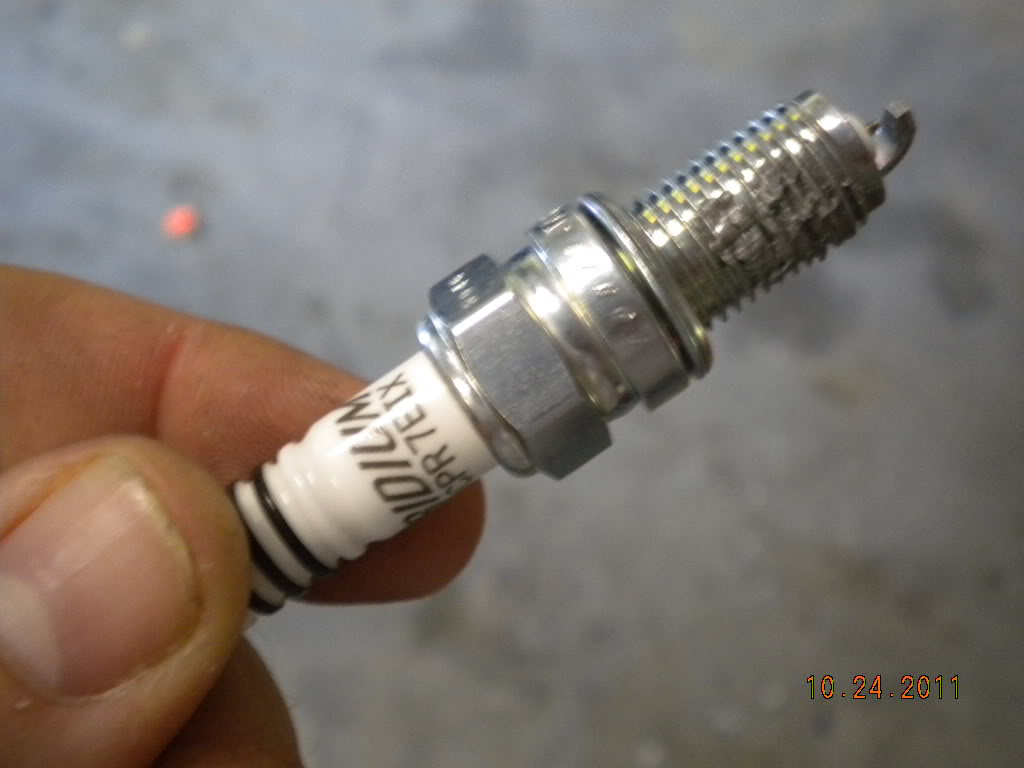
NGK Iridium spark plugs $7.19 per plug X2- YOU DO NOT HAVE TO BUY HARLEY DAVIDSON PLUGS! Your local parts store will likely not be able to look the plugs up, but they do carry them. You just have to know the right part number. My plugs were almost $15 a pair because I upgraded to Iridium, but you can get the same plugs in a standard for a couple of bucks. Just drop off the letters "IX" from the plugs for the standard versions.
Plug number (NGK) DCPR7EIX Advance Auto Part PN#6046
Antiseize: $1.00 or so for a small packet
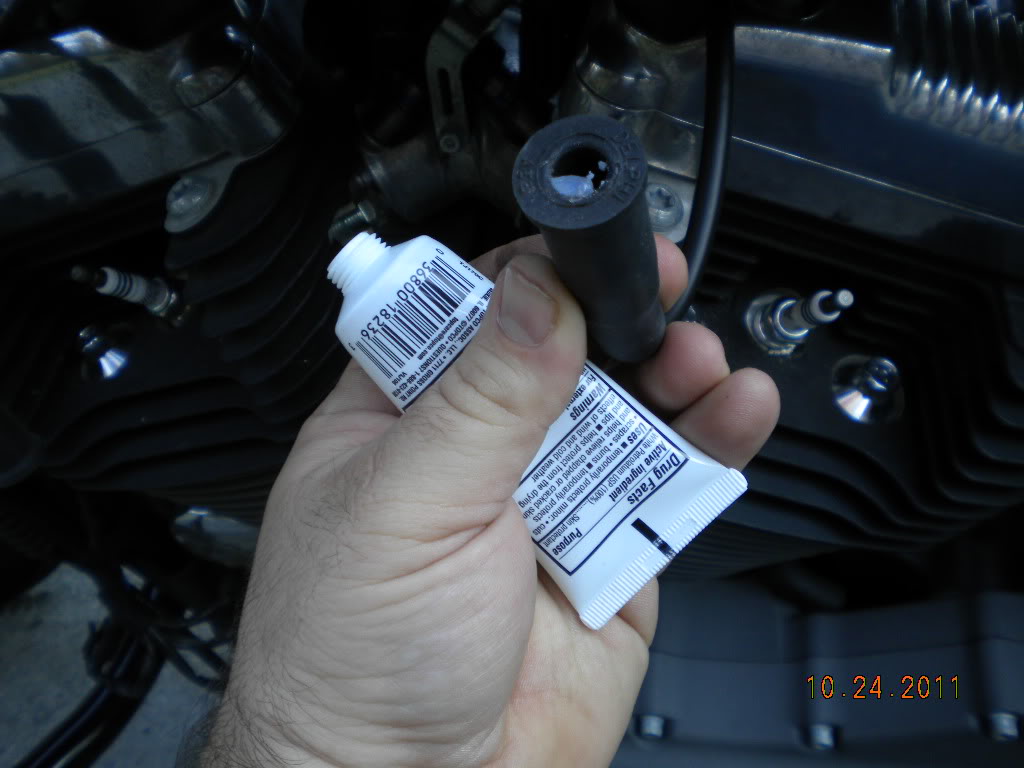
Dielectric grease: $3 or so for a jar
Tools needed:
Spark plug gapping tool (Available for a buck or two at your auto parts store)
5/8" deep well socket (5/8" combination wrench can be substituted)
Ratchet
Plug removal:
Working with a slightly warm motor can assist in breaking the plugs lose, however allow the engine to cool properly before moving forward.
Begin by removing the plug wire from the plug. Pull from the boot using a back and forth twisting motion.
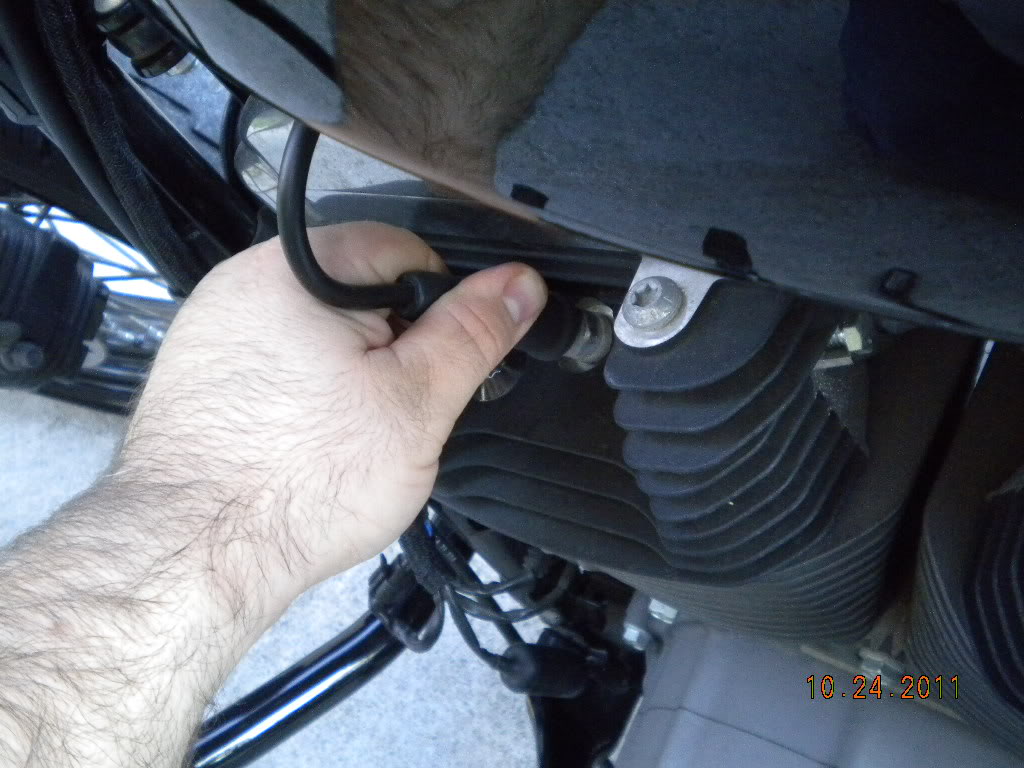
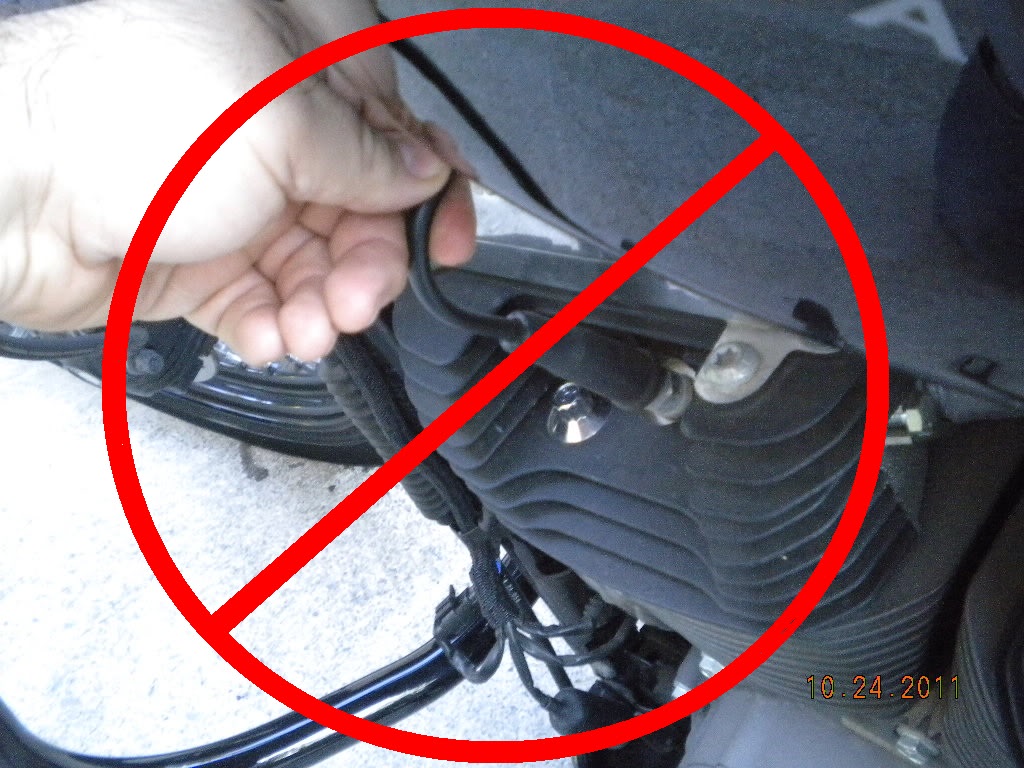
DO NOT pull the wire from the wire itself, otherwise damage to the wire may result.
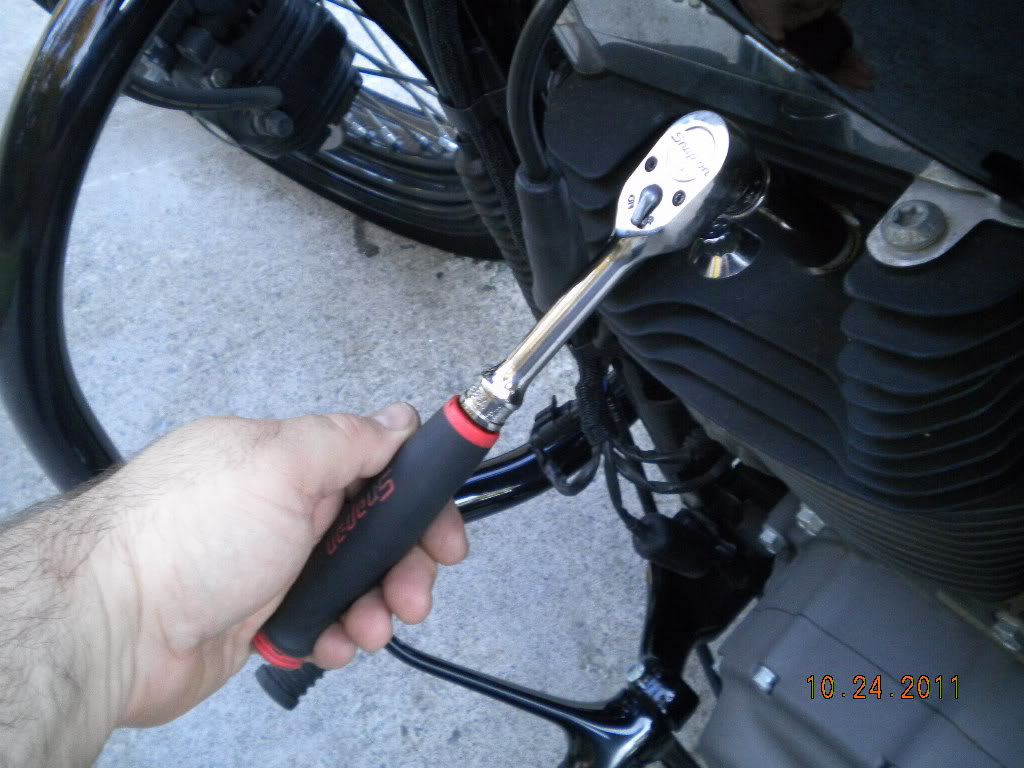
Blow any debris from the cylinder heads at the plug pocket. Once the motor has been given proper time to cool, remove the plug from the first cylinder with the socket turning counter clockwise. Tune the vehicle up one plug at a time, to prevent debris from falling into exposed cylinders.
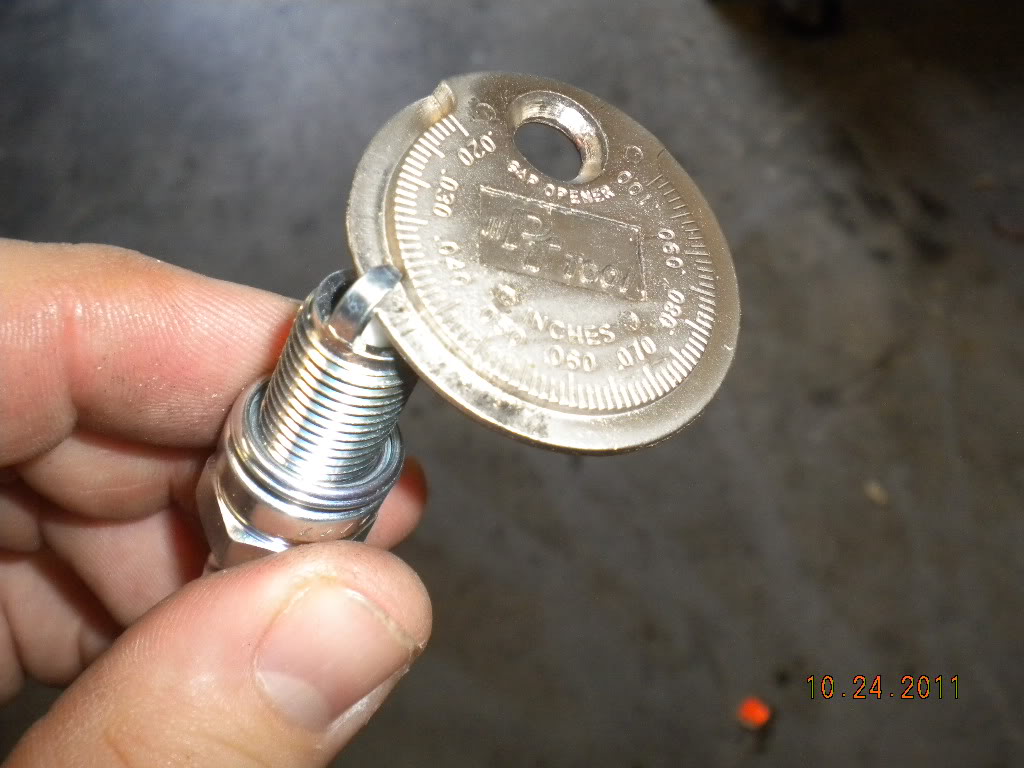
Remove the old plug and check the gap. This will tell you a lot about the plug and how the engine is operating. Use a Sharpie to write a number indicating which cylinder the plug came out of. This will become important- should you discover that one plug is running lean or rich, you can easily tell which cylinder is having issues.
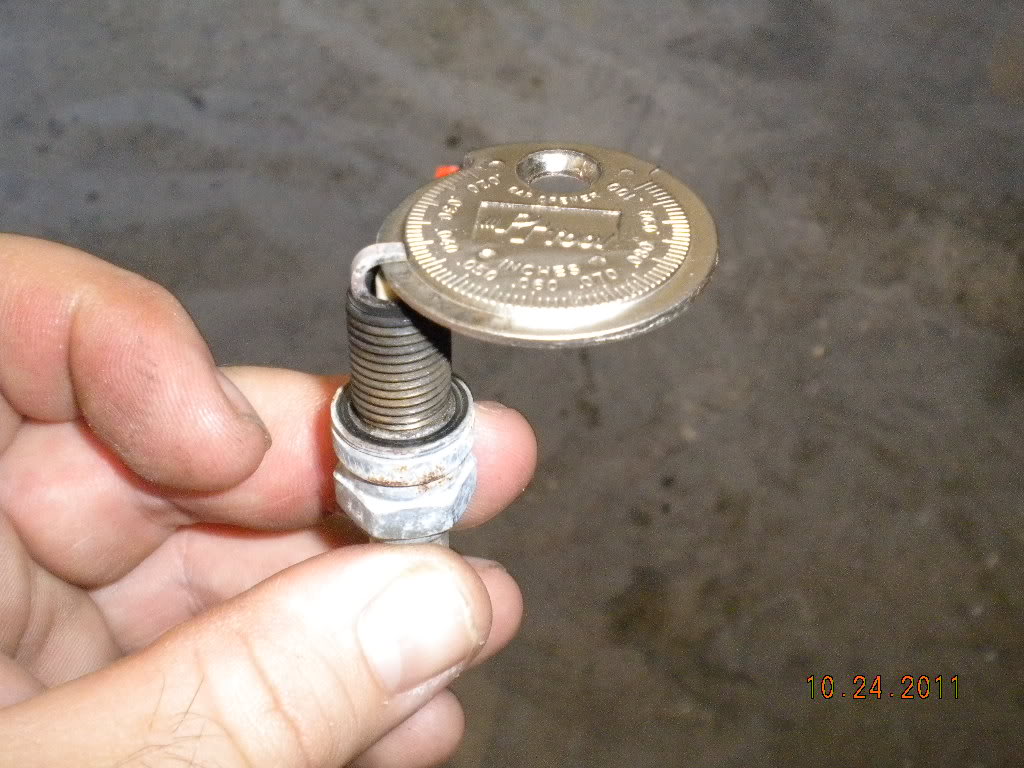
Remove the new plug and gap it properly. Most Harley Davidsons, including the 1200 Nightster will gap at .040", but verify this before moving forward. The gapping tool should insert into the plug gap and offer resistance when removing.
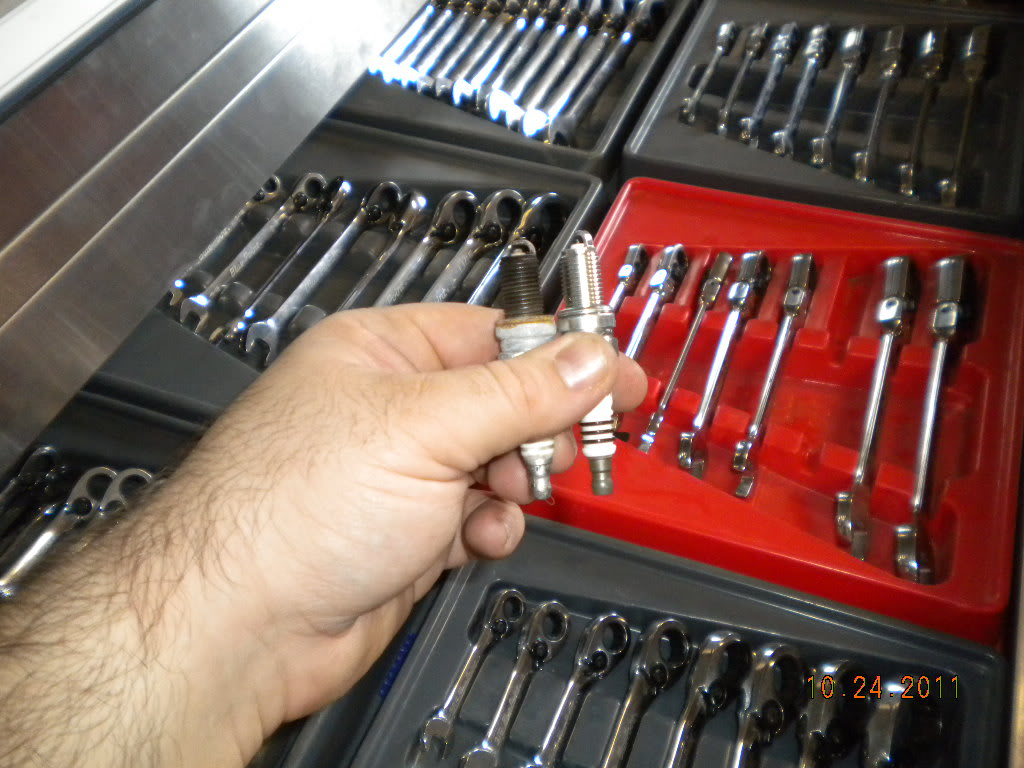
Compare the length of threads on the old plug with the new, to verify that the plug is indeed correct and that the tolerances are not too long or too short. Defects can happen, and you want to find them before your motor does.
Add a little antizeize to one side of the threads. Don't worry about coating the entire thread surface, just a dab will suffice. A lot of people over lube the threads and have problems. The threads are part of the electrical circuit, and too much antiseize can interfere with the operation of the plugs.
Reinstall the plugs and torque to spec. Most Harleys will wrench down to 14ft. lbs., if I am not mistaken. Again, make sure that the engine has properly cooled before the new plug is installed, otherwise the torque spec will be off and the plug may become damaged or difficult to remove later. Repeat the process with the other cylinder, noting which wire goes onto which cylinder.
At this point, I like to "dry fire" the engine to check for clearance issues. Just bump the ignition once or twice, listening for any sounds that do not sound right. Once confirmed, move on to the next step.
Apply a small dab of dielectric grease to the plug wire boot and install it onto the plug. You will know when you have hit paydirt, as the boot will make a slight audiable click. It will also hold firm to the plug, so give it a small tug to verify contact. Make sure that you put the correct wire on the proper plug, otherwise engine damage may result. On most Harleys, crosswiring is impossible.
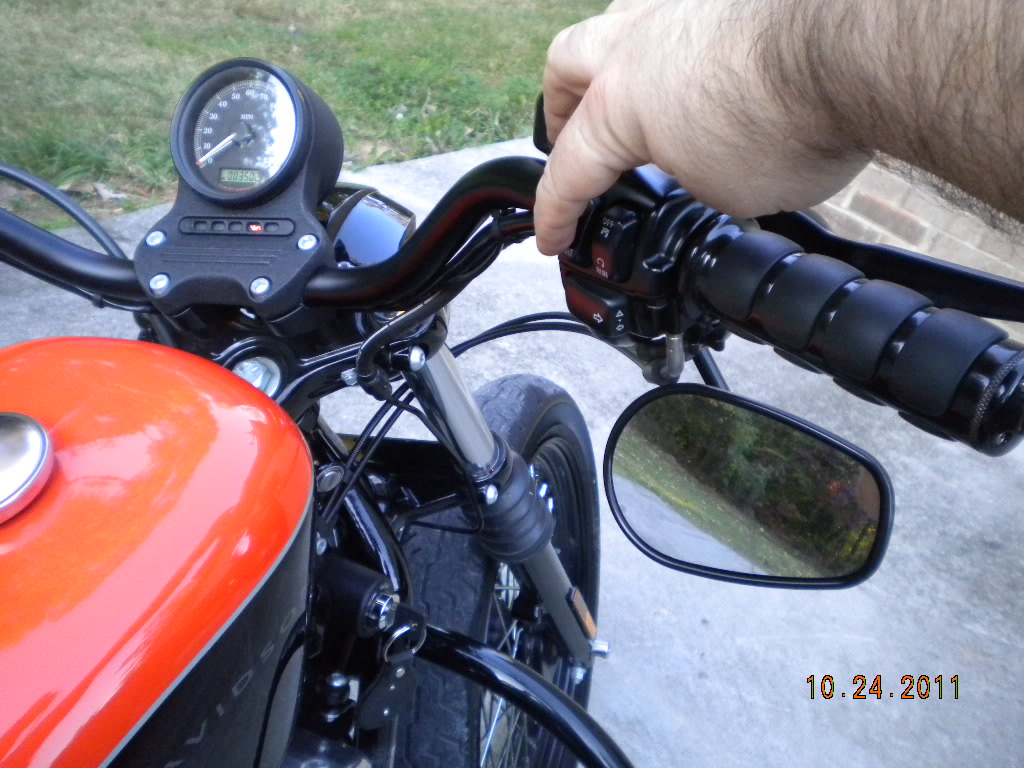
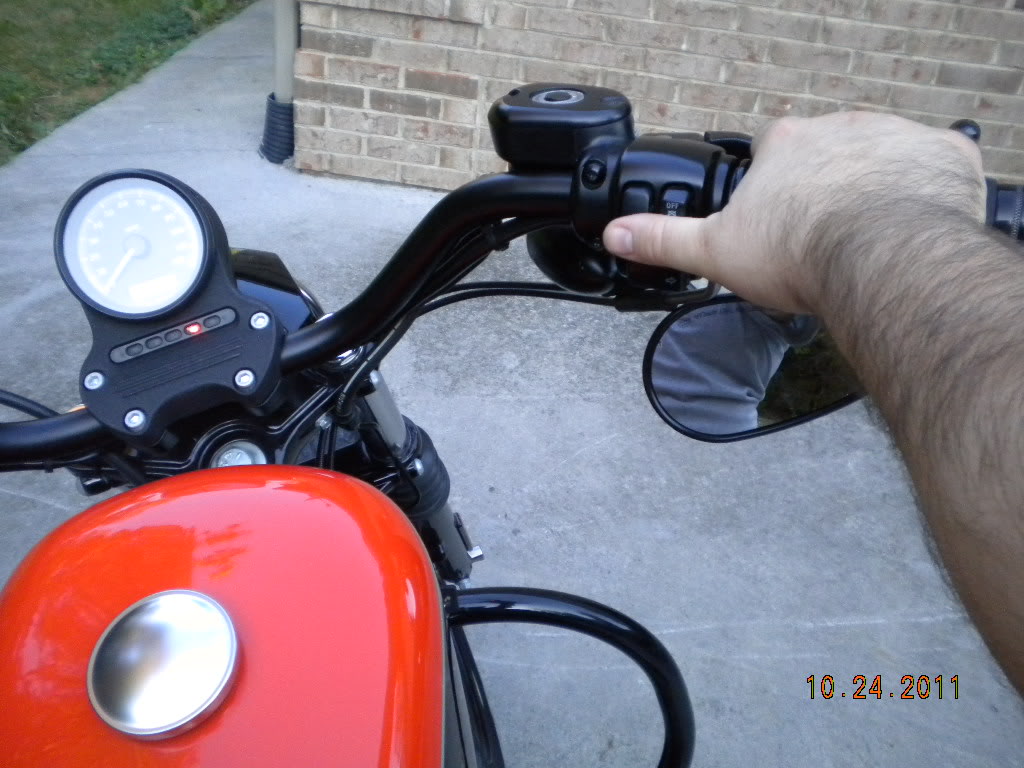
Get onto the bike and start it up. Give the bike a few small revs to make sure that everything is properly gapped and installed. The motor should idle, rev, and run like normal.
Weatherproofing the bike: Optional service, if never before performed.
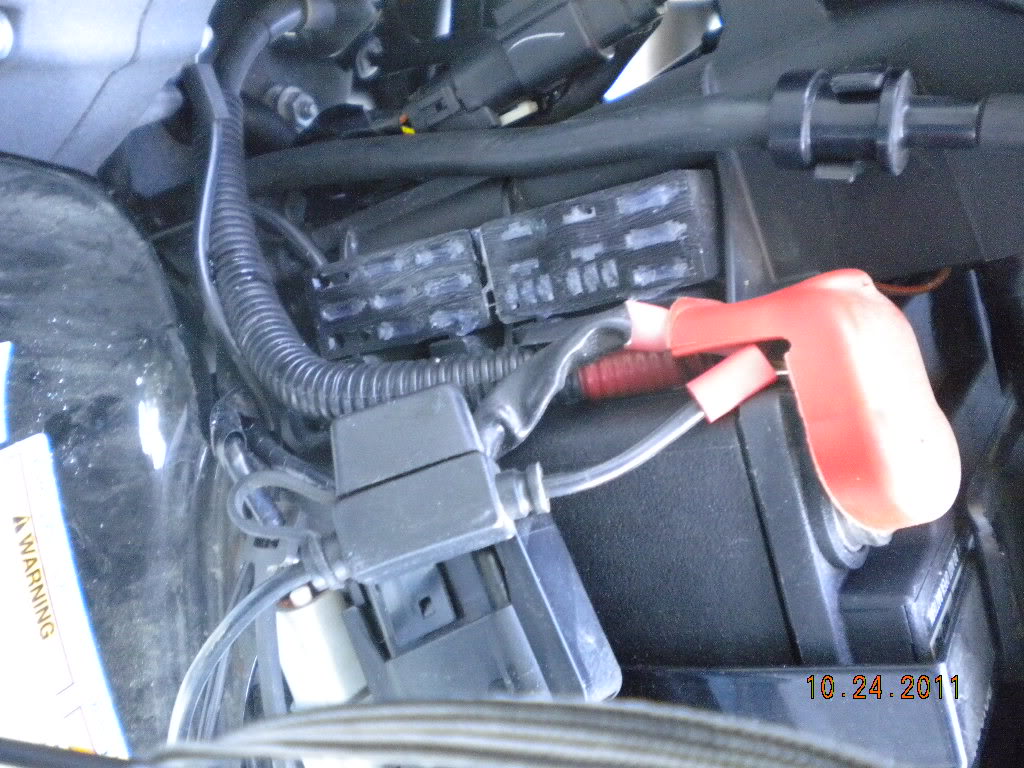
Now open the battery cover and remove the fuses and relays, noting where they go in the motorcycle. They will likely be 15a micro fuses, so the values are all the same, but there are two null slots that will remain open at the bottom corners of the fuse block.
Check the fuses and the relays for corrosion. If corrosion is found, remove with corrosion cleaner (battery terminal cleaner) or some vinegar and an old toothbrush.
Apply enough dielectric grease to cover the metal terminals, and reinstall the fuses and relays. If dielectric grease is unavailable, Vasoline or other petroleum jelly will work.
Start the vehicle to confirm success.
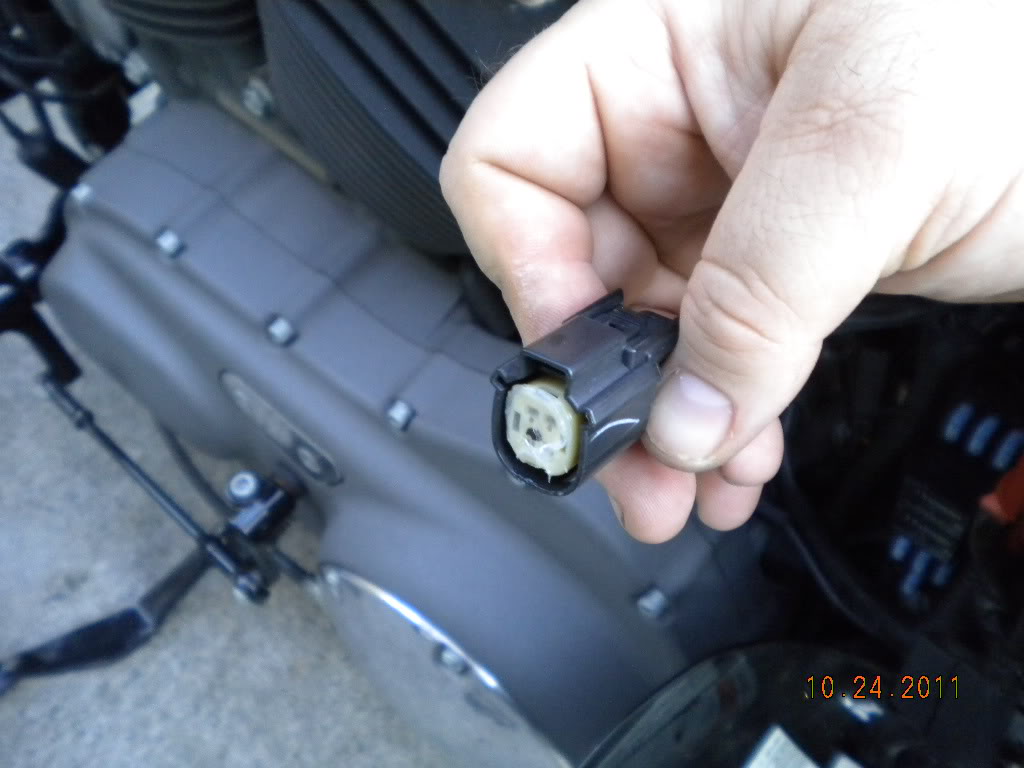
Now unplug each harness one by one, apply dielectric grease to the terminals, and replug.
Use the following chart to verify plug coloration to diagnose the engine's conditions and air/fuel ratios.

Again, start the bike to confirm success, and you are done! Hope this helps!
Task: Changing the plugs and weatherproofing the harnesses.
Time for task: .5 - 1.0 hours for most, plug change is about 1 minutes of it for most. It took me about fifteen minutes for everything, which can be expected for the expert technician.
Total cost:
$15 give or take for iridium, $5 or so for standard plugs.
NGK Iridium spark plugs $7.19 per plug X2- YOU DO NOT HAVE TO BUY HARLEY DAVIDSON PLUGS! Your local parts store will likely not be able to look the plugs up, but they do carry them. You just have to know the right part number. My plugs were almost $15 a pair because I upgraded to Iridium, but you can get the same plugs in a standard for a couple of bucks. Just drop off the letters "IX" from the plugs for the standard versions.
Plug number (NGK) DCPR7EIX Advance Auto Part PN#6046
Antiseize: $1.00 or so for a small packet
Dielectric grease: $3 or so for a jar
Tools needed:
Spark plug gapping tool (Available for a buck or two at your auto parts store)
5/8" deep well socket (5/8" combination wrench can be substituted)
Ratchet
Plug removal:
Working with a slightly warm motor can assist in breaking the plugs lose, however allow the engine to cool properly before moving forward.
Begin by removing the plug wire from the plug. Pull from the boot using a back and forth twisting motion.
DO NOT pull the wire from the wire itself, otherwise damage to the wire may result.
Blow any debris from the cylinder heads at the plug pocket. Once the motor has been given proper time to cool, remove the plug from the first cylinder with the socket turning counter clockwise. Tune the vehicle up one plug at a time, to prevent debris from falling into exposed cylinders.
Remove the old plug and check the gap. This will tell you a lot about the plug and how the engine is operating. Use a Sharpie to write a number indicating which cylinder the plug came out of. This will become important- should you discover that one plug is running lean or rich, you can easily tell which cylinder is having issues.
Remove the new plug and gap it properly. Most Harley Davidsons, including the 1200 Nightster will gap at .040", but verify this before moving forward. The gapping tool should insert into the plug gap and offer resistance when removing.
Compare the length of threads on the old plug with the new, to verify that the plug is indeed correct and that the tolerances are not too long or too short. Defects can happen, and you want to find them before your motor does.
Add a little antizeize to one side of the threads. Don't worry about coating the entire thread surface, just a dab will suffice. A lot of people over lube the threads and have problems. The threads are part of the electrical circuit, and too much antiseize can interfere with the operation of the plugs.
Reinstall the plugs and torque to spec. Most Harleys will wrench down to 14ft. lbs., if I am not mistaken. Again, make sure that the engine has properly cooled before the new plug is installed, otherwise the torque spec will be off and the plug may become damaged or difficult to remove later. Repeat the process with the other cylinder, noting which wire goes onto which cylinder.
At this point, I like to "dry fire" the engine to check for clearance issues. Just bump the ignition once or twice, listening for any sounds that do not sound right. Once confirmed, move on to the next step.
Apply a small dab of dielectric grease to the plug wire boot and install it onto the plug. You will know when you have hit paydirt, as the boot will make a slight audiable click. It will also hold firm to the plug, so give it a small tug to verify contact. Make sure that you put the correct wire on the proper plug, otherwise engine damage may result. On most Harleys, crosswiring is impossible.
Get onto the bike and start it up. Give the bike a few small revs to make sure that everything is properly gapped and installed. The motor should idle, rev, and run like normal.
Weatherproofing the bike: Optional service, if never before performed.
Now open the battery cover and remove the fuses and relays, noting where they go in the motorcycle. They will likely be 15a micro fuses, so the values are all the same, but there are two null slots that will remain open at the bottom corners of the fuse block.
Check the fuses and the relays for corrosion. If corrosion is found, remove with corrosion cleaner (battery terminal cleaner) or some vinegar and an old toothbrush.
Apply enough dielectric grease to cover the metal terminals, and reinstall the fuses and relays. If dielectric grease is unavailable, Vasoline or other petroleum jelly will work.
Start the vehicle to confirm success.
Now unplug each harness one by one, apply dielectric grease to the terminals, and replug.
Use the following chart to verify plug coloration to diagnose the engine's conditions and air/fuel ratios.
Again, start the bike to confirm success, and you are done! Hope this helps!
Last edited by TennesseeMustangPerf; 10-24-2011 at 06:04 PM.
#4
10-24-2011, 08:22 PM
#5
10-24-2011, 09:11 PM
Outstanding HDF Member
#6
10-24-2011, 10:13 PM
There are dozens of threads in this section about plug brand/type to use. Most of them contain the cross-reference for all brands of plugs.
#7
10-24-2011, 10:40 PM

Thank you...I know. I usually do these things automatically, but stopped to think for a minute that what I am doing just might help others out there. It is indeed easy to take your skills for granted, and there are a lot of people out there who are just beginning.
Trending Topics
#8
10-24-2011, 11:00 PM
Tourer
Join Date: May 2011
Location: Orange County, New York
Posts: 333
Likes: 0
Received 0 Likes
on
0 Posts
#9
10-24-2011, 11:49 PM
I'll make a deal with you. You buy them from me for 1/3 MSRP, you put them through the endurance testing, then you can resell them for a profit.
Oh ya, just so you know, now the new HD plugs say "H-D" on them in black Sharpie.

Last edited by Gpsjr10; 10-24-2011 at 11:56 PM.
#10
10-25-2011, 12:03 AM
I usually change standard copper plugs once a year, but this year I got the Pulstar plugs to try them out. I am gonna see how long they last.