Harley Davidson Dyna Glide: How to Replace Fuel Filter
A dirty fuel filter can result in a loss of performance and poor running due to a lack of fuel supply. Regular replacement of the fuel filter can ensure that your bike's engine is getting the necessary fueling it needs to operate at its best. Plus, replacing the fuel filter allows for the inspection and replacement of the in-tank fuel lines for cracks and pinholes.
This article applies to Harley Davidson Dyna Glide models (1999-2015).
The fuel filter is in place to strain unwanted particles from the fuel that could otherwise clog the fuel-injected components. While the refinement process of today's gasoline is quite good, it is nearly impossible to keep it completely clean during transportation and supplying of fuel stations. Additionally, filling up in dusty environments or with older fuel tanks often can contaminate fuel and eventually clog up the fuel filter. Owners disagree as to how regularly the fuel filter should be replaced, with some traveling up to 100,000 miles before opening up the tank and replacing the filter element. On the other hand, some have noticed a dirty filter in as little as 10,000 miles. All opinions aside, Harley recommends a maintenance interval of 25,000 miles, and it never hurts to replace the fuel filter on a regular basis. Whether you have logged 10,000 or 100,000 miles, this article will outline the procedure for replacing the fuel filter on fuel-injected Harley-Davidson Dyna Glide models.

Materials Needed
- Phillips and flat head screwdrivers
- Torx socket set
- 1/4" drive ratchet and extension
- Wire cutters
- SAE socket set
- SAE Hex (Allen) key set
- Shops rags
- Torque wrench (in/lbs)
- Filter element and O-ring
- Top plate gasket and fastening screws
The following procedure applies to fuel-injected Dyna Glide models that utilize an in-tank fuel pump and fuel filter setup.
Step 1 – Purge fuel system
For fuel-injected models, fuel pressure should first be relieved before any work begins on the fuel system. The fuel pump can maintain fuel pressure for days even when the bike is off, so purging the system will eliminate the possibility of any accidental fuel spray.
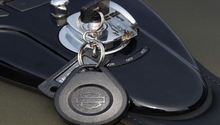
- Access and remove the fuel pump fuse located in the fuse box just below the left side of the seat assembly.
- With the fuse removed, crank the engine over to relieve fuel pressure. The engine may start and run for a few seconds before it loses fuel pressure and stalls.
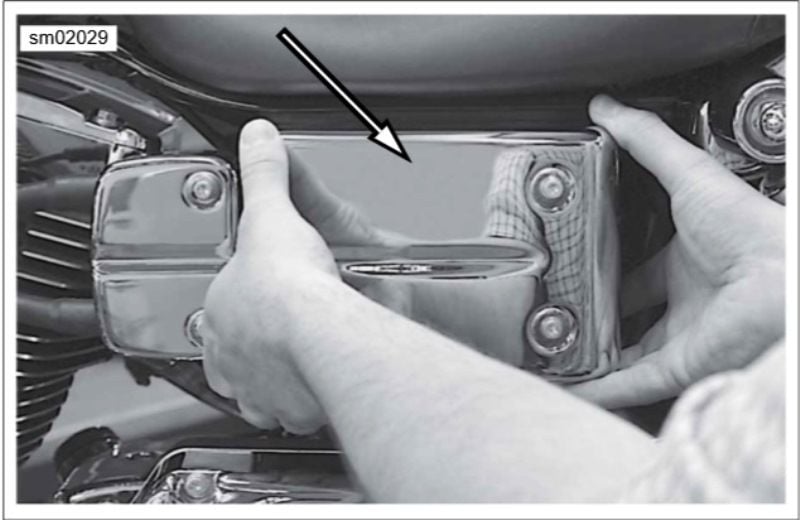
Figure 1. Accessing fuel pump fuse. 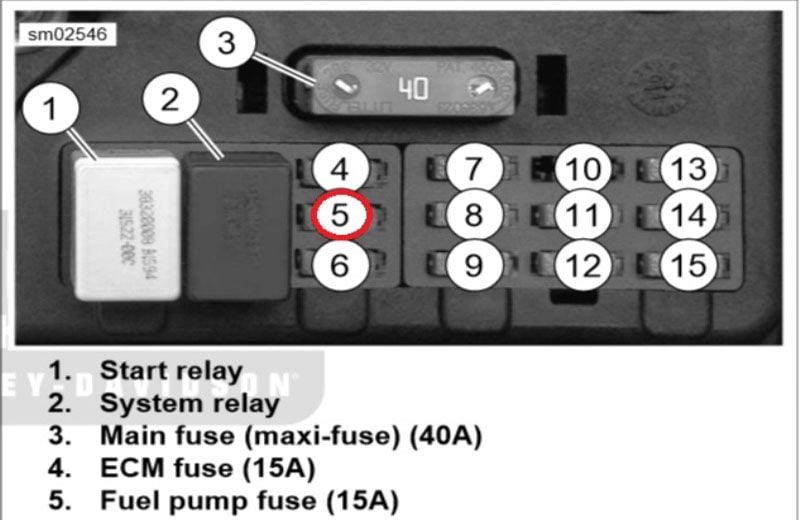
Figure 2. Fuse box diagram.
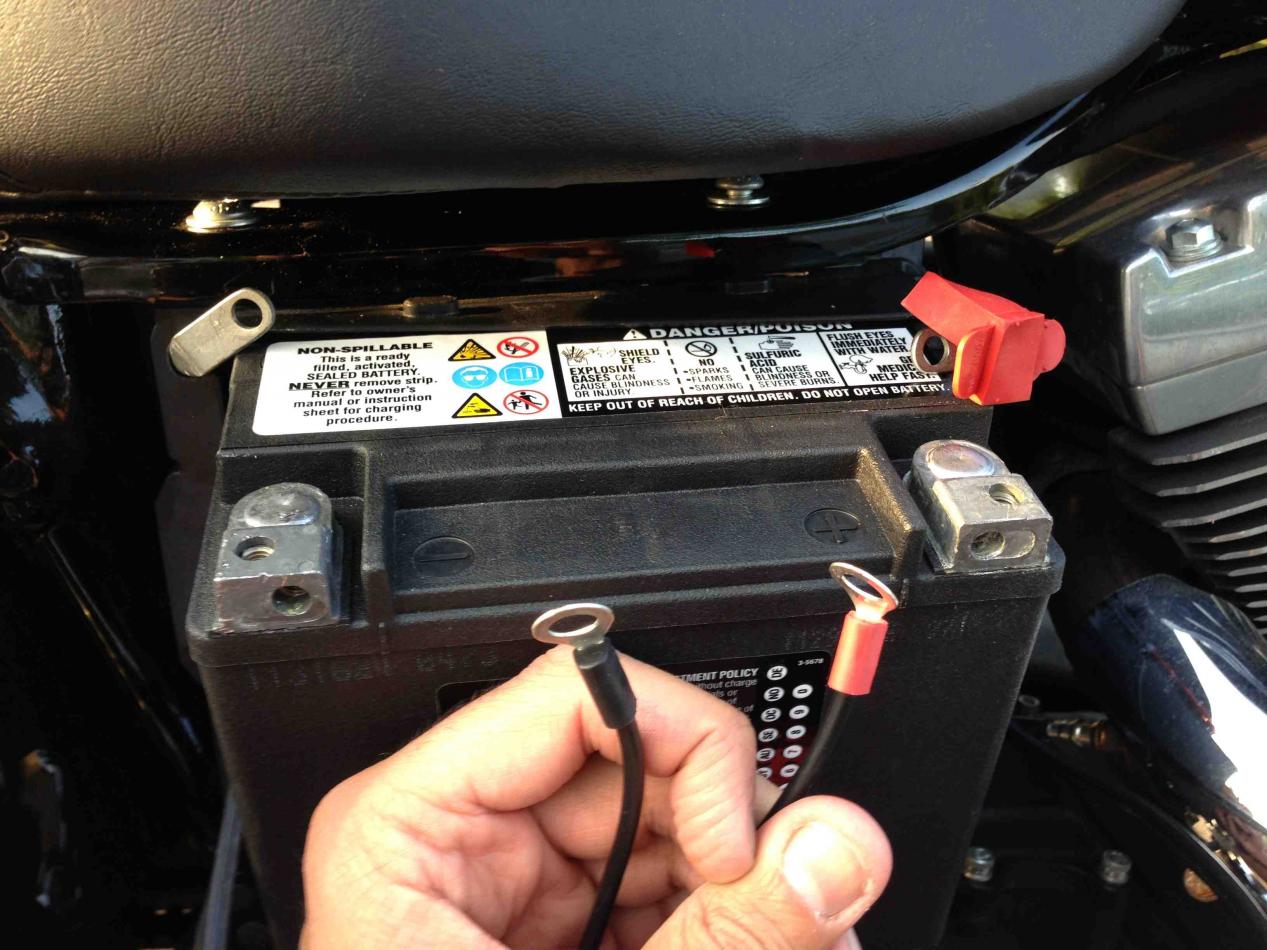
Step 2 – Disconnect battery
Since this job requires working with fuel, disconnect the battery to prevent the possibility of an accidental short and potential fire hazard.
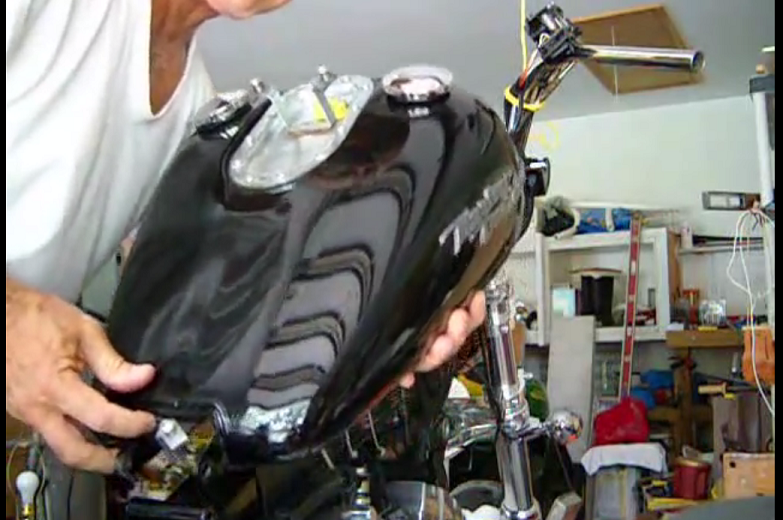
Step 3 – Drain and remove fuel tank (optional)
While not required, many owners prefer to drain the fuel tank and remove it from bike. Some feel that replacing the fuel filter with the tank on a workbench can allow for easier manipulation of the tank internals. That being said, this step is not necessary when replacing the fuel filter. For information on removing the fuel tank, see How to Remove Fuel Tank.
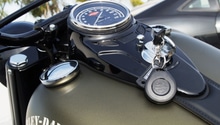
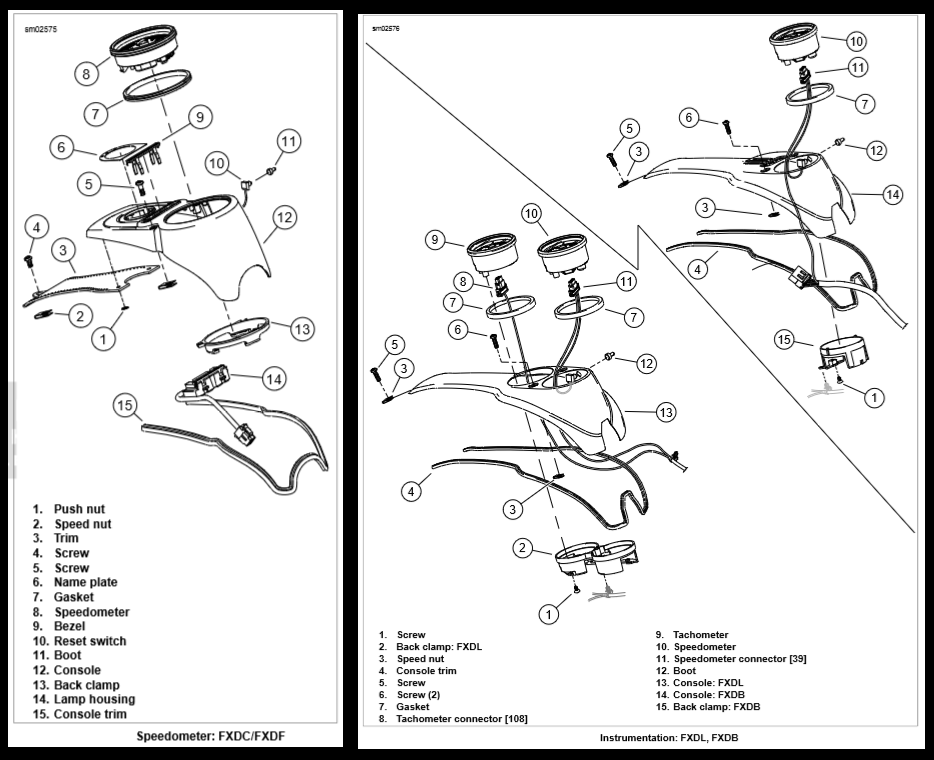
Step 4 – Remove tank console and gauge(s)
If you are changing the fuel filter with the tank mounted on the bike, proceed with removing the console and gauges.
- Remove the fastening screws securing the console to the fuel tank. Depending on the model, removal of the seat may be required.
- With the console free from the tank, disconnect the gauge(s) and set the console assembly aside.
Step 5 – Remove fuel pump assembly
- With the tank top plate now accessible, disconnect the fuel pump wiring harness connector and vent tube.
- Remove the (12) screws from the top plate.
- Lift the top plate up at an angle to allow the hard vent tube to clear the fuel tank. With the top plate away from the tank, depress the tab on the fuel pump wiring harness with a small screwdriver to release it from the plate. Set the plate and plate gasket aside.

Figure 6. Tank top plate removal. 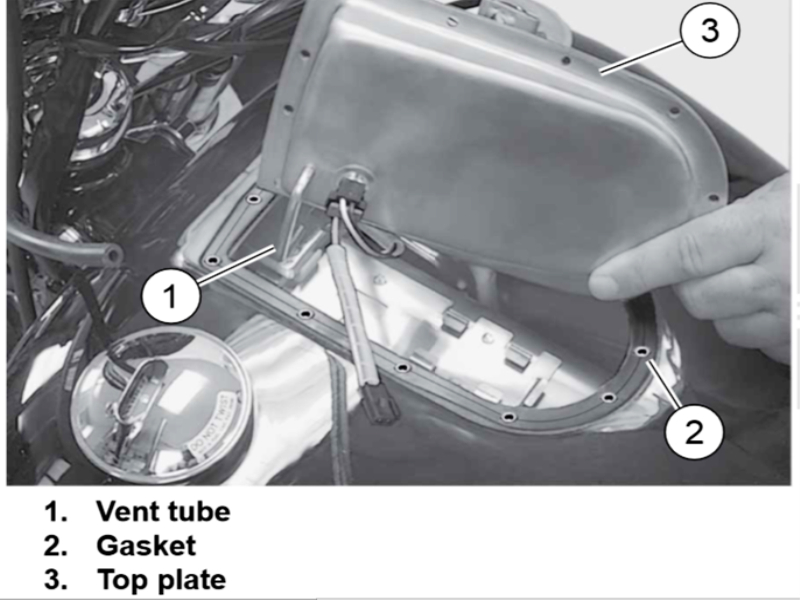
Figure 7. Disconnect the vent tube from the top plate. 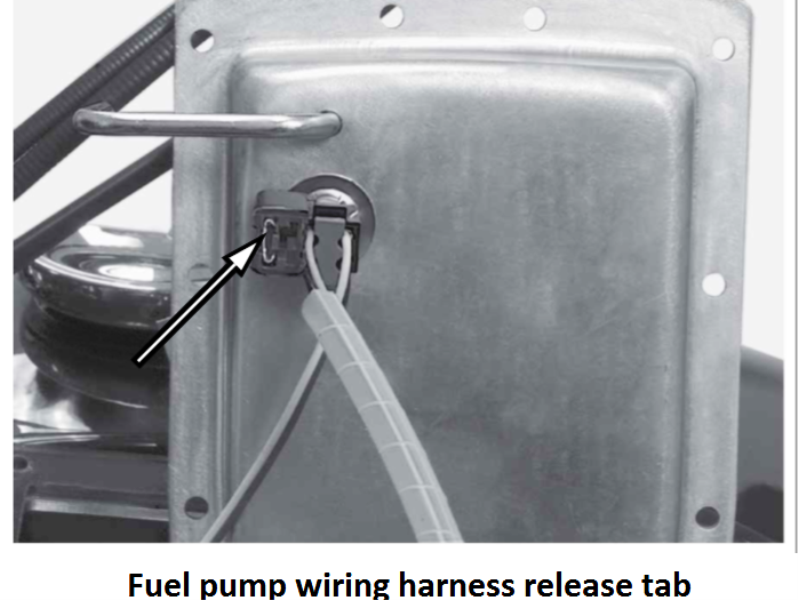
Figure 8. Disconnect wiring harness from top plate.
- Depress the tabs (#1) and remove the fuel line (#4) from the fuel pump assembly.
- Slide the gauge wiring harness (#5) out from the hold-down clip (#6). Disconnect the fuel pump connector (#3).
- Finally, lift up on the securing tab while pushing the fuel pump assembly towards the front of the tank to free it from the hold-down.
- Maneuver the fuel pump assembly out of the tank.
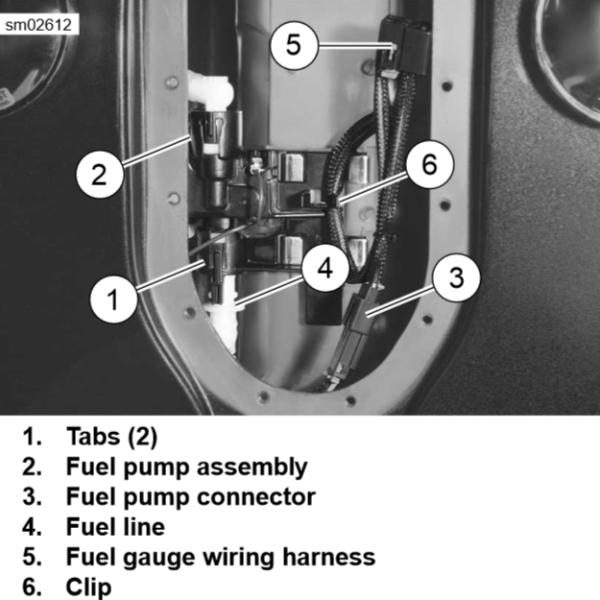
Figure 9. Disconnect the fuel lines and wiring. 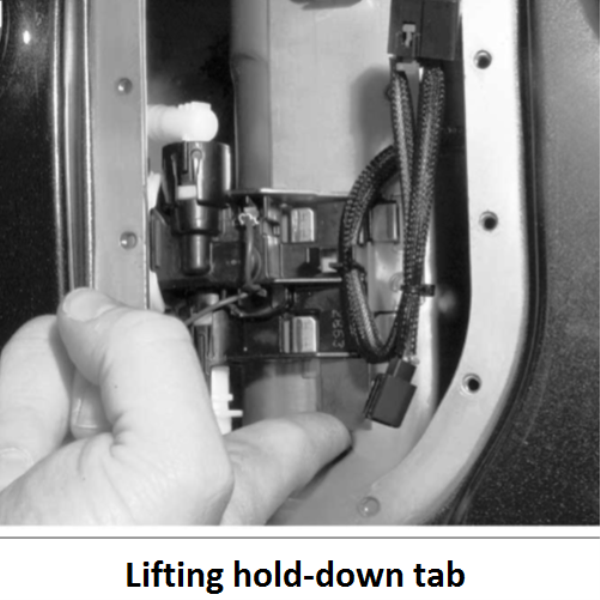
Figure 10. Wiring hold down tab.
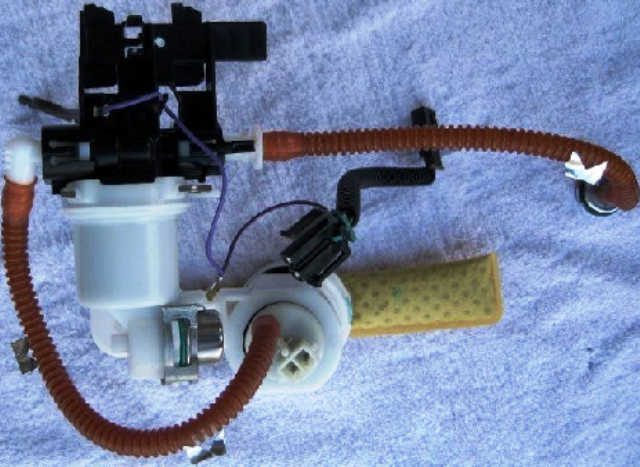
Now that the top plate is removed, you have access to the entire fuel pump assembly. Dyna models were some of the first bikes to begin using a smaller, compact fuel pump assembly that is easier to manipulate and remove from the tank than the traditional Harley EFI pump assembly. Those brown flexible lines are the ones you may want to replace, and you certainly should inspect for signs of cracks.
Pro Tip
Many owners opt to replace the fuel lines while the fuel pump assembly is removed from the tank. The fuel lines tend to become brittle with age and are prone to leaking.
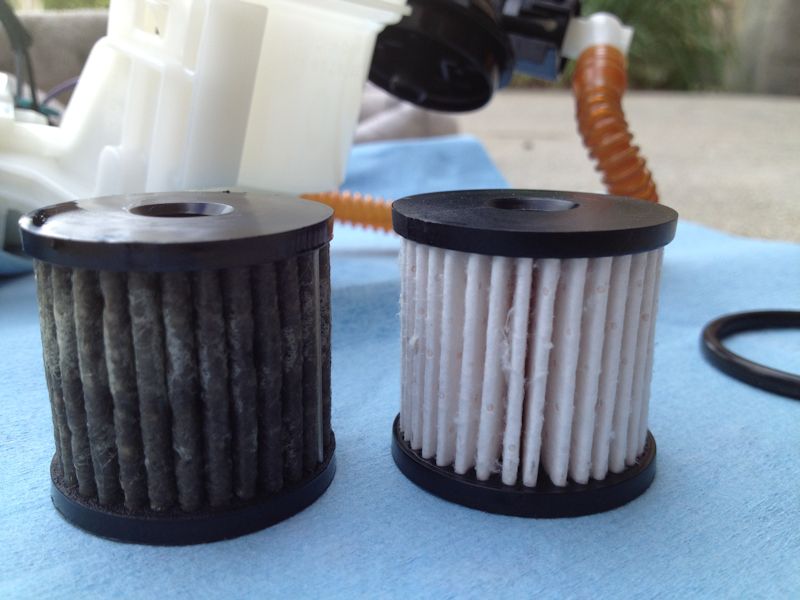
Step 6 – Replace filter element
- Depress the release tab to remove the fuel filter retaining clip.
- Separate the fuel pump body from the end cap and remove the filter element along with the O-ring.
- Install the new filter element and O-ring before attaching the end cap to the pump body and installing the filter retaining clip.

Step 7 – Re-assembly
With the new fuel filter in place, the bike can be re-assembled in the reverse order of the procedure outlined above.
- Replace the fuel lines and hose clamps as necessary before installing the pump assembly into the fuel tank.
- Be sure all electrical connections are securely fastened and the pump is securely held in place before installing the tank top plate.
- Per Harley's recommendation, use a new top plate gasket and fastening screws.
- Tighten the screws in a crisscross pattern to 20 in/lbs.
- With the top plate installed, connect the fuel pump wiring harness and vent tube.
- Connect all gauge wiring before installing the gauges and tank console.
- Re-connect the battery and install the seat unit.
- Install the fuel pump fuse and fuse box cover.
- If necessary, fill the tank with fuel and start the engine to ensure proper operation.
Featured Video: Fuel Filter Replacement
Related Discussions
- Anybody Replace Their In-Tank Fuel Line? - HDForums.com
- Don't Forget to Change the Fuel Filter! - HDForums.com