Harley Davidson Touring: How to Remove Gas Tank
The Harley Davidson Touring bike is as comfortable as your living room easy chair, and has just as many infotainment options. If you are adding to the already loaded factory spec sheet, chances are you are going to have to remove the fuel tank to wire it all up. You also have to take it off for almost every engine related mod, so best to learn how to do it now.
This article applies to Harley Davidson Touring models (2000-2015).
A number of modifications require removal of the fuel tank on a Harley, and this is especially true for Touring models. The shear size of the modern Harley Touring fuel tank can leave owners a bit gun-shy when tank removal is necessary; however, many of the aftermarket accessories available to improve those long distance rides require access to the wiring harness located under the tank. Additionally, removal of the fuel tank will allow for more working room when engine service needs to be completed. While nobody wants to damage the finish on their pristine tank, patience and attention to detail will go a long way to ensure your tank makes it through the removal and re-installation process unscathed. This article will outline the steps involved in removing the fuel tank on various Harley Davidson Touring models.

Materials Needed
- SAE socket set
- 1/4" or 3/8" drive ratchet
- SAE Hex (Allen) key set
- Torx driver set
- Funnel and length of hose
- Catch can/fuel can
- Torque wrench (optional)
- Shop rags
- Hose clamp pliers
- Screwdriver
Step 1 – Purge fuel system
Models equipped with fuel-injection have a pressurized fuel system that must be purged prior to removing the fuel tank.
- Remove the left saddlebag and side cover to expose the fuse box.
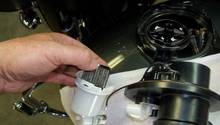
- Depress the latch on the bottom of the fuse box lid to swing the lid open. Using the diagram on the fuse box lid, remove the fuel pump fuse.
- Crank the engine over to purge the fuel system pressure. The bike may start and run for a moment before stalling from a lack of fuel.

Figure 1. Remove saddlebag and fuse box cover. 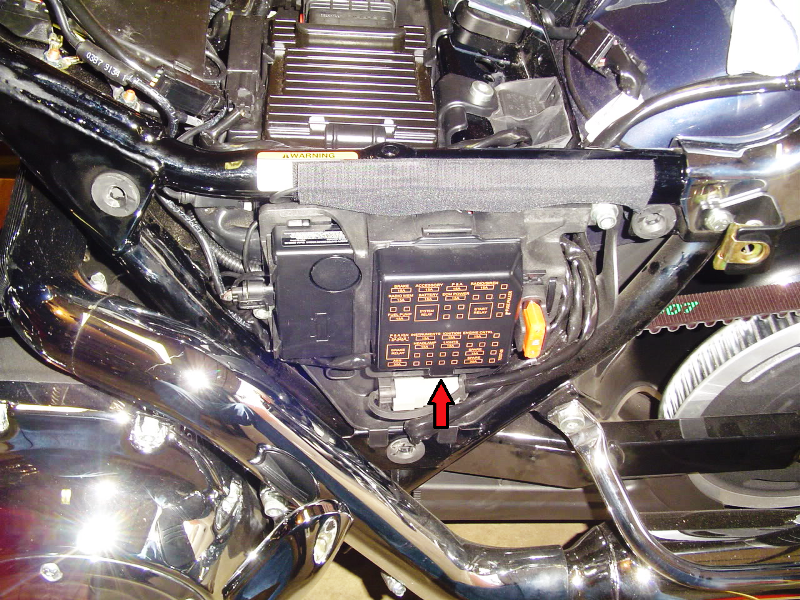
Figure 2. Fuse box cover.
Step 2 – Disconnect battery
Since removing the fuel tank often requires working with fuel, it is best to disconnect the battery to avoid any electrical shorts that could start a fire.
- Remove the fastener at the rear of the passenger seat and slide the seat unit rearwards to remove it from the bike. If your bike has a seat strap, remove one of the strap bolts on either side to free the strap before removing the seat.
- For bikes with the ECM located on top of the battery, remove the T40 Torx fastener and lay the ECM aside. If your bike is equipped with a security system, slide the antennae (circled in red in Figure 4) off of the plate before removing the ECM. ECM plate removal.
- The battery is now accessible and the negative (black) cable can be disconnected.

Figure 3. Seat removal. 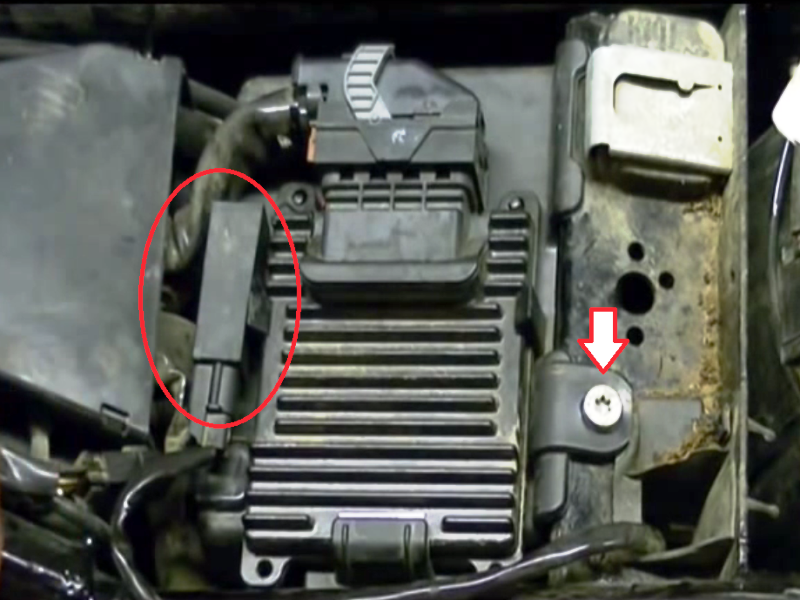
Figure 4. Move the security system antenna (if equipped) and ECM. 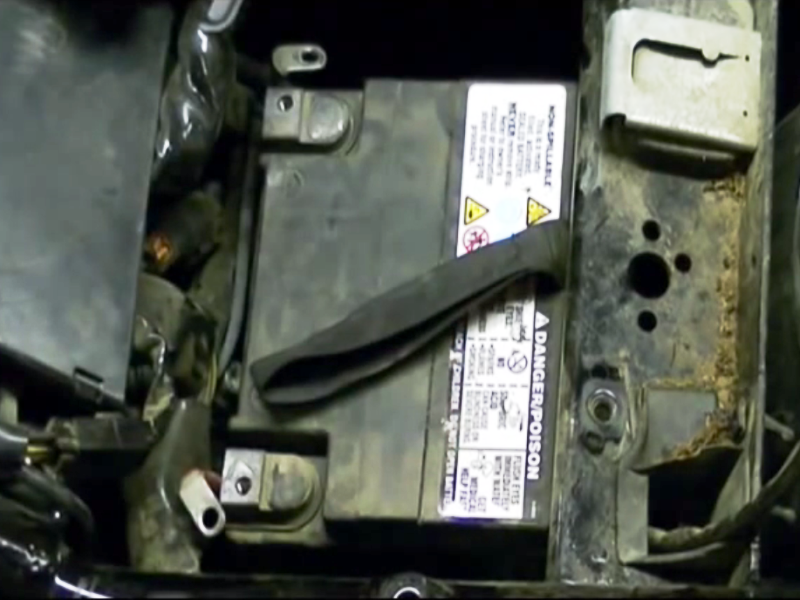
Figure 5. Battery disconnected.
Step 3 – Remove fuel tank console
If possible, it is best to begin this procedure with a fuel tank that is nearly empty; otherwise, you may have to drain several gallons of gas out of the tank in the process. With the battery disconnected, proceed with removal of the fuel tank console.
- Begin by removing the front and rear fasteners holding the console assembly to the tank.
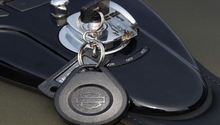
- Open the fuel door and remove the filler cap.
- Place a soft towel on the rear fender and lay the console onto the towel to avoid disconnecting any gauge wiring.
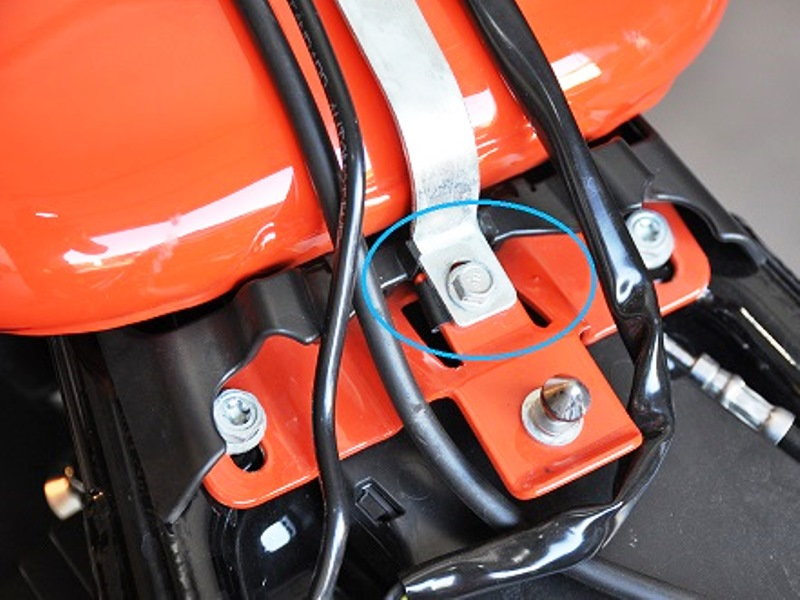
Figure 6. Unbolt the console at the back. 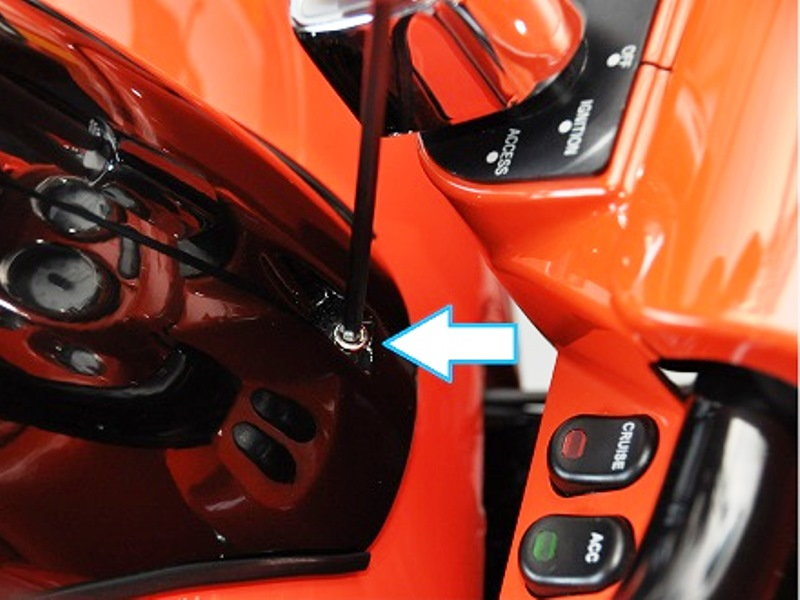
Figure 7. This screw holds the console at the front. 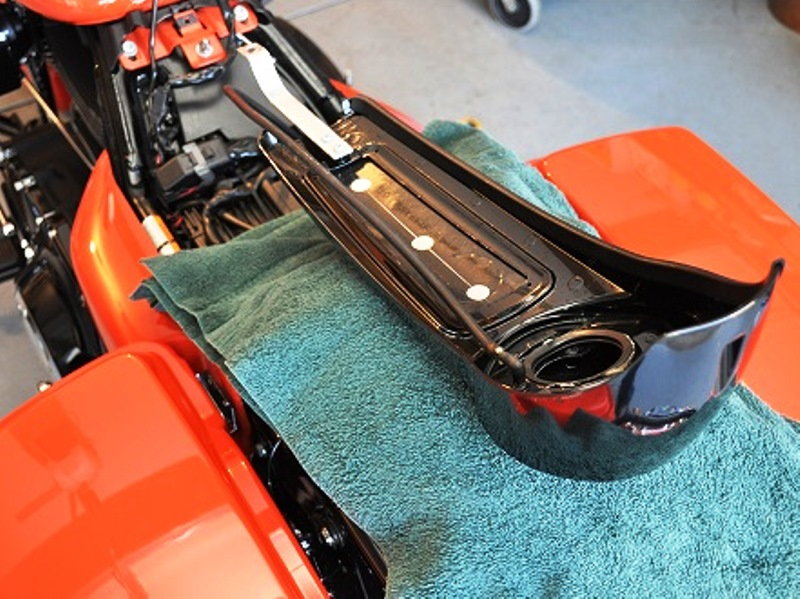
Figure 8. Lay the console aside on a soft towel.
Pro Tip
Depending on the year and model, there may be several Hex (Allen) screws under the fuel door that require removal before the console can be removed.
Step 4 – Disconnect the fuel tank
- Disconnect the pump wiring harness plug.
- On the left underside of the tank, disconnect the fuel level sensor plug.
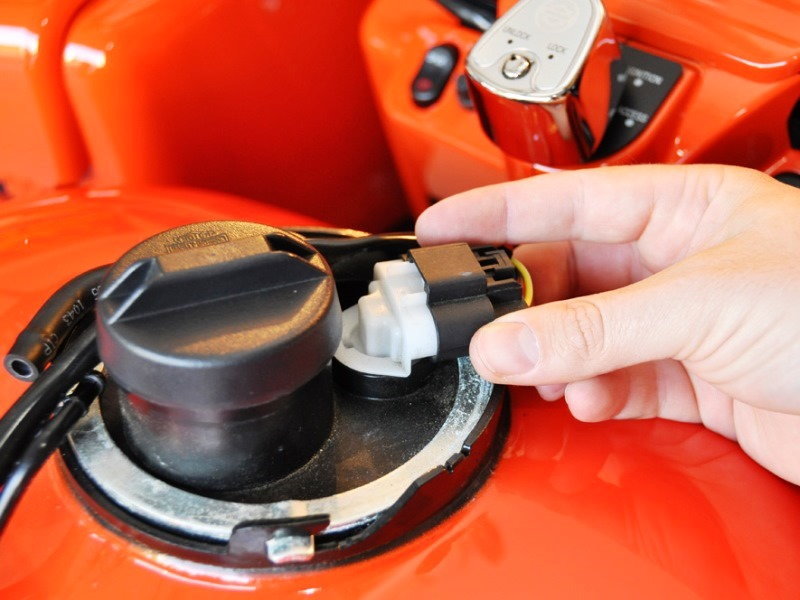
Figure 9. Disconnecting fuel pump harness plug. 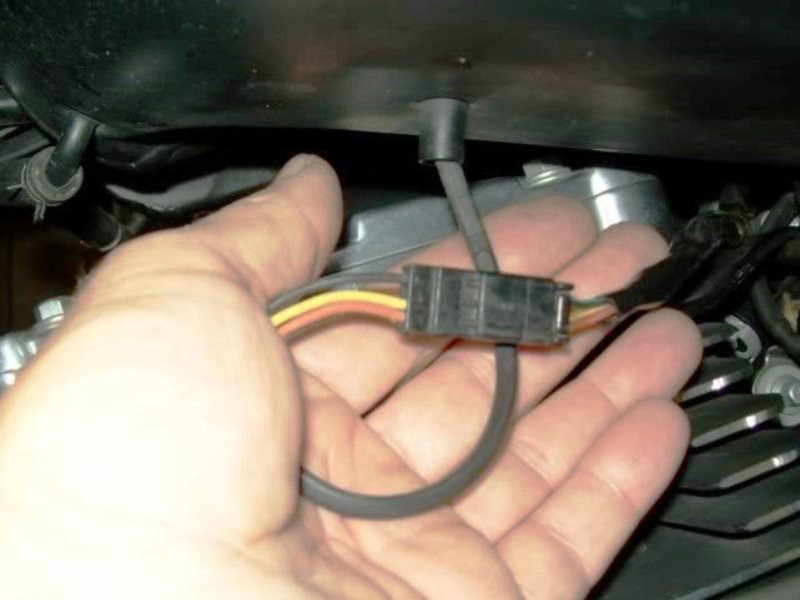
Figure 10. Fuel level sensor plug.
- Disconnect the hard vent line from the vent hose.
- Remove the fuel supply line by lifting up on the quick-connect sleeve and pulling down on the fuel line. You may need a funnel and gas can to catch any remaining fuel in the tank.
- For fuel-injected models equipped with a five gallon fuel tank, the crossover fuel line at the front of the tank must be disconnected. Disconnect the crossover line and allow escaping fuel to drain into your catch can.
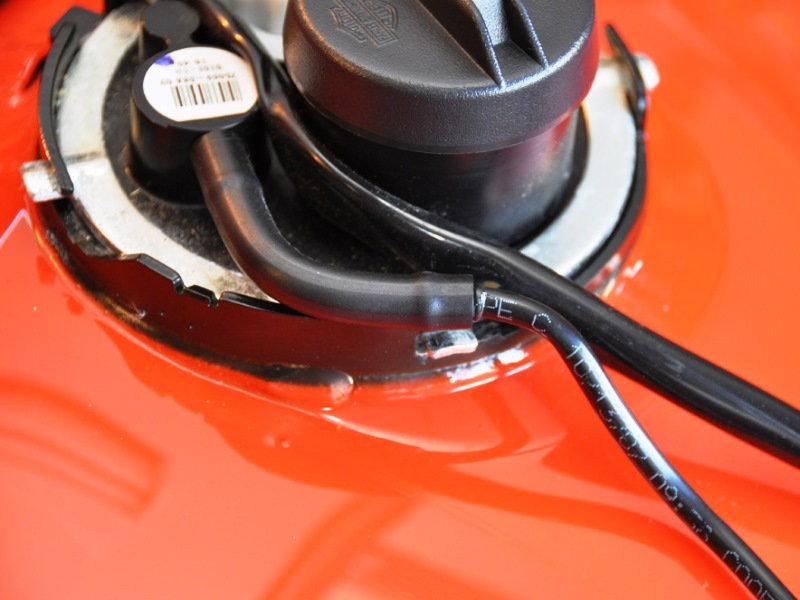
Figure 11. Tank vent line. 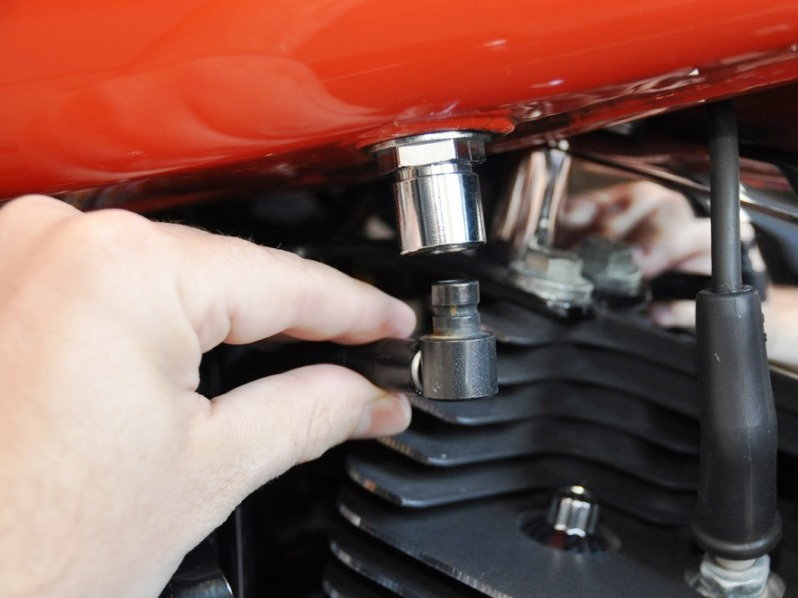
Figure 12. Quick-connect fuel line fitting. 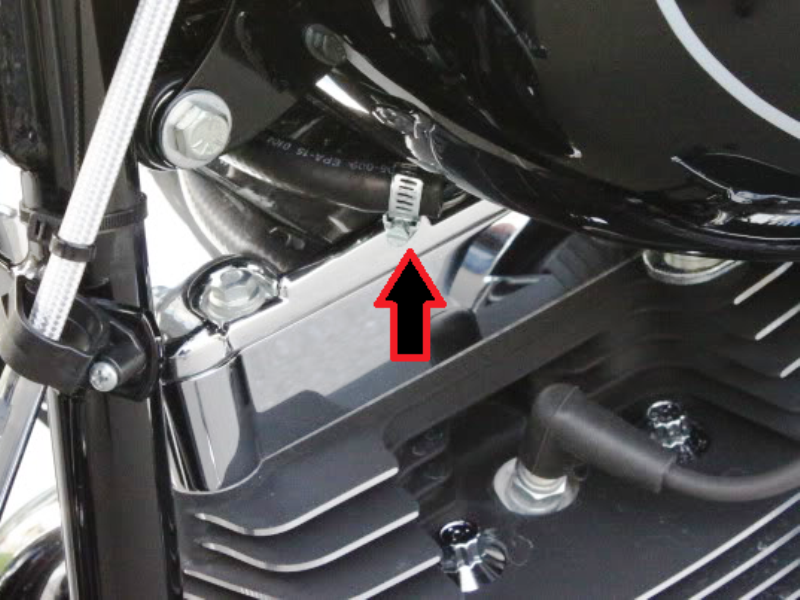
Figure 13. Crossover fuel line.
Step 5 – Unbolt the fuel tank
- Remove the rubber tank mount caps at the front of the fuel tank to reveal the mounting fasteners. Using a 1/2" socket or T40 Torx driver, remove the (2) front tank mounting bolts.
- At the rear of the tank, slide the plastic trim piece off of the tank bracket before removing the (2) fasteners with either a 1/2" socket or T40 Torx driver.
- With all fasteners, fuel lines, and electrical wiring disconnected, the fuel tank can be gently lifted from the bike and set in a safe place.
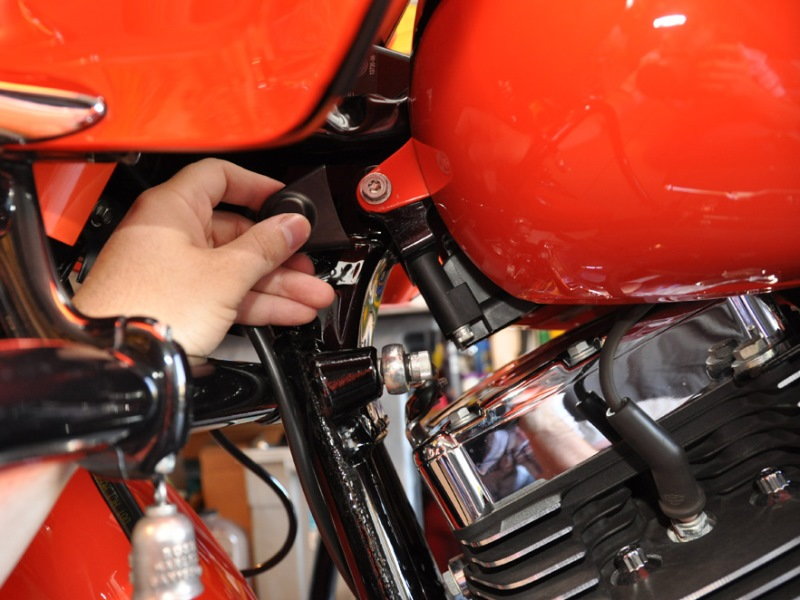
Figure 14. Front tank mounting fasteners. 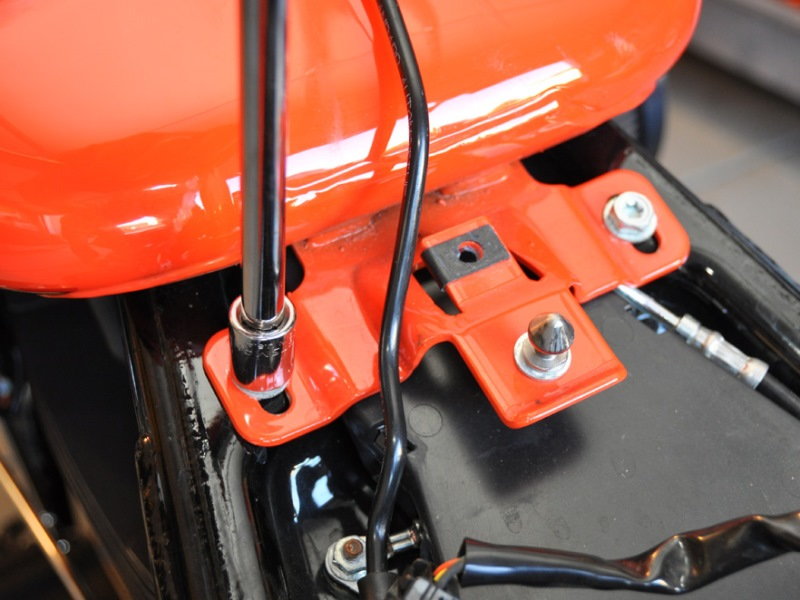
Figure 15. Rear tank mounting fasteners.
Step 6 – Re-installation
Installation of the fuel tank is the reverse of the procedure outline above.
- Set the fuel tank onto the bike and install the front and rear fastening bolts. Torque to 15-20 ft/lbs. Be sure to install the plastic trim piece and rubber mount covers (if applicable).
- Reconnect the fuel supply line quick release.
- Reconnect the fuel tank level harness plug as well as the fuel pump harness plug.
- For models using a crossover fuel line setup, reconnect the fuel line and secure it with a hose clamp.
- Slide the vent hose onto the hard vent line.
- Place the console onto the tank and torque the fasteners to 36-60 in/lbs.
- Install the fuel cap and close the fuel filler door.
- Reconnect the battery and fasten the ECM plate.
- Install the fuel pump fuse, side cover, and saddle bag (if applicable).
- Install the seat unit.
Pro Tip
If your bike is equipped with a security system, it may need resetting after reconnecting the battery. See your service manual for details.
Related Discussions
- 2009 & Later - Gas Tank Removal- HDForums.com
- Fuel Tank Removal - Oh What a MESS!- HDForums.com
- Fuel Tank Removal - HDForums.com