Harley Davidson Touring: How to Replace Fuel Pump and Filter
Not only is regular replacement of the fuel filter part of your bike's basic maintenance needs, but filter replacement will also allow for inspection or replacement of the in-tank fuel lines and fuel pump assembly. A clogged filter can hinder engine performance to the point that the bike may become unrideable.
This article applies to Harley-Davidson Touring (2000-2015).
Your fuel injected Harley Davidson touring bike needs a proper supply of presureized fuel to run properly. And much like air filters cleanse the air as it enters the engine, fuel filters strain any unwanted contaminants from the fuel before it is plumbed to the fuel injection system. While modern gasoline is highly refined and quite clean, occasionally contaminants do get into the tank and get stopped by the fuel filter element. The filter can become clogged, and the pump has to work harder when that happens, which can cause premature failure. Many ridebility issues and a general lack of engine performance can be linked back to a dirty fuel filter, so Harley-Davidson recommends replacing it at 25,000 mile intervals. There are also fuel lines in the tank that can crack and leak, effecting how well the fuel pump can work. This article outlines the fuel filter replacement procedure for fuel-injected Touring models.

Materials Needed
- Hex (Allen) key set
- Torx bit set
- Screwdriver
- 1/4" drive ratchet and extension
- Wire cutters
- Torque wrench
- Shop rags
- Hammer
- Punch
- Fuel filter and filter o-ring(s)
- Fuel line hose clamps
- Top plate gasket & fastening screws or locking ring gasket
This article applies to fuel-injected Touring models. Carbureted models use a small strainer attached to the fuel petcock, and don't have any pump at all. The filter on an early bike can simply be changed by removing the petcock from the tank.
Step 1 – Purge fuel pressure
Before messing with the fuel tank and pump, the whole fuel injection system needs to be purged of fuel pressure to avoid any unwanted fuel spills, though the tank does not have to be emptied or removed.
- Remove the left saddle bag and side cover. The cover simply pulls straight off to reveal the fuse box.
- Depress the tab on the bottom of the fuse box lid to open the box. Following the fuse diagram, remove the fuel pump fuse.
- With the fuse removed, start the engine to relieve fuel pressure. The engine will stall within a few seconds once it runs out of fuel.
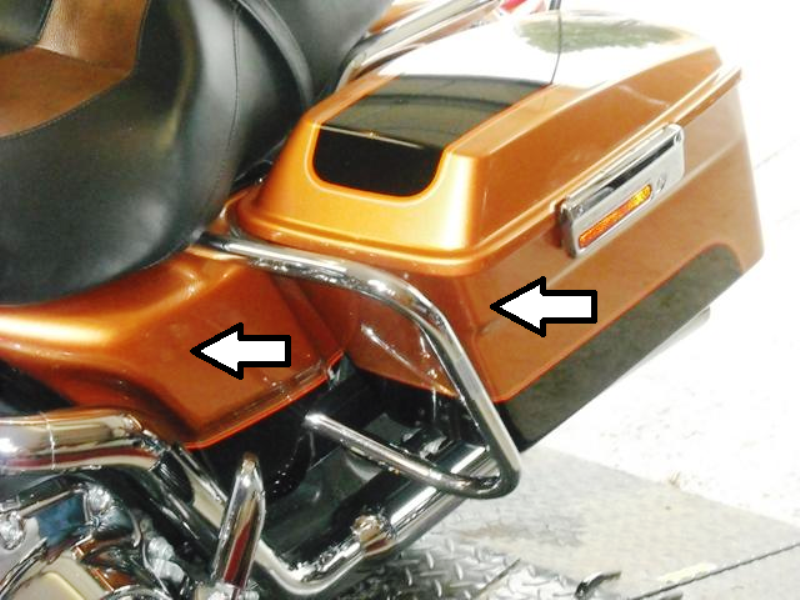
Figure 1. Remove saddle bag and side cover. 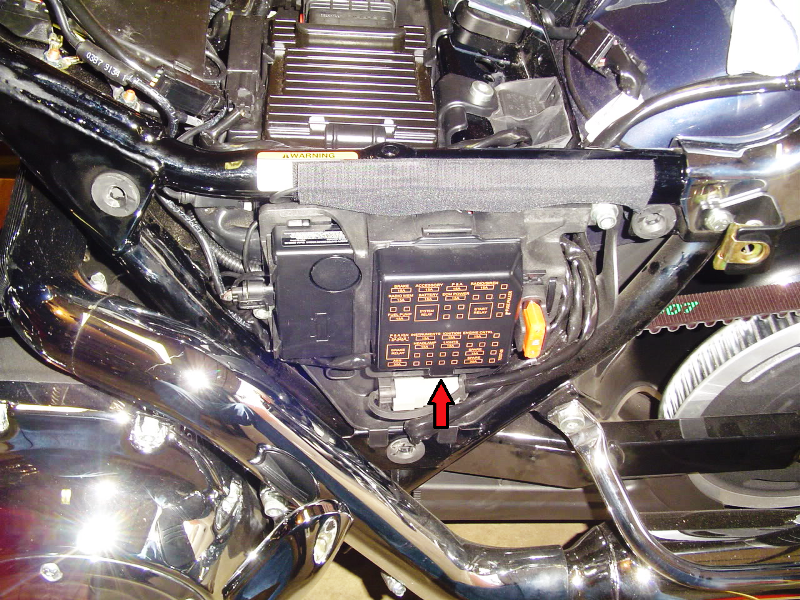
Figure 2. Fuse box.
Step 2 – Disconnect battery
Disconnecting the battery will prevent the possibility of an electrical short and potential fire hazard. Disconnecting the battery is always a good idea when working with fuel system components. You may be able to get away with just pulling the main fuse, but you need to remove the seat anyway to get to the tank console.
- Remove the fastener at the rear of the seat and slide the seat unit rearward to free it from the bike. Some bikes may require the seat strap be removed prior to removing the seat unit.
- Under the seat is the ECM plate, which must be removed to access the battery. Remove the T40 torx fastener and lay the ECM plate aside. If your bike is equipped with a security system, slide the antennae (circled in red) off of the plate prior to plate removal.
- With the battery accessible, disconnect the negative (-) cable.
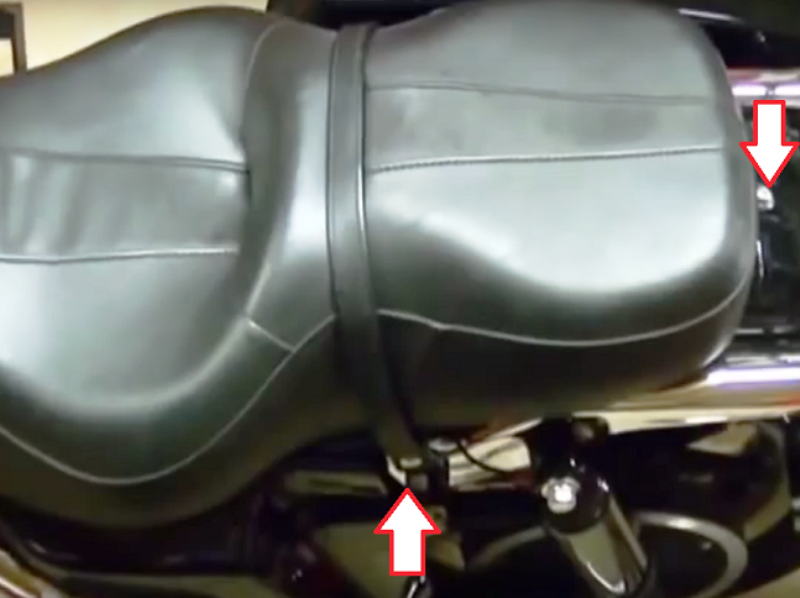
Figure 3. Seat removal. 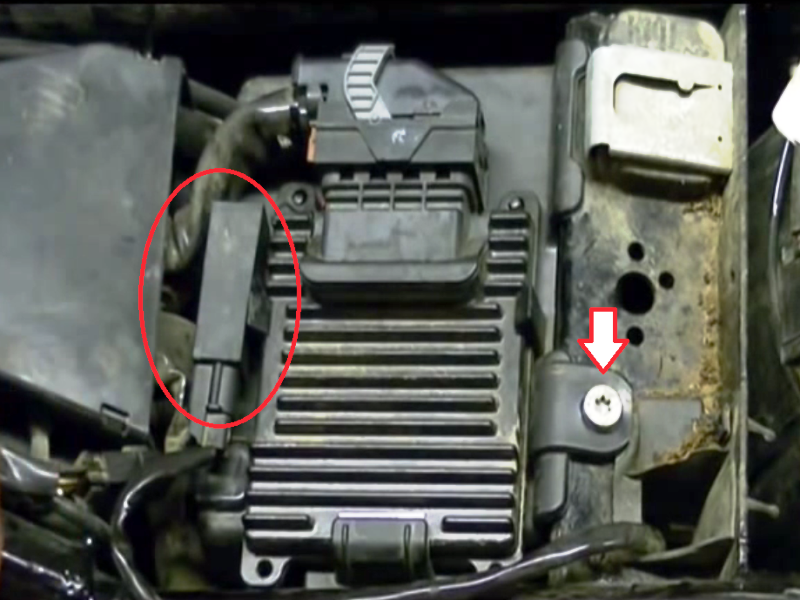
Figure 4. Remove antennae and ECM plate. 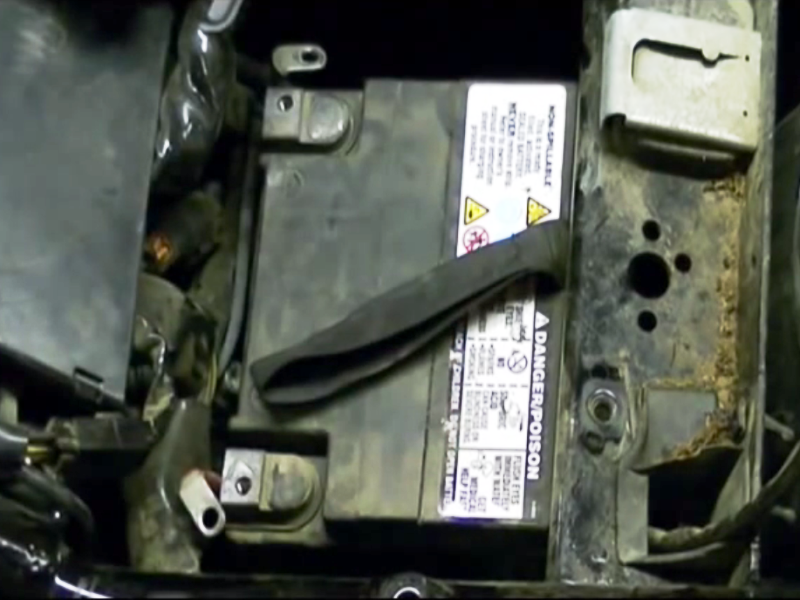
Figure 5. Battery cables disconnected.
Step 3 – Remove fuel tank console
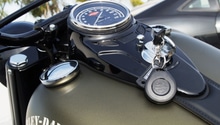
The tank console must first be removed to gain access to the fuel pump assembly.
- The console is held in place on the fuel tank with hex (Allen) fasteners.
- Remove the front and rear fasteners to free the console from the tank.
- For pre-2008 year models, there are an additional (2) fasteners under the fuel filler door.
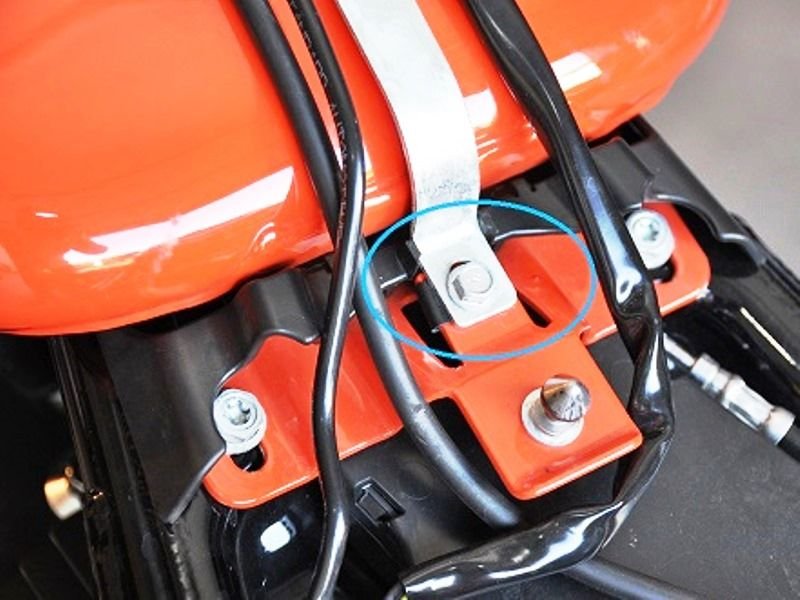
Figure 6. Rear console bolt. 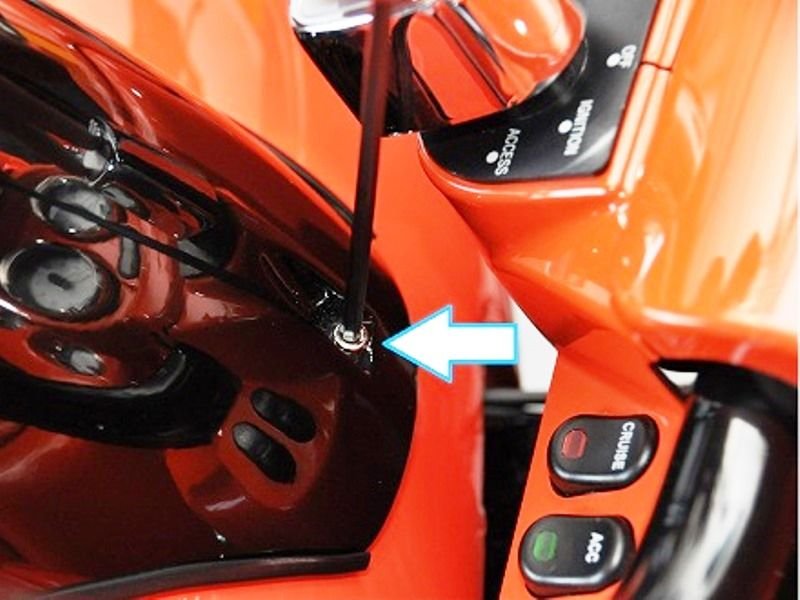
Figure 7. Front hold down bolt. 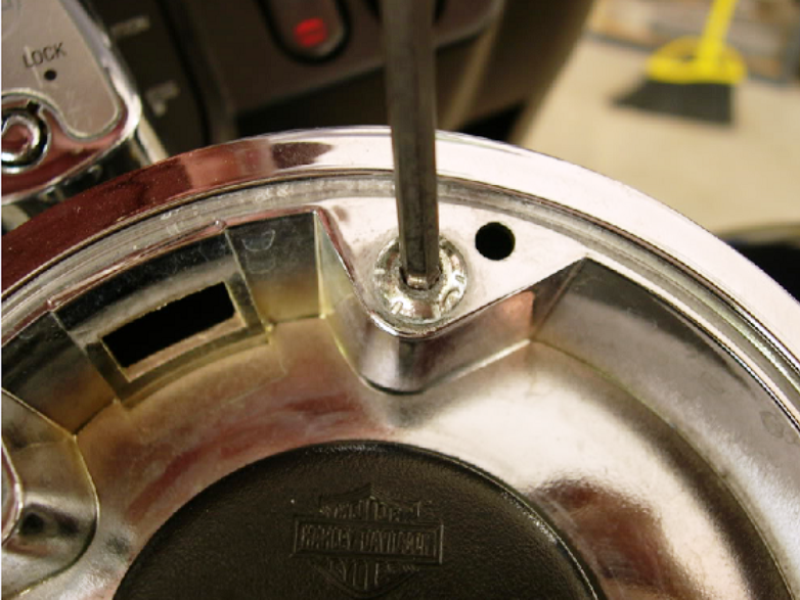
Figure 8. Fuel filler hold down bolts.
-
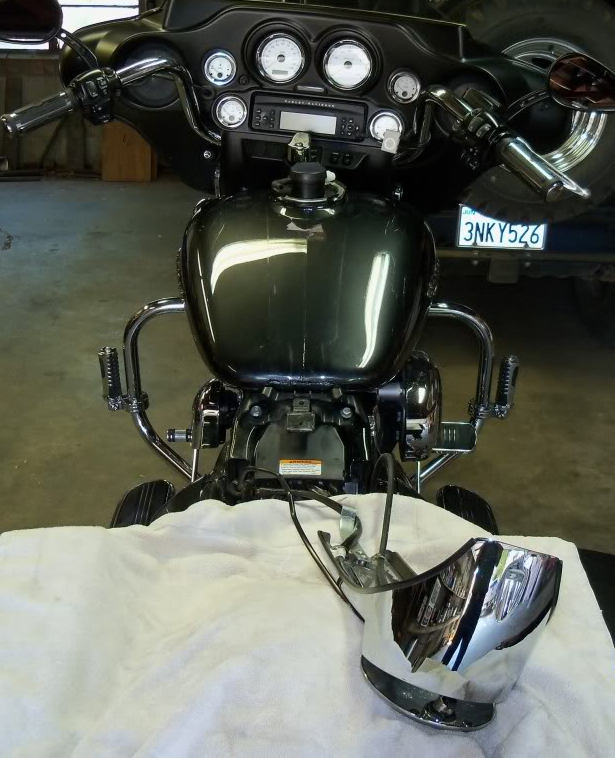
Place a soft towel on the rear fender. Remove the fuel cap and carefully lay the console onto the towel. This will allow for the pump assembly to be removed without disassembly of the console.
For 2008 and newer year models, Harley changed from their original fuel pump assembly to a more compact design; therefore, the removal process is different for early and later bikes. For 2008 or newer, skip to Step 7.
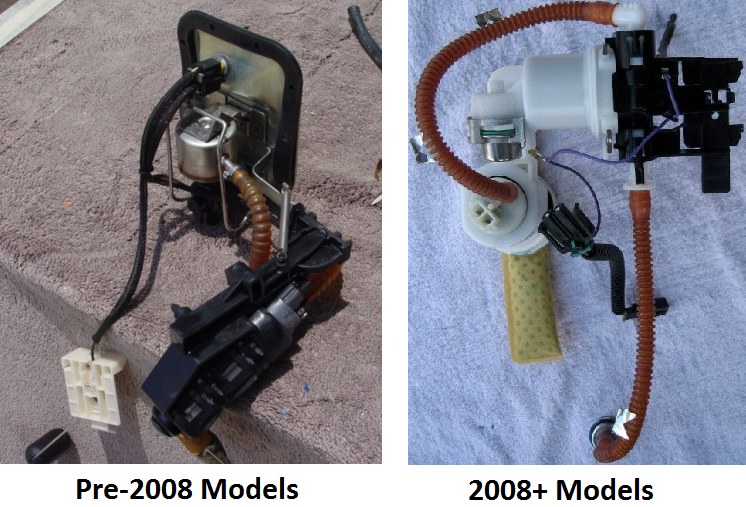
Step 4 – Remove fuel pump assembly (pre-2008 models)
-
Disconnect the fuel pump harness plug and fuel vapor vent line. Using a T20 torx driver, remove the screws securing the canopy assembly to the fuel tank.
-
Slightly lift the canopy/fuel pump assembly and cut the hose clamp securing the corrugated tube in place. Be careful to not allow the cut clamp to fall into the tank.
- The fuel pump assembly sits in an "L" position while in the tank and must be unlocked and unfolded to allow the pump to fit through the opening.
- Using a screwdriver or similar tool, depress the black locking tab to allow the pump to swing open.
- The pump can now be lifted from the tank.

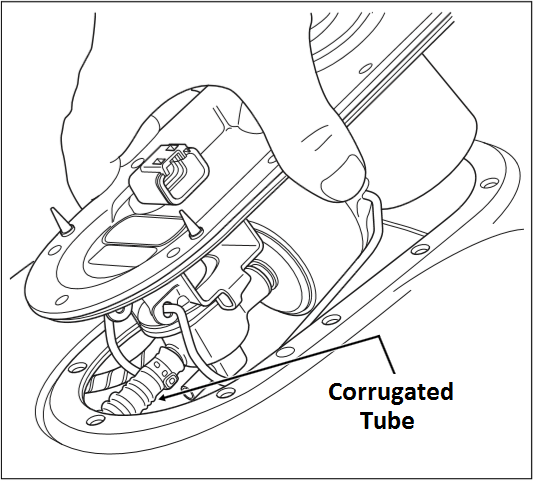
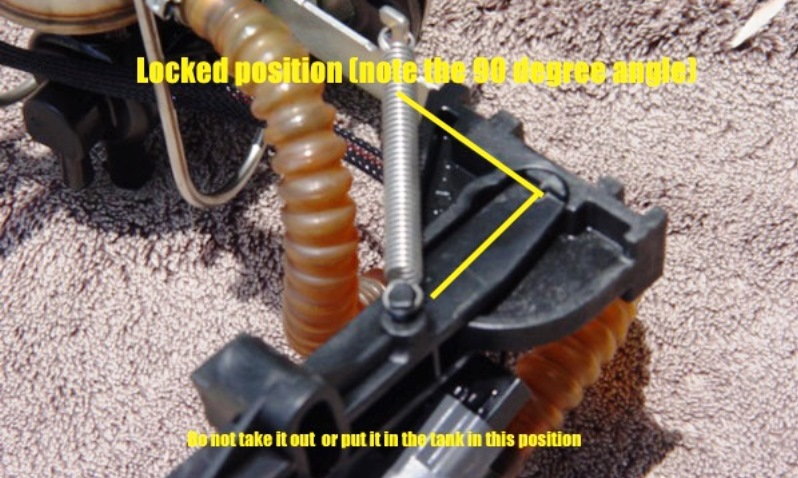
Figure 13. Fuel pump in folded position. 
Figure 14. Unlocking fuel pump. 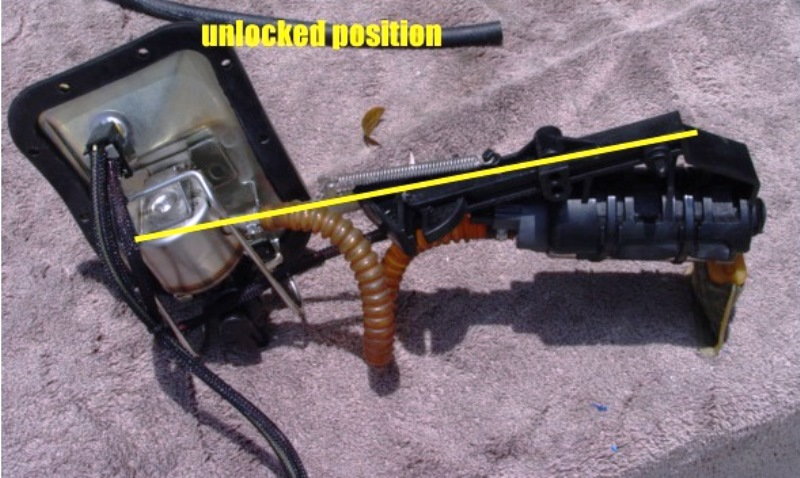
Figure 15. Fuel pump in unfolded position.
Step 5 – Replace pump
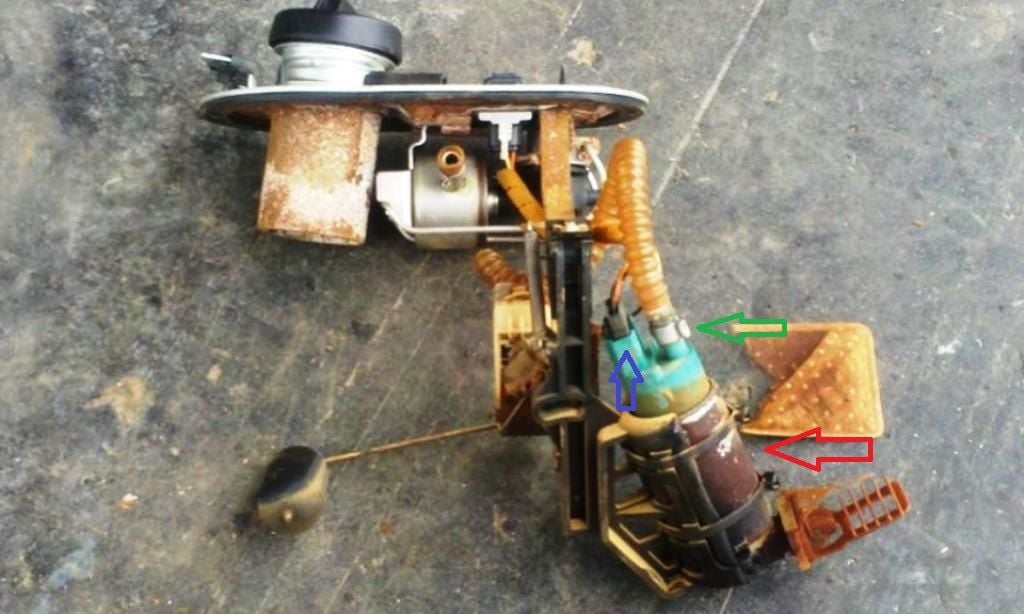
Witht he assembly out of the tank, it is obvious how the pump mounts. There is a clamp, or sometimes 2 around the body of the pump holding it in place. Disconnect the wire, and hoses, loosen the clamps, and the pump slides out. Installation is just the opposite.
Step 6 – Replace filter (pre-2008 models)
- Swing the wireform securing strap off of the filter body.
- Remove the hold-down tab from behind the filter. Cut the hose clamp off of the corrugated fuel line at the filter nipple and separate the filter from the pump assembly.
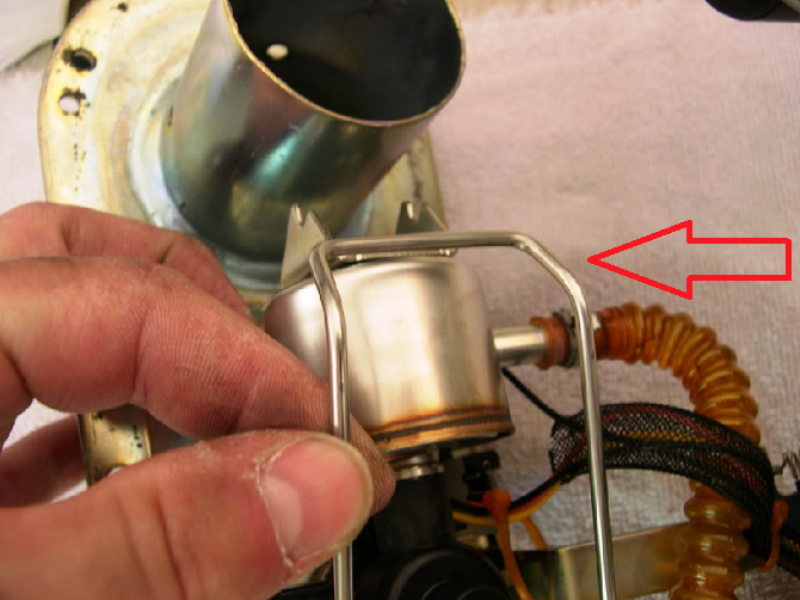
Figure 16. Filter wireform securing strap. 
Figure 17. Unhook the hold down tab. 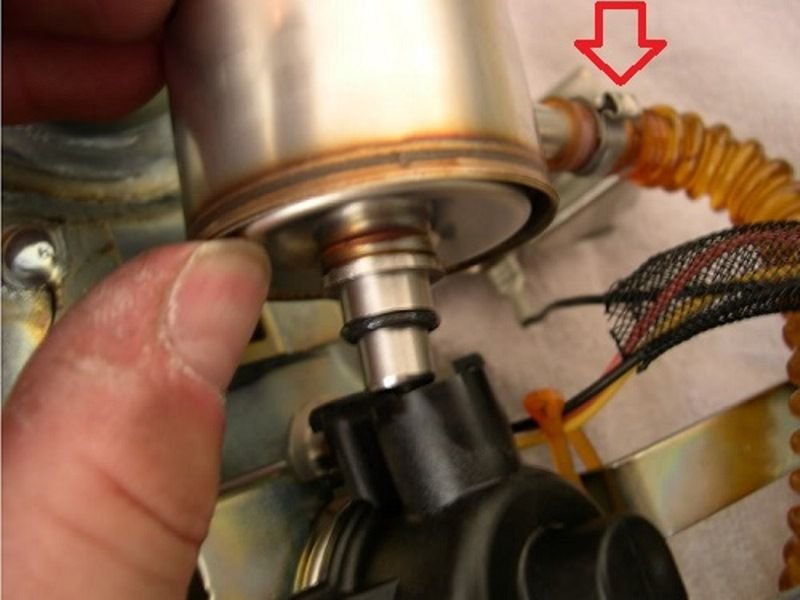
Figure 18. Cut hose clamp, unplug pump.
- Install a new o-ring(s) onto the fuel filter before placing it into the fuel pump.
- Attach the corrugated fuel hose to the filter nipple and secure it with a new hose clamp. Be sure the filter hold-down tab engages when installing the filter.
- Slide the wireform securing strap over the filter body until it engages the slots in the filter bracket.
Step 7 – Remove fuel filter assembly (2008+ models)
- Disconnect the fuel pump harness plug and fuel vapor vent line.

Figure 19. Disconnect pump harness. 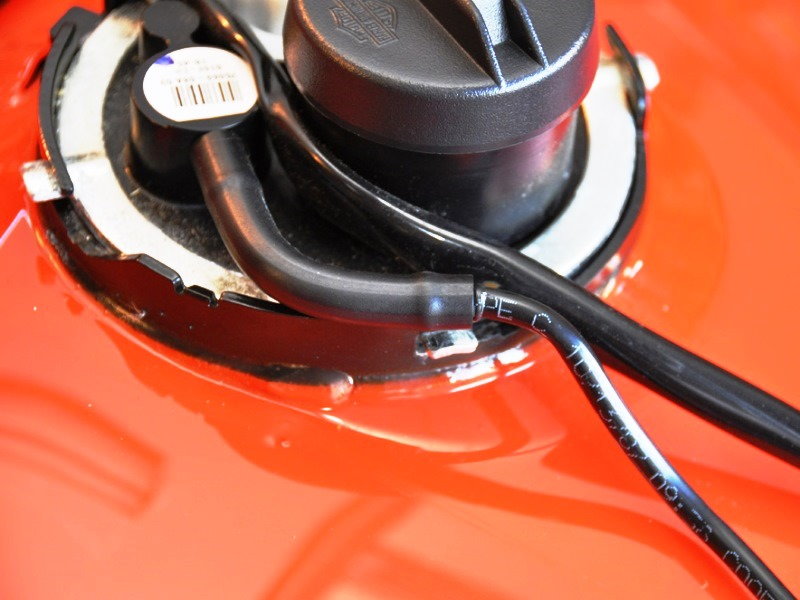
Figure 20. Disconnect vent line.
-
Using a hammer and punch (or similar blunt object), tap the locking ring tabs in a counter-clockwise direction to free the locking ring. Similarly, a locking ring removal tool can be used if available.
-
Lift the fuel filter assembly out of the tank and disconnect the quick-connect fuel lines running to the filter housing.

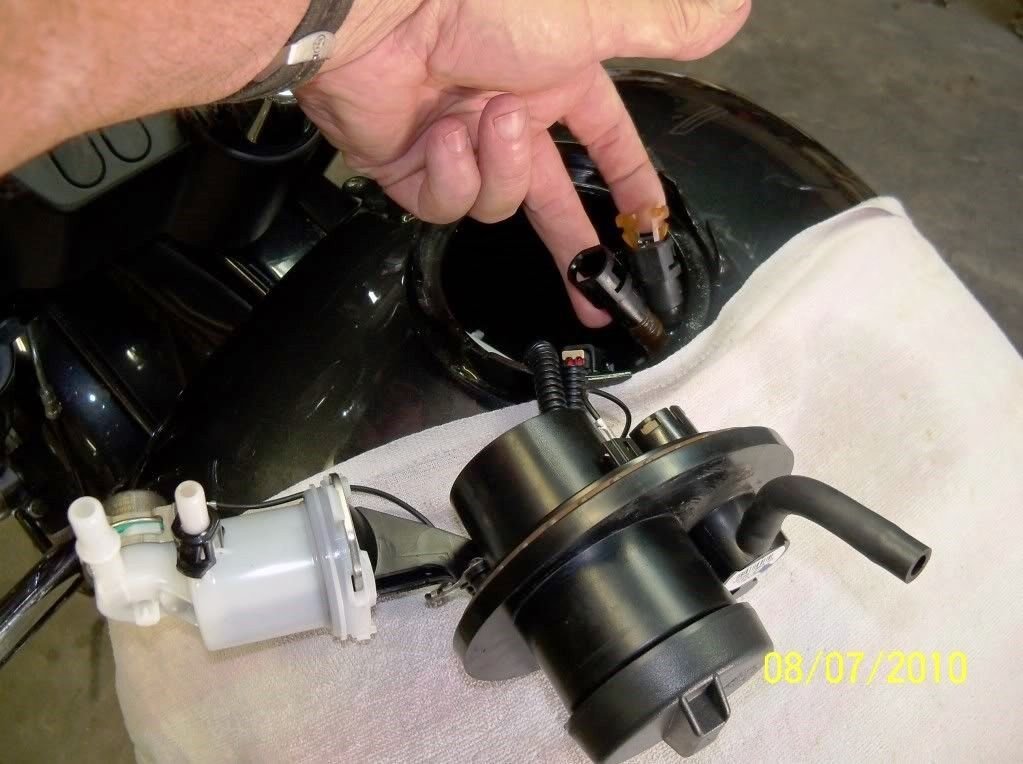
Step 8 – Remove pump assembly (2008+ models)
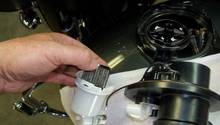
The pump assembly on later bikes sits on the bottom of the tank, mostly held down by the filter. Pull the entire assembly out, inspect the corrugated lines for cracking, and replace if needed. The pump is held in place by a plastic housing that snaps around it. Remove old pump and replace with new unit by removing lines, wiring and clips, and replacing them on new unit.

Step 9 – Replace filter (2008+ models)
- Remove the filter retaining clip by depressing the release tab and sliding the clip out of its groove.
- Separate the filter housing from the pump body.
- Install the new filter along with a new filter housing o-ring.
- Attach the filter housing to the pump body and secure it in place with the retaining clip.
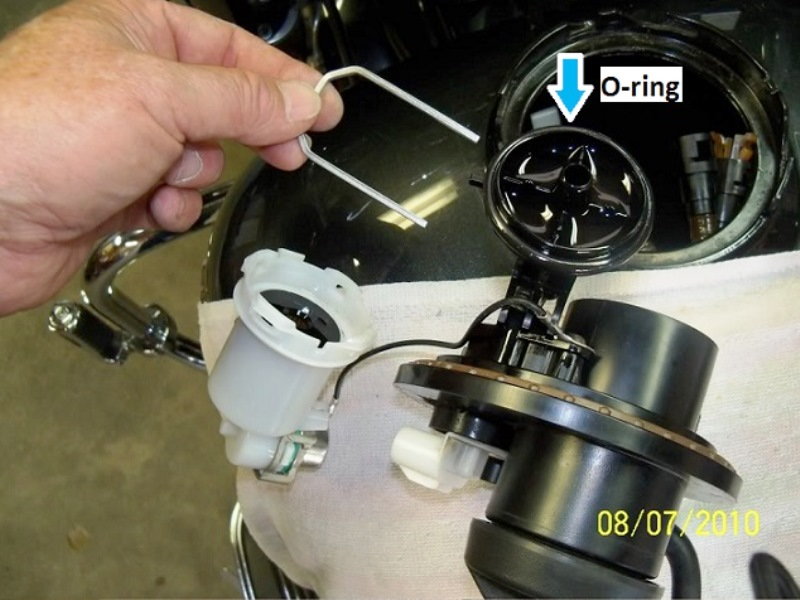
Figure 24. Remove retaining clip and filter housing. 
Figure 25. Remove old filter.
Pro Tip
Many owners opt to also replace the in-tank fuel lines when servicing the fuel filter as they are prone to deterioration.
Step 10 – Reassembly
Reassembly is simply the reverse of the above process:
- Replace any fuel lines and hose clamps as necessary before placing the fuel pump assembly back into the tank.
- Harley-Davidson recommends using a new canopy gasket (pre-2008) or locking ring gasket (2008+).
- On pre-2008 models, the pump should pivot once it is inside the tank to engage the locking mechanism.
- For pre-2008 models, install 10 new canopy bolts and torque to 18-24 in/lbs in a criss-cross pattern.
- On 2008+ models, using downward pressure, start the locking ring into the fuel tank. Using a hammer and blunt object, drive the locking ring in a clockwise direction until the tabs are seated against their stops.
- Reconnect the fuel pump harness plug and fuel vapor vent line.
- Install the console onto the tank and torque the fasteners to 36-60 in/lbs.
- Install the fuel cap and close the fuel filler door.
- Re-connect the battery cable(s) before installing the ECM plate and antennae (if applicable).
- Install the fuel pump fuse.
- Install the seat unit, side cover, and saddle bag.
Note
Motorcycles equipped with a security system often require the system to be reset after the battery has been disconnected. See your service manual for details.
Related Discussions
- Fuel filter change? - HDForums.com
- Fuel filter change 2004 - HDForums.com
- 06 Ultra Fuel Filter Replacement with Pics - HDForums.com
- Remove 2009 Fuel Pump - HDForums.com
- 2015 Fuel Pump Assembly Question - HDForums.com