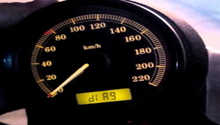
Harley Davidson Softail: How to Set the Clock
Everyone remembers when Henry Fonda ditched his watch in the beginning of the movie "Easy Rider." Ever since then, wearing a watch is one of the many unofficial taboos of the biker world. But fear not! We are gong to go over setting the clock on your Softail, so that you aren't late to meet you ol' lady (or man!).
This article applies to the Harley Davidson Softail models.
Sometimes, even the simple things can cause major setbacks. Case in point, having an incorrectly timed clock can result in being late for important dates, and generally ruin your day. That's something that even having a sweet ride on your Harley can't fix. Fortunately, setting the clock on your Softail is as easy as pie. It will take you longer to read this article than it will to do the job.

Material Needed
- None
Step 1 – Set ignition switch/assy on
This is the exact same thing you do every time you start your Softail: set the ignition switch/assy switch to the ON position and you are ready to move on.

Step 2 – Press TRIP button until time displays
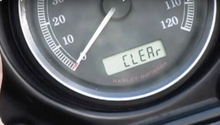
Press and release the TRIP button until 12 HR begins to blink. Once 12 HR begins to blink, release the TRIP button. From here, select between "12 HR" time or "24 HR" time; this is a simple choice between standard 12 hour time and 24 hour, or "Military" time. In order to select between the two options, simply press the TRIP button one time.

Step 3 – Set the hour
After choosing between a 12 or 24 hour cycle, hold the trip button again until the hour display begins to blink. Once the hours display begins to blink, you are ready to begin setting the time. The hours are advanced by pressing the TRIP button repeatedly. Once you have the correct hour, you are ready to move on!
Pro Tip
If you chose the 12 HR option, don't worry about AM or PM yet. That will come later in the process.
Step 4 – Set the minutes
After you have the correct hour selected, press and hold the TRIP button until the minutes begin to flash. Once the minutes begin to flash, you can advance the minutes in the same was as the hour. Repeatedly press the TRIP button until the correct minutes are displayed. Once you have the correct minutes displayed, you are ready to move on.
Step 5 – Set the AM/PM
Once the correct time is displayed, press and hold the trip button again. In the 12HR display, AM or PM will appear flashing. Select the AM or PM with the TRIP button, then press and hold the switch for five seconds. With that, you are done.
Related Discussion
- How to Set the Clock - HDForums.com