Harley Davidson Touring: How to Change Your Oil
Changing your oil at the recommended intervals is an easy DIY job that will keep your bike in peak performance.
This article applies to the Harley Davidson Touring (2000-2016).
Changing the oil on your Harley Davidson Touring bike is one of the easiest, yet most satisfying DIY job that you'll ever do. You don't need to pay a professional to do this simple task, so save those dollars for that nice mod you've been dreaming about. You only need basic tools and a little time to do this in the comfort of your own garage. A bike lift is a plus, but it is not necessary to get this done.

Materials Needed
- New oil filter and 4 quarts of new oil
- Oil filter wrench
- Ratchet and 5/8" socket
Step 1 – Get your bike upright
If you have a bike lift or stand, put your bike up on it. If you only have a side stand, you can use that, but be prepared to hold your bike up level to ensure all the oil is out and to properly check the level of the new oil. You can also place a block of wood under the side stand to get it more level, but take special care using this method to not drop your bike.

Step 2 – Drain the old oil
You may want to warm up your bike for a few minutes to help get that old oil out faster and ensure it is completely drained.
- Find the oil drain plug on the bottom of the bike inline with the rear of the transmission.
- Position your drain pan underneath the drain plug.
- Use a ratchet and 5/8" socket to remove the drain plug.
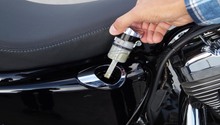
- You may want to remove the oil fill cap to help the oil drain faster.
- Inspect the drain plug for any debris, clean it and wrap the threads with Teflon tape (optional).
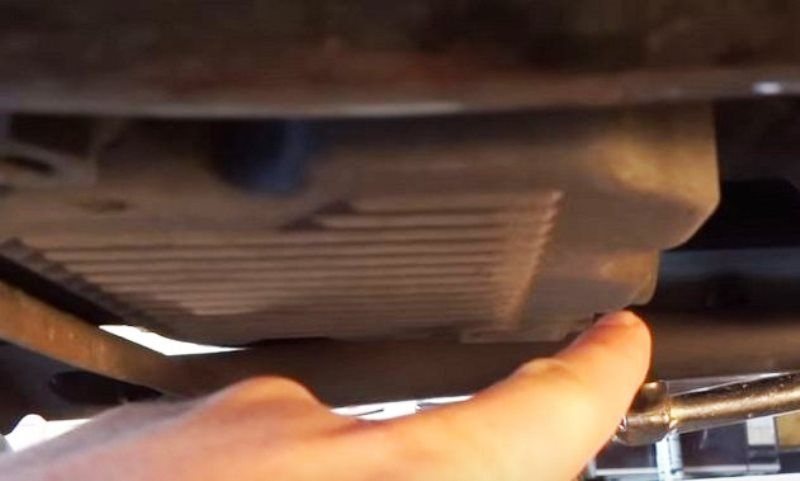
Figure 2. Locate the oil drain plug and remove to drain the oil into your catch basin. 
Figure 3. Magnetic oil drain plug removed, cleaned and wrapped with Teflon tape.
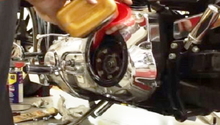
Step 3 – Remove and replace old oil filter
While the oil is draining, go ahead and get a second catch basin and move up to the front of the bike to replace the oil filter. The oil filter will be pretty tight and you will likely need a tool to remove it. Just use an oil filter wrench or large pair of pliers to break it free and use your hands to remove it completely. You will have some oil spillage, so have your catch basin ready. Use a rag to clean up any old oil. Once the old filter is off and any oil spills or leaks have subsided, you can go ahead and install the new filter. You should rub some fresh clean oil around the filter gasket to ensure a good seal to the engine, and pour as much oil in the filter as you can without spilling it while reinstalling.
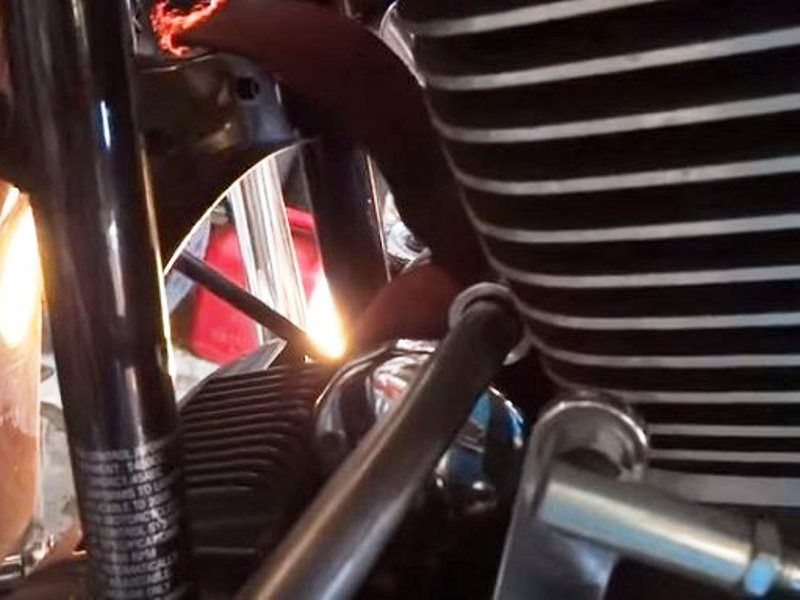
Figure 4. Use a strap wrench to loosen the old filter and remove by hand. 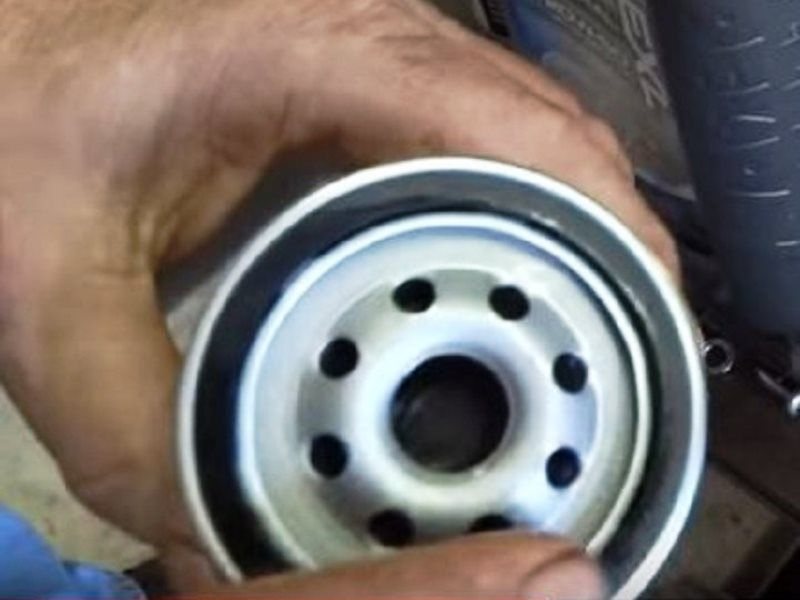
Figure 5. Lubricate the oil filter gasket to prevent sticking. 
Figure 6. Install the new filter and hand-tighten only.
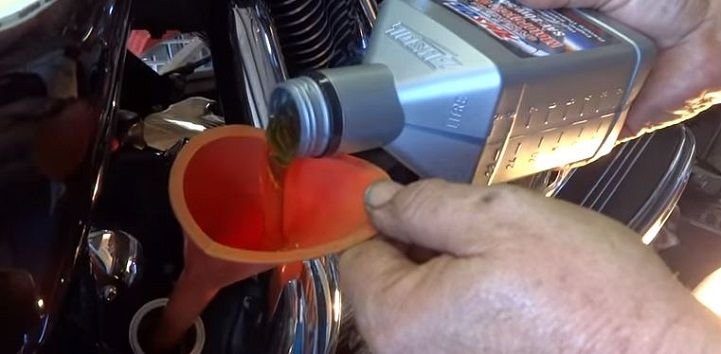
Step 4 – Add new oil
By the time you finish up with the filter, all the oil should have drained out of the bike. Replace the drain plug and be careful not to over-tighten it. Use a funnel in the oil fill port and fill with your favorite motor oil made especially for V-twins. The important thing is to do this routine maintenance at the regular interval every time on time, not what brand of oil you use. Your bike may take up to 3.5 quarts of oil and you should start with adding three. After the three quarts are added, start your bike and let it warm up, then check the level on the dipstick and add as necessary.
Pro Tip
Be careful not to overfill the oil tank, as this will lead to oil blowing out of the breather bolts in the air cleaner and making a mess by the end of your ride.
Featured Video: Oil Change
Related Discussions
- Oil Change How-To - HDForums.com
- 3-Hole Oil Change Dumb Question - HDForums.com
- Oil Change, Hot or Cold - HDForums.com
- How to Change the Oil for Your Harley Davidson Touring - HDForums.com