How to Remove the Front Wheel of a 2024+ Harley-Davidson Touring
Removing the front wheel on a 2024 and up Harley-Davidson touring bike is easy to do, so long as one follows the proper procedure.
Even in today’s advanced world – where most folks simply take their complicated vehicles to dealerships or third-party shops for maintenance or repairs – many Harley-Davidson owners still prefer to work on their own motorcycles. Luckily, we have a ton of informative content showing us exactly how to do just about anything via the internet, and YouTube is chock full of helpful how-to videos pertaining to Harley-Davidson motorcycles.
One such video comes to us from the YouTuber Ryan Urlacher, who this time around is showing us how to remove the front wheel on a 2024 and up Harley-Davidson Touring model – as well as how to remove the brake calipers, handle spacers, and the speed sensor, then reinstall everything with the proper torque specs. Let’s break it all down —
The first step in this process is to remove the brake calipers from both sides and disconnect the wire clips that hold the speed sensor and brake lines in place. The three wire clips must be popped off carefully before moving on to the calipers, which are removed by first loosening the bottom 10mm 12-point socket bolt, then the top bolt. The calipers should be supported with the other hand to prevent them from dropping, and they can then be hung on the crash bars using special hooks to avoid placing stress on the lines.
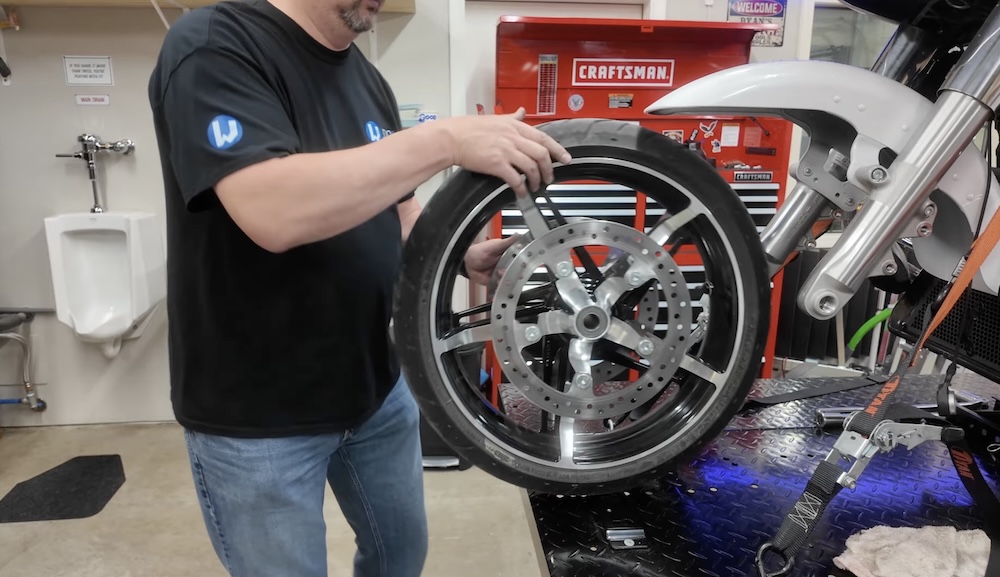
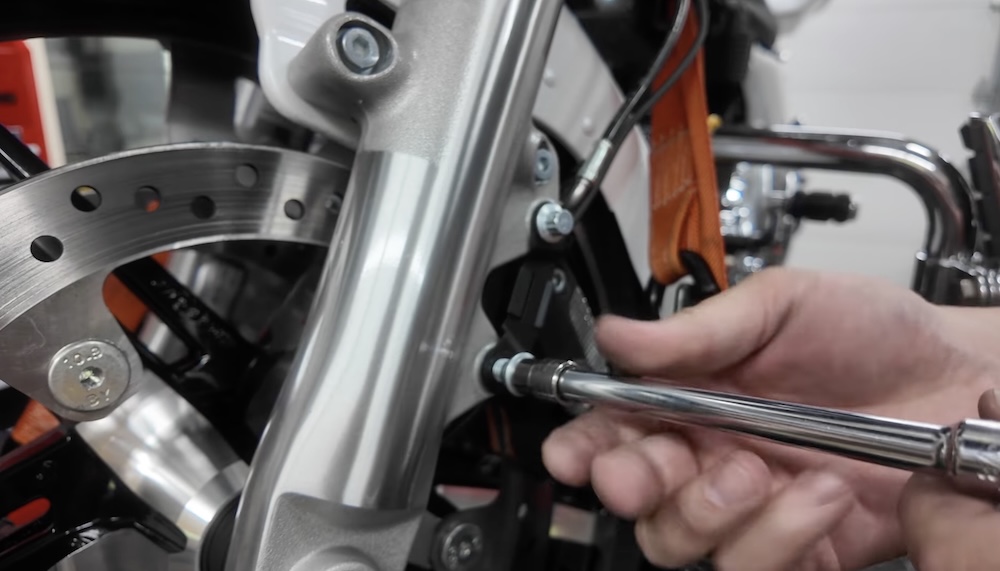
Next, one needs to remove the axle pinch bolt (6mm hex head) before taking off the axle. The right side spacer has machine lines facing outward, toward the fork, and smooth sides toward the wheel. One can loosen the axle using a 19mm hex head on a breaker bar, at which point you can carefully lower and remove the wheel, after the axle and spacer are taken out. It’s important to handle the speed sensor wire and guide plate carefully, however.
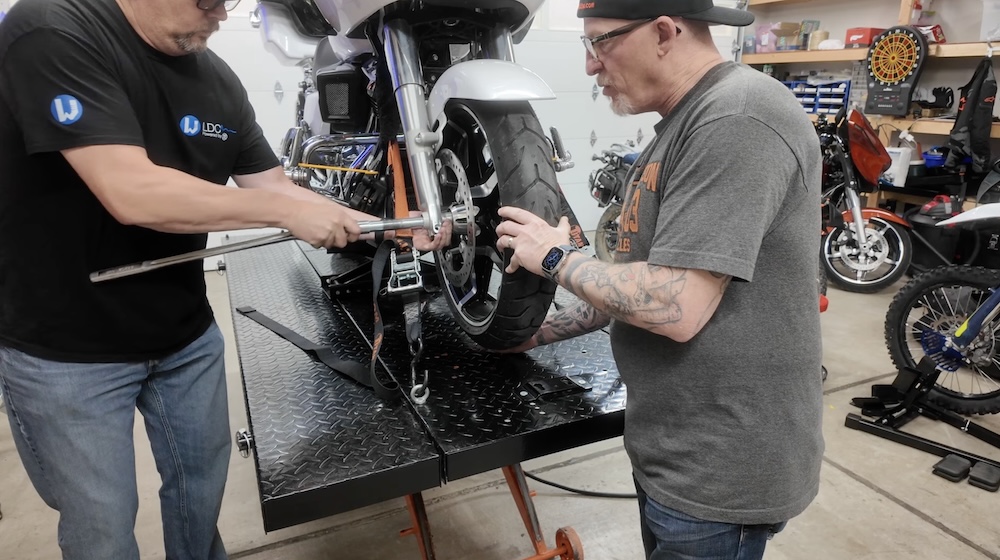
The same is true when one goes to reinstall the wheel – it has to be placed so that it rotates in the correct direction, notated by an arrow on the tire. The spacer is reinserted with machine lines facing outward toward the fork, after which the axle slides through the wheel assembly and is threaded back in place. Next, torque the front axle bolt to 70-75 ft-lbs, and the axle pinch bolt to 18-22 ft-lbs, though one will want to verify this is the case for their specific bike.
From here, one can reinstall the brake pads and calipers, bolting them back into place with a torque spec of 28-38 ft-lbs. The speed sensor wire guide and wire clips are next, after which this job is complete. Overall, it’s a pretty easy task, so long as one follows the instructions and is careful not to damage anything – though having a friend to help is certainly going to make it easier.
You must be logged in to post a comment.