When you click on links to various merchants on this site and make a purchase, this can result in this site earning a commission. Affiliate programs and affiliations include, but are not limited to, the eBay Partner Network.
I ran mine out the left side. The factory harness is just long enough to do on the left side, but not enough to put on the right side.
I also added my Bright *** Light (has been on 3 bikes now), and the HD LED Saddle Bag lights. I put the HD Color Matched Filler panels on the rear.
Got rid of the ugly License Plate mounting method too.
I ran mine out the left side. The factory harness is just long enough to do on the left side, but not enough to put on the right side.
That's a handy piece of information...
Given what my garage layout is like now, verses when I installed the plug, I would have gone your route on the left side with the factory plug. Not that I still couldn't, but.....
Adding pics of another mod...
Saw these LED pods, and had an idea.
Came in 2 sets of 4, but I'm only using 1 set.
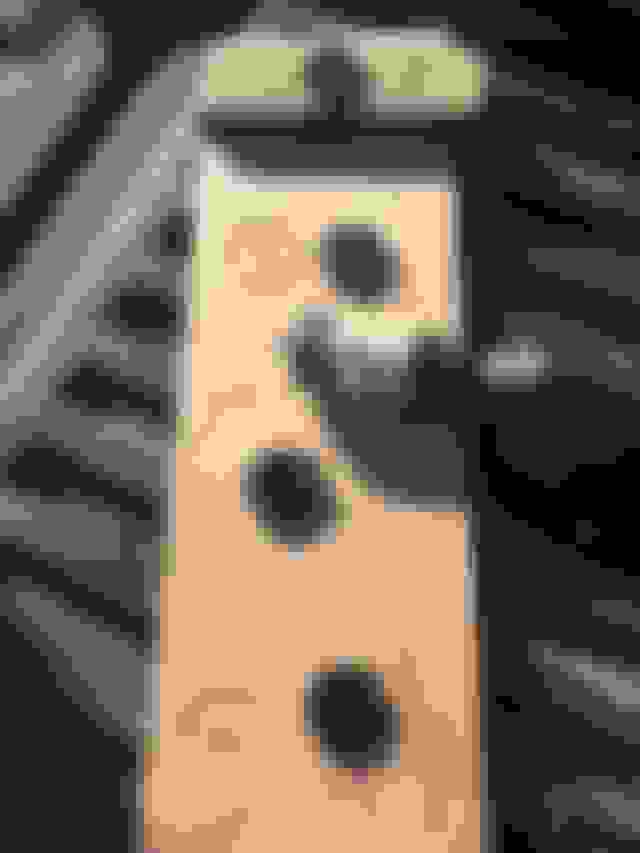
Laid out, marked, and drilled the 4 pod locations
Not the most obvious, but you can see the hole in each corner
Little more obvious
Everything laid out. I removed & tapped into the 'cigarette lighter' for the power source and used a simple rocker switch.
Lights stuck in place and 12v power reinstalled
I used the dual-lock type fastener for the switch. I planned on mounting it to the 12v accessory, but that placed the switch really low and cumbersome to operate. Meh, the speaker port suits me fine.
Liner slid back in place.
In the garage with all the lights turned off. Ignition set to accessory to where the Electra Glo bag lights & tourpack side lights are on. These aren't the brightest LED's, but they do OK inside the black tourpack. Should be just enough light to keep the wife happy. Otherwise, I can run the other set on the lid without too much difficulty.
I added a heated seat and knew I'd be adding additional lights in the front of some sort at some time. I debated about going with the standard 69200722 to plug in the seat or spring for the 71400106 Power Switch Kit since I already have the stock passing lights. (Which is basically the same as 71400105 for those without stock passing lights)
I went for the Power Switch Kit from Boardtracker (bottom half of the box)
Unboxed
With the dash panel removed, here's the back side of the switch pack
Switch pack is out. From top to bottom - stock passing light switch > plug > plug
Notice the 3 silver metal tabs. Those are the locks.
With a flat blade screwdriver slid under the lock, place your thumb on the lock/screwdriver and life straight up.
You can see how the middle lock is higher than the one closest to the camera.
Pop the plugs out, slide the switch in, and push in the lock. That's it. Back in the dash it goes.
I did it with the tank off, but there are other ways. This is all back together up front and ready to tackle the back.
This is my FP3 in place and in between is the the accessory plug I need to plug the new harness into.
Try as I might, but I couldn't get the plug end through where I was satisfied. So, lets take a look at the wire orientation.
Annnnnd take the plug apart.
That was much easier to route.
Connector all back together
And now plugged in under the left side cover looking like it was meant to be.
Took the Mustang heated seat for a ride Sunday and it works like a charm.
Now, to only figure out what lights to use that other switch for......
Because of my garage layout, I use the tender on the right side. I routed the (new) harness to the right side and used heat-shrink over the connection.
I may have missed it but I don't see where you mention what this new harness is. It doesn't appear the stock cable would be long enough to reach to the right side of the bike. Did you use an extension cable?
Baeseman1, can you tell me more about how you connected the CD Fillerz lights and the HD saddlebag lights. I want to do this to my bike but after reading the install instructions for both lights it appears they connect to the same factory harness. Did you just tandem (put them in series)the CD and the HD bag light harness to the factory?
I already have the CD lights as run, stop and turn. I want to change them to just run and stop and add the bag lights with all 3 functions. Thanks.
I may have missed it but I don't see where you mention what this new harness is. It doesn't appear the stock cable would be long enough to reach to the right side of the bike. Did you use an extension cable?
2 part answer. I bought a new battery tender harness and bolted it to the battery. That's the (new) harness I was speaking of. Last night, I found/ordered a 12" tender extension cable from amazon so I can remove the (new) harness and use the factory harness. I wanted to keep my plate/flange mount kit on the right side, but the stock harness isn't long enough.
Baeseman1, can you tell me more about how you connected the CD Fillerz lights and the HD saddlebag lights. I want to do this to my bike but after reading the install instructions for both lights it appears they connect to the same factory harness. Did you just tandem (put them in series)the CD and the HD bag light harness to the factory?
I already have the CD lights as run, stop and turn. I want to change them to just run and stop and add the bag lights with all 3 functions. Thanks.
Yeah, they're just linked in tandem. It makes for a number of plug-n-play connections under the seat, but there's space and hasn't been an issue. As you can see in the video, I didn't use the Fillerz for turn signals. Just ran both of the CD red wires to the red brake light wire.
I always sit my charger on the seat so I don't forget it so it wouldn't matter which side the charger cable was on. I really like the idea of the port and inspection sticker plate.
7 Surprising Harley-Davidson Products that Are Not Motorcycles
Slideshow: The bar-and-shield logo shows up on far more than motorcycles, some of the company's most unexpected products have nothing to do with riding.
Slideshow: From the troubled AMF years to modern misfires, these bikes earned reputations for reliability issues, questionable engineering, or disappointing performance.
Crazy Bunderbike Build Looks Amazing, But Is It Impossible to Ride?
Slideshow: The Swiss custom shop has taken a Harley Softail and stretched it into something so long and low that it looks closer to a rolling sculpture than a conventional motorcycle.
Engraved Rebellion: Inside Bundnerbike's Glam Rock II
Slideshow: A standard cruiser becomes an intricate metal canvas in the hands of a Swiss custom house known for pushing Harley-Davidson platforms far beyond their factory brief.
Slideshow: Harley-Davidson's challenges aren't abstract; they show up in dropping shipments, shrinking dealer traffic, and strategic decisions that aren't yet translating into growth.